
Elder Scrolls V: Skyrim Guide The Atlas Hold 7: Eastmarch
Primary Locations
[7.01] Uttering Hills Cave
Related Quests
- Thieves Guild City Influence Quest: Summerset Shadows
Recommended Level: 6
Dungeon: Bandit Camp
- Bandit (prequest only)
- Summerset Shadows (only during quest)
Collectibles
- Skill Book [One-Handed]: Mace Etiquette
- Unique Item: Fjotli’s Silver Locket [63/112]
- Chests
- Potions
- Loose gear
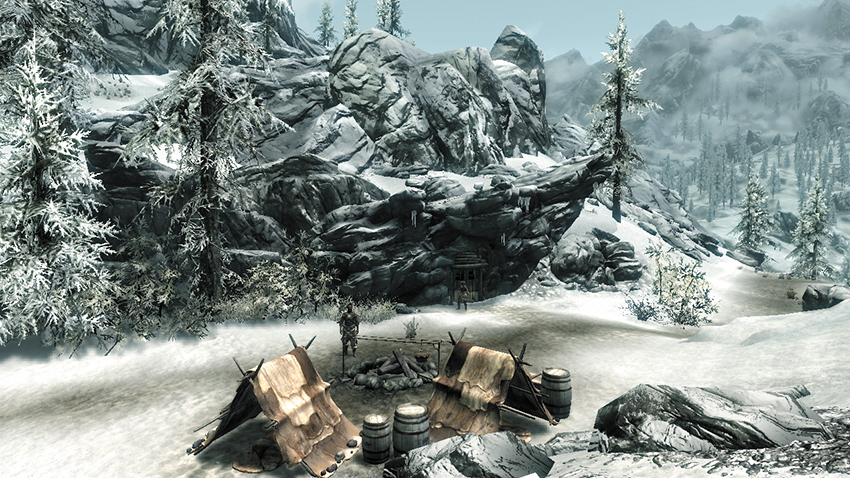
This small bandit cave is found within Eastmarch’s northwest mountains. Slay a couple of exterior guards before venturing inside.
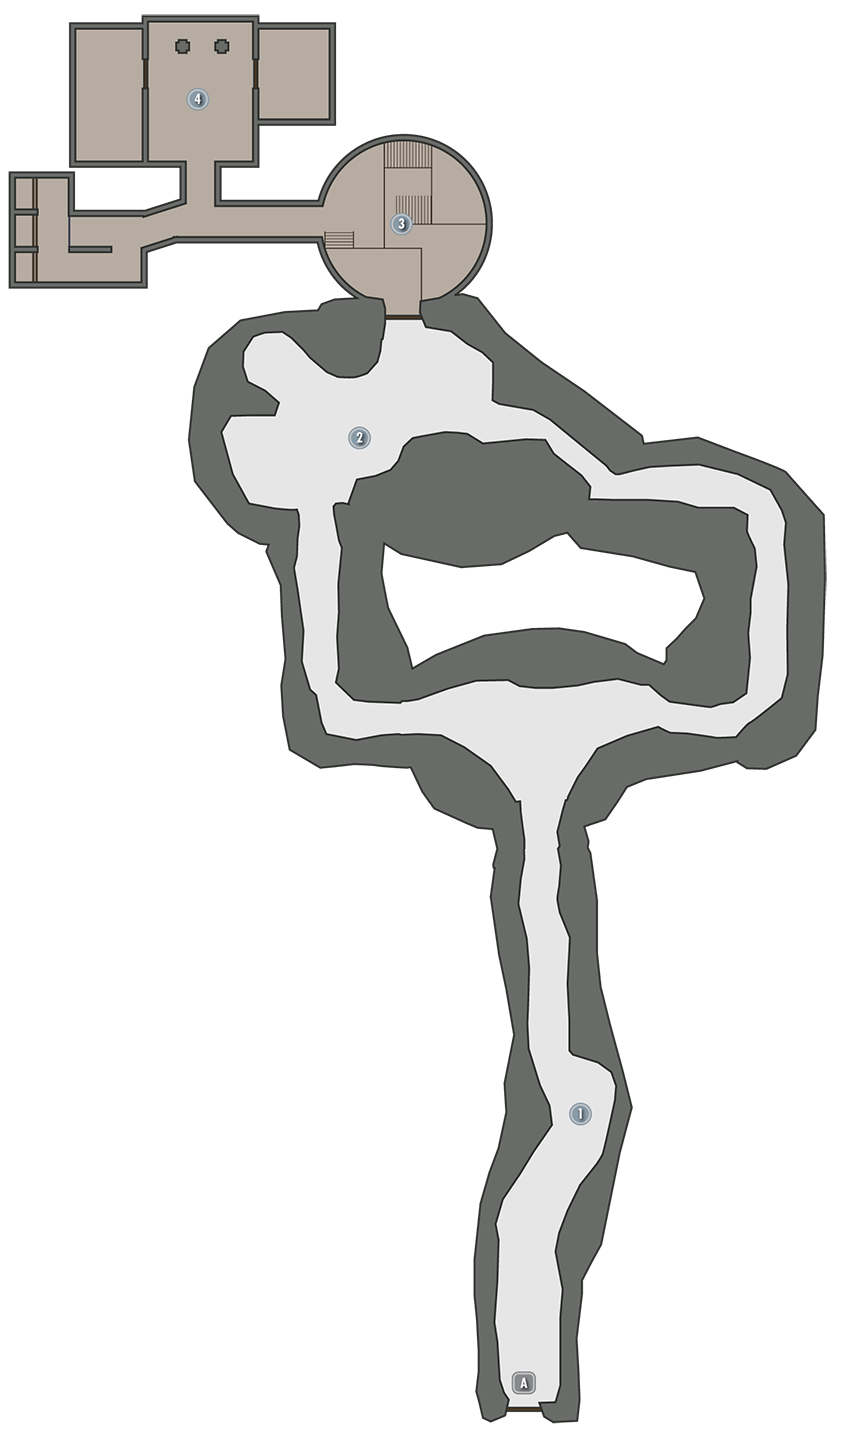
 Exit to Skyrim
 Entry Tunnel
Grab a few items of value from a table as you descend the cave’s snowy entry tunnel.
- Potions
- Loose gear
 Campfire Cavern
Slay bandits as you make your way to this far cavern, where several bandits guard a chest near a campfire.
- Chest
 Hideout Entry and Holding Cells
Loot the hideout’s entry chamber, and discover a chest that’s tucked away in a nook near the following corridor.
- Chest (Locked: Adept)
- Potions
 Bandit Hideout
A powerful bandit lurks at the cave’s end. Raid the place after securing the area, and burn the banner here as part of your quest. Find a Skill Book on a shelf in the bedroom with the chest, then make your way back outside.
- Skill Book [One-Handed]: Mace Etiquette
- Chest
- Knapsack
- Potion
[7.02] Gallows Rock
Related Quests
- The Companions Quest: The Silver Hand
Recommended Level: 6
Dungeon: Bandit Camp
- Animal
- Silver Hand
- Werewolf
Crafting
- Tanning Racks (2)
- Skill Book [One-Handed]: The Importance of Where
- Skill Book [Smithing]: Last Scabbard of Akrash [C2/10]
Dangers
- Swinging Wall Trap (pressure plate)
- Chests
- Potions
- Loose gear
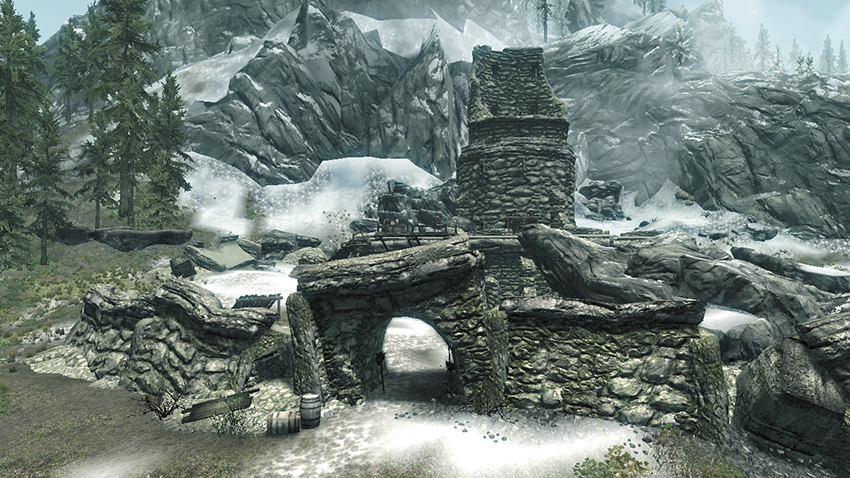
A group of bandits called the Silver Hand control a small fortress along Eastmarch’s northwest border. You fight your way through this fort during Companions Quest: Silver Moon.
Exterior
Slay the outdoor guards, then search the top of the fort to discover a chest inside a small tower.
- Chest
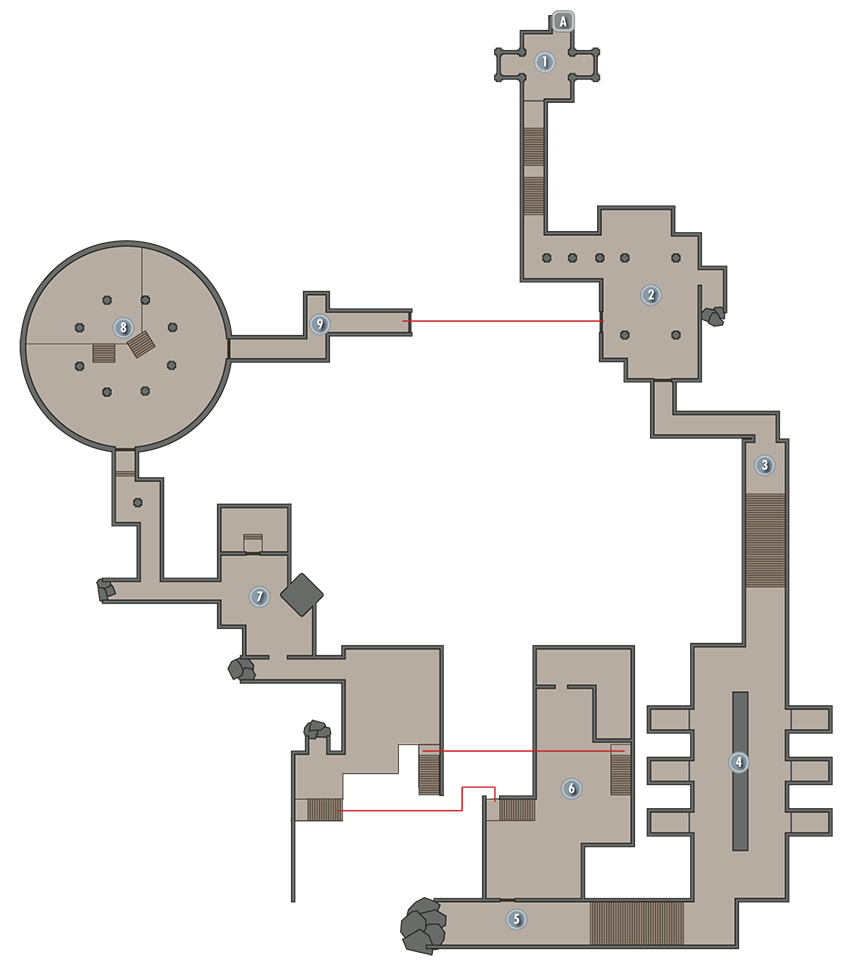
Exit to Skyrim
Entry Chamber
Pull a chain in the entry chamber to open the way forward.
- Loose gear
Mess
Slay a few more Silver Hand in this room, which contains a chest. The west door is barred, so go south instead.
- Chest
- Potions
- Loose gear
Corridor and Stairs
Slay a Skeever on your way upstairs, and avoid the pressure plate at the top of the steps—it triggers a nasty trap.
- Danger! Swinging Wall Trap (pressure plate)
Prison Cells
Defeat the Silver Hand bandits that guard a number of werewolves in this area. If you dare, pick the Adept-level locks on the cell doors to free and battle with the beasts.
- Potions
- Loose gear
 South Stairs and Corridor
The primary item of interest here is a knapsack that contains valuable loot.
- Knapsack
- Loose gear
 Great Hall
Kill more Silver Hand to secure the Great Hall, then explore the downstairs area thoroughly to discover a large chest with a tricky lock. A Skill Book rests on a table at the hall’s north end.
- Crafting: Tanning Racks (2)
- Skill Book [One-Handed]: The Importance of Where
- Chest (Locked: Master)
- Potions
- Loose gear
 Hearth and Sleeping Quarters
A roaring fireplace dominates the first chamber of this area. Find a Skill Book on a table near the hearth. Unlock the Adept-level north door to access a sleeping quarters filled with valuables.
- Skill Book [Smithing]: Last Scabbard of Akrash [C2/10]
- Chest
- Potions
 Circular Chamber
Slay the final batch of Silver Hand here before looting the room and making your way back outside.
- Crafting: Tanning Racks (3)
- Chest
- Potions
- Loose gear
 Barred Door Corridor
Claim an array of worthy gear from this corridor, then unbar the far door and take your leave of this place.
- Knapsack
- Loose gear
[7.03] Mara’s Eye Pond
Related Quests
- Dungeon Activity
Recommended Level: 6
Dungeon: Vampire Lair
- Animal
- Vampire
Collectibles
- Skill Book [Pickpocket]: Wulfmare’s Guide to Better Thieving [E2/10]
- Chest(s)
- Loose gear
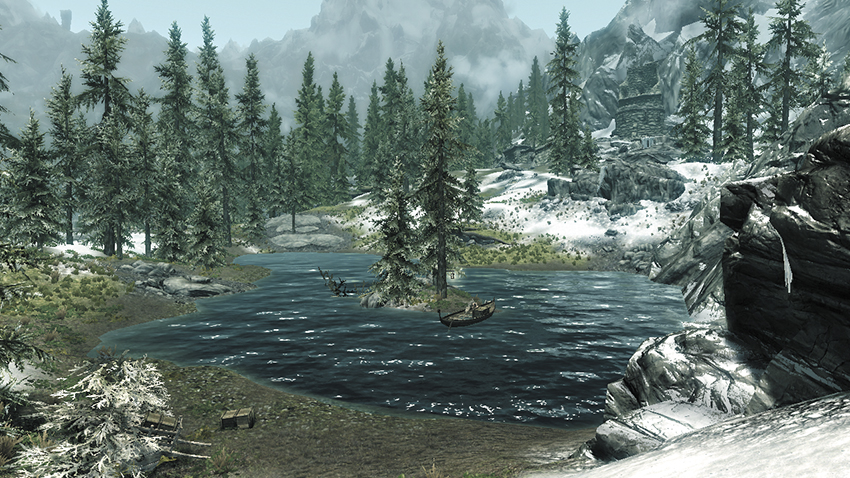
This small, eerie pond lies on the west side of Eastmarch, just north of the Hold’s larger and more prominent western hot springs. The pond derives its name from the tiny isle found in its center—when viewed from above, it resembles an eye.
Exterior
Exterminate the small cluster of Mudcrab near the pond’s central “eye,” then search for a trapdoor on the central isle, which leads into Mara’s Eye Den. There’s little else of interest around the pond.
Mara’s Eye Den (Interior)
This small underground cavern was once a smugglers den but has since been taken over by a more blood chilling foe—vampires. Slay the cursed beings, then loot the place for loads of valuables, including a Skill Book that’s mixed in with other books in a small crate. There’s no need to pick the locked cage here—nothing of interest is found within.
- Skill Book [Pickpocket]: Wulfmare’s Guide to Better Thieving [E2/10]
- Chest
- Chest (Locked: Apprentice)
- Loose gear
[7.04] Morvunskar
Related Quests
- Daedric Quest: A Night to Remember
Recommended Level: 8
Dungeon: Warlock Lair
- Mage
- Naris the Wicked
Crafting
- Blacksmith Forge
- Tanning Rack
- Workbench
Dangers
- Swinging Wall Trap (pressure plate)
Collectibles
- Skill Book [Destruction]: Mystery of Talara, v3
- Skill Book [Smithing]: Cherim’s Heart [A2/10]
- Unique Weapon: Sanguine Rose [51/80]
Special Objects
- Shrine of Dibella [6/8]
- Chest(s)
- Potions aplenty
- Loose gear
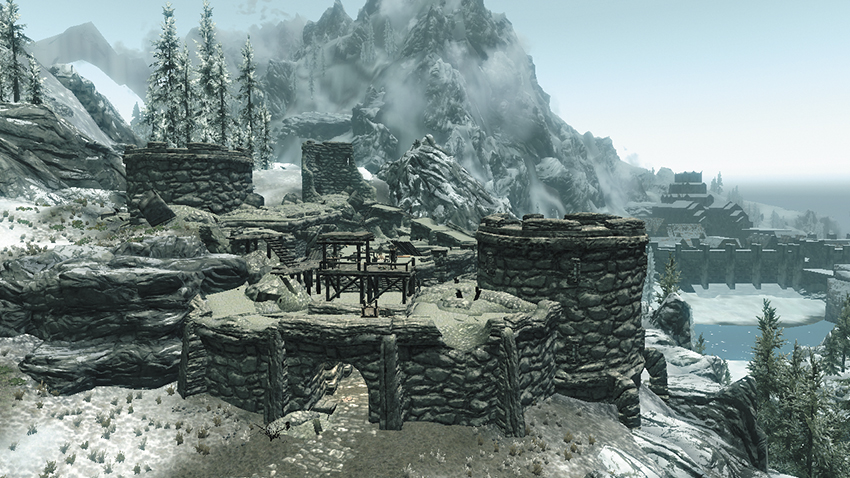
A host of hostile mages practice their nefarious arts at this frigid fortress, which you visit during Daedric Quest: A Night to Remember. Slay the mob of mages that guard the grounds before heading inside. There’s little of interest out in the cold.
Exit to Skyrim
Crafthouse
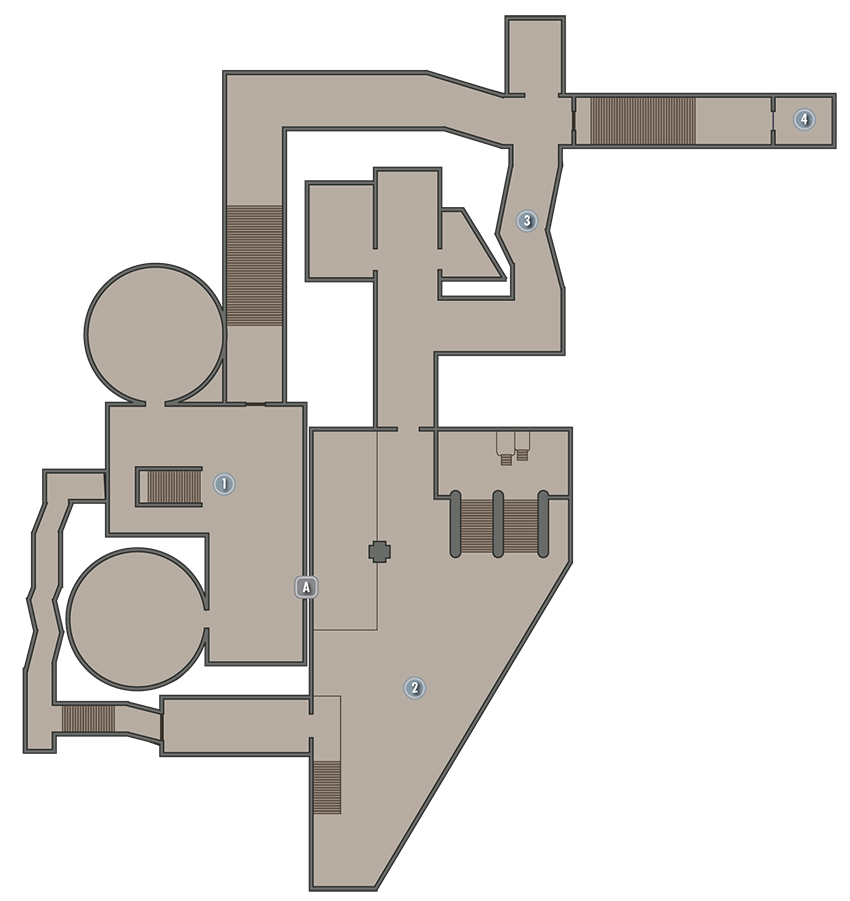
Crafting opportunities abound in this first area of Morvunskar. Beware when engaging mages here—the sound of battle may bring reinforcements. Find a Skill Book resting on a table.
- Crafting: Blacksmith Forge, Tanning Rack, Workbench
- Skill Book [Smithing]: Cherim’s Heart [A2/10]
- Potion
- Loose gear
Head Mage’s Chamber
Take the basement stairs from [1] to visit this wide chamber, collecting a bit of gold on your way. Slay a powerful mage here, then claim precious loot from the large chest atop the stairs.
- Chest
- Potions
Corridors and Sleeping Quarters
Dispatch a few more mages here and raid their bunks for valuables. Touch the shrine in the north quarters to instantly cure any diseases you might be suffering.
- Danger! Swinging Wall Trap (pressure plate)
- Shrine of Dibella [6/8]
- Potions aplenty
- Loose gear
Torture Chamber
Unlock Morunskar’s northwest door and slay the twisted mage in the chamber beyond. A Skill Book sits on a shelf here. Pull a lever to access and loot the burnt corpses in the holding cell.
- Area Is Locked (Novice)
- Skill Book [Destruction]: Mystery of Talara, v3
- Chest
- Potions
[7.05] Kynesgrove
Related Quests
- Main Quest: A Blade in the Dark
- Miscellaneous Objective: Innkeeper Rumors (the Braidwood Inn)
- Miscellaneous Objective: Salt for the Stoneweaver* (Dravynea the Stoneweaver)
- Favor (Activity): Chopping Wood* (Ganna Uriel)
- Favor (Activity): Mining Ore* (Kjeld)
- Favor: A Good Talking To* (Iddra)
- Favor: Item Retrieval (Cave)* (Roggi)
Habitation: Town
- Dravynea the Stoneweaver (Marriage Prospect; Trainer: Alteration)
- Ganna Uriel
- Gemma Uriel
- Iddra (Innkeeper)
- Kjeld the Younger
- Roggi Knot-Beard (Follower; Marriage Prospect)
- Stormcloak Soldier
Services
- Follower: Roggi Knot-Beard [37/47]
- Marriage Prospect: Dravynea the Stoneweaver [47/62]
- Marriage Prospect: Roggi Knot-Beard [48/62]
- Trader (Innkeeper): Iddra [12/15]
- Food, Room and Board
- Innkeeper Rumors
- Trainer (Alteration: Expert): Dravynea [3/3]
Crafting
- Smelter
Collectibles
- Skill Book [Enchanting]: Catalogue of Armor Enchantments [B2/10]
- Chest(s)
- Potion
- Loose gear
- Mineable ore (Malachite)
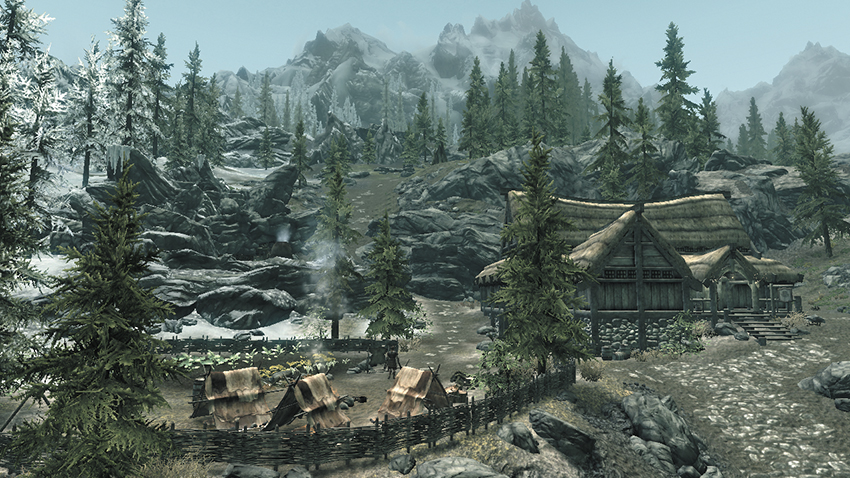
A short jaunt south of Windhelm lies a small mining community consisting of an inn that’s been erected next to a working mine. You visit Kynesgrove during the Main Quest in search of Dragons.
Exterior
Chop wood outside the inn, or smelt ore by the mine.
- Crafting: Smelter
- Loose gear
Braidwood Inn
Chat up the locals in the inn to hear an array of gossip that leads to several Side Quests. Trade with Iddra if you like, or purchase a room if you’re weary.
- Chests (2)
Steamscorch Mine
Kynesgrove’s mine lies just up the hill from the Braidwood Inn. Inside, a woman named Ganna Uriel will purchase any firewood that you cut outside. If you like, use a pickaxe to mine some Malachite from the ore veins that run along the walls and floors. A Skill Book rests on the table at the tunnel junction.
- Skill Book [Enchanting]: Catalogue of Armor Enchantments [B2/10]
- Potion
- Loose gear
- Mineable ore (Malachite)
[7.06] Windhelm Stables
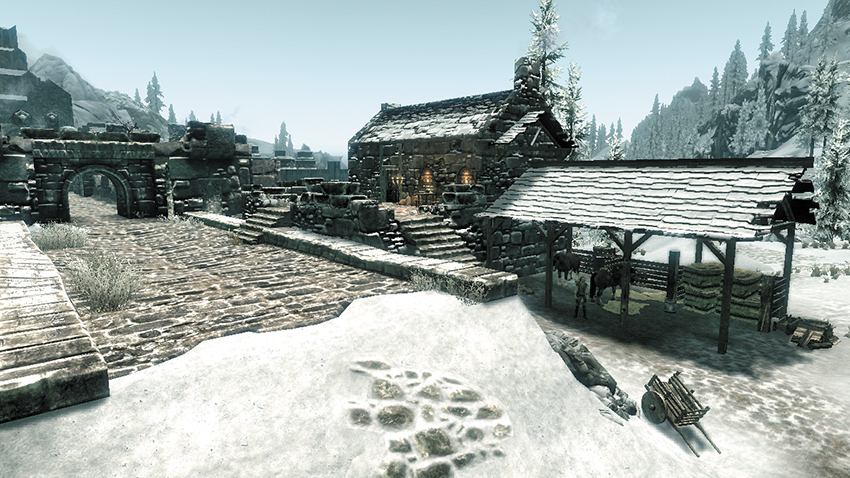
Habitation: Farm
- Alfarinn (Carriage Driver)
- Arivanya
- Ulundil (Stablemaster)
Services
- Trader (Carriage Draiver): Alfarinn [4/5]
- Trader (Stablemaster): Ulundil [4/5]
Special Objects
- Business Ledger
- Strongbox (Expert)
- Potion
The Windhelm Stables lie directly south of Eastmarch’s capital city. The lone building here remains shut tight with a Novice-level locked door, but worthy services are available just outside. Break into the building and see if you can open the strongbox within.
[7.07] Brandy-Mug Farm
Related Quests
- Favor (Activity): Harvesting Crops* (Bolfrida Brandy-Mug)
Habitation: Farm
- Bolfrida Brandy-Mug
- Faryl Atheron
Collectibles
- Skill Book [Alteration]: Daughter of the Niben [B2/10]
- Chest
- Potion
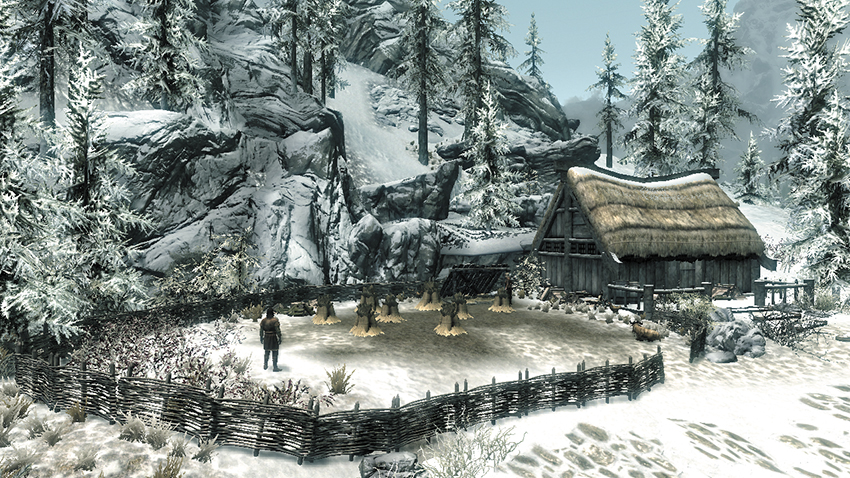
This quaint farm lies just south of Windhelm. Harvest wheat and other ingredients from outside, then enter the farm and sell Bolfrida’s wheat back to her for 5 gold a bundle.
[7.08] Hlaalu Farm
Related Quests
- Favor (Activity): Harvesting Crops* (Belyn Hlaalu)
Habitation: Farm
- Adisla
- Belyn Hlaalu
Collectibles
- Chest
- Potions
- Loose gear
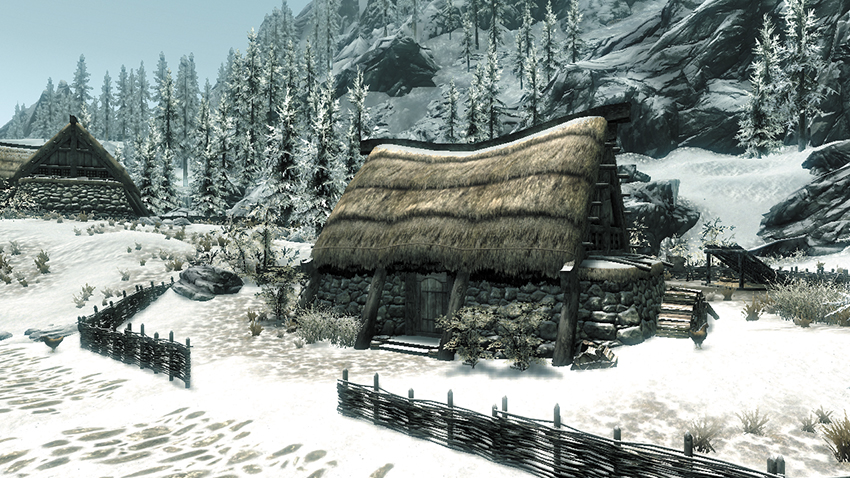
This small farm lies southeast of Windhelm and is owned by a Dark Elf named Belyn Hlaalu. Harvest some wheat from outside, but you’ll need to pick the door’s Novice-level lock to enter and raid the farmhouse.
[7.09] Hollyfrost Farm
Related Quests
- Favor (Activity): Harvesting Crops* (Tulvur)
Habitation: Farm
- Tulvur
- Tiber (dog)
Collectibles
- Chest
- Potion
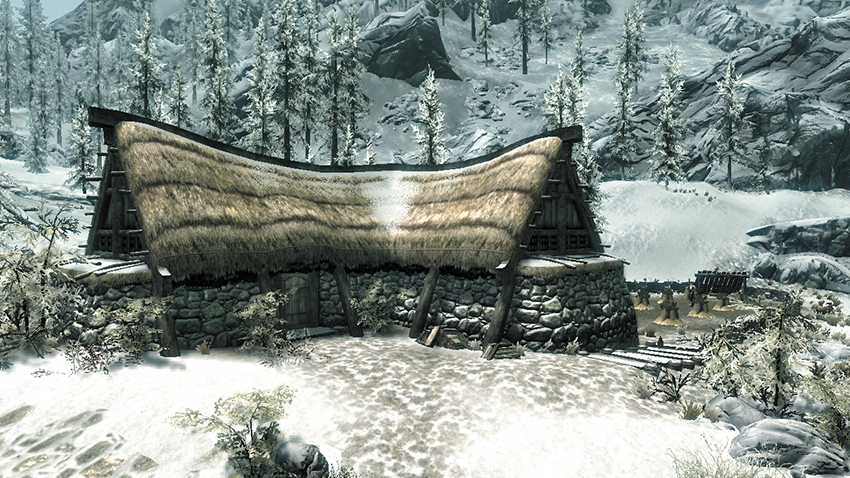
This humble farm stands to the southeast of Eastmarch’s capital. A feisty guard dog named Tiber guards the locked farmhouse.
[7.10] Traitor’s Post
Related Quests
- Side Quest: The Great Skyrim Treasure Hunt*
Recommended Level: 5
Dungeon: Bandit Camp
- Bandit
Crafting
- Tanning Rack
Collectibles
- Skill Book [Block]: A Dance in Fire, v2 [A2/10]
- Treasure Map VII [5/11]
- Chest (Locked: Novice)
- Chest (Locked: Master)
- Loose gear
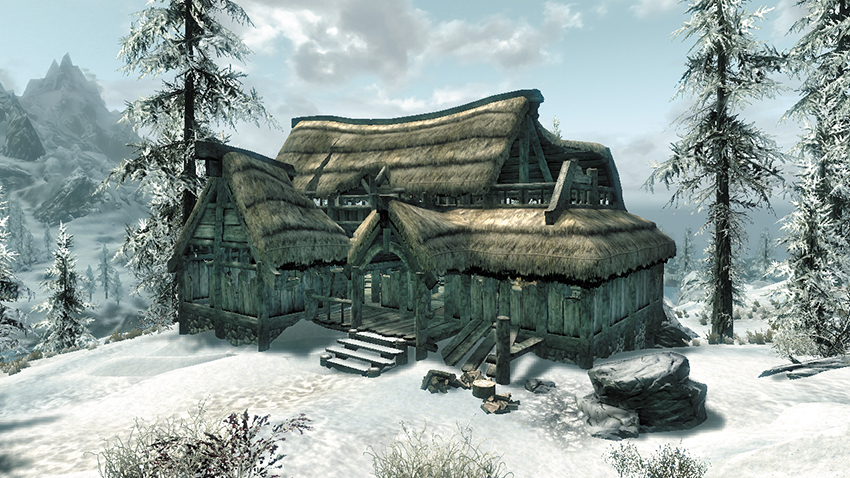
A small gang of bandits has taken refuge within a derelict inn located at Eastmarch’s northeast corner. Find a Treasure Map inside the chest on the main floor, along with a Skill Book that’s on a cupboard shelf. Then scale the rocks on the west side of the building, edge your way around the roof, and climb into the otherwise-inaccessible second floor to reach another, larger chest.
[7.11] Refugees’ Rest
Dungeon: Animal Den
- Animal
Collectible
- Chest (Locked: Adept)
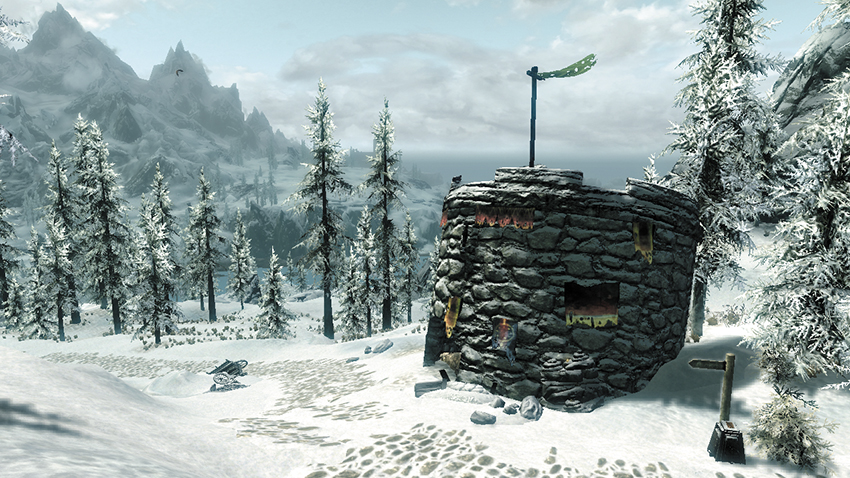
This remote station, which lies at Eastmarch’s northeast tip along the northern road to Morrowind, consists of a ruined tower and unceremonious graveyard. A book found at the base of the nearby road sign reveals a little of this location’s history.
[7.12] Sacellum of Boethiah
Related Quests
- Daedric Quest: Boethiah’s Calling
Recommended Level: 30
Habitation: Special
- Boethiah Cultist
- Priestess of Boethiah
Crafting
- Alchemy Lab
- Arcane Enchanter
Collectibles
- Unique Weapon: Blade of Sacrifice [52/80]
- Potions
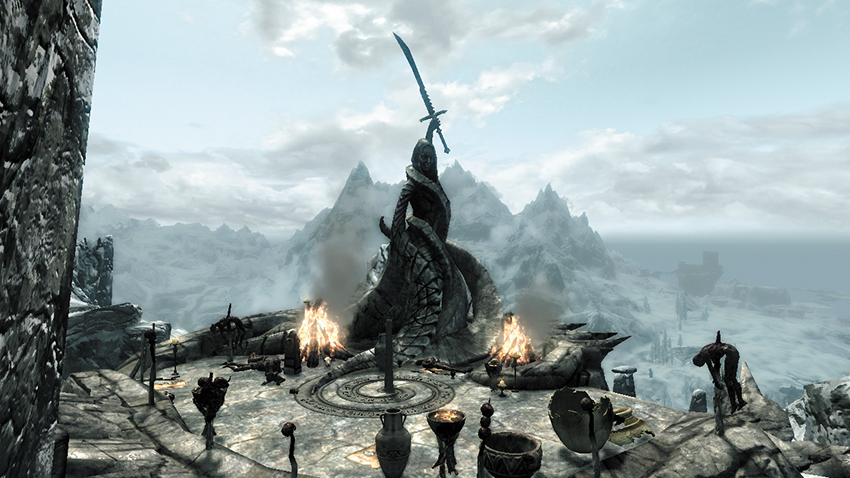
You obtain the “Boethiah’s Calling” quest upon discovering this unusual cult hideout, which lies at Eastmarch’s northeast corner. Speak to the Priestess of Boethiah to learn of her cult and advance your quest. Watch the zealots practice their swordplay in the training area, and notice the pillar of sacrifice atop the snowy stairs—this comes into play later in the quest, after you lure an unfortunate soul here to their demise.
[7.13] Cradlecrush Rock
Dungeon: Giant Camp
- Giant
Collectibles
- Chest
- Knapsack
- Potions
- Loose gear
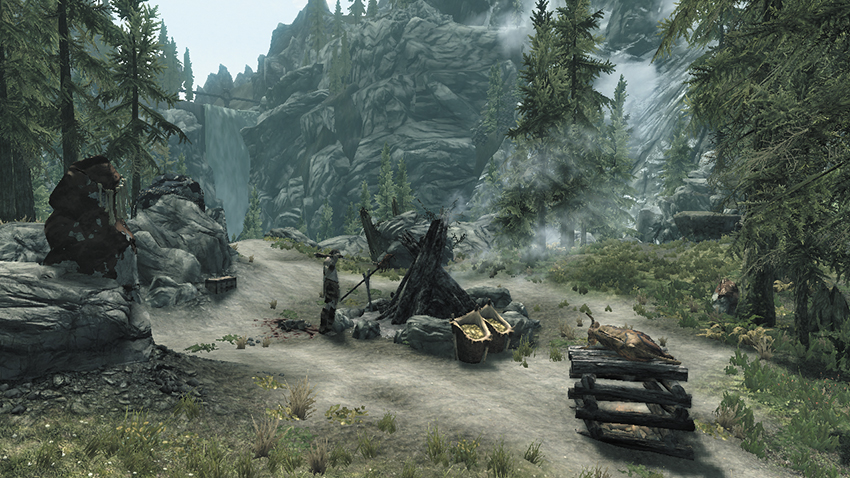
A monstrous giant makes its home near these large, ominous rocks. One rock has apparently crushed some poor, unfortunate soul—loot the fool’s surviving knapsack, which lies near a skeletal foot, for additional valuables.
[7.14] Abandoned Prison
Recommended Level: 6
Dungeon: Special
- Ghost
Collectibles
- Skill Book [Two-Handed]: Song of Hrormir
- Chest(s)
- Loose gear
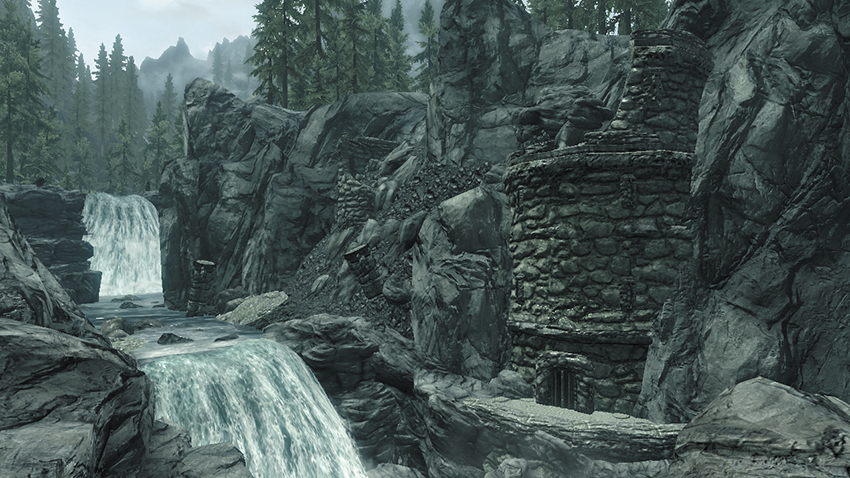
This derelict prison’s entrance can be seen from the road along Eastmarch’s western boarder—cross a rushing river to get there.
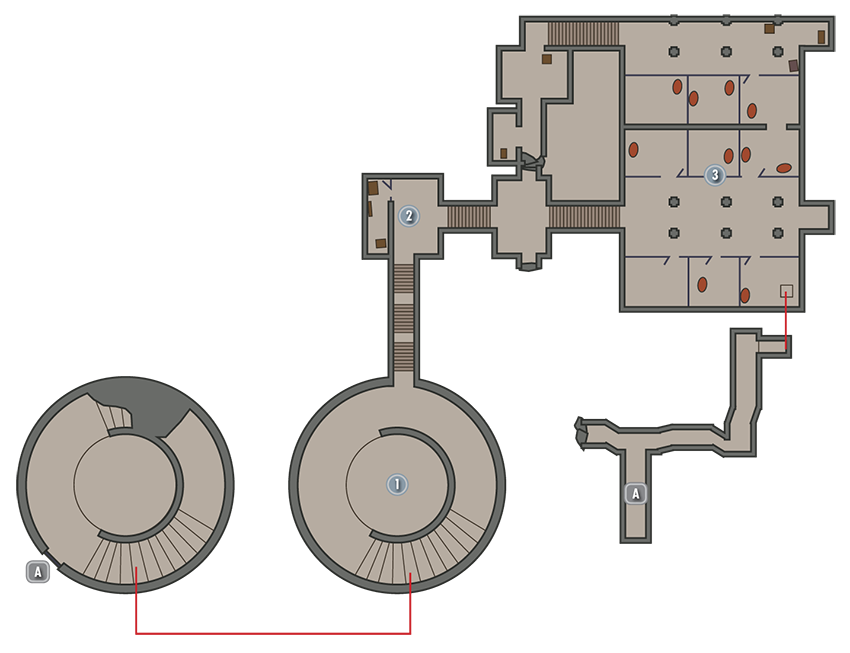
Exit to Skyrim
Leaky Chamber
Collect a host of hanging moss in this otherwise empty chamber, then take the lower passage to [2].
Guards’ Office
A handful of valuables lie in the guards’ small office, including a note that sheds some light on what may have happened here.
- Loose gear
Holding Cells
Search the skeletons here to find a handful of valuables. Take the Abandoned Prison Key from the far table and use it to open the cells. Find a chest to the north and claim the Skill Book that lies against it. Drop through the southeast cell’s trapdoor to locate a sewer tunnel that leads back out to Skyrim.
- Skill Book [Two-Handed]: Song of Hrormir
- Abandoned Prison Key
- Chest (Locked: Master)
- Loose gear
[7.15] Mixwater Mill
Related Quests
- Favor (Activity): Chopping Wood* (Gilfre)
Habitation: Lumber Mill
- Gilfre (Marriage Prospect)
Services
- Marriage Prospect: Gilfre [49/62]
Collectibles
- Skill Book [Archery]: The Marksmanship Lesson [D2/10]
- Chest(s)
- Potions
- Loose gear
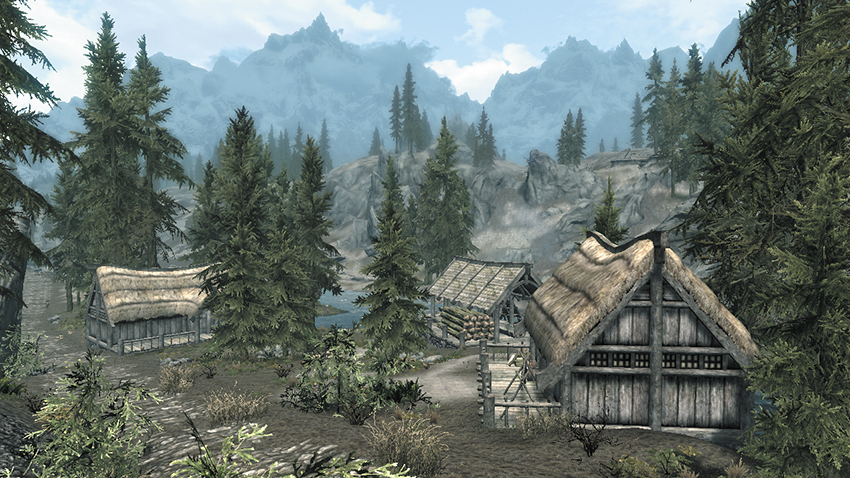
Life moves at a slower pace here at this quaint lumber mill, which is located along the White River on the west side of Eastmarch, just north of where the Darkwater River branches off.
Exterior
If you like, enter the mill and slice up logs for Gilfre. Or grab a Woodcutter’s Axe and chop wood to sell back to Gilfre for a bit of honest coin.
- Loose gear
Gilfre’s House
Breaking into Gilfre’s humble abode is worthwhile. Your unscrupulous actions can net you some decent coin, a few potions, and a Skill Book that rests on a small table.
- Area Is Locked (Novice)
- Skill Book [Archery]: The Marksmanship Lesson [D2/10]
- Chest
- Potions
Worker’s House
No need to break into the Worker’s House—the door is unlocked. Pop in, loot the place, and then head back out.
- Chests (3)
- Potions
[7.16] Broken Limb Camp
Dungeon: Giant Camp
- Giant
Collectible
Chest
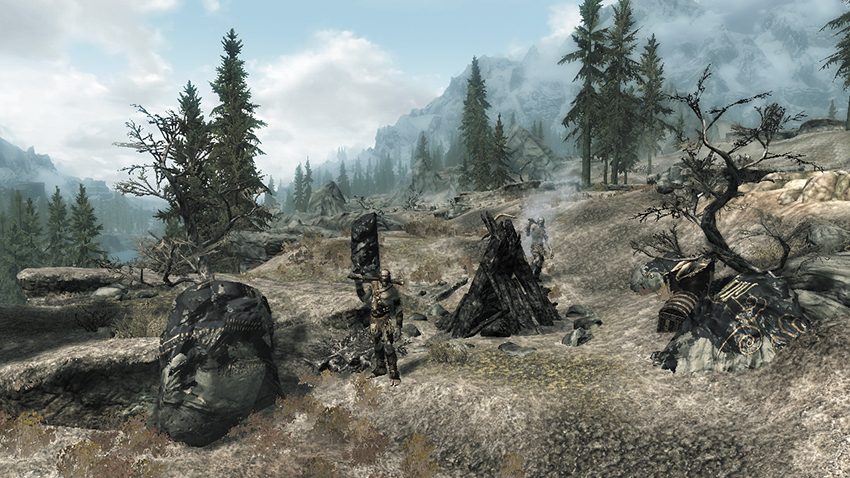
Two fearsome giants have made camp along Eastmarch’s southwestern hills. While fighting giants is never wise, you can gain some decent loot and experience by clearing this campsite—if you’re up to the task. If the brutes are too tough, try raiding their chest and then quickly fleeing before they realize they’ve been robbed.
[7.17] Cronvangr Cave
Related Quests
- Dungeon Activity
Recommended Level: 6
Dungeon: Vampire Lair
- Animal
- Vampire
Collectibles
- Chests
- Potions
- Loose gear
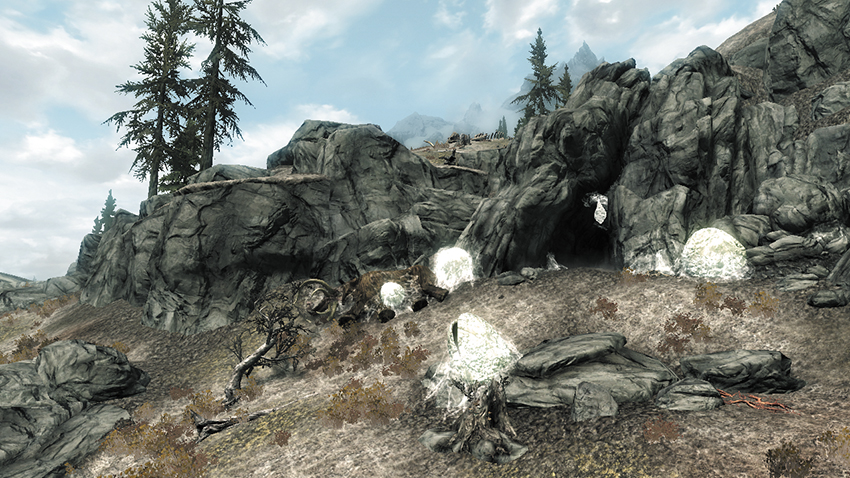
Near the heart of Eastmarch, massive egg sacks covered in thick webbing line the mouth of a forboding vampire cave.
Cronvangr Cave (Interior)
The cave’s first cavern is overrun by Frostbite Spiders. Look for a button along the wall and press it to open a secret door. Go through to battle a small brood of vampires in a secret chamber, then raid the chest they guard. Exit the secret lair and continue to squash spiders as you proceed deeper into the cave, looting an underwater chest when you reach the bottom before advancing into the Broodlair.
- Chests (2)
- Apothecary’s Satchel
- Potions
- Loose gear
Convangr Broodlair
Exterminate more spiders as you navigate the Broodlair’s narrow passages. You soon reach a wide cavern, where a monstrous spider drops from the ceiling. Slay the brute and loot the nearby chest, then advance to loop around and find your way back outside.
- Chest
[7.18] Riverside Shack
Related Quests
- Side Quest: The Great Skyrim Treasure Hunt*
Recommended Level: 6
Dungeon: Animal Den
- Animal
Crafting
- Tanning Rack
Collectibles
- Skill Book [Light Armor]: Rislav the Righteous
- Treasure Map III [6/11]
- Chest (Locked: Apprentice)
- Loose gear
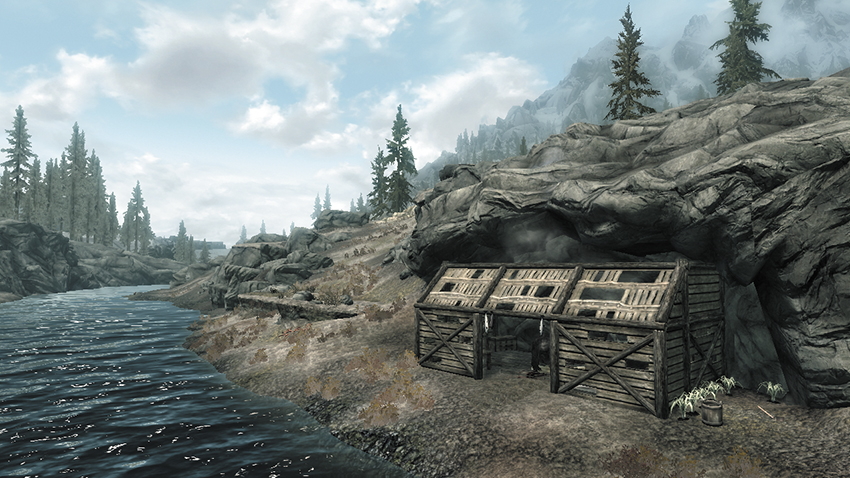
As its name implies, this is a small, abandoned shack poised on the bank of the White River, somewhat near the middle of Eastmarch. If you can slay the vicious animal that lives inside the shack, you’ll be free to loot the chest that’s found here—and claim the Treasure Map within! A Skill Book is also found here, mixed in with a stack of other tomes.
[7.19] Witchmist Grove
Related Quests
- Daedric Quest: A Night to Remember
Recommended Level: 14
Dungeon: Hagraven Nest
- Witch
Quest Items
- Wedding Ring
Collectibles
- Skill Book [Destruction]: Response to Bero’s Speech
- Chest (Locked: Expert)
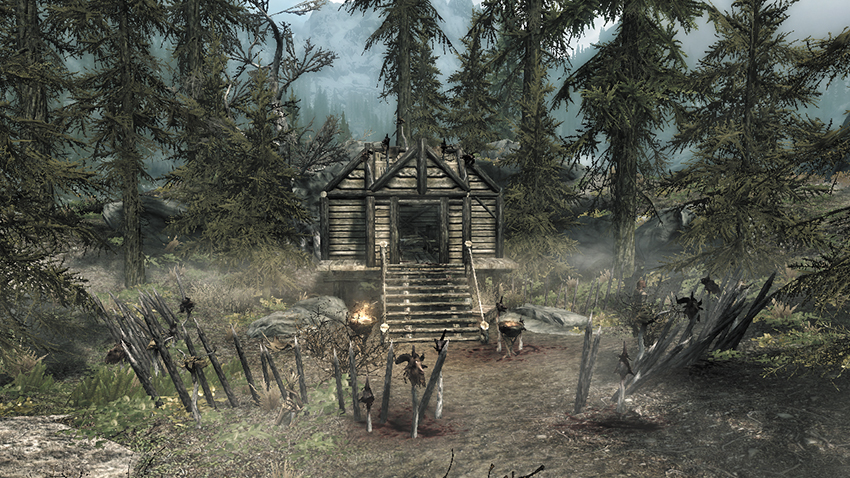
The woods in the center of Eastmarch are home to a vicious witch who lives in a small shack. If you manage to slay the spellcaster, see if you can also open the locked chest that she guards. You visit this site in search of a lost ring during Daedric Quest: A Night to Remember. Find a Skill Book stashed under the bed.
[7.20] Bonestrewn Crest
Dungeon: Dragon Lair
- Dragon (after Main Quest: Dragon Rising)
- Skeleton
Special Objects
- Word Wall: Frost Breath [3/3]
- Chest (Locked: Expert)
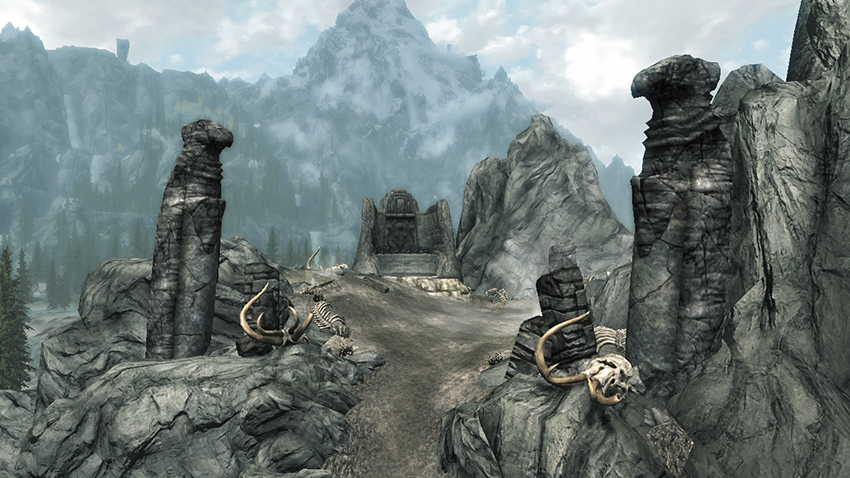
At the very center of Eastmarch, a handful of lowly skeletons guards a dismal hilltop, where the bones of great beasts lie strewn about. Defeat a monstrous dragon here if you’ve advanced past the “Dragon Rising” quest; then follow the sound of chanting to locate a Word Wall that bestows you with a new Word of Power. If possible, open the nearby locked chest to obtain valuable plunder.
[7.21] Steamcrag Camp
Dungeon: Giant Camp
- Animal
- Giant
- Mammoth
Collectibles
- Chest
- Chest (Locked: Adept)
- Knapsack
- Potion
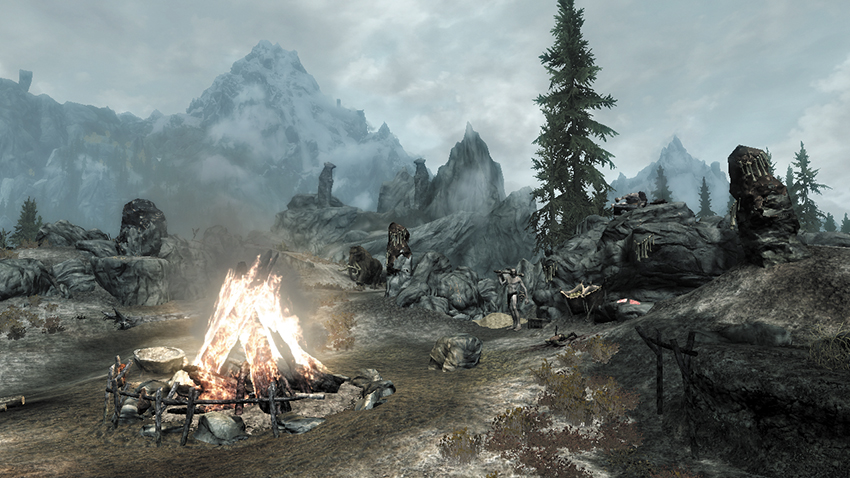
A towering giant has set up a campsite near the heart of Eastmarch. Attack the giant from the north ridge to gain a tactical advantage. Loot a chest here, then find another chest and a knapsack on a nearby smashed Khajiit wagon. Beware the wild animals that are nuzzling through the Khajiit’s remains!
[7.22] Narzulbur
Related Quests
- Side Quest: The Forgemaster’s Fingers
- Favor (Activity): Mining Ore* (Dushnamub)
- Favor: Sparring Partners* (Mauhulakh)
Recommended Level: 6
Habitation: Orc Stronghold
- Bolar
- Chief Mauhulakh
- Urog
- Yatul
Crafting
- Alchemy Lab
- Tanning Rack
Collectibles
- Skill Book [Heavy Armor]: The Knights of the Nine
- Skill Book [Two-Handed]: Song of Hrormir
- Chests
- Potions aplenty
- Loose gear
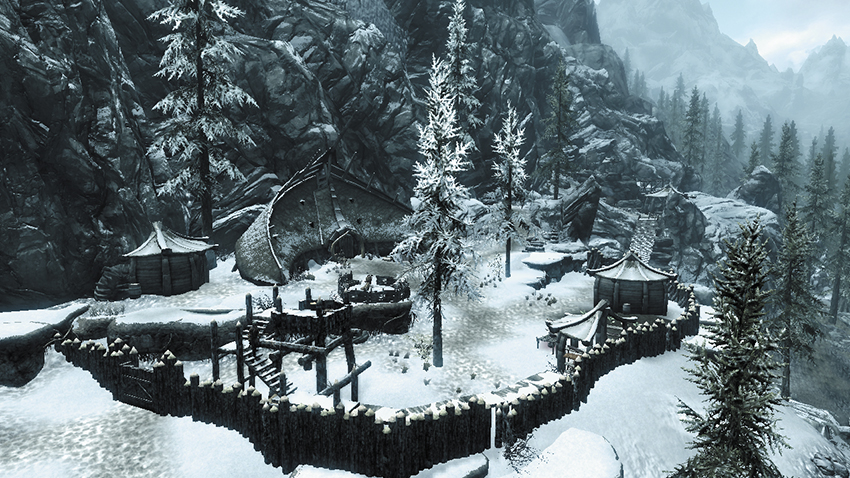
Nestled among the mountains that form Eastmarch’s eastern border, this small Orcish mining community struggles to prosper by gathering ebony ore from the nearby Gloombound Mine.
Exterior
The Orcs are cold to outsiders, but they won’t attack or force you away. Speak to the villagers to potentially gain a new quest that can help you earn their acceptance.
- Crafting: Alchemy Lab, Tanning Rack
- Potions
- Loose gear
Alchemy Workshop
Expert-level Lockpicking skill is required to enter the Narzulbur’s alchemy workshop, where a vast array of potions and ingredients are kept.
- Area Is Locked (Expert)
- Crafting: Alchemy Lab
- Potions aplenty
Mauhulakh’s Longhouse
The Longhouse features a roaring hearth, numerous food items, and sleeping quarters. A Skill Book sits on a table here, partially covered by other tomes.
- Skill Book [Heavy Armor]: The Knights of the Nine
- Chest (Locked: Adept)
- Chest (Locked: Master)
- Loose gear
Mauhulakh’s Cellar
The cellar holds a few items of interest, particularly a chest with an Adept-level lock. A Skill Book is found on the shelf above.
- Skill Book [Two-Handed]: Song of Hrormir
- Chest (Locked: Adept)
[7.23] Gloombound Mine
Related Quests
- Dungeon Activity
Recommended Level: 8
Habitation: Mine
- Bor
- Dushamub (Blacksmith)
- Gadba gro-Largash
- Mogdurz
- Mul gro-Largash
Services
- Trader (Blacksmith): Dushamub [23/33]
- Weapons, Apparel, Misc
Crafting
- Blacksmith Forge
- Grindstone
- Smelter
- Workbench
Dangers
- Oil Pool Trap
Collectibles
- Skill Book [Smithing]: Heavy Armor Forging [B2/10]
- Loose gear
- Mineable ore (Ebony)
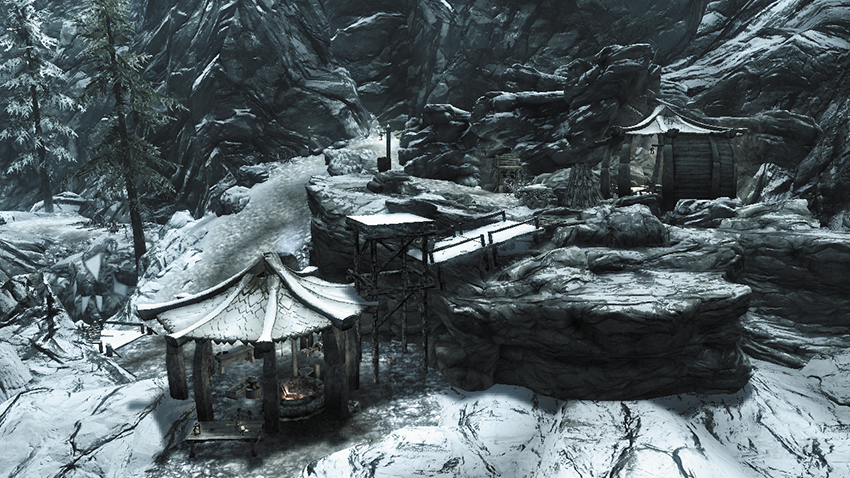
This small mine is located in Eastmarch’s eastern mountains, just south of the Orcish stronghold of Narzulbur. A gifted blacksmith works nearby, and a variety of useful ore can be freely harvested within the mine. This is the only true ebony mine in Skyrim.
Exterior
Speak with an Orc blacksmith who works just outside the mine to purchase an array of superior weapons and arms. The blacksmith also has raw materials for sale and will pay top coin for any materials mined from the nearby site. Also feel free to use the blacksmith’s crafting stations as you please. The Smelter requires a shovel to operate, which you can find in the mine. Discover a Skill Book in the open-air hut near the mine’s entrance.
- Crafting: Blacksmith Forge, Grindstone, Smelter, Workbench
- Skill Book [Smithing]: Heavy Armor Forging [B2/10]
Gloombound Mine (Interior)
Many useful tools can be found within the Orcs’ mine, such as Woodcutter Axes, Pickaxes, and Shovels. Scan the walls and floors of the mine to find Ebony Ore veins. Mine these for valuable ore that you can either sell or use to fashion weapons and armor.
- Danger! Oil Pool Trap
- Loose gear
- Mineable ore (Ebony)
[7.24] Cragwallow Slope
Recommended Level: 6
Dungeon: Warlock Lair
- Atronarch
- Mage
Crafting
- Alchemy Lab
- Arcane Enchanter
Collectibles
- Skill Book [Alteration]: The Lunar Lorkhan [E2/10]
- Chest(s)
- Potions aplenty
- Loose gear
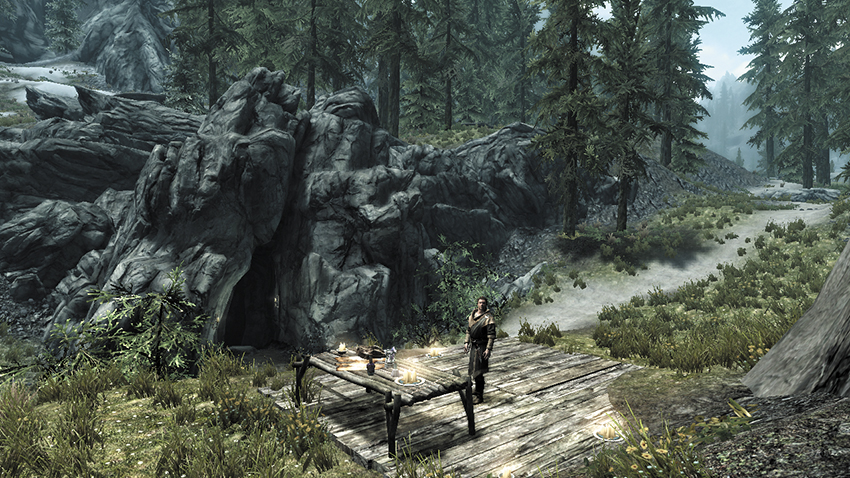
Dangerous mages reside in this small cave, which lies at the foot of Eastmarch’s eastern mountain range. Nab a Soul Gem from the exterior ritual site on your way in.
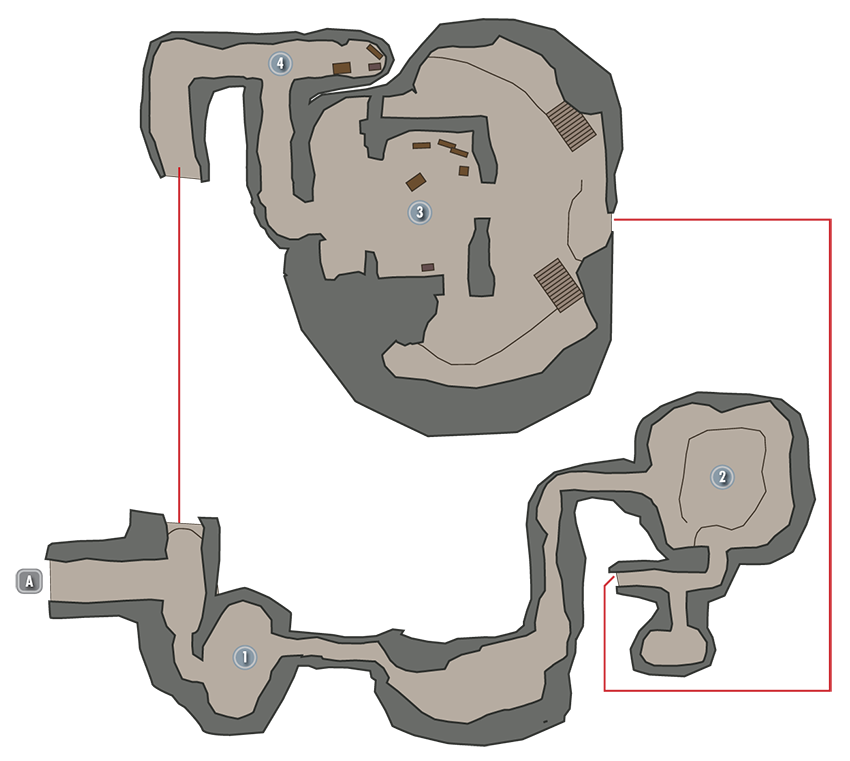
Exit to Skyrim
Alchemy Station
Slay a lone mage in the cave’s first small chamber, then collect some useful items from atop the nearby Alchemy Lab. Beware the Atronarchs and mages that lurk in the following tunnel.
- Crafting: Alchemy Lab
- Apothecary’s Satchel
- Potion
Ruined Book Chamber
A long tunnel leads to this open chamber, where mining tools and a few Soul Gems are found among a host of worthless ruined books. Duck into the south sleeping quarters to snag a potion and loot a chest on your way to the next area.
- Chest
- Potion
Central Chamber
Slay more mages and Atronachs in the heart of this giant cavern before exploring the upper ledges to the north and south, which contain potions and other valuables. A Skill Book sits on a table here.
- Crafting: Alchemy Lab, Arcane Enchanter
- Skill Book [Alteration]: The Lunar Lorkhan [E2/10]
- Chest
- Potions aplenty
Exit Passage
One final mage lurks in the final passage, which deposits you back near the cave’s entrance.
- Chest (Locked: Adept)
- Potions
- Loose gear
[7.25] Mzulft
Related Quests
- College of Winterhold Quest: Revealing the Unseen
Recommended Level: 16
Dungeon: Dwarven City
- Chaurus
- Dwarven Sphere
- Dwarven Spider
- Falmer
- Paratus Decimius
Crafting
- Alchemy Lab
Dangers
- Dwarven Piston Traps (pressure plate)
- Rockfall Trap (trip wire)
- Spear Trap (pressure plate)
Collectibles
- Skill Book [Alteration]: The Lunar Lorkhan
Special Objects
- Dwarven Armillary
- Mineable ore (Moonstone) Ore
- Area Is Locked (quest required)
- Chests
- Potions aplenty
- Loose gear
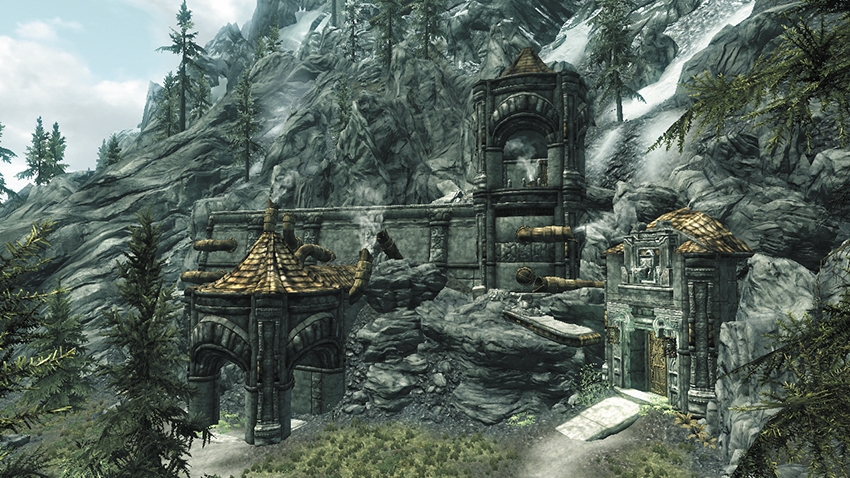
This massive network of dwarven engineering has been carved into Eastmarch’s eastern mountains. Its door remains securely locked until you acquire College of Winterhold Quest: Revealing the Unseen.
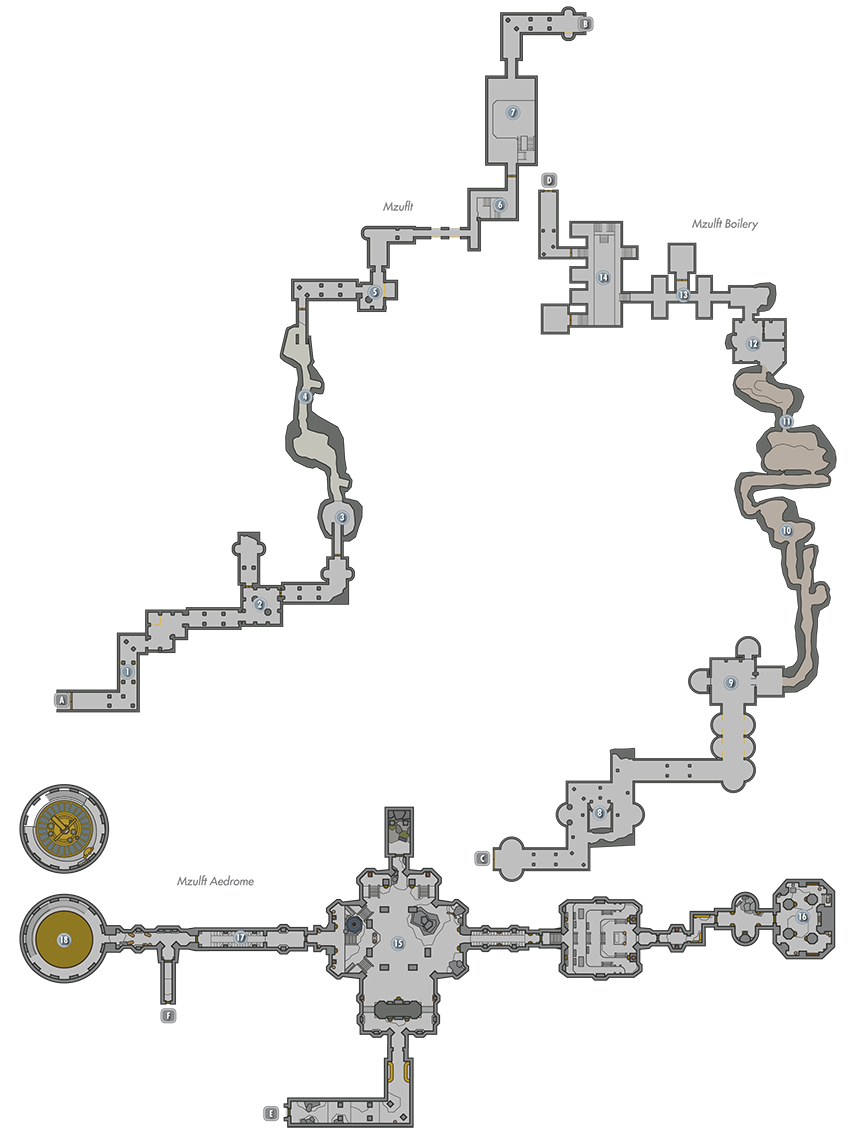
Exit to Skyrim
Entry Corridor
There’s little of note in this corridor, but beware of a dangerous trap that’s triggered by a pressure plate. Dwarven Spiders lurk farther down the passage.
- Danger! Spear Trap (pressure plate)
- Potions
Treasure Room 1
Defeat more Dwarven Spiders, then pick an Adept-level door lock to access a northern treasure room that’s guarded by a Dwarven Sphere.
- Chest
- Potion
Sunlit Cavern
Spy a valuable item that’s hidden in a corner of this softly lit chamber. Mine some Moonstone Ore from the vein here if you’ve brought a pickaxe.
- Loose gear
- Mineable ore (Moonstone)
Chaurus Chambers
Dangerous creatures called Chaurus lurk in these two small caverns. Beware the trip-wire trap in the hall that connects them. Mine more Moonstone Ore here if you’re feeling crafty.
- Danger! Rockfall Trap (trip wire)
- Knapsack
- Mineable ore (Moonstone)
Storeroom 1
Multiple Dwarven Spheres guard this small chamber, which sports an ornate gate and storeroom. Pick the gate’s lock to access some minor items within the storeroom.
Treasure Room 2
Fight your way downstairs and pick an Adept-level lock to open a gate and access a chest in this odd chamber.
- Crafting: Alchemy Lab
- Chest (Locked: Adept)
- Potions
Spider Chamber
Use caution when creeping along this wide chamber’s left ledge—pressure plates trigger dwarven pistons that can knock you into the central, spider-filled pit.
- Danger! Dwarven Piston Trap (pressure plates)
 Door to Mzulft Boilery
 Door to Mzulft
Boilery Entry
Slay a nimble Falmer in this wide hallway, which holds little of interest.
Storeroom 2
Fight your way through a few more Falmer on your way to this chamber. Don’t trouble with unlocking the Expert-level west gate; there’s nothing but Dwemer scrap metal in the storeroom beyond.
- Potions
- Loose gear
 Earthen Passage
Don’t overlook the odd-looking chests as you navigate this cavernous passage.
- Chests (2)
- Potion
- Loose gear
 Iridescent Cavern
Harvest the many glowing mushrooms that lend an eerie light to these two caverns. Chaurus Eggs can be obtained by inspecting the various egg sacs as well.
- Chest
- Loose gear
 Treasure Room 3
Pick the Expert-level door lock in this area to obtain an important key, along with treasure from a chest and a Skill Book.
- Skill Book [Alteration]: The Lunar Lorkhan
- Mzulft Room Key
- Chest
 Treasure Room 4
Pick the Adept-level lock on the ornate door here to access a treasure room that’s guarded by a Chaurus.
- Chest (Locked: Apprentice)
- Loose gear
 Treasure Room 5
Beware: this large chamber’s worthy treasures are guarded by multiple Falmer. Pick the Expert-level door in the southwest corner to access a small treasure room.
- Chest
- Chest (Locked: Novice)
- Potions aplenty
 Door to Mzulft Aedrome
 Door to Mzulft Boilery
 Great Hall
This massive foyer is crawling with Falmer. Fight hard to secure the area, then pick the north door’s Expert-level lock to access a treasure niche. The west door cannot be opened without the key you find inside a chest located in the eastern Cog Chamber. A Falmer Gloomlurker is carrying a Focusing Crystal, which is needed for location [18].
- Focusing Crystal
- Chests (3)
 Cog Chamber
A lone Dwarven Sphere guards this far chamber. Open the chest and retrieve the Mzulft Observatory Key.
- Mzulft Observatory Key
- Chest
- Potions
- Loose gear
 Locked Hall
You cannot access this hall without the Mzulft Observatory Key. The far door to [18] is locked as well—Paratus Deimius opens it when you retrieve the Focusing Crystal for him. The ruins’ exit door is found here, accessed only after you complete the puzzle inside location [18]..
- Knapsack
 Armillary Chamber
This large chamber houses a giant and mysterious dwarven mechanism. Paratus Decimius, and your knowledge of flame and frost spells, are the keys to solving this puzzle. Consult College of Winterhold Quest: Revealing the Unseen for the answers.
- Dwarven Armillary
 Exit to Skyrim
 [DG.16] Mzulft: Dwarven Storeroom
Hold: Eastmarch
Related Quests
- Side Quest: Lost to the Ages
Recommended Level: 16
Faction: Dwarven City
- Katria
Miscellaneous
- Loose gear
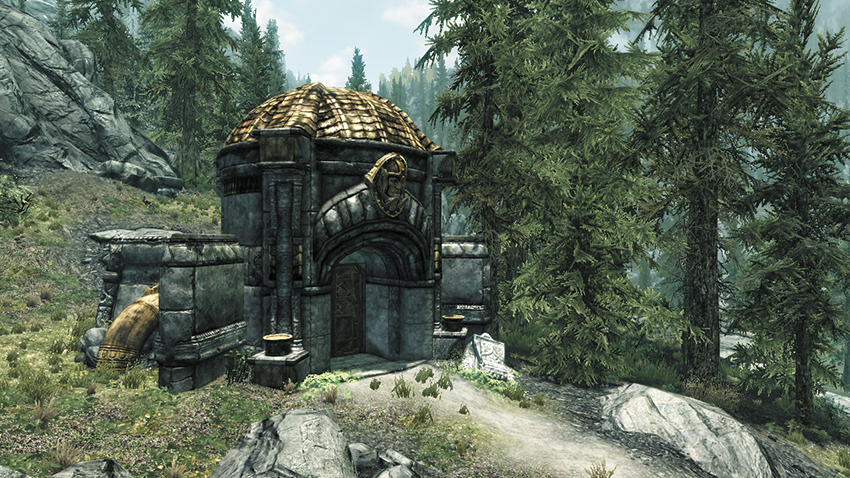
Search the nearby grounds for the Dwarven Storeroom and open the door. If you are on Side Quest: Lost to the Ages, Katria is waiting for you inside, wondering how best to break through the locked door. Otherwise, this is simply a small storage area.
You can unlock the gate [Expert] or locate the metal door to the right of it [Apprentice]. Open that and the second door [Apprentice] in the storage area beyond. Both allow you to reach the inner storeroom, which has a Glowing Crystal Shard (which you identify as an Aetherium Shard if you’re on the quest). You can also claim a variety of dwarven items and scrap from this location, as well as several Dwarven Metal Ingots.
- Aetherium Shard [4/4]
- Loose gear
[7.26] Lost Knife Hideout
Recommended Level: 6
Dungeon: Bandit Camp
- Animal
- Bandit
Crafting
- Grindstone
- Cookpot
Dangers
- Bone Alarm Trap
- Rockfall Trap (trip wire)
Collectibles
- Skill Book [Heavy Armor]: Orsinium and the Orcs
- Skill Book [Two-Handed]: Words and Philosophy [E1/10]
- Chest(s)
- Potions
- Loose gear
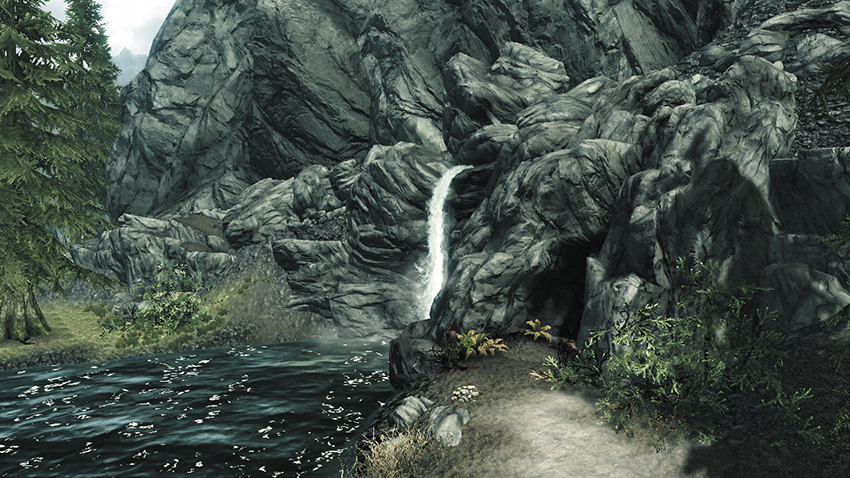
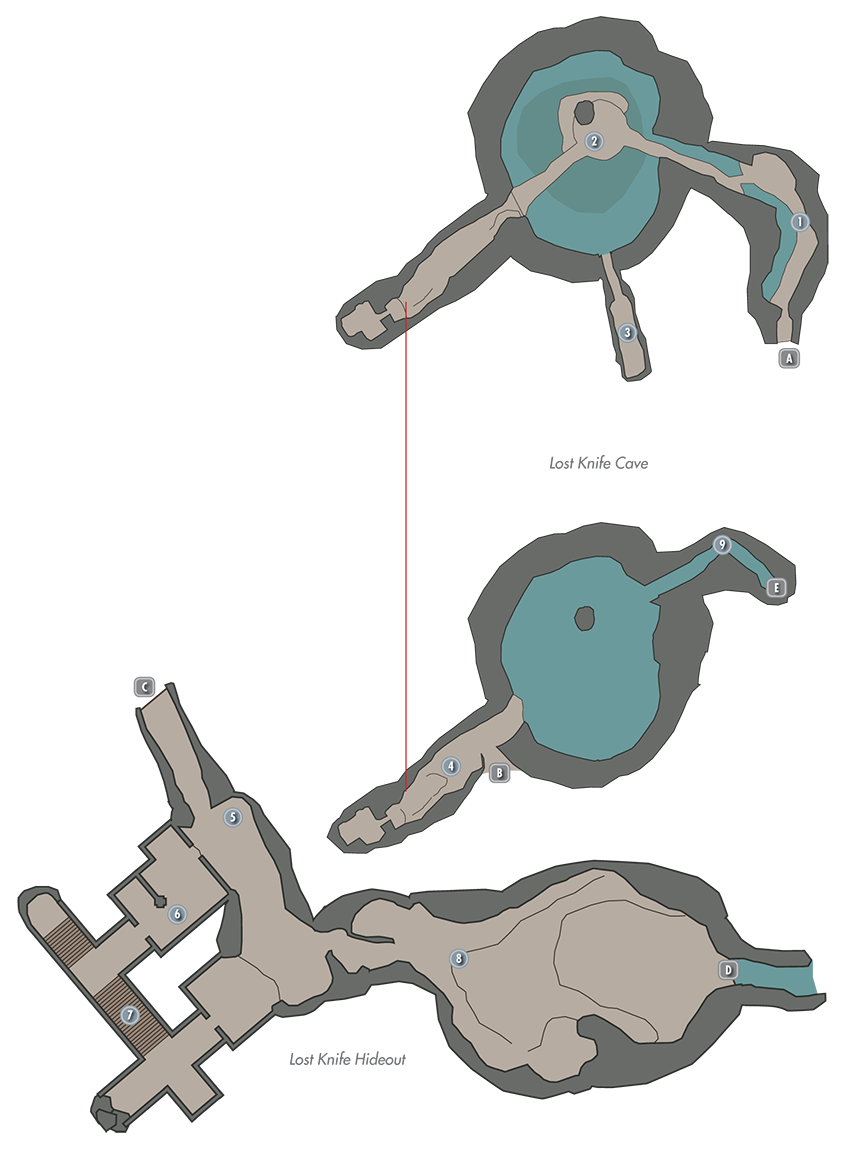
Bandits have set up a formidable hideout in this watery cavern. Make your way through Lost Knife Cave to reach the inner Lost Knife Hideout.
Exit to Skyrim
Entry Tunnel
Kill the bandits at the end of the entry tunnel to obtain a key from one of their corpses.
- Lost Knife Cage Key (Bandit)
- Potions
- Loose gear
Watery Cavern
The cave’s center is patrolled by more bandits, including archers that fire down from elevated walkways. A Skill Book sits on a table on the central wooden lookout.
- Danger! Bone Alarm Trap
- Skill Book [Two-Handed]: Words and Philosophy [E1/10]
- Loose gear
Waterfall Tunnel
Take a secret underwater passage, behind a waterfall, from [2] to reach a small tunnel with a treasure chest.
- Chest
- Loose gear
West Tunnel
This tunnel leads to the Lost Knife Hideout and features more bandits and a dangerous trip-wire trap. Scour the upstairs storeroom to find a chest.
- Danger! Rockfall Trap (trip wire)
- Chest
- Loose gear
Path to Lost Knife Hideout
Path to Lost Knife Cave
Hideout Entry
Sneak your way past the talking bandits, then slip behind the far scaffolding to discover a hidden chest.
- Chest
- Potion
West Barracks
Beware: numerous bandits lurk in stone barracks to the west.
- Loose gear
West Corridors
Wipe out more bandits and claim more loot in these halls. Another Skill Book sits on a table atop the stairs here.
- Skill Book [Heavy Armor]: Orsinium and the Orcs
- Chest
- Potions
- Loose gear
Cage Chamber
Drop into the waterfall hole as you enter this area to discover a secret tunnel with a large, locked chest. The tunnel leads to several cages and a host of bandits. Open the cages with the key you found on the very first bandit—the same key can be found on another bandit here. Loot another large chest here as well.
- Danger! Bone Alarm Trap
- Crafting: Grindstone
- Lost Knife Cage Key (Bandit)
- Chests (2)
- Chest (Locked: Master)
- Potions
- Loose gear
Path to Lost Knife Cave
Path to Lost Knife Hideout
East Overlook
Dispatch a few more bandits and loot a chest on your way back through the cave after exiting the Lost Knife Hideout.
- Chest
- Potions
- Loose gear
[7.27] Fort Amol
Related Quests
- Civil War Quest: Reunification of Skyrim
- Civil War Quest: The Battle for Fort Amol
Recommended Level: 6
Habitation: Military Fort
- Mage (pre-Civil War)
- Soldier (Imperial/Stormcloak, depending on the state of the Civil War)
Crafting
- Alchemy Lab
- Arcane Enchanter
- Blacksmith Forge
Collectibles
- Skill Book [Enchanting]: Catalogue of Armor Enchantments
Special Objects
- Shrine of Julianos [5/5]
- Chest(s)
- Potions aplenty
- Loose gear
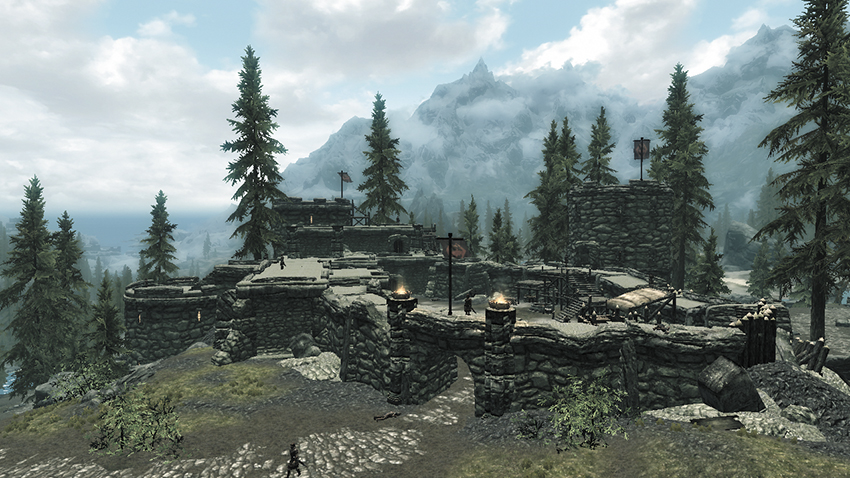
This medium-sized fortress has been overrun by a group of hostile mages. Once the Civil War begins in earnest, the mages are driven out, and Fort Amol becomes a point of contention for Imperial and Stormcloak forces. A collapsed outer wall lets you infiltrate the fortress from the east.
Exterior
Secure the fort’s exterior before exploring its small inner areas. A Shrine of Julianos rests on the Blacksmith Forge.
- Crafting: Alchemy Lab, Blacksmith Forge
- Shrine of Julianos [5/5]
- Chests (2)
Fort Amol (Interior)
Slay more mages and search every nook and cranny to find much more loot within Fort Amol’s small interior. Don’t miss the Skill Book on the shelf near the Arcane Enchanter.
- Crafting: Arcane Enchanter
- Skill Book [Enchanting]: Catalogue of Armor Enchantments
- Chest
- Chest (Locked: Adept)
- Potions aplenty
- Loose gear
Prison
Dispatch the mages in the prison’s entry chamber, then loot the place.
- Potion
[7.28] Darkwater Pass
Related Quests
- Miscellaneous Objective: Extracting an Argonian* (Derkeethus)
Recommended Level: 18
Dungeon: Falmer Hive
- Animal
- Derkeethus (Follower)
- Falmer
Services
- Follower: Derkeethus [38/47]
Dangers
- Swinging Wall Trap (lever/trip wire)
Collectibles
- Skill Book [Enchanting]: Catalogue of Weapon Enchantments
- Chests
- Potions
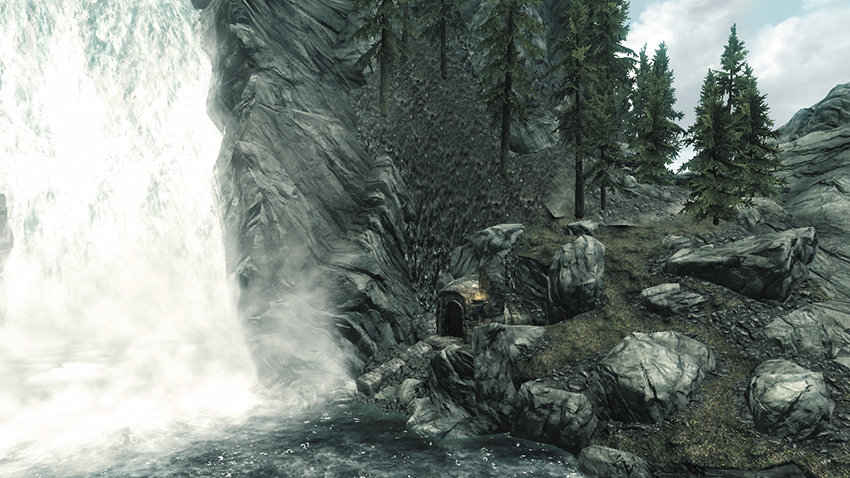
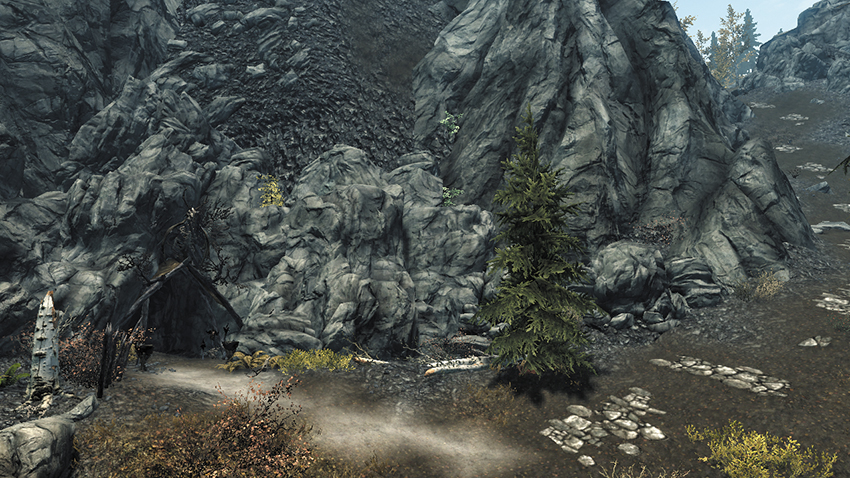
This watery pass runs through the Rift’s northern mountains. An unfortunate Argonian named Derkeethus has become stuck in a sticky situation within...
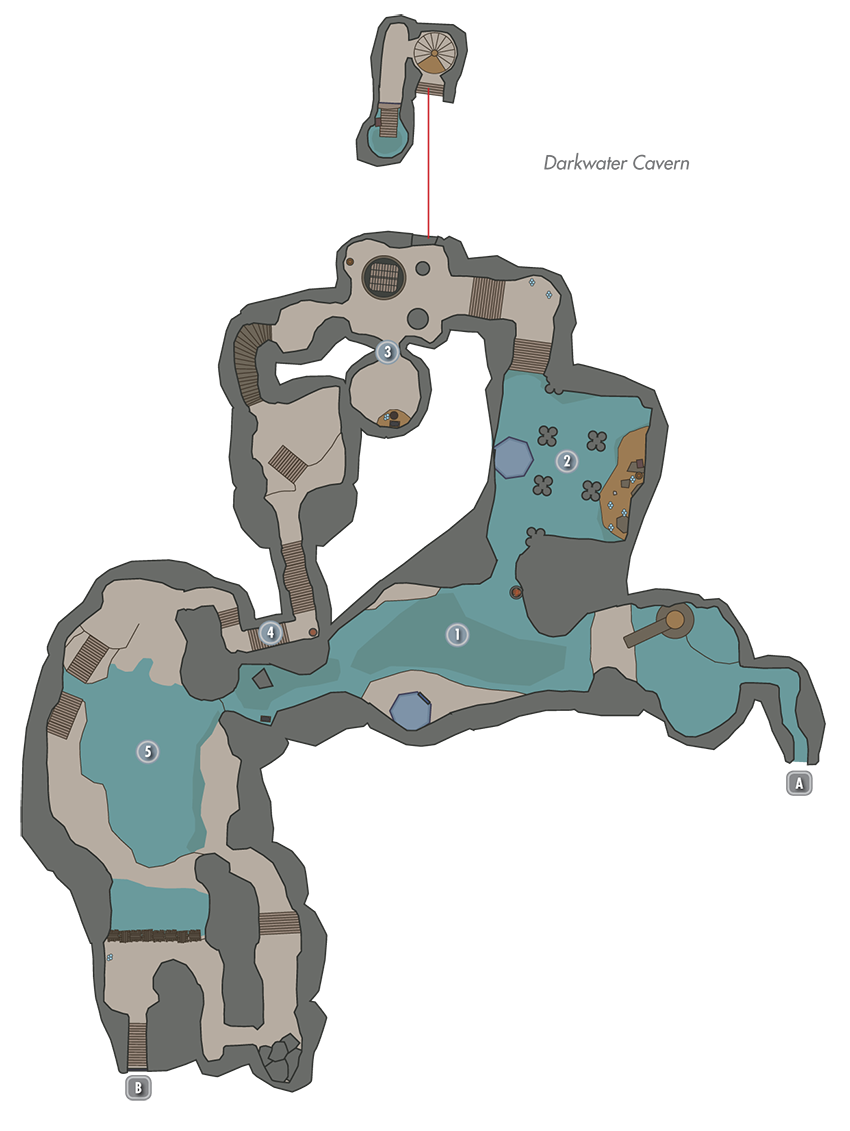
Exit to Skyrim
Waterfall Cavern
Loot a chest and slay a few Falmer on your way to this first wide, watery cavern. Raid the Falmer chest by the far waterfall before proceeding into the north passage.
- Chests (2)
Chaurus Nest
Slay a number of Chaurus here, then search the east rubble to find more urns and another chest.
- Chest (Locked: Apprentice)
Pit Chamber
Slay a powerful Falmer here to obtain a key and free a nonhostile named Derkeethus, who asks for help in escaping the cave, thereby granting you a Side Quest. Pull a lever in the room’s dark northeast corner to reveal a secret passage that leads down to a pair of chests in the watery pit below.
- Crafting: Arcane Enchanter
- Follower: Derkeethus [38/47] Skill Book [Enchanting]: Catalogue of Weapon Enchantments
- Darkwater Pit Key (Burial Urn)
- Shaman’s Key (Falmer)
- Chests (3)
- Potion
Trapped Passage
Pull a lever to slay an unwary Falmer with a trap in this passage. Carefully deactivate the trip wire that also triggers the trap as you proceed to [5].
- Danger! Swinging Wall Trap (lever/trip wire)
- Potions
Rushing Rapids Cavern
Cut down multiple Falmer as you navigate this wide chamber. Scale the west ledges to locate a dark passage above the south waterfall, where you discover a chest. Climb the east ledges to reach a passage that leads back outside, but beware the trip wire that’s stretched across the passage’s entrance.
- Danger! Swinging Wall Trap (trip wire)
- Chest
Exit to Skyrim
[7.29] Snapleg Cave
Recommended Level: 14
Dungeon: Hagraven Lair
- Animal
- Hag
- Witch
Crafting
- Alchemy Lab
- Arcane Enchanter
Dangers
- Magic Caster Trap
Collectibles
- Skill Book [Alteration]: Breathing Water
- Chests
- Potions
- Loose gear
This medium-sized cave lies at the north base of the Rift’s northern mountains and is home to vicious beasts and witches.
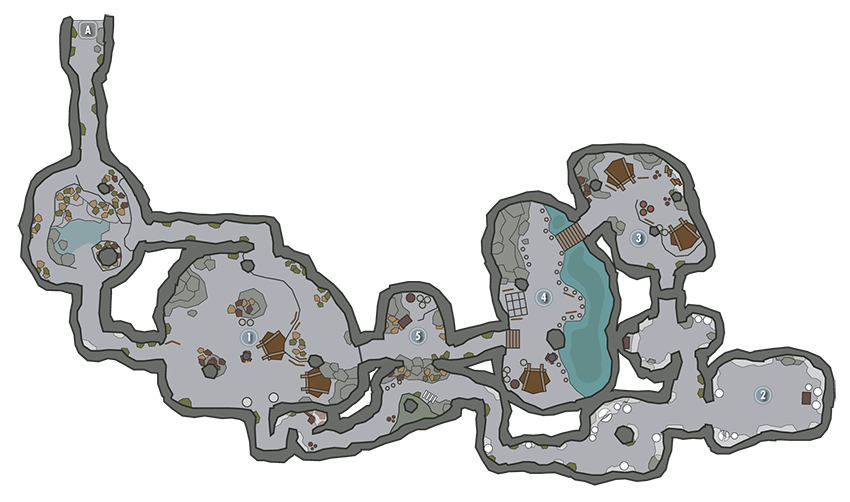
Exit to Skyrim
Troll Cavern
Slay a few Skeevers in the cave’s first tall chamber, then make your way to this wide cavern, where a few spell-slinging witches and a vicious predators lurk. Raid a chest inside a tent and find valuable loot in a box atop a rock; then take the south passage to [2], battling another troll along the way and snagging a Soul Gem from atop a pedestal to stop it from casting Ice Spikes at you.
- Danger! Magic Caster Trap
- Chest
- Potions
- Loose gear
Giant Spider Lair
Dispatch a few Frostbite Spiders on your way to this web-covered cavern, where a Giant Frostbite Spider descends from the ceiling to feast.
- Chest
Hag’s Cavern
Cut down a few more spiders on your way to this cavern, where a Hag lurks. Claim the Skill Book that rests on a barrel inside the tent here.
- Skill Book [Alteration]: Breathing Water
- Potions
Canal Cavern
Slay a vicious Hag and Hagraven in this cavern, which features a watery canal. If you release a Spriggan from its Apprentice-level holding cell here, it will battle these enemies for you. There’s nothing of value underwater.
- Crafting: Arcane Enchanter
Loot Stash
Raid a giant chest as you navigate the cave’s exit passage, making your way back to the first tall chamber.
- Crafting: Alchemy Lab
- Chest
[7.30] Eldergleam Sanctuary
Related Quests
- Temple Quest: The Blessings of Nature
Recommended Level: 8
Dungeon: Spriggan Grove
- Asta
- Sond
- Spriggan
Collectible
- Skill Book [Restoration]: Mystery of Talara, v2
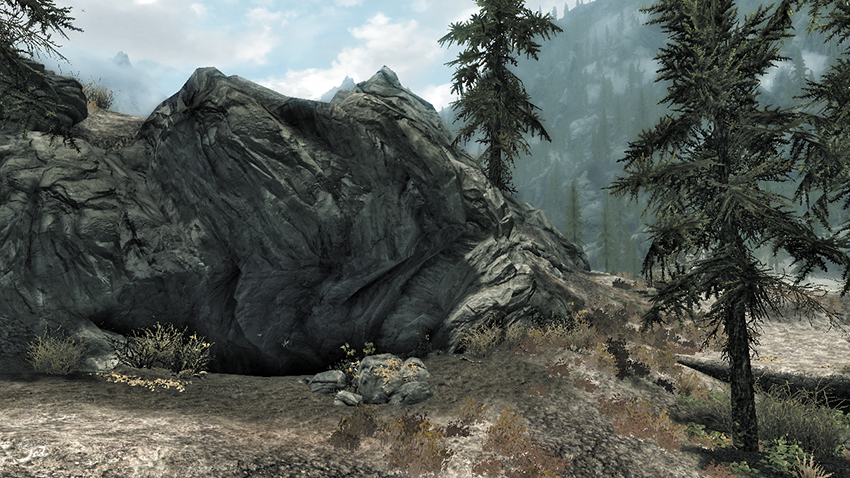
This widemouthed cave is located within Eastmarch’s southern territory. The interior of the cave consists primarily of one huge, sunlit cavern. Find a Skill Book leaning against a small pile of rocks near the path by the waterfall. A woman named Asta hints at a fearsome weapon being able to have some sort of effect on the roots of the cavern’s great tree, the Eldergleam, which block the uphill path leading to the wondrous tree. You will return here with the necessary item during Temple Quest: Blessings of Nature.
[7.31] Darkwater Crossing
Related Quests
- Favor (Activity): Mining Ore* (Verner Rock-Chucker)
- Favor: Special Delivery* (Sonda Drenim)
- Favor: The Bandit Slayer* (Annekke)
Habitation: Town
- Annekke Crag-Jumper (Follower)
- Derkeethus (Marriage Prospect)
- Hrefna
- Sondras Drenim (Marriage Prospect)
- Stormcloak Soldier
- Tormir
- Verner Crag-Jumper
Crafting
- Smelter
Services
- Follower: Annekke Crag-Jumper [39/47]
- Marriage Prospect: Derkeethus [50/62]
- Marriage Prospect: Sondas Drenim [51/62]
Collectibles
- Skill Book [Heavy Armor]: Chimarvamidium [B2/10]
- Chest(s)
- Loose gear
- Minable ore (Corundum)
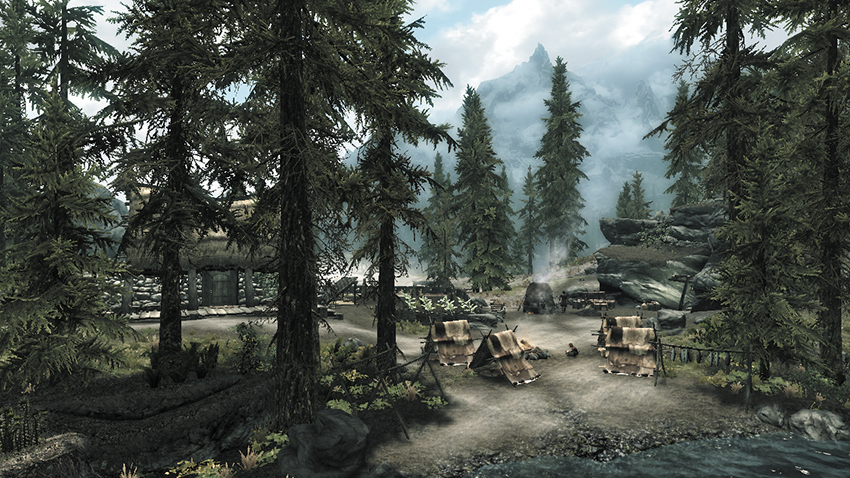
This picturesque town sits on either side of the wide, short waterfalls of the Darkwater River, at the southern border of Eastmarch. An ancient stone bridge spans the river—a remnant of an earlier age.
Exterior
Speak with an old miner named Sondas Drenim to gain a new Side Quest. If he isn’t outside, then you’ll find him in the nearby mine.
- Crafting: Smelter
Verner and Annekke’s House
You must pick the lock of the farmhouse’s door in order to gain entry, yet the place holds little worth stealing.
- Area Is Locked (Adept)
- Chest
Goldenrock Mine
The mine near Darkwater Passing is small, having been worked for only a few years by the locals. Grab a pickaxe and mine Corundum Ore from the veins that run along the mine’s walls; then sell it to Verner Crag-Jumper, who gladly pays you for your efforts. A Skill Book rests atop a barrel at the end of the tunnel.
- Skill Book [Heavy Armor]: Chimarvamidium [B2/10]
- Loose gear
- Minable ore (Corundum)
[7.32] The Atronach Stone
Recommended Level: 6
Special Objects
Standing Stone: The Atronach Stone [8/13]
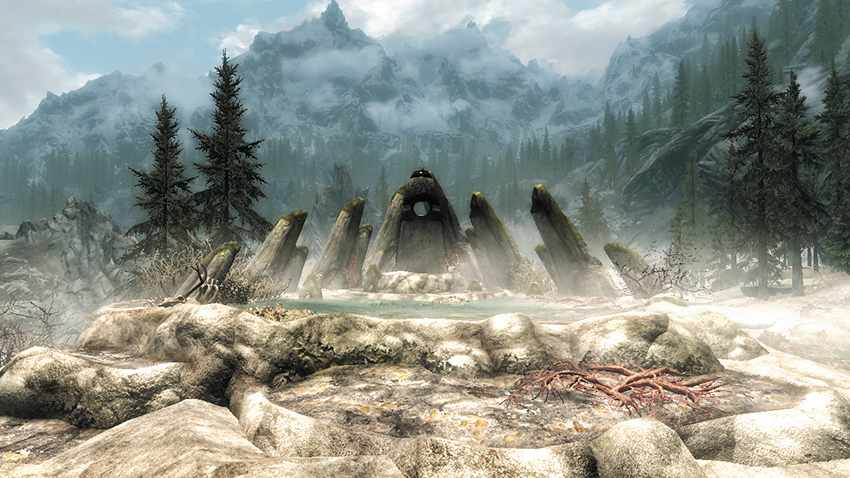
An ancient stone with peculiar markings stands on a small rise along the southern edge of Eastmarch. Touch the stone to gain the sign blessing of the Atronach. Those under the sign of the Atronach absorb Magicka from incoming spells and have a larger pool of Magicka, but they recover Magicka more slowly.
[7.33] Mistwatch
Related Quests
- Dungeon Quest: Forgetting About Fjola*
Recommended Level: 6
Dungeon: Bandit Camp
- Christer
- Mistwatch Bandit
- Bandit Leader (Fjola)
Quest Items
- Fjola’s Wedding Band
Crafting
- Alchemy Lab
Collectibles
- Skill Book [Heavy Armor]: Hallgerd’s Tale
- Unique Item: Fjola’s Wedding Band [64/112]
- Chests
- Potions
- Loose gear
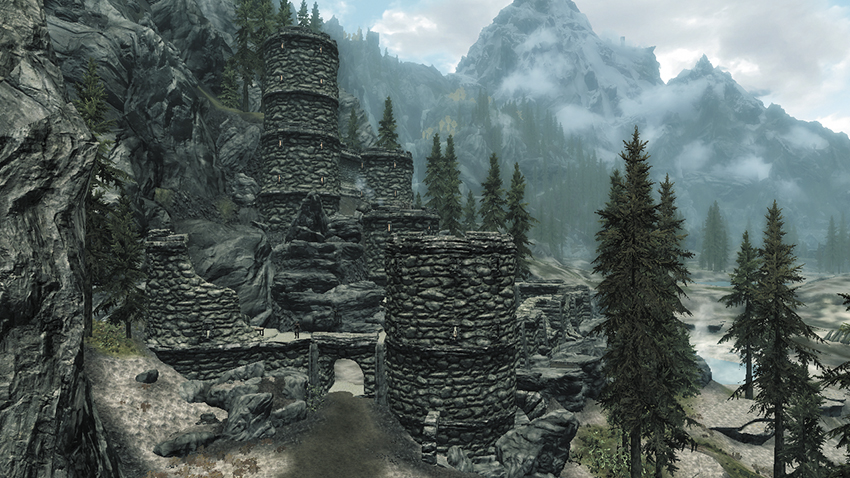
This imposing stone fortress stands at the southern edge of Eastmarch, not far from the mountains along the Reach’s north edge. A group of bandits have taken control of the fort and must be dealt with.
Exterior
Dispatch the handful of bandits who defend the fort’s exterior, then pull a lever to lower the drawbridge and advance into the first of three interior towers.
North Tower
Speak with a man named Christer inside the tower to gain a new Side Quest and an important key that unlocks the nearby door. Make your way upstairs, then climb a ladder and use the key again to go outside. (Don’t bother opening the upstairs holding cell—there’s nothing of interest in the small room.)
- Mistwatch Key (Christer)
- Crafting: Alchemy Lab
- Chest
- Chest (Locked: Apprentice)
- Apothecary’s Satchel
- Potions
- Loose gear
West Tower
Open a locked chest before entering the fort’s second tower. More bandits await you inside, including one that’s quite powerful. Fight your way upstairs and proceed through the high door.
- Chest
- Chest (Locked: Adept)
- Loose gear
East Tower
You encounter the bandit’s leader in this final tower, but she isn’t what you’d expect. It turns out to be Fjola, Christer’s missing wife. Fjola won’t come with you, so you must either kill her on the spot or return to Christer and give him the bad news. Fjola is a powerful enemy, but she carries many valuables, so killing her is worth the effort. Agree to help her first, and you can slay Fjola and complete the quest with Christer by handing him her wedding band. Either way, search for a Skill Book that rests atop a dresser in this tower.
- Unique Item: Fjola’s Wedding Band [64/112](Fjola)
- Skill Book [Heavy Armor]: Hallgerd’s Tale
- Potions
- Loose gear
[7.34] Eastmarch Imperial Camp
Related Quests
- Civil War Quest: Reunification of Skyrim
- Civil War Quest: The Battle for Fort Amol
Habitation: Military: Imperial Camp
- Imperial Soldier
- Imperial Quartermaster (Blacksmith)
Services
- Trader (Blacksmith): Imperial Quartermaster [24/33]
- Weapons, Apparel, Misc
Crafting
- Anvil
- Grindstone
- Workbench
Special Objects
- Civil War: Map of Skyrim
- Chests (2)
- Loose gear
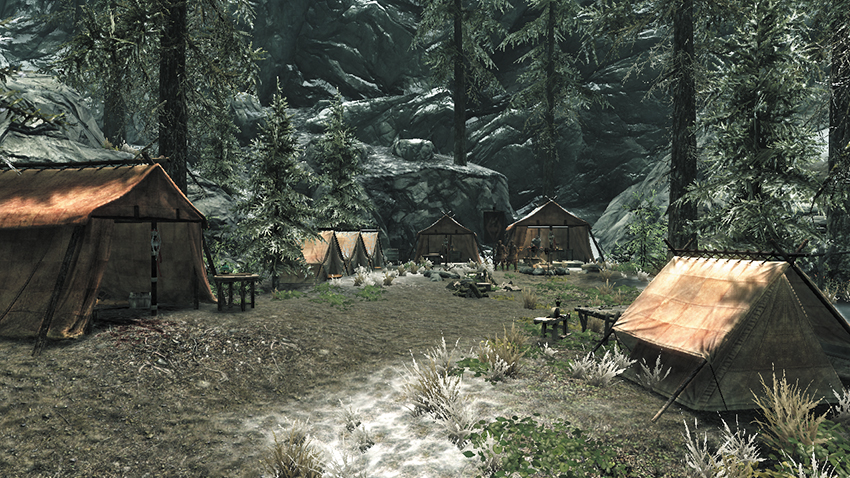
Nestled at the foot of Eastmarch’s eastern spires, a small band of Imperial Soldiers have dared to make camp. Speak with the Quartermaster here to browse his selection of fine weapons and armor. Examine each of the strategic map’s flagged sites as well to potentially gain new map data. Note that this site may or may not exist, depending on the status of the Civil War campaign.
[7.35] Kagrenzel
Related Quests
- Dungeon Activity
Recommended Level: 18
Dungeon: Falmer Hive
- Falmer
Dangers
- Rockfall Trap (proximity)
Underground Connection: Stony Creek Cave [7.36]
Special Objects
- Strange Orb
- Chest(s)
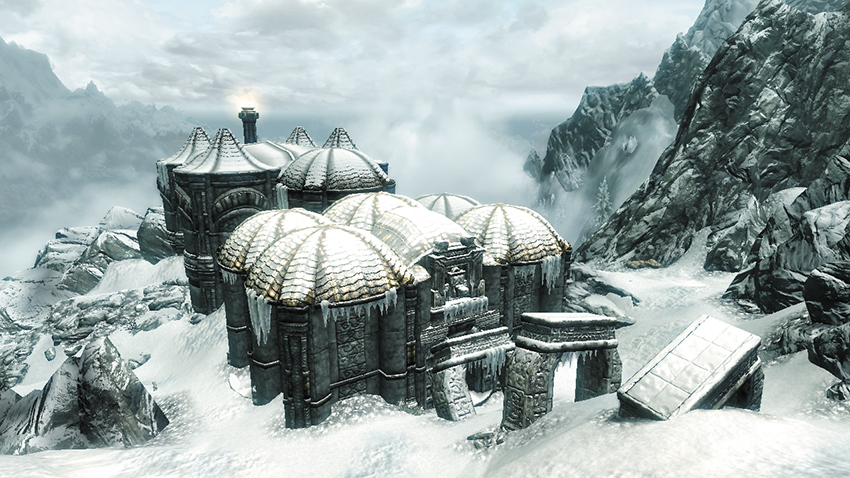
Perched high upon Eastmarch’s eastern mountains, a long-forgotten temple stands at the very edge of Skyrim. Circle around and enter this mysterious structure from the east. Touch the Strange Orb inside the temple to take a wild ride that lands you in a watery cavern far, far below.
Watery Cavern
Find a chest with an Expert-level lock hidden deep underwater, and another chest up on dry land. Take the narrow passage back up to the bridge you recently plummeted past, slaying Falmer that emerge from holes in the walls. Fight your way across the bridge and follow the path back down to Stony Creek Cave [7.36]. There’s no going back up to the temple from inside here.
- Danger! Rockfall Trap (proximity)
- Chest
- Chest (Locked: Expert)
[7.36] Stony Creek Cave
Related Quests
- Side Quest: The Great Skyrim Treasure Hunt*
- Other Factions: Bards College Quest: Finn’s Lute
- Thieves Guild Radiant Quest: No Stone Unturned
Recommended Level: 6
Dungeon: Bandit Camp
- Bandit
Crafting
- Alchemy Lab
Dangers
- Flail Trap (trip wire)
- Underground Connection: Kagrenzel [7.35]
Collectibles
- Skill Book [Illusion]: The Mystery of Princess Talara, Part 4
- Treasure Map X [7/11]
- Unusual Gem: [18/24]
- Chest
- Chest (Locked: Apprentice)
- Potions aplenty
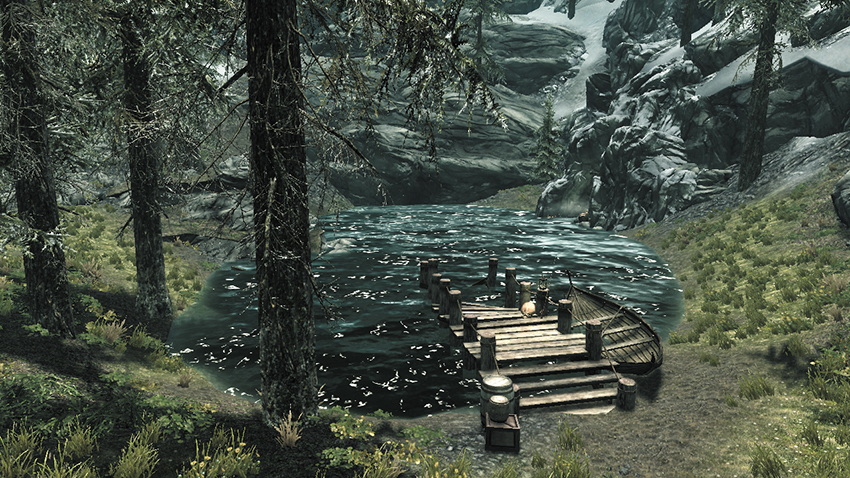
This watery cave lies near a small pond near the base of Eastmarch’s eastern mountains. Enter a side passage, slay a lowly bandit guard, and then safely trigger a trip wire from afar to avoid begin struck by a swinging flail. Cut down the powerful bandit mage in the nook beyond to discover a Treasure Map on her body. Collect a Skill Book here, along with the Unusual Gem, which pertains to the Thieves Guild Radiant Quest: No Stone Unturned. Raid the large chest, then make your way to the cave’s far end to discover another chest that’s locked. Stony Creek Cave links to Kagrenzel [7.35], but it’s a one-way passage, and you can only travel from Kagrenzel to Stony Creek Cave.
[7.37] Cragslane Cavern
Recommended Level: 6
Dungeon: Bandit Camp
- Animal
- Bandit
- Barkeep
- Gambler
Danger
- Bear Trap
Crafting
- Tanning Rack
Collectibles
- Skill Book [Lockpicking]: The Wolf Queen, v1 [E2/10]
- Chests
- Potions
- Loose gear
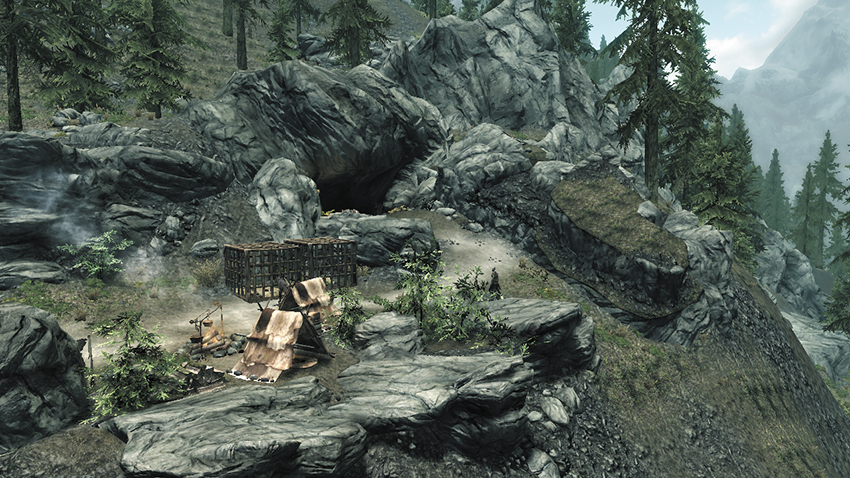
This cave lies in the hills of Eastmarch’s southeast corner, not far from where the main road leads into the Rift.
Exterior
Slay the lone bandit that guards the cave’s exterior. Dispatch the harmless caged Pit Wolves as well if you like.
- Crafting: Tanning Rack
Entry and Gambler’s Den
Cut down another solitary bandit in the cave’s entry passage, then sneak into the following cavern to eavesdrop on a group of hostile gamblers. Slay the men and find a key on the Barkeep, which unlocks the betting area. The powerful bandit who fights to defend the gamblers also carries a key, which unlocks the cages you noticed outside, along with the ones in the back cavern. Find another, larger chest in the back cavern as well, but watch out for the bear trap in front of it. A Skill Book is stashed behind the bar.
- Danger! Bear Trap
- Skill Book [Lockpicking]: The Wolf Queen, v1 [E2/10]
- Cragslane Cavern Key (Barkeep)
- Cragslane Dog Cage Key (Bandit)
- Chests (Locked: Apprentice) (2)
- Potions
- Loose gear
[7.38] Ansilvund
Related Quests
- Side Quest: No Stone Unturned
- Dungeon Quest: A Love Beyond Death*
Recommended Level: 8
Dungeon: Warlock Lair
- Atronach
- Draugr
- Fjori
- Holgeir
- Lu’ah Al-Skaven
- Mage
Crafting
- Alchemy Lab
- Arcane Enchanter
- Arcane Imbuer
Dangers
- Dart Trap (pedestal pressure plates)
- Flail Trap (tripwire)
- Flamethrowers (pressure plates)
- Oil Lamp Traps
- Oil Pool Trap
- Rising Floor Trap
- Rockfall Trap (trip wire)
- Swinging Blade Trap (pressure plates/lever)
- Swinging Wall Trap (pressure plates)
Puzzles
- Nordic Pillars
Collectibles
- Skill Book [Illusion]: 2920, Sun’s Dawn, v2
- Unique Weapon: Ghostblade [53/80]
- Unusual Gem: [19/24]
- Chests
- Potions
- Loose gear
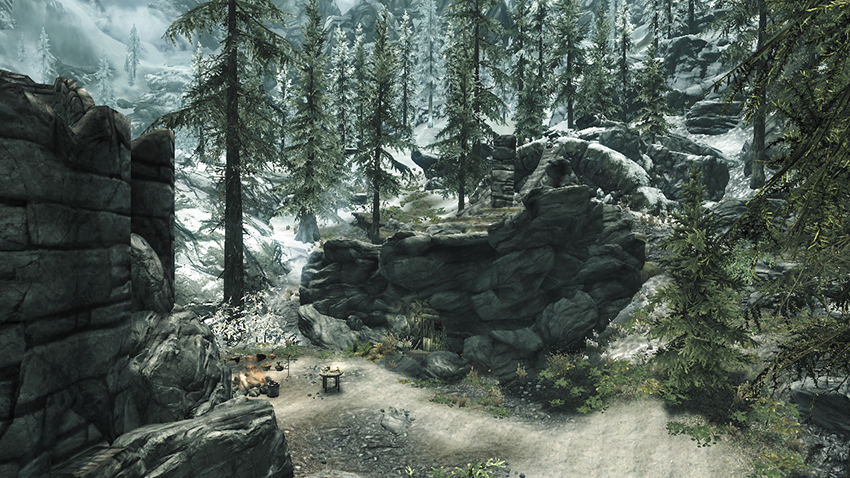
Located at Eastmarch’s southeastern tip, this recently excavated crypt runs deep into Skyrim’s eastern mountains. The fragments of a story about the lovers interred here, Fjori and Holgier, can still be found.
Exterior
Slay a mage and nab some goodies before entering the excavation site’s interior.
- Crafting: Alchemy Lab
- Chest (Locked: Apprentice)
- Potions
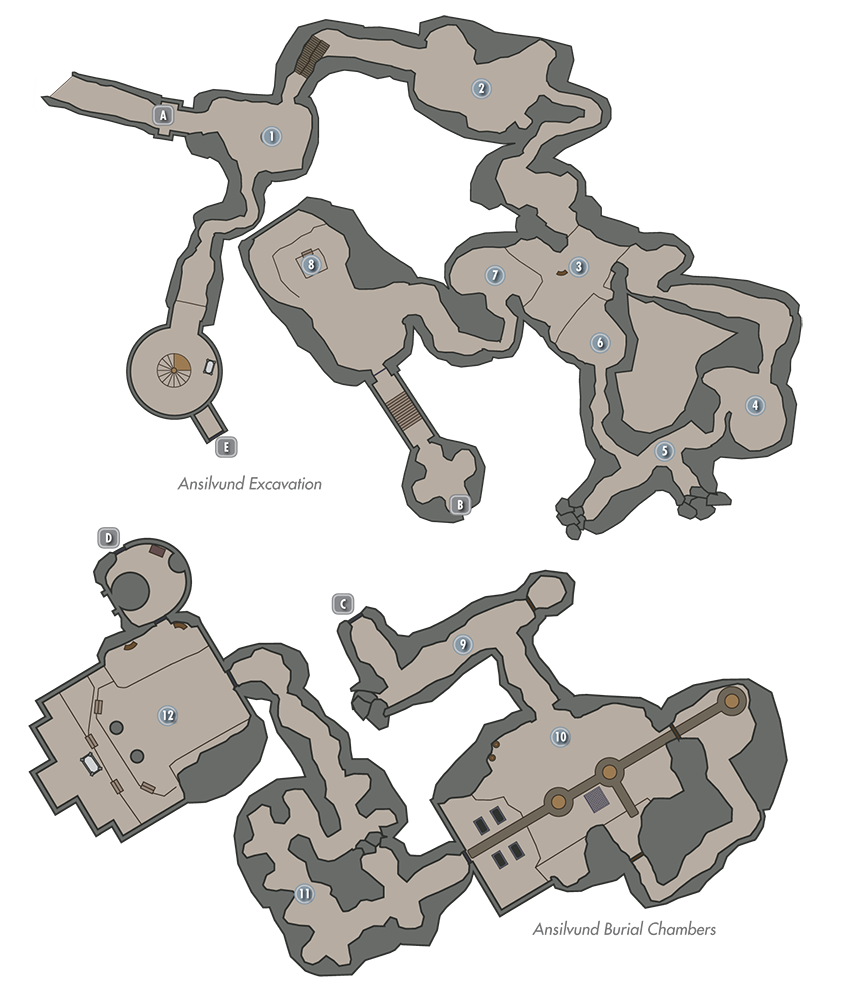
Exit to Skyrim
Entry Chamber
Snag a few potions and any mining tools you may need on your way into this first chamber, where a powerful Draugr lurks. Venture down the lower passage to eliminate another Draugr if you like before taking the upper trail to [2].
- Potions
- Loose gear
Small Excavation Chamber
A mage watches over a pair of ensorcelled Draugr here, bemoaning his task of watching over them as they are forced to excavate the ruins. Try to exploit the hanging lamp and oil slick on the room’s far side. Loot the locked chest on the scaffolding as you make your way here from [1].
- Danger! Oil Lamp Trap, Oil Pool Trap
- Chest (Locked: Novice)
- Potions
- Loose gear
Nordic Overlook Chamber
Open a locked chest as you enter this cavern, and beware the trip wire in the following passage. A haunting voice calls out to you here, initiating a new Side Quest. Loot the Draugr corpses as you proceed to [4].
- Danger! Flail Trap (trip wire), Oil Lamp Trap
- Chest (Locked: Apprentice)
- Potions
Arcane Cave
More mages lurk in this small chamber, where various ingredients and food items are found.
- Crafting: Arcane Enchanter
- Oil Lamp Traps
Draugr Hall
The haunting voice returns as you move through this hall, calling upon the resting dead to rise up and attack you.
Fatal Floor Chamber
Beware: the entire center of this room rises if you step on it, delivering you up to deadly spikes that line the ceiling. Avoid the chamber’s center as you make your way through here.
- Danger! Rising Floor Trap
Nordic Overlook Chamber Revisited
Cross elevated walkways to reach this location, where some valuable potions sit on a small table. A small chest can be found on the wooden platform overlooking the area where you first came into this chamber. Another possessed Draugr is busy digging near a large scaffold that over the doorway onward.
- Oil Lamp Traps
- Potions
Pillar Puzzle
Beware the trip-wire trap as you approach this large cavern. A power Draugr, mage, and Flame Atronach engage you here. When the dust settles, solve the far puzzle by rotating the upper row of Nordic pillars so that they feature the same symbols as the row of glyphs hidden near the floor below (from left to right: Snake, Hawk, Whale, Snake). You may have noticed this solution in the common book Fjori and Holgier! This opens the south gate; avoid the pressure plate when crossing the footbridge or you’ll be scorched. Loot a chest on your way to the Ansilvund Burial Chambers.
- Danger! Flamethrower (pressure plate), Rockfall Trap (tripwire)
- Chest
- Potions
Door to Ansilvund Burial Chambers
Door to Ansilvund Excavation
Swinging Blades Passage
Avoid the many pressure plates in this first passage—stepping on any of them causes a host of swinging blades to activate in the adjacent hall. Pick the Adept-level door at the end of this corridor to access a small nook with a locked chest and lever. Pull the lever to deactivate the swinging blades if you happened to trigger them.
- Danger! Swinging Blade Trap (pressure plates/lever)
- Chest (Locked: Master)
Key Chamber
This Draugr-filled chamber also sports several traps. Avoid the central pressure plates or you’ll be burned by flames. Beware when taking the item off the nearby pedestal as well—removing it causes arrows to fire from the wall directly behind you. (Stand to one side to avoid damage.) Taking the key from the far pedestal causes a host of Draugr to awaken, but the key is a great help in opening the upper gates, whose Master-level locks aren’t easily picked. When you loop back around to the main chamber, sprint straight across the elevated walkway to avoid damage from traps.
- Danger! Dart Trap (pedestal pressure plate), Flamethrower (pressure plates), Oil Lamp Trap, Swinging Wall Trap (pressure plates)
- Ansilvund Key
- Chest
- Chest (Locked: Adept)
- Loose gear
Floor Trap Passage
Lay more Draugr to rest and snag some potions as you pass through this area. Avoid the rising floor trap where the passage widens, and stand near the far wall when collecting the item off the pedestal in the nearby alcove to avoid being shot by arrows from the wall. A Skill Book rests atop another, trap-free pedestal here.
- Danger! Dart Trap (pedestal pressure plate), Rising Floor Trap
- Skill Book [Illusion]: 2920, Sun’s Dawn, v2
- Potions
Lamp-Lit Hall
Lu’ah Al-Skaven awaits you here. You’re just in time to disrupt her nefarious ritual. However, Lu’ah manages to raise two powerful Draugr. Try knocking down the cavern’s many hanging lamps to inflict extra damage upon these dangerous foes. Kill Lu’ah to complete your Side Quest. This also frees the souls of Fjori and Holgeir, who leave a unique blade behind in thanks. Use the key you find on Lu’ah’s corpse to open the upstairs door and sack one last chest on your way back to the surface.
- Danger! Oil Lamp Traps
- Crafting: Alchemy Lab, Arcane Imbuer
- Unique Weapon: Ghostblade [53/80]
- Unusual Gem: [19/24]
- Lu’ah’s Key (Lu’ah Al-Skaven)
- Chest
- Potions
- Loose gear