
Elder Scrolls V: Skyrim Guide The Atlas Apocrypha
Primary Locations
[S.A01] Apocrypha: Epistolary Acumen
Related Quests
- Dragonborn Main Quest: The Gardener of Men
Recommended Level: 25
Dungeon: Apocrypha
- Lurker
- Seeker
Special Area
- Black Book: Epistolary Acumen
- Word of Power: Bend Will [DB2/3]
- Word of Power: Bend Will [DB3/3]
Miscellaneous
- Area is locked
- Chest
Black Book: Epistolary Acumen
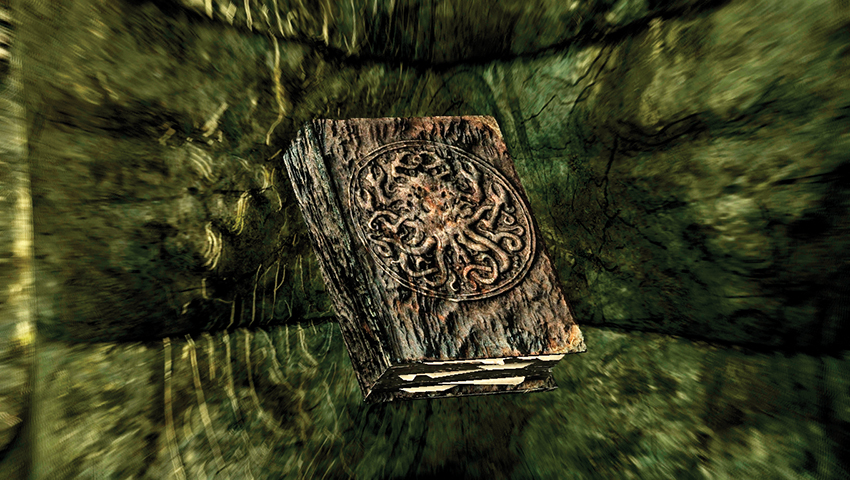
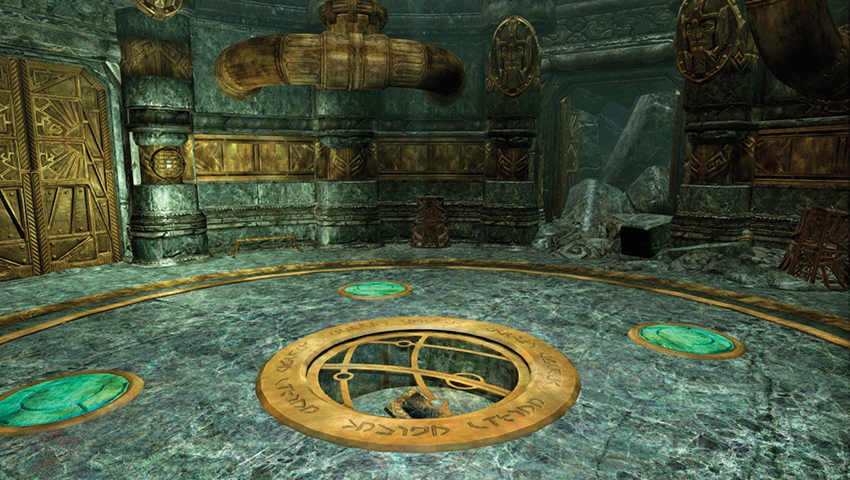
This book is sealed within the Reading Room inside the dwarven water city of Nchardak [S.S14]. Complete Dragonborn Main Quest: The Path of Knowledge with Neloth, restore steam to this chamber, retrieve the Black Book, and read it. You are transported to Apocrypha.
Interior: Apocrypha
 Chapter I: Unfurling Walkway
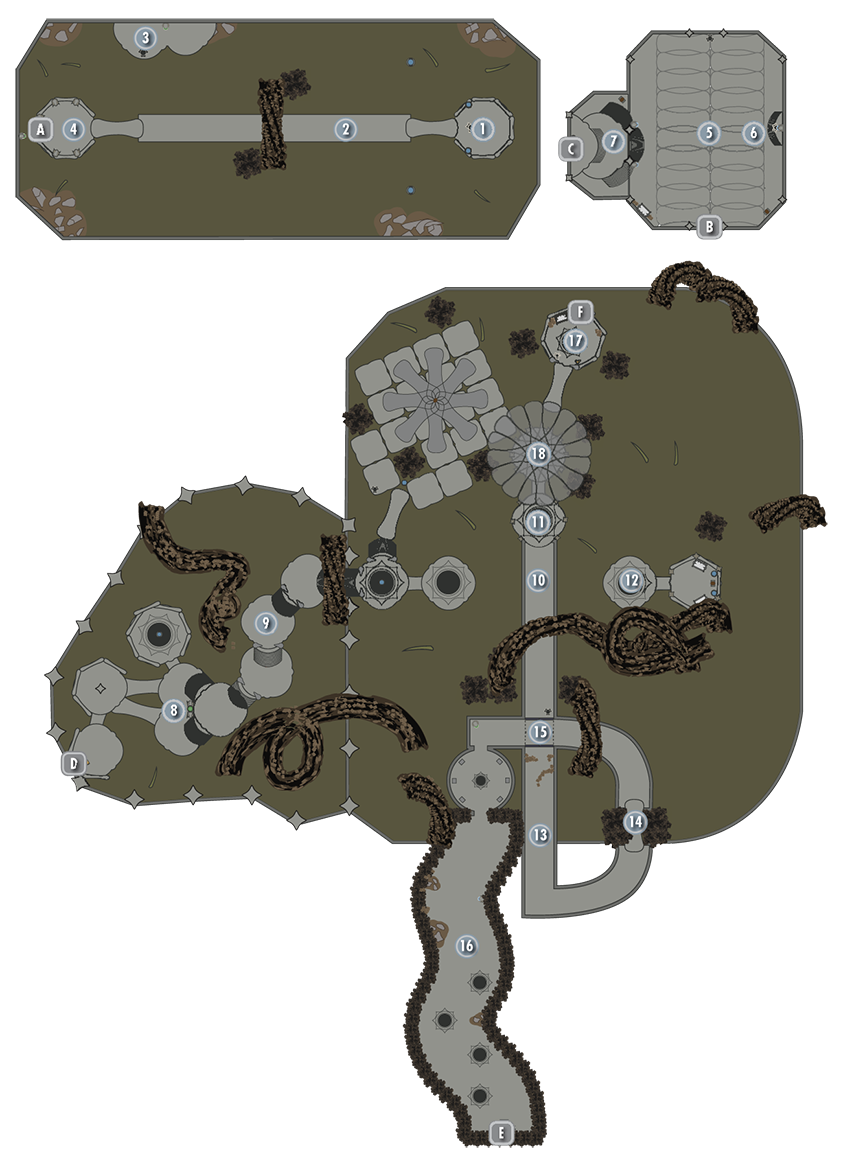
Use either or both of the Magicka fonts, then activate the Scrye to lower the walkway ahead (west) of you.
- Font of Magicka (2)
 Chapter I: Tunnel of Lore
Time your walk so you meet the moving tunnel of lore. Walk to the opposite end, through the flying pages, and wait for the tunnel to move right (north). Step off the tunnel and onto a promontory.
 Chapter I: Promontory
Once on the promontory, claim the Stamina font, activate the Scrye, and watch a second walkway unfurl. Step back onto the moving tunnel, riding it along the edge (watching for tendrils) to the walkway.
- Font of Stamina
 Chapter I: Island of Unfinished Thoughts
Step off, heading across (west) to an island, a Stamina font, and Chapter II.
- Font of Stamina
 Book to Chapter II
 Book to Chapter I
 Chapter II: Tunnel of Tumbling Paper
Head north down the tunnel of pages, to the Scrye. Activate it, which unfurls the tunnel walls.
 Chapter II: Unfurled Arena of Minions
Step out into a medium-sized arena where a Lurker and up to three Seekers await you. There are three Magicka fonts (gather from them during combat to support your magical attacks), a pod, and another Scrye.
- Font of Magicka (3)
- Pod
- Lurker
- Seeker
 Chapter II: Western Gate
Activate the Scrye on the eastern wall below the third Magicka font, opening the gate to the west. Head up the stairs, claim either of the Stamina fonts, and then open Chapter III.
- Font of Stamina
- Pod
 Book to Chapter III
 Book to Chapter II
 Chapter III: Stepped Chamber
You appear in a stepped chamber with columns of books arcing into the skies. Head across either of the small parallel bridges to the steps, where Seekers appear. There is a half-submerged Magicka font in the black ooze to the northwest. Climb the steps, slaying Seekers as you go (there are two or three to thwart).
- Font of Magicka
- Seeker
 Chapter III: Circular Platforms
At the top of the steps is a circular black pool and another Magicka font. Slay any Seekers that have followed you before venturing into the second circular platform, avoiding the mire.
- Font of Magicka
 Chapter III: Moving Tunnel
Step into the moving tunnel. Turn back and investigate the two islands if you wish. Then head along the tunnel to a Scrye to the south, which opens the adjacent door and elongates the tunnel ahead (south) of you.
 Chapter III: Lurker Island
Wait at the edge of the moving tunnel to reach this Lurker confrontation. There’s no way forward, so return to the tunnel.
- Lurker
 Chapter III: Seeker Island
Two Seekers attempt to stop you if you step onto this optional island; go here for the pod, Skill Book, and Soul Gems.
- Skill Book: Fire and Darkness (One-Handed)
- Pod
 Chapter III: Tunnel of Books
Step past the piles of books, heading down the tunnel, turning left (east), and slaughtering Seekers as you go. You must dispatch at least two. Ignore Scryes and areas you can’t access yet. As you continue east, the tunnel moves.
- Seeker
 Chapter III: Unfurling Platform
Step north onto an unfurling platform and into another tunnel.
- Lurker
 Chapter III: Tunnel of Books Crossroads
This tunnel has a Lurker to face (so you may wish to retreat a little as you battle it). Head north until the tunnel turns to the left, forcing you west to a Scrye you may have seen earlier. Activate it and a door opens, leading you through the tunnel you came from and to a Stamina font and a left (south) turn.
- Font of Stamina
 Chapter III: Arched Tome Tunnel
Avoid the tendril in the ruins of the reading room and continue south, passing a Magicka font and a host of Seekers. Concentrate on slaying the first ones you see to shorten the battle significantly. Pass by another three fonts (two Stamina—one above the book—and one Magicka) and open Chapter IV of this book.
- Font of Magicka (2)
- Font of Stamina (2)
 Book to Chapter IV
 Book to Chapter III
 Chapter IV: High Platform
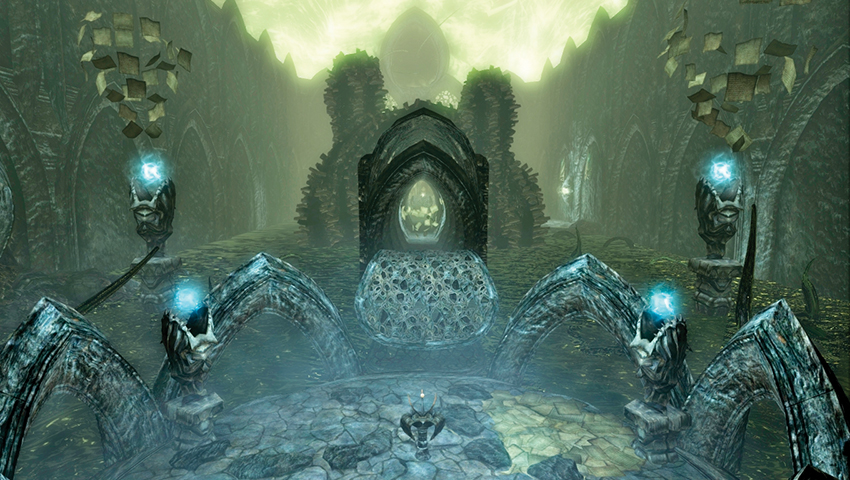
Gather any Soul Gems from the nearby table, and avoid the circular pool. Activate the Scrye from your ascendant position, watching a giant cage in the center of this realm unfurl.
 Chapter III: Black Book: Epistolary Acumen
Head across and approach Black Book: Epistolary Acumen. After an encounter with Hermaeus Mora, you receive a Word of Power. You can also select one of the following powers:
- Word of Power: Bend Will [DB2/3]
- Word of Power: Bend Will [DB3/3]
- Dragonborn Force (your Unrelenting Force Shout does more damage to enemies and may disintegrate them)
- Dragonborn Flame (when your Fire Breath Shout kills an enemy, a Fire Wyrm emerges from their corpse)
- Dragonborn Frost (your Frost Breath Shout encases foes in ice)
[S.A02] Apocrypha: Filament and Filigree
Related Quests
- Solstheim Side Quest: Black Book: Filament and Filigree
Recommended Level: 25
Dungeon: Apocrypha
- Lurker
- Seeker
Special Area
- Black Book: Filament and Filigree
Miscellaneous
- Area is locked
- Chest
Black Book: Filament and Filigree
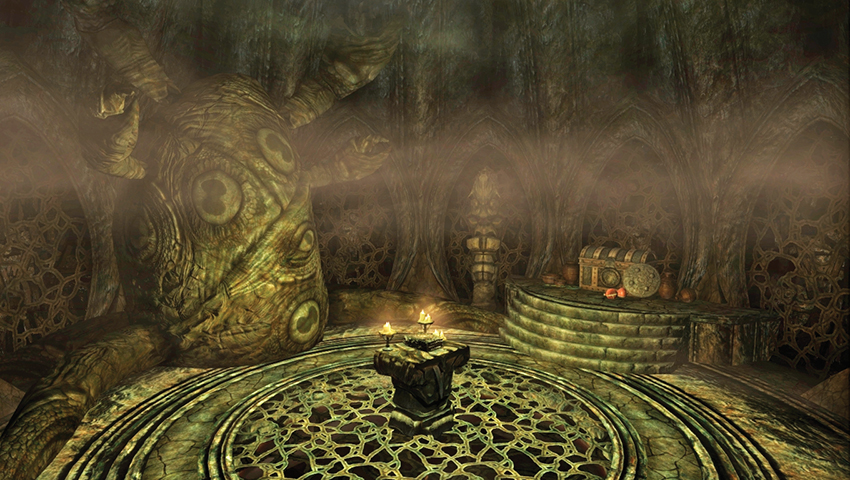
This book is hidden deep within Kolbjorn Barrow [S.S04], accessible only by completing Solstheim Side Quest: Unearthed. Fund all phases of Ralis Sedarys’s excavation, defeat the Dragon Acolyte Priest Ahzidal, and exit his chamber via the open sarcophagus in the southwest wall. The chamber you must reach is circular and features an effigy of Hermaeus Mora. Reach the pedestal containing the Black Book and read it. You are transported to Apocrypha.
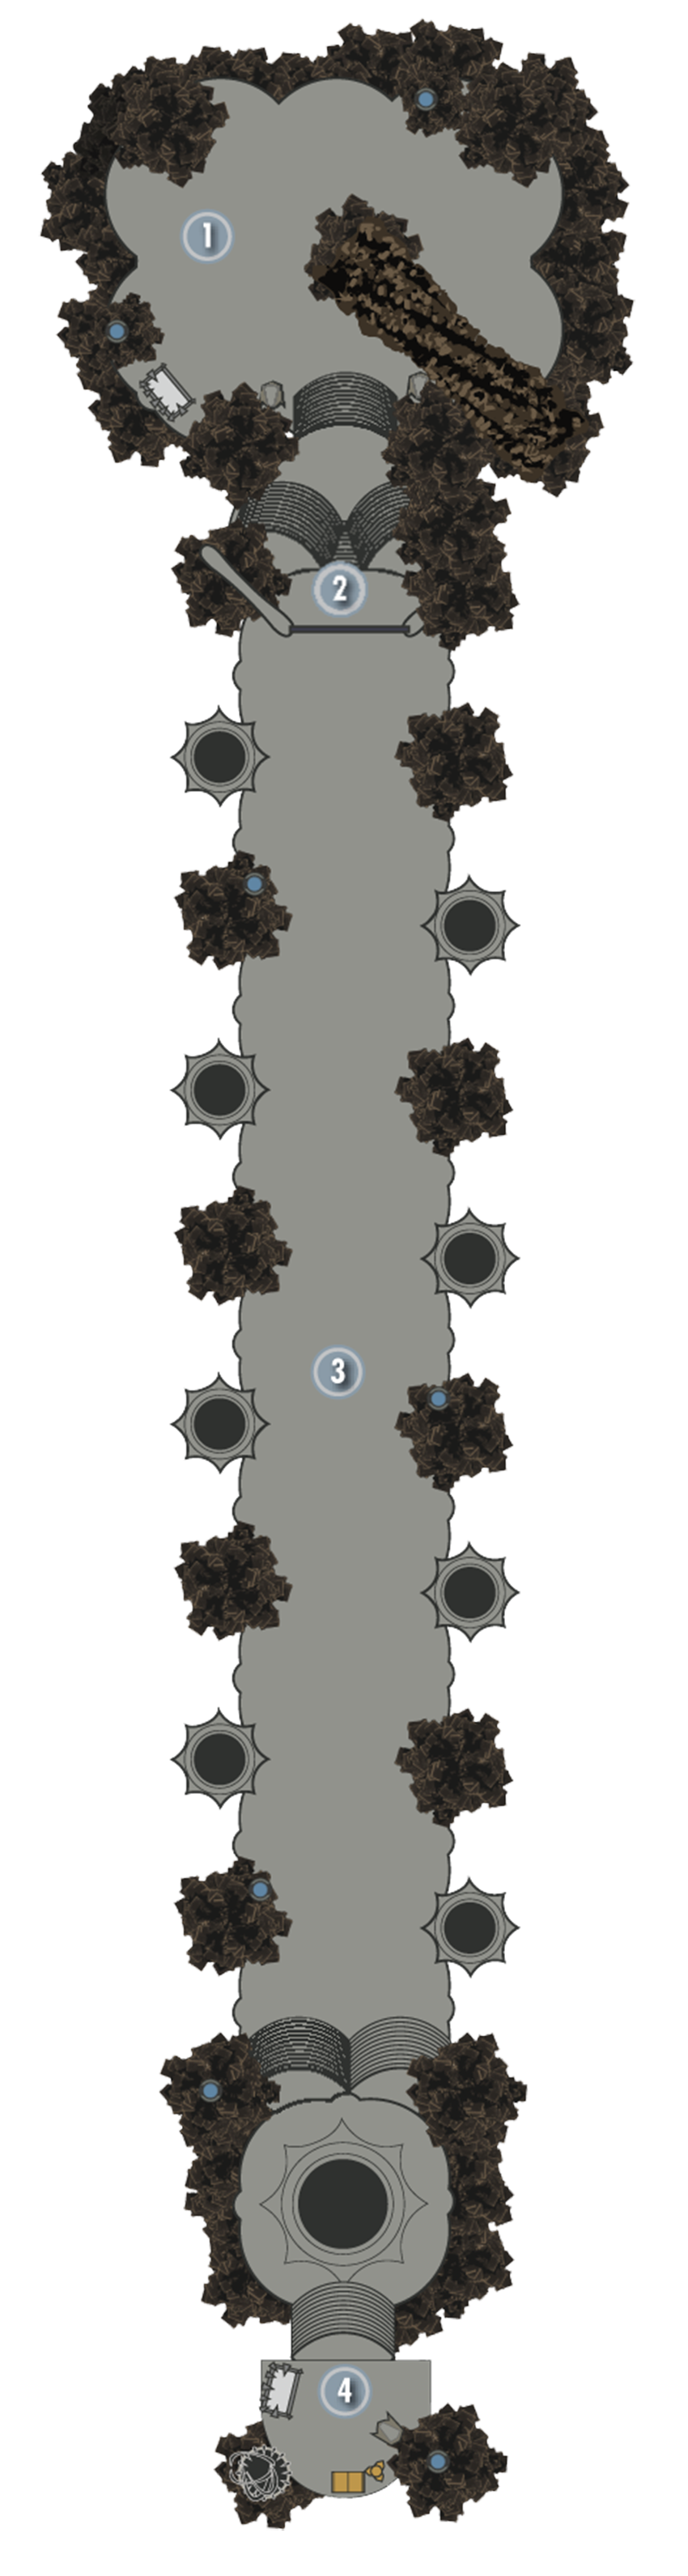
Interior: Apocrypha
Chapter I: Shadow Path
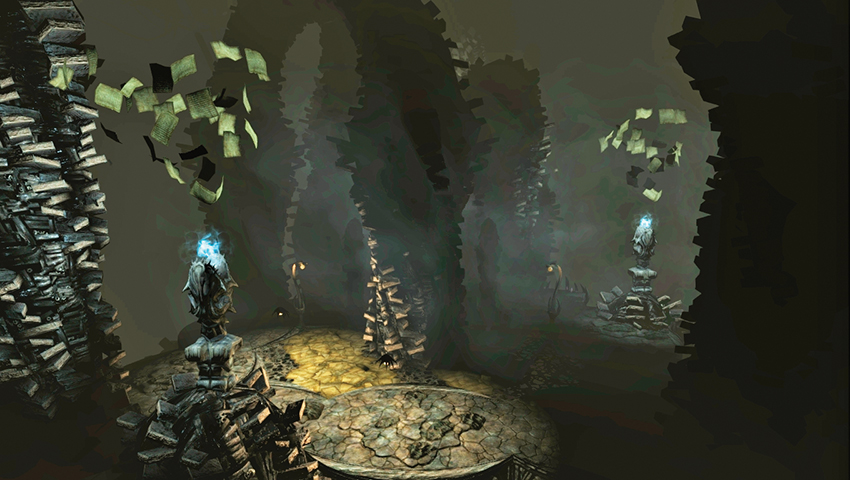
You are transported into a partial void, where the floating living lanterns hover and cast their light. They are important here, as the blackness is harmful to you. So head toward the steps and Magicka font when the light shines on your path.
- Font of Magicka
Chapter I: Shadow Door
Climb the steps, search the pod, and activate the Scrye to open the door south.
- Pod
Chapter I: Shadow Platform
The route ahead features a sheer drop on both sides, limited movement, and harmful shadows. Run across as the light shines, pausing to slay two Seekers and Lurker and watching for tentacle ponds along the way. Some may wish to stand and fight. Others find it more prudent to run!
- Seeker
- Lurker
Chapter I: Black Book: Filament and Filigree
Dash up the steps to a larger black pool, out of which a Lurker strides. Slay it if you wish, or dodge past, racing up to the pedestal containing the tome, and an adjacent vessel to ransack. Open the book and select one of the following powers:
- Secret of Strength (power attacks cost no stamina for 30 seconds)
- Secret of Arcana (spells cost no Magicka for 30 seconds)
- Secret of Protection (you take half damage for 30 seconds)
- Lurker
- Vessel
[S.A03] Apocrypha: The Hidden Twilight
Related Quests
- Solstheim Side Quest: Black Book: The Hidden Twilight
Recommended Level: 25
Dungeon: Apocrypha
- Lurker
- Seeker
Special Area
- Black Book: The Hidden Twilight
Miscellaneous
- Area is locked
- Chest
Black Book: The Hidden Twilight
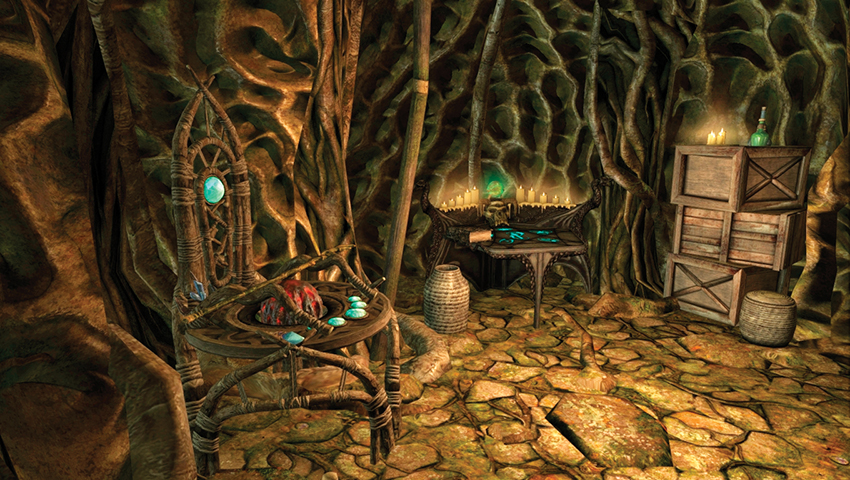
This book is actually part of Neloth’s collection within his tower at Tel Mithryn. In order to reach it, you need the Staff Enchanter Key, which you receive as a reward for completing Solstheim Side Quest: Reluctant Steward. Use the key to unlock the Staff Enchanter chamber, then take the book from the Arcane Enchanter table. Read it, and you will be transported to Apocrypha.
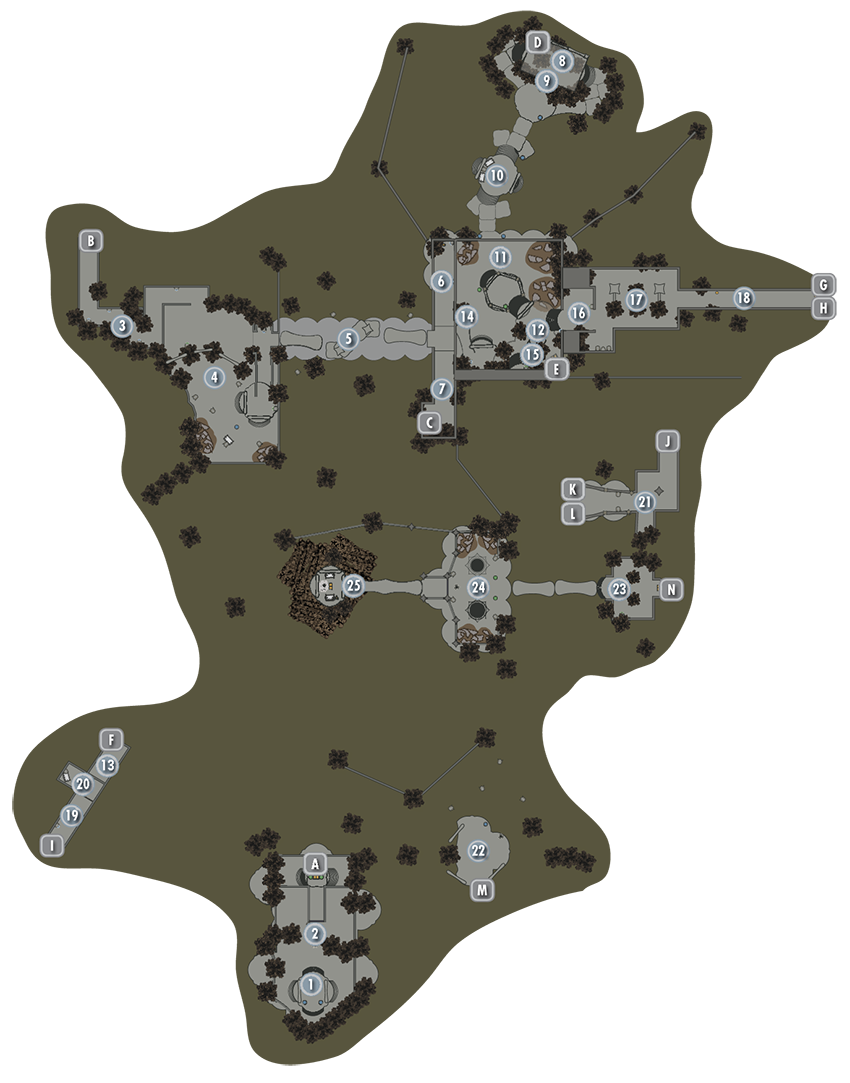
Interior: Apocrypha
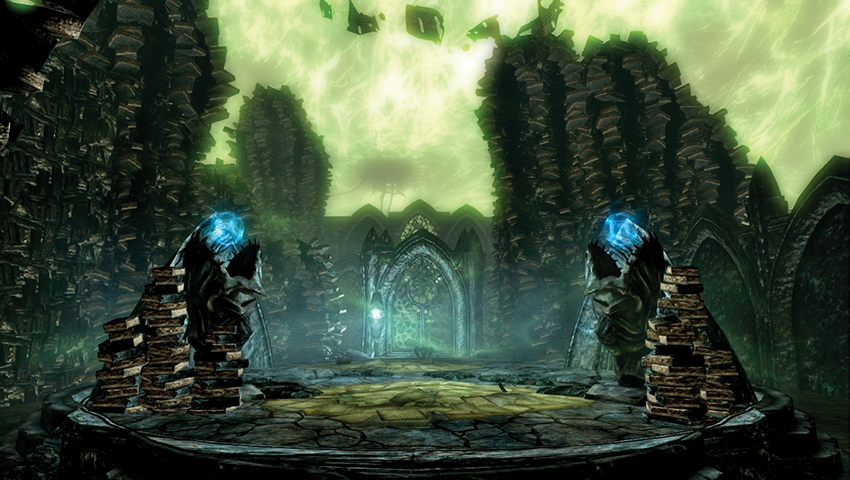
Chapter I: Stepped Platform
You begin near a raised stepped platform with two Magicka fonts. Head across to the north gate with another Magicka font and activate the Scrye.
- Font of Magicka (3)
Chapter I: Gate
The gate swings open, enabling you to reach a second chamber with two Stamina fonts and a book leading to Chapter II.
- Font of Stamina (2)
- Pod
Book to Chapter II
Book to Chapter I
Chapter II: Winding Corridor
After passing through a short corridor with a Magicka font at both ends, turn left (east) and right (south), pass another Magicka font, and take a left again to a wall. Follow the corridor around, passing another Magicka font.
- Font of Magicka (4)
Chapter II: Arch Chamber
Stop when you reach the large chamber of arches between book stacks, dimly illuminated by curled lights and a Stamina font. Behind (southeast) the arches is a platform with liquid frothing underneath. However, it is safe to move across, as you battle two or three Seekers to reach a black table, Magicka font, and a stepped platform with a Stamina font.
- Font of Magicka
- Font of Stamina (2)
- Seeker
Chapter II: Nimble Leaping
Ascend a ramped tunnel (north) to a Magicka font. Turn right (east) at the font, peering across a sea of black ooze, and activate the Scrye. This moves two flapping bridge platforms up and down. Time your run so you leap and land on the platform ahead when the ramp is up and avoid falling short. Jump across to the second ramp as it rises, and exit to a junction tunnel.
- Font of Magicka
Chapter II: Dead End
Head left (north) to reach a Magicka font, pod, black table, and dead end.
- Font of Magicka
- Pod
Chapter II: Live End
Head right (south) to reach a Magicka font and open Chapter III.
Book to Chapter III
Book to Chapter II
Chapter III: Alcove of Books
You appear in a confined book-filled area with Magicka and Stamina fonts.
- Font of Magicka
- Font of Stamina
- Pod
Chapter III: Roof Scrye
Head south into the large open area and take the ramp right (northwest) to the roof and a Scrye.
Chapter III: Ooze Island
This elongates the steps back on the ground, allowing you to cross to the island, a Magicka font, and a battle with one or two Seekers. Pass the black tables and continue toward the opposite entrance, past two more Magicka fonts.
- Font of Magicka (4)
- Seeker
Chapter III: Central Gate and Courtyard
Move into a courtyard with a central gated area and a lumbering Lurker. Tackle the foe, grabbing Stamina from the nearby font if you wish. Back up into the previous chamber if necessary. Then search the mazelike ground area.
- Font of Stamina
- Lurker
Chapter III: Tome Antechamber
To the south through some narrow, book-stacked areas is a Stamina font and the book to open Chapter IV. This is optional but worth taking.
- Font of Stamina
Book to Chapter IV
Book to Chapter III
Chapter IV: First Cell
(Optional) Chapter IV is a simple cell-like chamber with one or two Seekers and a Magicka font. There is also a Scrye to activate, which opens a gate beyond the cell, in an unknown corridor to the west. This corridor is accessible only if you reach Chapter V (below). Return back to Chapter III.
- Font of Magicka
- Seeker
Chapter III: Upper Balcony
Move up the ramped area, passing a Magicka font to an upper balcony with a Scrye that unlocks the gate room below.
- Font of Magicka
Chapter III: Secondary Platform Ramp
Head through to a Stamina font and steps up to a secondary platform ramp and second Scrye. This opens the main gate with the Magicka font just below you.
- Font of Magicka
- Font of Stamina
Chapter III: Central Gate Steps
Head through past a Stamina font.
- Font of Stamina
Chapter III: Maze of Books
You enter a square-shaped tunnel area with a Seeker to slay. Simply continue east.
- Seeker
Chapter III: Elongating Corridor
Reach a pod and the corridor elongates considerably, offering you two chapters to read: Chapter V and VI. Head into V only if you investigated Chapter IV earlier. Otherwise, read Chapter VI and you’re poised to finish this quest.
 Book to Chapter V
 Book to Chapter VI
 Book to Chapter III
 Chapter V: Second Cell
(Optional) Chapter V is a single-cell room across from the one in Chapter IV. Pass the Magicka font, use the Scrye to open the door, and head left (west).
- Font of Magicka
 Chapter V: Third Cell
(Optional) There should be an open gate and Seeker here. If the gate is shut, backtrack to Chapter IV to open it. Slay the foe and inspect the pod and black table with the following Skill Books. Then head back to Chapter III and open Chapter VI.
- Pod
- Skill Book: Before the Ages of Man (Illusion)
- Skill Book: 2920, Hearth Fire, v9 (Conjuration)
- Skill Book: Breathing Water (Alteration)
- Skill Book: Racial Phylogeny (Restoration)
- Skill Book: A Hypothetical Treachery (Destruction)
 Book to Chapter III
 Chapter VI: Uncomplicated Corridor
Aside from the Magicka font under the book, this is a straightforward corridor leading west to two more books marked Chapter VII and Chapter VIII.
- Font of Magicka
 Book to Chapter VII
 Book to Chapter VIII
 Book to Chapter VI
 Chapter VII: Sloping Island
The former leads you to a sloping island with a couple of Seekers to finish, a Magicka font, and a Scrye to activate. This opens a gate platform in Chapter VIII. Head back to the book and open Chapter VIII.
- Font of Magicka
- Seeker
 Book to Chapter VI
 Chapter VIII: Cramped Corridor
A Seeker meets you in a cramped corridor. There’s a Stamina font above the book and black table before you head out to a ramped platform.
- Font of Stamina (2)
- Seeker
 Chapter VIII: Lurker Ledge
A Scrye opens the gate ahead (west) of you. The bridge leads to the pedestal containing the tome, and there’s an adjacent vessel to ransack. Open the book and choose one of the following powers once you’re through the gate.
- Font of Stamina (2)
- Lurker
 Chapter VIII: Black Book: The Hidden Twilight
A Scrye opens the gate ahead (west) of you. The bridge leads to the pedestal containing the tome, and there’s an adjacent vessel to ransack. There are three floating orbs to inspect as the book opens. Choose one of the following powers:
- Mora’s Agony (summons a field of writhing tentacles that poison foes)
- Mora’s Grasp (freezes the target between Oblivion and Tamriel for 30 seconds, making them immune to all damage)
- Mora’s Boon (fully restores your Health, Magicka, and Stamina)
- Vessel
[S.A04] Apocrypha: The Sallow Regent
Related Quests
- Solstheim Side Quest: Black Book: The Sallow Regent
Recommended Level: 25
Dungeon: Apocrypha
- Lurker
- Seeker
Special Area
- Black Book: The Sallow Regent
Miscellaneous
- Area is locked
- Chest
Black Book: The Sallow Regent
Reach the Black Book chamber by navigating your way through White Ridge Barrow [S.N16], which is also the dungeon for Solstheim Side Quest: Spider Crafting*. Inside White Ridge Sanctum, enter the crypt with a Word Wall and a Dragon Acolyte Priest named Dukaan. Defeat or avoid this foe and claim the Word of Power for the Cyclone Shout. The Black Book is on a pedestal on the chamber’s opposite side (below where you entered). Reach the pedestal containing the Black Book and read it. You are transported to Apocrypha.
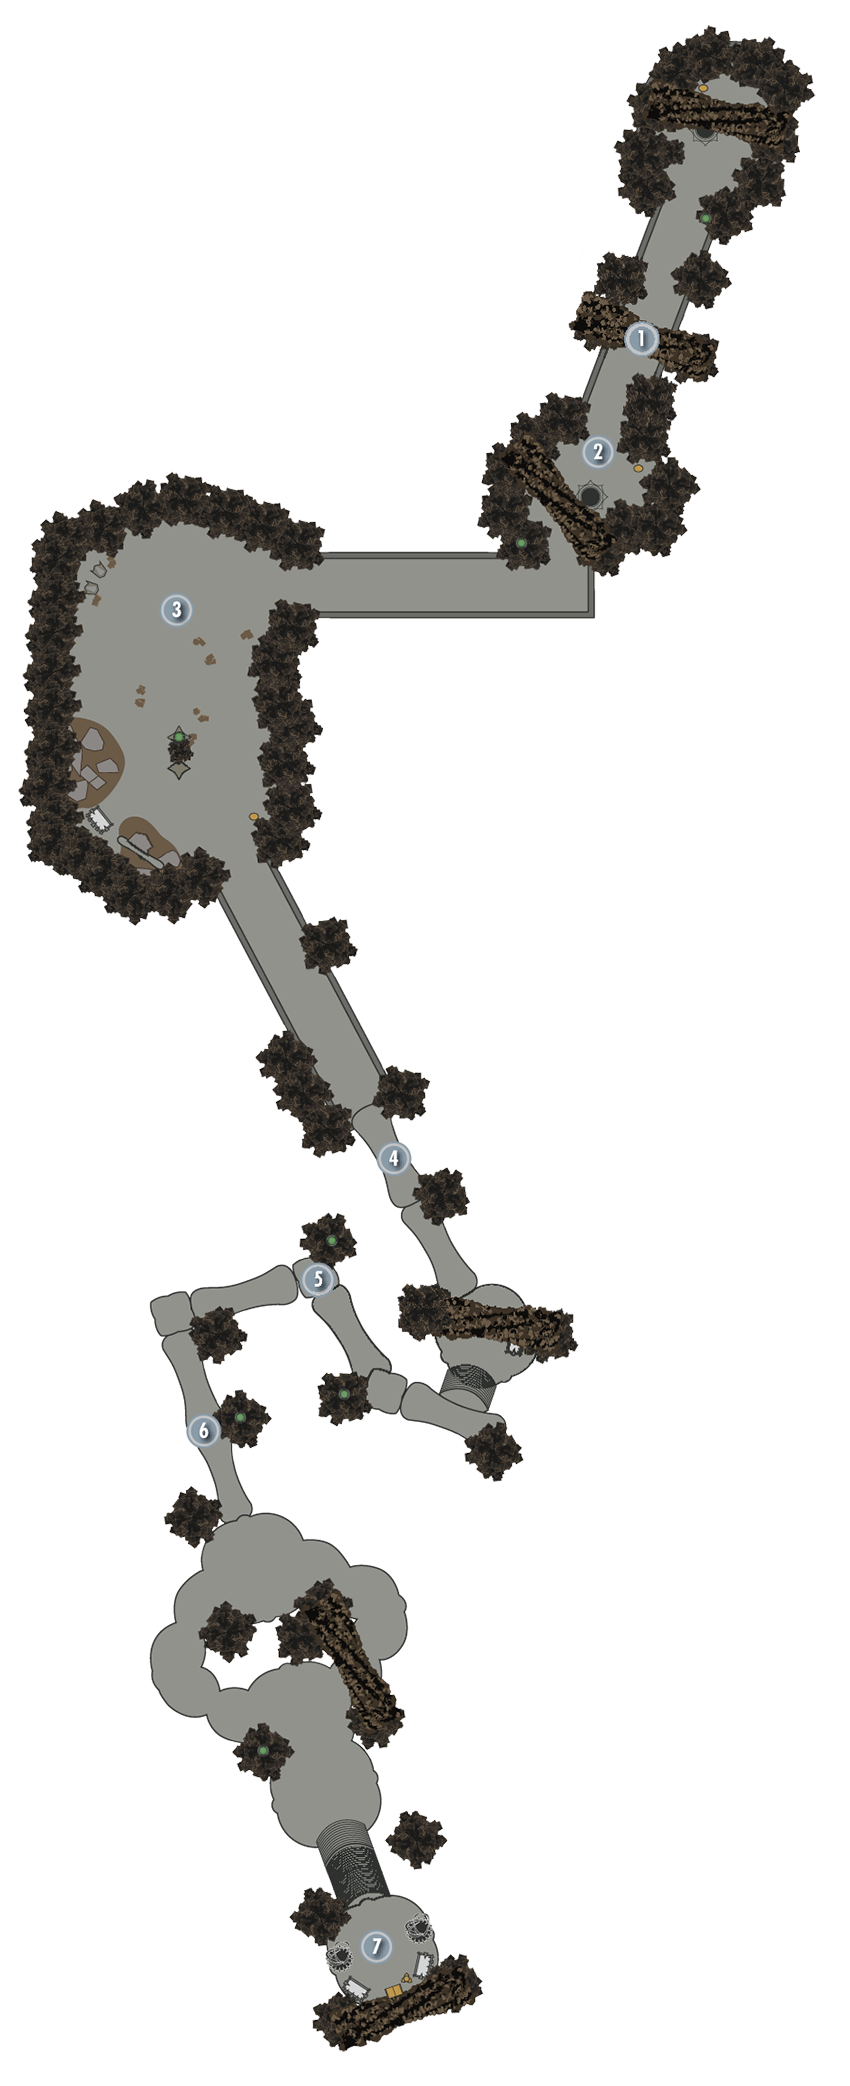
Interior: Apocrypha
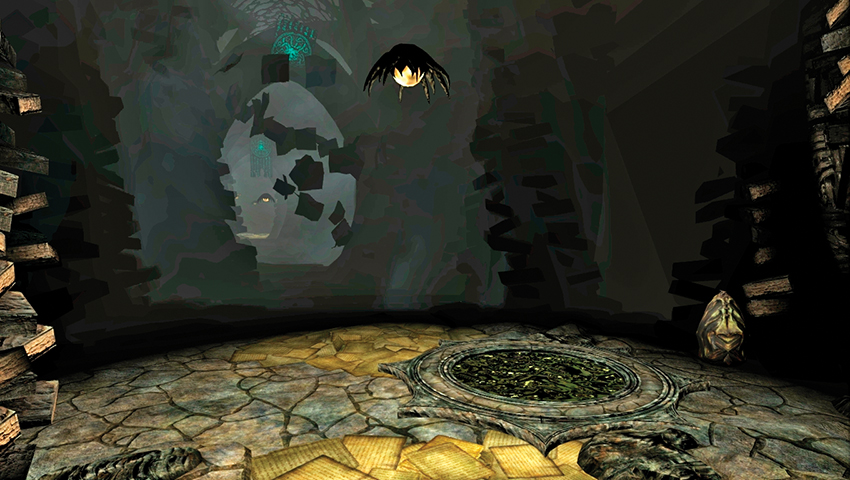
Chapter I: Dark Corridor
You are transported into the partial void, where strange hovering lanterns flit across a long and dark corridor. They are important as they provide light, and the darkness harms you. Watch out for the tentacles in the small pond near the pod, then set off down the dark and blackened path heading roughly south.
- Pod
Chapter I: Dark Pond
Continue south to a second tentacle pond and a pod, then turn west and walk up the sloping tunnel.
- Pod
Chapter I: Shadow Chamber
Head up a larger, partially lit chamber with stacks of books, a random Spell Tome, and a few gems and scrolls to search for. A Seeker appears to block your path.
- Spell Tome [Random]
- Seeker
Chapter I: Unfurling Platform
Move to a second tunnel (south) and ascend that. This seems to be a dead end, but continue south and a platform uncurls.
Chapter I: Dark Refuge
This links to a well-lit area with a black table and a random Spell Tome.
- Seeker
- Spell Tome [Random]
Chapter I: Corridor Ascension
When the lights go out, head up the steps to the south, attacking (or running past) a Lurker and winding your way up and around to the highest platform.
- Lurker
Chapter I: Black Book: The Sallow Regent
This area splits into two platforms before merging again. These narrow bridges have Lurkers to attack or avoid (there are three), before you head south and up to the final platform. Here you’ll find a vessel, two black tables with assorted items (including another random Spell Tome), and a Black Book. Open the book and choose one of the following powers:
- Seeker of Might (Combat skills are all 10% more effective)
- Seeker of Sorcery (Magic skills are all 10% more effective)
- Seeker of Shadows (Stealth skills are all 10% more effective)
- Lurker
- Spell Tome [Random]
- Vessel
[S.A05] Apocrypha: Untold Legends
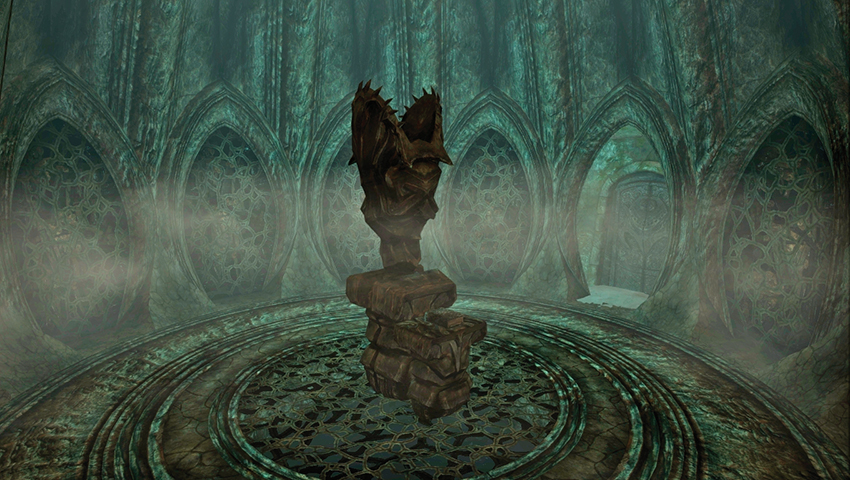
Related Quests
- Solstheim Side Quest: Black Book: Untold Legends
Recommended Level: 25
Dungeon: Apocrypha
- Lurker
- Seeker
Services
- Trader (General Goods): Dremora Merchant [DB11/16]
Special Area
- Black Book: Untold Legends
Miscellaneous
- Area is locked
- Chest
Black Book: Untold Legends
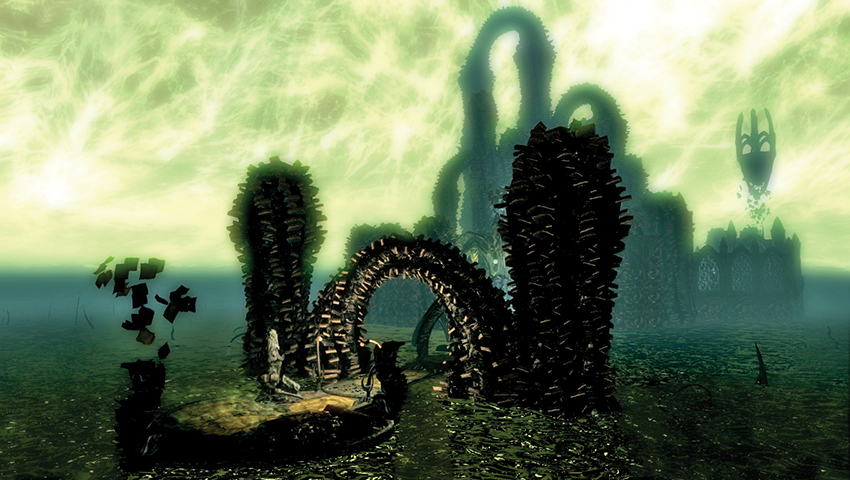
This specific book is hidden deep within Benkongerike [S.N15]. Head east from the Word Wall, down a narrow tunnel and into a circular chamber where the Black Book is located. Reach the pedestal containing the Black Book, and read it. You are transported to Apocrypha.
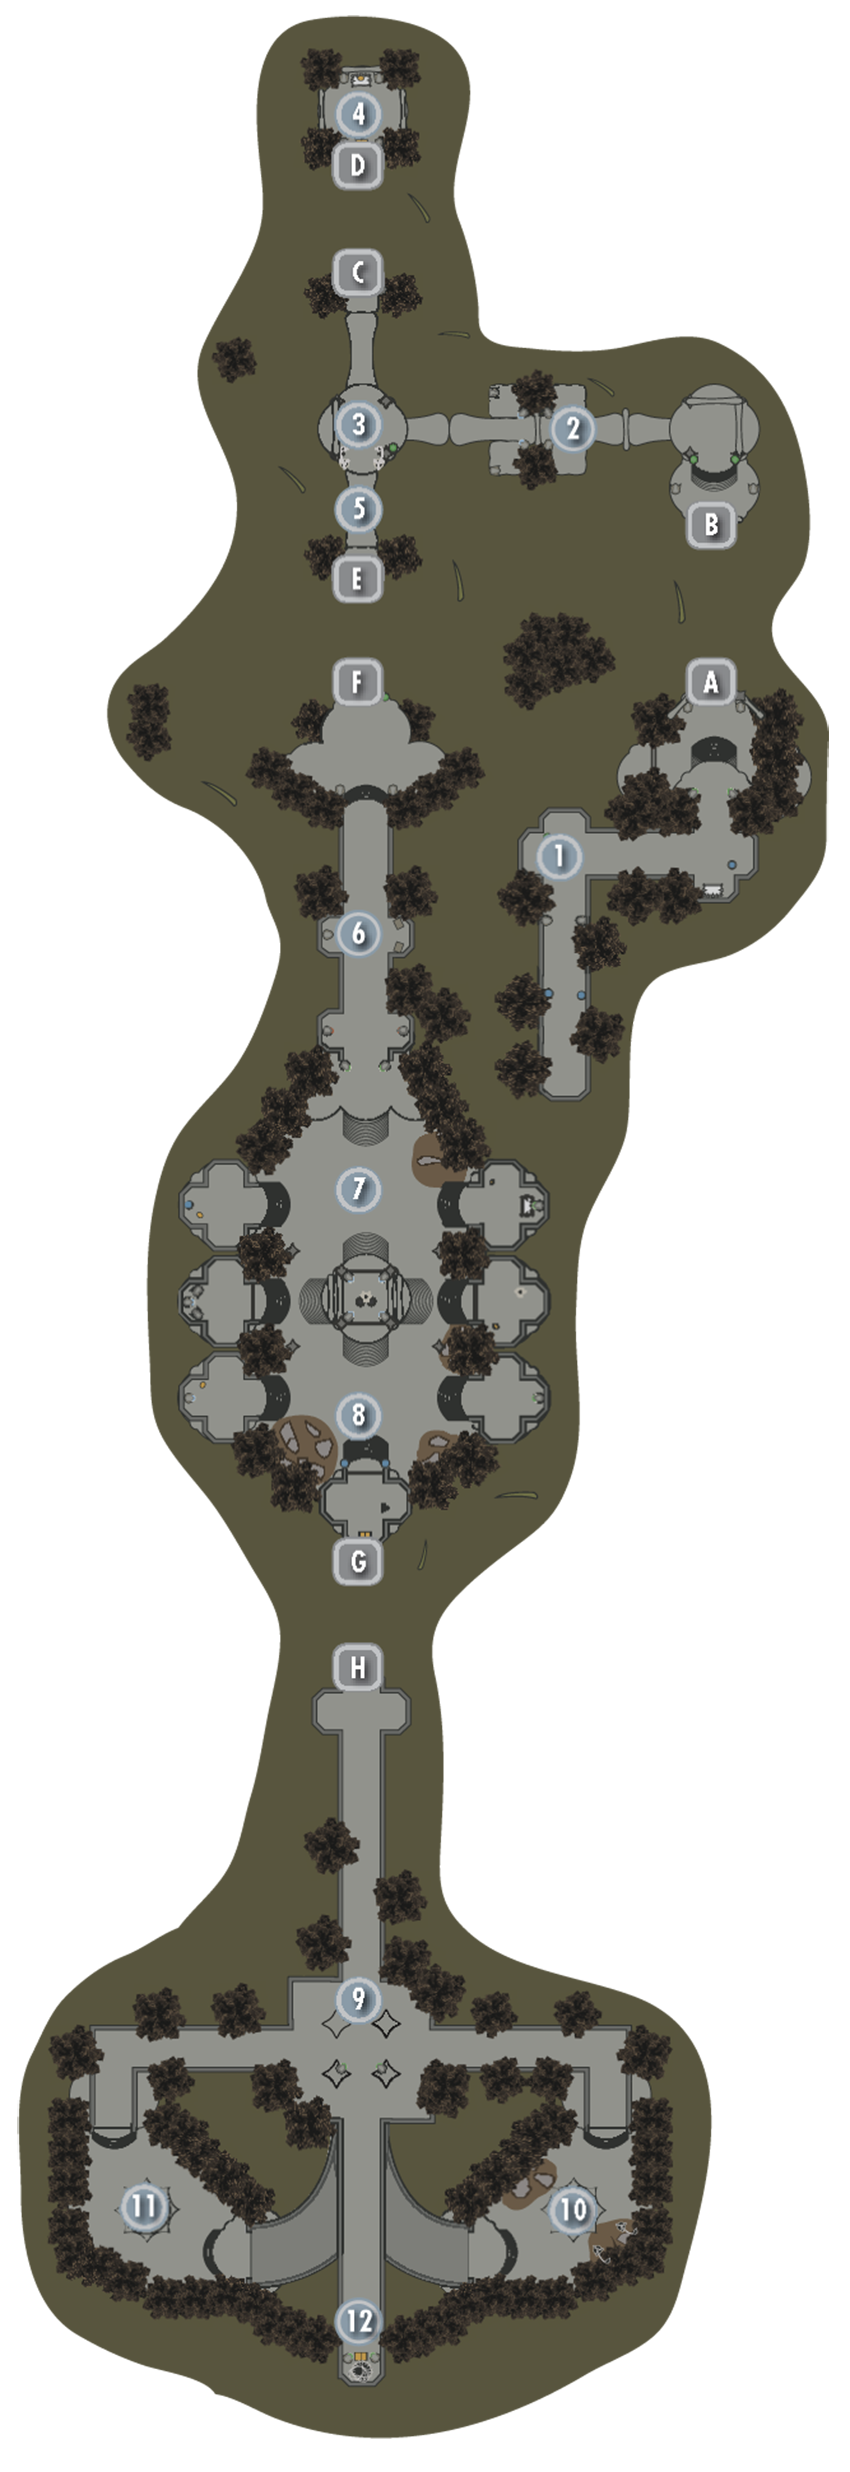
Interior: Apocrypha
Chapter I: Descending Passage
Pass the two Magicka fonts, heading north to a Stamina font. Go east to another Magicka font and a black table and then north to Chapter II.
- Font of Magicka (3)
- Font of Stamina (2)
Book to Chapter II
Book to Chapter I
Chapter II: Bridge of Desolation
You appear facing a stepped platform. Head onto it, turning left (west), crossing the bridge, and facing off against a Lurker just beyond two more Magicka fonts on the far part of the bridge.
- Font of Magicka (3)
- Lurker
Chapter II: Descent to Two Books
Continue west to the double exit; there is a ramp on either side. Head north, passing a Stamina and two Magicka fonts. Open Chapter III first.
- Font of Stamina
- Font of Magicka (2)
Book to Chapter III
Book to Chapter II
Chapter III: Cage
You appear in a cagelike chamber. Slay the Seeker and inspect the pod on the black table and a possible Spell Tome; then open Chapter II again.
- Seeker
- Pod
- Spell Tome [random]
Chapter II: Return to Two Books
Cross south to the Magicka font and the book leading to Chapter IV.
- Font of Magicka
Book to Chapter IV
Book to Chapter II
Chapter IV: Stepped Tunnel
Head north, through a stepped tunnel with a Magicka font and past two Stamina fonts.
- Font of Stamina (2)
Chapter IV: Cathedral Chamber
The tunnel opens to a stepped cathedral chamber without a roof. Beware of two Seekers as you seek to open the exit.
Puzzle Solution: In the center is a locked area with a Scrye. Surrounding this are six raised antechambers and the exit:
- Antechamber 1 (northeast): Stamina font and random Skill Book.
- Antechamber 2 (east): Locked gate and Scrye, accessed from Antechamber 5.
- Antechamber 3 (southeast): Stamina font.
- Antechamber 4 (southwest): Magicka font.
- Antechamber 5 (west): Scrye outside, which opens the gate leading to a Magicka font and Scrye inside, which opens the gate to Antechamber 2.
- Antechamber 6 (northwest): Magicka font.
Simply head to Antechamber 5 and activate the outside Scrye to open the adjacent door. Go inside this antechamber to a second Scrye, which opens Antechamber 2. Make your way to the next Scrye and activate that. The north gate of the central locked area opens. Enter here, with its four Magicka fonts and activate the final Scrye.
- Font of Magicka (7)
- Font of Stamina (2)
- Pod (2) [1 = Apprentice]
- Skill Book: [Random]
- Seeker
Chapter IV: Extending Steps
The steps to the south extend, allowing access past two more Magicka fonts to a vessel and Chapter V.
- Font of Magicka (2)
- Vessel
Book to Chapter V
Book to Chapter IV
Chapter V: Extending Steps
Head down the main corridor, peering ahead at what seems to be the Black Book at the end of this long tunnel. However, when you reach the middle, near the two Stamina fonts, the tunnel ahead grinds to the left.
- Font of Stamina (2)
Chapter V: Black Pond (East)
You are forced east to a black pond and a Lurker fight! Follow the exit corridor north and west after the battle, activating a Scrye and opening a gate that leads back into the main tunnel.
- Lurker
Chapter V: Black Pond (West)
Dash south again and perform the same trick; the tunnel grinds right this time, forcing you west to a chamber with a Stamina font and a second Lurker to battle. Then follow the exit corridor north (passing a Stamina font) and east, back once more into the main tunnel.
- Font of Stamina (2)
- Lurker
Chapter V: Black Book: Untold Legends
Trek south one last time, and the corridor allows you access to two Stamina fonts and the Black Book. Open the book and select from the following powers:
- Black Market (summons a Dremora merchant to trade with you): Trader (General Goods): Dremora Merchant [DB11/16]
- Secret Servant (summons a Dremora butler to carry your excess items)
- Bardic Knowledge (summons a spectral drum that plays for you, increasing Stamina Regeneration for you and nearby allies)
[S.A06] Apocrypha: The Winds of Change
Related Quests
- Solstheim Side Quest: Black Book: The Winds of Change
Recommended Level: 25
Dungeon: Apocrypha
- Lurker
- Seeker
Special Area
- Black Book: The Winds of Change
Miscellaneous
- Area is locked
- Chest
Black Book: The Winds of Change
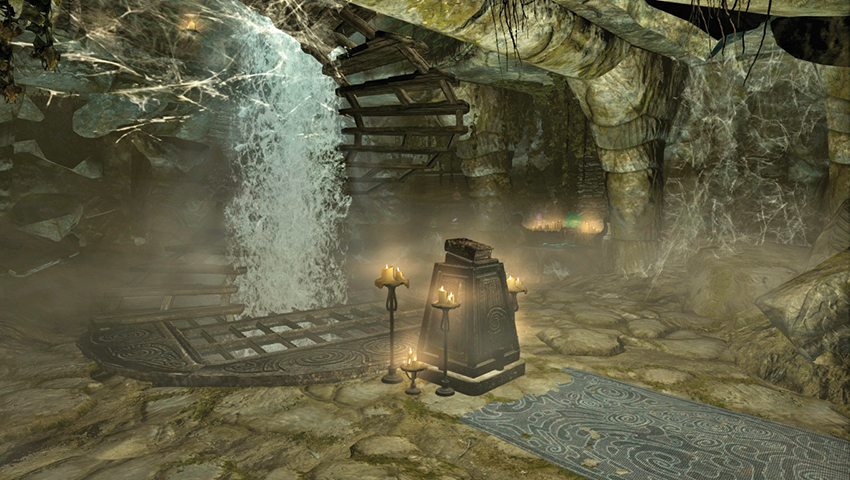
This book is nestled deep within Bloodskal Barrow [S.S02], which is accessed from Raven Rock Mine. Defeat (or avoid) the Dragon Acolyte Priest Zahkriisos, learn the Word of Power from the Word Wall behind him, then locate the circular spiral-stepped area with a small waterfall. Reach the pedestal containing the Black Book and read it. You are transported to Apocrypha.
Interior: Apocrypha
Chapter I: Fetid Pier and Lookout
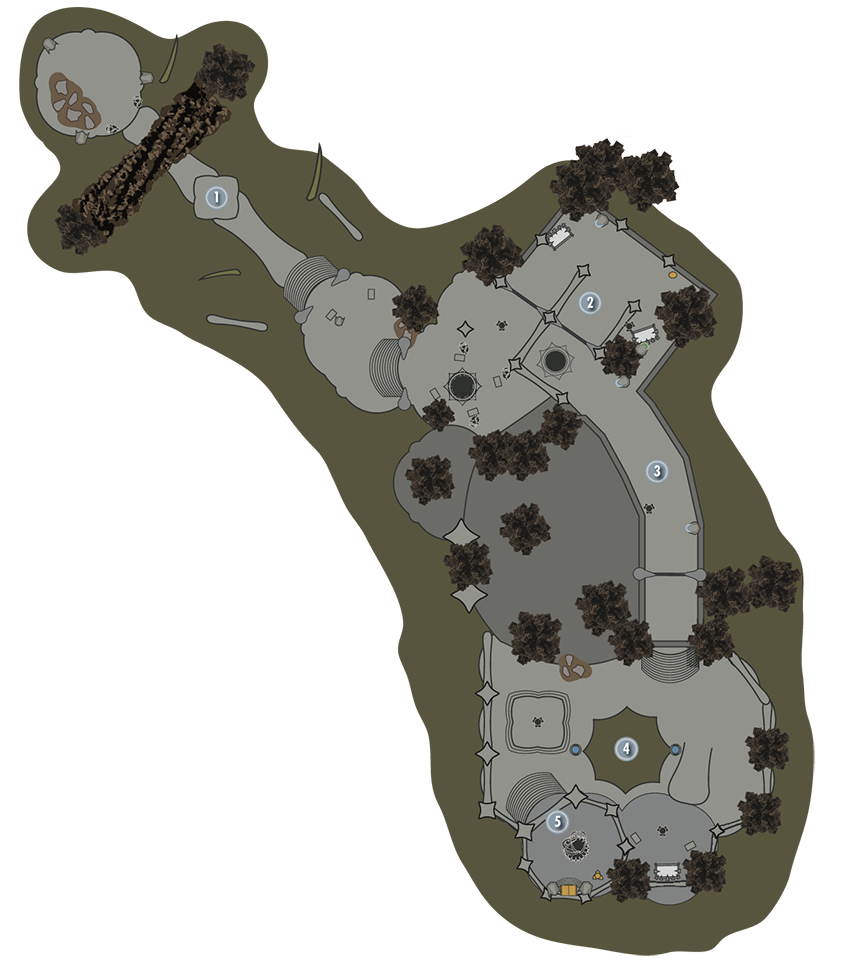
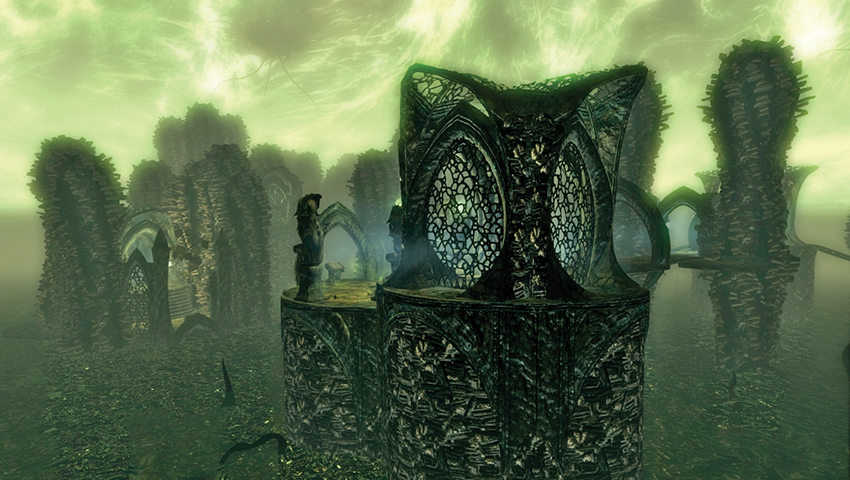
The great fetid seas of Apocrypha greet you. Focus on the path and head southeast, climbing the stepped platforms to your left as you turn east. Fight two or three Seekers as you go. Avoid the tentacle from the black pond, as you reach a Scrye that opens a gate ahead (northeast) of you.
- Seeker
Chapter I: Side Passage
Move past a black table and a Magicka font. A Stamina font, a black table, and a Scrye are crammed together. The Scrye opens a second gate.
- Font of Magicka
- Font of Stamina
Chapter I: Corridor of Whirling Pages
Head southwest, engaging two more Seekers in the corridor beyond. Gather Magicka from a font as you continue south to a Scrye. This opens a gate to the south.
- Font of Magicka (2)
- Seeker
Chapter I: Lurker Pool
This leads to a larger, open chamber with a ramp and a forming Lurker. Slay this atrocity, before or after you activate the Scrye to the west. There are two Magicka fonts to siphon here too. The Scrye on the ground elongates the steps. The Scrye atop the ramp opens the gate atop these steps.
- Font of Magicka (2)
- Lurker
Chapter I: Black Book: The Winds of Change
The gate allows access to the pedestal containing the tome, and there is an adjacent vessel to ransack. Open the book to claim one of the following abilities:
- Scholar’s Insight (reading Skill Books gives you an extra skill point)
- Companion’s Insight (your attacks, shouts, and destruction spells do no damage to your followers)
- Lover’s Insight (do 10% more damage and get 10% better prices from people of the opposite sex)
- Vessel
[S.A07] Apocrypha: Waking Dreams of a Starless Sky
Related Quests
- Dragonborn Main Quest: The Temple of Miraak
- Dragonborn Main Quest: At the Summit of Apocrypha
Recommended Level: 35
Dungeon: Apocrypha
- Kruziikrel
- Lurker
- Miraak
- Relonikiv
- Sahrotaar
- Seeker
Special Area
- Black Book: Waking Dreams of a Starless Sky
- Word of Power: Dragon Aspect [DB3/3]
Collectibles
- Unique Weapon: Miraak’s Staff [DB10/11]
- Unique Weapon: Miraak’s Sword [DB11/11]
- Unique Item: Miraak’s Boots [DB1/31]
- Unique Item: Miraak’s Gloves [DB2/31]
- Unique Item: Miraak’s Mask [DB3/31]
- Unique Item: Miraak’s Robes [DB4/31]
Miscellaneous
- Area is locked
- Chest
Black Book: Waking Dreams of a Starless Sky
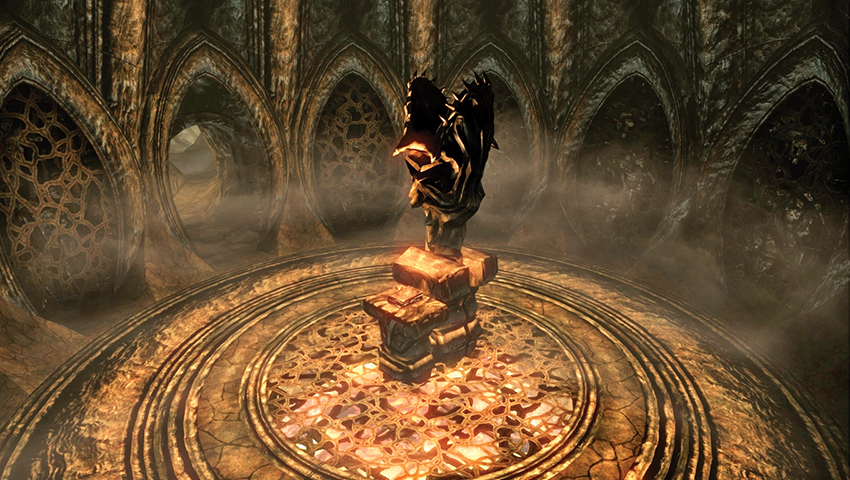
This book rests on a pedestal deep within the Temple of Miraak [S.N24], which you will find during Dragonborn Main Quest: The Temple of Miraak. After slaying the Gatekeeper, traverse the large stepped chamber and pass a statue of Hermaeus Mora before scrambling down a winding tunnel to a circular chamber. Take the Black Book and read it. You are transported to Apocrypha. You read it again at the start of Dragonborn Main Quest: At the Summit of Apocrypha.
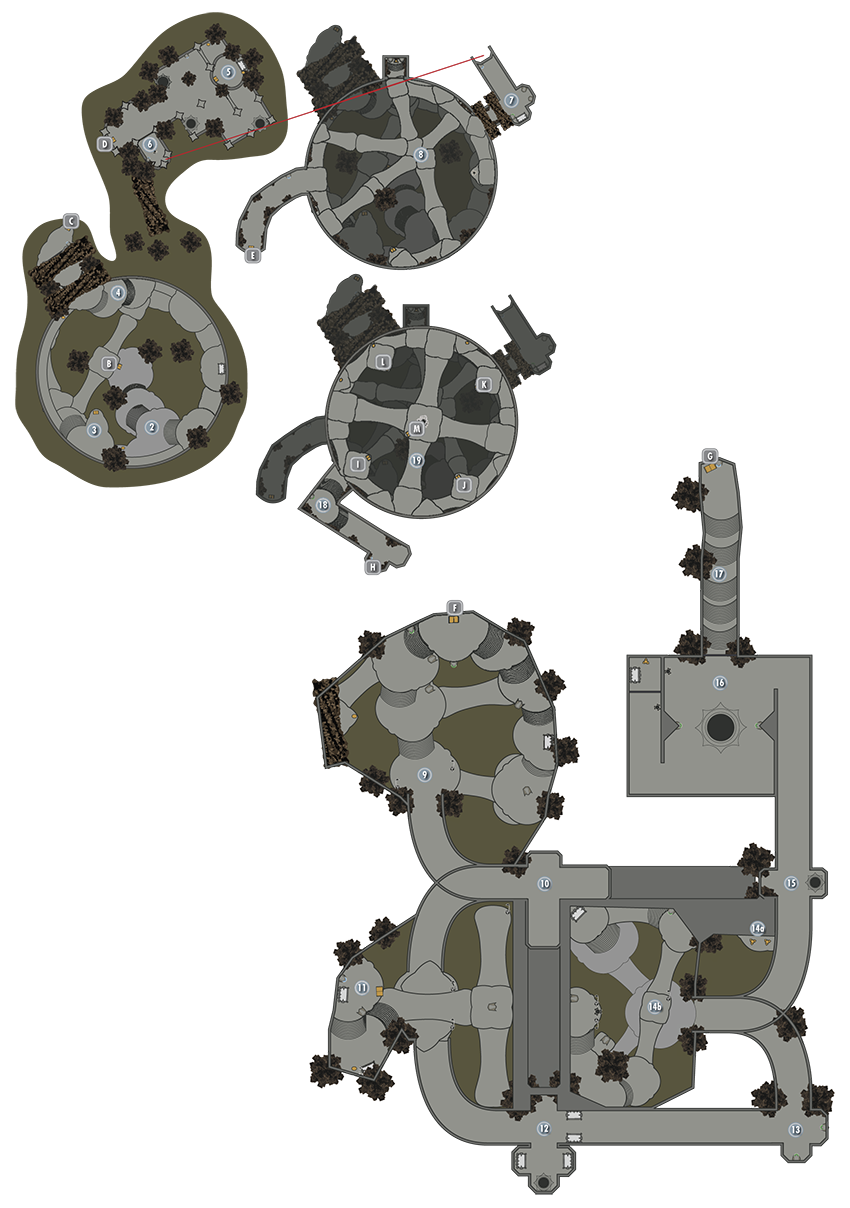
Interior: Apocrypha
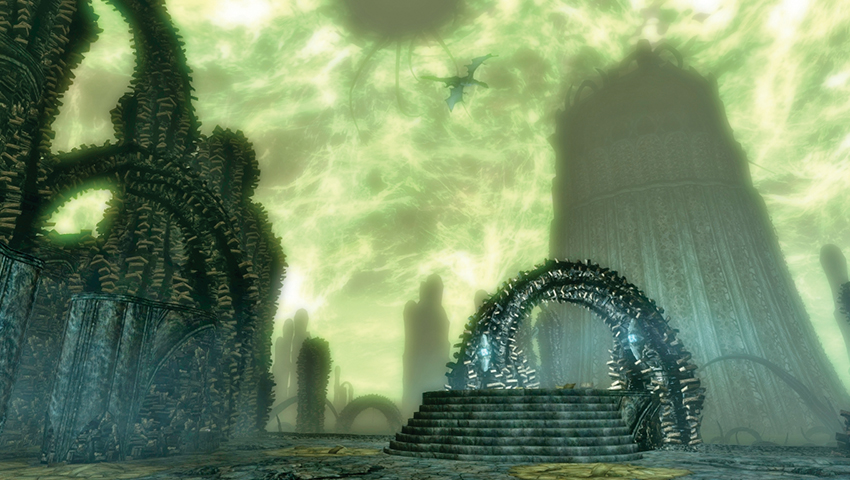
Chapter I: Plateau on the Stinking Sea
Check the table to the south for a trio of books. There is also a pod to open along the left and right (east and west) walls. Scan a second table for a Soul Gem, and then head north, passing two Magicka fonts and open Chapter II.
- Font of Magicka (2)
- Pod (2)
Book to Chapter II
Book to Chapter I
Chapter II: Miraak’s Tower: Entrance Steps
Climb the first set of stone steps, watching Seekers. Check the nearby table for a book before ascending farther and heading left (north) around the edge of this large, cylindrical chamber: Miraak’s Tower. Pass the table with Heavy Armor Forging (a Smithing Skill Book) and around to a small bridge to your left (south). There are some steps not yet elongated into a staircase position.
- Skill Book: Heavy Armor Forging (Smithing)
Chapter II: Miraak’s Tower: Entrance Bridges
Cross the bridge, go up the steps, and head around to the plinth that holds a cracked and ancient book called Boneless Limbs.
- On Apocrypha: Boneless Limbs [1/4]
Chapter II: Miraak’s Tower: Archway Doors
The gathering of this book elongates the steps at the initial side of the bridge, so cross over, head up the steps to the north, and go out of the open archway doors to view a vast ocean of filth. Turn right (northeast) and open Chapter III.
Book to Chapter III
Book to Chapter II
Chapter III: Corridors of Books
Enter the tunnel that leads roughly northeast, passing a door to your right that you can’t open yet. The corridor splits to the left and right, with two or three Seekers and a couple of pools with whipping tentacles to dodge. There are two Magicka fonts if you need them. Both corridors merge at some steps up to a platform and a table with Song of the Alchemists (an Alchemy Skill Book). Turn around, and on a stone plinth lies another ancient book called Delving Pincers. Gather the book to open the door you passed earlier.
- Seeker
- Font of Magicka (2)
- Skill Book: Song of the Alchemists (Alchemy)
- On Apocrypha: Delving Pincers [2/4]
Chapter III: Elongating Corridor
Retrace your steps along the corridor (southwest), as the previously closed door opened when you took the ancient book. Step inside and activate the Scrye. This stretches out the corridor ahead of you.
Chapter III: Corridor Junction
Head past a Magicka font, then another, stopping at the junction to inspect a table with Catalogue of Weapon Enchantments (an Enchanting Skill Book) and other books on it. Pass a Stamina font and head right (southwest), back into Miraak’s tower chamber.
- Font of Magicka
- Font of Stamina
- Skill Book: Catalogue of Weapon Enchantments (Enchanting)
Chapter III: Miraak’s Tower: Crisscrossing Platforms
Head left (south), opening a pod and activating a nearby Scrye, which opens a door to the northwest (leading to a small alcove with a vessel you can search for items). Now head south along the main bridge platform, then go right, passing a pod to a plinth with a Magicka font and another ancient tome, Prying Orbs. Taking the book opens a gate on the western part of the chamber, allowing further progress. After a Magicka and Stamina font, you reach Chapter IV.
- Font of Magicka (2)
- Font of Stamina
- Pod (2)
- Vessel
- On Apocrypha: Prying Orbs [3/4]
- Seeker
Book to Chapter IV
Book to Chapter III
Chapter IV: Stepped Courtyard
From your high position above a multitude of steps and shifting tunnel walls, turn right (west) and head down the steps, pausing to grab at the Stamina font above you. Directly ahead is a low balcony fence below which is a second Stamina font; access that from the top of the steps, then descend on either side, facing down two or three Seekers as you go. Don’t forget a pod on a southwest platform.
- Font of Stamina (2)
- Pod
- Seeker
Chapter IV: Retracting Tunnels
Head past the black table and the selection of books, then down to the lower ground and a tattered banner. Enter the tunnel to the south, moving around the long left curve to a junction with a black table and two very long passages ahead (east) and right (south). The tunnel ahead with the Magicka and Stamina fonts retracts as you move down it, forcing you right, where a similar retraction occurs.
- Font of Magicka
- Font of Stamina
- Seeker
Chapter IV: Open and Stepped Area
Backtrack to the initial tunnel; it has turned to the opposite (south) direction, allowing you to move into an open area, where you face two more Seekers. There is a stepped area to the west. Climb the steps, passing two tables (one houses some scrolls) and a Magicka font near your fourth and final ancient book, Gnashing Blades. As you gather this tome, the books around you will shift and expose a new passage.
- Font of Magicka
- Seeker
- On Apocrypha: Gnashing Blades [4/4]
Chapter IV: Elongating Tunnel
Move down the steps and head right (southeast) into the newly opened tunnel. This ends in a junction with an alcove to your right (south) with two black tables and a corridor that expands when you enter it. Nearby are two additional tables with more books to leaf through.
Chapter IV: Long Corridor
Move ahead (east) down the long corridor to a pair of Stamina fonts and a pod, before continuing down the left turn and into another chamber with a Stamina font under a walkway.
- Font of Stamina
- Pod
14A.Chapter IV: Frothing Pool
14B. Chapter IV: Secret Vessels
Avoid the black tentacles as you head northwest across the ground bridge, and engage two or three Seekers on the initial stepped balcony. Pass a black table, working your way along an upper bridge heading south, and up more steps to a Scrye. This moves the tunnel you passed through to a new position.
Look closely at the map, and you’ll discover a small, narrow plinth with two strange vessels on it. This is normally inaccessible during your exploration. To reach it, “die” partway through (just after taking On Apocrypha: Gnashing Blades; by succumbing to an enemy or stepping into the fetid waters). Then re-read Black Book: Waking Dreams. This resets the moving hallways into a configuration allowing you to reach the plinth!
- Seeker
- Vessel (2)
Chapter IV: Eastern Tunnel
Descend and enter the tunnel now heading east, down the long left curve past a small tentacle pool.
Chapter IV: Lurker-Summoning Chamber
One of these beasts is summoned as you near the circular black ooze in the middle. There’s a Scrye in the northwest corner of the chamber that opens an alcove with a vessel and black table in an adjacent corridor farther northwest (head around the corridor entrance to access it). Just before that alcove is a second Scrye. Activate that, and the chamber’s main door to the north swings open. Slay the horror before proceeding.
- Font of Stamina (2)
- Lurker
Chapter IV: Stepped Exit
At the end of the corridor to the north is a Magicka font and access to Chapter V.
- Font of Magicka
Book to Chapter V
Book to Chapter IV
Chapter V: Book Tunnel
Siphon the Magicka font near the open book before following the corridor up the steps, past a Stamina font, and out into the upper walkways of the central tower chamber.
- Font of Magicka
- Font of Stamina
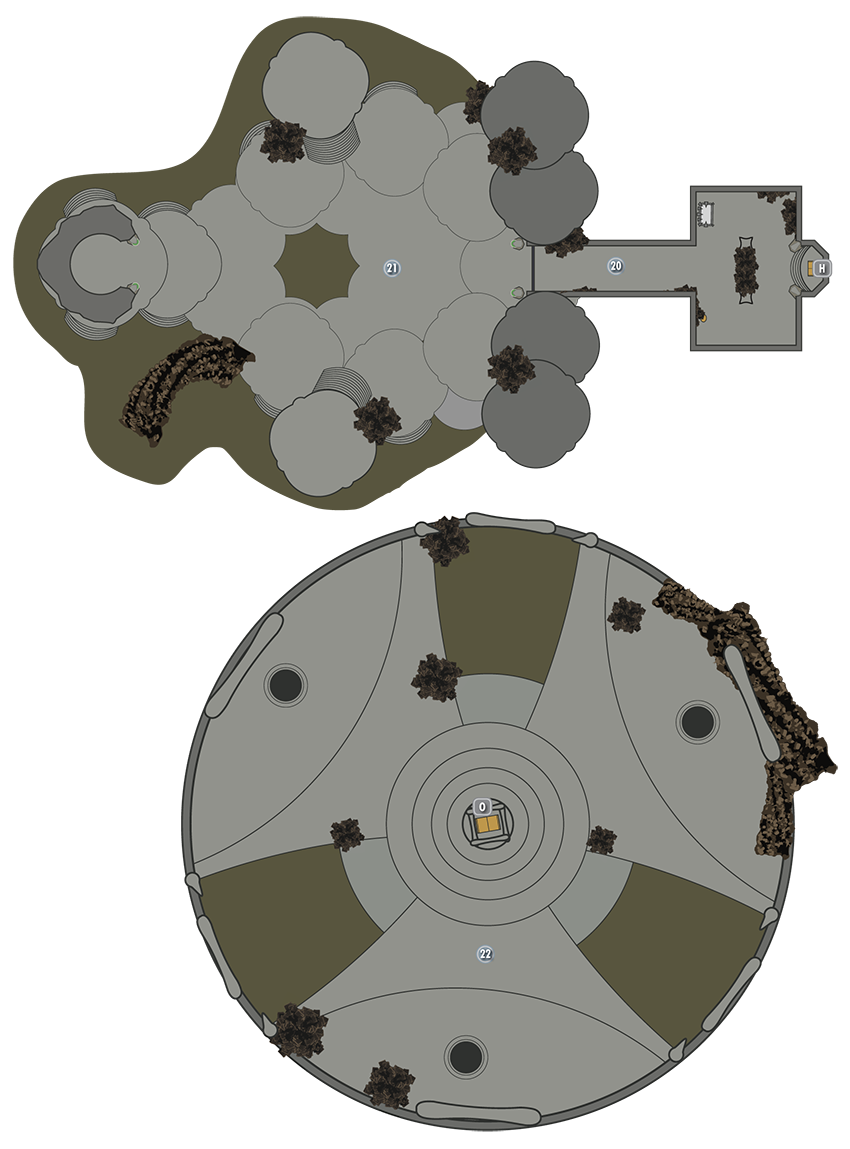
Chapter V: Miraak’s Tower: Book Pedestals
Slay the Seekers first. The focus of the room is a plinth in the central spine of the chamber, which houses access to Chapter VI. Place each of the four Apocrypha Books on their correct pedestals. Simply read the clues from the books and the books’ names and lay the tome on the image best associated with each book. Or, follow this plan:
Gnashing Blades Pedestal
The pedestal with the fishlike maw is closest to you. Place “Gnashing Blades” here.
Delving Pincers Pedestal
The pedestal with the two claws is nearby. Place “Delving Pincers” here. Expect Seekers to attack you at this point.
Boneless Limbs Pedestal
The pedestal with the mass of writhing tentacles is opposite the entrance. Place “Boneless Limbs” here.
Prying Orbs Pedestal
The pedestal with the strange evil fishlike eye is the last of the plinths. Place “Prying Orbs” here.
If you’ve placed the books on the correct pedestals, the opening to Chapter VI glows green. If not, remove the books and try again. When you’re ready for the final chapter, head to Chapter VI and open it.
- Seeker
- Pod (3)
Book to Chapter VI
Book to Chapter V
Chapter VI: Double Corridor Entrance
Exit via a small double-corridor leading to a single tunnel. Grab the Art of War Magic (a Destruction Skill Book) from the black table as you go.
- Skill Book: The Art of War Magic (Destruction)
Chapter VI: Promontory Amid the Unspeakable Ocean
This is bereft of life until you pass the Stamina fonts and approach the curved stone edifice at the opposite end. This is a Word Wall! Approach the Word Wall and defeat the two Seekers that are summoned to prevent your progress. Learn the powerful new Thu’um, part of the Dragon Aspect Shout.
- Seeker
- Sahrotaar
- Word Wall: Dragon Aspect [DB3/3]
Final Chapter: Summit of Apocrypha
At this point, assuming you’re completing the Dragonborn Main Quest, Sahrotaar appears. You must tame him so you can ride him to the final confrontation with Miraak atop Apocrypha. The confrontation occurs on a huge, circular plateau.
Miraak’s Tower: Summit
When Miraak finally yields, you can claim your just rewards from Hermaeus Mora:
- Dragon Souls
- Unique Weapon: Miraak’s Staff [DB10/11]
- Unique Weapon: Miraak’s Sword [DB11/11]
- Unique Item: Miraak’s Boots [DB1/31]
- Unique Item: Miraak’s Gloves [DB2/31]
- Unique Item: Miraak’s Mask [DB3/31]
- Unique Item: Miraak’s Robes [DB4/31]
After taking Miraak’s equipment, approach the Black Book: Waking Dreams in the center of the summit. Read this tome, and green light envelops you. Look around, and you’ll see shimmering images of the Skill Constellations arrayed around you. You can approach any of these mirages, activate them, and expend a Dragon Soul to clear all of the perks in a particular Skill Constellation. You can:
- Recover all of the Perk Points you have spent in a single constellation, then spend them elsewhere.
- Do this as many times as you wish, as long as you have enough Dragon Souls.
- Read the Black Book a second time to return to Solstheim.
 Book to Solstheim