
Elder Scrolls V: Skyrim Guide The Atlas Hold 3: The Pale
Primary Locations
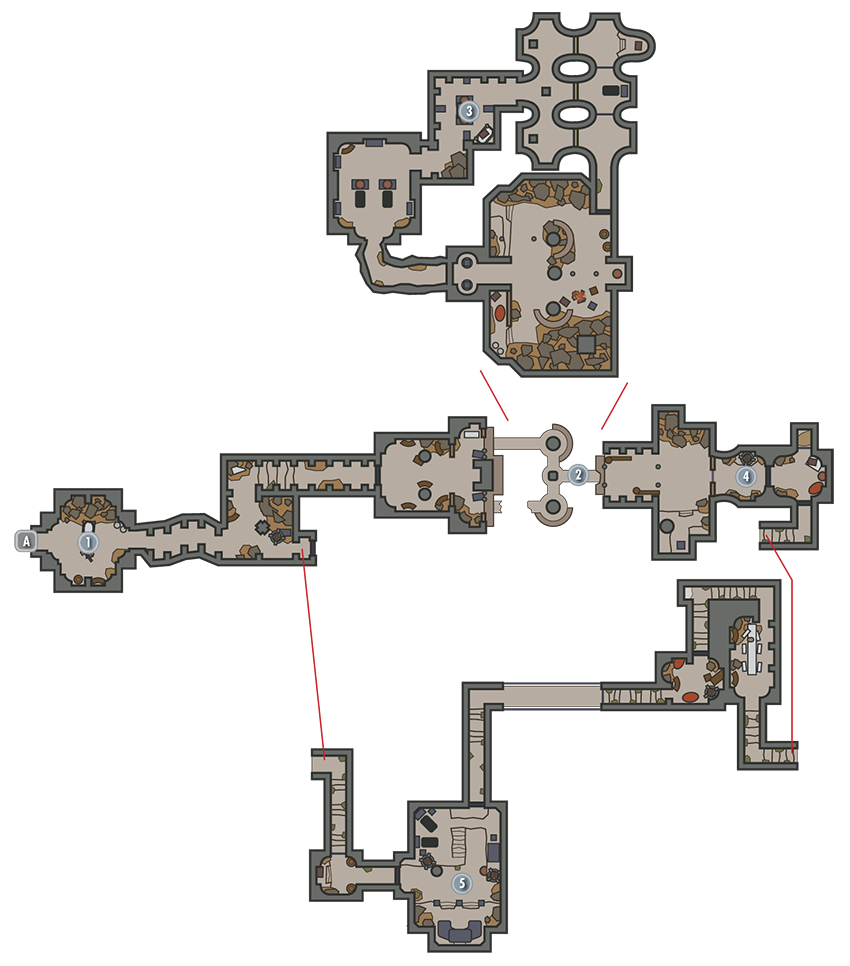
[3.01] High Gate Ruins
Related Quests
- Side Quest: Masks of the Dragon Priests*
- Dungeon Quest: A Scroll for Anska
Recommended Level: 24
Dungeon: Dragon Priest Lair
- Anska
- Draugr
- Vokun
Dangers
- Dart Trap (pressure plates)
- Spear Trap (pressure plate)
- Swinging Spikes (pressure plates)
Quest Items
- Sealed Scroll
Collectibles
- Dragon Priest Mask: Vokun [5/10]
- Skill Book [Destruction]: A Hypothetical Treachery [A1/10]
Special Objects
- Word Wall: Storm Call [1/3]
- Chest(s)
- Potions aplenty
- Loose gear
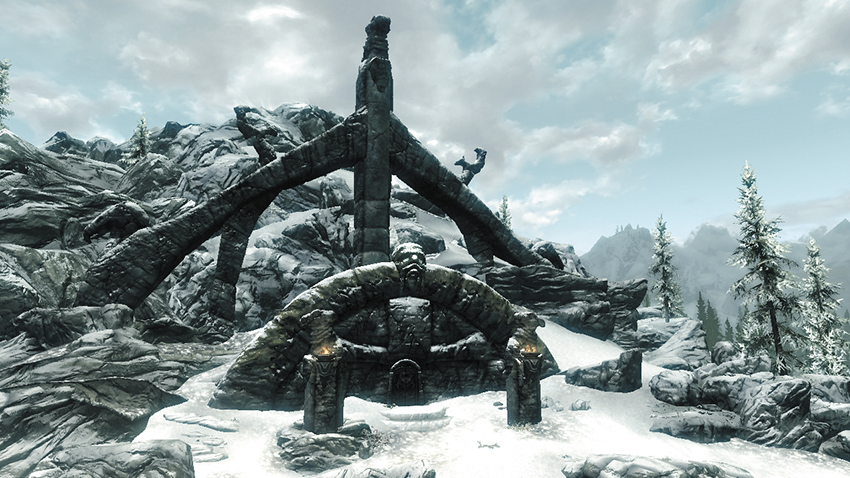
High Gate ruins is an old Draugr ruin inhabited by the Dragon Priest Vokun, wearer of the Iron Mask. The plucky adventurer and powerful Fire Mage Anska has already begun making her way toward Vokun’s treasure, where she believes she will find a scroll tying her family’s history to Ysgramor’s.
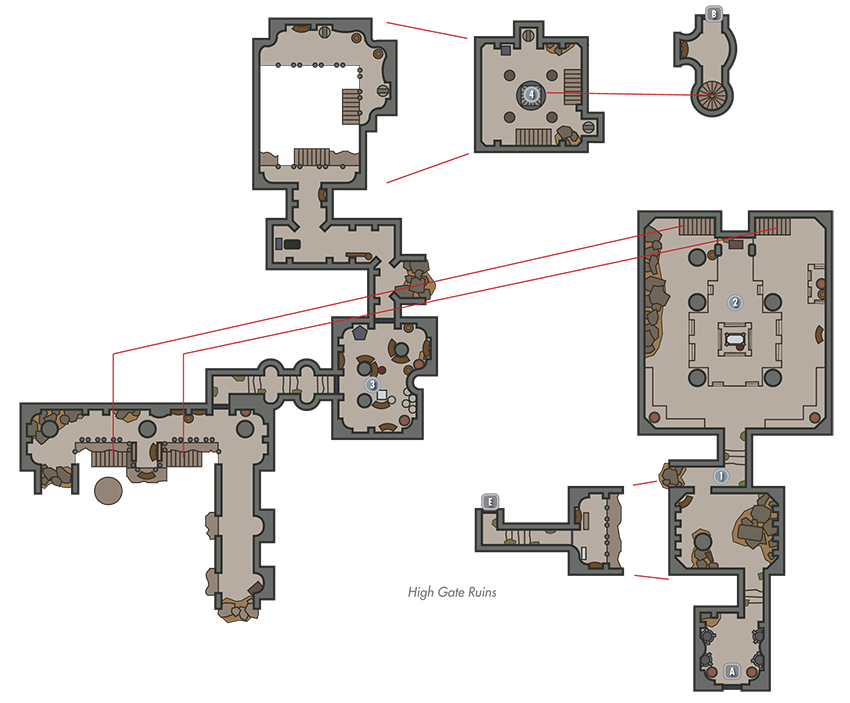
 Exit to Skyrim
 Door to Vokun’s Throne Room
 Anska Encounter
Loot a few Draugr corpses on your way into this small chamber, where you encounter a woman named Anska. Speak with her to begin a new Side Quest that takes place in these ruins. Anska then assists you in clearing this dreary place.
 Sacrificial Chamber
Slay a few Draugr in this large chamber, then raid the far chest and surrounding urns. Head upstairs and claim a number of potions from the balcony, along with a Skill Book that lies next to a skeleton in a dark corner. Don’t miss looting another chest at the balcony’s far end.
- Skill Book [Destruction]: A Hypothetical Treachery [A1/10]
- Chest (2)
- Potions aplentyv
 Potion Room
Slay a group of Draugr on the way to this next chamber, which holds several more potions.
- Potions aplenty
- Loose gear
 Stairwell Chamber
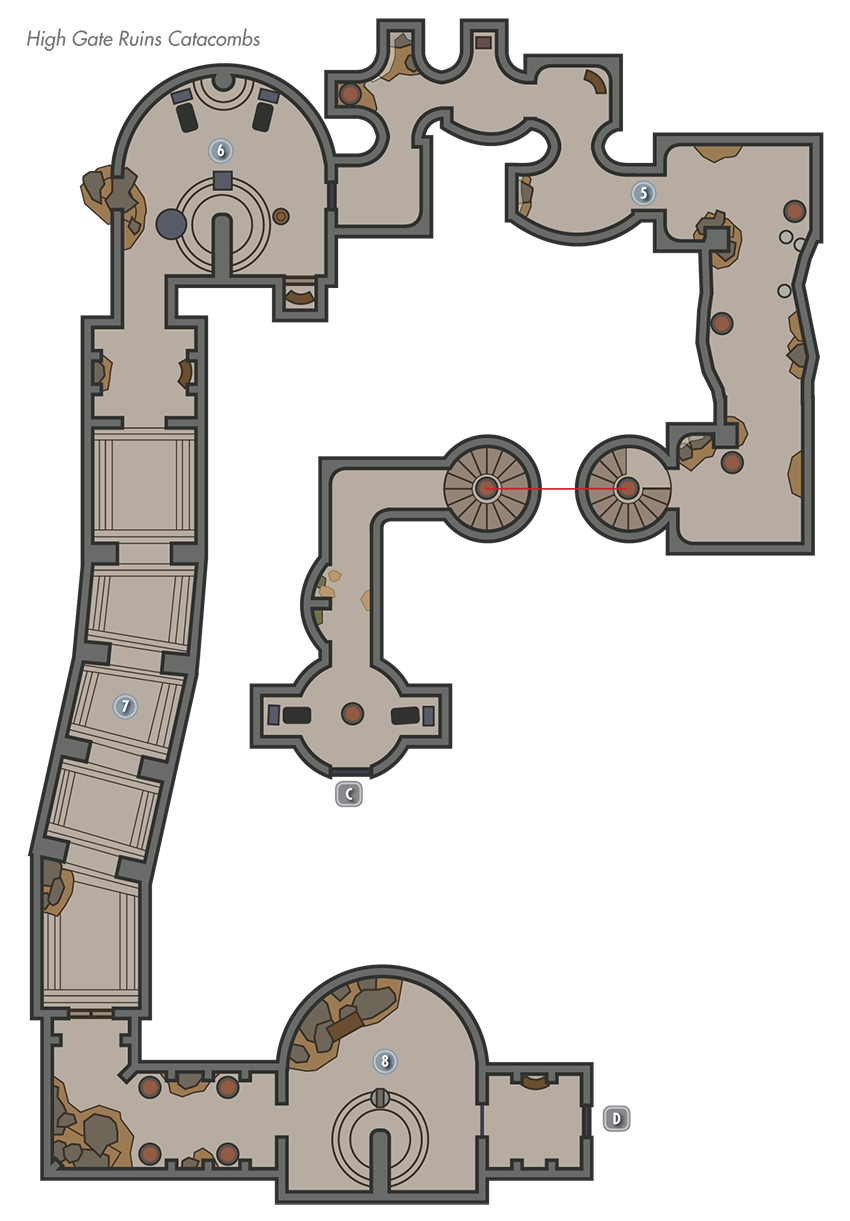
Sidestep a pressure plate trap in the passage that leads to this chamber. Look at the ceiling to find the pattern in which you must pull this chamber’s four levers to open the central stairwell and descend to the catacombs below.
- Danger! Swinging Spikes (pressure plate)
- Potions
 Door to High Gate Ruins Catacombs
 Door to High Gate Ruins
 Draugr Tunnels
Leap over a pressure plate that lies directly in a doorway in these passages—you’ll be punctured by arrows if you touch it. Open the chest along the northernmost stretch without getting too close; you’ll be impaled by spears if you touch the pressure plate on the ground near the chest.
- Danger! Dart Trap (pressure plate), Spear Trap (pressure plate)
- Chest
- Potions
- Loose gear
 Treasure Room
After slaying this cavern’s resident undead, open an Adept-level door to access a tiny closet with a chest. Removing the Soul Gem from the central pedestal causes two additional Draugr to emerge from the coffins behind you.
- Chest
- Loose gear
 Trapped Passage
Avoid a myriad of pressure plates in this wide corridor—each one triggers a lethal trap.
- Danger! Dart Trap (pressure plates), Spear Trap (pressure plates)
- Potions
 Lever Chamber
Slay a lone Draugr here, then pull the lever in the nearby alcove to open aonther small nook, freeing a powerful Draugr that quickly attacks. Pull the lever in the other nook to open the way to the throne room. The central lever can be ignored.
- Potions aplenty
- Loose gear
 Door to Vokun’s Throne Room
Vokun’s Throne Room
The doors swing open as you enter this wide chamber, and a demonic apparition rises from the central sarcophagus. It’s Vokun. Slay the deadly Dragon Priest and collect his powerful mask, then head to the back room to locate a Word Wall. Open two chests along the upstairs balcony and loot a number of urns before claiming the scroll that Anska seeks from the central table. Take the upstairs passage back to the ruin’s entrance and return the scroll to Anska, who now awaits you just outside.
- Dragon Priest Mask: Vokun [5/10]
- Word Wall: Storm Call [1/3]
- Sealed Scroll
- Chests (2)
[3.02] The Wreck of the Brinehammer
Recommended Level: 6
Dungeon: Shipwreck
- Mudcrab
Collectibles
- Skill Book [Archery]: Father of the Niben [A1/10]
Special Objects
- Shrine of Kynareth [3/6]
- Chest(s)
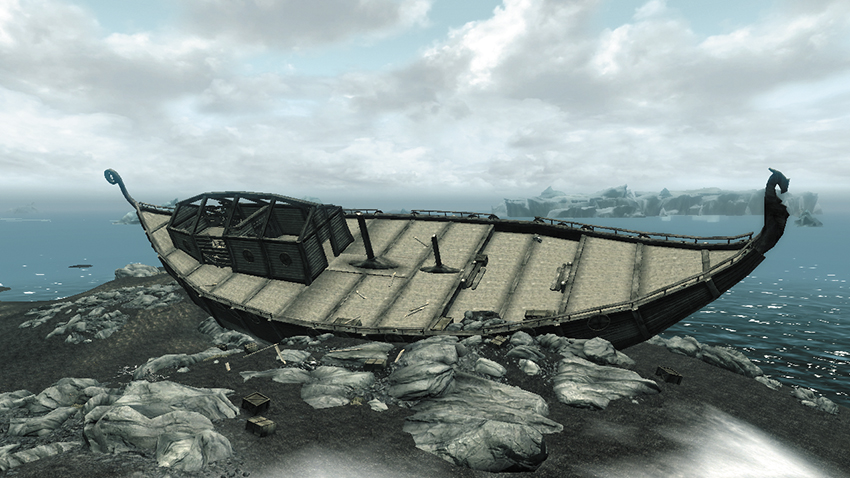
A merchant vessel called the Brinehammer has crashed along the Pale’s brutal northern shoreline. Before heading below deck, enter the captain’s quarters, where a chest and the remains of the captain await plundering.
- Captain Slaughterfish’s Key (Captain Slaughterfish)
- Chest
Below Deck
Slay the odd Mudcrab as you scour the Brinehammer’s belly—the only items of interest are a chest near the vessel’s center and the shrine that’s nearby. There’s no need to unlock the Novice-level door; you can simply circumvent it. Head down to the cargo hold after looting the chest. The north door to the cargo hold is unlocked as well.
- Shrine of Kynareth [3/6]
- Chest
Cargo Hold
Open the hold’s locked chest and collect the nearby Skill Book, then dive underwater and find another locked chest that’s sunken beneath the ship.
- Skill Book [Archery]: Father of the Niben [A1/10]
- Chests (Locked: Adept) (2)
[3.03] Pale Imperial Camp
Related Quests
- Civil War Quest: Reunification of Skyrim
- Civil War Quest: A False Front
- Civil War Quest: The Battle for Fort Dunstad
- Dungeon Activity
Habitation: Military: Imperial Camp
- Imperial Quartermaster (Blacksmith)
- Imperial Soldier
- Legate Constantius Tituleius
Services
- Trader (Blacksmith): Imperial Quartermaster [7/33]
- Weapons, Apparel, Misc
Crafting
- Anvil
- Grindstone
- Workbench
Special Objects
- Civil War: Map of Skyrim
- Chest(s)
- Loose gear
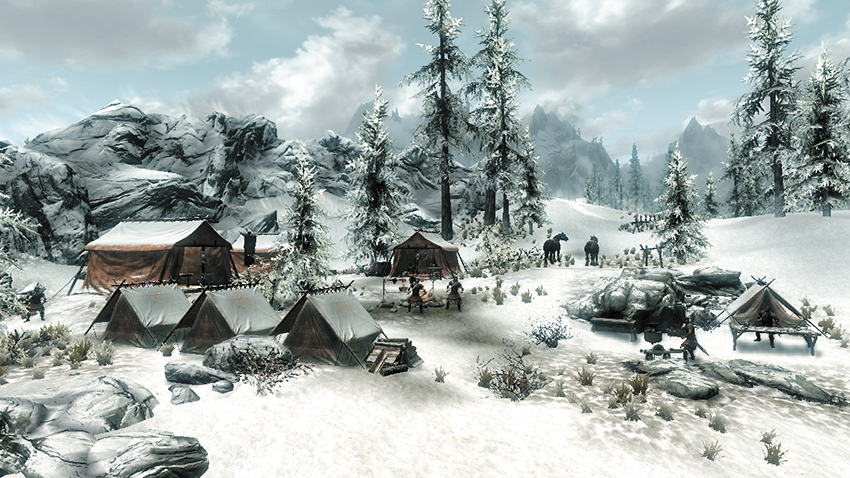
This small military camp stands against the harshness of the Pale’s frozen northern wastelands. Trade with the quartermaster, or use his many crafting workstations. Examine the map in the largest tent to potentially gain new map data. Loot a few chests within the smaller tents if you like before setting off.
[3.04] Windward Ruins
Related Quests
- Side Quest: Kyne’s Sacred Trials
- College of Winterhold Radiant Quest: Destruction Ritual Spell
Recommended Level: 5
Dungeon: Animal Den
- Animal
- Chest (Locked: Adept)
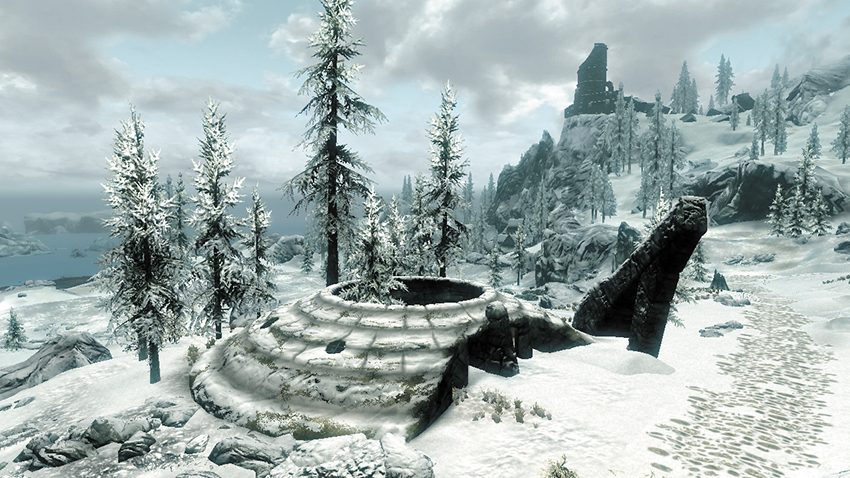
A pair of lowly Skeevers guard this small collection of ruins. Head inside the small domed structure and utilize the pedestal in the back to advance the Destruction Ritual Spell Quest. Plunder the chest that’s tucked away among rocks in the ruins’ outer ring.
[3.05] Dawnstar Sanctuary
Related Quests
- Dark Brotherhood Quest: The Cure for Madness
- Dark Brotherhood Quest: Where You Hang Your Enemy’s Head…
- Dark Brotherhood Quest: Welcome to the Brotherhood
- Dark Brotherhood Quest: Cicero’s Return*
- Dark Brotherhood Quest: The Dark Brotherhood Forever!
- Dark Brotherhood Quest: The Torturer’s Treasure: Parts I, II, III, IV*
Recommended Level: 8
Dungeon: Special/Habitation: Special
- Cicero
- Sanctuary Guardian
- Udefrykte (Troll)
Services
- Follower: Cicero [6/47]
- Follower: Dark Brotherhood Initiate [7/47]
Dangers
- Bear Traps
- Oil Pool Trap
- Spear Trap (proximity)
Collectibles
- Skill Book [Alteration]: Sithis
- Skill Book [Archery]: The Marksmanship Lesson [D1/10]
- Skill Book [One Handed]: Fire and Darkness
- Skill Book [Sneak]: Sacred Witness
- Unique Item:Jester’s Boots [10/112]
- Unique Item:Jester’s Clothes [11/112]
- Unique Item:Jester’s Gloves [12/112]
- Unique Item:Jester’s Hat [13/112]
- Unique Item:Cicero’sBoots [14/112]
- Unique Item:Cicero’sClothes [15/112]
- Unique Item:Cicero’sGloves [16/112]
- Unique Item:Cicero’sHat [17/112]
- Unique Item:Worn Shrouded Armor [18/112]
- Unique Item:Worn Shrouded Boots[19/112]
- Unique Item:Worn Shrouded Cowl [20/112]
- Unique Item:Worn Shrouded Gloves [21/112]
- Unique Item:Tumblerbane Gloves[22/112]
- Area Is Locked (quest required)
- Chest(s)
- Potions
- Loose gear
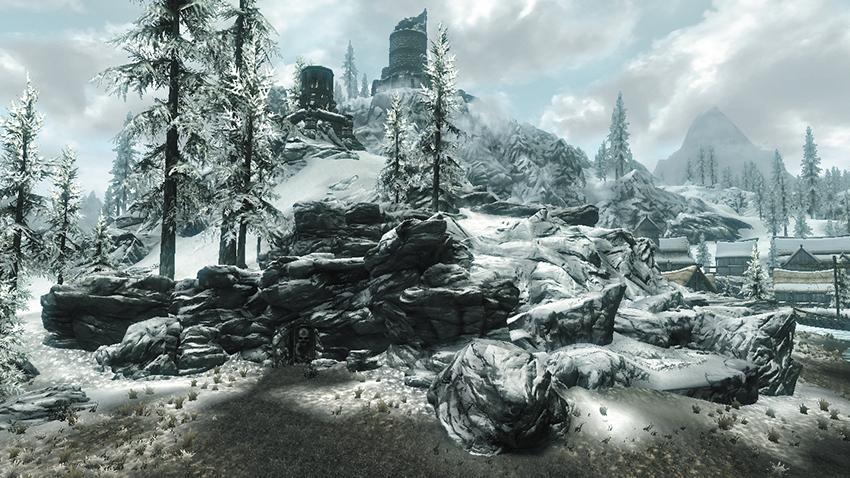
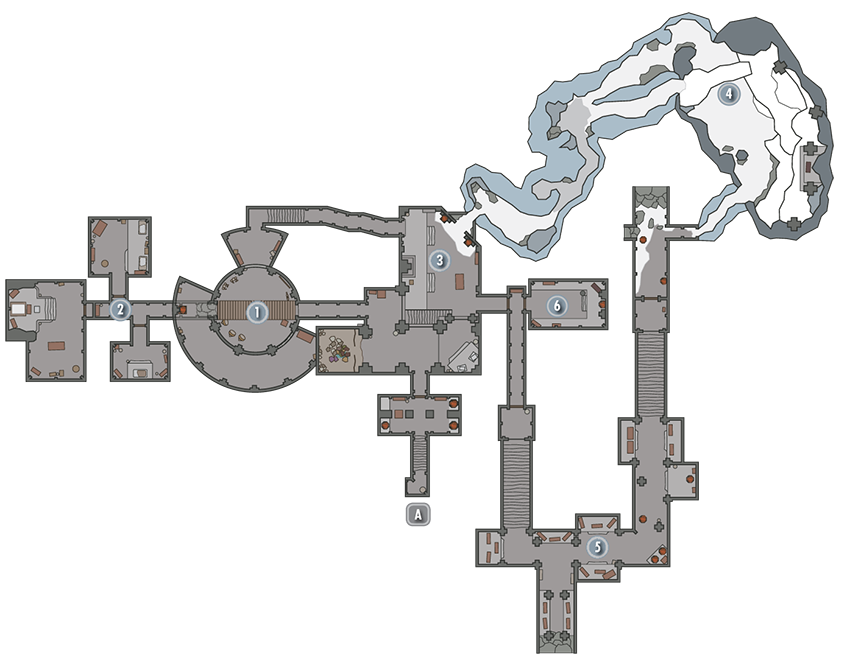
Explore the coastline north of Dawnstar to discover an ominous door built into the rock face. This is the entrance to Dawnstar Sanctuary, which you cannot enter until you’ve advanced to Dark Brotherhood Quest: The Cure for Madness, during which you must chase a wounded person through this trap-filled place. The Dark Brotherhood eventually moves their hideout here after you complete their quest line.
Exit to Skyrim
Training Chamber
Swipe a Sneak Skill Book off a small table on your way to this tall, circular chamber. Before maneuvering past the stabbing spears (Whirlwind Sprint may help), knock down two hanging lamps to ignite the oily floor below and singe a pair of Sanctuary Guardians. Get past the spears and then go downstairs to find a pair of Skill Books. Another book on a nearby shelf can potentially grant you a new quest.
- Danger! Oil Pool Traps, Spear Trap (proximity)
- Skill Book [Archery]: The Marksmanship Lesson [D1/10]
- Skill Book [One Handed]: Fire and Darkness
- Skill Book [Sneak]: Sacred Witness
- Potions
- Loose gear
No Access
These rooms are blocked by rubble until the Dark Brotherhood takes over the Dawnstar Sanctuary and removes the debris.
North Entry Hall
Moving through the training chamber lets you explore the north half of the sanctuary’s entry hall. This section of the sanctuary has given way to the ravages of time. Collect a Skill Book from a shelf near the circular stained-glass window before proceeding into the snowy tunnel on your way to [4].
- Skill Book [Alteration]: Sithis
- Loose gear
Udefrykte’s Lair
Dodge bear traps as you navigate the frigid tunnel, which leads to the den of an ill-tempered troll named Udefrykte. Raid a chest on a high ledge here as you continue to the trail of blood toward your quarry.
- Chest
Coffin Corridors
Slay a number of Sanctuary Guardians as you navigate this long passage. If you’re skilled enough, loot the large locked chest in the southern nook as you go.
- Chest (Locked: Master)
Torture Chamber
Don’t worry if you couldn’t open that last chest—this gruesome chamber contains another. Unbar the nearby door to find yourself back at [3], your exploration of the Sanctuary complete. During Dark Brotherhood Quest: The Cure for Madness, you face Cicero here.
- Chest
Post–Dark Brotherhood Occupation
The Dark Brotherhood repurposes Dawnstar Sanctuary for their own base of operations after you complete the entire Dark Brotherhood quest line. Naturally, the place is much different after the Brotherhood moves in:
During Dark Brotherhood: Where You Hang Your Enemy’s Head..., you can purchase New Banners (1,000 gold), a Poisoner’s Nook (5,000 gold), a Torture Chamber (5,000), a Secret Entrance (5,000) that can be accessed from the hills above the Sanctuary, and a Master Bedroom (3,000 gold). All are bought from Delvin Mallory of the Thieves Guild, inside the Ragged Flagon in Riften.
During Dark Brotherhood: Welcome to the Brotherhood, Nazir has an initiate recruited for you.
- Follower: Dark Brotherhood Initiate [7/47]
During Dark Brotherhood: Cicero’s Return,* you can elect to keep Cicero as a companion.
- Follower: Cicero [6/47]
During Dark Brotherhood: The Dark Brotherhood Forever!, you receive assassination orders from the Night Mother, who is also ensconced in these new surroundings.
During Dark Brotherhood: The Torturer’s Treasure: Parts I, II, III, IV,* providing you’ve had the Torture Chamber installed, you can torture victims until they reveal the location of their treasure.
[3.06] Nightcaller Temple
Related Quests
- Daedric Quest: Waking Nightmare
- Dungeon Activity
Recommended Level: 18
Dungeon: Falmer Hive
- Animal
- Orcish Invader
- Thorek
- Vaermina Devotee
- Veren Duleri
Services
- Follower: Erandur [8/47]
Crafting
- Alchemy Labs (3)
- Arcane Enchanter
Quest Items
- The Dreamscape
- Skull of Corruption
- Vaermina’s Torpor
Collectibles
- Skill Book [Alchemy]: Mannimaro, King of Worms [D1/10]
- Unique Weapon: Skull of Corruption [12/80]
Special Objects
- Shrine of Mara [2/5]
- Area Is Locked (quest required)
- Chest(s)
- Potions aplenty
- Loose gear
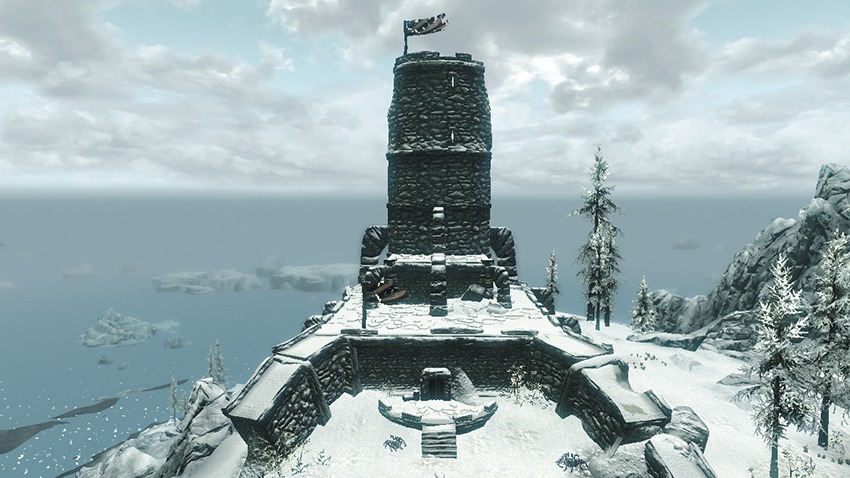
Just southeast of the Pale’s capital city of Dawnstar, the single tower of an ancient temple rises up from the frozen rock. You visit this temple with Erandur as part of Daedric Quest: Waking Nightmare, hoping to solve the mystery of why Dawnstar’s townsfolk have been suffering nightmares. Slay the beasts that guard the temple’s entrance, then head inside.
Exit to Skyrim
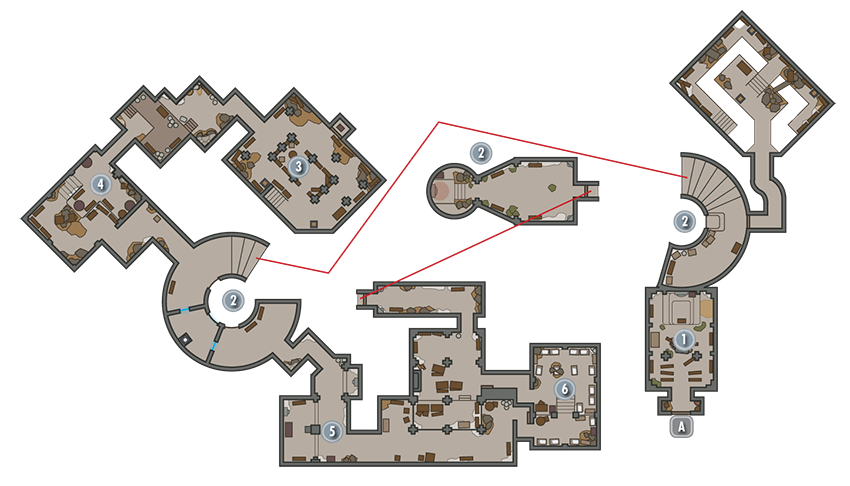
Shrine Chamber
The temple’s entry chamber features a small shrine that instantly cures you of all diseases when touched. When you visit the temple as part of the “Waking Nightmare” quest, Erandur will open the way forward, allowing you to explore beyond this first room.
- Shrine of Mara [2/5]
- Chest (Locked: Novice)
Inner Sanctum
The Skull of Corruption is located here, which Erandur insists you must destroy to end the townsfolk’s nightmares. Follow Erandur downstairs and slay the Orcish Invaders that awaken and attack. A barrier halts your progress; follow Erandur back upstairs and into the library.
- Skull of Corruption
Library
The library is in a terrible state. Cross a fallen pillar to locate a unique tome entitled The Dreamstride, which Erandur seeks.
- The Dreamstride
Laboratory
Secure the lab, then find a Skill Book near one of its three Alchemy Lab stations. Find the potion you seek downstairs, then speak to Erandur to advance the quest. Drink the potion to be whisked away to a vision of the past.
- Crafting: Alchemy Labs (3)
- Skill Book [Alchemy]: Mannimarco, King of Worms [D1/10]
- Vaermina’s Torpor
- Apothecary’s Satchels (2)
- Potions
Torpor Tantrum
After drinking Vaermina’s Torpor, you must race through these rooms and passages to locate your objective: the Miasma release controls. At the end of the passage, pull the chain to release the Miasma and awaken from the dream.
- Potions aplenty
- Loose gear
Inner Sanctum Revisited
You emerge from the Torpor’s effects back at the inner sanctum. Somehow you’ve gotten past the barriers. Take the Soul Gem that feeds them to deactivate the obstacles so that Erandur may join you. Follow Erandur to [5].
Passage to Sleeping Quarters
Use an Arcane Encanter and loot a chest as you navigate this passage.
- Crafting: Arcane Enchanter
- Chest
- Potions
Sleeping Quarters
Loot a chest on the balcony as you enter this room, and find another down below, near the stairs. Grab potions off a table and find more in the dining room that follows.
- Chest
- Chest (Locked: Adept)
- Potions
- Loose gear
Inner Sanctum, Third Visit
At last, you’ve reached the Skull of Corruption. Slay the final pair of priests after their brief chat with Erandur, then loot a large chest that’s tucked away near the Skull’s platform as your partner begins his ritual. A voice urges you to slay Erandur before the ritual is complete. If you do, the Skull of Corruption, an incredibly powerful and valuable staff, will be yours. Allowing Erandur to complete his ritual destroys the Skull and earns you Erandur’s services as a follower.
- Unique Weapon: Skull of Corruption [12/80]
- Chest
[3.07] Red Road Pass
Dungeon: Giant Camp
- Giant
- Mammoth
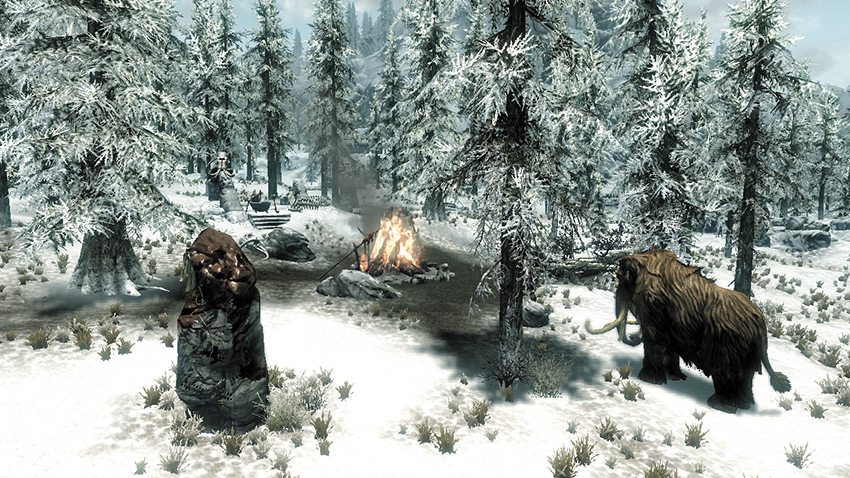
In the northern section of the Pale, along the main road that runs between the east and west mountains, a giant has made camp. Bandits may attack this giant camp as you draw near. If this occurs, allow the conflict to play out, then slay the weakened victor (usually the giant) to claim some worthy plunder from the giant and the surrounding corpses.
[3.08] Frostmere Crypt
Related Quests
- Dungeon Quest: The Pale Lady
Recommended Level: 6
Dungeon: Bandit Camp
- Bandit
- Eisa Blackthorn
- Kyr
- Ra’jirr
- The Pale Lady
Crafting
- Grindstone
Quest Items
- Eisa’s Log
- Kyr’s Log
- Ra’jirr’s Note
Collectibles
- Skill Book [Sneak]: The Red Kitchen Reader [D1/10]
- Unique Weapon: The Pale Blade [13/80]
Special Objects
- Word Wall: Ice Form [1/3]
- Chest(s)
- Potions
- Loose gear
- Mineable ore: Iron
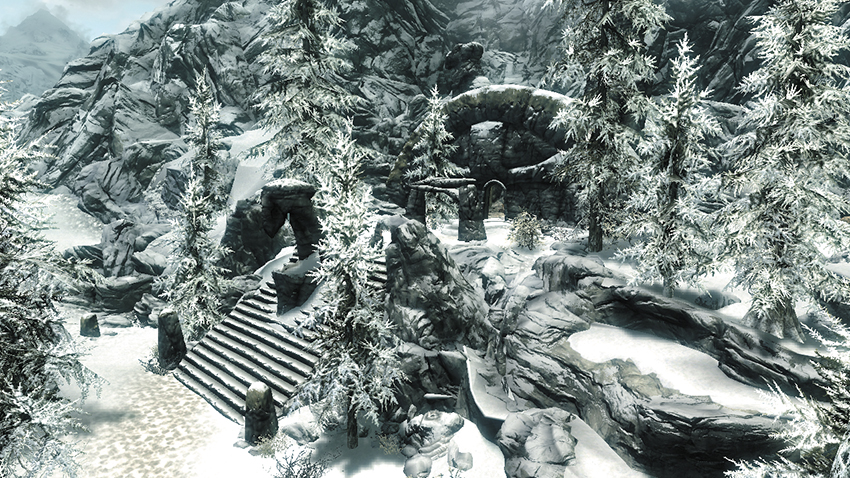
When you approach these mountain ruins, a warrior named Eisa flees down the steps, pursued by several bandits. Help her fight off the ruffians, then speak with her to begin a new quest that takes place within the nearby ruins.
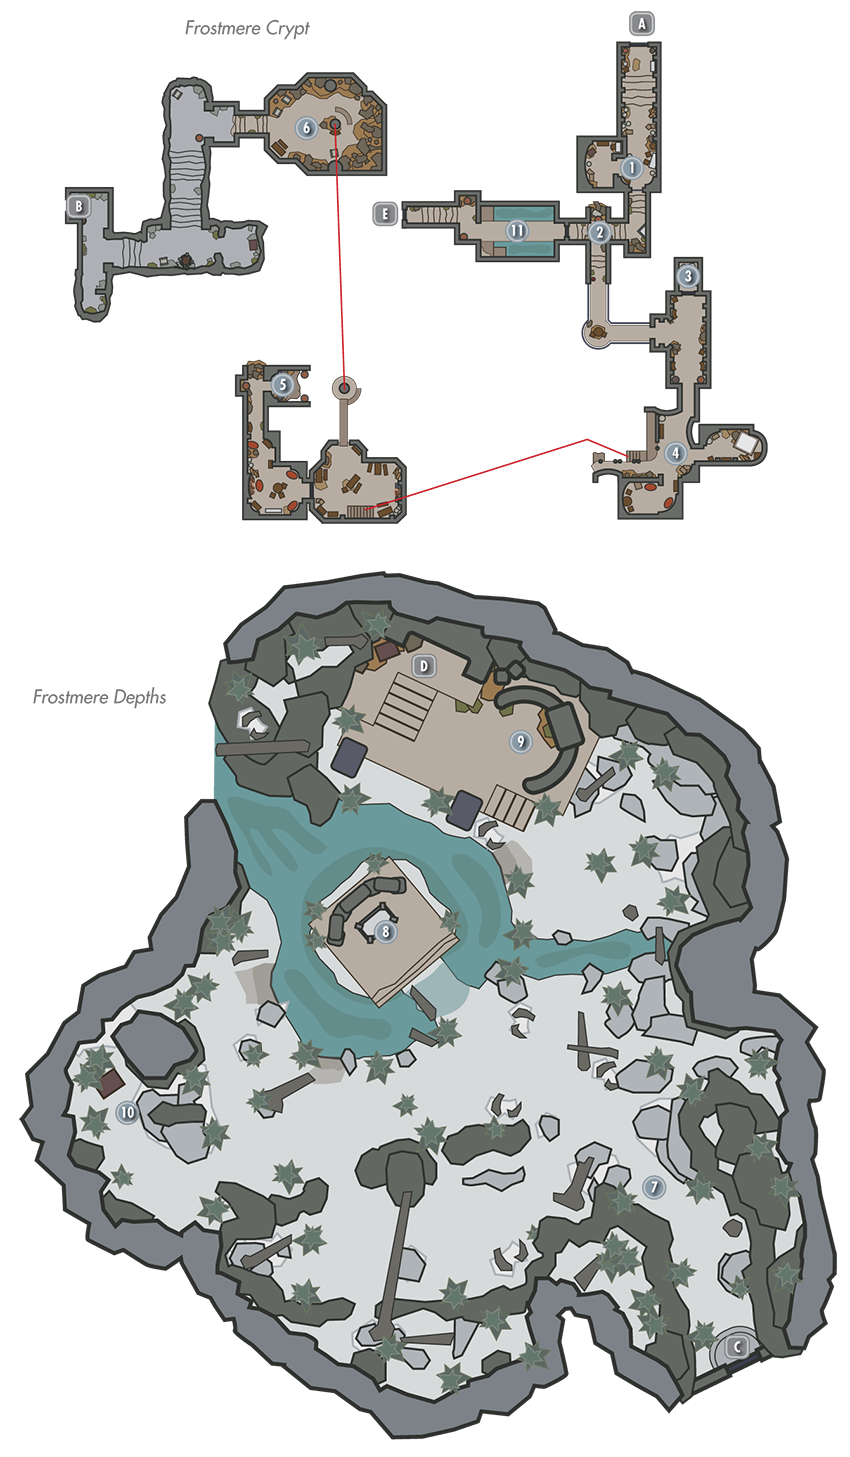
Exit to Skyrim
Guard Room
Slay a couple of bandits in this entry hall and loot a locked chest in the western nook. Pull the wall chain near the portcullis to open the way forward.
- Chest (Locked: Apprentice)
- Potions
- Loose gear
Connecting Tunnels
Claim a few valuables on your way through these short passages.
- Potion
- Loose gear
Grindstone Alcove
Grab a Skill Book from a shelf before picking a locked door to enter this small nook, where a crafting station and some valuable gear is found.
- Area Is Locked (Adept)
- Skill Book [Sneak]: The Red Kitchen Reader [D1/10]
- Crafting: Grindstone
- Loose gear
Upper Quarters
Search these small bedchambers to loot a chest and collect important quest-related documents.
- Eisa’s Journal (if you didn’t take it from outside)
- Kyr’s Log
- Ra’jirr’s Note
- Chest
- Potion
- Loose gear
Lever Overlook
Silence more bandits, then swipe a potion and loot an urn on your way to this overlook, where a Bandit Archer awaits. Pull the nearby lever to cause a drawbridge to fall, then head to [6] and head north across this new bridge.
- Potion
Drawbridge and Stairwell
Cross the drawbridge to enter this chamber from the south, then descend some stairs and slay a Bandit Mage in the lower chamber. Press onward through a winding mining tunnel, looting a chest and optionally mining some Iron Ore on your way to the crypt’s lower depths.
- Chest
- Mineable ore: Iron
- Loose gear
Door to Frostmere Depths
Door to Frostmere Crypt
Shrouded Grove
A massive, overgrown cavern lies beneath the Frostmere Crypt. You find Kyr just inside—he’s near death and gasps out a few final words before expiring. Continue deeper into the grove, and you’ll spot Ra’jirr racing to the altar. The wraithlike form of the Pale Lady emerges and strikes him down before turning her wrath on you.
The Pale Blade
Claim the Pale Blade from Ra’jirr’s corpse, then deal with the Pale Lady. Slay her or return the sword to the stand on the central altar to seal her away. Either choice completes this quest.
- Unique Weapon: The Pale Blade [13/80]
 Word Wall
After defeating the Pale Lady, go upstairs and follow the sound of chanting to this location, where a Word Wall bestows you with an new Word of Power. Scale more steps and open a large chest near the exit door to the crypts. Don’t leave just yet!
- Word Wall: Ice Form [1/3]
- Chest
 Chest Nook
Raid a large locked chest that rests on a rise in this corner of the cavern. There’s also some gear on a nearby skeleton that’s just to the left as you step out into the grove proper.
- Chest (Locked: Master)
- Loose gear
Door to Frostmere Crypt
Door to Frostmere Depths
 Watery Chamber
Take a quick dive underwater and try to open a chest for some loot before scaling this watery chamber’s ramp. Unbar the far door and go through to return to the crypt’s entrance.
- Chest (Locked: Adept)
- Loose gear
[3.09] and
 [DG.19] Hall of the Vigilant
Related Quests
- Dungeon Activity
Recommended Level: 5
Dungeon: Special
- Keeper Carcette (Restoration Trainer)
- Vigilant of Stendarr
Services
- Trainer (Restoration): Keeper Carcette [1/3]
Crafting
- Alchemy Labs (2)
- Tanning Rack
Collectibles
- Skill Book [Heavy Armor]: The Knights of the Nine [E1/10]
Special Objects
- Book: The Aetherium Wars
- Chest(s)
- Loose gear
- Potions
- Shrine of Stendarr [2/5]
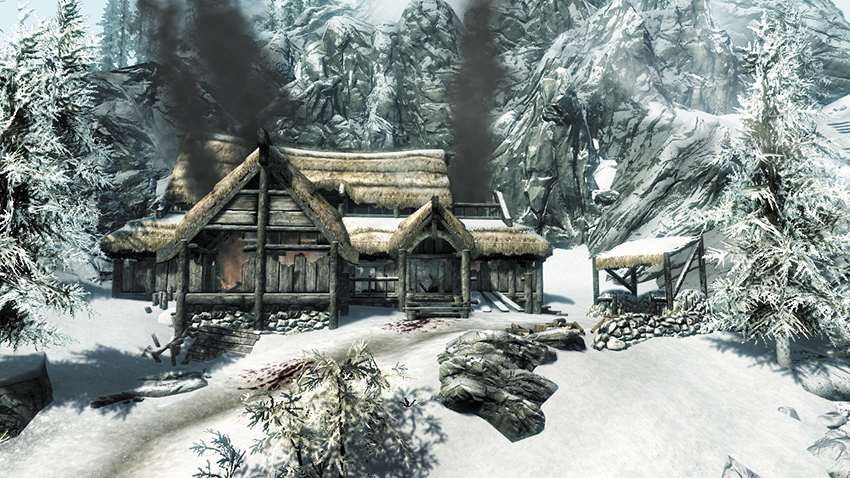
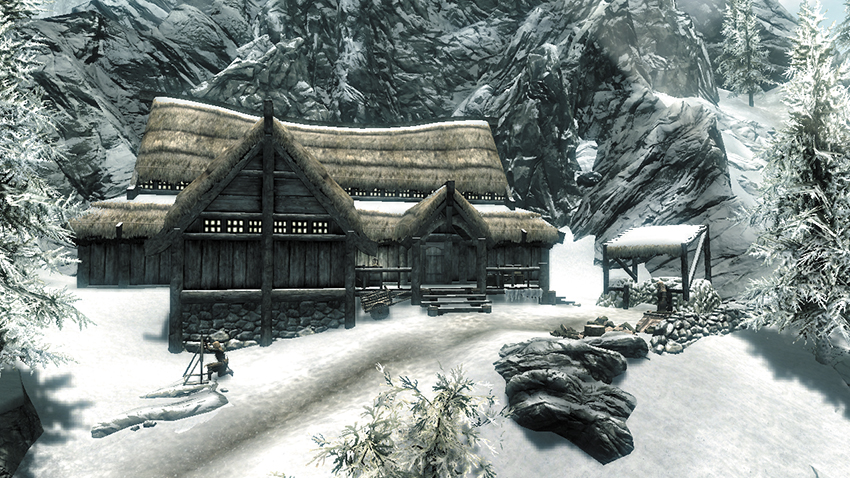
Follow the main road south from Dawnstar, and you may notice this small meeting hall, located to the right of the road (first picture). This lodge is owned by the Vigilants of Stendarr—a group of monster hunters that specializes in fighting Daedra. Speak to any of the Vigilants here to have them cure you of any diseases or maladies you might be suffering, free of charge. Keeper Carcette runs the Hall and offers training in the Restoration skill.
As soon as the Dawnguard Main Quest begins, visit this location for a completely different experience: A recent and vicious battle between the Vigilants and a band of vampires has left the Hall in burning ruins, almost beyond repair. Bodies are strewn everywhere, and none of the Vigilants can be found. For this reason, avail yourself of Keeper Carcette’s training for as long as you need to before the quest begins, or she (and the Skill Book) are likely to perish. However, there’s a new book among the debris: The Aetherium Wars. When read, this begins Side Quest: Lost to the Ages.
[3.10] Fort Dunstad
Related Quests
- Civil War Quest: Reunification of Skyrim
- Civil War Quest: The Battle for Fort Dunstad
Recommended Level: 6
Habitation: Military Fort
- Bandit or Civil War Soldiers
Crafting
- Alchemy Labs (2)
- Blacksmith Forge
- Grindstone
- Workbench
Dangers
- Bear Traps
- Oil Pool Traps
- Wall Trap (lever)
Collectibles
- Skill Book [Heavy Armor]: 2920, MidYear, V6 [A2/10]
- Chest(s)
- Potions aplenty
- Loose gear
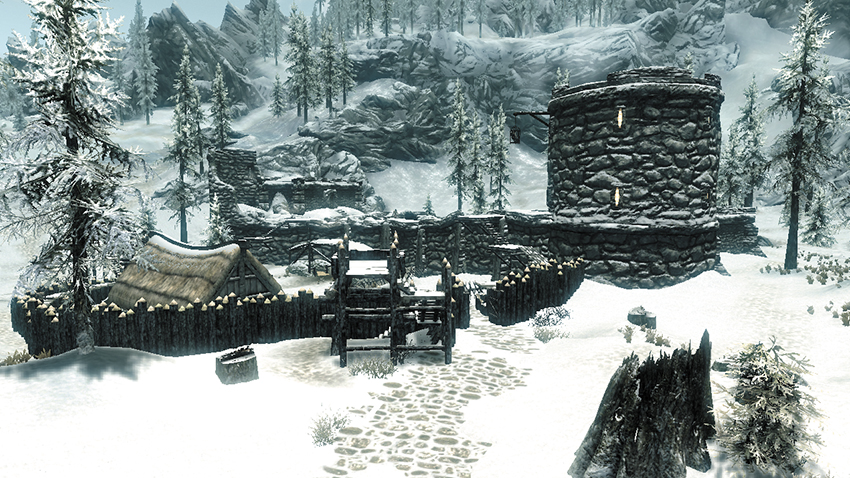
This Imperial fort was constructed around the Pale’s main road as a highly effective checkpoint station and served as a prison for some of the worst criminals in Skyrim. Unfortunately, it’s been overrun by vicious bandits! However, during the Civil War quest line, the bandits are banished from Fort Dunstad, and the place becomes a point of contention between the Stormcloaks and Imperials.
Exterior
Secure the exterior compound and tavern before breaching the keep, and snag a potion hidden inside a bucket atop the southern exterior watchtower.
- Crafting: Blacksmith Forge, Workbench
- Potion
- Loose gear
Stumbling Sabrecat (Tavern)
A pair of bandits lurk in this small tavern’s basement. Clear out the place, then raid the basement chest.
- Chest (Locked: Apprentice)
Fort Dunstad (Interior)
Breach the stronghold’s interior using either the main door or the second-story trapdoor. Inside, wipe out a host of bandits on the first floor, and optionally pull a lever to release a caged Skeever. Three more caged Skeevers are found upstairs, but beware of bear traps on the floor.
- Danger! Bear Traps
- Chest (Locked: Novice)
- Potion
- Loose gear
Commander’s Quarters
This small barracks is loaded with potions of every sort, but a dangerous mage defends the place.
- Crafting: Alchemy Lab
- Potions aplenty
Prison
Enter the prison from the ground floor, and spy a potion that’s mixed in with the booze on the wall. A large oil spill in the following hall gives you an opportunity to set the corridor ablaze with a fire-based attack. Loot a chest and free some caged Skeevers in the next room. If you wish, you can use the Wall Trap there by pulling a nearby lever. The chief of these villainous outlaws lurks upstairs, as does a ladder that leads up to a large chest.
- Danger! Oil Pool Trap, Wall Trap (lever)
- Crafting: Alchemy Lab, Grindstone
- Skill Book [Heavy Armor]: 2920, MidYear, V6 [A2/10]
- Chest (Locked: Apprentice)
- Potions
- Loose gear
[3.11] Shrine of Mehrunes Dagon
Related Quests
- Daedric Quest: Pieces of the Past
Dungeon: Special
- Dremora
Collectibles
- Skill Book [Enchanting]: Catalogue of Armor Enchantments
- Unique Weapon: Mehrunes’ Razor [14/18]
- Area Is Locked (quest required)
- Chests (3)
- Potion
- Loose gear
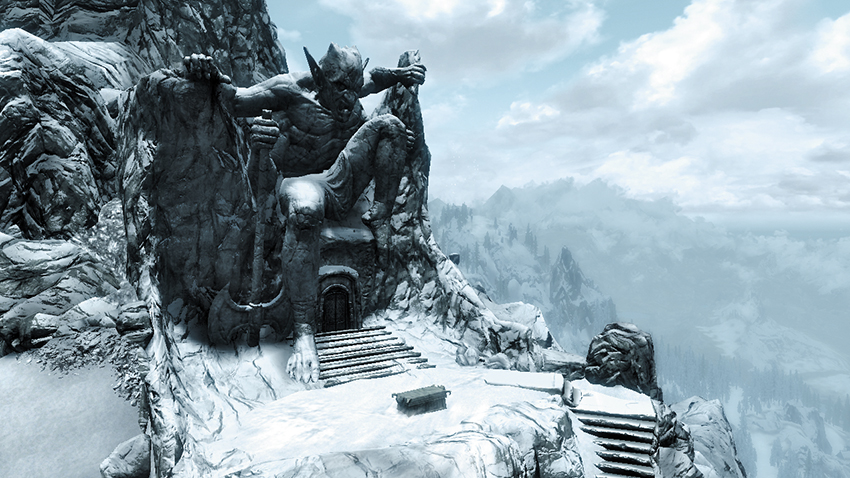
High atop the frigid peaks of the Pale’s western mountains, narrow stone stairs carved into the rock lead up to an ancient shrine. You visit this site during Daedric Quest: Pieces of the Past. Decide whether you wish to slay Silus and wield Mehrunes’ Razor, a unique and powerful weapon, or allow Silus to keep the blade and be paid a large sum of coin in the process. Fight Dremora both inside and in this shrine, providing the Quest has reached its zenith.
[3.12] The Lord Stone
Recommended Level: 6
Dungeon: Special
- Bandit
Special Objects
- Standing Stone: The Lord Stone [3/13]
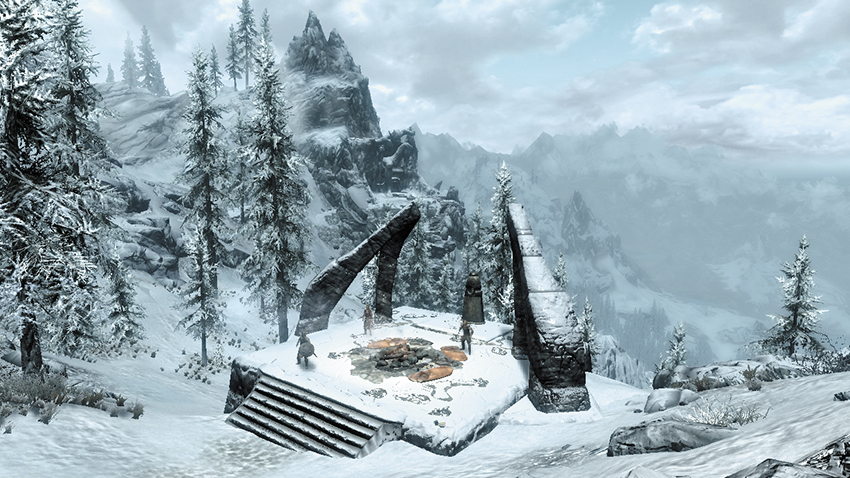
High atop the snowy mountains on the Pale’s western edge, a small crew of bandits guards a tranquil shrine. Lay waste to the ruffians, then inspect the nearby stone to activate it and gain a new sign blessing. Those under the sign of the Lord are more resistant to both physical and magical damage. Note that you may have only one sign blessing at a time, so activating this Standing Stone will override any previous Stones you may have discovered.
[3.13] Volunruud
Related Quests
- Dark Brotherhood Quest: The Silence Has Been Broken
- Dark Brotherhood Quest: Hail Sithis!
- Dungeon Quest: Silenced Tongues
Recommended Level: 14
Dungeon: Draugr Crypt
- Dragon Priest
- Draugr
- Kvenel the Tongue
- Skeleton
Dangers
- Spear Trap (pressure plates)
Collectibles
- Skill Book [One-Handed]: Mace Etiquette
- Unique Item: Jeweled Amulet [23/112]
- Unique Weapon: Ceremonial Sword [15/80]
- Unique Weapon: Ceremonial Axe [16/80]
- Unique Weapon: Eduj [17/80]
- Unique Weapon: Okin [18/80]
Special Objects
- Word Wall: Aura Whisper [1/3]
- Chest(s)
- Potions
- Loose gear
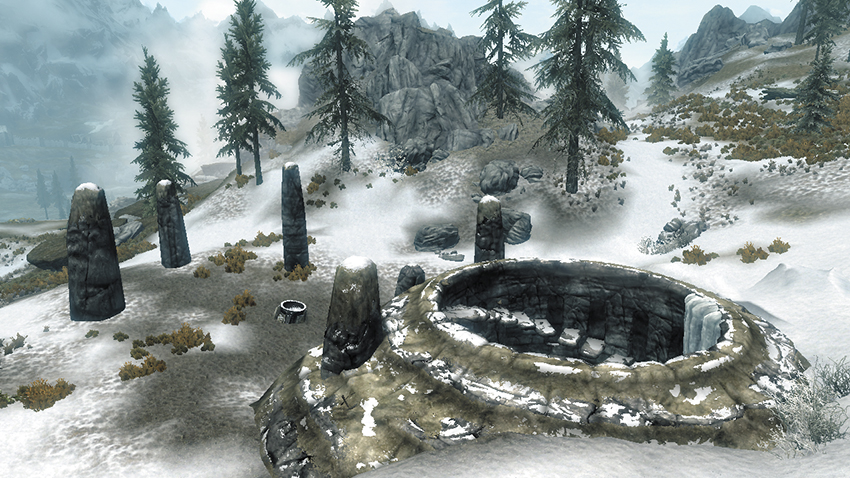
Standing stones mark these sunken ruins, which lie at the far southwest reaches of the Pale. This small Draugr crypt is the personal mausoleum of a legendary Nord named Kvenel the Tongue and houses a pair of legendary weapons that he possessed in life. During Dark Brotherhood Quest: The Silence Has Been Broken, Amaund Motierre will give you a unique amulet here as well.
Exterior
Loot a chest and burial urn outside the ruins, then drop into the recessed area to raid another chest and urn before heading inside.
- Chests (2)
Exit to Skyrim
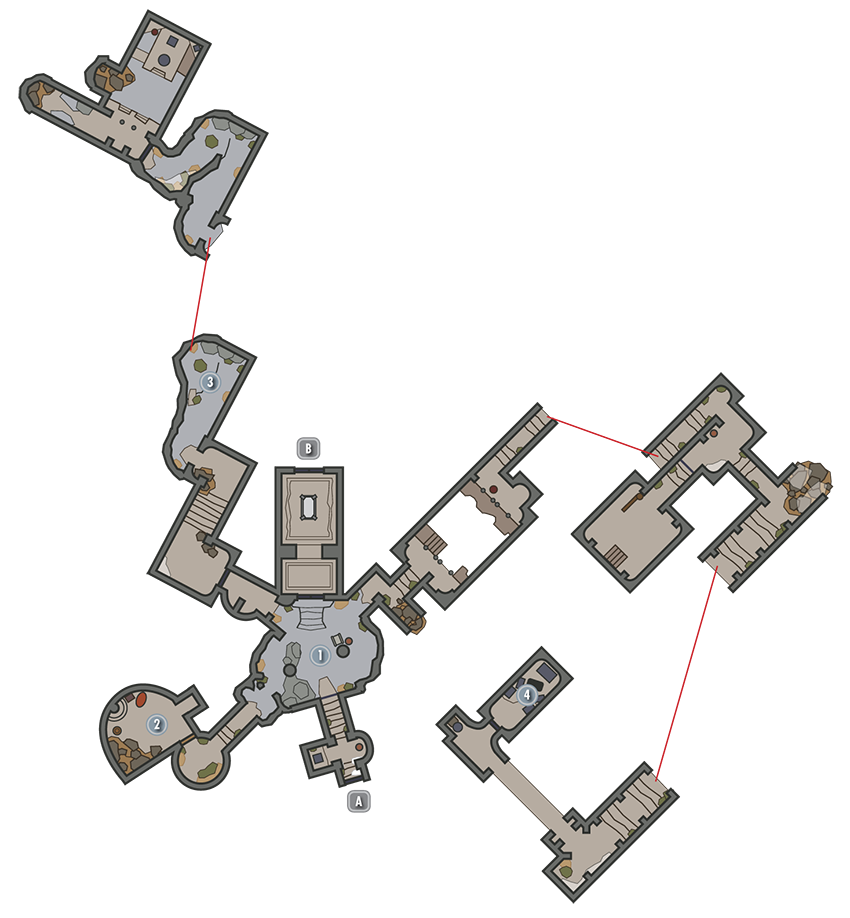
Junction Chamber
Slay an unsuspecting skeleton as you descend into the central cavern, optionally stopping to read the book near the foot of its throne. Three side passage stretch off from this central hub. Scale the north steps to visit an altar room, and inspect the Elder’s Cairn Door, which you cannot open until completing the Side Quest that plays out in these ruins.
Sleeping Nook
Visit this southwest nook first to loot a chest and urn.
- Chest
Weapon Chamber A
Slay a host of vile Draugr on your way to this far chamber, and head upward to where you find one of the two ceremonial weapons you seek in an open tomb. Claim a Skill Book that rests on a throne here as well. As you exit, beware the two mighty Draugr that guard the weapon.
- Skill Book [One-Handed]: Mace Etiquette
- Unique Weapon: Ceremonial Sword [15/80]
Weapon Chamber B
Dispatch many more undead and avoid dangerous traps as you head to this far room, where the second ceremonial weapon you’re after is kept. Bring both weapons back to [2] and scale the north steps once more to at last open the Elder’s Cairn Door.
- Danger! Spear Trap (pressure plate)
- Unique Weapon: Ceremonial Axe [16/80]
Door to Volunruud Elder’s Cairn
Knevel’s Chamber
Battle some Draugr and a powerful undead chieftan called Knevel the Tongue in this cavernous lair. After the melee, search Knevel’s remains to obtain two unique weapons, and follow the sound of chanting to locate an ancient Word Wall. Go north and cross a small footbridge to reach a treasure-filled alcove, then drop down to retrace your steps to the entrance.
- Unique Weapon: Eduj [17/80]
- Unique Weapon: Okin [18/80]
- Word Wall: Aura Whisper [1/3]
- Chests (4)
- Potions
- Loose gear
[3.14] Stonehill Bluff
Related Quests
- Side Quest: Repairing the Phial
Dungeon: Giant Camp
- Giant
Quest Items
- Mammoth Tusk Powder
- Chest(s)
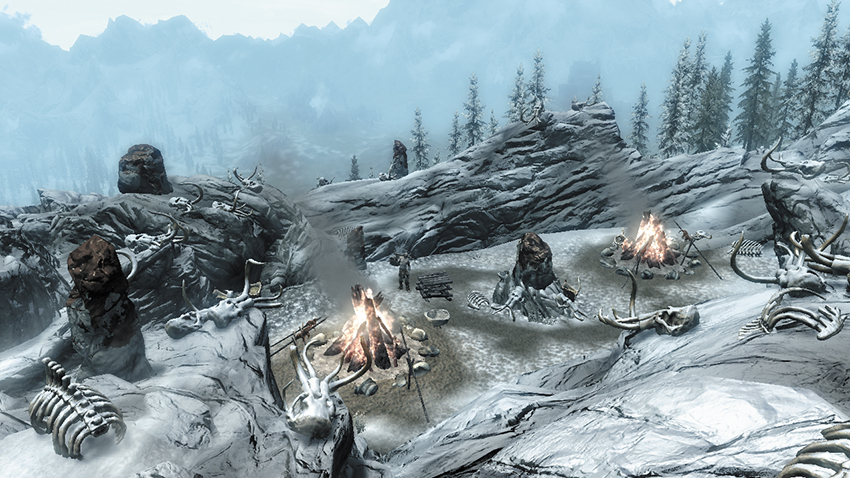
The massive bones of slain mammoths decorate this giant’s campsite, which is nestled amongst the Pale’s southwest mountains. Slay the mighty giant if you dare, then raid his chest and corpse for plenty of treasure. During Side Quest: The White Phial, you’ll find some needed Mammoth Tusk Powder here.
[3.15] Tower of Mzark
Related Quests
- Main Quest: Elder Knowledge
- Main Quest: Alduin’s Bane
- Daedric Quest: Discerning the Transmundane
Recommended Level: 18
Special Objects
Underground Connection: Blackreach [10.02]
Collectibles
- Area Is Locked
- Chest
- Loose gear
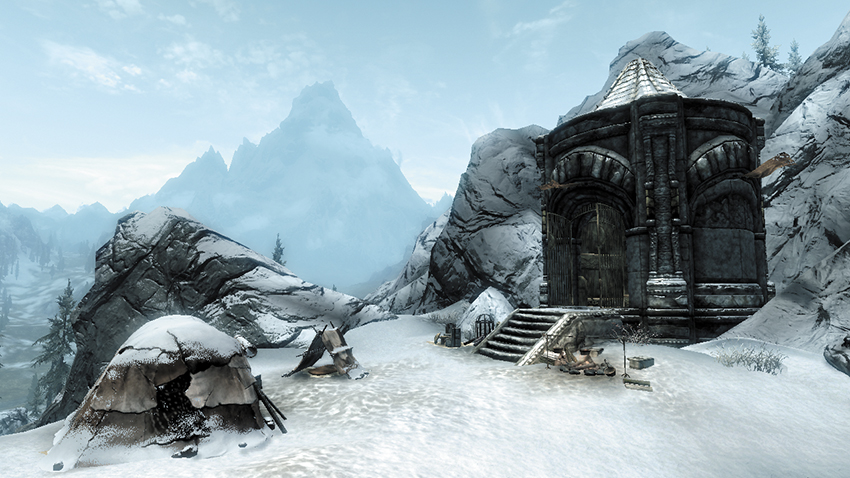
This small tower, located just east of Stonehill Bluff [3.14], doesn’t appear as a Primary Location on the in-game map, but it’s important enough to consider it one. Beyond the tower’s locked gate lies an elevator that ferries you down to the mythical Dwarven city of Blackreach [10.02], but you must pull the lever inside the tower to open its gate, making this a one-way ride until after you’ve used this elevator to exit Blackreach—then the gate remains unlocked.
[3.16] Loreius Farm
Related Quests
- Side Quest: Kyne’s Sacred Trials
- Dark Brotherhood Quest: Delayed Burial
Habitation: Farm
- Curwe
- Vantus Loreius
Collectibles
- Unique Item: Cicero’s Boots [14/112]
- Unique Item: Cicero’s Clothes [15/112]
- Unique Item: Cicero’s Gloves [16/112]
- Unique Item: Cicero’s Hat [17/112]
- Chest
- Potion
- Loose gear
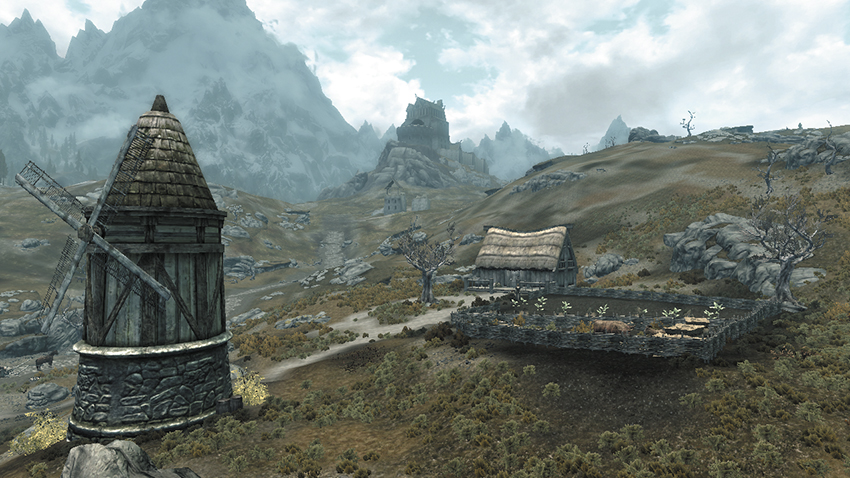
Speak to the owner of this quaint farm to obtain Dark Brotherhood Quest: Delayed Burial, which plays out here. However, you can only obtain this quest prior to joining the Dark Brotherhood. You’ll be rewarded no matter how you choose to resolve this quest, but note that if you choose to turn Cicero over to the guards, or if you’re unable to convince Loreius to fix his cart’s broken wheel, you will find Loreius and his wife murdered when you return here later. Pick a Novice-level lock to break into the farmhouse if you like. You can steal from a chest and swipe a potion from the floor within.
[3.17] Blizzard Rest
Dungeon: Giant Camp
- Giant
- Mammoth
- Chest (Locked: Expert)
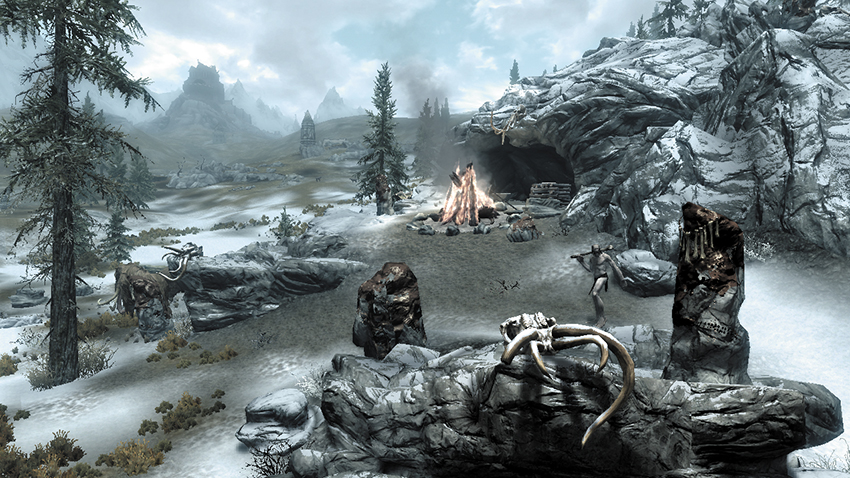
Beware when exploring the Pale’s southern scrubland—an ill-tempered giant has made camp here. Exploit the difficult terrain to outmaneuver the lumbering brute when battling him, but beware his roaming mammoths. If you’re able, unlock the campsite’s chest afterward to obtain valuable plunder.
[3.18] Weynon Stones
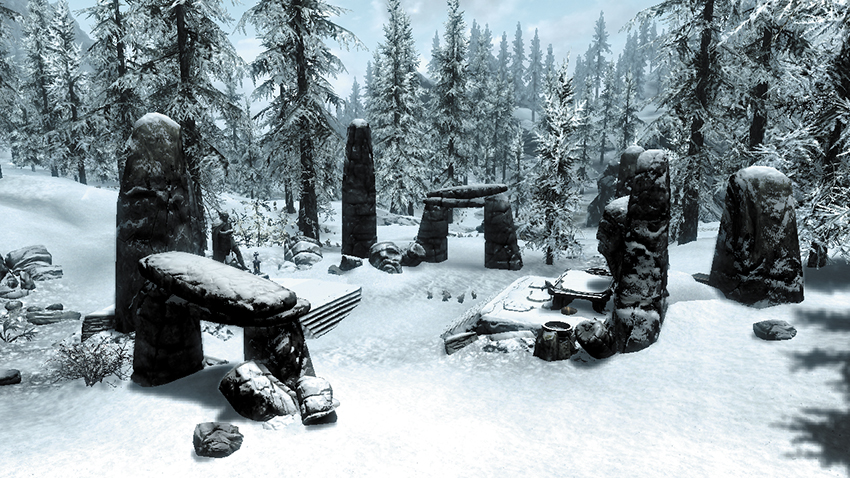
Recommended Level: 18
Dungeon: Special
- Ice Wraith
Special Objects
- Shrine of Talos [2/17]
- Chest (Locked: Novice)
- Loose gear
Near the heart of the Pale, just south of the main road, a small collection of stones stands in the scrubland. The broken gear found here is largely worthless; loot a locked chest that’s tucked away amongst the surrounding stones instead. You may also pray at the shrine at the base of the statue to receive Talos’s blessing.
[3.19] Duskglow Crevice
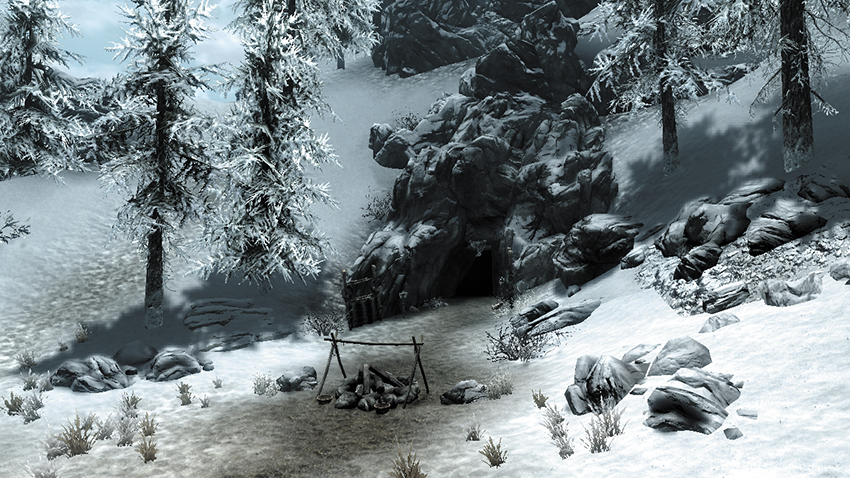
This small cave is home to several vicious entities, but valuable treasure awaits the bold.
Related Quests
- Side Quest: Captured Critters*
- Dungeon Activity
Recommended Level: 18
Dungeon: Falmer Hive
- Animal
- Bandit
- Falmer
Collectibles
- Captured Critter: Moth in a Jar [1/5]
- Skill Book [Lockpicking]: The Wolf Queen, v1
- Skill Book [Pickpocket]: Purloined Shadows [C1/10]
- Chest(s)
- Potions
- Loose gear
Exit to Skyrim
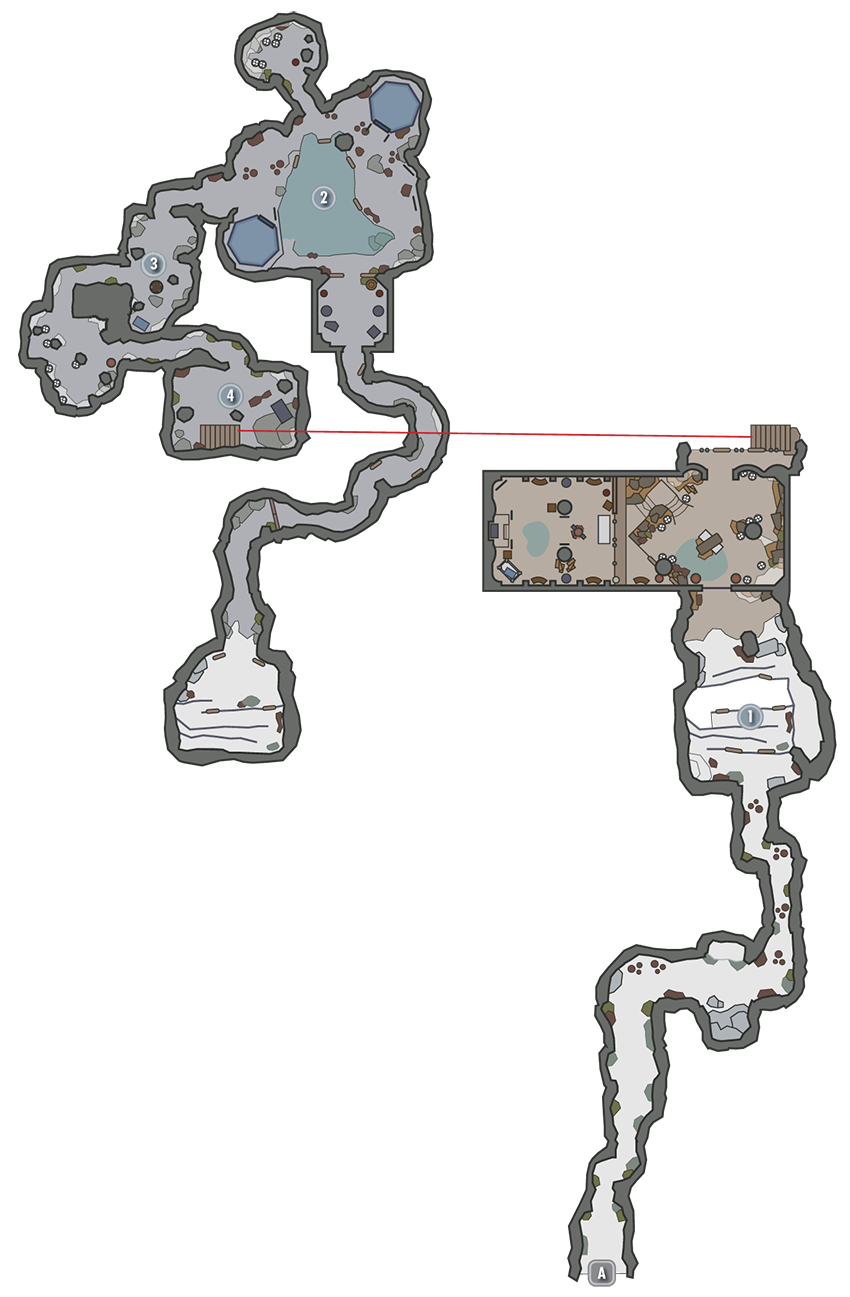
Tall Cavern
Murder a few lowly bandits on your way into this first sizeable cavern, and slay a few Falmer here to secure the area. You can’t reach the far ledge at present; watch your footing as you descend to the lower passage instead.
Falmer Den
The vicious Falmer have erected a few tents here—search one of them to discover an odd-looking chest. Follow the north passage to locate an angry Chaurus, and loot the body of its latest victim.
- Chest
Firepit Cave
Don’t miss the chest in this small cavern—it’s hidden in the shadows.
- Chest
Chaurus Chamber
Butcher another Chaurus on your way to this large chamber, then scale some stairs and squash yet another of the giant bugs. Proceed westward to locate a large chest and several valuable potions, along with a pair of Skill Books and a special Moth in a Jar that pertains to Side Quest: Captured Critters. Pull the chain on the wall in the corner near the potion shelf to open the downstairs portcullis, granting passage back to the cave’s entrance.
- Captured Critter: Moth in a Jar [1/5]
- Skill Book [Lockpicking]: The Wolf Queen, v1
- Skill Book [Pickpocket]: Purloined Shadows [C1/10]
- Chest
- Potions
- Loose gear
[3.20] Silverdrift Lair
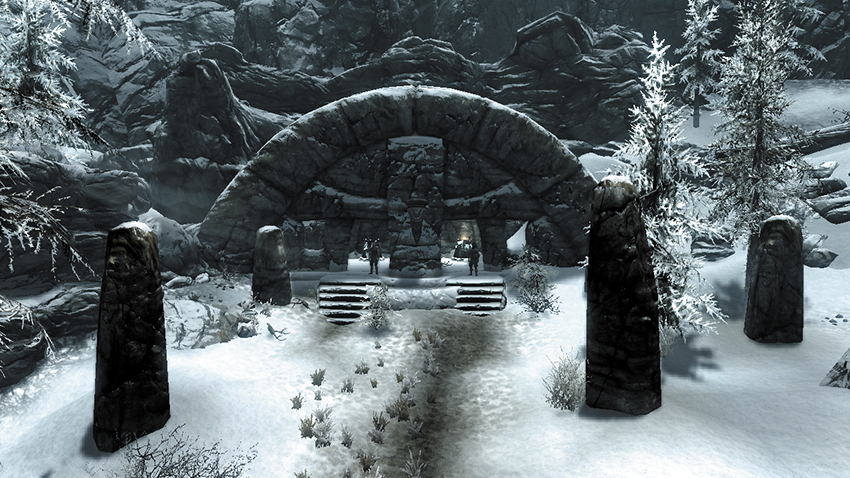
These Nordic ruins, which lie along the southwest base of the Pale’s eastern mountains, have become home to ruthless bandits. Dispatch a few exterior guards before investigating the ruins’ interior.
Recommended Level: 6
Dungeon: Draugr Crypt
- Bandit
- Draugr
Dangers
- Battering Ram Trap (wall chain)
- Oil Lamp Trap
- Oil Pool Trap
- Swinging Spikes (pressure plates)
- Spear Trap (pedestal pressure plate)
Collectibles
- Skill Book [Pickpocket]: Thief
- Skill Book [Two-Handed]: Words and Philosophy
Special Objects
- Word Wall: Disarm [2/3]
- Chest(s)
- Potions aplenty
- Loose gear
Exit to Skyrim
Entry Chamber
Loot an urn and the corpses of a few bandits in this first chamber before delving down into the Draugr-filled passages ahead. Don’t miss the coin purse and piece of gear that’s tucked away behind some rubble in the passage as you make your way to [2].
Central Chamber
Collect a number of potions from a table and a shelf as you enter this large, central chamber. Find a Skill Book on a stone table at the room’s east end before heading downstairs to loot a couple of chests and turn a pair of handles in the oily western nook to open a passage leading toward [3].
- Danger! Oil Lamp Trap, Oil Pool Trap, Swinging Spikes (pressure plate)
- Skill Book [Two-Handed]: Words and Philosophy
- Chest
- Chest (Locked: Apprentice)
- Potions aplenty
Burial Chambers
Slay a few Draugr in these passages, then open a locked chest to claim plenty of precious gear. Turn the handles on the three stone pillars that follow to open small chambers filled with treasure and enemies. Pass through the south chamber to return to [2].
- Chest
- Chest (Locked: Master)
- Potions
- Loose gear
Portcullis Passage
Explore the elevated walkways at [2] to discover a handle on the central stone pillar. This opens the east portcullis; jump the dangerous pressure plate at the walkway’s end and beware the powerful Draugr ahead. When taking the valuable item from the southern pedestal, stand on the nearby rockshelf to avoid being impaled by floor spikes. Find a Skill Book lying on a stone mound in a corner near a brazier, bedroll, and chest that’s resting on a short shelf. Pull a wall chain to the east to open the next portcullis—but keep back to avoid the dangerous battering ram that unexpectedly swings through.
- Danger! Battering Ram Trap (wall chain), Swinging Spikes (pressure plate), Spear Trap (pedestal pressure plate)
- Skill Book [Pickpocket]: Thief
- Chests (2)
- Potions
- Loose gear
Word Wall Chamber
Navigate a series of passages to reach this large chamber, where two mighty Draugr guard an ancient Word Wall. Slay the fiends and then approach the Word Wall to learn a new Word of Power. Take the west door back to the ruins’ entrance, pillaging a large chest and turning the nearby handle on the wall to open the exit route.
- Word Wall: Disarm [2/3]
- Chest
- Loose gear
[3.21] Shrouded Grove
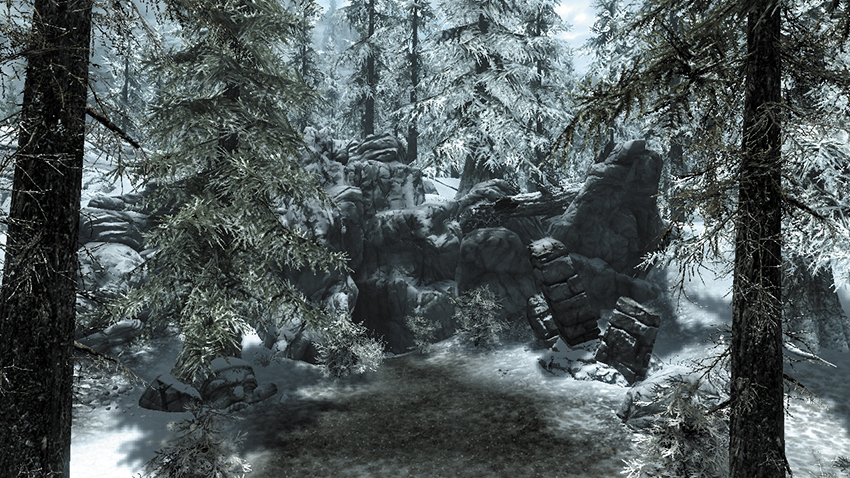
Recommended Level: 8
Dungeon: Spriggan Grove
- Animal
- Spriggan
Collectibles
- Skill Book [Light Armor]: Ice and Chitin
- Chest(s)
Battle a Spriggan and its animal companion at this grove before entering the small nearby cave. Slay another Spriggan and dangerous animal inside the cave, then open the half-buried chest to claim plenty of loot.
[3.22] Korvanjund
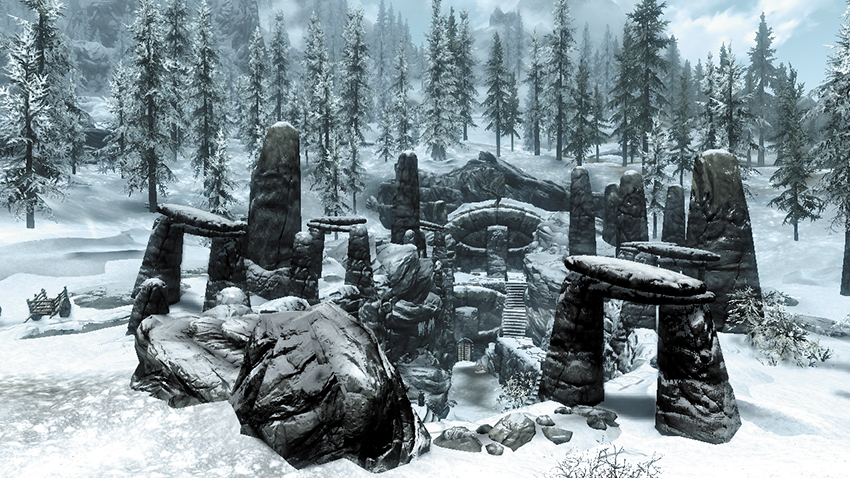
Related Quests
- Civil War Quest: The Jagged Crown
Recommended Level: 12
Dungeon: Draugr Crypt
- Bandit (Prequest)
- Soldier (Imperial or Stormcloak depending on your allegiance)
- Draugr
Dangers
- Oil Lamp Traps
- Oil Pool Traps
- Swinging Blade Trap
- Trapped Chest
Puzzles
- Nordic Puzzle Door (Ebony Claw)
Quest Items
- Jagged Crown
Collectibles
- Dragon Claw: Ebony Claw [3/10]
- Skill Book [Light Armor]: Jornibret’s Last Dance
- Unique Item: Jagged Crown [24/112]
Special Objects
- Word Wall: Slow Time [2/3]
- Chest(s)
- Potions
- Loose gear
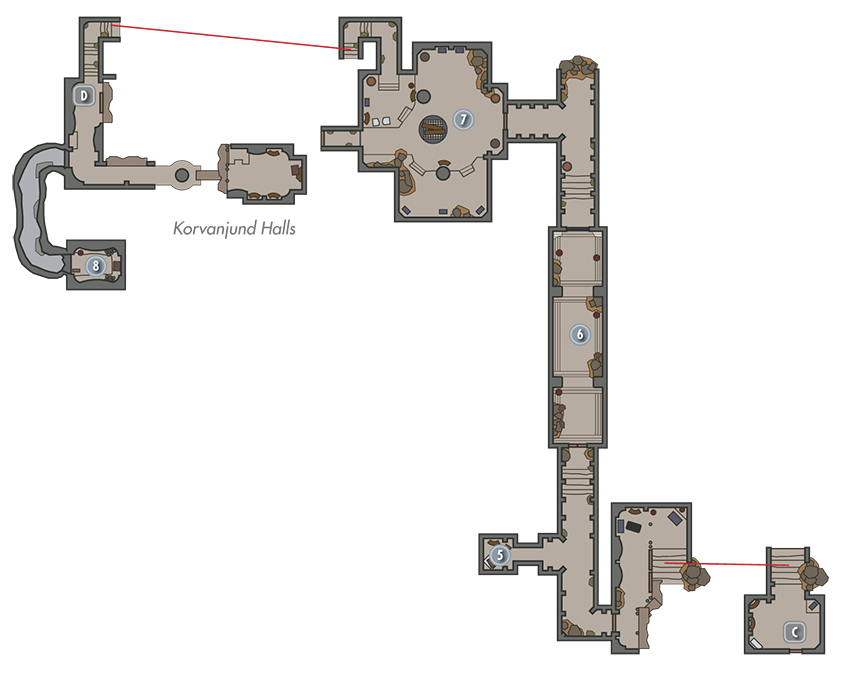
These unusual, crevicelike ruins are found north of the Pale’s southern mountains. You can’t do much here until you visit Korvanjund as a part of Civil War Quest: The Jagged Crown. A rockslide seals off much of the ruins until then.
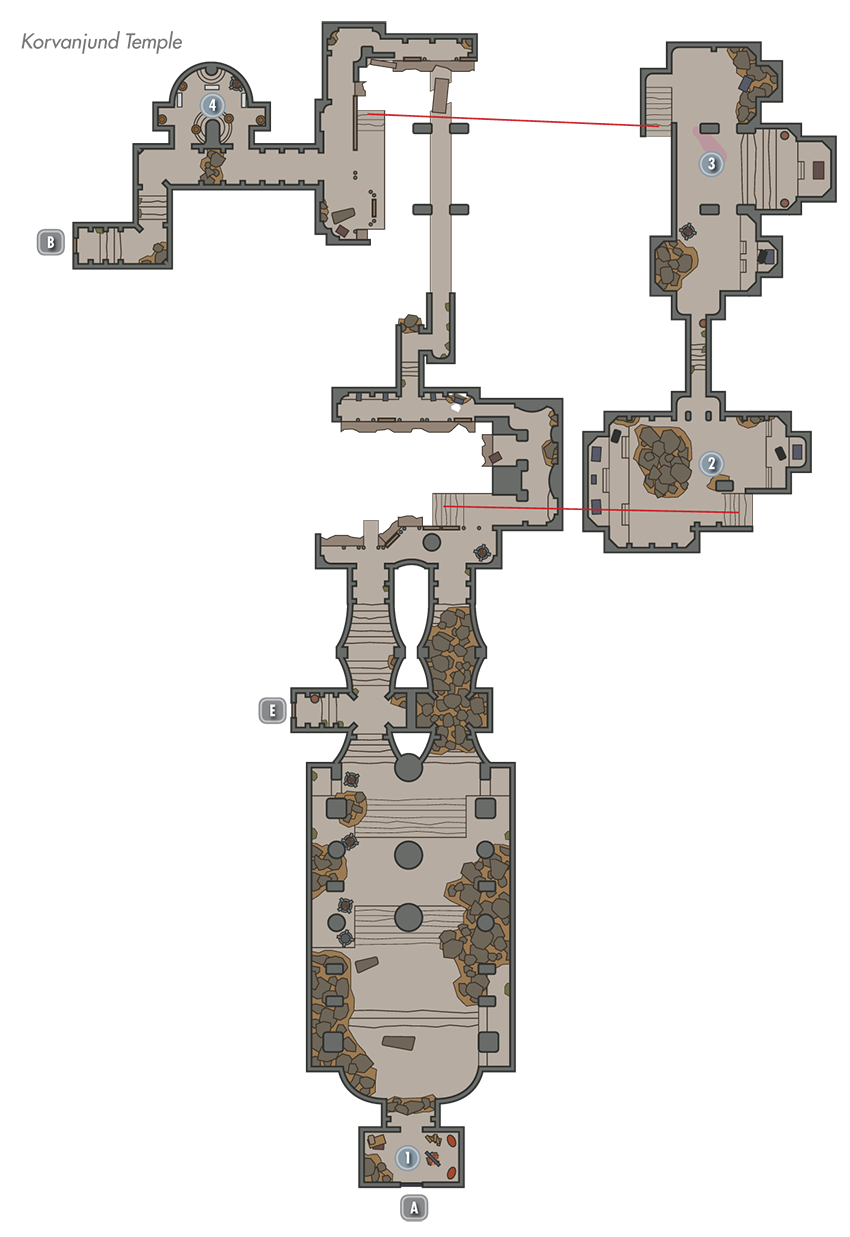
Exterior
Defeat a few dangerous bandits to secure the crevicelike exterior of these ancient ruins. (During Civil War Quest: The Jagged Crown, the bandits will already be slain and replaced with either Imperial or Stormcloak soldiers, depending on your allegiance.) If possible, unlock a Master-level gate at the far basin to access a chest and a few coin purses. Head through the upper door to enter the Korvanjund Temple.
- Chest
Exit to Skyrim
Entry Chamber
Loot a chest in this first small chamber, then cross the huge hall that follows.
- Chest
- Loose gear
Open-Air Chamber
The ceiling has collapsed here, allowing fresh air and light to pour in. Raid the chest on the east balcony and loot a number of urns found at the chamber’s bottom, then take either the upper or lower north passage to reach [3] (taking the upper passage gives you a tactical advantage).
- Chest (Locked: Novice)
- Potion
- Loose gear
Oil Lamp Chamber
Knock down this chamber’s plentiful array of hanging lamps to ignite various pools of oil on the ground and burn up the enemy soldiers that assault you here. Though the large east chest is empty, a Skill Book sits not far away.
- Danger! Oil Lamp Traps, Oil Pool Traps
- Skill Book [Light Armor]: Jornibret’s Last Dance
Urn Room
Loot an assortment of urns on your way through this small chamber as you make for the Korvanjund Halls.
Door to Korvanjund Halls
Door to Korvanjund Temple
Trapped Treasure Nook A
Sprint straight past the swinging blades in the passage that leads to this small treasure room—you can just make it through unscathed. Pull a lever in the room to deactivate the blades and make your exit less stressful.
- Danger! Swinging Blade Trap
- Chest
Puzzle Door Passage
Collect the Ebony Claw from the ground near this passage’s peculiar door. Inspect the Ebony Claw in your inventory to notice three symbols running down its palm. Rotate the door’s three rings to mimic the same sequence of symbols (Wolf, Moth, Dragon), then inspect the central keyhole to insert the Ebony Claw and open the way forward.
- Dragon Claw: Ebony Claw [3/10]
Great Hall
Take the north passage to go upstairs, then cross this large chamber’s elevated walkway to locate a chest. Pull the nearby wall handle to open the portcullis, gaining access to the Korvanjund Crypts—but beware that doing so causes a number of Draugr to burst out from the surrounding sarcophagi.
Trapped Treasure Nook B
Before rushing off to the crypts, take the upstairs west passage to locate a dagger sitting on a pedestal. If you take the dagger off the pedestal, a secret passage will open, revealing a tunnel to a room containing a large chest. Notice the holes in the floor and ensure you’re not standing near one when opening the chest—spikes shoot up when you lift its lid. (You may also attempt to disable the chest’s trigger hinge.)
- Danger! Trapped Chest
- Potion
Door to Korvanjund Crypts
Korvanjund Crypts
Slay the mighty Draugr that sleeps upon this great chamber’s central throne, then loot the locked chest behind the throne and approach the far Word Wall to gain a new Word of Power. You’re all done here. Take the southeast passage to quickly find your way back to the temple’s entrance.
- Word Wall: Slow Time [2/3]
- Chest (Locked: Apprentice)
- Potion
Door to Korvanjund Crypts
[3.23] Tumble Arch Pass
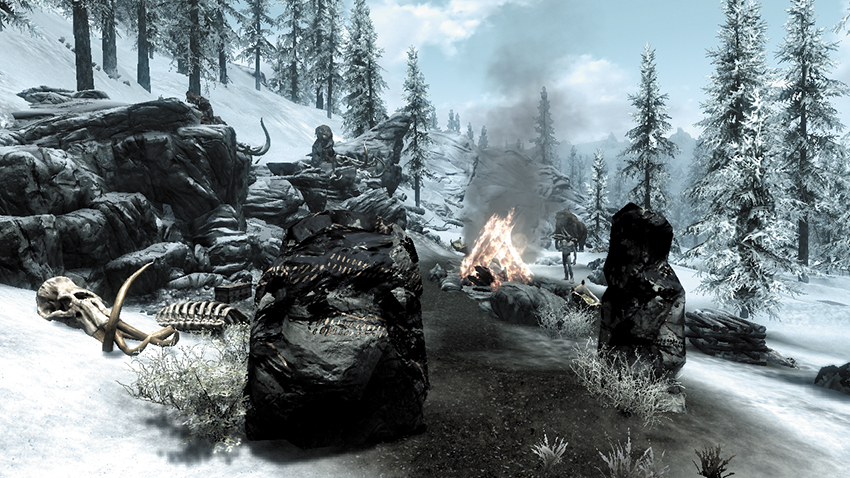
Dungeon: Giant Camp
- Giant
- Mammoth
Chest
A massive bonfire blazes away at the northern base of the Pale’s southern mountains—a sure sign of a giant’s campsite. Muster your courage and defeat the mighty brute, firing down from the upper rock ledge to present a difficult target. Loot the giant’s corpse afterward, along with the nearby chest.
[3.24] Shearpoint
Related Quests
- Side Quest: Masks of the Dragon Priests*
Dungeon: Dragon Lair
- Dragon (after Main Quest: Dragon Rising)
- Krosis
Collectibles
- Dragon Priest Mask: Krosis [6/10]
Special Objects
- Word Wall: Throw Voice [1/1]
- Chest (Locked: Master)
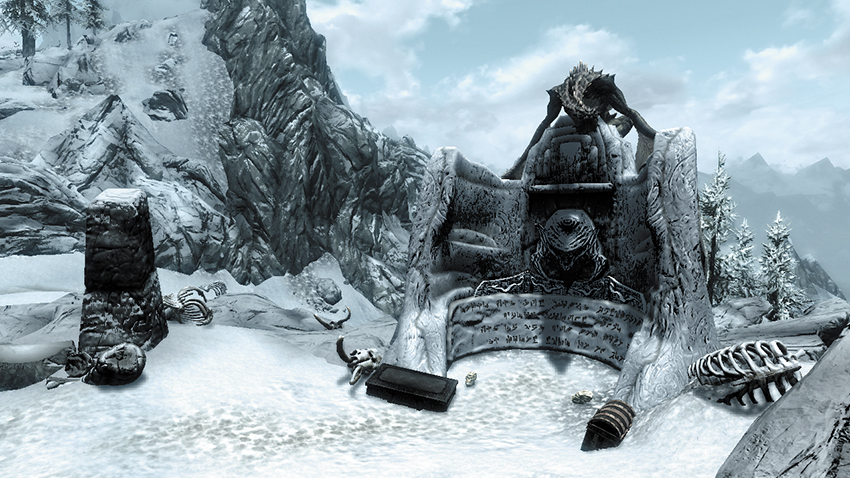
Located high atop the Pale’s southern mountains, Shearpoint is the most formidable of all the Dragon Lairs. This ancient Word Wall is guarded by a dragon and by a terrifying Dragon Priest as well. This is Krosis, who holds one of the eight masks needed to unlock the Konahrik Mask at Labyrinthian [2.23].
[3.25] Nightgate Inn
Related Quests
- Civil War Quest: Reunification of Skyrim
- Civil War Quest: A False Front
- Dark Brotherhood Quest: Recipe for Disaster
- Miscellaneous Objective: Innkeeper Rumors
Habitation: Inn
- Balagog gro-Nolob
- Fultheim
- Hadring (Innkeeper)
Services
- Trader (Innkeeper): Hadring [5/15]
- Food, Room and Board
- Quest Rumors
Quest Items
- Writ of Passage
Collectibles
- Skill Book [Sneak]: The Legend of Krately House [B1/10]
- Chests (2)
- Loose gear
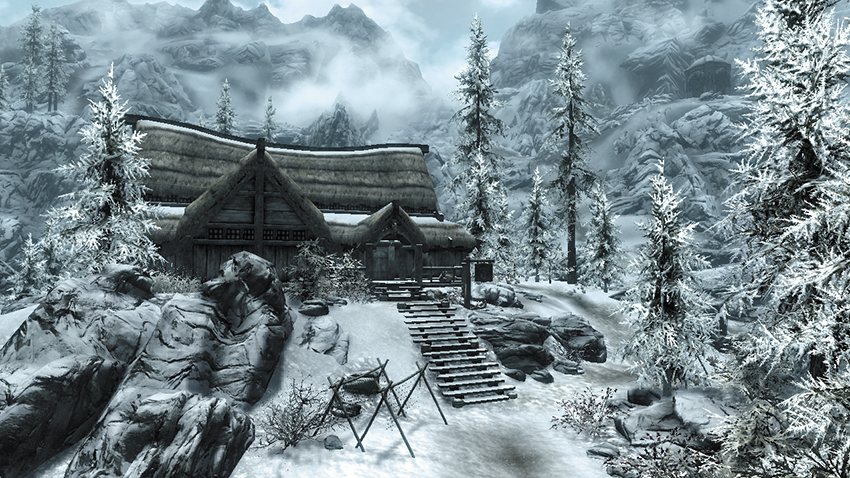
This old tavern is one of the few places where one can find a warm bed and frothy pint in the southern end of the Pale. The unscrupulous can steal from a few chests here if they wish. One particular Dark Brotherhood Quest leads you to this humble establishment, where you must kill an Orc named Balagog gro-Nolob and steal the important Writ of Passage that he possesses.
[3.26] Blackreach Elevator (Alftand)
Special Objects
- Underground Connection: Blackreach [10.02]
Collectibles
Area Is Locked
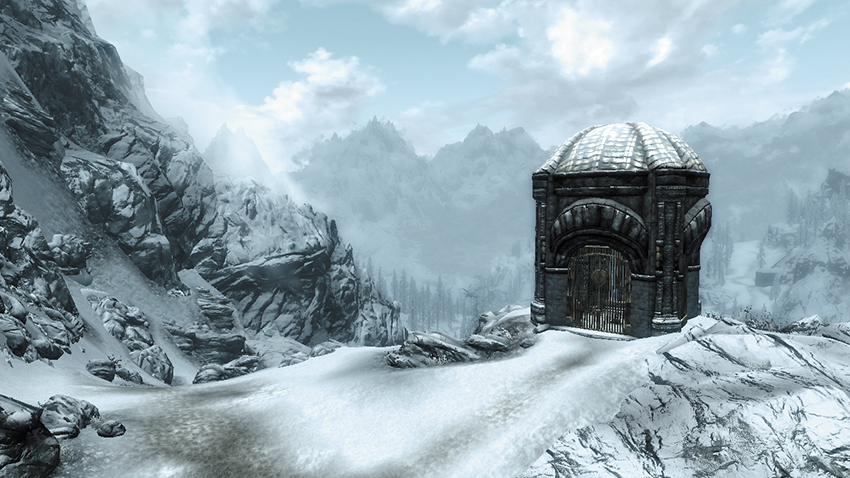
This small tower, located high up on the hills north of Nightgate Inn [3.25], doesn’t appear as a Primary Location on the in-game map, but it’s important enough to be considered one. Beyond the tower’s locked gate lies an elevator that transports you down to the legendary dwarven city of Blackreach [10.02], but you must pull the lever inside the tower to open its gate. This makes this a one-way trip until after you’ve used this elevator to exit Blackreach (the gate remains unlocked afterward).
[3.27] Forsaken Cave
Related Quests
- Side Quest: The White Phial
Recommended Level: 6
Dungeon: Draugr Crypt
- Curalmil
- Draugr
- Frost Troll
Crafting
- Alchemy Lab
Dangers
- Battering Ram Trap (pressure plate)
- Dart Trap (pressure plate)
- Rising Floor Trap
Quest Items
- Cracked White Phial
Collectibles
- Skill Book [Alchemy]: A Game at Dinner
- Skill Book [Block]: The Mirror
Special Objects
- Word Wall: Marked for Death [1/3]
- Chest(s)
- Potions
- Loose gear
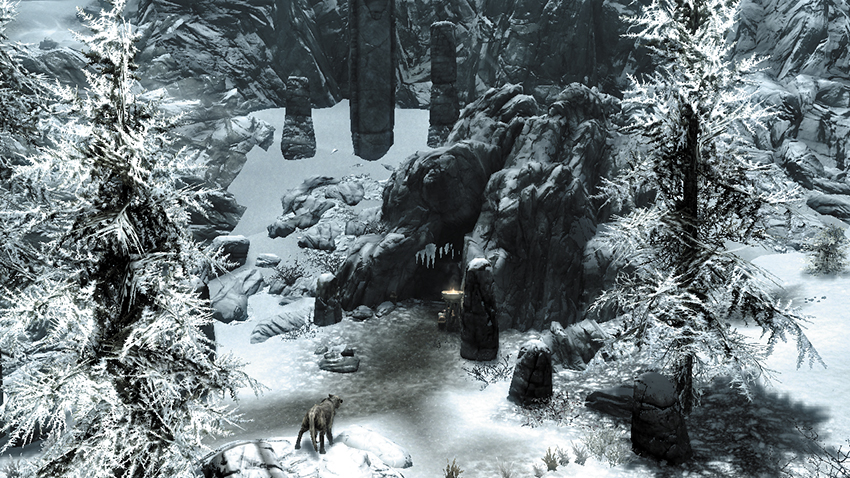
Just off the main road at the Pale’s southeast end, a ferocious Frost Troll stomps about near the entrance to a huge, frozen cave.
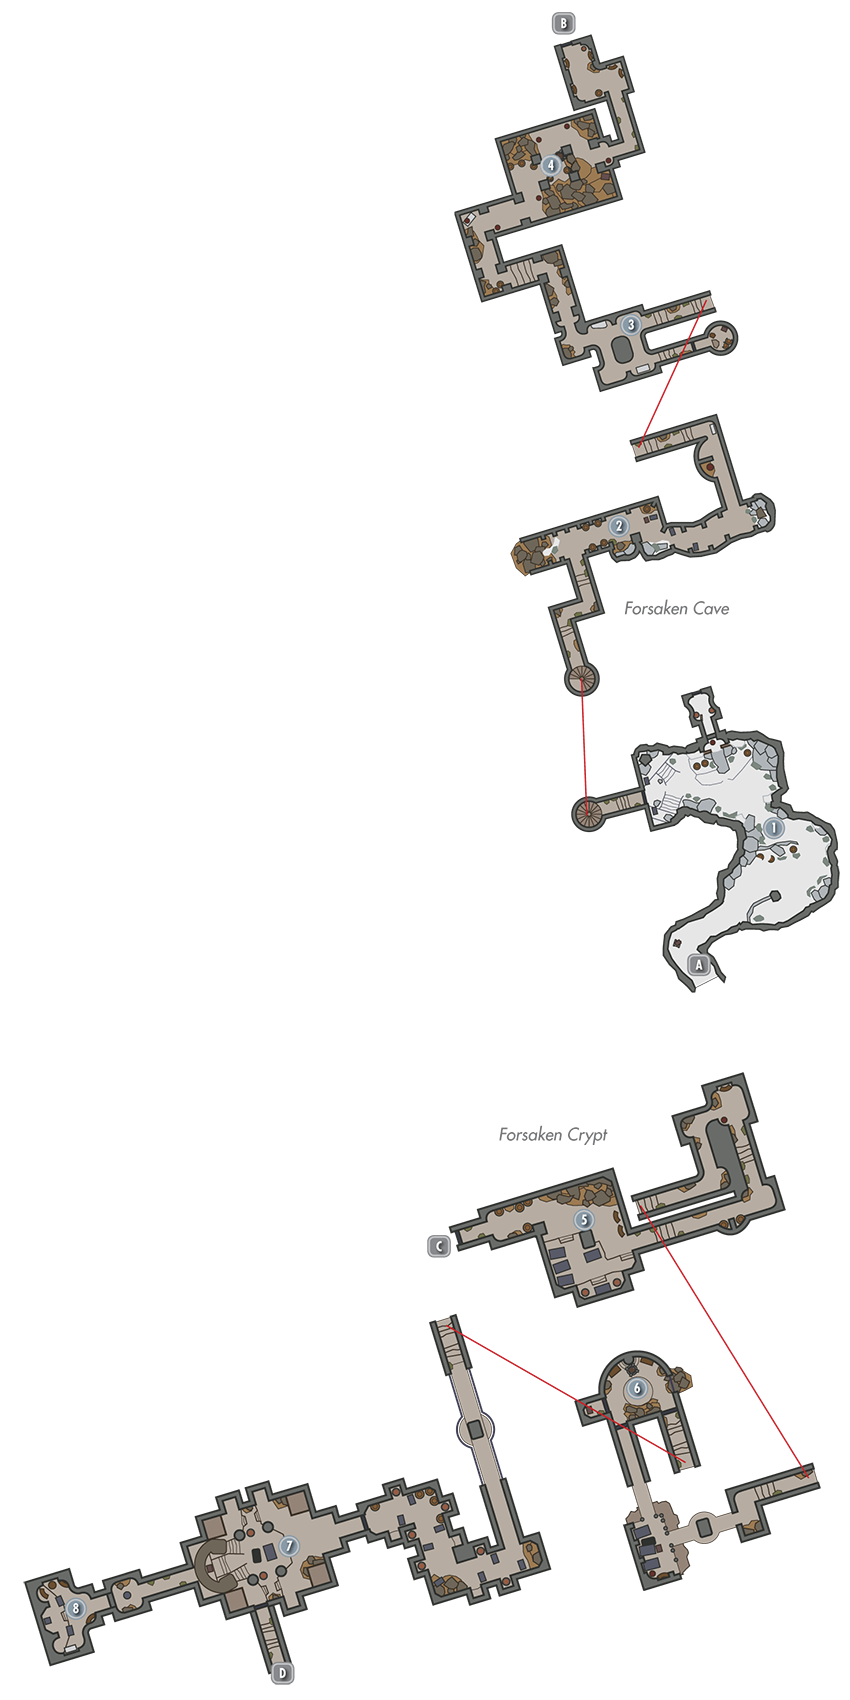
Exit to Skyrim
Troll Cavern
Loot a satchel and chest as you enter this first frosty cavern, which is home to a pair of Frost Trolls and numerous gold-holding urns. Open an iron door and proceed to [2].
- Chest
- Satchel
- Loose gear
Trapped Passage
Loot even more urns and skirt a pressure plate in this hall to avoid being perforated by arrows. Open a chest and beware the host of Draugr that lurk just ahead.
- Danger! Dart Trap (pressure plate)
- Chest
Burial Halls
Loot a number of burial urns in these passages, which are lined with the resting dead. Spy a Skill Book lying on a stone table, and unlock an Adept-level door to access a small room with a chest.
- Skill Book [Block]: The Mirror
- Chest
- Loose gear
Collapsing Chamber
Slay more Draugr in this chamber, and don’t miss the chest that’s hidden in the shadows among the southeast rubble. Jump a pressure plate in the passage that follows to avoid a trap, and proceed into the crypts.
- Danger! Battering Ram Trap (pressure plate)
- Chest
- Potions
- Loose gear
Door to Forsaken Crypt
Door to Forsaken Cave
Junction Chamber
Loot a few urns on your way into this tall, multitiered chamber. Slaughter all Draugr and navigate the east passages to reach this chamber’s second level. Open a chest up here and then proceed north to [6].
- Chest
- Potions
- Loose gear
Trapped Floor Room
Beware the center of the floor in this small chamber—stepping on it causes it to rise, slamming you into lethal ceiling spikes. Unlock the Expert-level west door to access a treasure nook, then proceed through the other door to cut back through [5] and eventually arrive at [7].
- Danger! Rising Floor
- Chest
Curalmil’s Chamber
Cut down more undead and loot more urns on your way to this chamber, where a mighty Draugr warrior awaits. Sprint past the swinging blades and slay Curalmil, then scale the nearby steps to reach a large chest and Word Wall.
- Word Wall: Marked for Death [1/3]
- Chest
Phial Chamber
Make your way to this quiet chamber, which opens after you use Nurelion’s Mixture. Collect the Cracked White Phial from the pedestal, along with a Skill Book. Return to [7] and take the exit passage back to the cave’s entrance.
- Crafting: Alchemy Lab
- Cracked White Phial
- Skill Book [Alchemy]: A Game at Dinner
- Apothecary’s Satchel
- Potions
Door to Forsaken Cave
Door to Forsaken Crypt
[3.28] Yorgrim Overlook
Recommended Level: 5
Dungeon: Special
- Skeleton
Collectibles
- Chest(s)
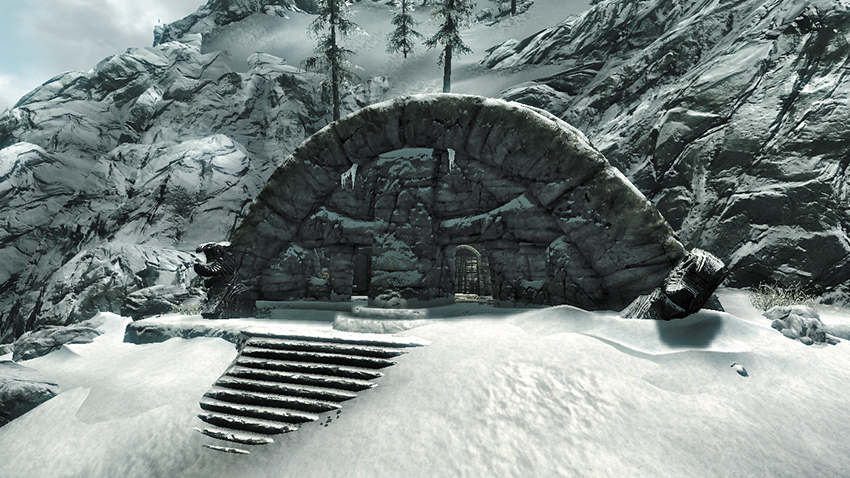
At the Pale’s southeast end, a shallow cave has been carved into the mountains that form the border to Winterhold. Slay a few skeletons up here, then see if you can unlock an Expert-level gate and claim the contents of a large chest.
[3.29] Bronze Water Cave
Related Quests
- Thieves Guild Quest: Blindsighted
- Dungeon Activity
Dungeon: Animal Den
- Animal
Underground Connection: Irkngthand [3.31]
Collectibles
- Unique Weapon: Nightingale Bow [19/80]
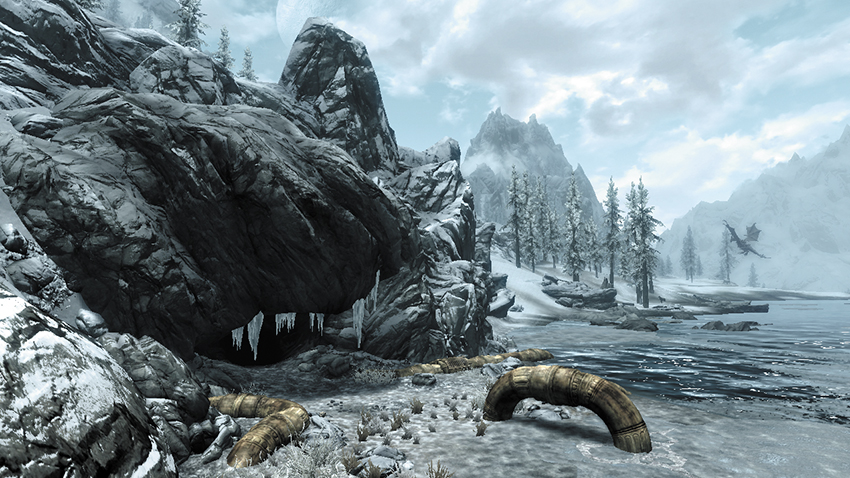
Along the Pale’s southeast border, several thick metal pipes protrude from the ground near a widemouthed cave. Enter the cave with caution—a pair of ferocious beasts lurk within. You also visit this cave during a frantic escape from Irkngthand [3.31] at the climax of Thieves Guild Quest: Blindsighted. When you make good your escape, Karliah rewards your success with a unique bow.
[3.30] Pale Stormcloak Camp
Related Quests
- Civil War Quest (when active, depending on who you side with)
Habitation: Military: Stormcloak Camp
- Stormcloak Quartermaster (Blacksmith)
- Stormcloak Soldier
Services
- Trader (Blacksmith): Stormcloak Quartermaster [8/33]
- Weapons, Apparel, Misc
Crafting
- Anvil
- Grindstone
- Workbench
Special Objects
- Civil War: Map of Skyrim
- Chests (2)
- Loose gear
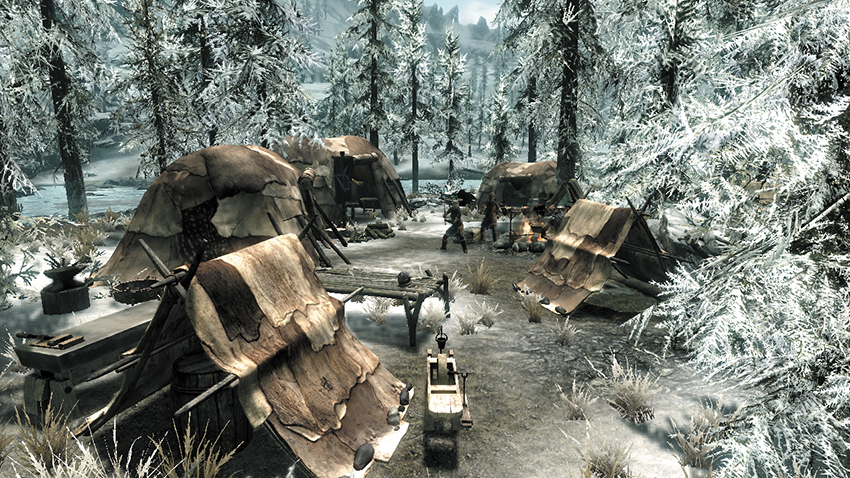
The Stormcloaks have set up a samll encampment here, but this site may appear only during the Civil War quest line. Feel free to trade with the quartermaster or improve your weapons at his crafting workstations. Examine the map in the largest tent to potentially update your own.
[3.31] Irkngthand
Recommended Level: 12
Related Quests
- Thieves Guild Quest: Blindsighted
- Thieves Guild Additional Quest: Larceny Targets*
- Dungeon Activity
Dungeon: Dwarven City
- Animal
- Bandit
- Dwarven Sphere
- Dwarven Spider
- Dwarven Centurion
- Falmer
- Mercer Frey
Crafting
- Alchemy Lab
- Tanning Rack
Dangers
- Bear Traps
- Bone Alarm Trap
- Dwarven Fire Pillar Trap (proximity)
- Dwarven Thresher (proximity)
- Dwarven Thresher (lever)
- Flail Trap (door)
- Flamethrower Trap (proximity)
- Flamethrower Trap (pressure plates)
- Spear Trap (pressure plate)
Underground Connection: Bronze Water Cave [3.29]
Quest Items
- Skeleton Key
- Right Eye of the Falmer
Collectibles
- Larceny Target: Left Eye of the Falmer [2/7]
- Unique Item: Skeleton Key [25/112]
- Area Is Locked (quest required)
- Chest(s)
- Potions aplenty
- Loose gear
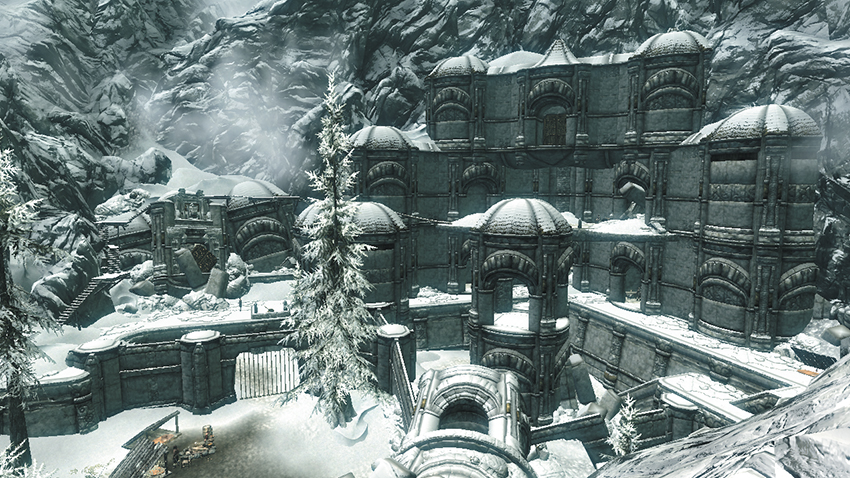
This massive dwarven city remains largely sealed off until you venture here as part of Thieves Guild Quest: Blindsighted. Only the exterior ruins can be explored until then. Use stealth whenever possible here.
Exterior
Bandits have established a campsite at Irkngthand’s exterior ruins. The front gate is sealed, so go west, pillaging a chest and swiping some potions from a wooden table. Go left and scale the stone steps, skirting bear traps and swiping some potions from a lean-to found at the top. Find a chest tucked away beneath another wooden table near some bedrolls, then avoid a pressure plate trap in the tunnel-like passage that follows. Pull the lever beyond the tunnel to open Irkngthand’s front gate. Scale a series of narrow wooden stairs afterward to locate the bandits’ leader. Loot two more chests that the chief guards. Scale the following ramps to reach the high door that leads to the Irkngthand Arcanex—these last few ramps appear only when the “Blindsighted” quest is active.
- Danger! Bear Traps, Spear Trap (pressure plate)
- Chests (2)
- Chest (Locked: Apprentice)
- Chest (Locked: Adept)
- Potions
- Loose gear
Exit to Skyrim
Entry Chamber
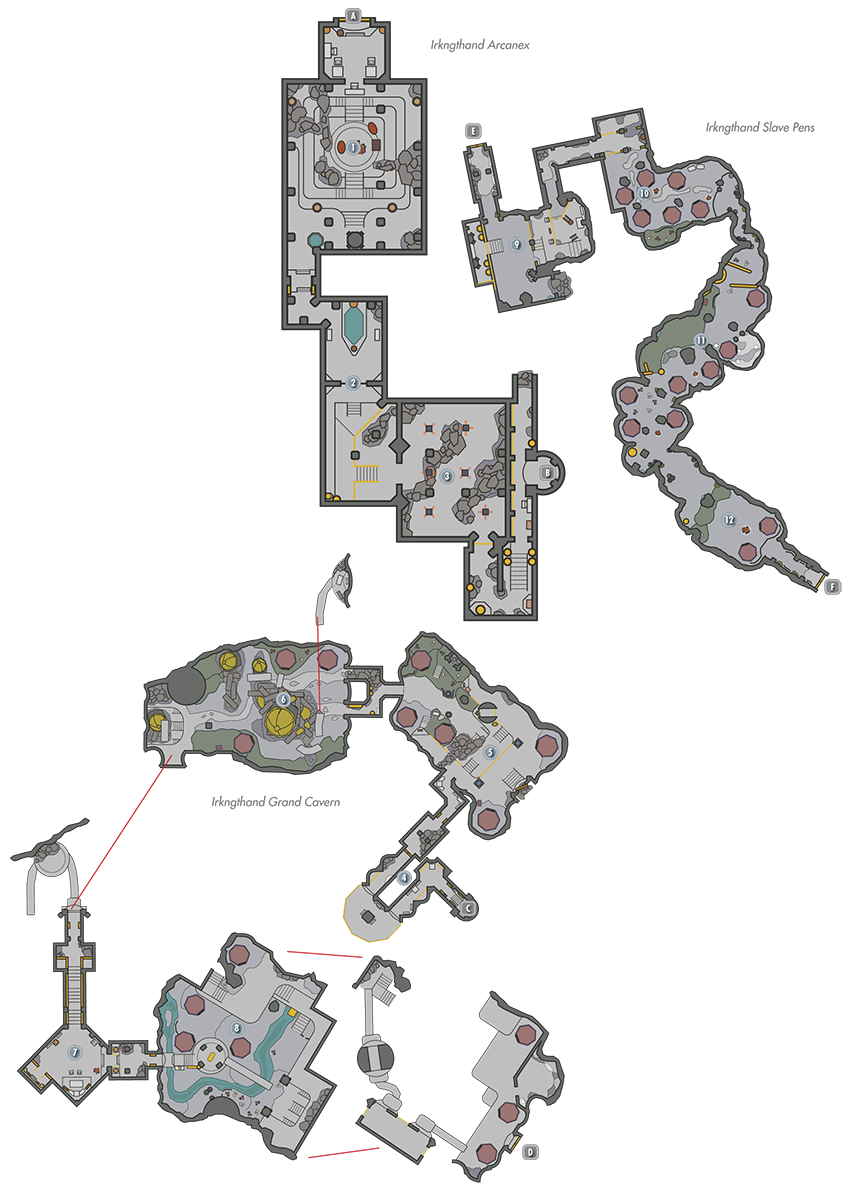
Bandits lay slain near a firepit in this first chamber—likely the work of your quarry, Mercer Frey. Loot the large nearby chest if you’re able to pick its tricky lock—an even more challenging dwarven chest sits nearby, tucked away near the middle of the west wall. Beware of a patrolling Dwarven Sphere as you make your way to [2].
- Chest (Locked: Expert)
- Chest (Locked: Master)
Pipeworks Passage
Sneak through this passage to reduce the odds of alerting reinforcement sentries. Find two small dwarven chests at the far south end of the passage—one on the lip of the outside wall, the other near the foot of the nearby stairs.
- Chest
Gate Chamber
Keep as close to the outside wall as possible to avoid this wide chamber’s spinning Flame Pillars. Sneak or you’ll alert Dwarven Spiders, which stand too short to be harmed by the traps. You can just barely circle past the final spout without being seared. Open the gate beyond and navigate a passage that leads up to a high east balcony, raiding a couple of chests as you go. Use the Alchemy Lab if you wish before taking the elevator down to the Grand Cavern.
- Danger! Dwarven Fire Pillar Trap (proximity)
- Crafting: Alchemy Lab
- Chests (Locked: Apprentice) (2)
- Potions
Elevator to Irkngthand Grand Cavern
Elevator to Irkngthand Arcanex
Entry Passage
After meeting up with Karliah and Brynjolf, stand back after opening the door here—Mercer has left it trapped, and a mace will come swinging your way. (Alternately, you can try and disable the trap’s hinge.) Unlock an Expert-level gate a few paces farther to claim a chest and some potions. Continue out onto a balcony overlooking a huge cavern and you can spot Mercer offing a pair of Falmer. You cannot get to him yet, so continue down a sloping passage.
- Danger! Flail Trap (door)
- Chest
- Potion
Cavern A
Turn left as you enter this first massive cavern and creep across a pile of debris to locate a lever. Pull the lever, then creep back the way you came and loot a grotesque chest that sits near a Falmer tent with several potions. Continue sneaking around the balcony and, if possible, unlock an Expert-level gate so you may fire a ballista down at the dangerous Falmer below. Raid a chest at the balcony’s other end and find the second lever there. You must pull one of the levers, then race to the other side to pull the other lever to open the gate below or the levers will reset. You can tell that the gate is open when the dwarven lamps on either side are both lit. Make your way downstairs, looting the chest that’s tucked away near the steps. Avoid the road that follows—it’s trapped with lethal spinning blades. Hop up and navigate the earthen ledges instead, finding a chest stashed near the north wall. Use stealth or you will alert the Sphere Centurions here.
- Danger! Dwarven Thresher (proximity)
- Crafting: Tanning Rack
- Chests (2)
- Chest (Locked: Novice)
- Chest (Locked: Adept)
- Potions
Cavern B
This second cavern is as big as the first. Sneak through here to avoid alerting the roaming Falmer. Scale a ramp as you enter to visit a small balcony with a few ingredients, as well as a good sniping position. Search the ledge to the left of the central road to discover a Falmer chest. A dwarven chest lies in the rubble at the trail’s end. Follow a looping walkway around to reach the hallway that leads to the third cavern.
- Chest
- Chest (Locked: Apprentice)
Connecting Hallway
Mercer Frey has been here, looted the place, and scribbled a taunting message on the wall. Three scrolls of Detect Life can be found here, which can make the fight with Mercer much easier, so be sure to grab them.
- Danger! Bear Traps
- Loose gear
Cavern C
The third cavern is the largest of all, and it’s teeming with powerful Falmer and a Dwarven Centurion. Do your best to avoid detection, and optionally jump off the bridge’s right side, which you start on when entering the area. Press the button at the base of the entry stairs to unleash the Dwarven Centurion on the unsuspecting Falmer. Scale the east steps and cross a long walkway to advance toward the cavern’s south end, where more Falmer and a nest of Frostbite Spiders threaten you. Watch out for Bear Traps left by Mercer along the way. Loot the two chests near the Falmer tents before proceeding through the door to the Slave Pens.
- Danger! Bear Traps
- Chest
Door to Irkngthand Slave Pens
Door to Irkngthand Grand Cavern
Entry and Torture Room
Ignore this area’s locked gate—there’s little of interest behind it. Check the south rubble to discover a chest, then sneak down and pull the lever on the east balcony to slice up the unsuspecting Falmer below. Go downstairs and collect an array of potions from a table. Search an unfortunate thief to discover his last words, which hint at riches ahead. Beware of the pressure plates in the passage that leads to [10].
- Danger! Bone Alarm Trap, Dwarven Thresher (lever), Flamethrower (pressure plates)
- Chest
- Potions aplenty
- Loose gear
Falmer Camp
Several powerful Falmer are camped here, making this a dangerous area. Sneak through by keeping close to the west wall. Two of their tents contain chests.
- Chests (2)
Chaurus Den
Stick close to the west wall to slip past the Falmer in this area, raiding a chest as you go. Beware of two hulking Chaurus that lurk to the south. A chest with a difficult lock sits in one of the southern tents, and a potion lies on the ground where the passage bends southeast. Pipes span the ceiling above the area with the Chaurus. Sneaking along here should allow you to bypass the enemies below or give you a great vantage to snipe them. A health potion can also be found at the opposite end of this cave.
- Chest (Locked: Apprentice)
- Chest (Locked: Expert)
 Sanctuary Access
Loot one last chest—an ornate dwarven chest with an intricate lock—as you make your way through the Slave Pens’ final stretch. Proceed through the nearby gate to reach the door to the Irkngthand Sanctuary.
- Chest (Locked: Master)
 Door to Irkngthand Sanctuary
Irkngthand Sanctuary
You finally catch up with your quarry in the sanctuary. Slay Mercer Frey in an epic battle (see Thieves Guild Quest: Blindsighted for complete strategies), then loot his body to obtain vast wealth, including the priceless Right Eye of the Falmer and the quest-related Skeleton Key. The cavern soon begins to collapse and fill with water. Exploit the rising tide to make your escape, but the way will open to you only if you possess the Skeleton Key. You will eventually emerge in Bronze Water Cave [3.29].
- Right Eye of the Falmer
- Larceny Target: Left Eye of the Falmer [2/7]
- Unique Item: Skeleton Key [25/112]
[3.32] and
[DG.15] Raldbthar
Related Quests
- Dark Brotherhood Quest: Mourning Never Comes
- Side Quest: Lost to the Ages
- A Dungeon Activity Is Available
Hold: The Pale
Recommended Level: 12
Dungeon: Dwarven City
- Alain Dufont
- Animal
- Bandit
- Dwarven Centurion
- Dwarven Sphere
- Dwarven Spider
- Falmer
- Katria
Crafting
- Workbench (3)
Dangers
- Dwarven Ballista Trap (pressure plate)
- Dwarven Piston
- Dwarven Thresher (proximity)
- Dwarven Thresher (pressure plate)
- Flamethrower
- Flamethrower (buttons)
- Oil Pool Traps
Underground Connection: Blackreach [10.02]
Collectibles
- Chest(s)
- Loose gear
- Potions
- Skill Book [Sneak]: 2920, Lost Seed, v8 [A1/10]
- Unique Weapon: Aegisbane [20/81]
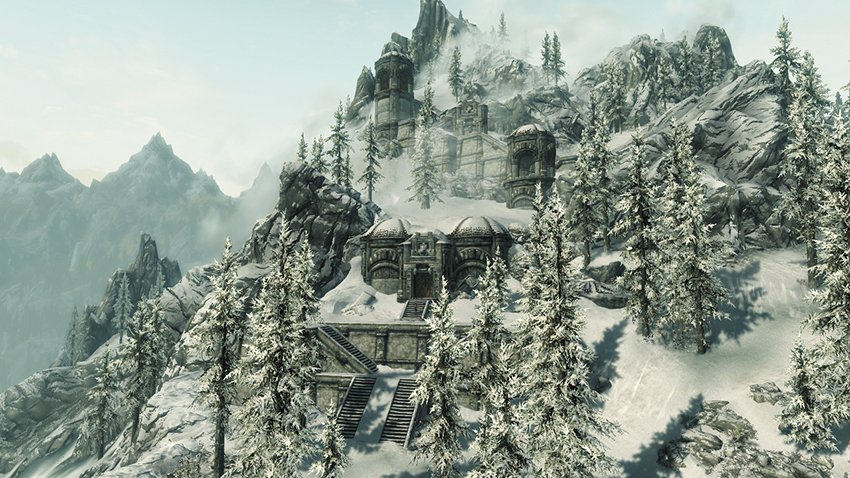
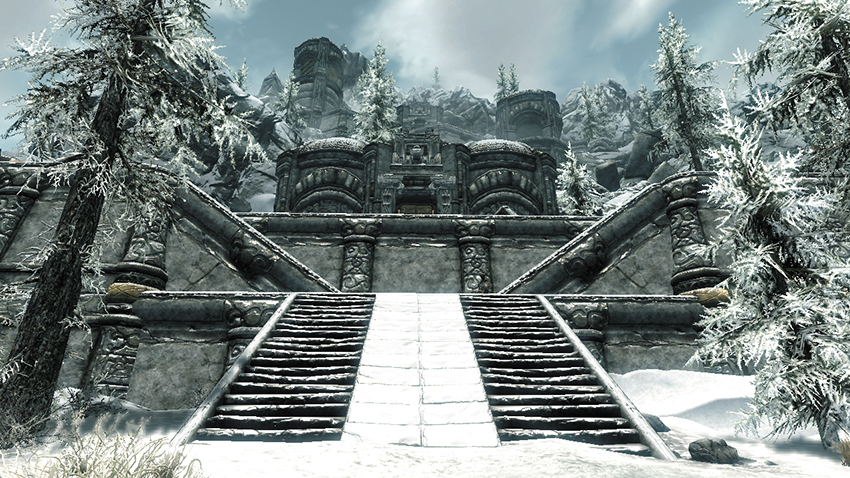
These ancient dwarven ruins, which run through the mountains at the Pale’s southeast tip, have been overrun by treasure-seeking bandits.
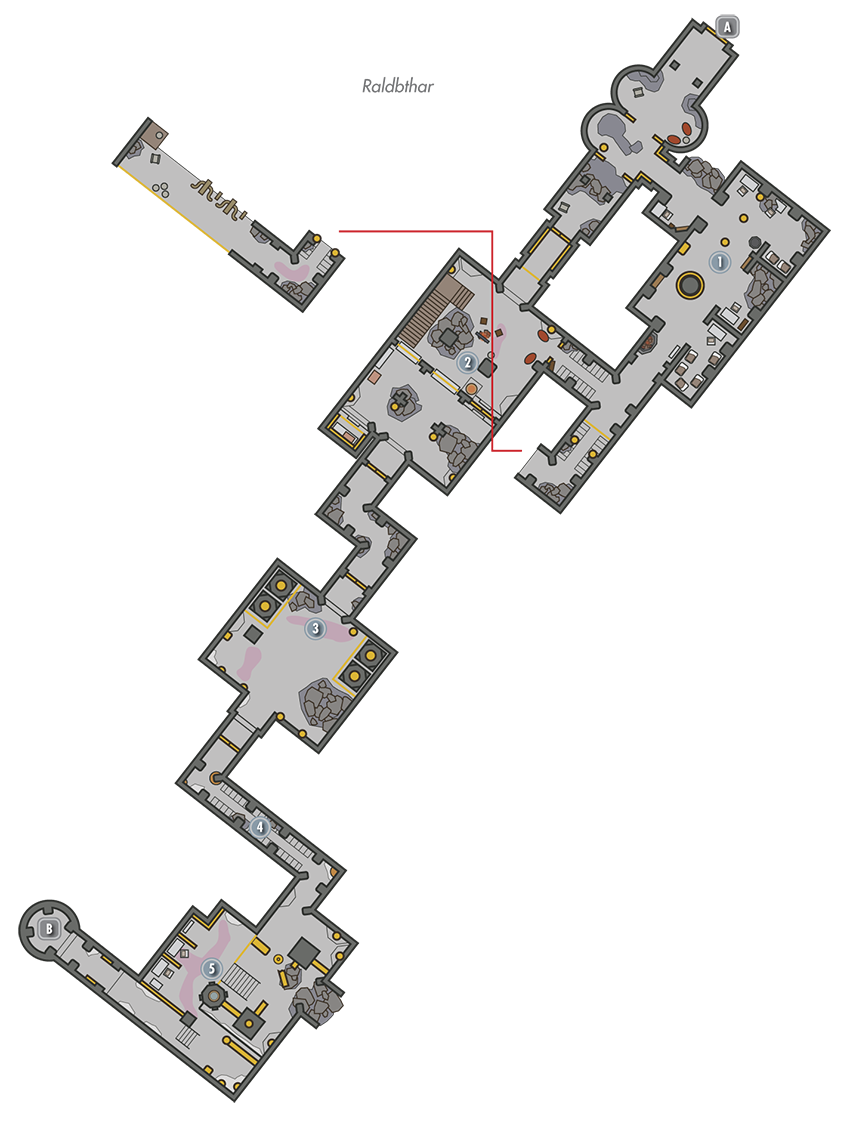
Exit to Skyrim
Bandit Den
Ignore the passage that’s blocked by active fire spouts, and take a side passage to reach this chamber, which the bandits have secured as a base of operations. Dispatch the villains and loot an odd-looking dwarven chest that’s tucked to one side of the room’s entry doorway.
- Chest
- Crafting: Workbench
- Loose gear
Trading Consortium
If possible, pick a locked gate in the hall that leads to this chamber so you may enter from an elevated position; then pull a few levers to fire large siege weapons down at the bandits below. Eliminate all bandits to discover a valuable key on one of their bodies. If you’re running quests for the Dark Brotherhood, ensure that you kill Alain Dufont in this room as well. Collect a Skill Book from the counter in the center of the room, and loot a chest that’s tucked beneath the northwest stairs. Pass through the central gate and raid the odd-shaped dwarven chests on the other side. If possible, unlock a Master-level gate to claim even more plunder.
- Chest [Locked: Apprentice]
- Chests (4)
- Crafting: Workbench
- Danger! Oil Pool Trap
- Irkngthand Consortium Key (bandit)
- Loose gear
- Potions
- Skill Book [Sneak]: 2920, Lost Seed, v8 [A1/10]
- Unique Weapon: Aegisbane [20/81]
Oily Floor Chamber
Formidable Dwarven Spheres emerge from small holes in this second chamber’s walls. Look to ignite the room’s oil slicks to help defeat these foes. Secure the chamber and pillage the chest near the northwest wall. Find a coin purse tucked away near the southeast wall as well.
- Chest [Locked: Apprentice]
- Danger! Oil Pool Traps
Thresher Hallway
Carefully time the movement of the spinning blades as you scale this sloping passage, and keep close to the walls to avoid being sliced to ribbons.
- Danger! Dwarven Thresher (proximity)
Pipeworks
Search the wall near the stairs here to find a well-hidden dwarven chest. Find two more chests upstairs in the cubicles—one is long and rectangular and features a difficult lock. Beware of Dwarven Spiders that emerge from holes in the walls as you head for the far lift that ferries you to Raldbthar’s Deep Market.
- Chest [Locked: Master]
- Chests [Locked: Novice] (2)
- Crafting: Workbench
- Danger! Dwarven Piston
- Danger! Flamethrower
- Danger! Oil Pool Trap
- Loose gear
Door to Deep Market
Door to Raldbthar
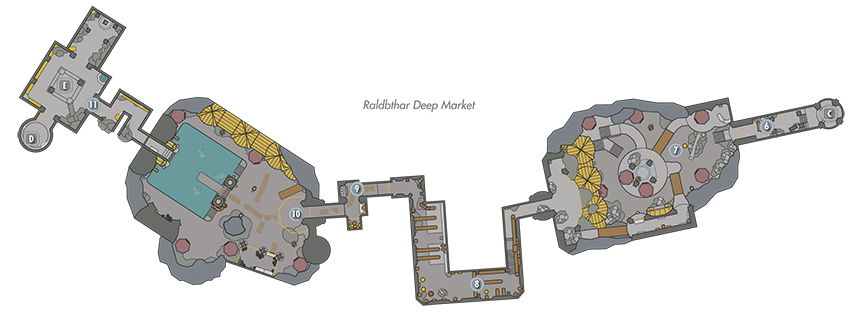
Deep Market Entry
Carefully move past the spinning blade that emerges from the ground as you descend this first sloping passage. Raid a chest that’s tucked away in a corner at the bottom.
- Chest [Locked: Novice]
- Danger! Dwarven Thresher (proximity)
Fountain Square
Beware: vicious Falmer lurk in this massive cavern. Free a couple of Skeevers from a holding pen as you enter, then flee—they may attack their captors for you. Loot an odd-looking Falmer chest in the west tent, then scale the north steps and raid a locked dwarven chest. Slay a powerful Falmer on the high central balcony—believe it or not, you can circle around the Falmer tents up here to locate a chest that’s cleverly hidden behind them. Cross a ramp afterward to locate another Falmer chest and a button. Press the button to lower a drawbridge that grants you access to the room’s southern and western ledges. Loop around and take the west passage to [8].
- Chests (2)
- Chest [Locked: Apprentice]
- Loose gear
- Potion
Trapped Passage
Dodge pressure plate traps as you navigate this passage, slaying the odd Dwarven Automaton as you go. Loot a dwarven chest that’s curiously affixed to the east wall. If you have Whirlwind Sprint, you can walk up the diagonal pipes in this room, then sprint across to the caged area you just walked under to find another hidden chest.
- Chest (2)
- Danger! Dwarven Ballista Trap (pressure plate)
- Danger! Swinging Blade Trap (pressure plate)
Button Puzzle Passage
Four buttons are lined up in a row in this passage. Simply press the third button from the left to open the way forward. Pressing any other button causes lethal flamethrowers to jet out from the surrounding walls.
- Danger! Flamethrower (buttons)
Jammed Gear Chamber
Battle several fierce Falmer in this sizeable chamber. If you are feeling tough, unlock the small trading post to battle the Chaurus and obtain the treasure lock in the cage. Find a chest at the chamber’s west end and another within a Falmer tent that features an Expert-level locked gate. A third chest sits near another tent to the north. Remove obstructions from four gears around the room to restore power to the central button—search underwater to find one of the blocked gears. Press the button to lower the far drawbridge and unleash a fearsome Dwarven Centurion! Loot the rectangular chest across the drawbridge after defeating the Centurion.
- Chests (4)
- Potion
Mechanism Chamber
If you are on Side Quest: Lost to the Ages, Katria appears as you enter this chamber and helps you fend off a swarm of dwarven automatons. Raid the chest that lies among this final room’s north rubble, along with the locked chest that’s affixed to the west wall; then grab the Glowing Crystal Shard in the northern part of this chamber. If you’ve previously been to Blackreach [10.02], you can use the central mechanism here to return to the dwarves’ subterranean city. Otherwise, the nearby lift will take you back out to Skyrim. Loot one last dwarven chest as you descend the outdoor steps that lead back to Raldbthar’s main entrance.
- Aetherium Shard [3/4]
- Chest
- Chest (outdoors)
- Chest [Locked: Adept]
- Loose gear
- Potion
Exit to Skyrim
Elevator to Blackreach
[3.33] Blackreach Elevator (Raldbthar)
Underground Connection: Blackreach [10.02]
Collectibles
- Area Is Locked
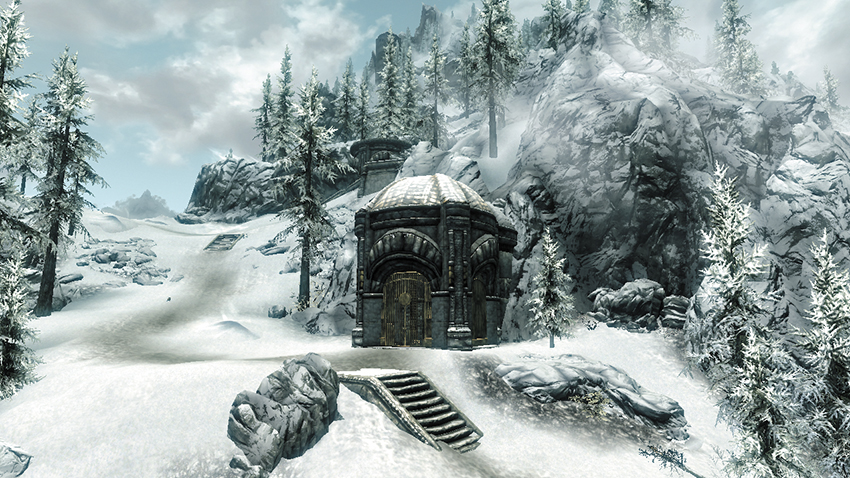
This small tower, located near the base of the mountain ruins of Raldbthar [3.32], doesn’t appear as a Primary Location on the in-game map, but it’s important enough to be considered one. Beyond the tower’s locked gate lies an elevator that zips you down to the rumored dwarven city of Blackreach [10.02], but you must pull the lever inside the tower to open its gate. This makes it a one-way transport until after you’ve used this elevator to exit Blackreach. (The gate remains unlocked afterward.)
[3.34] Anga’s Mill
Related Quests
- Dark Brotherhood Quest: Side Contract: Ennodius Papius
- Favor (Activity): Chopping Wood* (Aeri)
- Favor: Special Delivery* (Aeri)
Habitation: Lumber Mill
- Aeri (Marriage Prospect)
- Kodrir
- Leifur
Crafting
- Grindstone
Services
- Marriage Prospect: Aeri [7/62]
Collectibles
- Skill Book [Speech]: Biography of the Wolf Queen
- Chest(s)
- Potions
- Loose gear
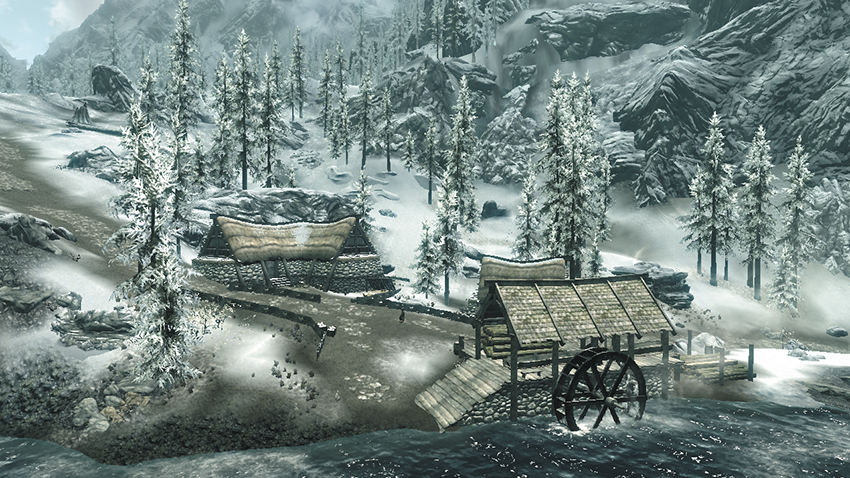
At the Pale’s southern end, a quiet lumber mill sits along the River Yorgrim, erected along the main road and near a bridge.
Exterior
Take advantage of the crafting stations located around the mill.
- Crafting: Grindstone
Aeri’s House
Break into this small cabin to loot a chest and swipe a few potions, among other items of interest.
- Area Is Locked (Novice)
- Chest
- Potions
- Loose gear
Common House
Pick the lock of the common house’s door to break in and plunder a few chests. A Skill Book rests on the end table by the bed.
- Area Is Locked (Novice)
- Skill Book [Speech]: Biography of the Wolf Queen
- Chests (2)
- Potion
- Loose gear