
Elder Scrolls V: Skyrim Guide The Atlas Hold 1: Haafingar
Additional Locations
 [DG.08] Icewater Jetty
Related Quests
- Dawnguard Main Quest: Bloodline
- Dawnguard Main Quest: The Bloodstone Chalice
- Dawnguard Main Quest: Chasing Echoes
- Dawnguard Main Quest: Unseen Visions
- Dawnguard Main Quest: Kindred Judgment
- Vampire Faction Quest: All
Recommended Level: 10
Faction: Castle Volkihar Vampire
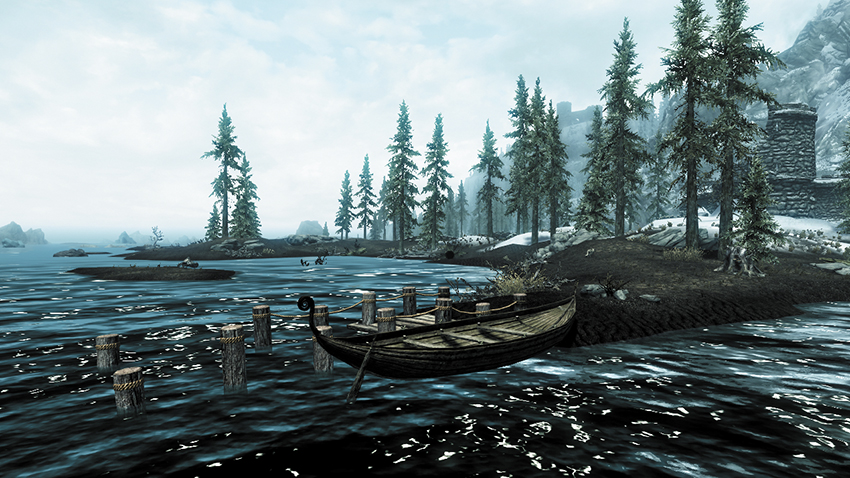
North of Rimerock Burrow and Northwatch Keep is a small pier with an attached rowboat. Gaze into the Sea of Ghosts to see the crags of Castle Volkihar, the location where this boat takes you once you board it. There is a second jetty at the castle that brings you back to this point. This is the quickest way to and from Castle Volkihar (although you can ignore the boat and swim instead, if you’re feeling a little deranged).
[DG.09] Castle Volkihar
Related Quests
- Dawnguard Main Quest: Bloodline
- Dawnguard Main Quest: Power of the Blood
- Dawnguard Main Quest: The Bloodstone Chalice
- Dawnguard Main Quest: Prophet
- Dawnguard Main Quest: Seeking Disclosure
- Dawnguard Main Quest: Scroll Scouting
- Dawnguard Main Quest: Chasing Echoes
- Dawnguard Main Quest: Unseen Visions
- Dawnguard Main Quest: Kindred Judgment
- Vampire Faction Quest: Amulets of Night Power
- Vampire Faction Quest: Ancient Power
- Vampire Faction Quest: Culling the Beast
- Vampire Faction Quest: Deceiving the Herd
- Vampire Faction Quest: Destroying the Dawnguard
- Vampire Faction Quest: The Gift
- Vampire Faction Quest: The Hunt
- Vampire Faction Quest: New Allegiances
- Vampire Faction Quest: Protecting the Bloodline
- Vampire Faction Quest: Rings of Blood Magic
Recommended Level: 10
Faction: Vampire
- Death Hound
- Gargoyle
- Skeleton
- Vampire
Services
- Apothecary
- Blacksmith
- General Goods Vendor
Crafting
- Alchemy Lab
- Anvil or Blacksmith Forge
- Arcane Enchanter
- Tanning Rack
- Workbench
Miscellaneous
- Area is locked
- Chest
- Loose gear
- Potions aplenty
Lore: Castle Volkihar Overview
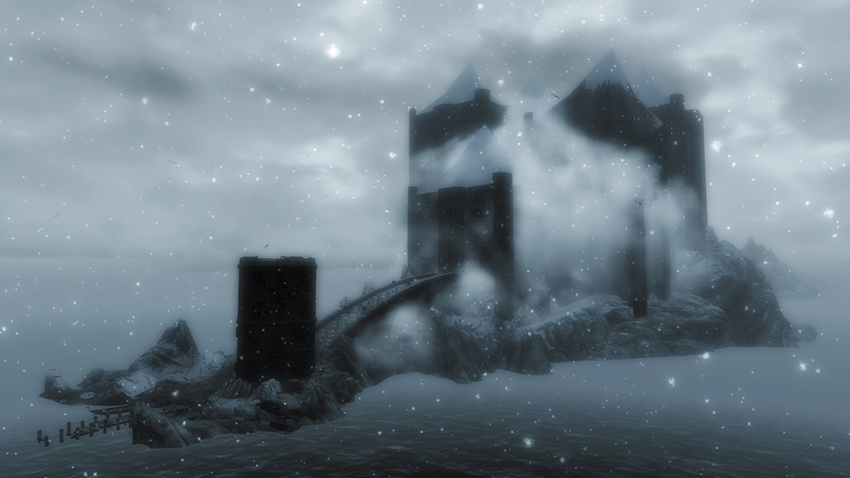
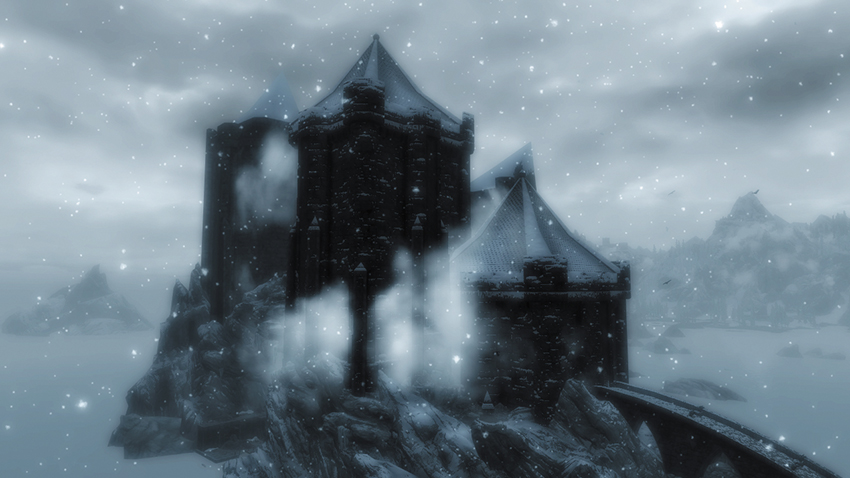
Long thought lost to the eternal mists of the Sea of Ghosts, the sprawling castle manifesting on the rocky islands north of Icewater Jetty has been seen by fishermen on Skyrim’s northwest coast. Little is known about the previous owners of the place, but it has been home to the Volkihar Vampires and their leader, Lord Harkon, for centuries. The castle is a formidable place even from the outside, but once you manage to pass the Watchman, all the horror and decadence of the pure-blooded vampire is on display.
Castle Volkihar’s interior is upgraded in stages throughout the Dawnguard Main Quest:
- Initially, the castle is entirely sealed off. When you bring Serana home during Dawnguard Main Quest: Bloodline, you gain access to the main hall, but the rest of the castle remains sealed until you decide whether to accept or reject Harkon’s offer.
- If you side with the vampires, once Dawnguard Main Quest: Power of the Blood is complete, you are free to explore the keep; use the smithing, enchanting, and alchemy stations; and feed on the castle’s thralls. You can also trade and seek training from the other members of the court.
- After Dawnguard Main Quest: The Bloodstone Chalice, Serana’s room is refurnished. You can now accept Faction Quests from the members of the court and recruit Death Hounds. You can also drink from the Bloodstone Chalice to enhance your Drain Life abilities.
- After Dawnguard Main Quest: Kindred Judgment, you take possession of Lord Harkon’s quarters. Optionally, you can improve the castle further, if you wish:
- If you speak to Garan, you can order him to begin repairing the castle, which clears the rubble from a passage connecting the main banquet hall to the central courtyard.
- If you speak to Valerica (in the Soul Cairn), you can convince her to return to the castle. She takes up residence in her laboratory (the Volkihar Ruins area) and takes charge of both the laboratory and the courtyard garden, which are stocked with potions and alchemy ingredients, respectively.
Notable Inhabitants
- King of the Vampires: Lord Harkon
- Castigated Wife: Valerica
- Advisor: Garan Marethi
- Advisor: Feran Sadri
- Advisor: Orthjolf
- Advisor: Vingalmo
- Vampire Warrior: Fura Bloodmouth
- Feeder: Rargal Thrallmaster
- Vampire Smith: Hestla
- Vampire Adept: Modhna
- Vampire Adept: Namasur
- Vampire Adept: Ronthil
- Vampire Adept: Salonia Viria
- Vampire Adept: Stalf
- Death Hound: Cusith [DG9/13]
- Death Hound: Garmr [DG10/13]
The following castle personnel offer these services to you:
- Trader (Apothecary): Feran Sadri [DG2/2] [DG&HF 5/23]
- Trader (Blacksmith): Hestla [DG2/2] [DG&HF 6/23]
- Trader (General Goods): Ronthil [DG2/2] [DG&HF 7/23]
- Trainer: (Two-Handed: Master): Fura Bloodmouth [DG1/1]
- Trainer: (Destruction: Expert): Garan Marethi [DG1/1]
- Trainer: (Speech: Expert) Ronthil [DG1/1]
Castle Volkihar (Exterior)
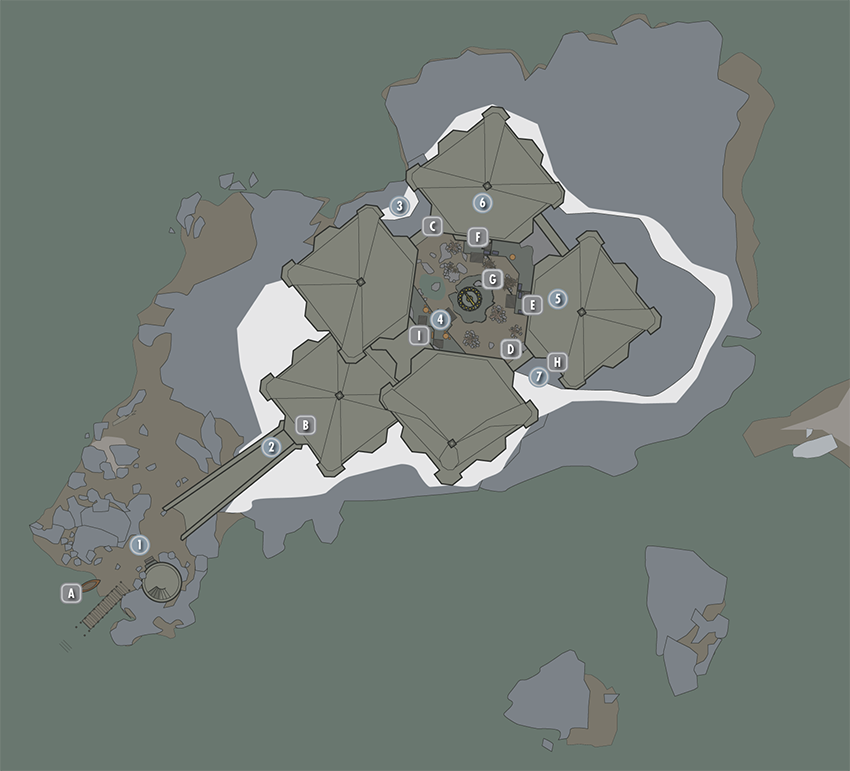
 Boat to Icewater Jetty
 Jetty and Watchtower
An imposing watchtower stands over the jetty and moored boat. Access the mainland from here.
 Volkihar Bridge
A grand span leading up to the main castle entrance, the bridge is flanked by gargoyle statues (which don’t spring to life until the Dawnguard assault on the castle during Dawnguard Main Quest: Kindred Judgment).
 Door to Volkihar Keep
The entrance is guarded by a Watchman behind a portcullis. You’re unable to enter until Dawnguard Main Quest: Bloodline is active.
 Ruined Docks
The main docks of Castle Volkihar are in a shocking state of disrepair. There are numerous boats (and a galleon) sunk beneath the icy water (watch you don’t drown as you extricate items from a chest inside the galleon hull) and four skeletons ready to attack from this U-shaped jetty.
- Chest
 Door to Volkihar Undercroft
This door is firmly sealed and is accessible only during Dawnguard Main Quest: Chasing Echoes.
 Door from Volkihar Undercroft
This door is firmly sealed and is accessible only during Dawnguard Main Quest: Chasing Echoes. It allows access into the Courtyard.
 Volkihar Courtyard
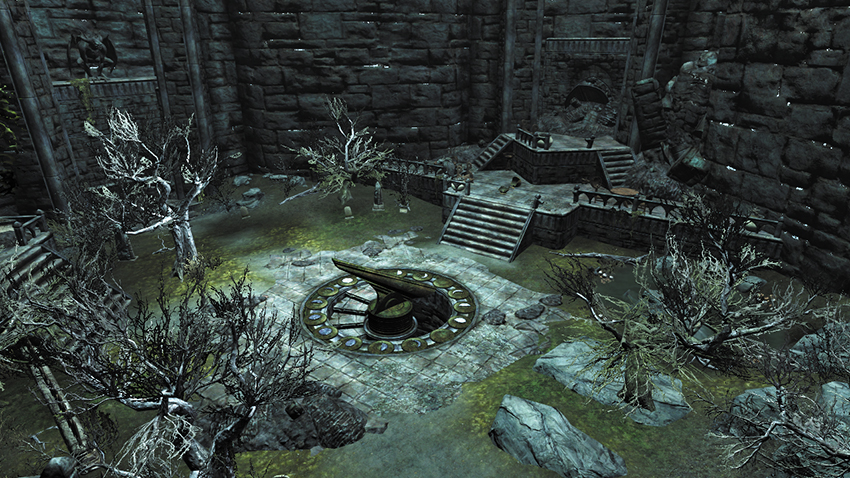
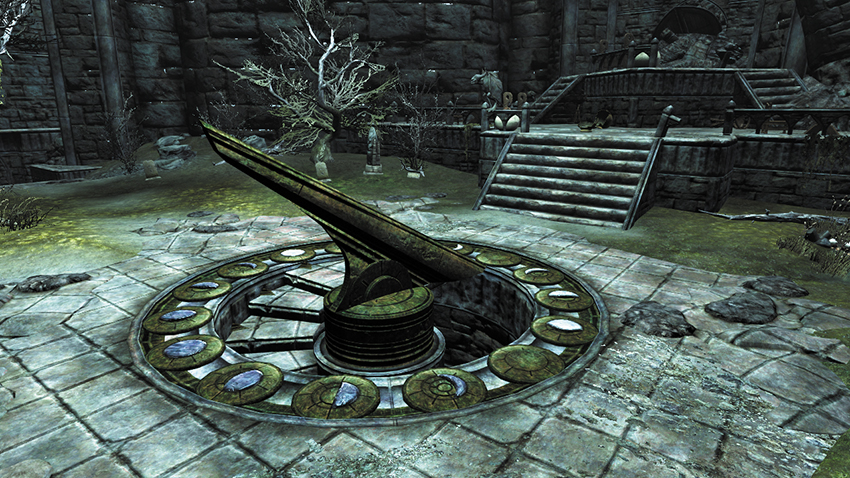
This central courtyard garden, dominated by a moondial that reveals the phases of Masser and Secunda (the moons of Tamriel), is accessible only from the Undercroft during and after Dawnguard Main Quest: Chasing Echoes. Aside from the unkempt Nightshade allotment that Serana used to tend, this is simply a gnarled and overgrown reminder of Valerica’s favorite spot in the castle. It is the only way you can reach the ruined north and east towers and the secret entrance to Volkihar Ruins (under the moondial, once you find the crests and slotted them into place).
Once the Dawnguard Main Quest ends, you can ask Valerica to return to the castle; once she does, she will replant the courtyard garden. If you sided with the vampires, you can also instruct Garan to remove the debris from inside the keep, allowing direct access here from Volkihar Keep.
- Full Moon Crest
- Half Moon Crest
- Crescent Moon Crest
 Door to East Tower
 East Tower (Interior)
Here is a tumbledown staircase with crushed and long-forgotten skeletons poking from the rubble. None are dangerous, although the bones at the top of the blocked steps had some valuable gems spilling from his purse. This is a dead end.
- Lots o’ Gold
 Door to North Tower
 North Tower (Interior)
This leads to a large banquet hall where you face three skeletons and a gargoyle. There are two chests to easily uncover in the ruins of the hall, a crushed skeleton behind a side door [Adept] holding Gold Ingots, and an upper balcony in the western corner with a chest that’s accessible only if you use Bats (Vampire Lord) or Whirlwind Sprint (Shout) to dash there.
- Chest (3)
- Lots o’ Gold
 Door to Volkihar Ruins
This secret door is hidden under the moondial and is first accessed during Dawnguard Main Quest: Chasing Echoes.
 Door to Volkihar Ruins
During Dawnguard Main Quest: Chasing Echoes, you enter the Volkihar Ruins via the moondial in the courtyard (Location 4) and emerge here, on a high balcony that is otherwise inaccessible. This balcony provides a Fast-Travel point that allows you to quickly return to the lab and the Soul Cairn in the future.
 Volkihar Balcony
This southern balcony leads nowhere, except back into Valerica’s Laboratory and the Soul Cairn. It is useful later into your questing as a method of quickly leaving the castle, as you can Fast-Travel from here.
 Door to Volkihar Keep (sealed)
This door is blocked by rubble and is inaccessible unless you’ve sided with the vampires, completed the Dawnguard Main Quest, and told Garan to remove debris from the keep to this location.
Volkihar Keep (Interior)
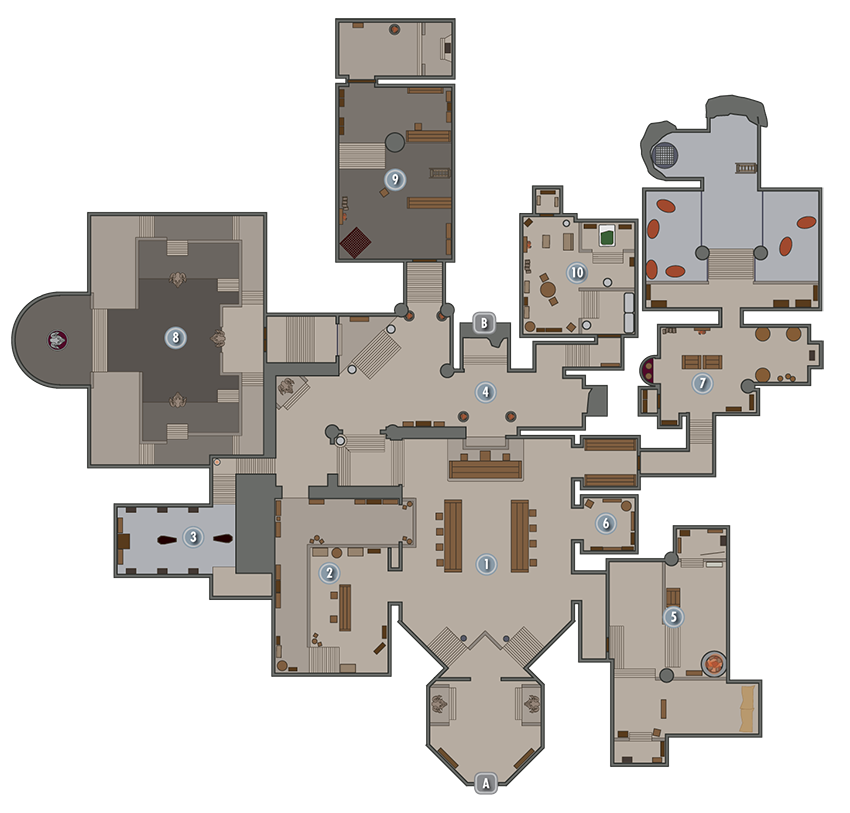
Exit to Skyrim
This leads to the front entrance of the Keep, at the far end of the bridge that appears on the Castle Volkihar Exterior Map (Location B of that map).
Banquet Hall
A lavish feast is under way (assuming you enjoy the taste of human blood). This hub room connects you to the rest of the keep. If you’re searching for a member of Harkon’s court, start here.
- Potions (of Blood)
Research Laboratory
Garan Marethi conducts his research (which looks like it involves some particularly dark arts). There are many different ingredients here, some in locked display cases, and numerous books to peruse (including The Legend of Red Eagle and Lost Legends, which begin Dungeon Quest: The Legend of Red Eagle and Side Quest: Forbidden Legend, respectively). The upstairs balcony has more display cases with some sizable Soul Gems to grab. Check the large number of bookcases for additional tomes, pass Garan’s coffin, and check the small balcony with a third book—The Aetherium Wars—that begins Side Quest: Lost to the Ages.
- Alchemy Lab
- Arcane Enchanter
- Book: The Aetherium Wars
- Book: The Legend of Red Eagle
- Book: Lost Legends
- Damage Health Poison Recipe
- Loose gear
- Potions
Armory and Coffin Chamber
The vampires of the court sleep here from time to time and store their armor, clothing, and weapons here.
- Loose gear
Upper Hall and Balcony
Lord Harkon is fond of launching into ranting diatribes from the balcony on this connecting hallway above the Banquet Hall. Garan also tends to stand here if you’re undertaking Faction Quests from him.
Training Room and Forge
This is the domain of Fura Bloodmouth. It consists of sleeping quarters and rooms to train in various combat arts. There are ores and ingots to take, as well as another copy of The Aetherium Wars and weapon racks to inspect.
- Blacksmith’s Forge
- Book: The Aetherium Wars
- Loose gear
- Potions
- Tanning Rack
- Workbench
Bloodstone Chalice Alcove
A fabled chalice of the vampires is set inside this alcove, along with some bookcases. After Dawnguard Main Quest: The Bloodstone Chalice, you can drink from the Bloodstone Chalice to enhance your Drain Life abilities.
- Bloodstone Chalice
- Skooma
Kitchens and Gaol
Rargal Thrallmaster is in charge of the “meat preparation” in the kitchen and attached gaol, where the vampire cattle (also known as thralls) are imprisoned. There are around seven cattle, which you can feed upon or abuse with your Drain Life ability (as a Vampire Lord) to quickly unlock a few perks.
 Volkihar Cathedral
Harkon’s cathedral is off-limits to everyone except those with the Vampire Lord ability (if you have the ability, this is a great place to test your Bats power and other abilities). This is also the location where the final battle with Harkon occurs.
- Unique Weapon: Harkon’s Sword [DG4/7]
 Harkon’s Quarters
To the north is where Lord Harkon rests. His small torture chamber and sumptuous quarters can become yours if you side with the vampires and complete the Dawnguard Main Quest.
- Loose gear
- Lots o’ Gold!
- Potions
 Serana’s Bedroom
This is where Serana resided prior to her imprisonment. If you sided with the vampires, she moves back into her old room.
- Alchemy Lab
- Arcane Enchanter
- Loose Gear
Door to Courtyard
This door is buried under tons of collapsed rubble and is inaccessible unless you complete the Dawnguard Main Quest, side with the vampires, and ask Garan to clear out the rubble. If you do, you can use this door to reach the courtyard that appears in the Castle Volkihar Exterior Map (Location I of that map).
Volkihar Undercroft and Volkihar Ruins
Related Quests
- Dawnguard Main Quest: Chasing Echoes
Recommended Level: 10
Faction: Vampire Lair
- Death Hound
- Feral Vampire
- Gargoyle
- Giant Frostbite Spider
- Skeever
- Skeleton
Crafting
- Alchemy Lab
- Arcane Enchanter
Dangers
- Bear Trap
- Spear Trap
- Spike Trap
Miscellaneous
- Area is locked
- Chest
- Loose Gear
- Lots o’ Gold
- Potions
Volkihar Undercroft
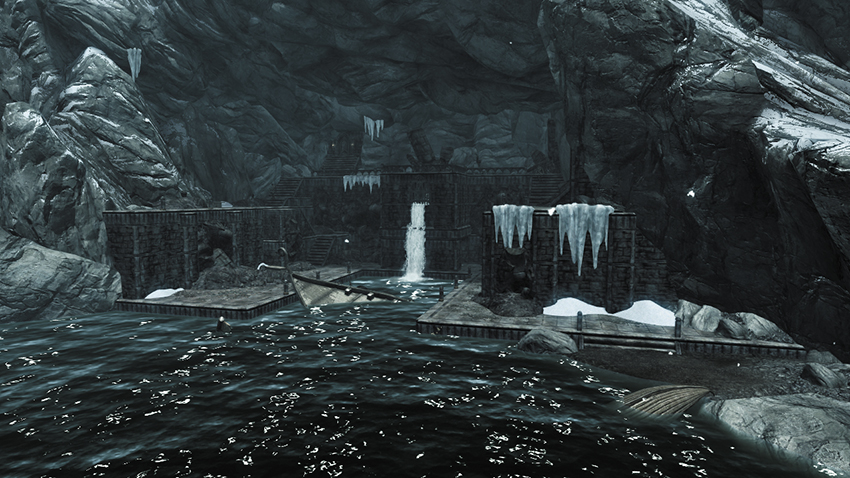
Exterior
The unused inlet on the tower’s northern side, which is where the entrance is located, is detailed earlier in the Castle Volkihar (Exterior) section.
Expect a skeleton attack from the right (north) as you enter this bridge platform. The bridge ahead (west) is raised and must be lowered (at location 8) to continue. Below is fetid water and spikes, with nothing of note to search for.
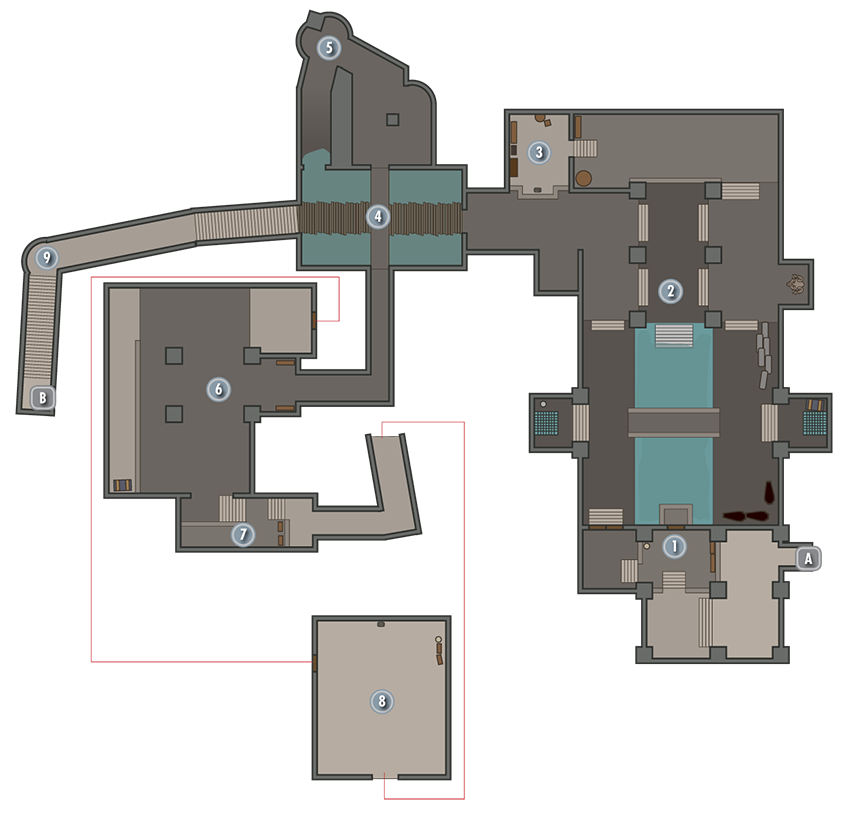
Interior
Exit to Skyrim
This door is sealed until Dawnguard Main Quest: Chasing Echoes begins.
Entrance Landing
A few gold pieces and some bloody rags, along with a Skeever, greet you in this set of descending landings.
Frigid Cistern
Expect an altercation with a Feral Vampire (read the Journal Fragment on her corpse) and her Death Hounds. Watch for the trap trigger (which releases spears) at the chest in the eastern alcove.
- Chest
- Danger! Spear Trap
- Journal Fragment
- Loose gear
Feral Lair
The lever here lowers the bridge blocking your path to the undercroft oubliette. Also, check the table for two books, one of which begins Side Quest: Lost to the Ages.
- Alchemy Lab
- Book: The Aetherium Wars
- Danger! Bear Trap
- Loose Gear
- Potions
- Skill Book [Destruction]: A Hypothetical Treachery
Oubliette Bridge
Expect a skeleton attack from the right (north) as you enter this bridge platform. The bridge ahead (west) is raised and must be lowered (at Location 8) to continue. Below is fetid water and spikes, with nothing of note to search for.
Northern Passage
A small winding tunnel north leads down (or up from) the water under the Oubliette Bridge. Expect bear traps and a Skeever.
- Danger! Bear Trap (4)
Waterlogged Catacomb
Engage three Death Hounds here, near the mounds of bones. To reach the chest and skeletal remains (with Knapsack) on the upper ledge, execute a Bats (Vampire Lord) or Whirlwind Sprint (Shout) from the opposite ledge, which you access from Location 8.
- Chest (2)
- Danger! Spike Trap (4)
Manacled Skeleton Torture Chamber
Pass the skeleton with the loose skull en route to the spiderwebs.
- Potions
Lever Room (Spider Lair)
Cut through the spiderwebs to reach this large arachnid, slaying or fleeing to the lever in this room that lowers the bridge back at Location 4. Check a side alcove for a chest [Adept], and open the left (west) side door to leap across Location 6 to reach the opposite ledge.
- Chest
Stepped Tunnel Exit
Climb the stairs here once the bridge has descended.
Door to Volkihar Courtyard
This leads to the courtyard that appears in the Castle Volkihar Exterior Map (Location D of that map).
Volkihar Ruins
Entrance
This set of ruins is initially accessible only via the moondial in the Castle Volkihar Courtyard (see the Castle Volkihar Exterior Map, Location G).
Interior
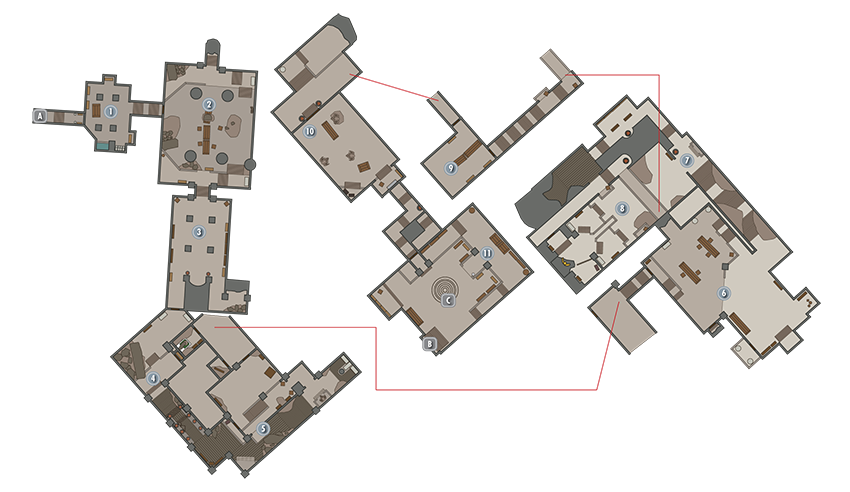
Exit to Volkihar Courtyard (Lower)
This leads to the spiral staircase under the moondial.
Bloodstained Kitchen
As soon as you step into the secret passage and steps, stop to search for an Emerald on the ground. Then release the pull chain to open the secret door into the ancient kitchen. Pass the bloody table and head up the stairs.
- Cooking Pot
- Emerald
- Lots o’ Gold
Skeletal Banquet (Lower)
Seven slumbering skeletons were once feasting here.
Gargoyle Dungeon (Lower)
A small cobwebbed dungeon with a gargoyle attempting a surprise attack.
- Danger! Spike Trap (3)
Crumbling Stairwell (Lower and Middle)
At the steps and landing beyond, engage two skeletons before checking the closet door [Adept] and scaling the stairs to fight another gargoyle and two more bony foes.
- Danger! Spike Trap (2)
- Loose gear
Fallen Buttress Balcony (Middle)
Fight skeletons to this two-tiered staircase, with a locked balcony [Adept] leading to a chest and an upper balcony with a bookcase and table and a door to Location 6.
- Chest
- Loose gear
Grand Vaulted Chamber (Middle)
Expect combat with three skeletons; then release the chain behind (southeast of) the gargoyle.
Tower Chapel Entrance (Upper)
Gargoyles attack along this staircase to a large gated archway (into the chapel), or a smaller locked door [Expert] to the side chambers of the chapel (the preferred route for stealthy characters).
Tower Chapel of Dibella (Upper)
Defeat five skeletons in this area (or sneak around via the side corridors and small armory), then cross the bridge and follow the corridor up the steps to the southwest.
- Loose Gear
- Potions
Examination Room (Upper)
A wolf’s head adorns the wall here, and there’s a skeletal corpse on the table. Head up through here.
- Potions
Gargoyle Carver’s Chamber (Upper)
Three gargoyles in this room are imbued with magic, so prepare for combat with them, then search for the left wall candlestick at the hearth to the southeast. This opens the fireplace, revealing a set of hidden steps.
- Loose gear
- Vampire Royal Armor
 Valerica’s Laboratory
Valerica’s Journal and the ingredients in her lab allow you to reconstruct the ritual needed to open the portal to the fabled Soul Cairn, bringing Dawnguard Main Quest: Chasing Echoes to an end.
- Alchemy Lab (2)
- Arcane Enchanter
- Finely Ground Bone Meal
- Loose gear
- Purified Void Salts
- Soul Gem Shards
- Valerica’s Journal
Door to Volkihar Balcony
This leads to the balcony that appears in the Castle Volkihar Exterior Map (Location H of that map). The balcony contains a Fast-Travel point; activate it so you can quickly return to the lab (and the Soul Cairn) in the future.
Portal to Soul Cairn
This is activated once the necessary ingredients (and blood) are collected and placed into the ceremonial vessel.