
Elder Scrolls V: Skyrim Guide The Atlas Hold 4: Winterhold Hold
Primary Locations
[4.01] Hela’s Folly
Related Quests
- Dark Brotherhood Quest: Side Contract: Deekus
Recommended Level: 6
Dungeon: Shipwreck
- Deekus
- Chest (Locked: Novice)
- Chest (Locked: Apprentice)
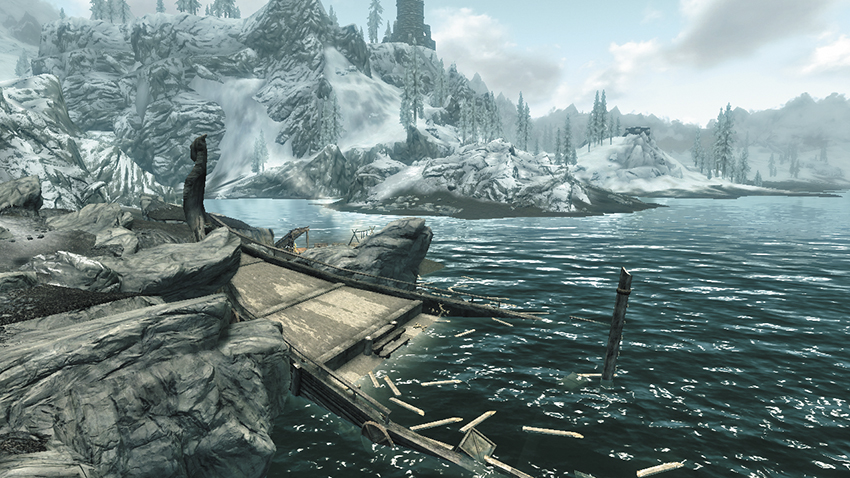
A treasure-seeker named Deekus has made camp near a shipwreck along Winterhold’s treacherous northern coastline. One of the Dark Brotherhood’s side contracts marks this Argonian as a target. Deekus has amassed a hoard of precious gemstones and baubles. Steal these valuables to gain a small fortune, if you dare. Hop aboard the remnants of the nearby ship and dive underwater to discover a locked chest and additional gemstones aboard the ship’s sunken half.
[4.02] Yngvild
Related Quests
- Side Quest: No Stone Unturned
- Miscellaneous Objective: Toying with the Dead*
Recommended Level: 8
Dungeon: Warlock Lair
- Aroundil
- Draugr
- Yngvild Ghost
Collectibles
- Skill Book [Alteration]: Reality & Other Falsehoods [C1/10]
- Unusual Gem: [6/24]
- Chest(s)
- Potions
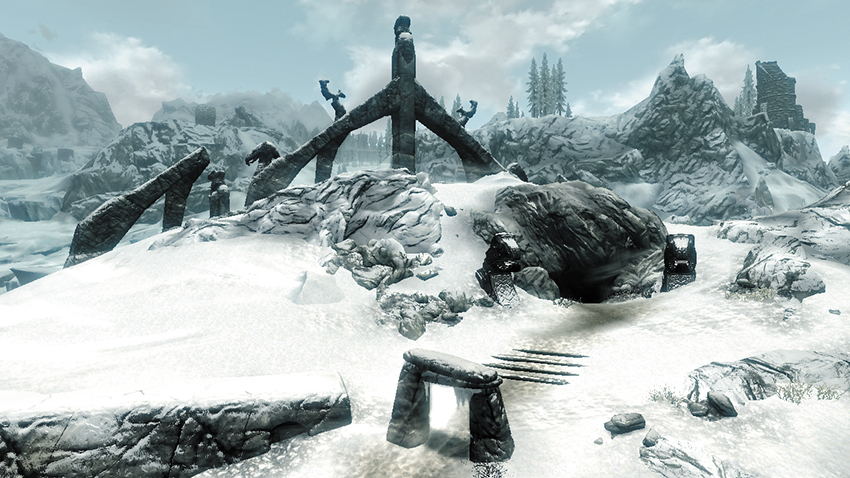
These ancient burial grounds lie on a frozen island in northeast Winterhold and are home to powerful undead. Arondil has been thrown out of Dawnstar and has unearthed and resurrected undead here. They are only female, however. His journals hint as his vile intentions.
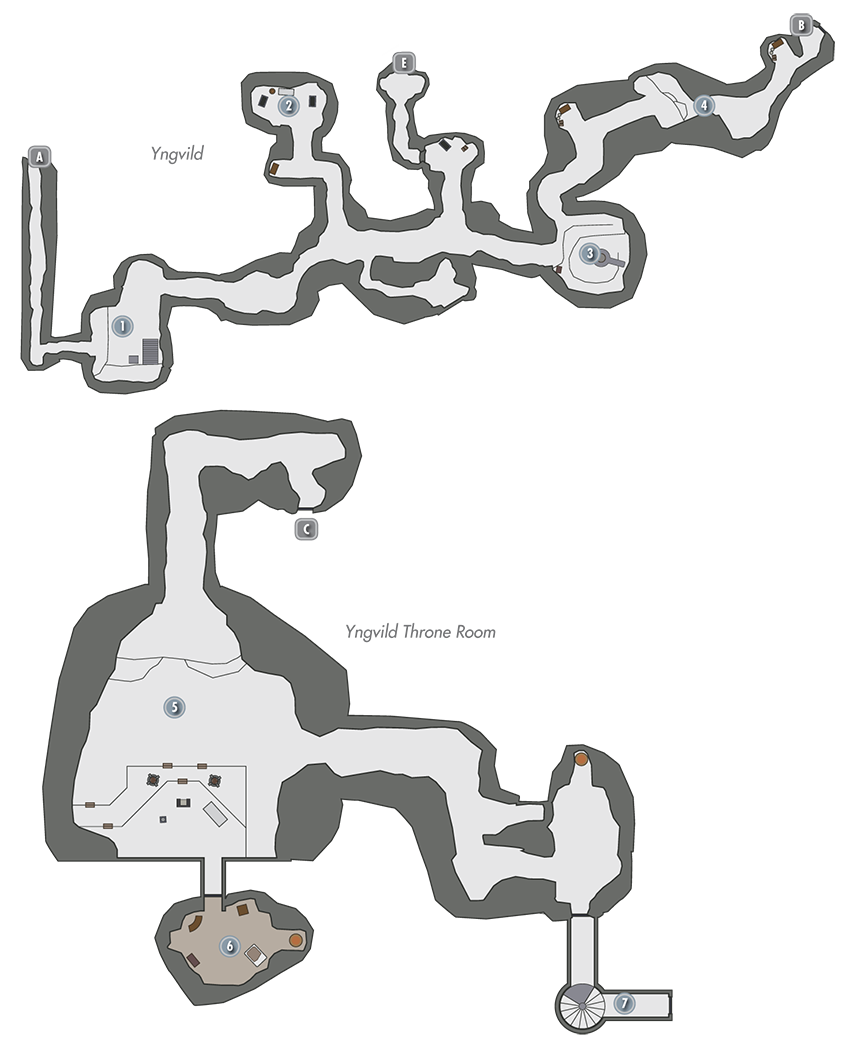
 Exit to Skyrim
 Entry Cavern
Swipe a few potions in this first cavern, then battle a powerful Draugr on your way to [2].
- Potions
 Urn Cavern
Defeat a deadly Yngvild Ghost and read an insightful journal on your way to this small cavern, where several urns beg looting.
 Tall Cavern
Kill more ghosts and more mighty Draugr on your way to this tall cavern, then descend to the bottom, where a chest awaits.
- Chest
 Passage to Throne Room
Slay another ghost and scan another two journals on your way to the Yngvild Throne Room.
- Potions
 Door to Yngvild Throne Room
 Door to Yngvild
 Throne Room
A powerful mage named Arondil sits on a throne in this wide cavern. Slay him and collect a key from his corpse. Snatch the Skill Book that rests on a nearby table as well.
- Skill Book [Alteration]: Reality & Other Falsehoods [C1/10]
- Arondil’s Key (Arondil)
 Arondil’s Quarters
Raid the giant chest in Arondil’s private chamber, and collect the Unusual Gem from the table to gain a new Miscellaneous Objective.
- Unusual Gem: [6/24]
- Chest
- Potions
 Exit Passage
Throw a lever in this final stretch to raise a portcullis, then use the key you found on Arondil to unlock the iron door and make your way back to Yngvild’s entrance. Loot a locked chest on your way out.
- Chest (Locked: Apprentice)
 Door to Yngvild
 Door to Yngvild Throne Room
[4.03] The Tower Stone
Recommended Level: 6
Special Objects:
- Standing Stone: The Tower Stone [4/13]
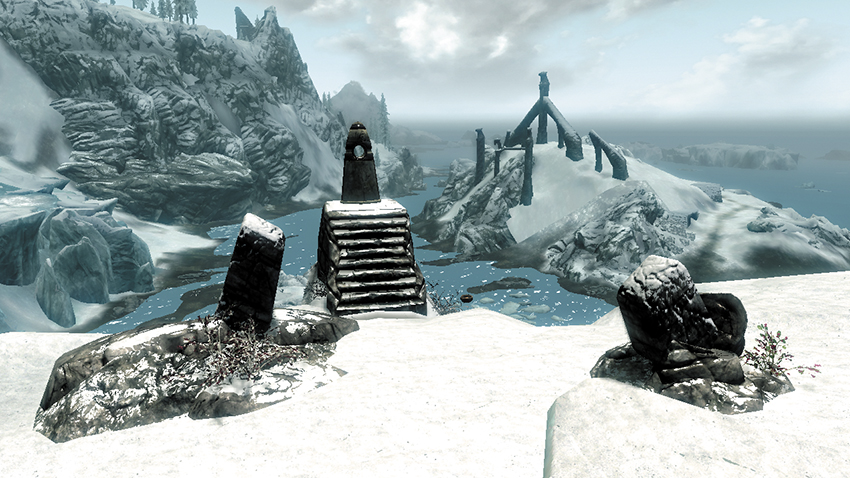
Ancient stones stand atop this glacial spire on Winterhold’s frozen northwest coastline. Inspect the central Standing Stone to accept a new sign blessing. Those under the sign of the Tower can automatically open one Expert-level or lower lock once per day. Note that you can have only one sign blessing at a time, so activating this Standing Stone will override your current sign blessing (if any).
[4.04] Winterhold Imperial Camp
Related Quests
- Civil War Quest: Reunification of Skyrim
- Civil War Quest: Rescue from Fort Kastav
Habitation: Military: Imperial Camp
- Imperial Quartermaster (Blacksmith)
- Legate Sevan Telendas
Services
- Trader (Blacksmith): Imperial Quartermaster [9/33]
- Weapons, Apparel, Misc
Crafting
- Alchemy Lab
- Anvil
- Grindstone
- Workbench
Special Objects
- Civil War: Map of Skyrim
- Chests (2)
- Potions
- Loose gear
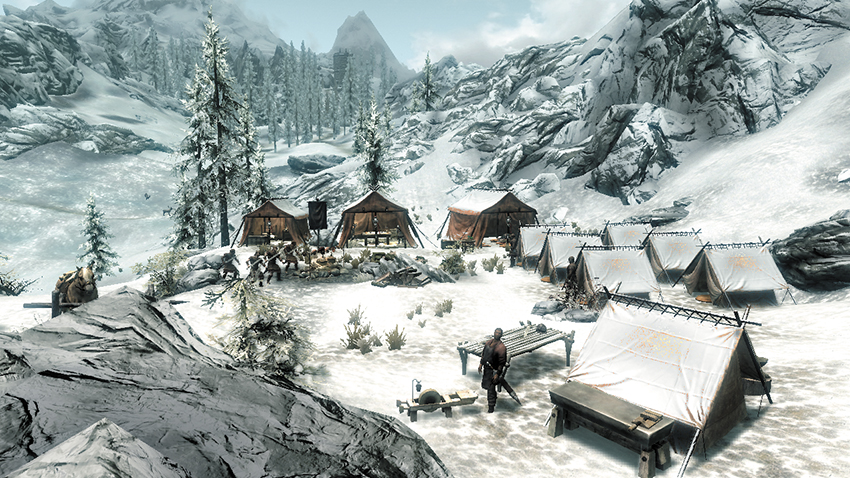
The Imperials have made camp in the frigid northwest mountains of Winterhold. Note that this Imperial campsite may only exist when you’re playing through the Civil War quest line. Trade with the quartermaster if you like, or use his bevy of crafting stations. Inspect the tabletop map in the largest tent to potentially gain new map data. Loot a few chests before moving on.
[4.05] Hob’s Fall Cave
Related Quests
- Other Factions: Bards College Quest: Pantea’s Flute
- Side Quest: No Stone Unturned
Recommended Level: 8
Dungeon: Warlock Lair
- Mage
- Skeleton
Crafting
- Alchemy Lab
- Arcane Enchanter
Collectibles
- Skill Book [Enchanting]: Enchanter’s Primer [D1/10]
- Skill Book [Restoration]: The Exodus
- Unusual Gem: [7/24]
- Chest(s)
- Potions
- Loose gear
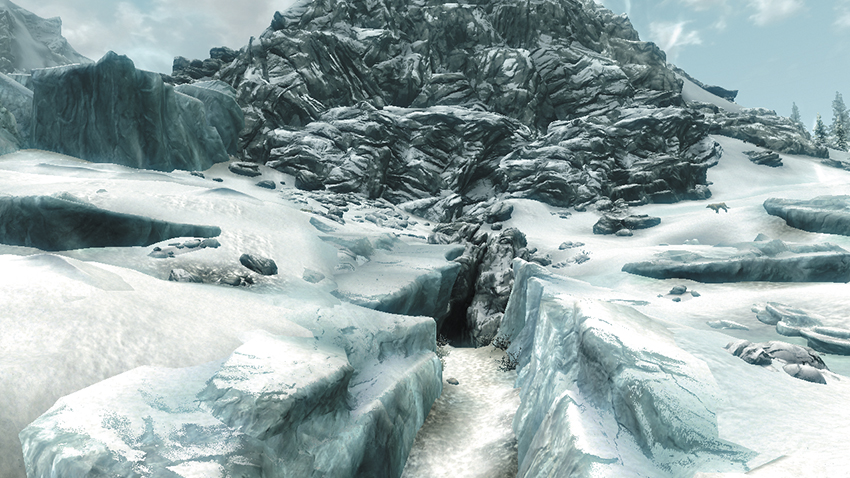
This frigid cave lies in northwest Winterhold and has been overrun by powerful mages.
Exit to Skyrim
Mage’s Cavern
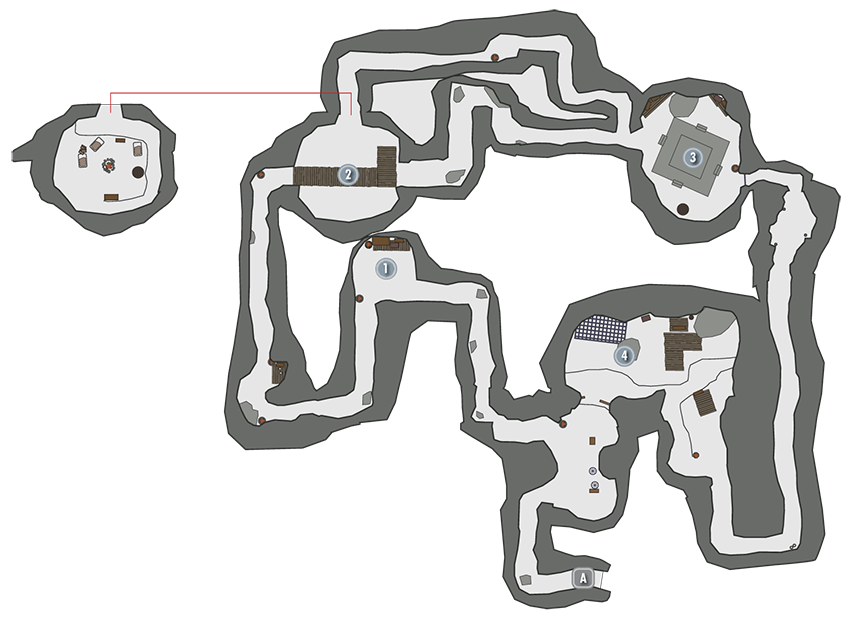
Slay a skeleton on your way to this small cavern, where a mage defends several potions and a chest.
- Chest
- Potions
Bridge Chamber
Avoid falling from this chamber’s wooden rope bridge—it’s a long way down. Instead, visit the bottom of this chamber by venturing down the north passage just before you reach [3]. Collect the Skill Book from the table here, along with the Unusual Gem that sits on the nearby cupboard—the latter begins a Side Quest.
- Crafting: Alchemy Lab
- Skill Book [Restoration]: The Exodus
- Unusual Gem: [7/24]
- Potions
Head Mage’s Lair
A powerful spellcaster lurks in this wide chamber. Raid the place after slaying the mage, collecting a Skill Book from atop an Arcane Enchanter before pulling a wall chain to open the way forward. Steal Soul Gems from the pedestals in the passage that follows to deactivate the dangerous frost spout.
- Crafting: Arcane Enchanter
- Skill Book [Enchanting]: Enchanter’s Primer [D1/10]
- Chest (Locked: Apprentice)
- Apothecary’s Satchel
- Potions
Mage’s Study
Several learned spellweavers guard this final cavern—slay them all to secure a large chest, then drop off the west cliff to return to the cave’s first chamber.
- Chest
- Potion
- Loose gear
[4.06] Frostflow Lighthouse
Related Quests
- Side Quest: Captured Critters*
- Dungeon Quest: What Lies Beneath*
Recommended Level: 18
Dungeon: Falmer Hive
- Animal
- Falmer
Dangers
- Falmer Claw Trap (trip wire)
Collectibles
- Captured Critter: Torchbug in a Jar [2/5]
- Skill Book [Restoration]: Mystery of Talara, v2 [B2/10]
- Chest(s)
- Potions
- Loose gear
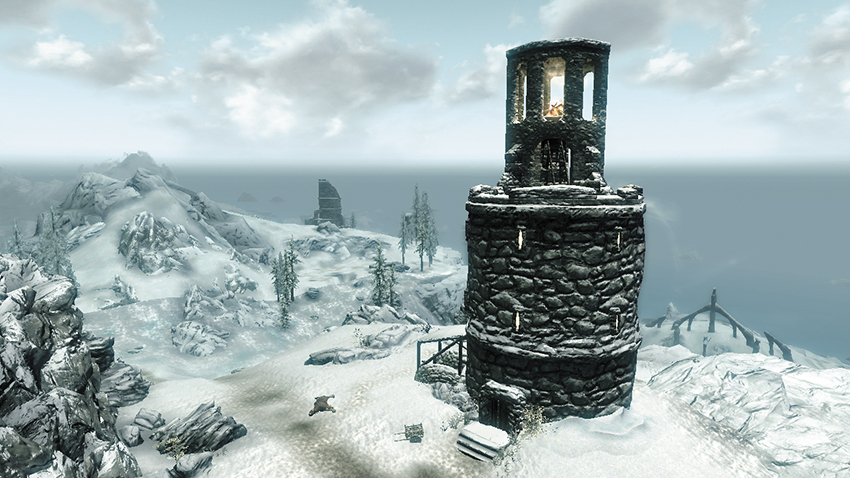
This tall watchtower stands atop Winterhold’s northwest mountains, within clear sight of the Hold’s northern coast.
Exterior
Pick the Novice door lock to open the small storage shed that’s attached to the lighthouse. A few potions are found within.
- Potions
- Loose gear
Frostflow Lighthouse (Interior)
Enter the tower to discover a butchered person. Search the corpse to gain a new Dungeon Quest and obtain an informative journal. A Torchbug in a Jar rests atop the mantel—this pertains to Side Quest: Captured Critters. In the northern room, you find Sudi’s Journal on the desk, Mani’s Letter in the knapsack under the bed, and a Skill Book. In the room adjacent, you find the journal of Ramati, the dead woman you just found. Piecing together the story from these journals will lead you to find Mani’s Cellar Key, hidden in an urn on the mantel above the fireplace. Ramati’s Journal also mentions a promise to cremate her husband in the lighthouse fire in the event of his death (this is important later).
Take the key and use it to reach the cellar where you can clear out a cluster of Chaurus and loot a locked chest. Venture through the large hole in the basement’s southeast wall to proceed to the Frostflow Abyss.
- Captured Critter: Torchbug in a Jar [2/5]
- Skill Book [Restoration]: Mystery of Talara, v2 [B2/10]
- Chest (Locked: Adept)
- Mani’s Cellar Key
- Mani’s Letter
- Ramati’s Journal
- Sudi’s Journal
- Potions
- Loose gear
Path to Frostflow Lighthouse
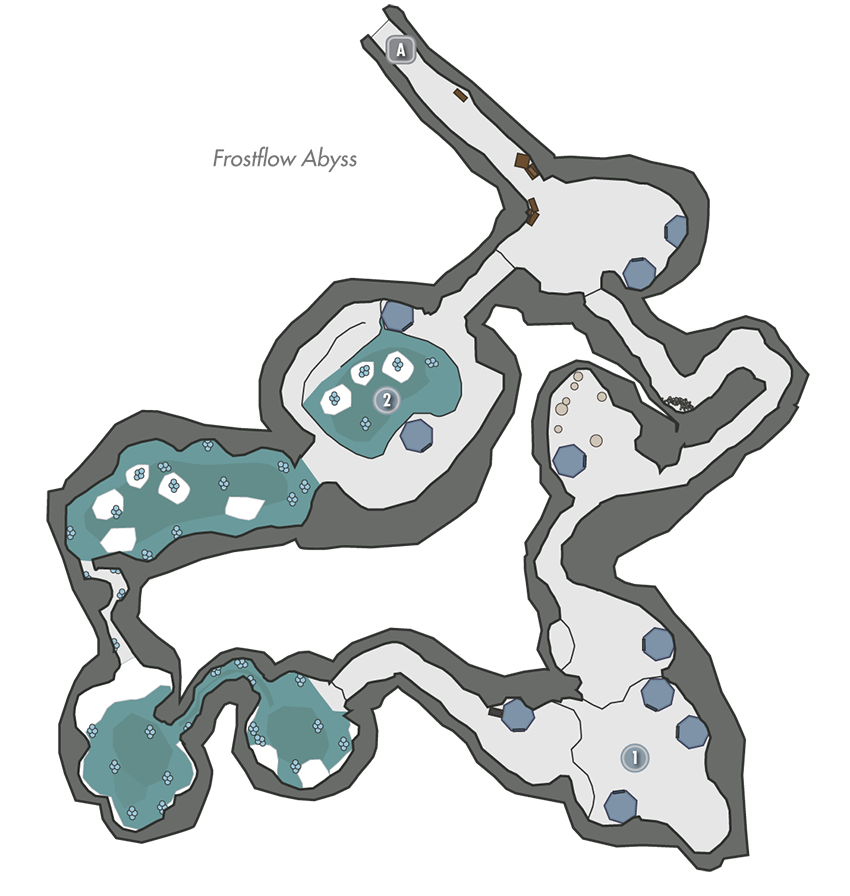
Falmer Den
Exterminate a Chaurus, Falmer, and Frostbite Spiders as you head to this chamber. Carefully trigger a trip wire from a safe distance to disable the Falmer Claw Trap as well. Dispatch all Falmer here, then search the tents to find two chests. Locate a third chest along the passage to [2].
- Danger! Falmer Claw Trap (trip wire)
- Chest (Locked: Novice)
- Chest (Locked: Apprentice)
Chaurus Nest
Slay countless Chaurus on your way to this final cavern, where a monstrous Chaurus lurks—the source of the murders back in the lighthouse. Defeat the fiend to purify this place and complete the Miscellaneous Objective you acquired when you first entered the lighthouse. Collect the key you find within the giant Chaurus’s remains, along with Habd’s Remains (trust us); then take the exterior path to reach a chest with valuable loot.
- Habd’s Lighthouse Key (Chaurus)
- Habd’s Remains (Chaurus)
- Chest
Rooftop Loot
Now that you’ve solved the lighthouse’s mystery, backtrack to the main level and use your newfound key to open the door that leads to the roof. Open the giant chest you find on the roof to obtain a nice haul of plunder. If you like, you may also throw Habd’s Remains into the signal fire to receive a special blessing called Sailor’s Repose, which permanently increases how much you heal with spells by 10 percent.
[4.07] Driftshade Refuge
Related Quests
- The Companions Quest: Purity of Revenge
Recommended Level: 6
Dungeons: Vampire Lair
- Silver Hand
Crafting
- Anvil
- Grindstone
- Workbench
Dangers
- Swinging Wall Trap (pressure plate)
Collectibles
- Skill Book [Block]: Warrior [E1/10]
- Skill Book [Light Armor]: The Rear Guard
- Skill Book [One-Handed]: 2920, Morning Star, v1
- Chest(s)
- Potions
- Loose gear
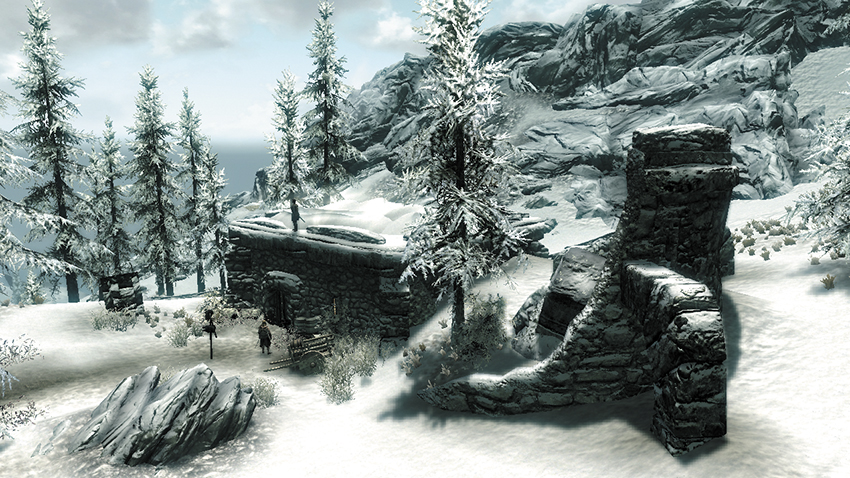
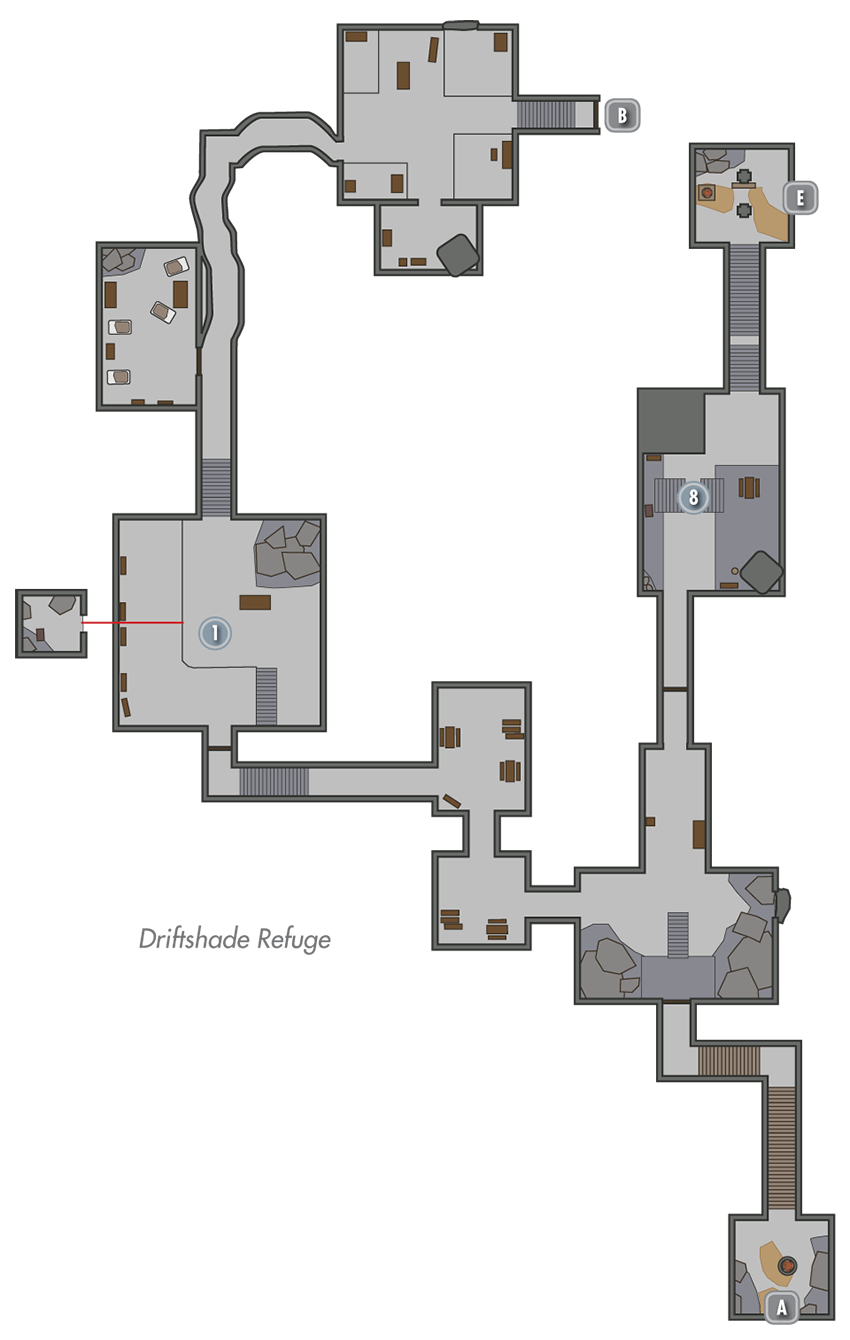
Though it appears to be a small barracks, the Driftshade Refuge features a sizeable tunnel network that’s filled with ruthless ruffians known as the Silver Hand—hated enemies of the Companions. You must fight your way through this area during Companions Quest: Purity of Revenge.
Door to Skyrim
Great Hall
Eliminate severeal Silver Hand and swipe a few minor valuables on your way to this chamber, where a chest awaits pillaging in a nook downstairs.
- Chest (Locked: Adept)
- Potions
- Loose gear
Sleeping Quarters
Pick a locked door to enter this small sleeping area, then slay the groggy guard and plunder the place.
- Area Is Locked (Adept)
- Chest
- Potions
Cellar Access
Dispatch more Silver Hand in this far chamber and pillage a chest before pulling the wall lever to open a passage that leads to the cellar.
- Chest
- Potions
Door to Driftshade Cellar
Door to Driftshade Refuge
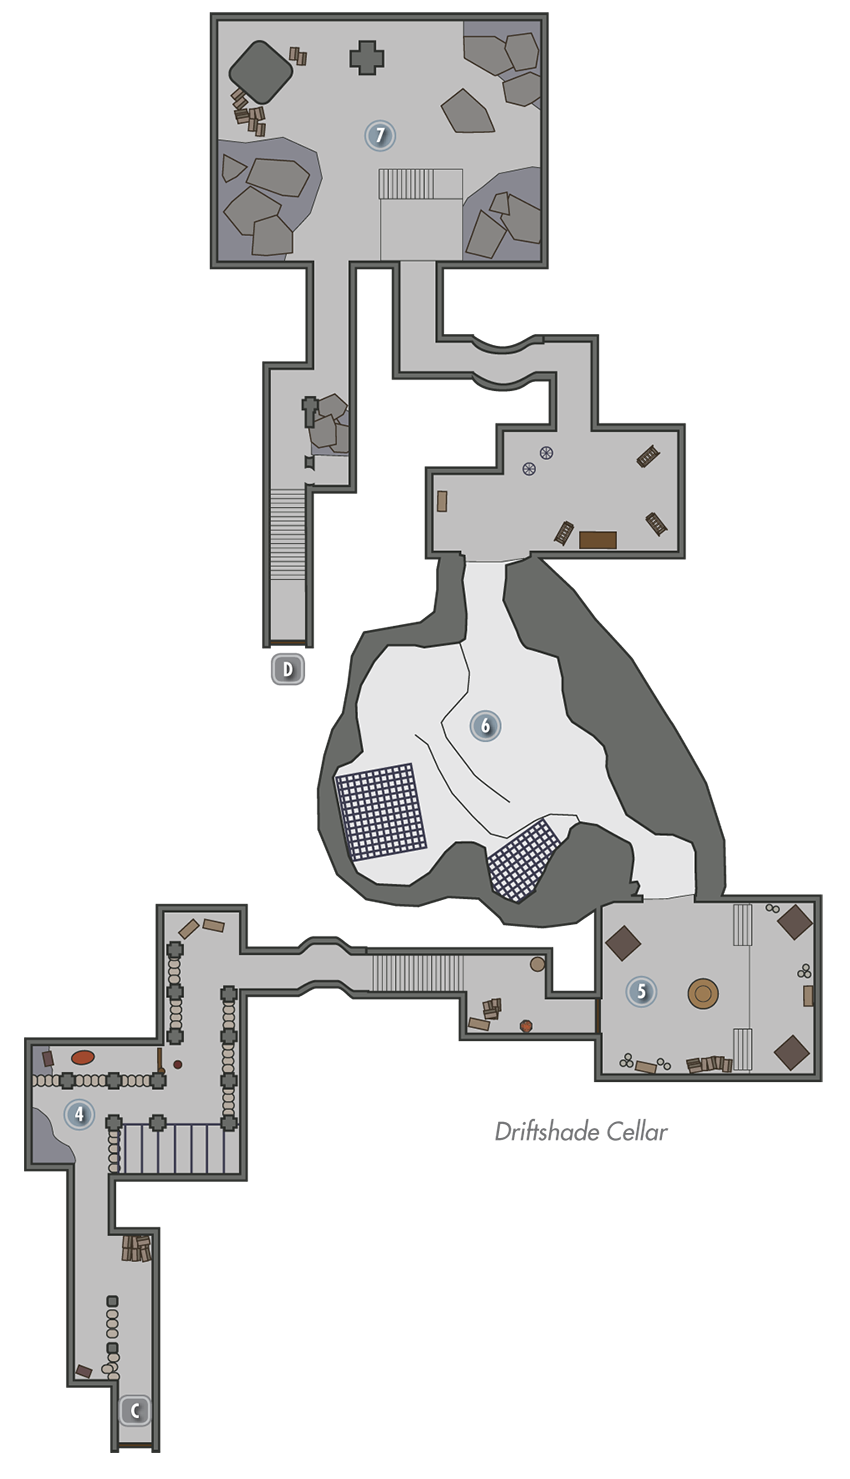
Barrel-Lined Passage
As you enter the cellar, search for a chest that’s tucked away in a dark corner among barrels. Jump a pressure plate trap in this area, and don’t bother picking the locked holding cell—the slain werewolf within has nothing of value.
- Danger! Swinging Wall Trap (pressure plate)
- Chest
- Potions
- Loose gear
Distillery
Dispatch several Silver Hand ruffians here, then collect the Skill Book on the far shelf.
- Skill Book [Light Armor]: The Rear Guard
- Potions
Holding Cells
Enter this snowy cavern, which features two giant holding cells, one of which contains a live werewolf. Free the creature if you dare, but be ready for a challenging battle.
Cellar Hearth
Check behind the large fireplace here to find some potions and a coin purse. Then head through the nearby door to return to the Refuge.
- Potions
Door to Driftshade Refuge
Door to Driftshade Cellar
 Crafting Station
Lay waste to the final crew of Silver Hand bandits here, then locate two Skill Books and loot a large chest before unbarring the far door and making your way back outside.
- Crafting: Anvil, Grindstone, Workbench
- Skill Book [Block]: Warrior [E1/10]
- Skill Book [One-Handed]: 2920, Morning Star, v1
- Chest
[4.08] Fort Fellhammer
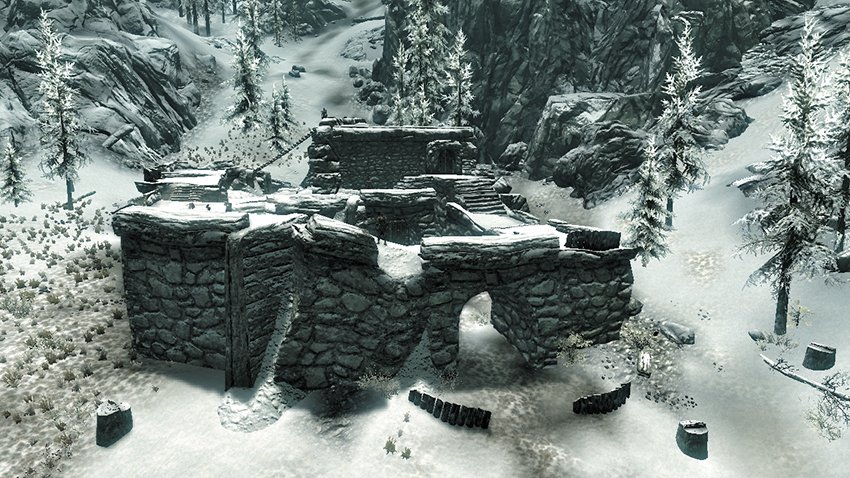
Recommended Level: 6
Dungeons: Bandit Camp
- Bandit
Crafting
- Smelter
Collectibles
- Skill Book [Heavy Armor]: Orsinium and the Orcs
- Chest(s)
- Potions
- Loose gear
- Mineable ore (Iron)
This bandit-ridden keep stands at the west base of Winterhold’s western mountains.
Garrison
Slay the bandit chief inside the small garrison and loot the large chest for valuables.
- Chest
- Potions
- Loose gear
Mines
A skilled hand is required to pick the lock to this fort’s interior mines, where more bandits lurk and iron can be harvested in abundance. More importantly, a Skill Book rests on the far table.
- Area Is Locked (Expert)
- Skill Book [Heavy Armor]: Orsinium and the Orcs
- Mineable ore (Iron)
[4.09] Snowpoint Beacon
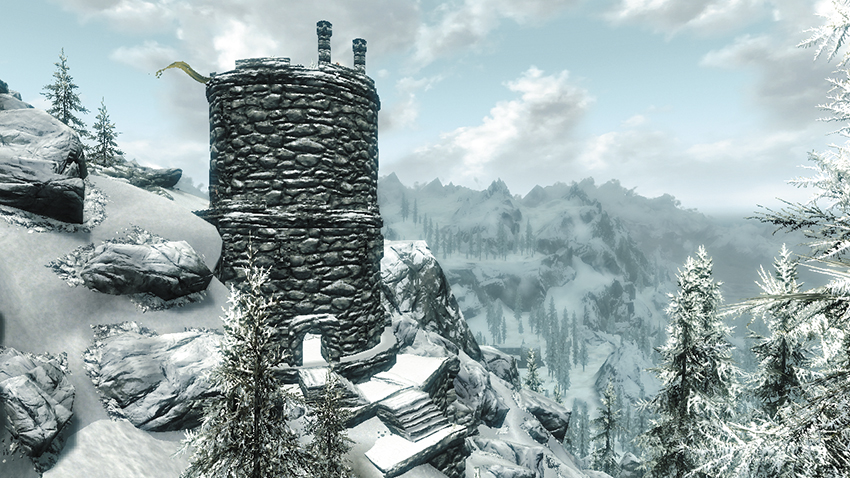
Recommended Level: 5
Dungeon: Bandit Camp
- Bandit
Collectible
- Chest (Locked: Novice)
Bandits have overrun this small tower, which stands atop Winterhold’s west mountains. The chief awaits up top. Loot his body after the slaughter for plenty of plunder.
[4.10] Pilgrim’s Trench
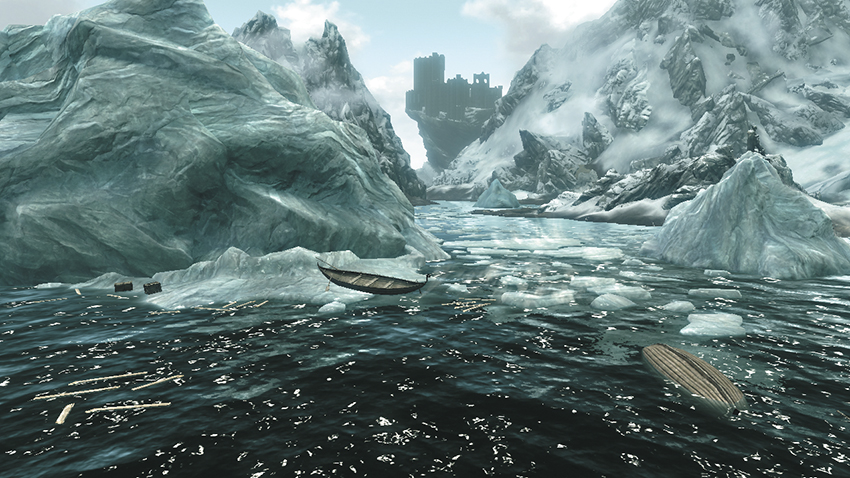
Recommended Level: 6
Dungeon: Shipwreck
Special Objects
- Chests (2)
This small campsite is located along Winterhold’s northern coastline. An interesting note rests atop a nearby barrel. Take a dip into the frigid ocean and swim out to a rowboat to the north. From here, dive straight underwater to discover a graveyard of ships that have wrecked against the ice and sunk. The largest ship, which features a topside cabin, still carries two chests within her hull.
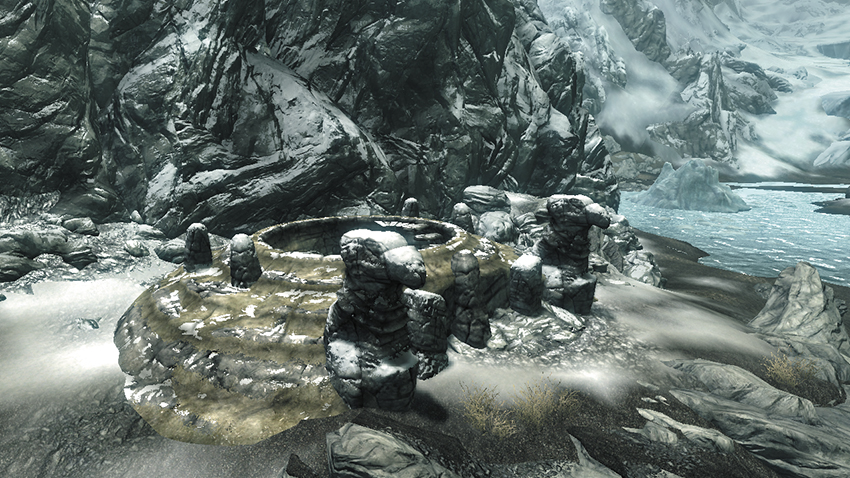
[4.11] Ysgramor’s Tomb
Related Quests
- The Companions Quest: Glory of the Dead
Recommended Level: 6
Dungeon: Draugr Crypt
- Animal
- Companion Ghost
- Kodlak Whitemane
- Kodlak’s Wolf Spirit
Collectibles
- Skill Book [Two-Handed]: The Legendary City of Sancre Tor
- Unique Item: Shield of Ysgramor [31/112]
Special Objects
- Word Wall: Animal Allegiance [1/3]
- Area Is Locked (quest required)
- Chest(s)
- Potions
- Loose gear
This remote burial ground holds special significance to the Companions; you visit here during their “Glory of the Dead” quest. The area remains largely sealed off until you acquire that quest.
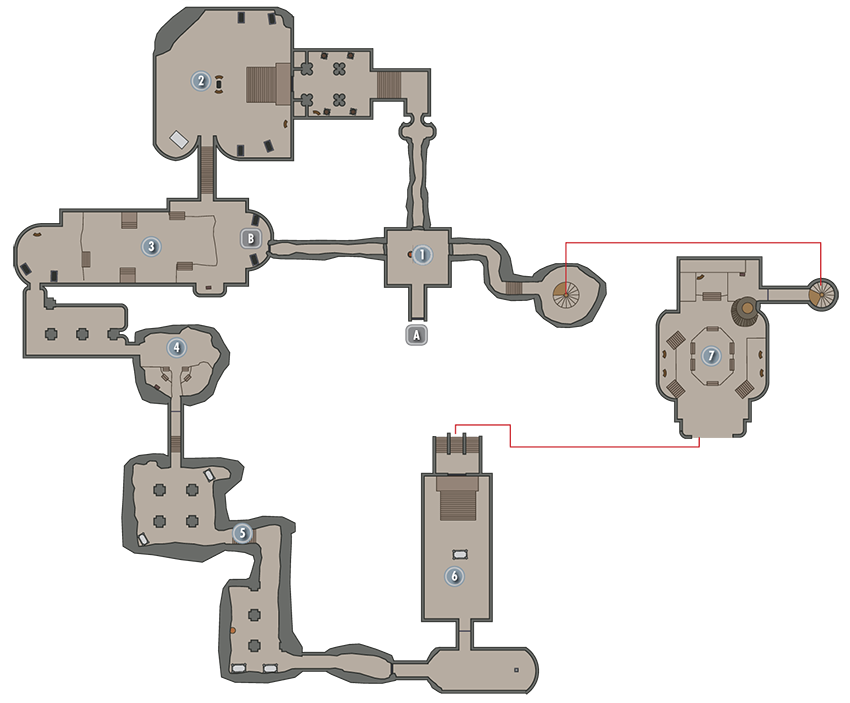
Exit to Skyrim
Entry Chamber
A statue to Ysgramor dominates the tomb’s quiet entry chamber. If you’re running Companions Quest: Glory of the Dead, place the axe Wuuthrad onto the statue at Vilkas’s instruction to open the north passage and advance to [2]. If you haven’t yet obtained that quest, then you cannot explore any farther.
- Potion
- Loose gear
Sarcophagi Chamber A
Prove your valor to the Companions’ ancestors by slaying the Companion Ghosts that emerge from sarcophagi in this sizable chamber.
- Potion
- Loose gear
Sarcophagi Chamber B
Many more Companion Ghosts ambush you here—expect a challenging battle. Raid the room’s southeast chest after things settle down, and find a potion in a nearby sarcophagus. Shred through thick cobwebs and snatch another potion on your way into a small room filled with ravenous Frostbite Spiders.
- Chest
- Potions
- Loose gear
Giant Spider Den
Squash more spiders in this room, including a monstrous Giant Frostbite Spider that drops from the ceiling in ambush. Loot a locked chest and pull a wall chain to open the way forward.
- Chest (Locked: Adept)
Burial Passages
Pocket a bit of plunder as you navigate these quiet halls. More Companion Ghosts attack as you near [6].
- Apothecary’s Satchel
- Potions
- Loose gear
Shrine Chamber
Pull a handle to open the passage that leads into this chamber, where another host of Companion Ghosts descend upon you. Claim a Skill Book and potion from the central table before scaling the north stairs to [7].
- Skill Book [Two-Handed]: The Legendary City of Sancre Tor
- Potion
Burial Chamber
Speak with Kodlak’s spirit in this large room, then examine the nearby Flame of the Harbinger to toss in one of the Glenmoril Witch Heads you obtained earlier in the Companions quest line. Slay Kodlak’s Wolf Spirit when it emerges, then speak with Kodlak again to complete your quest. Raid the chamber’s large northeast chest on your way upstairs, claiming a unique shield from within. You’ll soon find your way back to the tomb’s entry chamber.
- Unique Item: Shield of Ysgramor [31/112]
- Chest
- Loose gear
Exit to Skyrim
Exterior World Wall
Upon returning to [1], take the west passage and exit out to Skyrim via the west door. Marvel at the view for a moment before sprinting up the snowy steps to discover a Word Wall.
- Word Wall: Animal Allegiance [1/3]
[4.12] Saarthal
Related Quests
- College of Winterhold Quest: Under Saarthal
- Side Quest: Forbidden Legend
Recommended Level: 6
Dungeon: Draugr Crypt
- Arniel Gane
- Draugr
- Jyrik Gauldurson
- Nerien
Crafting
- Alchemy Lab
Dangers
- Dart Trap (pressure plates)
- Rune Traps (floor)
Puzzles
- Nordic Pillars I
- Nordic Pillars II
Quest Items
- Enchanted Rings (3)
- Saarthal Amulet
Collectibles
- Skill Book [Two-Handed]: The Legendary Sancre Tor
- Unique Item: Enchanted Ring [32/112]
- Unique Item: Gauldur Amulet Fragment (Saarthal) [33/112]
- Unique Item: Saarthal Amulet [34/112]
- Unique Weapon: Staff of Jyrik Gauldurson [23/80]
Special Objects
- Word Wall: Ice Form [2/3]
- Area Is Locked (quest required)
- Chest(s)
- Potions
- Loose gear
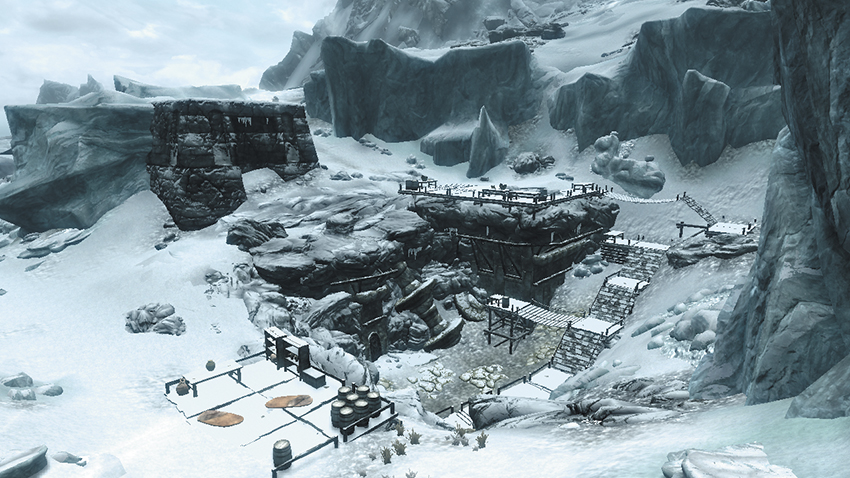
This snowy excavation site lies just southwest of Winterhold’s capital and serves as the setting for the College of Winterhold’s second quest.
Exterior
Loot a chest and several urns before speaking with Tolfdir at the excavation site as part of College of Winterhold Quest: Under Saarthal. Tolfdir unlocks the nearby door and urges you keep pace as he heads inside.
- Chest
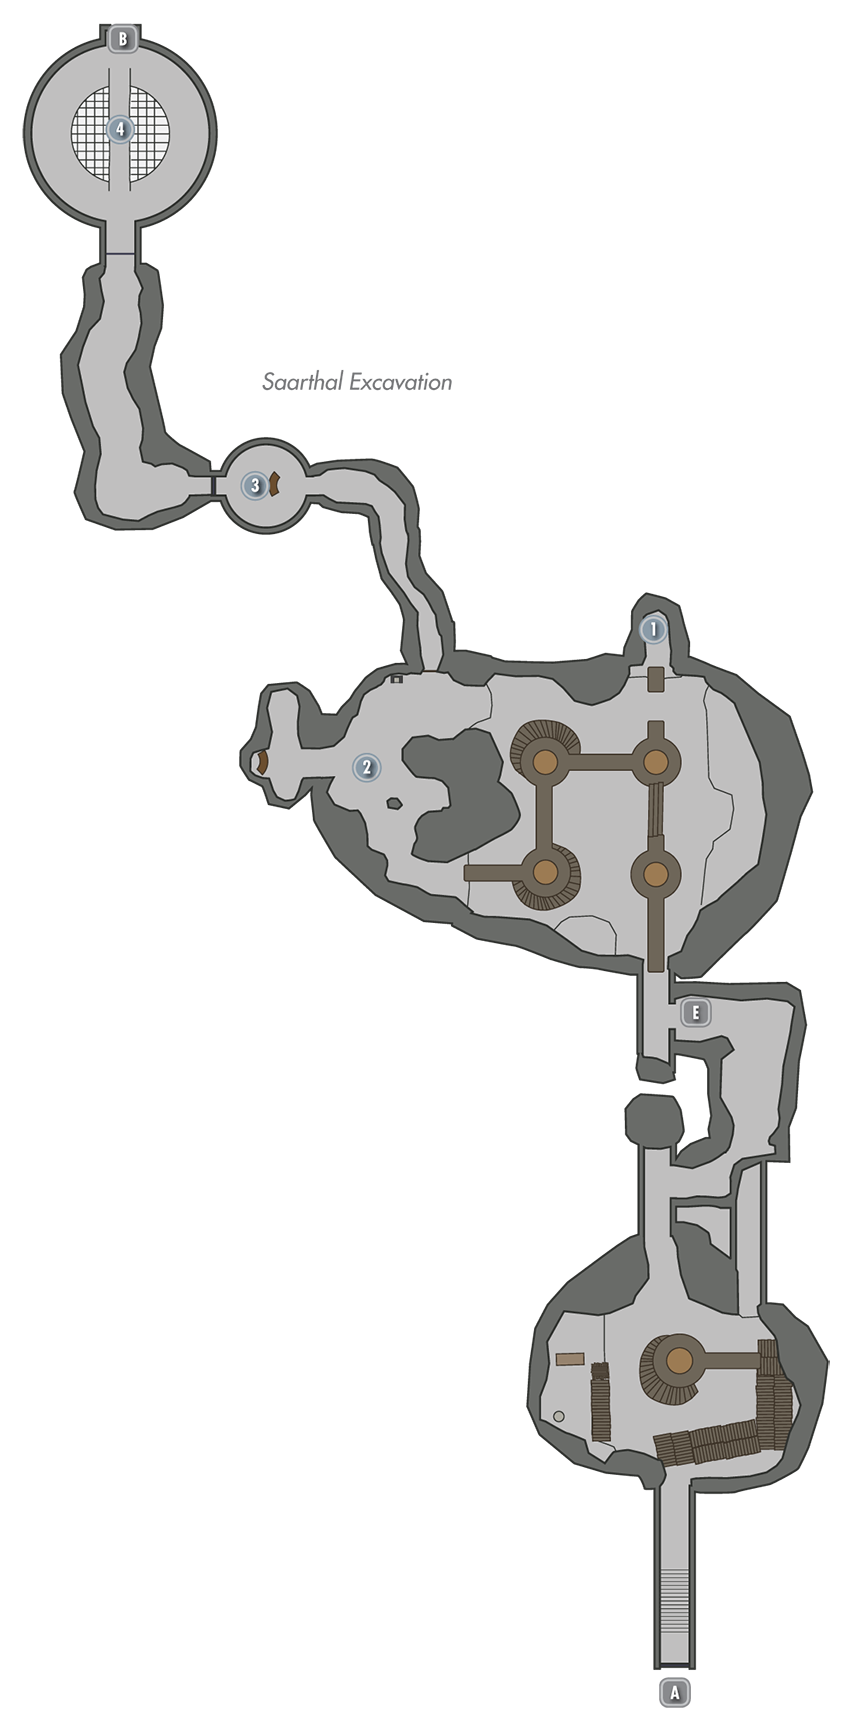
Exit to Skyrim
Chest Ledge
Chat up your colleagues as you follow Tolfdir deep into the excavation site. While navigating the high, narrow walkways here, boldly leap over to this north ledge and loot a chest.
- Chest
- Loose gear
Arniel Gane’s Study
Follow Tolfdir all the way to Arniel Gane’s study, then speak with Arniel to advance the quest. Use your map and compass to locate four magical artifacts scattered about the nearby area—three small enchanted rings found on the ground and one amulet that hangs from a wall. Removing the amulet springs a trap. Speak with Tolfdir, then put on the amulet and strike the wall where you recovered the amulet with any spell to destroy it, gaining your freedom.
- Unique Item: Enchanted Ring [32/112]
- Unique Item: Saarthal Amulet [33/112]
Vision Chamber
Tell Tolfdir of the curious vision you have upon entering this small chamber, then slay the powerful Draugr that burst out from the room’s standing sarcophagi. Follow Tolfdir into the west passage, pulling a lever to open a gate on your way to [4].
Coffin Chamber
You become trapped in this chamber when you enter and are forced to battle a swarm of Draugr. Slay them with haste, then pull the far wall chains to open the way forward; this seals off the passage from which you came. Tolfdir remains here to study; head through the west door to brave the heart of Saarthal.
Door to Saarthal
Door to Saarthal Excavation
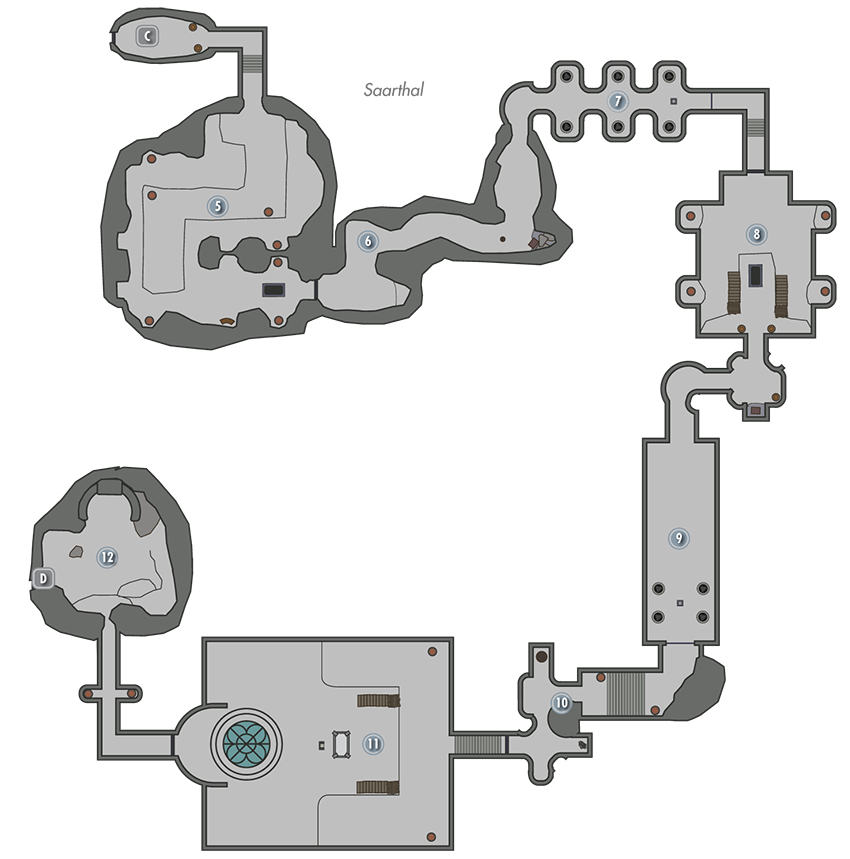
Draugr Passages
Sneak through these dark corridors, or risk awakening several powerful Draugr. Venture upstairs to loot a few urns and go through an iron door on your way to [6].
Trapped Passage A
Beware of a rune trap that’s been cast on the ground in this hall. Detonate it with a ranged attack from afar to safely advance. Avoid a pressure plate next, which lies just in front of a tantalizing chest. Slay or sneak past a few more deadly Draugr on your way to [7].
- Danger! Rune Trap (floor), Dart Trap (pressure plate)
- Chest
Puzzling Pillars
Spin the six pillars in this passage so that each one’s glyph matches the glyph on the wall behind it (Snake, Whale, Hawk, Hawk). Pull the lever to raise the portcullis and advance.
- Potion
Great Hall
Kill or avoid a deadly Draugr in this cavernous chamber, opening the far door to access a chest on your way to [9]. Beware of more rune traps that lie on the floor just beyond the chest. Detonate them both with ranged attacks from a safe distance.
- Danger! Rune Traps (floor)
- Chest
 More Nordic Pillars
Solve another simple puzzle here by spinning the four pillars so that their facing glyphs match those that make up the mouths of the nearby stone heads (Snake, Whale, Hawk, Whale). This is somewhat tricky, because rotating one pillar may also cause others to spin in sync. One of the pillars can be spun independently—save this one for last as you focus on correctly aligning the other three.
 Trapped Passage B
Tolfdir catches up to you as you enter this passage. Avoid the pressure plate on the floor as you swipe gear, potions, and loot urns here. Collect the Skill Book that rests atop the Alchemy Lab before entering the final cavern.
- Danger! Dart Trap (pressure plate)
- Crafting: Alchemy Lab
- Skill Book [Two-Handed]: The Legendary Sancre Tor
- Potions
- Loose gear
 Orb Chamber
A massive orb that churns with mysterious energy awaits you in this chamber, along with a deadly Draugr named Jyrik Gauldurson. No attack can harm Jyrik until Tolfdir begins to drain the energy from the orb. You must then vary your attacks to counter the Draugr’s defensive magics. Raid the chamber after the fight, then promise Tolfdir that you’ll hurry back to the College to tell the Arch-Mage of your discovery.
- Unique Item: Gauldur Amulet Fragment (Saarthal) [34/112]
- Unique Weapon: Staff of Jyrik Gauldurson [23/80]
 Word Wall Grove
This small cavern houses a mystical Word Wall. Approach the object to gain a new Word of Power as you follow the exit route out of Saarthal.
- Word Wall: Ice Form [2/3]
Door to Saarthal Excavation
Door to Saarthal
[4.13] Alftand
Related Quests
- Main Quest: Elder Knowledge
- Daedric Quest: Discerning the Transmundane
- Dungeon Activity
Recommended Level: 16
Dungeon: Dwarven City
- Animal
- Dwarven Centurion
- Dwarven Sphere
- Dwarven Spider
- Falmer
- J’darr
- Sulla Trebatius
- Umana
Crafting
- Alchemy Lab
- Blacksmith Forge
- Tanning Rack
- Workbench
Dangers
- Bone Alarm Trap
- Dwarven Piston Traps
- Dwarven Thresher Trap (pressure plates)
- Falmer Claw Trap (trip wire)
- Flamethrowers
- Flamethrowers (button)
- Oil Pool Traps
- Spear Trap (pressure plates)
- Swinging Wall Trap (pressure plate)
Underground Connection: Blackreach [10.02]
Collectibles
- Skill Book [Lockpicking]: The Locked Room [D2/10]
- Unique Item: Targe of the Blooded [35/112]
Special Objects
- Dwarven Mechanism
- Chest(s)
- Potions
- Loose gear
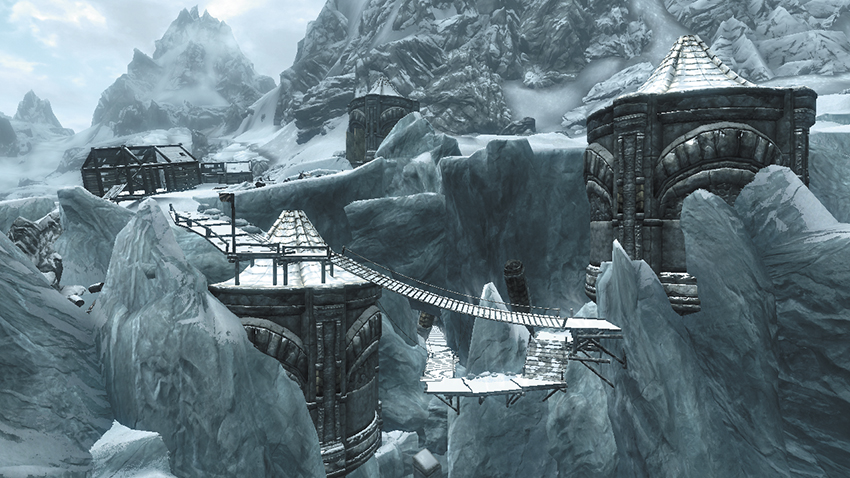
This collection of Dwarven ruins has been exposed by the splitting of a massive glacier in the mountains southwest of Winterhold’s capital. Navigating a ruined tower grants passage up to a high excavation site.
Exterior (Lower Glacier)
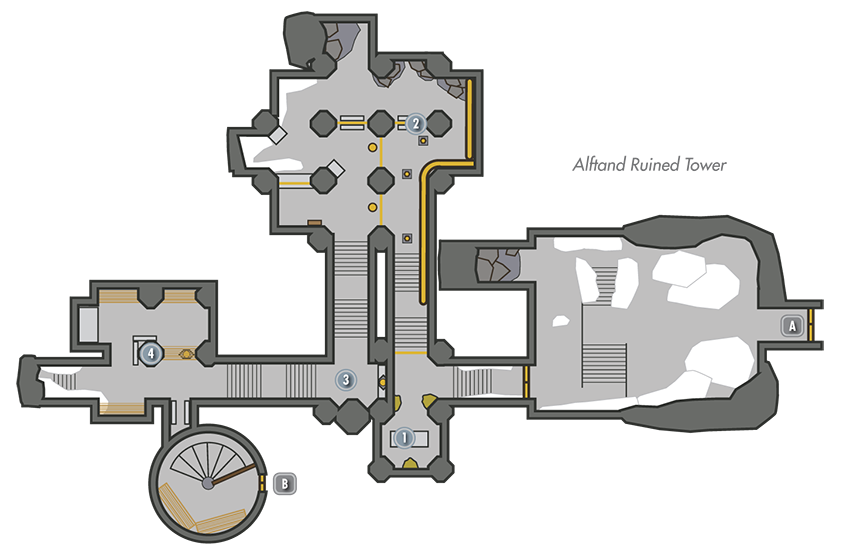
Slay the odd animal as you sprint south along the base of the glacier’s wide fissure. Enter the ruined tower at the fissure’s far end to navigate an interior passage that leads you high atop the glacier.
Exit to Skyrim
Chest Nook A
Sneak through the ruined tower, or you risk alerting Dwarven Spiders and Spheres that quickly emerge from small portals in the walls. Find a chest here, and push a button to open the nearby gate. This also activates several flamethrowers near the gate, which you must sprint through. Read the nearby book to learn the Lesser Ward spell, which can help reduce the flamethrowers’ harmful effect.
- Danger! Flamethrowers (button)
- Chest (Locked: Apprentice)
- Potion
- Loose gear
Trapped Stairwell
Beware of pressure plates in this passage as you head upstairs. If Dwarven Spheres sense your presence, try using these traps against them by looping around and pressing the buttons on the other side of the thin metal gate.
- Danger! Spear Trap (pressure plates)
Chest Nook B
If possible, unlock a challenging chest here to claim worthy loot.
- Chest (Locked: Expert)
Storage
Swipe some potions from the metal shelves here, and unlock another chest that sits on the ground. Make your way up a spiral stairwell and exit the tower.
- Chest (Locked: Adept)
- Potions
Exit to Skyrim
Exterior (Upper Glacier)
Head south after passing through the ruined tower, scaling a snowy hill. Sprint east to finally locate the Alftand excavation site. Search some open-air cabins here to discover a chest and an informative journal, then descend a series of wooden planks to discover a cave that leads into Alftand’s glacial ruins.
- Chest
Exit to Skyrim
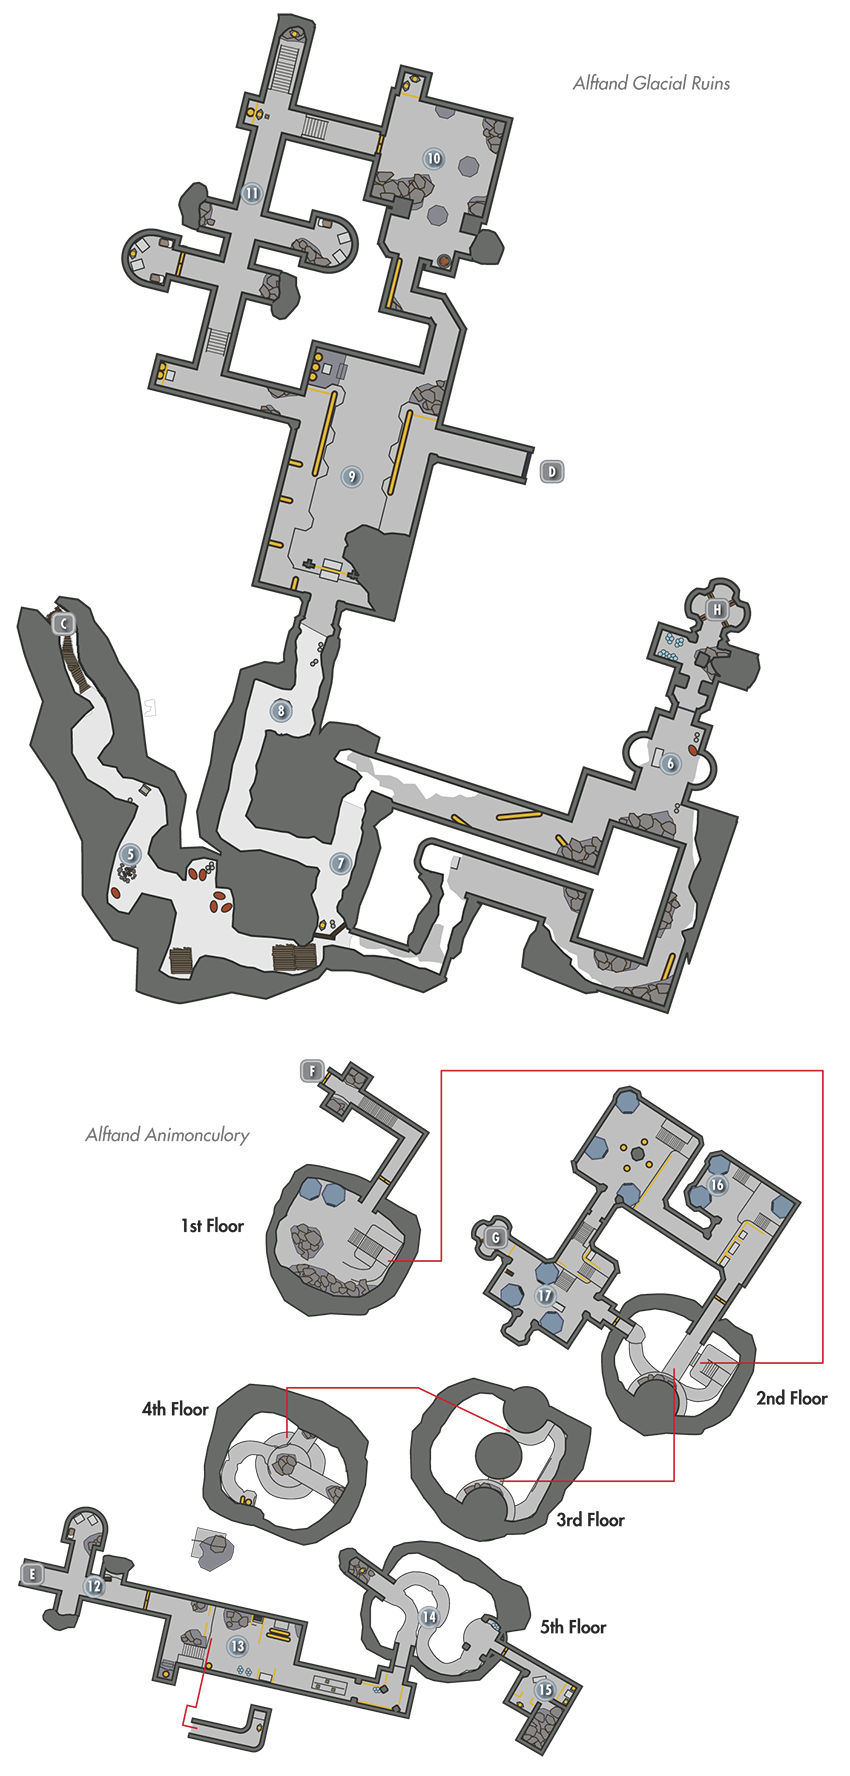
Glacial Ruins’ Entry Passage
Thumb through Sulla’s Journal, which lies on a barrel in the Glacial Ruins’ first passage, for a bit more insight into the expedition. Raid a nearby chest for plunder as well. As you pass a boarded off section by a dwarven tower, you can catch a glimpse of a deranged Khajiit searching the ruins and muttering to himself.
- Chest
Workstation
Trek through the frigid passages that lead to this work area. Inspect a book on the table here to learn more about the ill-fated excavation effort, and loot a chest that lies in the nearby snow. You can’t open the nearby gate for now, so continue following the snaking passage as it doubles back on itself. Be wary as Dwarven Spiders start to pop out of hiding.
- Chest (Locked: Novice)
- Loose gear
Chest Nook C
Find a chest and potion tucked away in this snowy corner, along with a coin purse and Apothecary’s Satchel.
- Chest
- Apothecary’s Satchel
J’darr Encounter
You encounter one of the expedition’s laborers in this icy passage. J’darr has gone quite mad and relentlessly attacks you on sight. Search around to find a pack, several potions, and an insightful journal afterward.
- J’zhar’s Pack
- Potions
- Loose gear
Oily Chamber
Flip through yet another journal as you enter this sizable chamber. Beware of Dwarven Spheres that emerge from portals in the room’s center. Ignite the oily floor to burn them up. Ride a trio of vertical dwarven piston traps in the room’s northwest corner to reach loot on a high ledge
- Danger! Oil Pool Traps
- Chests (2)
- Potions
Forge
Exploit this chamber’s oily floor as well to help you defeat its Dwarven Spiders. Use a crafting station here and unlock the Novice-level northwest gate to raid a small treasure nook.
- Crafting: Blacksmith Forge
- Chest (Locked: Apprentice)
- Chest (Locked: Adept)
Trapped Chest Corridor
Avoid the pressure plate that lies in front of this passage’s tantalizing chest, and loot another chest that lies among the nearby north rubble. Collect a few potions as you explore the passage’s southern alcoves, and pick an Apprentice-level gate to access a small room with yet another chest. Several Dwarven Spiders can be seen working through here, which can be bypassed if you are very stealthy.
- Danger! Spear Trap (pressure plate)
- Chests (2)
- Chest (Locked: Adept)
- Potions
Oily Chamber Revisited
You soon return to [9], entering at a high balcony. Loop around the room, jumping or slipping past rows of dangerous dwarven piston traps that threaten to knock you down. Destroy a few more Dwarven Spiders on your way to the door that leads to the Animonculory.
- Danger! Dwarven Piston Traps
Door to Alftand Animonculory
Door to Alftand Glacial Ruins
Animonculory Entry
Raid two chests in this first passage, one of them dark and made of bone and Chaurus hide.
- Chests (2)
 Connecting Corridor
First, explore this wide corridor’s lower tunnel to discover the remains of another member of the dig team, along with his personal journal. Loot a locked chest before backtracking out and heading upstairs to discover another chest and some potions in the oily passage above. Avoid the pressure plates on the slope that follows—they trigger a lethal trap.
- Danger! Oil Pool Trap, Dwarven Thresher Trap (pressure plates)
- Chest
- Chest (Locked: Adept)
- Potions
 Grand Cavern
Pull a lever to open the way into this tall chamber, then follow the first elevated walkway to its end to discover a chest and a few potions among debris. Descend the central winding ramp, and pick an Apprentice-level door to visit [15] before making a long drop down to a bloodstained platform, where the body of another excavation team member lies pierced with arrows on the rubble. Dispatch Dwarven Spiders and avoid pistons as you continue to descend the winding ramp, sprinting past a flamethrower when it momentarily deactivates to reach the door to [16].
- Danger! Flamethrower Trap, Dwarven Piston Traps
- Chest (Locked: Novice)
- Potions
 Treasure Room
Unlock a gate to visit this chamber and raid a chest. Unlock an Expert-level gate here to access a second chest with even more plunder.
- Area Is Locked (Apprentice)
- Skill Book [Lockpicking]: The Locked Room [D2/10]
- Chests (2)
- Chest (Locked: Master)
- Potions
 Falmer Den
Vicious Falmer have erected tents in these chambers. Slay the foul creatures, seeking to exploit oil spills when possible. Some ingredients and an alchemy workbench can be found in a corner, as well as some ingots and dwarven scrap on the shelves. The second room contains a blacksmith forge, as well as an armor workbench. Shelves to the left of the stairs can be used to sneak past the Falmer and traps here or to provide a good sniping position.
- Danger! Bone Alarm Trap, Flamethrower Trap, Oil Pool Trap
- Crafting: Alchemy Lab, Blacksmith Forge, Workbench
 Torture Room
The Falmer have turned the tools of their dwarven captures to their own uses, and the body of yet another excavation team member lies on a torture table. If you’ve had enough adventuring, ride the northwest elevator back to the start of the Glacial Ruins (behind the barred-off area you found before). You can quickly return to this point later. When you’re ready to delve deeper into Alftand, go through the southeast door to return to [14] and take a winding ramp down to the Grand Cavern’s bottom.
- Crafting: Tanning Rack
Grand Cavern Revisited
Slaughter a host of Falmer and Frostbite Spiders at the Grand Cavern’s bottom, then pass through a door and avoid a trap in the short hall that leads to the cavernous Alftand Cathedral.
- Danger! Falmer Claw Trap (pressure plate)
 Door to Alftand Cathedral
 Door to Alftand Glacial Ruins
 Door to Alftand Animonculory
Alftand Cathedral
Dodge a few pressure plates as in the cathedral’s entry passage. If you’re lucky, the patrolling Falmer may trigger them for you. Open a door and slay or sneak past more Falmer in the cavernous chamber. Loot three grotesque chests in and around the surrounding Falmer tents, then scale the east stone steps to find two dwarven chests, along with a lever that opens the west gate. Loot another two dwarven chests beyond the gate as you head upstairs, then defeat a mighty Dwarven Centurion to obtain a useful key. Raid one final dwarven chest at the top of the stairs before opening a gate and confronting the final two members of the expedition.
Slay the remaining expedition members while they are busy attacking each other, then either use the nearby Dwarven Mechanism to visit Blackreach [10.02], or use the key you found on the Centurion to open the nearby gate and take an elevator back up to the surface. Don’t forget to take the Targe of the Blooded off of Umana’s corpse. This unique shield causes bleeding damage to enemies when you bash them with it.
- Danger! Swinging Wall Trap (pressure plates)
- Unique Item: Targe of the Blooded [35/112] (Umana)
- Key to Alftand Lift (Dwarven Centurion)
- Chests (4)
- Chest (Locked: Novice)
- Chests (Locked: Apprentice) (2)
- Chest (Locked: Adept)
- Potion
- Loose gear
[4.14] Wayward Pass
Recommended Level: 5
Dungeon: Special
Special Objects:
- Shrine of Arkay [3/12]
- Loose gear
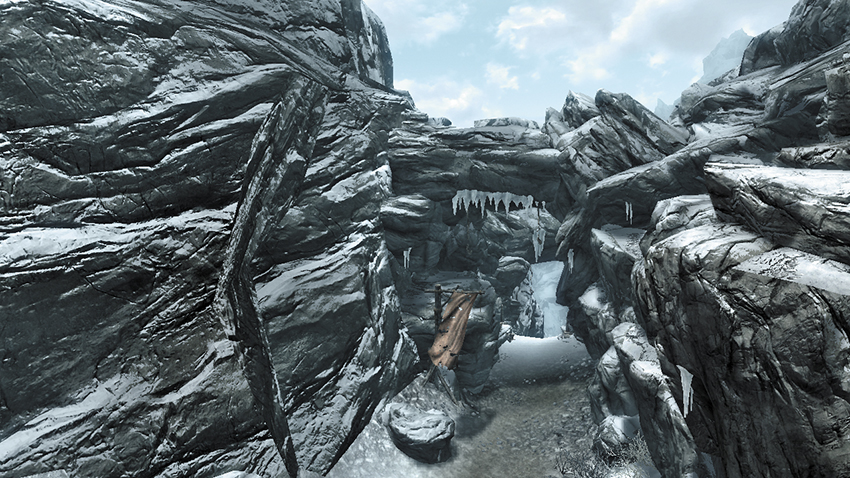
This smooth trail cuts through Winterhold’s harsh central mountains, making it the easiest means of traveling between this Hold and the southern end of the Pale. As a bonus, touch the shrine located halfway through this serene pass to instantly cure any diseases you might have.
[4.15] Ironbind Barrow
Recommended Level: 6
Dungeon: Draugr Crypt
- Animal
- Beem-Ja
- Draugr
- Salma
- Warlord Gathrik
Dangers
- Spear Trap (pedestal)
- Spear Trap (pressure plate)
Collectibles
- Unique Weapon: Steel Battleaxe of Fiery Souls [24/80]
Special Objects
- Word Wall: Become Ethereal [2/3]
- Chest(s)
- Potions
- Loose gear
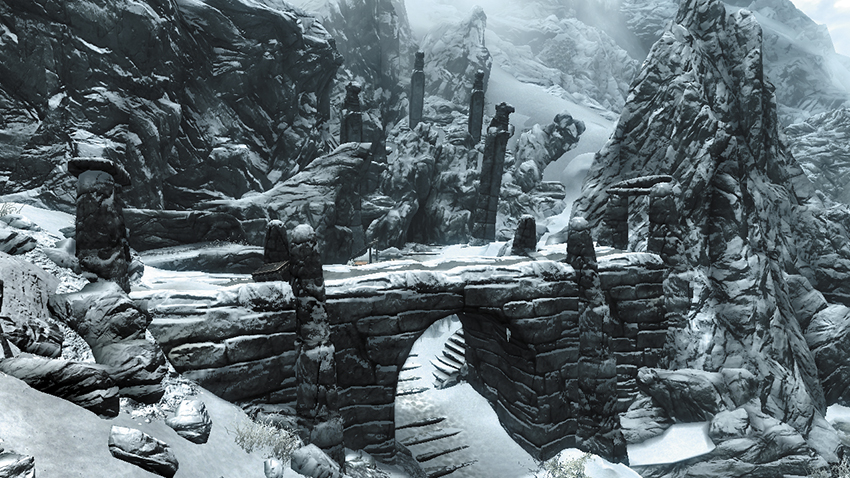
Near the heart of Winterhold, two adventurers stand just outside a cave. Listen to their discussion to learn that treasure lies within. Approach the pair afterward and speak to Salma. Tell her that you’re “going inside” to entice her and her partner Beem-Ja to rush into the cave ahead of you, thereby acting as partners to help you clear this dangerous area. Hurry inside after them. Alternatively, just barge in and they’ll do the same.
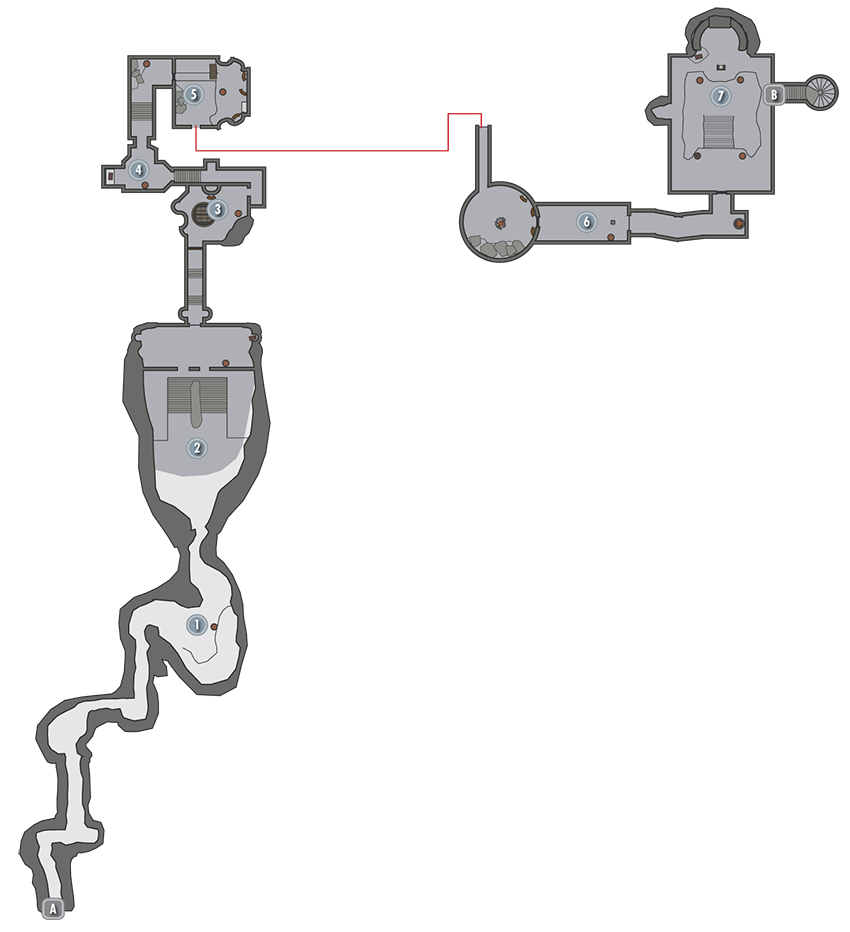
Exit to Skyrim
Giant Spider’s Lair
Slay a couple of Frostbite Spiders on your way to this first cavern, where a Giant Frostbite Spider lurks. Work together with Salma and Beem-Ja to bring the brute down.
Tomb Chamber
Stairs lead up to an ancient tomb, but the door is sealed tight. Raid a chest in the nearby east nook, then locate a handle in the west nook, which opens the tomb.
- Chest
Tomb Entry
Beware: a mighty Draugr ambushes you in the tomb’s small entry chamber. Slay the fiend, then snag some nearby potions and open the chest in the west nook.
- Chest
- Potions
- Loose gear
Trapped Treasure Nook
Avoid the pressure plate on the ground before this tantalizing chest.
- Danger! Spear Trap (pressure plate)
- Chest
Draugr Den
Slay a vicious little Skeever on your way into this chamber, where more powerful Draugr await. Dispatch yet more deadly Draugr as you head to [6].
- Chest (Locked: Adept)
- Potions
Pedestal Passage
Backpedal the moment you take the item off the pedestal here—removing the loot causes spears to stab up from the surrounding ground, yet also opens the way forward. There is also a chain hidden in the ceiling arch nearby, allowing you to open the way forward without fear of pointy retribution.
- Danger! Spear Trap (pedestal)
- Loose gear
Gathrik’s Chamber
A mighty Draugr warlord named Gathrik awaits you in this final chamber. Once this ancient horror is dispatched, Beem-Ja will reveal his true colors and must be put down. Find a unique axe affixed to the back of the throne, and approach the far Word Wall after slaying the traitorous villain to acquire a new Word of Power. Loot a large nearby chest as well before dropping down to the lower ground and pulling a chain to open the exit passage.
- Unique Weapon: Steel Battleaxe of Fiery Souls [24/80]
- Word Wall: Become Ethereal [2/3]
- Chest
- Potions
- Loose gear
Exit to Ironbind Overlook
[4.16] Mount Anthor
Recommended Level: 10
Dungeon: Dragon Lair
- Dragon (after Main Quest: Dragon Rising)
- Mage
Special Objects
- Word Wall: Ice Form [3/3]
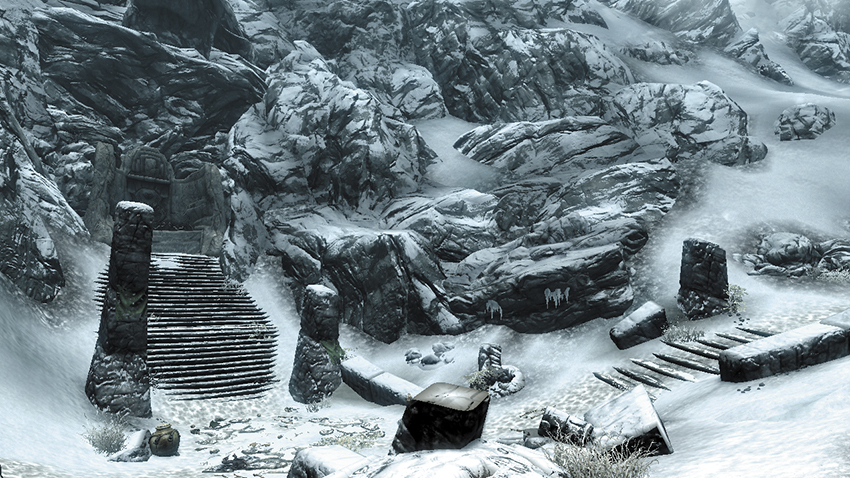
High in the heart of Winterhold’s central mountains, a snow trail leads to stone steps, which in turn lead to an ancient Word Wall. You must overcome powerful mages to secure this site and acquire a new Word of Power. If a dragon has roosted here, the mages have already been dealt with; slay the Dragon to claim your prize.
[4.17] Sightless Pit
Recommended Level: 18
Dungeon: Falmer Hive
- Animal
- Falmer
Dangers
- Dwarven Thresher Trap (proximity)
- Spear Trap (pressure plate)
Collectibles
- Skill Book [Pickpocket]: Aevar Stone-Singer
- Chest(s)
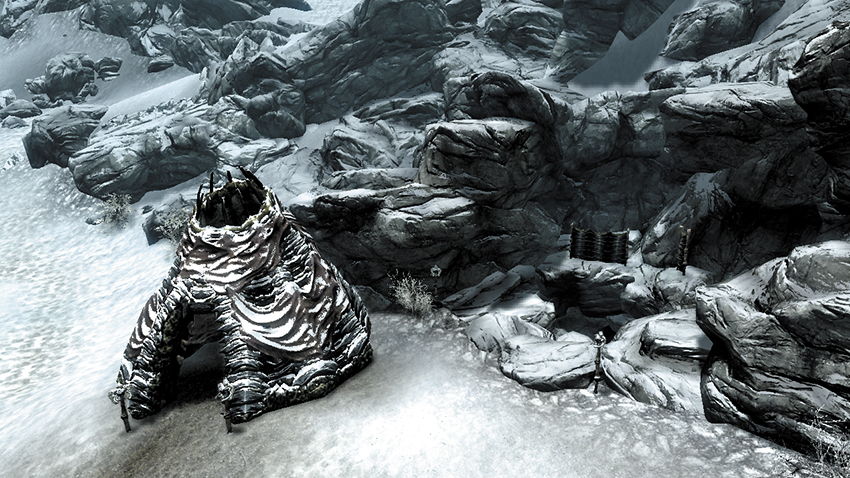
Drop into this dark hole if you dare—you’ll land in a large, frozen cave, which leads to a rare Falmer temple.
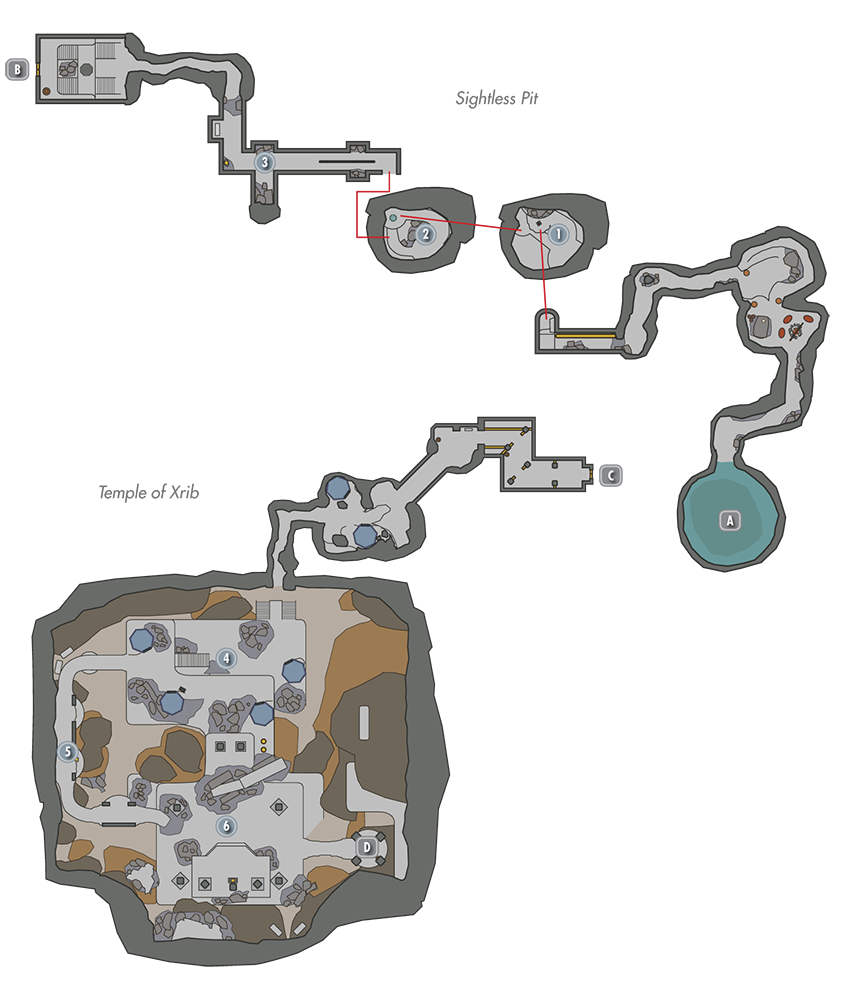
Exit to Skyrim
Trapped Passage
Grab a Skill Book that’s found near a campsite on your way to this passage, where you must sidestep a pressure plate to avoid being impaled by spears. Slay the Falmer that emerges from the hole in the wall ahead.
- Danger! Spear Trap (pressure plate)
- Skill Book [Pickpocket]: Aevar Stone-Singer
Vertigo Chamber
Avoid vertigo as you carefully traverse this tall, disorienting chamber. Drop from one ledge or outcropping to the next to break up your descent. Slay a few Falmer and a Chaurus as you near the bottom, then carefully maneuver past the spinning blade trap by seeking shelter in the side nooks.
- Danger! Dwarven Thresher Trap (proximity)
Path to the Temple
Slay a few more Falmer in this winding passage, and don’t miss looting the odd-looking chest on your way to the Temple of Xrib.
- Chest
Door to Temple of Xrib
Door to Sightless Pit
North Temple Grounds
Slay Falmer and Chaurus until you reach this vast cavern, where a massive temple has been built. Check in and around the Falmer tents to discover several chests.
- Chests (4)
Connecting Path
Take this passage to reach [6], looting a chest that rests on the railing along the way.
- Chest
South Temple Grounds
Battle a host of Frostbite Spiders and a powerful Falmer in this southern area, then loot the unique chest to the south. Take the east passage to an elevator that ferries you up to a small, empty cave. Simply pass through to return to the cold embrace of Skyrim.
- Chest
Elevator to Abandoned Cave
[4.18] Shrine of Azura
Related Quests
- Daedric Quest: The Black Star
Dungeon: Special
- Aranea Ienith (Follower)
Services
- Follower: Aranea Ienith [12/47]
Collectibles
- Unique Item: Azura’s Star [36/112]
- Loose gear
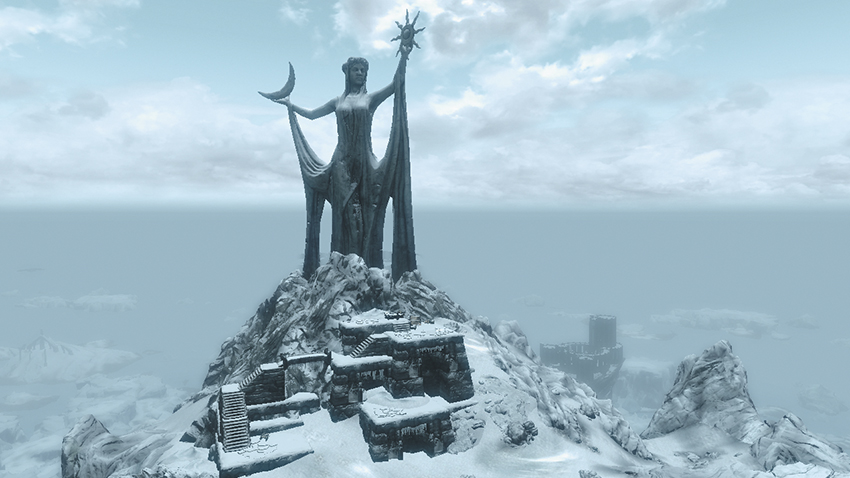
This awesome statue to the goddess Azura towers high atop Winterhold’s snowcapped northeast peaks. Scale the icy stone steps and speak with Aranea Ienith, who prays at the statue’s base, to obtain a new Side Quest. Return here later and give Azura’s Star to Aranea to speak with the goddess Azura, who asks you to enter her Star [10.01] and purge Malyn Varen’s soul from the sacred object.
If you choose to complete “The Black Star” quest with Aranea’s help, she’ll become available as a Follower afterward.
[4.19] Fort Kastav
Related Quests
- Civil War Quest: Reunification of Skyrim
- Civil War Quest: Rescue from Fort Kastav
Recommended Level: 6
Habitation: Military Fort
- Mage
- Skeleton
Crafting
- Alchemy Lab
Collectibles
- Skill Book [Block]: Warrior [E2/10]
- Chest(s)
- Potions
- Loose gear
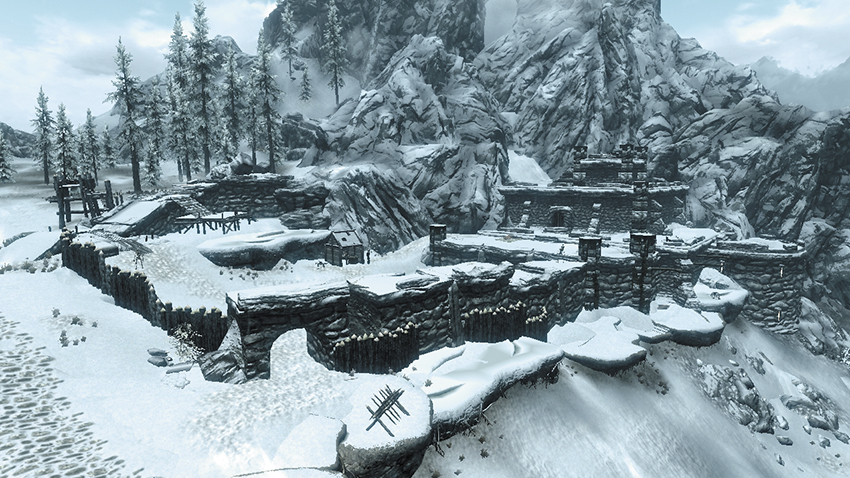
This forboding fortress is a point of contention between the Imperials and Stormcloaks during the Civil War campaign. When not running Civil War Quests, you may instead find Fort Kastav to be populated by a variety of powerful adversaries, including dangerous cultists and fearsome mages. The fort can be infiltrated covertly via a trapdoor that lies just outside the wall to the northwest. The trapdoor leads to the prison—the fort’s only interior area.
Exterior
Slay a few lowly skeletons and two mighty mages to secure the outer compound. This is the most dangerous area of the fort, so take care in how you approach the battle.
- Crafting: Alchemy Lab
Prison
Find a chest in the southeast corner of the prison’s north entry chamber, along with a few potions. A dangerous mage lurks in the southern holding cells. There’s no need to open any of the cells, unless you’re simply after lockpicking practice.
- Chest
- Potions
- Loose gear
Captain’s Quarters
Two chests, no enemies, and a Skill Book. What good fortune!
- Skill Book [Block]: Warrior [E2/10]
- Chests (2)
- Apothecary’s Satchel
[4.20] Septimus Signus’s Outpost
Related Quests
- Main Quest: Elder Knowledge
- Daedric Quest: Discerning the Transmundane
Habitation: Special
- Septimus Signus
Quest Items
- Attunement Sphere
- Blank Lexicon
Collectibles
- Unique Item: Oghma Infinium [37/112]
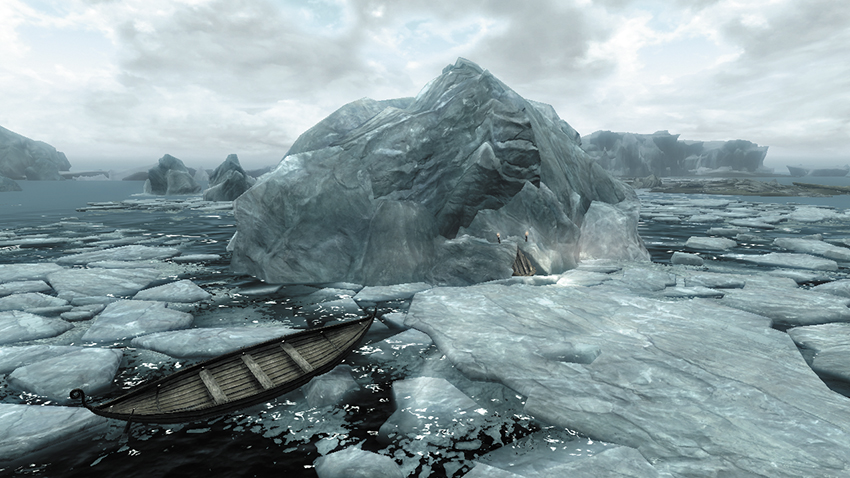
This small, coastal ice cave is easy to miss—only a wooden door at the base of one of Winterhold’s northern glaciers gives it away. Enter to speak with a robed man named Septimus Signus and learn about Blackreach [10.02]. Septimus also gives you a new quest, along with two important items. Complete the quest to obtain a unique item.
[4.21] Skytemple Ruins
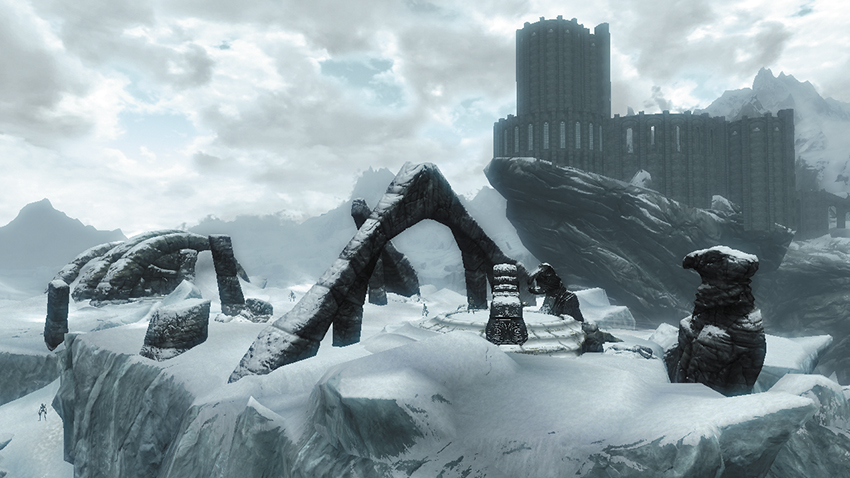
Recommended Level: 6
Dungeon: Special
- Draugr
- Skeleton
Collectibles
- Skill Book [Illusion]: Before the Ages of Man
- Chest (Locked: Apprentice)
- Potions
- Loose gear
On one of Winterhold’s frozen northern isles, slay skeletons as you fight your way up a snowy path that leads to some long-forgotten ruins. Pick a Novice-level door to access a small room with a large, locked chest and Skill Book—but beware the powerful Draugr that bursts from a nearby coffin to ambush you.
[4.22] Wreck of The Pride of Tel Vos
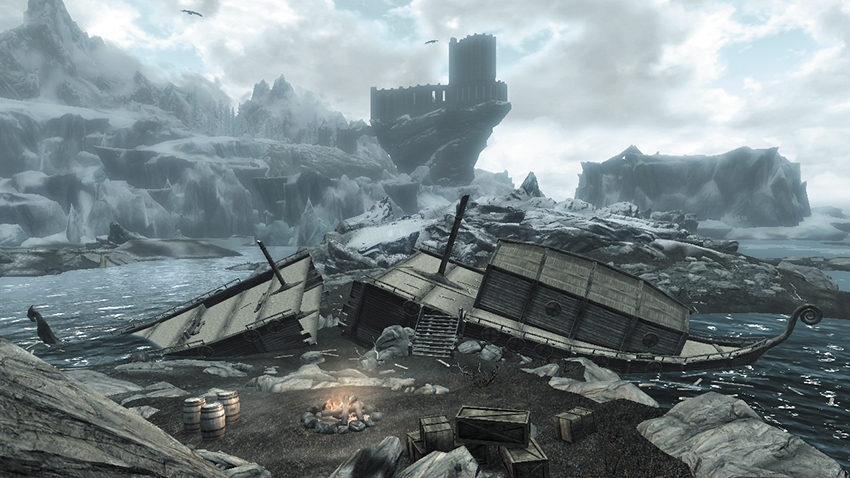
Recommended Level: 12
Dungeon: Shipwreck
- Bandit
Crafting
- Tanning Rack
Quest Items
- Lymdrenn Tenvanni’s Journal
- Waterlogged Chest
- Chests (2)
- Chest (Locked: Novice)
A number of seasoned bandits have made camp near a shipwreck along Winterhold’s northeast coastline. The bandits carry plenty of plunder. Raid the chest at their camp for even more loot, along with the two chests found within the wrecked ship. The journal that you find is the item that Brand-Shei in Riften has been searching for—proof of his childhood. Return it to him for a reward.
[4.23] The Serpent Stone
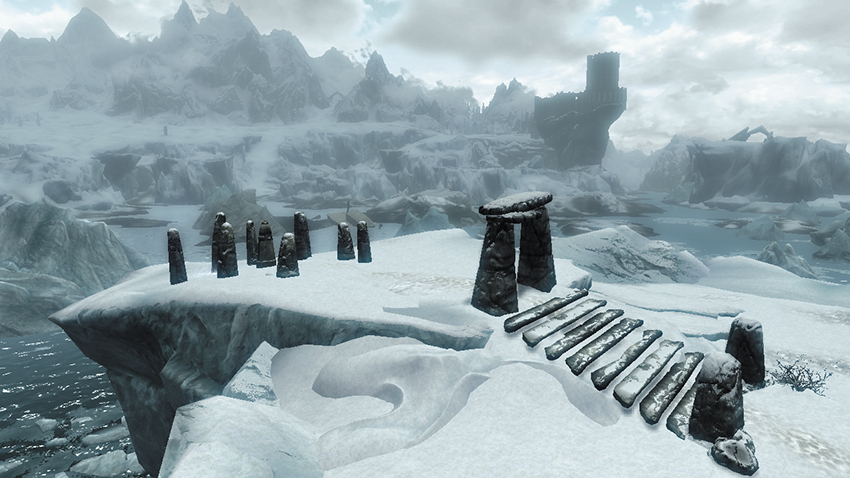
Related Quests
- Civil War Quest: Joining the Stormcloaks
Recommended Level: 6
Dungeon: Special
- Ice Wraith
Special Objects
- Standing Stone: The Serpent Stone [5/13]
Brave Winterhold’s icy northeast waters to discover a group of unique standing stones atop a large glacier. Slay a pesky Ice Wraith here, then examine the central Standing Stone to accept a new sign blessing. Once per day, those under the sign of the Serpent can use a ranged paralyzing poison against opponents. Note that you can have only one sign blessing at a time, so activating this Standing Stone will override your current sign blessing (if any).
[4.24] Bleakcoast Cave
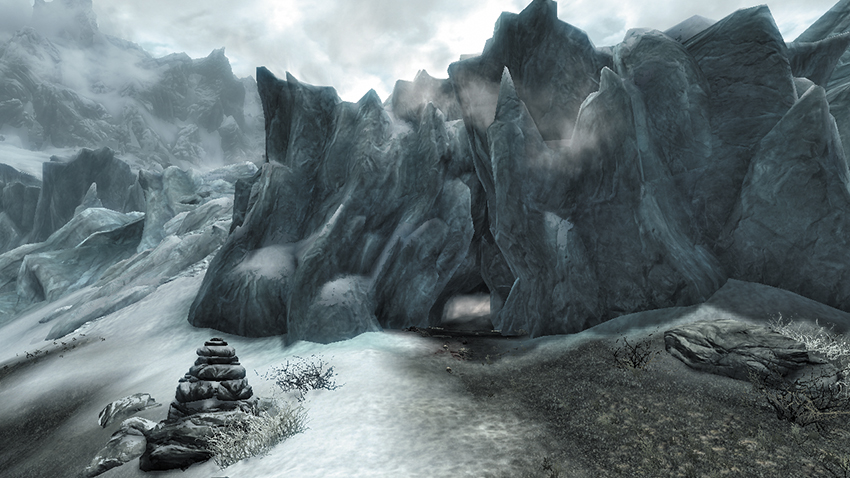
Related Quests
- Side Quest: Kyne’s Sacred Trials
Dungeon: Animal Den
- Animal
- Loose gear
Descend into this relatively small ice cave, where a pair of Frost Trolls lurk. Several smaller caverns sprout from the main one. Loot the corpses of less-capable adventurers in the side caverns to the east and west, which are also guarded by Frost Trolls.
[4.25] Whistling Mine
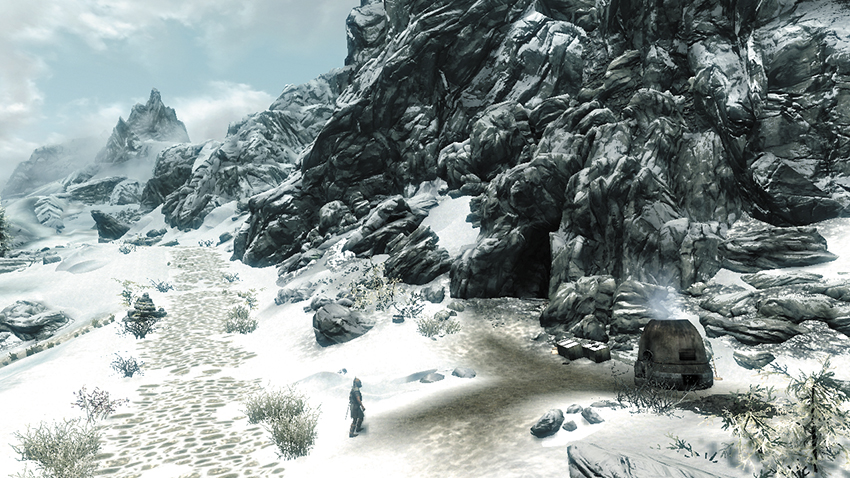
Related Quests
- Favor (Activity): Mining Ore* (Thorgar)
Recommended Level: 8
Habitation: Mine
- Miners
Crafting
- Smelter
Collectibles
- Skill Book [Smithing]: Heavy Armor Forging
- Loose gear
- Mineable ore (Iron)
This small, icy cave contains raw veins of iron ore that anyone with a pickaxe is free to mine. Find a Skill Book sitting atop a barrel in the campsite cavern.
[4.26] Journeyman’s Nook
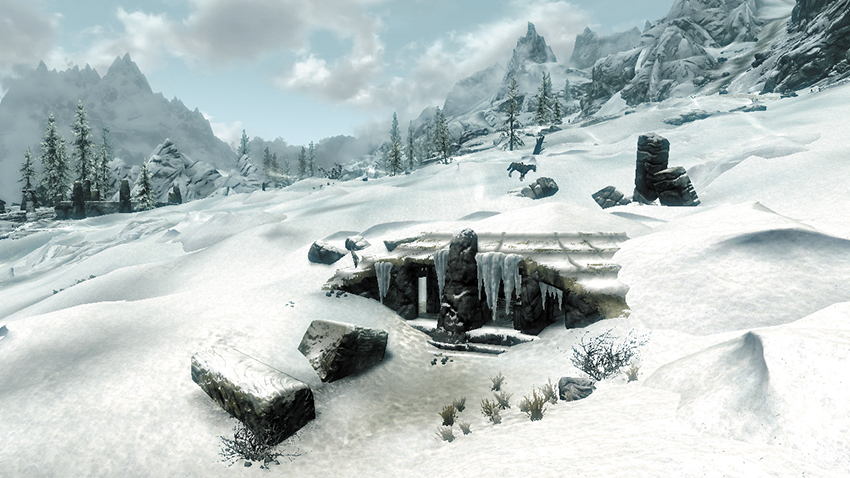
Related Quests
- Side Quest: The Great Skyrim Treasure Hunt*
- Miscellaneous Objective: Lost Apprentices: Borvir*
Recommended Level: 6
Dungeon: Bandit Camp
- Bandit
Crafting
- Alchemy Lab
Collectibles
- Skill Book [Alchemy]: Herbalist’s Guide to Skyrim
- Treasure Map II [2/11]
- Unique Weapon: Borvir’s Dagger [25/80]
- Knapsack
- Potions
- Loose gear
This small igloo lies among the snowy hills north of Snow Veil Sanctum [4.28]. The warmth of a roaring fire—and a heated encounter with a bandit—await you within. You find the corpse of Borvir here, one of the missing members of the College of Winterhold and brother to the also deceased Rundi. A unique dagger lies nearby, and there’s a Treasure Map in the nearby knapsack. After you’ve heard Phinis Gestor mention them in one of his addresses to the College, you can bring back proof of his demise. A Skill Book is also found here; it rests atop a snowy crate inside the ruin.
[4.27] Stillborn Cave
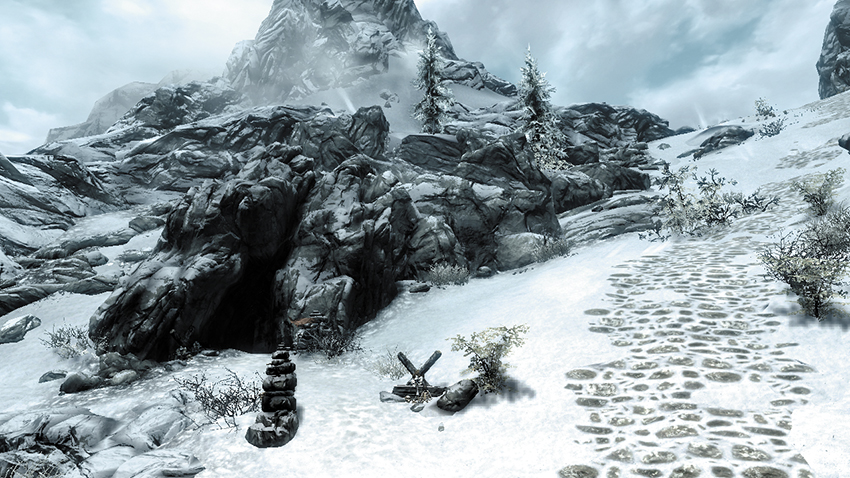
Recommended Level: 18
Dungeon: Falmer Hive
- Animal
- Falmer
Dangers
- Swinging Wall Trap (trip wire)
Collectibles
- Skill Book [Conjuration]: The Warrior’s Charge
- Chest(s)
This Falmer-filled cave is found in Whiterun’s southern mountains, a good hike west from Snow Veil Sanctum [4.28]. No quests pertain to this particular Falmer den, but treasure and adventure await you within.
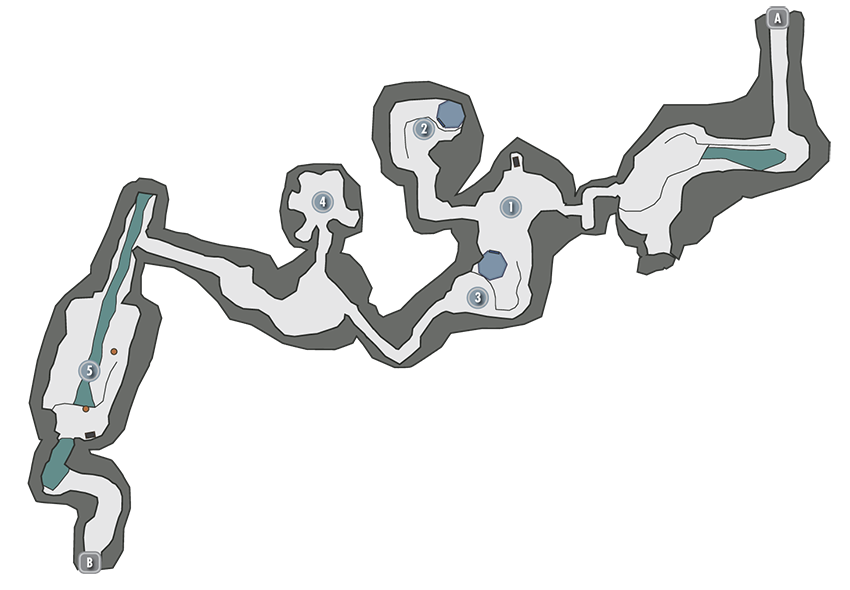
Exit to Skyrim
North Falmer Cavern
Slay a grotesque Chaurus on your way to this cavern, where a chest is found in a northern nook.
- Chest
Side Cavern A
Dispatch another Chaurus and loot another chest in this small side cavern.
- Chest
South Falmer Cavern
Beware the powerful Falmer on patrol here, and the dangerous trip wire that’s stretched near the tunnel that leads to [4]. After passing the trip wire, turn right and search a dark corner to discover a Skill Book that lies near a skeleton.
- Danger! Swinging Wall Trap (trip wire)
- Skill Book [Conjuration]: The Warrior’s Charge
Falmer Nest
Falmer emerge from holes in the walls around this area. Slaughter the fiends before looting the chest they sought to guard.
- Chest (Locked: Novice)
Chaurus Lair
Cut down a few more Chaurus in this final cavern, and raid the chest that’s found on the high ground.
- Chest
Exit to Skyrim
[4.28] Snow Veil Sanctum
Related Quests
- Thieves Guild Quest: Speaking With Silence
- Thieves Guild Radiant Quest: Larceny Targets*
Recommended Level: 6
Dungeon: Draugr Crypt
- Draugr
Dangers
- Bone Alarm Trap
- Bear Traps
- Dart Trap (wall chain)
- Oil Lamp Traps
- Oil Lamp Traps (pedestal pressure plate)
- Oil Lamp Traps (trip wires)
- Oil Pool Traps
- Swinging Wall Trap (wall chain)
Collectibles
- Larceny Target: Model Ship [3/7]
- Skill Book [Light Armor]: Ice and Chitin
- Skill Book [Sneak]: Three Thieves [E1/10]
Special Objects
- Word Wall: Disarm [3/3]
- Area Is Locked (quest required)
- Chest(s)
- Potions
- Loose gear
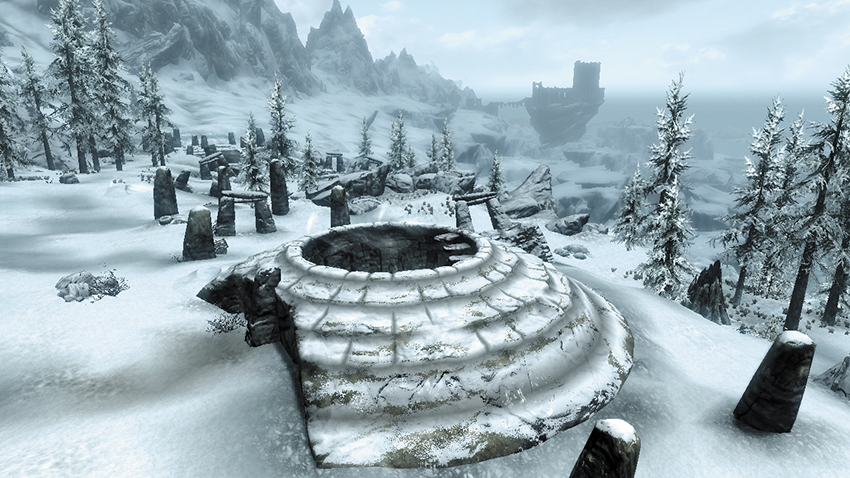
This frigid temple is found within Winterhold’s eastern barrens, just inland from the coastline. A collection of standing stones call attention to a round stone depression dug into the earth. Descend the stairs to discover the door that leads into the Snow Veil Catacombs. You can’t enter unless you’re participating in Thieves Guild Quest: Speaking With Silence. Then Mercer Frey opens the door for you.
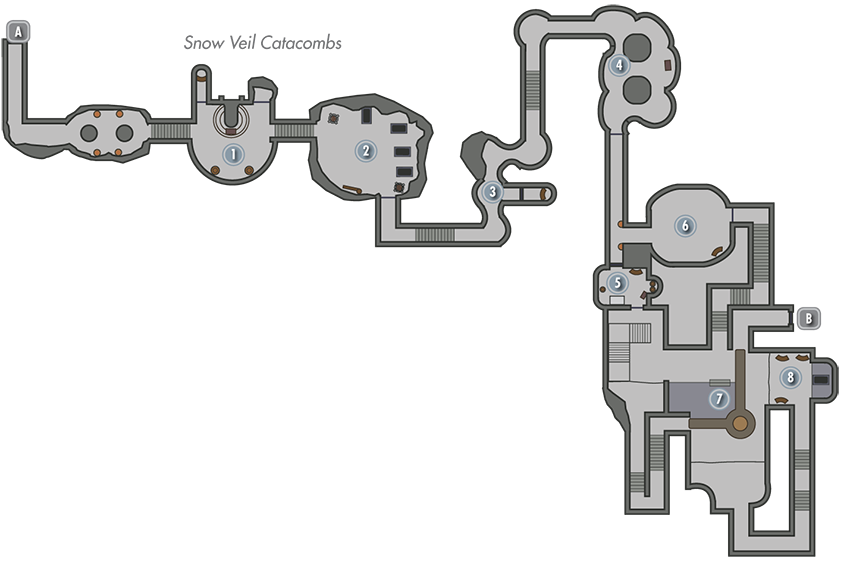
Exit to Skyrim
Entry Chamber
Slay the Draugr that ambush you in this small chamber, then loot the central chest and pull a wall chain to raise a portcullis and access some potions.
- Chest
Swinging Wall Trap Chamber
Pull a wall chain to open this chamber’s portcullis, and immediately run toward the portcullis after pulling the chain; otherwise you’ll soon be struck by a lethal trap that triggers after a slight delay.
- Danger! Swinging Wall Trap (wall chain)
Burial Passages
Sneak through these twisting passages to avoid rousing Draugr. Unlock an Adept-level iron door along the way to access a small alcove with valuable potions. Safely deactivate a few bear traps around the next corner.
- Danger! Bear Traps
- Potions
- Loose gear
Draugr Halls
Continue to sneak through these passages, or risk waking several more Draugr. Should the undead awaken, look to knock down hanging lamps and ignite the oily floor. Do this easily by triggering either of the two trip wires stretched across the corridor. Loot a chest here before pulling a wall chain to raise a portcullis and advance.
- Danger! Oil Lamp Traps (tripwires), Oil Pool Trap
- Chest
Treasure Nook
Unlock an iron door to access this small storage room. If you like, fire ranged attacks through the barred window to thin out the Draugr in [7].
- Area Is Locked (Apprentice)
- Chest
Hanging Rattle Chamber
Avoid the hanging rattles in this chamber—they can alert nearby undead. Claim a valuable Skill Book and nab some potions before pulling another wall chain to advance.
- Danger! Bone Alarm Trap
- Skill Book [Sneak]: Three Thieves [E1/10]
- Potions
Draugr Den
A hoard of fearsome undead lurk in this large cavern. Let Mercer Frey take the lead in battle. Scale the south wooden stairs and take the southeast passage to [8] before heading up the west stone stairs to reach an elevated walkway that leads to the Snow Veil Sanctum.
Model Ship Chamber
Take a southwest passage from [7] to reach this oily overlook, where a unique Model Ship sits atop a pedestal. Stand back and knock down the hanging lamps from a safe range to burn up the oil before taking the Model Ship; otherwise the lamps will fall when you take the item. Delvin will be interested in buying this unique item when you return to the Thieves Guild.
- Danger! Oil Lamp Traps (pedestal pressure plate), Oil Pool Trap
- Larceny Target: Model Ship [3/7]
- Potions
- Loose gear
Door to Snow Veil Sanctum
Door to Snow Veil Catacombs
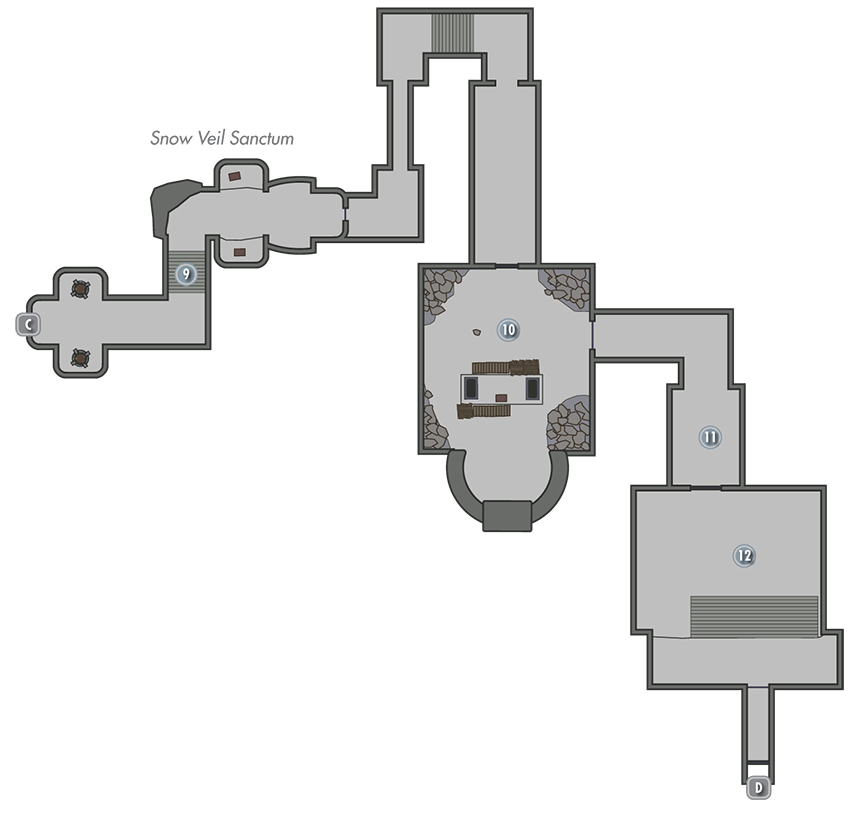
Sanctum Entry Passage
Sneak through the Sanctum’s first twisting passage, or risk stirring a legion of bloodthirsty undead. Leap over low-hanging rattles to reach a pair of chests as you go. When you reach the far portcullis, pull the nearby wall chain to raise it, then take cover from a slew of arrows that fly out from the passage beyond. This is a result of the clay jars stacked against the portcullis tumbling onto a nearby pressure plate. Quickly dart into the passage after the arrows stop flying and pull another wall chain to close the portcullis again, thereby cutting off any Draugr that might be in pursuit.
- Danger! Bone Alarm Trap, Dart Trap (pressure plate)
- Chest
- Chest (Locked: Adept)
Word Wall Room
Opening the door that leads into this sizable chamber knocks over several jars, rousing a slew of vicious Draugr. Inspect a book on a stone table to increase your Light Armor skill and follow the sound of chanting to locate a Word Wall that grants a new Word of Power. Scale the central stairs to raid a giant chest before pulling the wall chain near the east portcullis and advancing.
- Skill Book [Light Armor]: Ice and Chitin
- Word Wall: Disarm [3/3]
- Chest
Puzzle Door Passage
Don’t worry that you haven’t found the claw that unlocks the Nordic Puzzle Door in this hall—Mercer Frey kindly opens the door for you!
Inner Sanctum
The plot thickens when you enter this room, but we won’t reveal any story-based spoilers here. When you’re ready, proceed through the far door to quickly exit out to Skyrim.
Exit to Skyrim
[4.29] Winterhold Stormcloaks Camp
Related Quests
- Civil War Quest (when active, depending on who you side with)
Habitation: Military: Stormcloak Camp
- Stormcloak Quartermaster (Blacksmith)
- Stormcloak Soldier
Services
- Trader (Blacksmith): Stormcloak Quartermaster [10/33]
- Weapons, Apparel, Misc
Crafting
- Alchemy Lab
- Anvil
- Grindstone
- Workbench
Special Objects
- Civil War: Map of Skyrim
- Shrine of Arkay [4/12]
- Chests (2)
- Potions
Loose gear
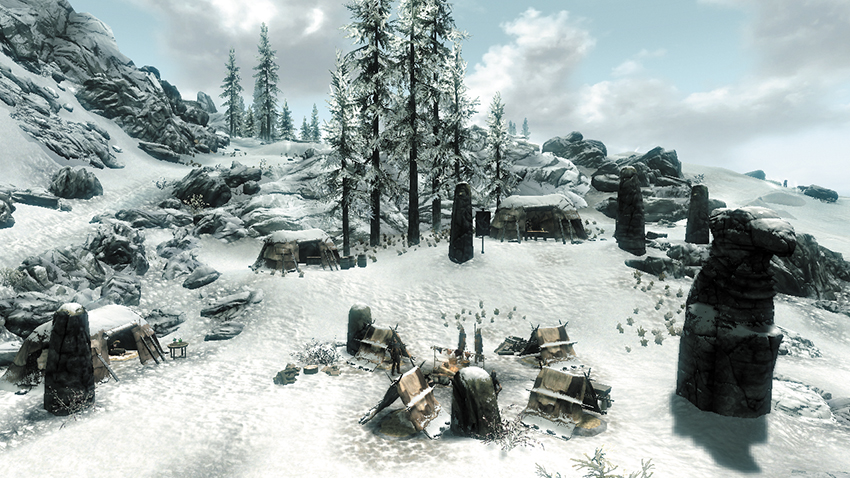
The Stormcloaks have set up camp here—though this encampment may appear only during the Civil War quest line. Trade with the quartermaster and exploit his array of crafting stations. Inspect the large map in one tent to potentially gain new map data. Loot a few chests before moving on.
[4.30] Yngol Barrow
Related Quests
- Dungeon Quest: Ashore in a Sea of Ghosts*
Recommended Level: 6
Dungeon: Draugr Crypt
- Draugr
Dangers
- Swinging Wall Trap (pressure plate)
Puzzles
- Nordic Puzzle Door (Coral Dragon Claw)
- Nordic Pillars
Collectibles
- Dragon Claw: Coral Dragon Claw [4/10]
- Unique Item: Helm of Yngol [38/112]
- Chest(s)
- Loose gear
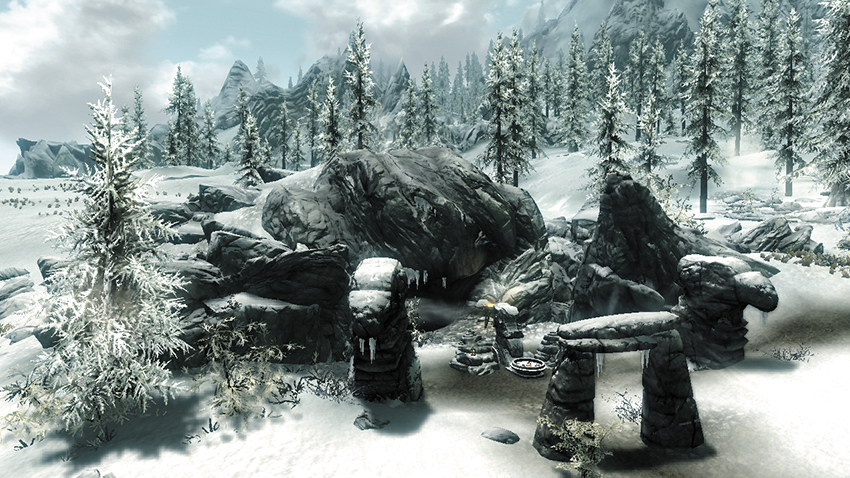
Yngol’s Barrow lies hidden within an ice cave at Winterhold’s southeast corner. This place is haunted by spectres of old and is scarcely remembered as the namesake of the Sea of Ghosts.
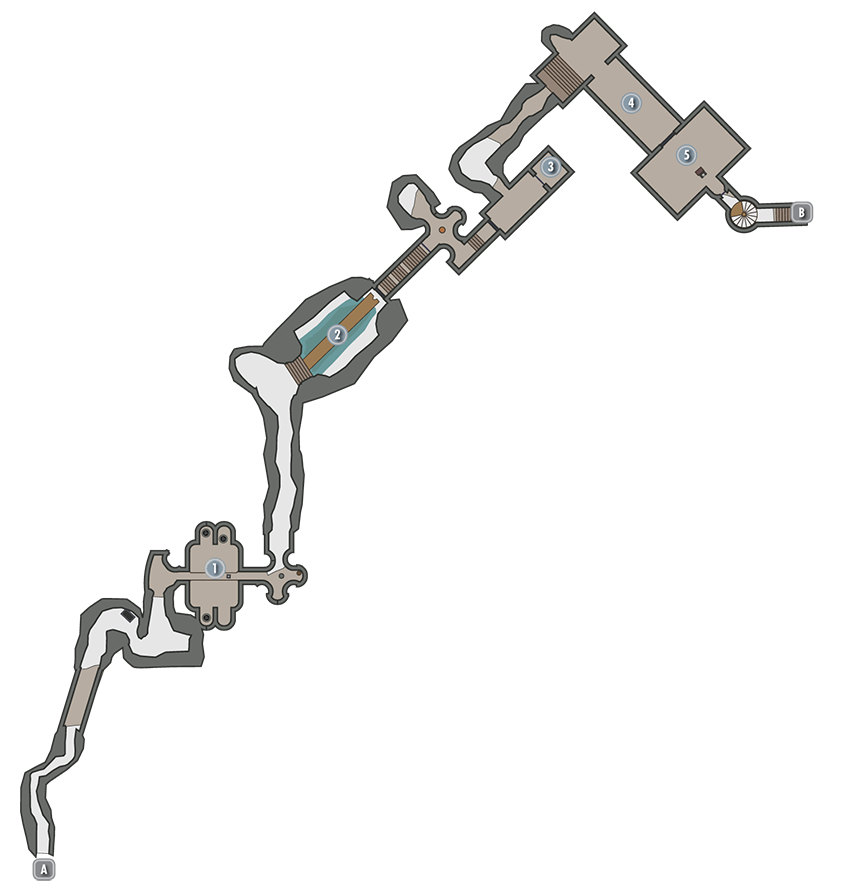
Exit to Skyrim
Pillar Puzzle Chamber
Loot a few Draugr corpses on the way to this first chamber, then inspect the dead scholar’s remains to discover a book that provides a clue on how to solve the room’s puzzle. Spin the glyph pillars to create the pattern described in the scholar’s book. The lone south pillar should be a Whale, while the other two north pillars should be a Snake and a Hawk; then pull the central lever to open the way forward. Collect the Coral Dragon Claw from a pedestal just beyond the gate, unless you’ve already acquired it from Winterhold.
- Dragon Claw: Coral Dragon Claw [4/10]
Watery Passage
Take a dip in the frigid water here to locate a sunken chest and burial urn.
- Chest
Treasure Nook
Unlock a metal gate here to access a nook full of goodies.
- Area Is Locked (Adept)
- Chest
- Loose gear
Nordic Puzzle Door
Jump the pressure plate in a narrow tunnel and loot a chest on your way to this unusual door. Examine the Coral Dragon Claw and notice the sequence of glyphs etched into the piece. Rotate the door’s rings to imitate the claw’s pattern (Snake, Wolf, Moth), then insert the claw into the door’s central keyhole to open the way forward.
- Danger! Swinging Wall Trap (pressure plate)
- Chest
Draugr Chamber
Put to rest the ancient Shade of Yngol just beyond the puzzle door, then loot a large chest and retrieve Yngol’s Helm from the throne nearby, raising the portcullis and allowing a quick exit from the ruin.
- Chest
- Unique Item: Helm of Yngol [38/112]
Exit to Skyrim
[4.31] Wreck of the Winter War
Recommended Level: 6
Dungeon: Shipwreck
- Bandits
Collectibles
- Skill Book [Lockpicking]: Surfeit of Thieves [C1/10]
- Chest (Locked: Expert)
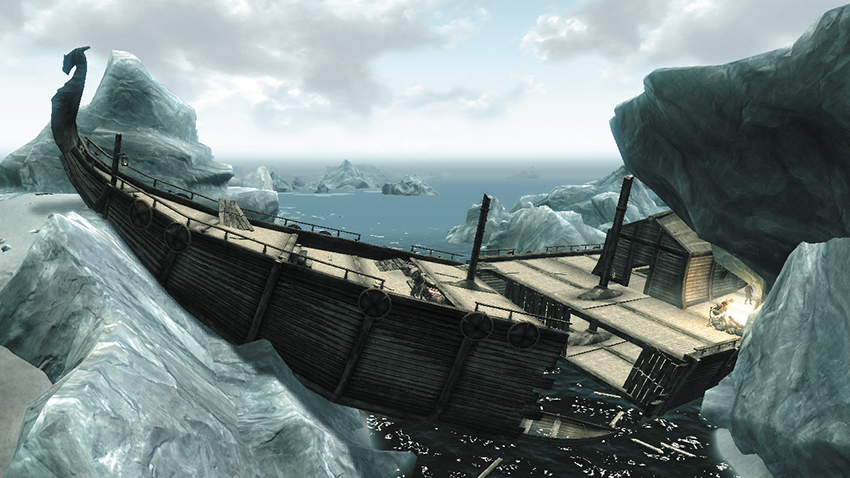
An old ship named the Winter War has crashed among the unyielding glaciers of Winterhold’s eastern coast. A crew of salty bandits have made this shipwreck their home. Kill them all, then locate a locked chest within the ship and collect the nearby Skill Book.