
Elder Scrolls V: Skyrim Guide The Atlas Hold 2: Hjaalmarch
Primary Locations
[2.01] Meeko’s Shack
Related Quests
- Dungeon Activity
Recommended Level: 6
Habitation: Hunter Camp Services
- Follower: Meeko [5/47]
Collectibles
- Skill Book [Speech]: A Dance in Fire, v6 [B1/10]
- Loose gear
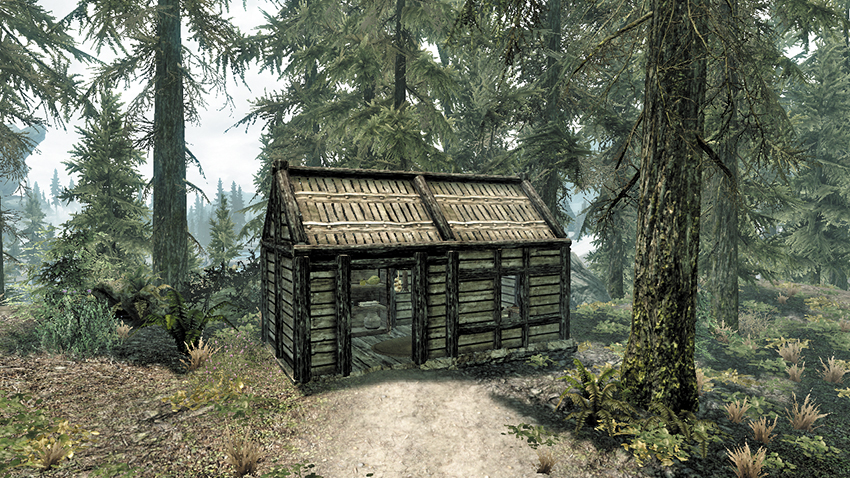
A dog named Meeko may approach you as you travel the road near this small, remote cabin. Follow Meeko to the nearby shack to find his late master—the dog will then join you as a Follower. There’s little of interest in the cabin besides the dead man and his journal, which references his faithful pooch.
[2.02] Chillwind Depths
Related Quests
- Dungeon Activity
Recommended Level: 18
Dungeon: Falmer Hive
- Chaurus
- Falmer
- Frostbite Spider
Dangers
- Spear Trap (pressure plate)
Collectibles
- Skill Book [Lockpicking]: Advances in Lockpicking
- Chest(s)
- Potions
- Loose gear
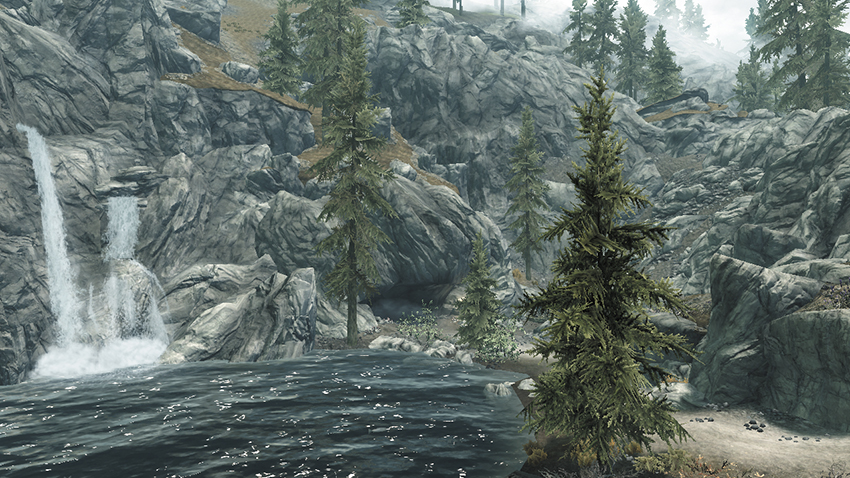
Along Hjaalmarch’s west edge, a dirt path follows the river to a small, watery cave. Beware of predatory animals on your way into the cave.
 Exit to Skyrim
 Fallen Adventurer Chamber
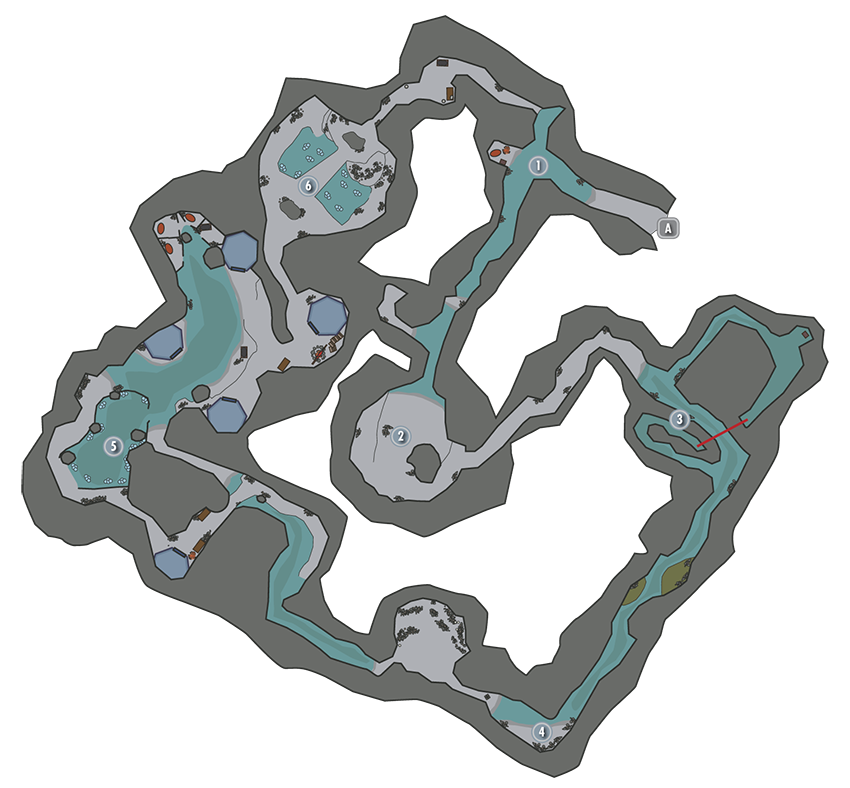
Just inside the cave, a slain adventurer lies on a bedroll near a looted chest. Swipe the nearby potions before venturing southwest toward [2].
- Potions
 Spider Nest
A nest of Frostbite Spiders have made quite a home for themselves here. The first spider is just a decoy—watch out for the others to drop from above if you rush in too quickly. Take the upper path to reach [3].
 Waterlogged Passageway
Explore the north section of these water-filled passages to loot a sunken chest. Beware of Falmer in the long, southern straight; they have a good angle on you.
- Chest (Locked: Apprentice)
 Precarious Passage
Beware the pressure plate as you enter the tunnel—stepping on it causes long spikes to stab out from the wall in lethal fashion. Avoid it, or sprint past after the spikes retract, then battle a blend of Falmer, Frostbite Spiders, and Chaurus in the tunnel ahead.
- Danger! Spear Trap (pressure plate)
 Chaurus Pen
Take either an upper or lower path to reach this wide chamber, where the Falmer are keeping a few pet Chaurus in a pen. If you take the higher path, you’ll face a powerful Falmer and discover some loose gear. Out in the main chamber, make sure to loot the two Chaurus-bone chests.
- Chests (2)
- Loose Gear
 Throne Room
A mighty Falmer sits on a stone throne in this final chamber. Slay the monster to clear the cave, then loot the large chest in the back passage. Follow the trail back to the start and exit this dank cavern.
- Chest
- Apothecary’s Satchel
- Potion
- Loose gear
[2.03] Robber’s Gorge
Related Quests
- Dungeon Activity
Recommended Level: 6
Dungeon: Bandit Camp
- Bandit
Collectibles
- Skill Book [Archery]: The Black Arrow, v2
- Chest(s)
Potions
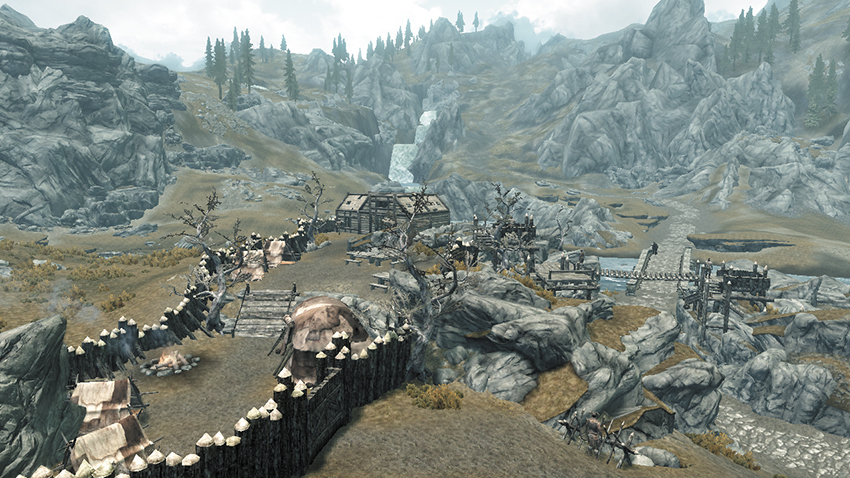
This impressive bandit camp is a perfect site for an ambush. The bandits here call out to passersby, demanding that they pay a “toll.” Either turn back, pay the toll, or be ready to fight. If you battle the bandits, slay their chief and then loot his corpse to find a key that unlocks the trapdoor in the chief’s cabin and a chest that you’ll find later. Find a Skill Book inside the cabin. The trapdoor leads to Robbers’ Cove.
- Skill Book [Archery]: The Black Arrow, v2
- Key to Robber’s Cove (Bandit Chief)
- Chest
Robbers’ Cove
Unlock the trapdoor in the bandit chief’s cabin to enter this small, watery cavern. A journal on the table tells the tale of this gang and mentions a hidden chest outside. Find a potion on the first table and a locked chest underwater, along with a couple of coin purses. Swim out to fresh air when you’ve finished looting the place, then swim south and raid the large chest on the island in the middle of the lake—the bandit chief’s secret stash!
- Area Is Locked (Adept)
- Chest (Locked: Adept)
- Chest (Locked: Master)
- Potion
[2.04] Dead Men’s Respite
Related Quests
- Other Factions: Bards College Quest: Tending the Flames
- Dungeon Activity
Recommended Level: 6
Dungeon: Draugr Crypt
- Animal
- Draugr
- King Olaf One-Eye
- Svaknir
Crafting
- Arcane Enchanter
Dangers
- Battering Ram Trap (pressure plate)
- Flamethrower Trap (pressure plate)
- Swinging Blade Trap
- Spear Trap (pressure plate)
Puzzles
- Nordic Puzzle Door (Ruby Dragon Claw)
- (Wolf, Hawk, Wolf)
Quest Items
- King Olaf’s Verse
Collectibles
- Dragon Claw: Ruby Dragon Claw [1/10]
- Skill Book [Speech]: The Buying Game
Special Objects
- Word Wall: Whirlwind Sprint [2/2]
- Chests
- Potions
- Loose gear
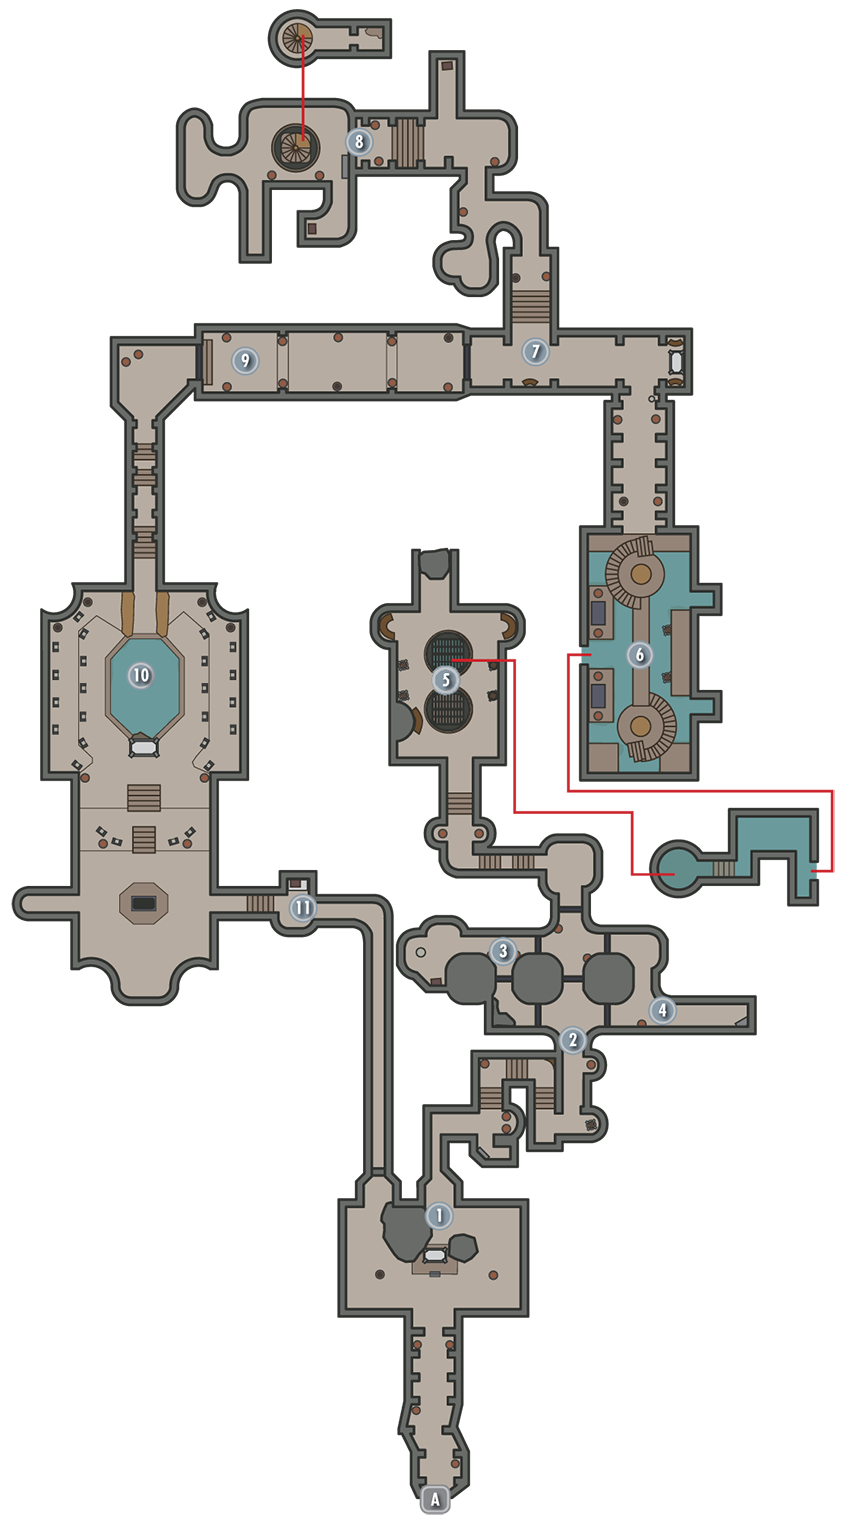
In the low mountains southwest of Morthal, stone steps lead up to a massive arch carved into the rock face. This is the tomb of King Olaf One-Eye, the ancient High King of Skyrim and also the de facto tomb of Svaknir, the bard who composed a legendary epic poem against Olaf’s reign. In revenge, Olaf captured Svaknir, burned all the copies of his work save one, then threw him into a pit to rot, with only the final verse to console himself. It is said that Svaknir’s ghost still haunts the tomb, hoping that someone will come to avenge him.
Exit to Skyrim
Claw Chamber
A ghostly figure beckons you forward as you enter this chamber. Take the Ruby Claw from the pedestal to open the portcullis, but beware—a swarm of vicious Draugr ambush you when you do. Collect a potion from the nook beyond the iron door before advancing to [2].
- Dragon Claw: Ruby Dragon Claw [1/10]
Snaking Passages
Beware the pressure plate in the corridor that leads into these passages, and pull a chain on the wall to open the way forward when you reach the dead end. Beware Frostbite Spiders in the passage that follows.
- Danger! Spear Trap (pressure plate)
Spider Nest
Wipe out the Frostbite Spiders here and loot the urn they guard; then head south and pull another wall chain to open a passage leading east.
Dead End
Slay a few Draugr and skirt a dangerous pressure plate trap as you move to collect a bit of loot from this dead end. Double back afterward (dodge the trap again!) and go north.
- Danger! Battering Ram Trap (pressure plate)
- Potion
Webbed Chamber
Loot a few urns and sidestep yet another pressure plate trap in the twisting passage that leads to this chamber, which is covered in webbing. Slay the Frostbite Spiders that descend from the ceiling, then pull the chain on the east wall to open a watery pit. Drop down to advance.
- Danger! Flamethrower Trap (pressure plate)
- Potion
- Loose gear
Watery Chamber
Slay a Skeever and a few Draugr on your way to this large chamber, where more Draugr await. When you approach the barred door, look down and disarm the hinge trigger if you can, or you’ll have to deal with a lethal series of swinging blades on the narrow bridge. If you fail to disarm the trap, stop carefully by the candles to avoid the blades as they swing past. Pull the chain on the far side if you need to allow your Follower through, then take the upstairs door to reach [7].
- Danger! Swinging Blade Trap (hinge trigger)
 Sealed Door Passage
Take advantage of a rare crafting station in this passage. The far door is sealed by some sort of energy—go north instead and slay several more Draugr on your way to [8].
- Crafting: Arcane Enchanter
 Svaknir’s Grave
As you enter this area, pick an Expert door lock to access a nook with a locked chest. Slay the mob of Draugr that attack you in the main chamber, then approach the chest in the south nook. Disarm the hinge trigger or stand aside as you open it to avoid the dart trap. Back out in the main room, pull the south wall chain to open the central stairwell, then descend to at last catch up with the apparition you’ve been pursuing. Collect the book near Svaknir’s corpse, then backtrack to [7] and follow Svaknir’s ghost through the previously sealed door.
- King Olaf’s Verse
- Danger! Dart Trap
- Chest
- Chest (Locked: Master)
 Puzzle Door Passage
Rotate the three rings of this passage’s far door to mimic the same sequence of symbols that appear on the Ruby Dragon Claw you collected back at [1] (Wolf, Hawk, Wolf). Then activate the keyhole to insert the claw and open the way forward.
 The Court of the Dead
Enter King Olaf’s court, and Svaknir calls his nemesis to battle. As the host of Draugr rise one by one, help Svaknir lay waste to the undead. When King Olaf rises to do battle, cut him down to finally free Svaknir from this tomb. Obtain a key off of Olaf’s corpse, and stand near the south wall to learn a new Word of Power.
- Word Wall: Whirlwind Sprint [2/2]
- Olaf’s Treasury Key
- Potions
 Olaf’s Treasury
Use the key you found on Olaf’s corpse to open this treasury, then loot the giant chest within. Pull the nearby lever to open the exit passage, which leads back to [1].
- Chest
- Potion
- Loose gear
[2.05] Crabber’s Shanty
Habitation: Hunter Camp
- Fisherman
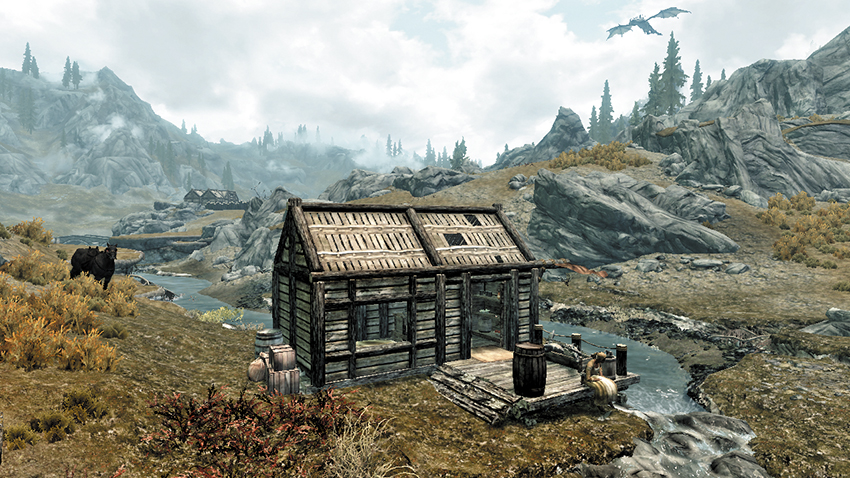
On the southwest edge of Hjaalmarch, a tiny crab shack sits by the river. Aside from a plethora of crab meat and a humble fisherman, there’s nothing here of particular value or interest.
[2.06] Orotheim
Related Quests
- Dungeon Activity
Dungeon: Bandit Camp
- Bandit
Crafting
- Grindstone
- Tanning Rack
Dangers
- Bone Alarm Trap
Collectibles
- Skill Book [One-Handed]: Mace Etiquette [C1/10]
- Chest
- Chest (Locked: Apprentice)
- Potions
- Loose gear
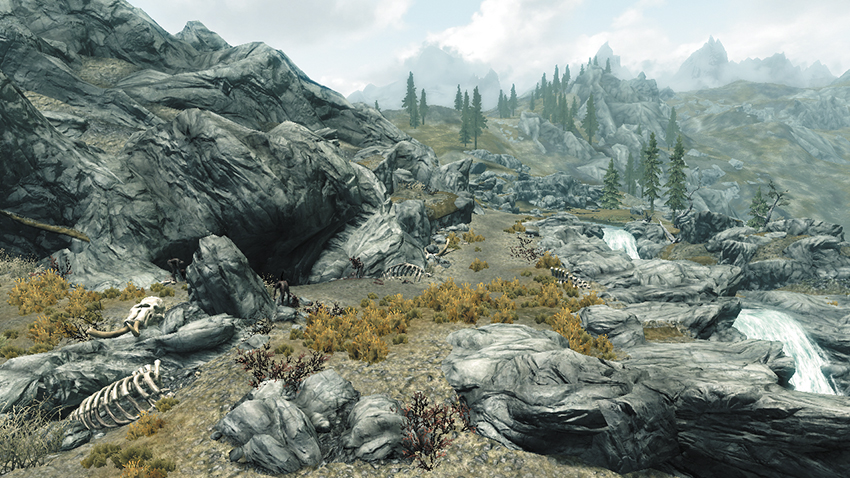
This small cave, located along Hjaalmarch’s southwest border, serves as a hideout for a small group of bandits. Beware the powerful leader, who lurks toward the cavern’s rear. Slay him and claim plenty of loot from his corpse and from the two chests he guards (one is hidden beneath the stairs). Dispatching all of the bandits at this location ends their raids against the giant of Talking Stone Camp [2.07] to the south.
[2.07] Talking Stone Camp
Related Quests
- Dungeon Activity
Dungeon: Giant Camp
- Giant
- Mammoth
Collectibles
- Chest
- Chest (Locked: Apprentice)
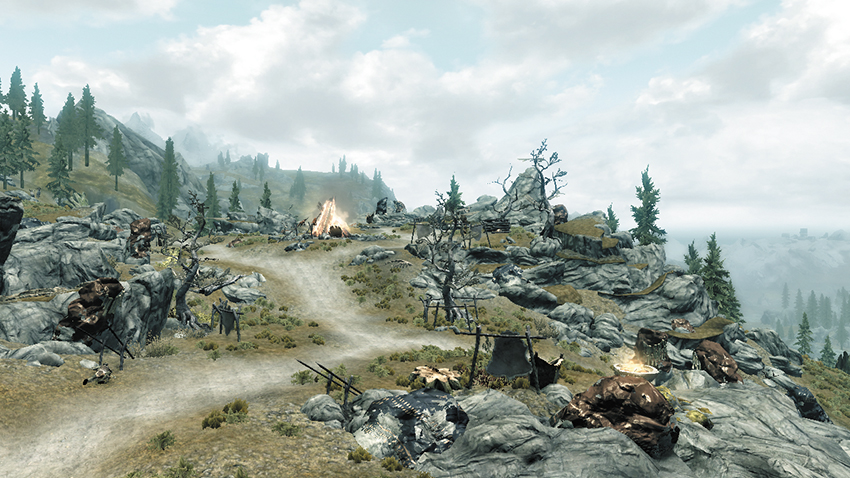
A massive bonfire at Hjaalmarch’s southernmost tip signals the camp of two towering giants. Mammoths roam the lower portion of the hill, shepherded by one giant, while the other can be found near the campfire up top. You can claim plenty of loot from their chests, one in the camp and one in the cove by the waterfall—if you can slay the brutes.
Dispatching all of the bandits at Orotheim [2.06] ends their raids against the giants, allowing them to lead their mammoths to the nearby stream (which they do every few hours). This draws off the giant and mammoths at the base of the hill, giving you free access to that chest, or a good opportunity to take out the lone remaining giant.
[2.08] Folgunthur
Related Quests
- Side Quest: Forbidden Legend
- Dungeon Activity
Recommended Level: 6
Dungeon: Draugr Crypt
- Frostbite Spider
- Draugr
- Mikrul Gauldurson
Quest Items
- Daynas Valen’s Journal
- Daynas Valen’s Notes
- Ivory Dragon Claw
Dangers
- Bone Alarm Trap
- Flamethrower Trap (pressure plate)
- Oil Lamp Trap
- Oil Pool Trap
- Rockfall Trap
- Spear Trap (pressure plates)
Puzzles
- Nordic Pillars
- Snake, Whale, Hawk
- Nordic Puzzle Door (Ivory Claw)
- Hawk, Hawk, Dragon
Collectibles
- Dragon Claw: Ivory Dragon Claw [2/10]
- Skill Book [One-Handed]: Fire and Darkness [B1/10]
- Unique Item: Gauldur Amulet Fragment (Folgunthur) [6/112]
- Unique Weapon: Gauldur Blackblade [6/80]
Special Objects
- Word Wall: Frost Breath [1/3]
- Chest(s)
- Potions
- Loose gear
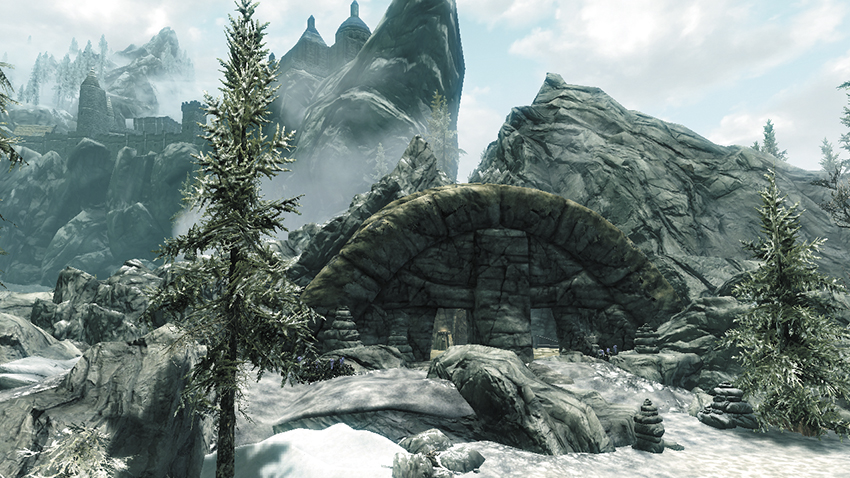
On a hill in Hjaalmarch’s northern marshlands lies the ominous entrance to the tomb of Mikrul Gauldurson, one of the three brothers sealed away in ancient times.
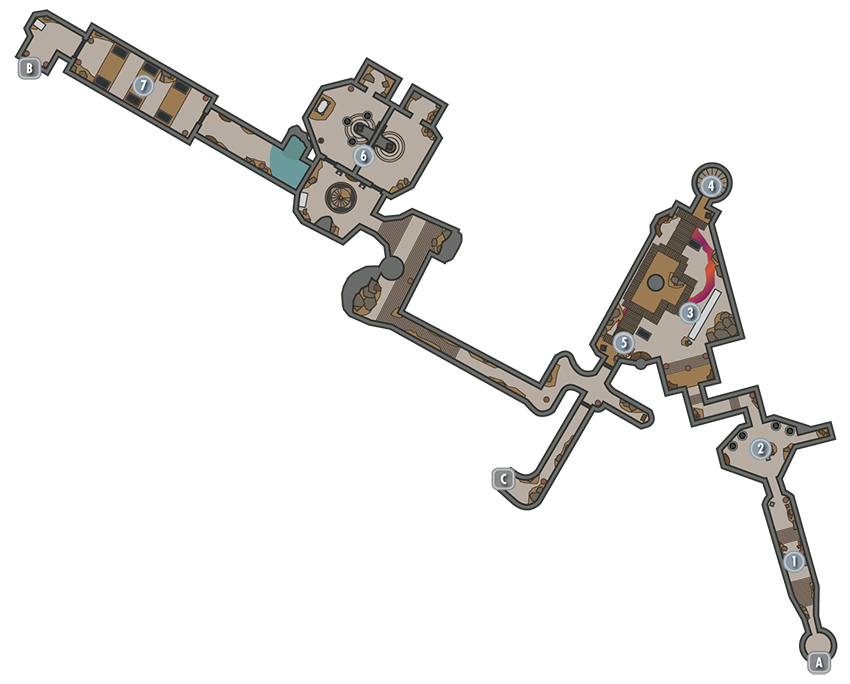
Exterior
The abandoned campsite outside the ruins hints at the fate that befell Daynas Valen’s adventuring party inside. Find his journal for some background on the expedition, then loot the urns near the tomb’s door.
- Daynas Valen’s Journal Folgunthur
Door to Skyrim
Trapped Passage
Beware the pressure plate in the very first passage—stepping on it causes spikes to stab out from the statues just ahead. Once you’re past the trap, don’t miss the burial urns in the nearby wall.
- Danger! Bone Alarm Traps, Spear Traps (pressure plate)
Puzzle Pillar Chamber
Daynas Valen’s adventurers already solved the puzzle in this room, so there’s little to do here during your first visit, but you can return after obtaining the Ivory Claw in [3]. Ignore the glyph puzzle and simply insert the claw into the keyhole on the east wall to open a small nook and expose a locked chest.
- Chest (Locked: Apprentice)
- Loose gear
Dining Hall
Avoid a pressure plate and slay a few Draugr on your way to this wide chamber. A gate shuts behind you, trapping you with more undead. Pull the chain near the gate to open it if you’d like to retreat. Knock down the oil lamps or cast a fire spell to ignite the rivers of oil with explosive results. Discover a Skill Book near a corpse in a dark corner of the room. Upstairs, grab the Ivory Claw from Daynas Valen’s corpse and use it to lower a drawbridge.
- Danger! Flamethrower Trap (pressure plate), Oil Lamp Trap, Oil Pool Trap
- Dragon Claw: Ivory Claw [2/10] (Daynas Valen)
- Skill Book [One-Handed]: Fire and Darkness [B1/10]
- Daynas Valen’s Notes (Daynas Valen)
- Loose gear
Stairwell 1
Use extreme care when entering this stairwell, which leads up to the dining hall’s second floor. A trapdoor opens beneath your feet as you enter, dunking you into a watery pit. The water actually spares you from falling onto lethal spikes—keep well away from the spikes as you carefully loot the sunken corpses, then swim onto the stairs (or pull the chain and let the trapdoor lift you up). Loot the corpses near an upstairs keyhole to at last discover the Ivory Claw. Insert the claw into the keyhole to lower the drawbridge ahead, which leads toward several Draugr and a passage to the lower crypts. Before entering the crypts, return to [2] and use the Ivory Claw to access a treasure nook.
Crypt Corridors
Beware: Numerous Draugr roam these tight corridors, and pressure plates trigger lethal traps. Avoid the pressure plate in the corridor that leads toward a locked chest, and manipulate the levers in the opposing hall until all four portcullises have risen. Avoid a rockslide as you make your way deeper into the crypts.
- Danger! Rockfall Trap, Spear Trap (pressure plate)
- Chest (Locked: Novice)
- Potions
- Loose gear
Stairwell 2
You must solve a Nordic Pillar Puzzle here in order to advance to the lower crypts. Ignore the room’s two levers and enter the northeast chamber. Note the order of the glyphs, then exit and pull either lever to access the northwest chamber. Rotate three glyph pillars here, mirroring the glyph sequence in the previous chamber (Hawk, Hawk, Dragon). Then exit and pull the chain on the far wall to open the central stairwell.
Spider Tunnel
Slay a few Frostbite Spiders in this final passage, and beware a surprise ambush as you approach the puzzle door. The lights suddenly go out, and Draugr emerge from the sarcophagi around you. Cut them down, then inspect the Ivory Claw you found earlier and notice its three glyphs. Manipulate the puzzle door’s three rings to mimic the Ivory Claw’s glyph sequence (Hawk, Hawk, Dragon); then insert the Ivory Claw into the door’s central keyhole to open the path to the crypt.
- Potion
- Loose gear
 Door to Folgunthur Crypt
Folgunthur Crypt
As you pass through this cavernous crypt, Mikrul Gauldurson, a powerful undead warrior, suddenly rises from the central sarcophagus. Refer to Side Quest: Forbidden Legend for strategies on dealing with this powerful foe and his vampiric blade. Once he falls, loot him and the corpses of his thralls before using the Ivory Claw to open the far gates. Follow the sound of chanting to locate a Word Wall and gain a new Word of Power. Loot a massive chest as well before proceeding through the nearby door and returning to the main level.
- Word Wall: Frost Breath [1/3]
- Unique Item: Gauldur Amulet Fragment (Folgunthur) [6/112]
- Unique Weapon: Gauldur Blackblade [6/80]
- Potions
- Loose gear
 Door to Folgunthur Crypt
[2.09] The Apprentice Stone
Recommended Level: 6
Special Objects
- Standing Stone: The Apprentice [2/13]
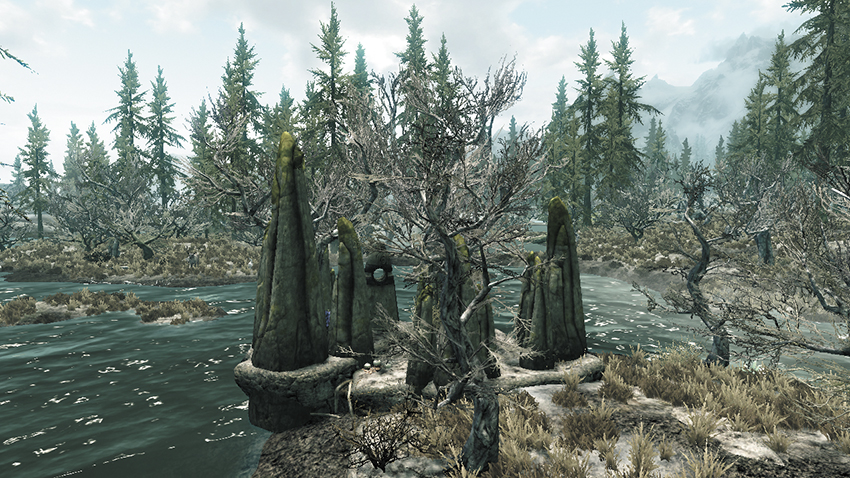
This standing stone can be found on a small island in Hjaalmarch’s frigid northern marsh. Inspect the stone to gain the Apprentice sign blessing. Those under the sign of the Apprentice recover Magicka faster but are more susceptible to Magicka damage. Note that you may possess only one sign blessing at a time.
[2.10] Fort Snowhawk
Related Quests
- Civil War Quest: Liberation of Skyrim
- Civil War Quest: The Battle for Fort Snowhawk
Recommended Level: 6
Habitation: Military Fort
- Mage
- Skeleton
Crafting
- Alchemy Lab
- Arcane Enchanter (2)
- Grindstone
Dangers
- Bear Traps
Collectibles
- Skill Book [Block]: A Dance in Fire, v2 [A1/10]
- Chest(s)
- Potions
- Loose gear
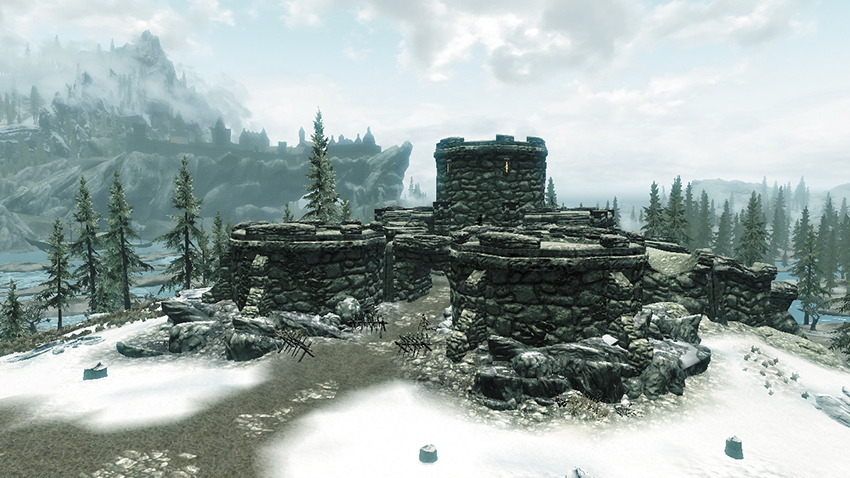
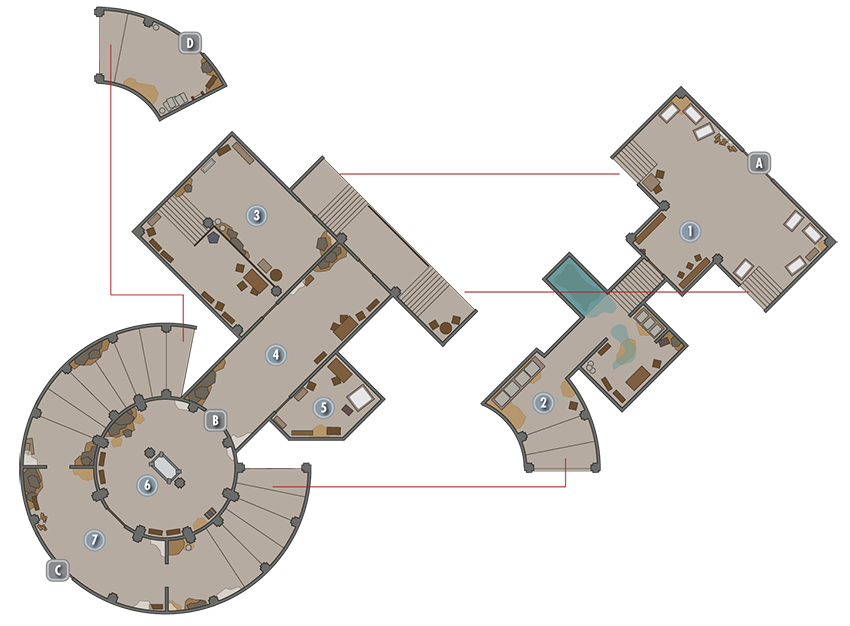
This imposing keep serves as a point of contention between the Stormcloaks and Imperials during the Civil War. Until then, it’s populated by a band of necromancers. You can tackle this eroding stronghold in a number of ways—storm the front gate, slip in through the hole in the southeast wall, or leap over any of the crumbling battlements.
Exterior
A host of necromancers and their skeletal minions defend the fort’s outer grounds. Scale the ramparts and clear out every foe to gain plenty of loot from their corpses. There’s little else of value outside.
- Loose gear
Fort Snowhawk Keep
Enter the fort’s central keep by any of three doors. The ground-level door to the south is the easiest to locate. Go upstairs to locate a few potions, then head downstairs to find more, along with a locked chest. Work your way through the sleeping quarters to reach the library, where you can find several crafting stations, a Skill Book, and a key that unlocks the Keep’s central chamber. Within, deal with the leader of the necromancers, then claim the chest in his chamber and a locked chest in the nearby bedroom.
- Crafting: Alchemy Lab, Arcane Enchanter, Grindstone
- Skill Book [Block]: A Dance in Fire, v2 [A1/10]
- Fort Snowhawk Quarters Key
- Chest
- Chest (Locked: Apprentice)
- Chest (Locked: Adept)
- Potions
Door to Skyrim
Sleeping Quarters
Expect a couple of mages here, and a button on the wall next to the gate, opening it and allowing access down into the Cellars. Check the steps up on either side, leading to a lower and upper door.
- Loose Gear
Cellars
Check the damp side chamber with a couple of potions, and an exit to the lower part of the central tower’s spiral stairs, where you’ll find another foe.
- Potions
Lower Door to Laboratory and Library
Expect a couple of foes in this well-stocked laboratory, and an important key on the table along with a note and a Skill Book. There are numerous books to peruse, too.
- Alchemy Lab
- Arcane Enchanter
- Grindstone
- Fort Snowhawk Quarters Key
- Necromancer’s Letter
- Loose Gear
- Potions
- Skill Book [Block]: A Dance in Fire, v2 [A1/10]
Connecting Corridor
This leads from the Sleeping Quarters, with doors to Locations #3 and #5, to the locked door (B). There’s a few books here.
Bedroom
Unlock the chest [Apprentice] here, and rummage around this small bedroom to find a Spell Book and Key on the table.
- Fort Snowhawk Quarters Key
- Chest [Apprentice]
- Loose gear
Locked Door to Sacrificial Chamber [Expert]
Use your Lockpicking, or Fort Snowhawk Quarters Key to open this door.
Sacrificial Chamber
The remains of a skeleton lie on the coffin here, where the dead were experimented on. Check the chest and loose gear in here, along with more books to read. Then remove the door bar so you can exit onto the staircase.
- Chest
- Loose Gear
Central Tower Spiral Stairs
Enter via the nearby door, and you’ll find the wooden door to the Sacrificial Chamber barred, so journey using the route shown here. Expect a couple of foes on these stairs. Head up when you’re ready to leave, as there’s an exit at the top.
- Danger! Rune Traps
- Potion
- Loose Gear
Door to Skyrim
 Door to Skyrim
Prison
Fight your way across the battlements to reach the entrance to the prison tower in the Keep’s northern courtyard. The prison is a small area with few guards. Find a chest in the nook just beyond the main entry staircase and another in one of the holding cells. A passage in the back of another cell leads to a secret exit, but beware the bear traps as you jump down.
- Danger! Bear Traps
- Crafting: Arcane Enchanter
- Chest (Locked: Apprentice)
- Potions
[2.11] Brood Cavern
Dungeon: Animal Den
- Animal
Collectibles
- Chest
- Chest (Locked: Novice)
- Potion
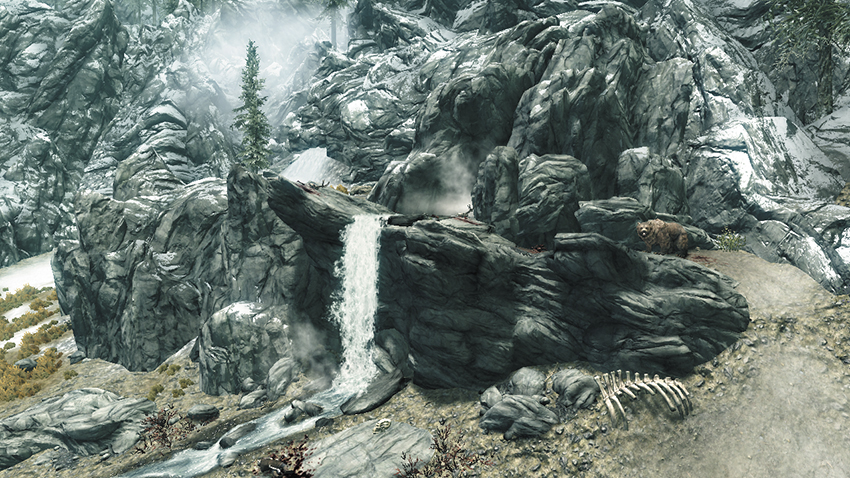
Ferocious [Leveled Predators] guard this waterfall cave. Make your way to the waterfall’s top and follow the stream into the mountain to enter the Brood Cavern. Slay more [Leveled Predators] inside the cave and pass through an interior waterfall to locate a chest with an easy lock. Another chest lies on dry land near the body of a late hunter, who recently became the animals’ prey.
[2.12] North and South Cold Rock Pass
Recommended Level: 8
Dungeon: Animal Den
Animal
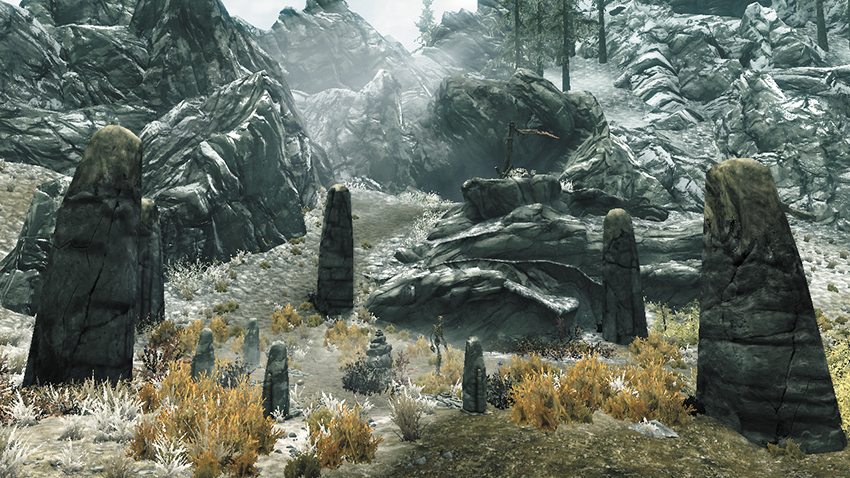
This small, frozen cave runs straight through Hjaalmarch’s southern mountains, providing a convenient means of passage into Whiterun. Unfortunately, a vicious Frost Troll resides here that you must either deal with or avoid.
[2.13] Eldersblood Peak
Dungeon: Dragon Lair
- Animal
- Dragon (after Main Quest: Dragon Rising)
Special Objects
- Word Wall: Disarm [1/3]
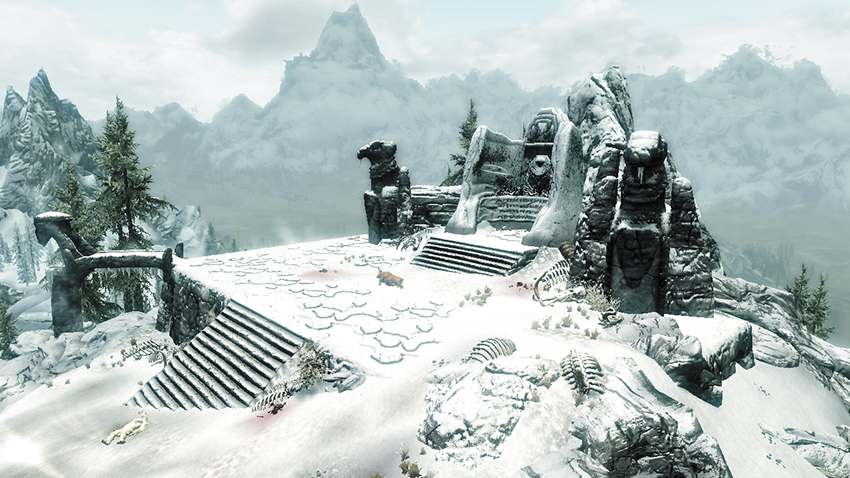
A pack of ferocious Frost Trolls guard this ancient dragon lair, which is located atop the peak south of Morthal. If you visit here after the dragons have returned, most of the Frost Trolls will have been killed, but you will have a much bigger foe to contend with. Secure the site, then follow the sound of chanting to locate a Word Wall that bestows you with a new Word of Power.
[2.14] Wreck of the Icerunner
Related Quests
- Side Quest: Lights Out!
Recommended Level: 6
Dungeon: Shipwreck
- Blackblood Marauder
- Deeja
Collectibles
- Area Is Locked (quest required)
- Potions
- Loose gear
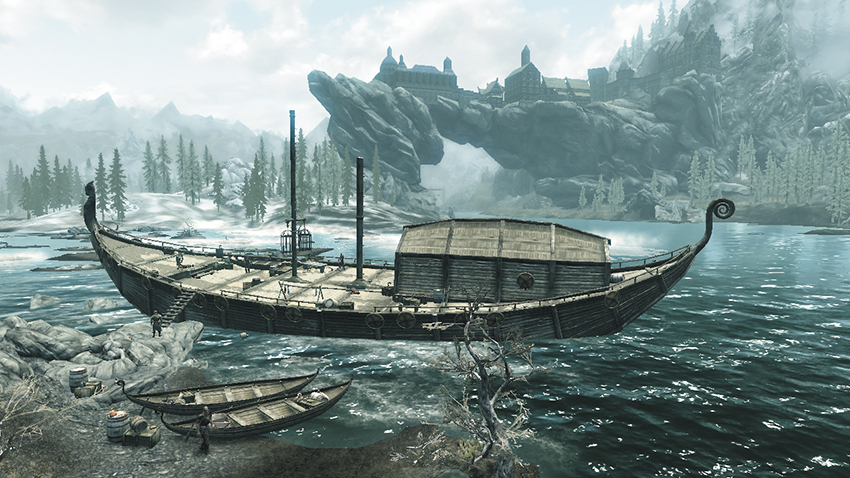
This unique location exists only after you extinguish the Solitude Lighthouse as part of Side Quest: Lights Out! Without the Lighthouse to guide it, the Icerunner, an Imperial supply ship, runs aground on the reefs in this area. There’s nothing of particular interest at this site until the shipwreck occurs.
Exterior
The ship’s deck is full of plunder, and there are potions stashed in a nearby rowboat—but anything you take on the way in to meet Deeja is considered theft by the marauders, who will turn on you without hesitation.
- Potions
- Loose gear
The Icerunner (Interior)
The thieves have nearly finished looting the ship’s interior, but there are still a few valuables to be found. Make your way down to the cargo hold and speak with Deeja, who suddenly double-crosses you. Slay the villain and inspect the note she carries to advance your quest, then fight your way back outside, claiming any loot you might have left alone before.
- Apothecary’s Satchel
- Satchels (2)
- Potions
- Loose gear
[2.15] Abandoned Shack
Related Quests
- Dark Brotherhood Quest: With Friends Like These...
Habitation: Special
- Alea Quintus
- Astrid
- Fultheim the Fearless
- Vasha
- Area Is Locked
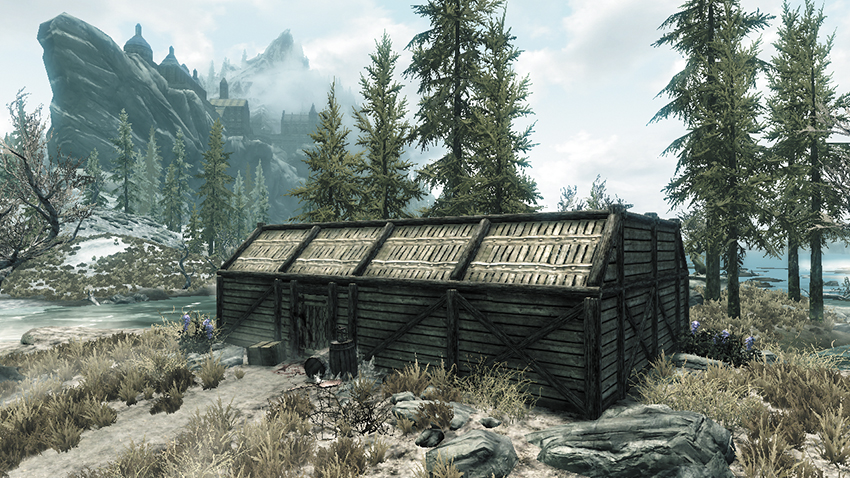
This remote, ramshackle cabin is used by the Dark Brotherhood for various purposes. After you complete the first Dark Brotherhood Quest, Astrid brings you here, where you’re faced with a choice of killing one of three persons as part of the second Dark Brotherhood Quest, “With Friends Like These...” Interrogate each of the three captives, then slay any of them to advance the quest—the choice affects only Astrid’s remarks after the deed is done.
[2.16] Ustengrav
Related Quests
- Main Quest: The Horn of Jurgen Windcaller
Recommended Level: 6
Dungeon: Bandit Camp
- Animal
- Bandit
- Draugr
- Mage
- Skeleton
Crafting
- Arcane Enchanter
Dangers
- Flamethrowers (pressure plates)
- Oil Lamp Trap
- Oil Pool Trap
Collectibles
- Skill Book [Restoration]: Mystery of Talara, v2 [B1/10]
Special Objects
- Word Wall: Become Ethereal [1/3]
- Area Is Locked (quest required)
- Chest(s)
- Potions
- Loose gear
- Mineable Ore (Corundum, Iron, Silver)
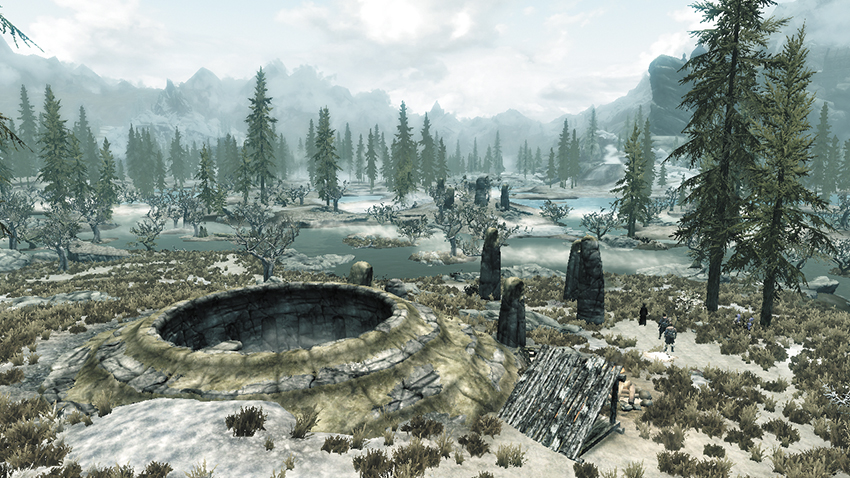
Warlocks have turned the ruins here into a temporary camp as they explore an ancient temple—and pillage the crypts below. You can’t delve too deeply into Ustengrav until you advance to Main Quest: The Way of the Voice, which tasks you with obtaining a special object from the crypts’ depths.
Exterior
Warlock Necromancers have made camp outside. It’s best if you go for the necromancer first since his reanimated followers will drop once he’s taken care of. After you finish off the necromancer and his reanimated bandits, descend into the circular ruins and loot a chest before entering the nearby door.
- Chest
- Loose gear
Exit to Skyrim
Entry Cavern
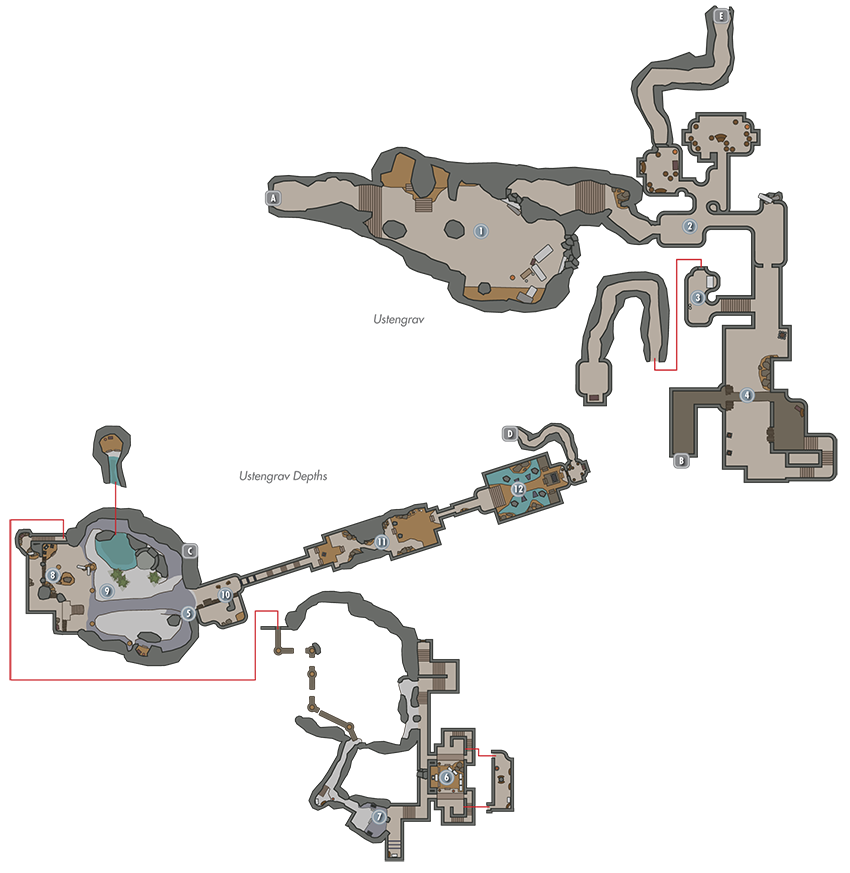
Several reanimated bandits and mages are encountered in this first cavernous chamber. Loot a chest and swipe a few potions before proceeding to [2]. Note that the passage that leads to [2] is blocked when you visit this location prior to starting Main Quest: The Way of the Voice.
- Chest
- Potions
- Loose gear
Draugr Passages
Cut down the large number of undead Draugr that roam these passages. Search the northern side rooms to locate a chest, Skill Book, and lots of lootable urns.
- Skill Book [Restoration]: Mystery of Talara, v2 [B1/10]
- Chest
- Potions
Secret Passage
Descend into this small side room and swipe some coins off a table, and take the gear that’s hidden beneath it. Pull the nearby wall chain afterward to reveal a secret passage that leads to a chest.
- Chest
- Loose gear
Sarcophagi Chamber
Slay more Draugr in this wide burial chamber, then scale the southeast stairs to locate several potions and a chest.
- Chest
- Potions
Door to Ustengrav Depths
Door to Ustengrav
Cavern Access
Navigate a twisting stairway as you descend into this massive subterranean cavern. If you own the Whirlwind Sprint Shout, use it to safely streak past some wide pressure plates that trigger flamethrowers when depressed. Also, if you look closely, you will see that some pressure plates are decoys and don’t actually shoot fire. Figuring this out will help you navigate the halls ahead.
- Danger! Flamethrowers (pressure plates)
- Mineable Ore (Iron)
Walkway Chamber
Dispatch a few Draugr in this sizeable side chamber. Cross a walkway and head downstairs to raid a chest in the east alcove, then scale the south stairs afterward and cross another walkway on your way to [7].
- Chest
- Potions
Oily Cavern
Draugr burst out from sarcophagi in this cavern. Quickly knock down the overhead lamps to ignite the oil on the ground and burn them up. Turn the handle on the wall near the south portcullis, then turn another handle on the wall near the south sarcophagus to expose a small crafting nook with a chest.
- Danger! Oil Lamp Traps, Oil Pool Trap
- Crafting: Arcane Enchanter
- Chest
- Potions
- Loose gear
Huge Cavern: West Balcony
Upon entering this massive cavern, you can utilize your Whirlwind Shout to jump across these destroyed bridges to discover a chest tucked away behind some rubble. Clear the skeleton archers from the west balcony afterward, and locate a few potions near the throne. Descend the north sloping trail afterward to reach the cavern’s bottom.
- Danger! Flamethrowers (pressure plates)
- Chest
- Potions
Huge Cavern: Ground Floor
Follow the sound of chanting to locate a Word Wall at the bottom of the cavern. Obtain a new Word of Power, then search behind the nearby waterfall to locate a hidden chest that’s guarded by a powerful Draugr. Backtrack out and explore the cavern’s opposite end to discover a chest and a few potions.
- Word Wall: Word of Power: Become Ethereal [1/3]
- Chests (2)
- Potions
- Mineable Ore (Corundum, Silver)
Huge Cavern: East Balcony
Return to the cavern’s west balcony and cross the central bridge to reach the opposite balcony, where a series of portcullises block your progress. The portcullises are controlled by the nearby glowing stones. You must use Whirlwind Sprint to dash past the glowing rocks and through the portcullises before they close. The easiest way to make it through the gates is to sprint past all the stones; just after you reach the final stone, use Whirwind Sprint and continue sprinting.
- Potion
Fire Trap Passage
Use your Whirlwind Sprint Shout again to blaze through this dangerous passage—the entire floor is made of flamethrower traps! Alternatively, remember that some flamethrowers are decoys, and don’t actually shoot flames. Look carefully at the ground coloration to see which is which. Once you’re past the traps, beware of a Giant Frostbite Spider that descends from the ceiling. Cut your way through the thick webs that follow so you may advance.
- Danger! Flamethrowers (pressure plates)
 Jurgen Windcaller’s Tomb
Massive pillars rise from the surrounding water as you enter this large, quiet chamber. Inspect the far tomb of Jurgen Windcaller to advance your quest, then enter the nearby door to locate a giant chest. Navigate the tunnel that follows to find your way back to the surface.
- Chest
Door to Ustengrav
 Door to Ustengrav Depths
[2.17] Hjaalmarch Stormcloak Camp
Related Quests
- Civil War Quest: Liberation of Skyrim
- Civil War Quest: A False Front
- Civil War Quest: The Battle for Fort Snowhawk
Habitation: Military: Stormcloak Camp
- Arrald Frozen-Heart
- Stormcloak Soldier
- Stormcloak Quartermaster (Blacksmith)
Services
- Trader (Blacksmith): Stormcloak Quartermaster [3/33]
- Weapons, Apparel, Misc
Crafting
- Anvil
- Grindstone (2)
- Workbench
Special Objects
- Civil War: Map of Skyrim
- Chests (2)
Loose gear
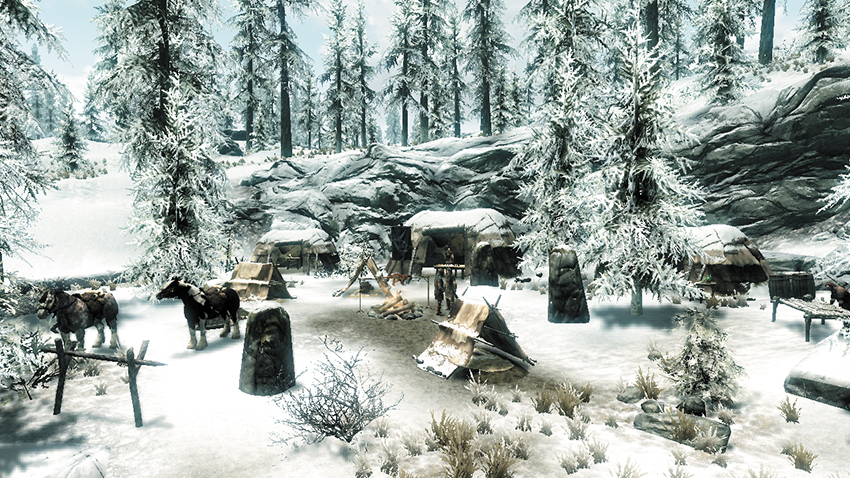
A small detachment of Stormcloak Soldiers has made camp along the northern edge of Hjaalmarch—yet this site may exist only during the Civil War quest line. Barter with the quartermaster if you like, and inspect the large map in one of the tents to potentially acquire new map information.
[2.18] Mzinchaleft
Related Quests
- Dark Brotherhood Quest: Side Contract: Maluril
- Dungeon Activity
Recommended Level: 16
Dungeon: Dwarven City
- Animal
- Bandit
- Dwarven Centurion
- Dwarven Sphere
- Dwarven Spider
- Falmer
Underground Connection: Blackreach [10.02]
Collectibles
- Skill Book [Archery]: The Black Arrow, v2
- Unique Weapon: Grimsever [7/80]
Special Objects
- Dwarven Mechanism
- Chest(s)
- Potions
- Loose gear
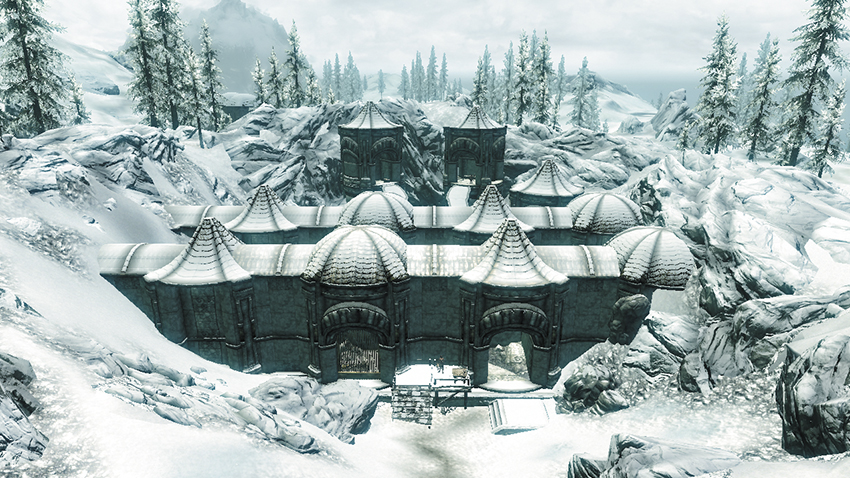
Surrounded by rocks, these impressive dwarven ruins stand in the frozen wastelands in Hjaalmarch’s northeast corner. South of the ruins, an ornate elevator grants passage to the Mzinchaleft Gatehouse, where a dwarven mechanism can be activated to grant passage to Blackreach [10.02]; known as the Great Lift at Mzinchaleft. However, you can’t use this elevator until you’ve navigated all of Mzinchaleft and used it to exit the Gatehouse, which is the ruins’ final area.
During a Miscellaneous Objective for Mjoll the Lioness, you can discover a unique weapon here at Mzinchaleft called “Grimsever.” See the Quests chapter for further details.
Exterior
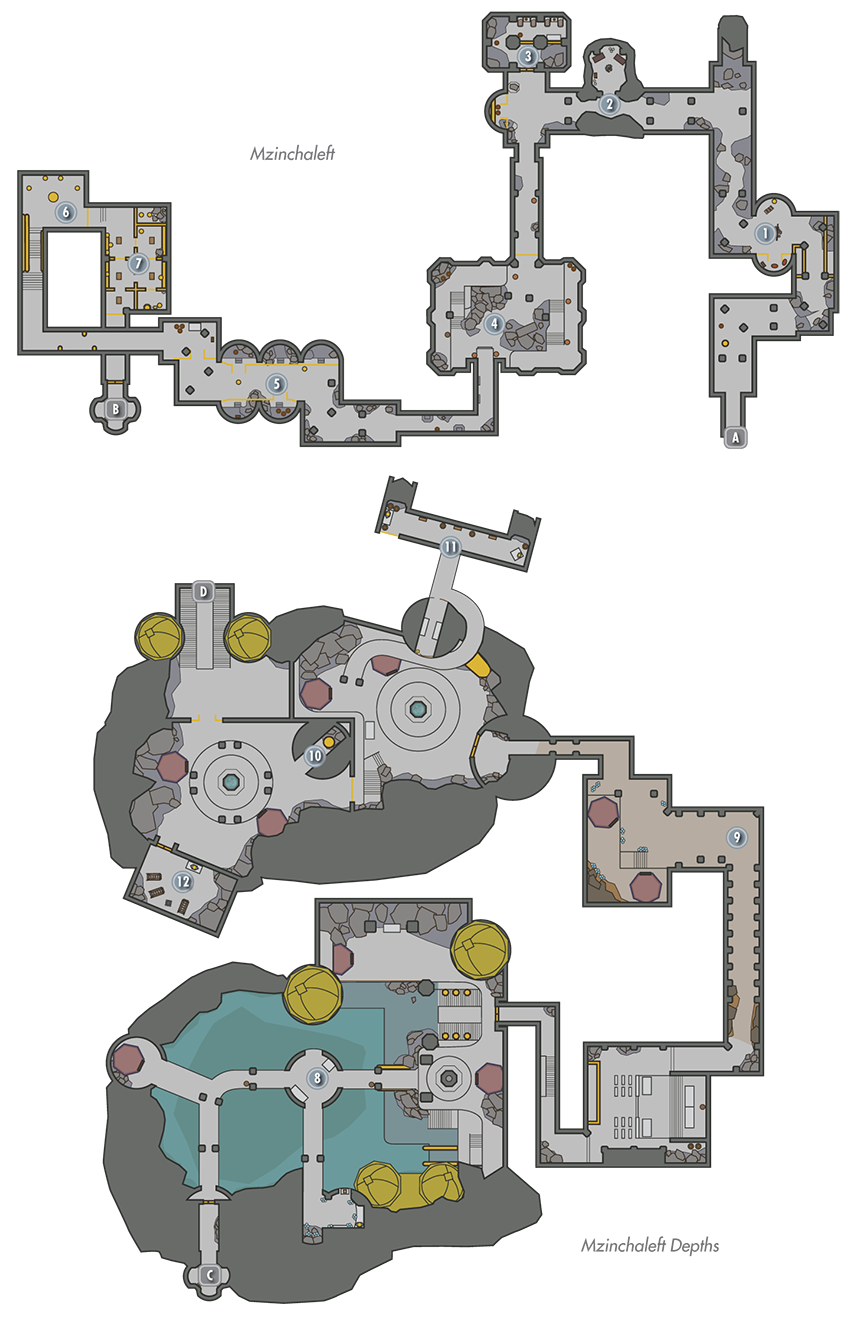
Entering the ruins won’t be easy, for a large group of bandits has make camp here as they work at ransacking the site. Slay a mob of brutes in the exterior area, and locate a locked chest atop one of the spiral-path towers.
- Chest (Locked: Adept)
- Loose gear
Door to Skyrim
Campfire Passage
A few bandits are huddled around a campfire in this first stretch of passage. Secure the site, loot a chest to the south, and swipe a few potions from the vicinity.
- Chest
- Potions
Frozen Cavern
Dispense with a couple of mages and loot another chest in this frosty cavern.
- Chest
- Potions
- Loose gear
Treasure Room 1
Pick a tricky door lock to enter this small chamber, where a chest, a Skill Book, and a few potions await collection.
- Skill Book [Archery]: The Black Arrow, v2
- Area Is Locked (Adept)
- Chest
- Potions
Sphere Chamber
Ancient, yet still functional, Dwarven Spheres patrol this large chamber. Allow them to engage any roaming bandits, then dispatch the stragglers. There’s little else of interest here.
Spider Chamber
Dangerous Dwarven Spiders skitter about this long hall. Pick an Adept-level gate to the south to access a unique-looking dwarven chest.
- Chest
Steam Pipe Passage
Disable several Dwarven Spheres in this chamber, then follow the thick pipes along the left wall to locate an elevated chest.
- Chest
Lever Chamber
Manipulate the levers in this chamber until you can access the southeast chamber, where you may loot a chest and turn a valve. This will allow you to advance to the Mzinchaleft Depths.
- Chest
Elevator to Mzinchaleft Depths
Elevator to Mzinchaleft
Mzinchaleft Depths: South
The Mzinchaleft Depths are truly breathtaking—an entire dwarven settlement built within a massive underground cavern. Dangerous Falmer and Chaurus lurk down here, and more Falmer will emerge from small holes high on the walls. Find one chest hidden among the southern Chaurus nest and another in an northern nook, deep underwater. Find two more sunken chests by opening the southeast underwater gate and following the submerged passage to a small room.
- Chests (4)
- Loose gear
Connecting Tunnel
After fulling looting the southern exterior area, enter the east building and slay a few more Falmer before following a long tunnel north. Dispatch additional Falmer and Chaurus along the way, and don’t miss the odd chest that’s hidden in a tent about halfway through.
- Chest
Mzinchaleft Depths: North
The long connecting tunnel deposits you in a northern exterior area. Find a chest in a north tent, then head up a winding ramp to reach a ledge with a button that shines a light on a nearby gate when pressed. Pick a nearby Expert-level gate to enter [11], then head back down, go through the now-lit gate, and loot a long, unique chest that sits near the central fountain. Pick an Adept-level door to visit as well [12]. When you’ve finished raiding this place, proceed up the northwest stairs to reach the door to the Mzinchaleft Gatehouse.
Treasure Room 2
Breaking into this small chamber isn’t easy, but picking the Expert-level lock lands you within easy reach of two dwarven chests.
- Area Is Locked (Expert)
- Chest (2)
Treasure Room 3
Pick a locked door in the southwest corner of [10] to access a small room with a chest.
- Area Is Locked (Adept)
- Chest
Door to Mzinchaleft Gatehouse
Mzinchaleft Gatehouse
A fearsome Dwarven Centurion guards this large chamber, along with a lesser Dwarven Sphere. Fight hard to survive this encounter. Pull a lever to the northeast afterward to open a nook with a chest, and open the southwest gate to access a peculiar Dwarven Mechanism—activating this with a special item opens a way into Blackreach.
When you’re ready to exit out to Skyrim, proceed through the far west door and take an elevator to the surface. Pull a lever outside to lower the elevator gate. Now you can quickly return to the Gatehouse in the future.
- Chest
- Loose gear
[2.19] Great Lift at Mzinchaleft
Underground Connection: Blackreach [10.02]
Miscellaneous
- Area is Locked
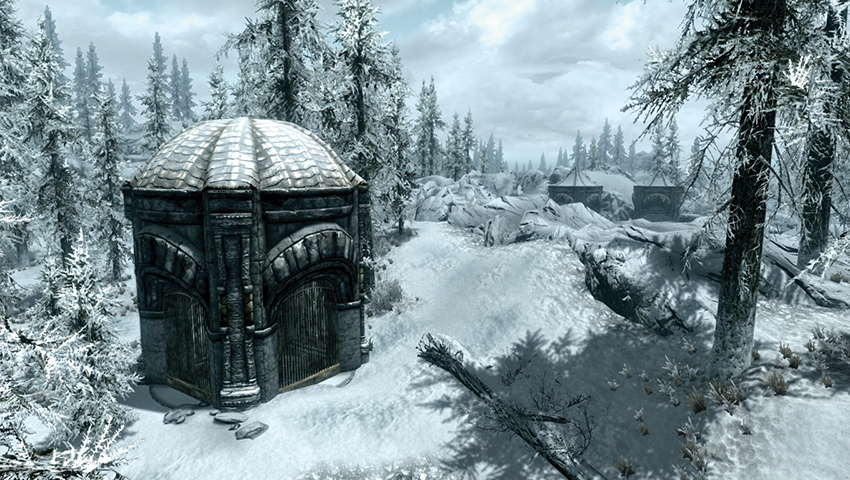
This small tower, located just south of Mzinchaleft itself, doesn’t appear as a Primary location on the in-game map, but it’s important enough to be considered one. Beyond the tower’s locked gate lies an elevator that transports you down to the legendary Dwarven city of Blackreach [10.02], but you must pull the lever inside the tower to open its gate. This makes this a one-way trip until after you’ve used this elevator to exit Blackreach (the gate remains unlocked afterward).
[2.20] Movarth’s Lair
Related Quests
- Side Quest: Laid to Rest
Recommended Level: 6
Dungeon: Vampire Lair
- Animal
- Movarth (During Laid to Rest)
- Vampire
- Vampire’s Thrall
Crafting
- Alchemy Lab
Collectibles
- Skill Book [Illusion]: 2920, Sun’s Dawn, v2
- Unique Armor: Movarth’s Boots [8/112]
- Chest(s)
- Potions aplenty
- Loose gear
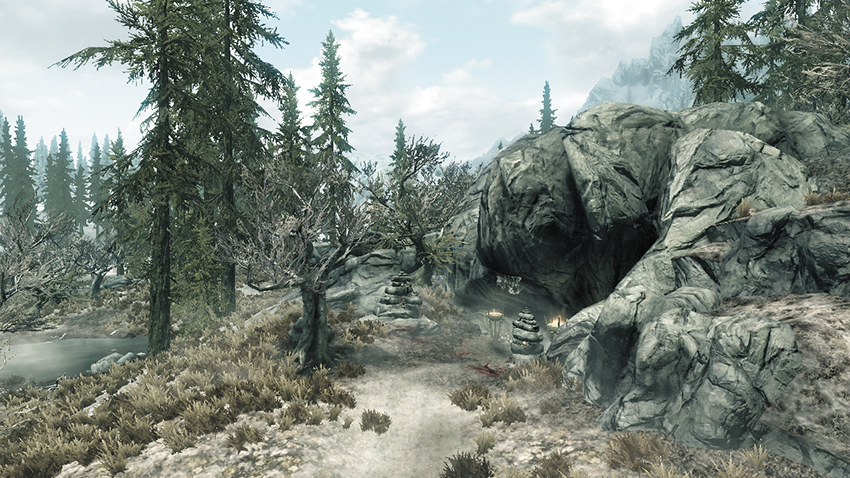
Bones and bloodstains lie at the mouth of this cave—an ominous warning of grave danger within. You must clear out this vampire lair during the final part of Side Quest: Laid to Rest.
Entry Stairwell and Passages
Pick off a couple of dangerous Frostbite Spiders in this first cavern, then dispatch a few Vampire Thralls in the following passages.
- Potion
- Loose gear
Master Vampire’s Lair
A powerful vampire lurks in the heart of the cave, along with several lesser vampires and thralls. Loot this cavern to obtain several potions, and find a chest and alchemy lab in a nook above the wooden ramp. Venture north to snag a Skill Book and some unique boots from the vampires’ sleeping quarters before proceeding south.
- Crafting: Alchemy Lab
- Skill Book [Illusion]: 2920, Sun’s Dawn, v2
- Unique Item: Movarth’s Boots [8/112]
- Potions aplenty
- Loose gear
Exit Path
Slay a final thrall and loot one last chest as you make your way south, taking your leave of this unholy den.
- Chest
- Potion
- Loose gear
[2.21] Hjaalmarch Imperial Camp
Related Quests
- Civil War Quest (when active, depending on who you side with)
Habitation: Military: Imperial Camp
- Imperial Soldier
- Imperial Quartermaster (Blacksmith)
Services
- Trader (Blacksmith): Imperial Quartermaster [4/33]
- Weapons, Apparel, Misc
Crafting
- Anvil
- Grindstone (2)
- Workbench
Special Objects
- Civil War: Map of Skyrim
- Chests (2)
- Loose gear
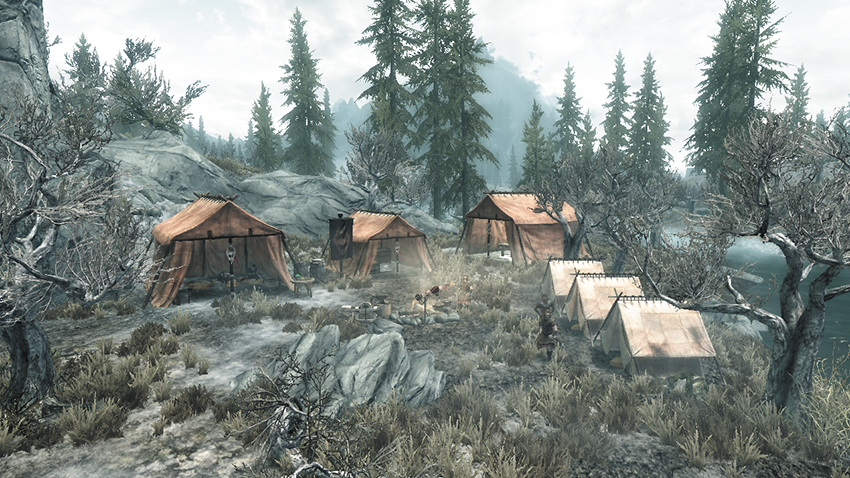
A small band of Imperial troops have set up a small yet functional encampment at this site, which may appear only during the Civil War quest line. The quartermaster offers you blacksmith services, and inspecting the large map in one of the tents can grant you new map data.
[2.22] Kjenstag Ruins
Recommended Level: 5
Dungeon: Special
- Ghost
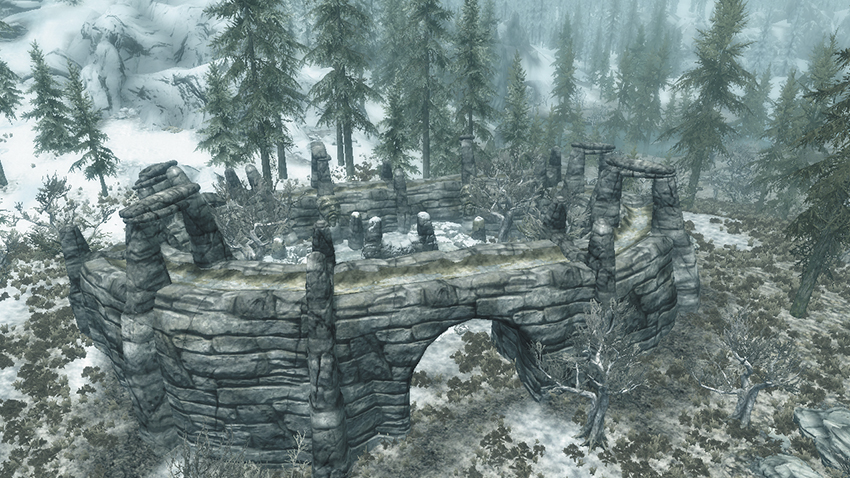
There must be something special about these unassuming ruins—and there is. Visit this site at night (between 8:00 p.m. and 4:00 a.m.) to witness a ghost materialize and run off. Pursue the specter and you’ll be led to a small grave that’s being looted by bandits. Dispatch the villains and claim their plunder.
[2.23] Stonehills
Related Quests
- Miscellaneous Objective: Slow Shipments to Bryling* (Pactur)
- Favor (Activity): Mining Ore* (Gestur Rockbreaker)
Habitation: Town
- Gestur Rockbreaker
- Hjaalmarch Guard
- Jesper
- Pactur
- Sorli the Builder
- Sirgar
- Swanhvir
- Teeba-Ei
Crafting
- Smelter
Collectibles
- Skill Book [Heavy Armor]: Orsinium and the Orcs [D1/10]
- Skill Book [Speech]: 2920, Second Seed, v5 [A1/10]
- Chest(s)
- Potions
- Loose gear
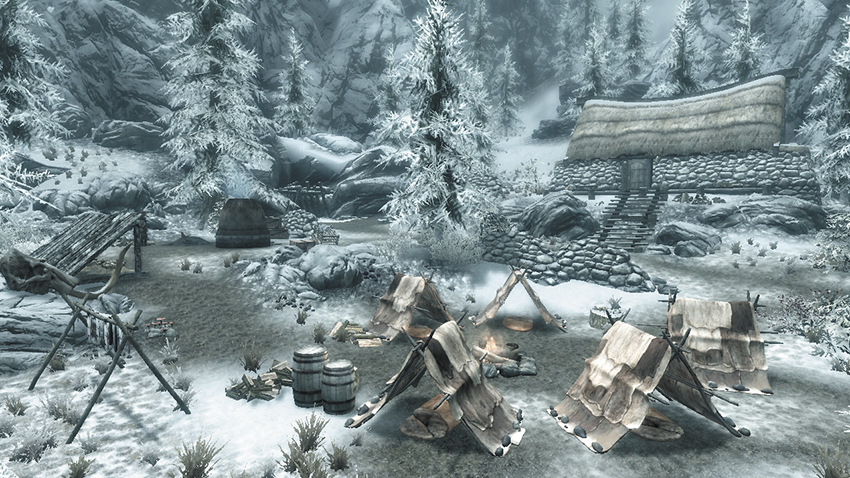
This humble mining settlement has seen its share of hard times. Its people have suffered greatly through the various wars of the last two decades. Though currently self-sufficient, Stonehills is quite poor and run-down.
Exterior
A few crafting stations can be exploited around town.
- Crafting: Smelter
Sorli’s House
This humble abode houses several potions, plenty of ore and ignots, and a chest. Oh, and there’s a Skill Book on the mantel!
- Skill Book [Speech]: 2920, Second Seed, v5 [A1/10]
- Chest
- Potions
- Loose gear
Rockwallow Mine
Grag a pickaxe and dig into this icy mine’s rich ore veins to collect some valuable Iron Ore. Any ore you mine can be sold to a man named Gestur Rockbreaker for fast coin. Speak with a man named Pactur to gain a new Side Quest as well. Nab the Skill Book that lies on the short table on the wooden loft.
- Skill Book [Heavy Armor]: Orsinium and the Orcs [D1/10]
- Loose gear
- Mineable ore (Iron)
[2.24] Labyrinthian
Related Quests
- Side Quest: Masks of the Dragon Priests*
- College of Winterhold Quest: The Staff of Magnus
Recommended Level: 24
Dungeon: Dragon Priest Lair
- Draugr
- Dremora
- Enthralled Wizard
- Estormo
- Frost Troll
- Ghost Mages
- Ice Wraith
- Morokei
- Skeever
- Skeletal Dragon
- Skeleton
- Slaughterfish
- Spectral Warhound
- Troll
- Wisp
- Wispmother
Crafting
- Alchemy Lab
- Arcane Enchanter
Dangers
- Rune Trap (floor)
- Magic Caster Trap (Frost)
Collectibles
- Dragon Priest Mask: Konahrik [2/10]
- Dragon Priest Mask: Morokei [3/10]
- Dragon Priest Mask: Wooden Mask [3/10]
- Skill Book [Conjuration]: Liminal Bridges [C1/10]
- Unique Item: Ancient Helmet of the Unburned [9/112]
- Unique Weapon: Drainblood Battleaxe [8/80]
- Unique Weapon: Drainheart Sword [9/80]
- Unique Weapon: Drainspell Bow [10/80]
- Unique Weapon: Staff of Magnus [11/80]
Special Objects
- Word Wall: Dismaying Shout [1/3]
- Word Wall: Slow Time [1/3]
- Chest(s)
- Potions
- Loose gear
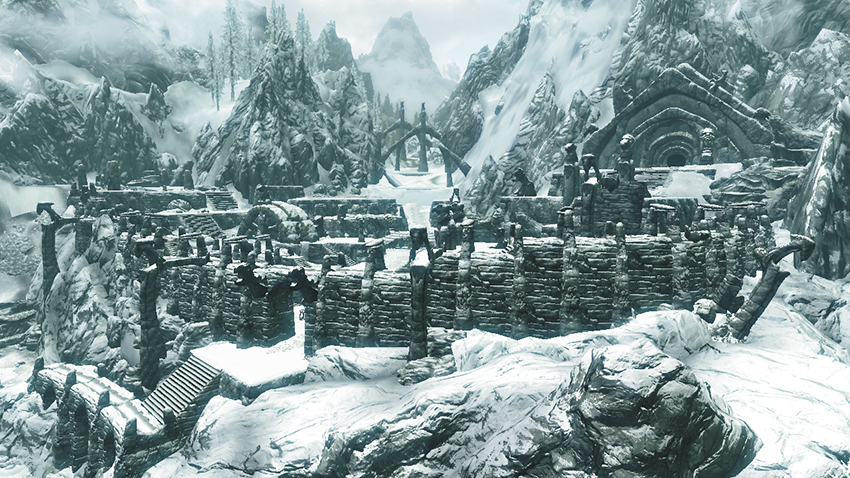
This vast network of ruins lies in the mountains southeast of Morthal. It was said to have been built by a mage named Shalidor, although in truth its history is much longer than this implies. Taken together, Labyrinthian may well be the largest network of ruins in all of Skyrim.
During the end of College of Winterhold Quest: The Staff of Magnus, you will obtain the unique Staff of Magnus.
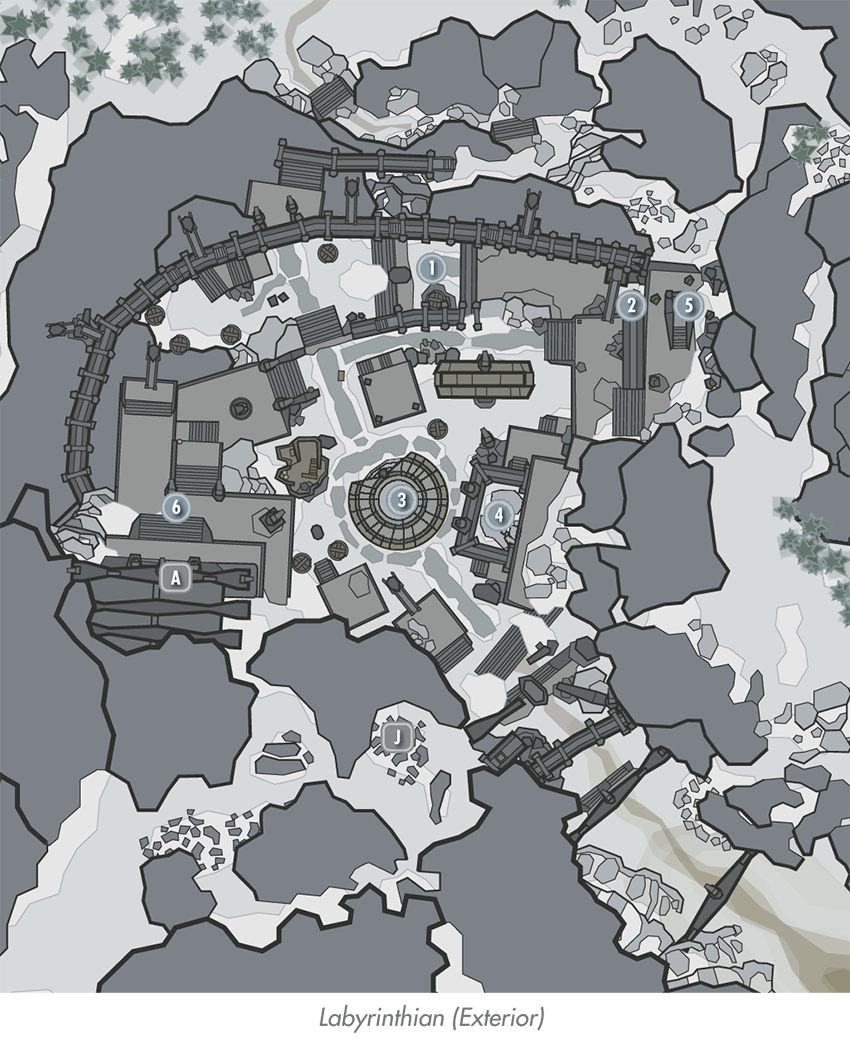
Chest Nook A
Though intimidating in size, Labyrinthian’s exterior ruins are simple to navigate. Slay a Frost Troll here and raid a chest.
- Chest
Chest Nook B
Scale some steps and slaughter another Frost Troll to secure a chest over here.
- Chest
Central Dome
Duck into this central dome-shaped structure to discover an informative note near a skeleton. Collect the nearby Wooden Mask and put it on—you’ll find yourself standing in a sacred chamber. It’s actually the same room; you’ve simply been whisked back to the past. Slay special named Dragon Priest adversaries that lurk at the end of dangerous dungeons throughout Skyrim to obtain special Dragon Masks, then bring these masks to this chamber and place them onto their corresponding busts. Once all eight masks have been restored to the shrine, an immensely powerful Dragon Mask will be yours. This is a unique quest that will never appear in your quest log. Remove the Wooden Mask to return to the present.
- Dragon Priest Mask: Konahrik [2/10]
- Dragon Priest Mask: Wooden Mask [4/10]
Shalidor’s Maze Entrance
You may enter Shalidor’s Maze at any time—see the “Shalidor’s Maze” section at the end of the main Labyrinthian walkthrough. Or simply raid the chest near its entry door and continue exploring these exterior ruins.
- Chest (Locked: Novice)
Lost Valkygg Entrances
Two entrances to a side area named Lost Valkygg [2.24] are found in Labyrinthian’s northeast corner. Use the higher entrance to fully explore this space.
Ceremonial Door
Progress through the College of Winterhold quest line until you acquire the College of Winterhold Quest: The Staff of Magnus. Then make your way up a series of steps that lead to this strange door. Fit the Torc of Labyrinthian onto the door so you may enter and begin your exploration of this massive place.
Door to Labyrinthian (Interior)
Exit to Skyrim
Entry Chamber
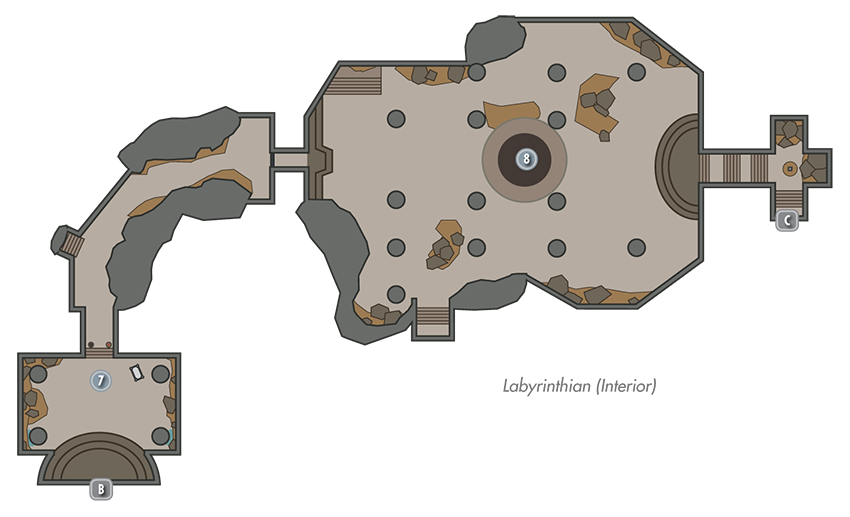
Labyrinthian’s sizable entry chamber hints at the magnitude of this epic dungeon, and the vast number of skeletons hints at the danger that lies ahead. Proceed through the far door and wide corridor that follows, looting urns along the way.
- Potion
- Loose gear
Skeletal Dragon Chamber
A horde of skeletons guards this huge chamber, and a massive skeletal dragon rises from the room’s center as you enter. Fortunately, these undead enemies are somewhat fragile, though the dragon’s attacks are fierce. Loot a few urns after the battle, then proceed to the far staircase to venture onward and downward, optionally stopping to check the carved tablet here.
Door to Labyrinthian Chasm
Door to Labyrinthian (Interior)
Chasm Entry
Before descending the Chasm’s entry steps, discover a chest that’s tucked away near the west wall. Go downstairs afterward and use any fire-based attack to thaw the door that has magically frozen. The Spell Tome that sits on a nearby pedestal can provide you with the means to advance.
- Chest
- Loose gear
Study
Dispatch powerful Draugr as you descend some narrow ramps, then duck into the south side passage to battle more undead on your way to a room filled with crafting stations and valuables. Don’t miss the Spell Tome: Equilibrium, a unique alteration spell that can only be obtained here.
- Crafting: Alchemy Lab, Arcane Enchanter
- Spell Tome: Equilibrium
- Chest
- Loose gear
Narrow Ramp Cavern
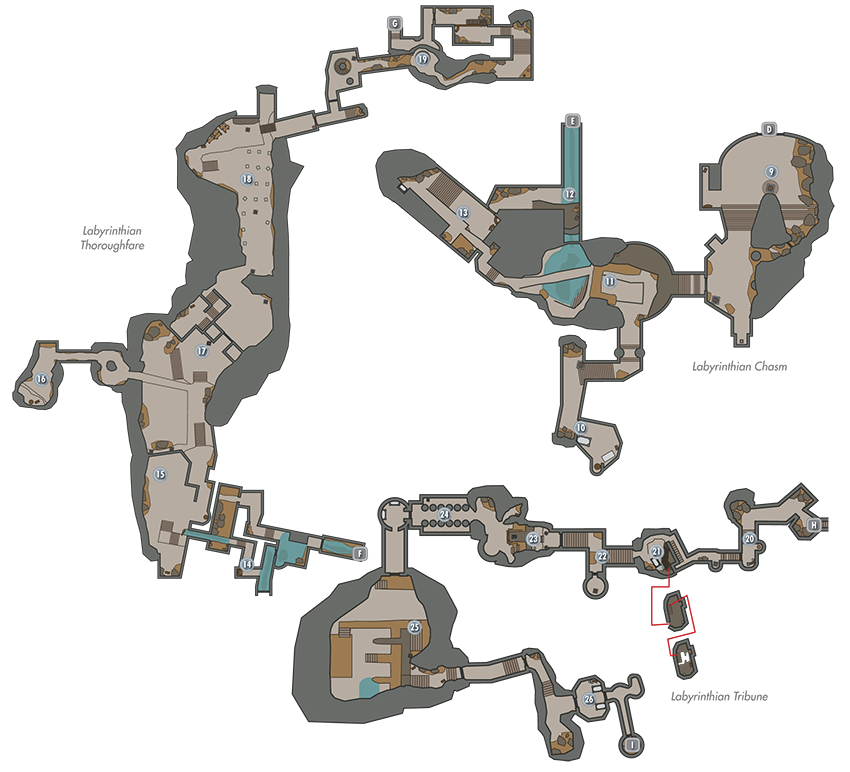
Backtrack out from [10] and continue descending the sloping narrow ramps here, slaying a few more deadly Draugr on your way to the cavern’s watery bottom.
Passage to Thoroughfare
Take the north passage from the bottom of [11] to locate the door that leads to the Labyrinthian Thoroughfare. Before heading through, venture up the west passage toward [13], doubling back at one point to scale a narrow trail that leads to treasure.
- Chest
- Loose gear
 West Chamber
Optionally visit this side area to battle a powerful Draugr and nab a bit of loot. You may access this area by taking the high west passage at [11], or the low west passage from [12].
- Potions
Door to Labyrinthian Thoroughfare
 Door to Labyrinthian Chasm
 Plunder Passage
Slay a skeleton as you enter the thoroughfare, then unlock a Novice-level gate to access this side passage, where treasure awaits.
- Chests (2)
 Thoroughfare Access
Discover a chest tucked away against the south wall here, and beware of a vicious troll that lurks in the north passage that leads into the main thoroughfare.
- Chest
 Troll Den
Lowly skeletons roam the spacious thoroughfare, while a pair of dangerous trolls lurk in this side cavern, which you may optionally access by crossing the thoroughfare’s first elevated footbridge. Best the trolls to secure the blood-soaked treasure they guard.
- Chest
 Thoroughfare
Throw a lever to gain entry to the main thoroughfare. Loot a few urns and scale the west steps to discover a chest on a ledge.
- Chest
- Potion
 Wisp Sanctum
A trio of captivating wisps drift about a collection of short stone headstones here, and a formidable Wispmother soon rises from the ground to attack. A Wispmother in danger will spawn duplicates of herself—focus on slaying the real enemy and ending the fight so you may loot the chest. Use any form of cold spell to douse the burning door that follows so you may proceed to [19], but stand back and beware: a Ghostly Mage appears and attacks you relentlessly as you consider this magical barrier.
- Chest
 Trapdoor Chamber
Dispatch more foes as you loop around a winding passage to reach this lower chamber—or bypass the passage by opening a large trapdoor to drop straight down to the lower chamber, using a pipe to break your fall. Loot a few urns here before proceeding through the nearby door that leads to the Labyrinthian Tribune.
 Door to Labyrinthian Tribune
 Door to Labyrinthian Thoroughfare
 Entry Passage
Slay a couple of dangerous Draugr that patrol the Tribune’s entry passage. Loot a chest and claim a Spell Tome that can help you navigate the next segment, which features several rune traps. If you’re no good with wards, you may do best to sprint and pray. Remove the soul gem from the pedestal to deactivate the first trap, then trigger the rune trap on the floor with a ranged attack from a safe distance.
- Danger! Rune Trap (floor), Magic Caster Trap (Frost)
 Tower
Tower
Slay lowly Draugr as you descend this crumbling tower in search of loot. There’s Malachite Ore at the bottom of the exterior pool, and a small stash of hidden loot in an upper area of the tower.
- Chests (2)
 Locked Gate Hall
Unlock an Adept-level gate as you move through here to access a south treasure nook that contains valuable gear, including a unique helmet.
- Unique Item: Ancient Helmet of the Unburned [9/13]
- Potions
- Loose gear
 Word Wall Cavern
Beware the mighty Draugr who sleeps upon this cavern’s central throne. Raid a chest that’s tucked away near the north wall before approaching the nearby Word Wall to gain new power.
- Word Wall: Slow Time [1/3]
- Chest
 Pillar Passage
Use the large pillars to help you slip through this passage, avoiding its undead sentries.
- Potion
 Grand Cavern
The staff you seek is housed in this cavernous chamber. Disturb nothing and you are safe for the moment. Dive into the far pool to raid a chest, then make your way upstairs. Two Enthralled Wizards are channeling their power to sustain a shield around the Dragon Priest Morokei. Interrupting these will break the shield, bringing the wrath of Morokei upon you. Slay Morokei afterward to obtain his precious mask, along with the Staff of Magnus. Scale the steps and head for the cavern’s door afterward, looting a large chest and then doubling back to locate a smaller chest that’s tucked away near the stairs.
- Staff of Magnus (Morokei)
- Dragon Priest Mask: Morokei [3/10]
- Chests (3)
 Exit Passage
Estormo ambushes you as you make your way out of Labyrinthian. Slay him, then loot a nearby chest before taking your leave of this forboding place.
- Chest
 Exit to Skyrim
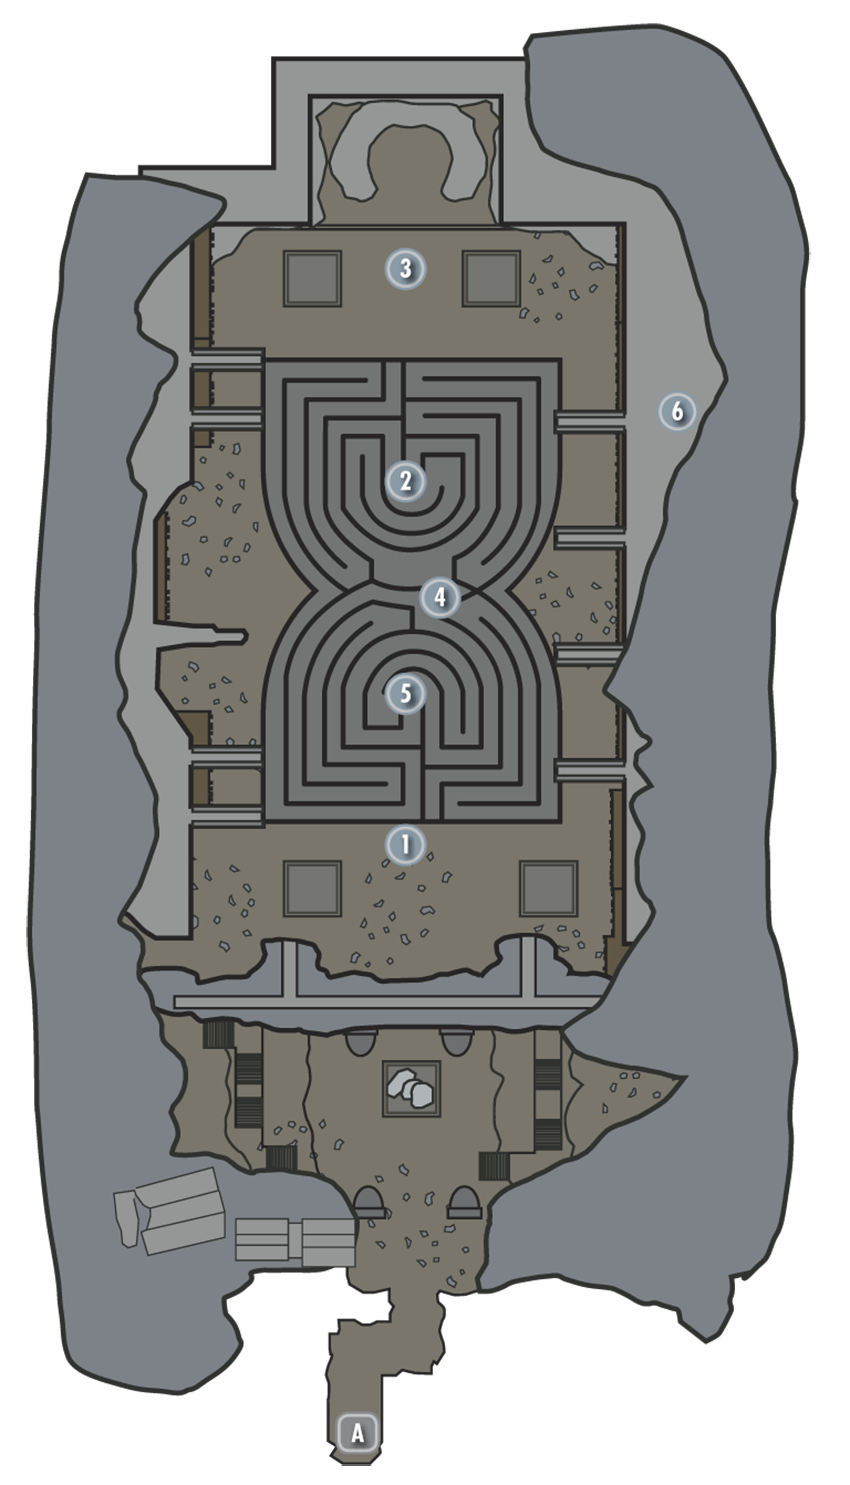
Shalidor’s Maze
Shalidor’s Maze is a separate subsection of Labyrinthian, and you may enter and fully explore this curious place at any time. Collect all four staves that hover in soft light at the entrance, then enter the maze and use the Staff of Magelight or any ranged Alteration spell you may possess to activate the Alteration Sigil so you may advance. Open special shutters to expose hidden valuables as you navigate the linear maze. Leave each shutter open to mark your progress.
Activate the next sigil, again by hitting the sigil with a ranged spell of its matching school, to drop into a short network of underground passages. Simply go west and take a spiral staircase back up to the surface. You’re now outside the maze again; loop around and enter from the north this time. Stop and obtain a new Word of Power from the wall nearby, then activate the next sigil and open the north gate. Find your way toward a Skill Book, and then activate the fourth and final sigil to be whisked away to a battle against a Daedric warrior called a Dremora and its two Atronach minions.
After slaying the Dremora, liberate the unique “Diadem of the Savant” from its corpse and try leaping from the high southern ledges to reach the snowy wooden platforms that run the length of the cavern’s west wall. Loop around the wooden ledge to eventually discover valuable gear near a skeleton. Drop to the ground floor afterward and approach the north Word Wall if you haven’t already claimed your new Word of Power.
- Skill Book [Conjuration]: Liminal Bridges [C1/10]
- Word Wall: Dismaying Shout [1/3]
- Diadem of the Savant
- Loose gear
Exit to Skyrim
Staves and South Maze Entrance
Collect all four staves that hover in soft light here, then enter the maze and use the Staff of Magelight (or any ranged Alteration spell you may possess) to activate the Alteration Sigil so you may advance. Open special shutters to expose hidden valuables as you navigate the linear maze. Leave each shutter open to mark your progress.
Destruction Sigil
Activate the next sigil here, again by hitting the sigil with a ranged spell of its matching school (use the Staff of Firebolts if you like), to drop into a short underground passage. Simply go west and take a spiral staircase back up to the surface.
North Maze Entrance and Word Wall
You’re now outside the maze again; loop around and enter from the north this time. Stop and obtain a new Word of Power from the wall nearby, then activate the Illusion sigil with the Staff of Fear and open the north gate.
- Word Wall: Dismaying Shout [1/3]
Skill Book Nook
Find your way toward a Skill Book that’s found in this small nook, lying near a skeleton. You can only reach this Skill Book when you enter the Maze from the north.
- Skill Book [Conjuration]: Liminal Bridges [C1/10]
Restoration Sigil
Again, dart through the linear maze until you find andactivate the fourth and final sigil with the Staff of Repulsion. Fall into the pit and step into the portal to be whisked away to a battle against a Daedric warrior called a Dremora, and its two Atronach minions. After slaying the Dremora, liberate the unique “Diadem of the Savant” from its corpse.
- Diadem of the Savant
Long-Lost Loot
After the Dremora battle, try leaping from the high southern ledges to reach the snowy wooden platforms that run the length of the cavern’s west wall. Loop around the wooden ledge to eventually discover valuable gear near a skeleton here. Drop to the ground floor afterward and take your leave of this unusual place.
- Diadem of the Savant
- Loose gear
[2.25] Lost Valkygg
Recommended Level: 6
Dungeon: Draugr Crypt
- Draugr
Crafting
- Alchemy Lab
Dangers
- Bone Alarm Trap
- Dart Trap (pressure plate)
Collectibles
- Skill Book [Pickpocket]: Aevar Stone-Singer [A2/10]
- Chest(s)
- Potions
- Loose gear
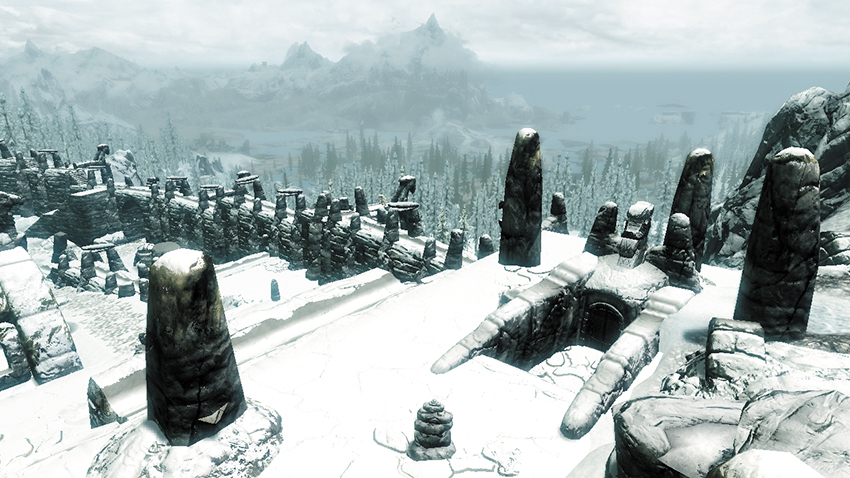
These ancient ruins lie at the northeast corner of Hjaalmarch’s massive ruin network, Labyrinthian ([2.23]). Lost Valkygg is unique in that it’s part of Labyrinthian but also considered a separate Primary Location that can be explored at any time. Lost Valkygg features two entrances that are easy to reach by navigating Labyrinthian’s exterior ruins. Both entrances remain unlocked at all times.
Exit to Skyrim
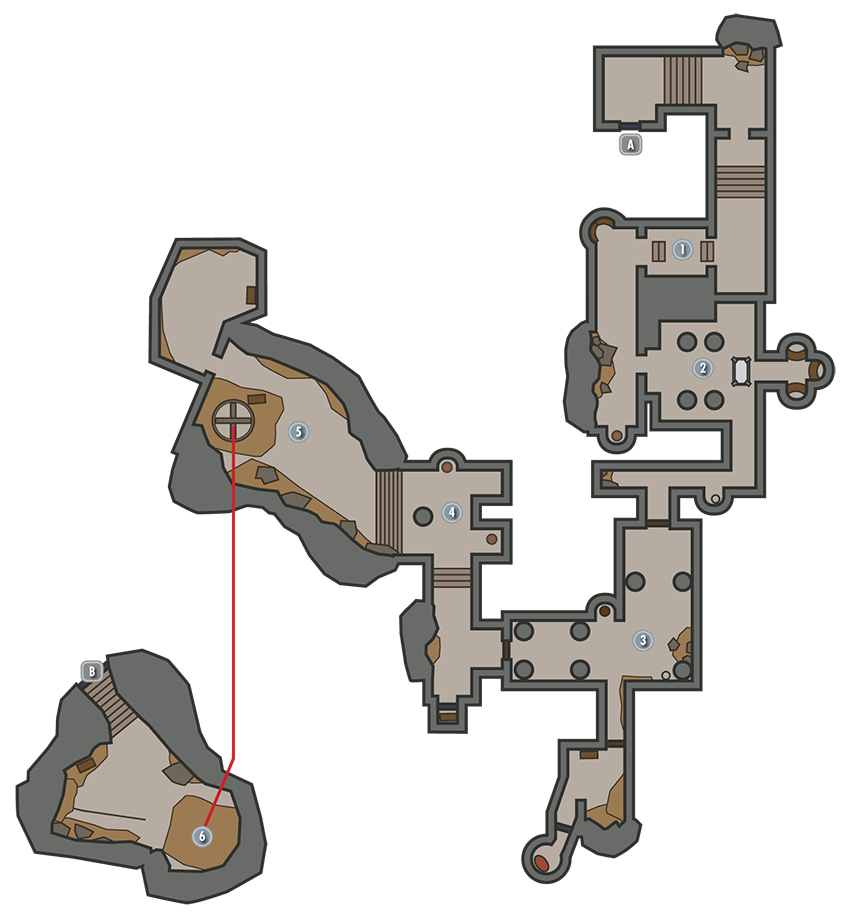
Pressure Plate Passage
Place three objects onto the three pressure plates in this passage to keep them depressed and open the way forward. You’ll return to collect these items soon.
- Potion
Quiet Chamber
Avoid hanging rattles and sneak through this small chamber to avoid stirring the mighty Draugr that rest on the central slab. Loot a few urns on your way to [3].
- Danger! Bone Alarm Trap
Sarcophagi Hall
The slightest noise causes Draugr to burst out from sarcophagi here. Use an Alchemy Lab if you like, then pop into the south chamber and pull a lever to open a holding cell. Claim a Skill Book from the ground near the skeleton.
- Crafting: Alchemy Lab
- Skill Book [Pickpocket]: Aevar Stone-Singer [A2/10]
- Apothecary’s Satchel
- Loose gear
Locked Gate Passage
Unlock an Apprentice-level gate in this passage to reach loose gear and a few urns, but beware the pressure plate on the ground before the gate.
- Danger! Dart Trap (pressure plate)
- Loose gear
Pit Cavern (Upper Level)
A deadly Draugr guards a tantalizing chest in this cavern. Before carefully dropping down the large pit to reach [6], enter the northwest doorway to find another, larger chest that’s tucked away near a sloping portion of floor.
- Chests (2)
Pit Cavern (Lower Level)
It’s possible to enter Lost Valkygg from its lower exit door. If you do, then you’ll appear in this final room, where another mighty Draugr guards a chest that sits on a high ledge. There’s no climbing back up the pit, so take your leave of Lost Valkygg.
- Chest
- Potion
Exit to Skyrim
[2.26] Skyborn Altar
Recommended Level: 10
Dungeon: Dragon Lair
- Dragon Lair (after Main Quest: Dragon Rising)
- Wispmother
Special Objects
- Shrine of Akatosh [2/6]
- Word Wall: Frost Breath [2/3]
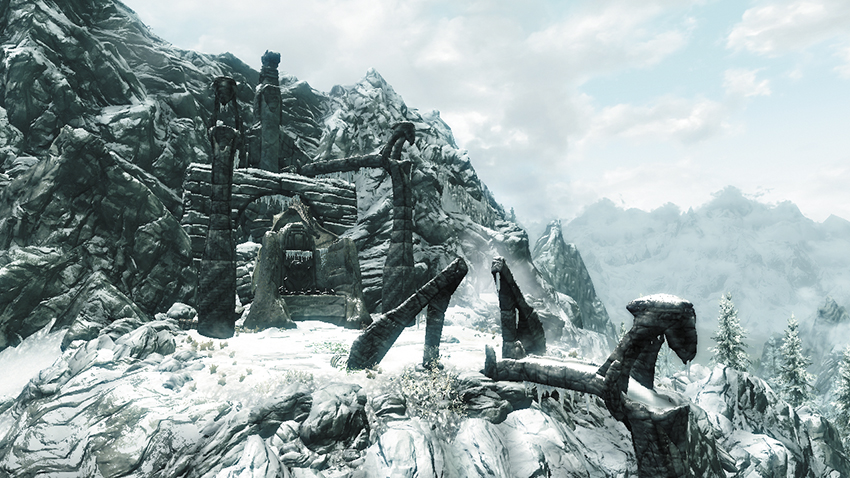
High atop Hjaalmarch’s eastern mountains, just east of the ruins of Labyrinthian [2.23], stands a remote shrine. Though this site is clearly visible from the north, you must either fight your way through the exterior of Labyrinthian to get here or approach from the south to find a narrow cliffside path that leads up to the summit. Prior to Main Quest: Dragon Rising, a dangerous Wispmother guards this sacred place, where a Shrine to Akatosh can be found. Afterward, a dragon perches here. Defeat the guardian, then claim a new Word of Power from the Word Wall that dominates the overlook.