
Elder Scrolls V: Skyrim Guide The Atlas Hold 9: The Rift
Additional Locations
 [DG.04] Redwater Den
Related Quests
- Dawnguard Main Quest: The Bloodstone Chalice
Recommended Level: 10
Faction: Vampire Lair
- Attendant
- Dealer
- Death Hound
- Doorman
- Master Vampire
- Skeleton
- Vampire
- Vampire’s Thrall
- Venarus Vulpin
-
 Salonia Caelia
- Stalf
Services
- Bartender: Dealer [DG1/1] [DG&HF 1/23]
Crafting
- Alchemy Lab
- Anvil or Blacksmith Forge
- Arcane Enchanter
- Cooking Pot
- Grindstone
- Workbench
Dangers
- Flamethrower Trap
- Oil Lamp Trap
- Oil Pool Trap
- Swinging Blade Trap
- Swinging Wall Trap
Miscellaneous
- Chest
- Loose Gear
- Potions
Exterior
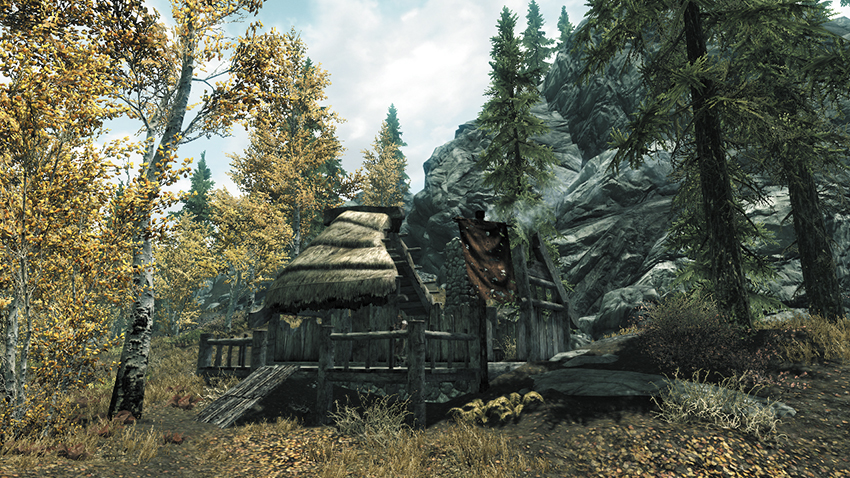
A ruined shack is home to a couple of Redwater Lookouts and their dog. Don’t try a frontal assault, as the lookouts are usually friendly and ask whether you’re interested in “a fix.” The front door is boarded; enter from the holes in the side walls. Explore the building to find a few items, then locate the trapdoor to descend into Redwater Den proper.
- Chest
- Loose gear
- Skill Book [Block]: Battle of Red Mountain
Redwater Den
 Trapdoor to Skyrim
A doorman requests you sheathe any weapons before he opens the door down to the Den. Check the alcove for the following:
- Chest
- Loose gear
 Redwater Skooma Den
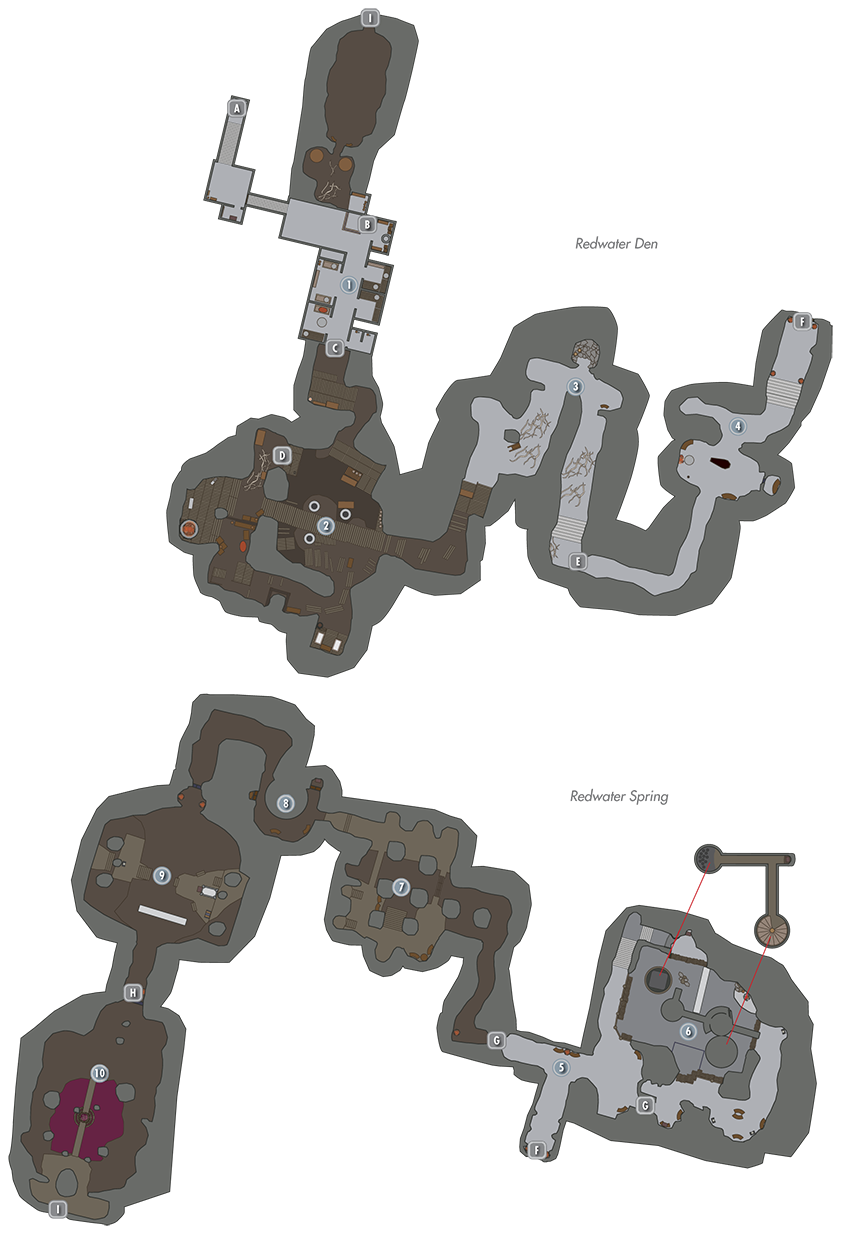
This murky bar is where deserters and bandits lie in small alcove rooms, feeling the aftereffects of Skooma consumption. The dealer can be persuaded to give you some Redwater Skooma, or you can pay to try some. If you’d prefer to fight, she is hostile, as is an attendant. The dealer, attendant, and vampires in the distillery all carry a Redwater Den Backrooms Key, which unlocks the hidden storeroom behind the bar, and the locked doors throughout this immediate area. The hidden storeroom to the north is the exit from this dungeon.
- Bartender: Dealer [DG1/1] [DG&HF 1/23]
- Loose Gear
- Redwater Den Backrooms Key
- Redwater Skooma
- Skooma
 Locked Door [Expert]
Or, unlock using the Redwater Den Backrooms Key.
 Locked Door [Adept]
You can pick this lock, or unlock it using the Redwater Den Backrooms Key. Either way, opening the door will cause the dealer and attendant to become hostile (if you haven’t dealt with them already).
Behind the door, a passage leads past a bookcase with potions and a chest, to a balcony overlooking the distillery.
- Chest
- Potions
 Skooma Distillery
This is where Redwater Skooma is fermented and distilled. The place is run by vampires, who use the potent magic of Redwater Spring to taint their Skooma. This is the first sign of their presence. If you consume Redwater Skooma in the den, you wake up in the cell in this chamber. The raised center of the ground floor has some Moon Sugar, other ingredients, and an Alchemy Lab. To the southwest is a tunnel up to a bridge that must be lowered via the nearby lever in order to continue forward. Watch for vampires and their thralls throughout.
- Alchemy Lab
- Book: The Aetherium Wars
- Cooking Pot
- Forge
- Grindstone
- Moon Sugar (5)
- Potions
- Skooma (12)
- Workbench
 Locked Cell Door [Adept]
If you drink Redwater Skooma while in the den, you black out and wake up behind this cell door. The body of a Novice Conjurer lies here, next to his Telekinesis Spell Tome (which you can read and use to fetch the key from the table just outside your cell).
- Spell Tome: Telekinesis
 Mine and Draugr Tomb Entrance
Follow the path down to a mine and into a Draugr tomb as it turns back on itself to the south. Watch for the floor trigger in the small chamber with the fallen walls and half-buried urns. Drop the skeleton and thrall (using weapons or the flaming pots hanging above), then activate the chain to raise a section of wall.
- Chest
- Danger! Dart Trap
- Danger! Oil Lamp Trap
- Potions
 Chain and Secret Passage
 Vampire’s Coffin
A secret tunnel leads to a vampire’s coffin. Slay the nightstalker and two Death Hounds in this area. Check the east wall for a chain to raise a section of wall, then head to a secret alcove with a leveled weapon and potions. Take the steps up to the large double doors leading to Redwater Spring.
- Arcane Enchanter
- Loose Gear
- Potions
 Door to Redwater Spring
 Door to Redwater Spring (Requires Key)
This door is accessible only after you visit Redwater Spring. It provides access back out of the spring, into the den to exit the dungeon.
Redwater Spring
Door to Redwater Den
 Venarus Vulpin’s Altar to Arkay
An altar with Venarus Vulpin’s Journal (charting his descent into Vampirism courtesy of the Redwater Spring) is here, between two gates, both of which open when you pull the chain in Location 6.
- Danger! Oil Pool Trap
- Venarus Vulpin’s Journal
 Portcullis Gates
Unlock both via the chain to the southeast, in Location 6.
 Draugr Crypt and Death Hound Pen
Defeat the two thralls in here, but watch your step—the entrance has a trapdoor down to a spiked pit. The pit has a lower corridor with swinging blade traps to a chest and steps up and out to the main floor, which houses two Death Hounds in a cage. Climb the spiral step column to an inaccessible chest alcove in the northwest corner (you can reach this only after using your Bats or Whirlwind Sprint abilities). Head around the upper edge of the room, past bookcases, benches, and another chest, to a chain that releases both portcullis gates.
- Chest (3)
- Cooking Pot
- Danger! Oil Lamp Trap
- Danger! Swinging Blade Trap
- Potions
 Draugr Crypt (Vampire’s Rest)
This large Draugr crypt has been recently reappropriated by vampires. Coffins line the alcoves of this tomb, and a Master Vampire, Death Hounds, and other nightstalkers await to attack. Exit in the northwest corner. Pull the chain to raise the gate.
- Alchemy Lab
- Danger! Oil Lamp Trap
- Danger! Oil Pool Trap
- Danger! Spike Trap
 Embalming Antechamber
The door on the altar’s right side simply flays spears in your face. The wooden door opens a small cupboard. The left side door opens to a passage with three nasty wall traps and a flamethrower trap to avoid (don’t step on the floor plates).
- Chest
- Danger! Flamethrower Trap
- Danger! Spear Trap
- Danger! Swinging Wall Trap (3)
 Grand Altar Chamber
It is here where you’ll discover around three vampires and Venarus Vulpin’s fate; he drank from the Bloodspring and is now a feral vampire! Pry the Redwater Wellspring Key from his corpse. It opens the door to the north [Master].
- Arcane Enchanter
- Loose Gear
- Redwater Wellspring Key
- Redwater Skooma (2)
- Venarus Vulpin’s Research
Door to Redwater Spring [Master]
 Bloodspring
This is where you must dip the Bloodstone Chalice during the vampire-only Dawnguard Main Quest. Salonia Caelia and Stalf then set upon you.
After drinking from the Bloodspring directly:
If you are a vampire, you receive the Tainted Blood of the Ancients ability. For one day, your Vampiric Drain will absorb Magicka and Stamina, but your maximum health will be reduced by 30.
If you are not a vampire, you have a chance of contracting Sanguinare Vampiris or another disease. Keep drinking from the spring, and you can contract any number of unpleasant poxes: This isn’t exactly sanitary!
- Tainted Blood of the Ancients (vampire only)
Door to Redwater Spring (Requires Key)
This is accessible only after you visit Redwater Spring. It provides access back out of the spring, into the den to exit the dungeon.
[DG.05] Ruunvald Excavation
Related Quests
- Dawnguard Faction Quest: Bolstering the Ranks
Recommended Level: 10
Faction: Vigilants of Stendarr
Dangers
- Crossbow Trap
- Oil Lamp Trap
- Oil Pool Trap
Collectibles
- Unique Weapon: Staff of Ruunvald [1/7]
Miscellaneous
- Area is locked
- Chest
- Loose gear
Exterior
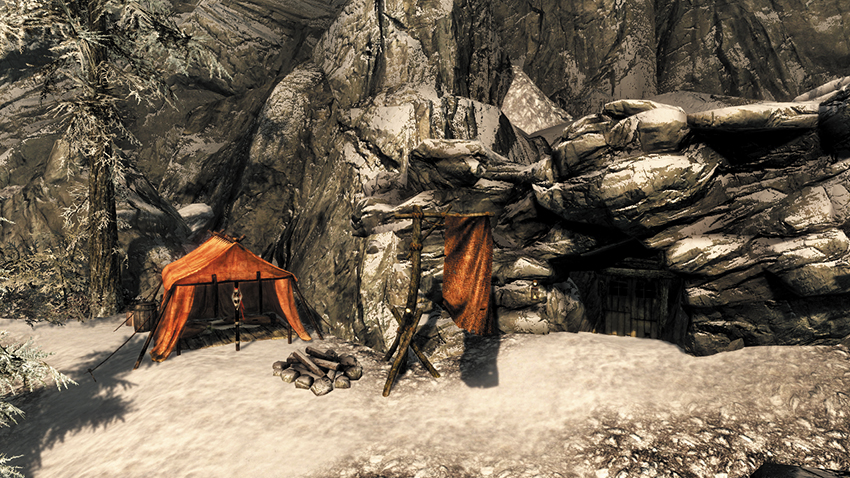
Close by the mine door to this site is a large tent with an interesting journal to read. It charts the last known movements of Volk, a Vigilant guard who watched as the excavation team took longer to return to the surface, then disappeared entirely.
- Chest
- Volk’s Journal
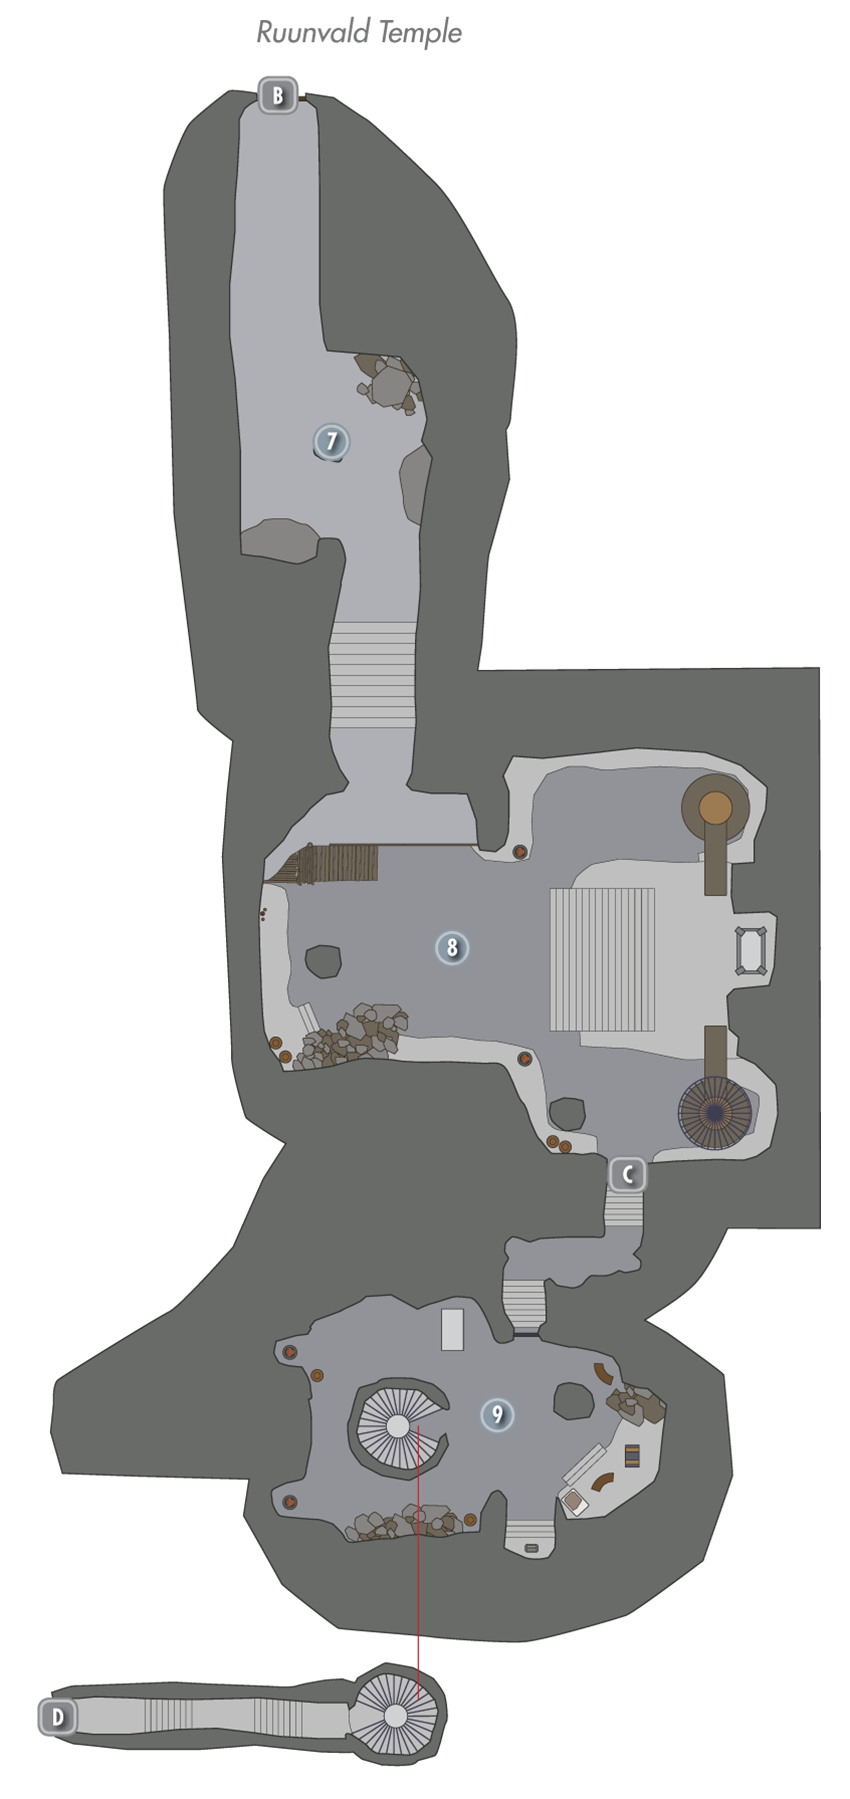
Ruunvald Excavation
Exit to Skyrim
Miner Camp and Storage
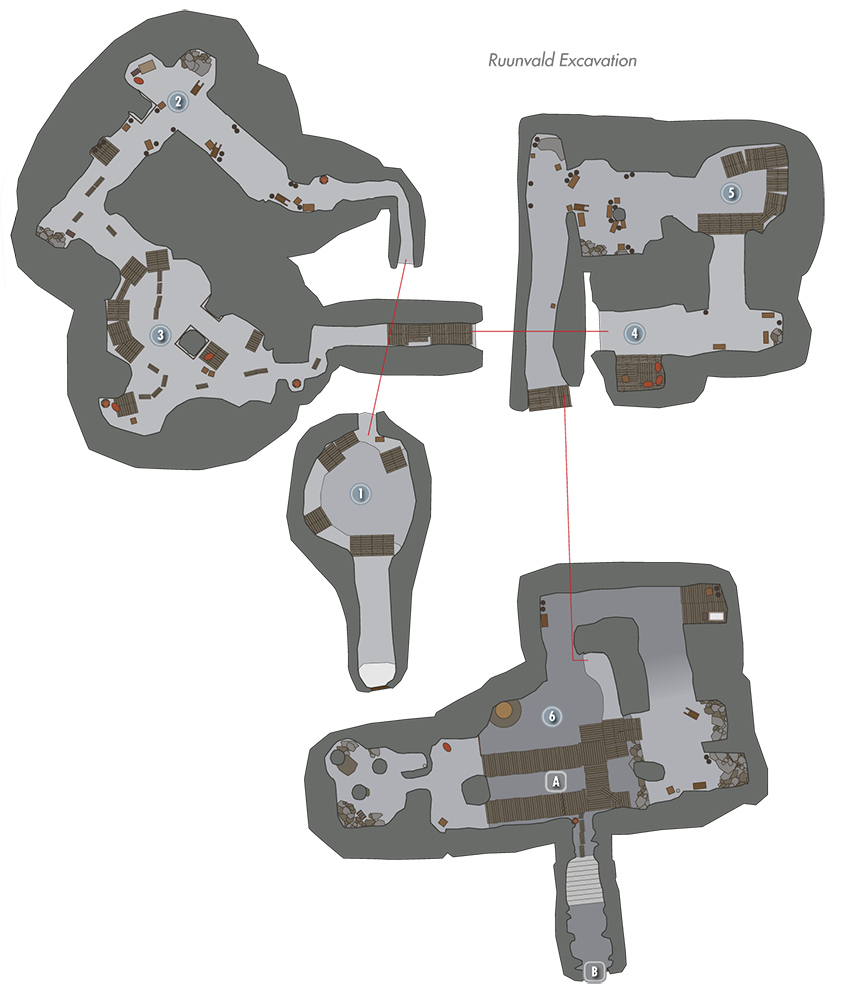
Strange magic is at work. Vigilants of Stendarr patrol this pit but aren’t in full control of their faculties. Charmed Vigilants are hostile throughout this dungeon. Enter the circular hole where miners (and the excavators) stored some of their equipment. Check the crate near the tunnel to the north for the first of explorer Moric Sidrey’s books in this area: Discovering Ruunvald, vol. I.
- Book: Discovering Ruunvald, vol. I
- Chest [Apprentice]
- Malachite Ore Vein
Mine Tunnel
There are a few Charmed Vigilants patrolling this old shaft. Check the table in the corner near the chest for some valuables, and you find a coin purse plus a Scroll after the Oil Lamp Trap.
- Chest (2)
- Danger! Oil Lamp Trap
- Danger! Oil Pool Trap
- Lots o’ Gold
- Malachite Ore (2)
- Malachite Ore Vein
- Scroll
Mine Camp
A Husky and Charmed Vigilant guard this large cavern. Locate the second of Moric Sidrey’s books on a crate near the tunnel exit.
- Book: Discovering Ruunvald, vol. II
- Loose Gear
- Malachite Ore Vein
Lower Mine Tunnel
Aside from watching for dogs and Charmed Vigilants, check the gap in the wooden decking for a chest [Adept].
- Chest [Adept]
Lower Mine Storage
The table and bookcase are of particular interest, as you’ll find another of Moric Sidrey’s writings and some other tomes. To the west is a storage tunnel; watch for pressure plates, as they activate crossbow traps.
- Book: Discovering Ruunvald, vol. III
- Danger: Crossbow Trap (2)
Excavation Entrance
This multilevel Nordic tomb entrance has several Vigilants to deal with, including Volk. Check the small cave across the first bridge for a chest, then work your way down. Check the lower mine shaft tunnel for some ore and a bed with a chest to search.
- Chest (2)
- Malachite Ore
- Potions
Door to Ruunvald Temple
Ruunvald Temple
Door to Ruunvald Excavation
Nordic Shrine Passage
Two ancient offering heads are present in this connecting passage. One has a journal on it, with a script (possibly) written by Volk, declaring his devotion to Minorne.
- Book: Minorne
Ruunvald Crypt
Moric Sidrey and Minorne are lurking in this expansive crypt room, along with a Charmed Vigilant,and Florentius, who is locked in the upper cage near the sarcophagus. Search Minorne for her staff and a key that opens both the cage and the iron door.
- Ruunvald Key
- Unique Weapon: Staff of Ruunvald [1/7]
Iron Door (Requires Key)
Use the Ruunvald Key to open it.
Minorne’s Study
To open the exit steps (which appear up through the floor), use the lever in the alcove. Note the book that begins Side Quest: Lost to the Ages on the table with the Alchemy Lab.
- Alchemy Lab
- Book: The Aetherium Wars
- Chest
- Potions
Exit to Skyrim
Once you unlock the exit, you can return to this location from Skyrim.
[DG.06] Dayspring Canyon
[DG.07] Fort Dawnguard
Related Quests
- Dawnguard Main Quest: Dawnguard
- Dawnguard Main Quest: Awakening
- Dawnguard Main Quest: Bloodline
- Dawnguard Main Quest: A New Order
- Dawnguard Main Quest: Prophet
- Dawnguard Main Quest: Seeking Disclosure
- Dawnguard Main Quest: Scroll Scouting
- Dawnguard Main Quest: Chasing Echoes
- Dawnguard Main Quest: Unseen Visions
- Dawnguard Main Quest: Kindred Judgment
- Dawnguard Faction Quest: Ancient Technology
- Dawnguard Faction Quest: Bolstering the Ranks
- Dawnguard Faction Quest: Cleansing Light
- Dawnguard Faction Quest: Hide and Seek
- Dawnguard Faction Quest: Hunting the Monster
- Dawnguard Faction Quest: A Jarl’s Justice
- Dawnguard Faction Quest: Lost Relic
- Dawnguard Faction Quest: Preemptive Strike
- Dawnguard Faction Quest: Rescue
Recommended Level: 10
Faction: Dawnguard
- Bear
- Mudcrab
- Vampire
Services
- Apothecary
- Blacksmith
- General Goods Vendor
Crafting
- Alchemy Lab
- Anvil or Blacksmith Forge
- Arcane Enchanter
- Cooking Spit
- Grindstone
- Smelter
- Tanning Rack
- Wood Chopping Block
- Workbench
Miscellaneous
- Chest
- Loose Gear
- Potions Aplenty
Entrance to Dayspring Canyon
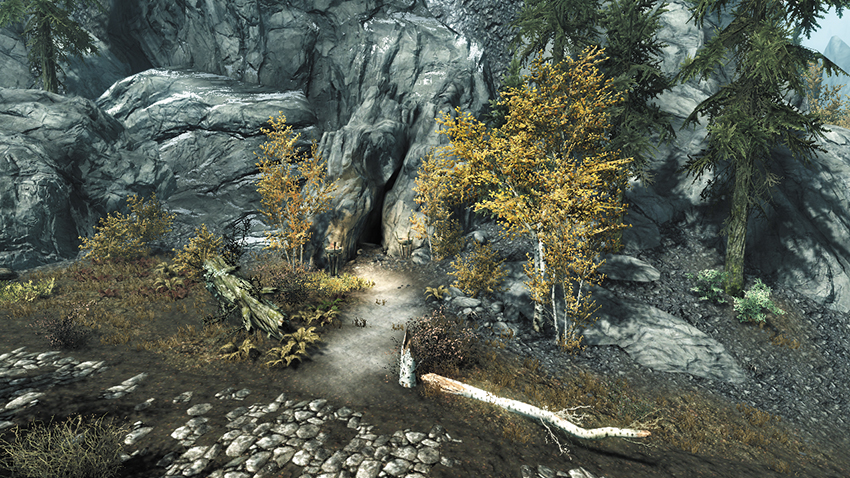
A cave entrance northeast of Stendarr’s Beacon in the southeast corner of the Rift is the only method of entering Dayspring Canyon and thus reaching Fort Dawnguard.
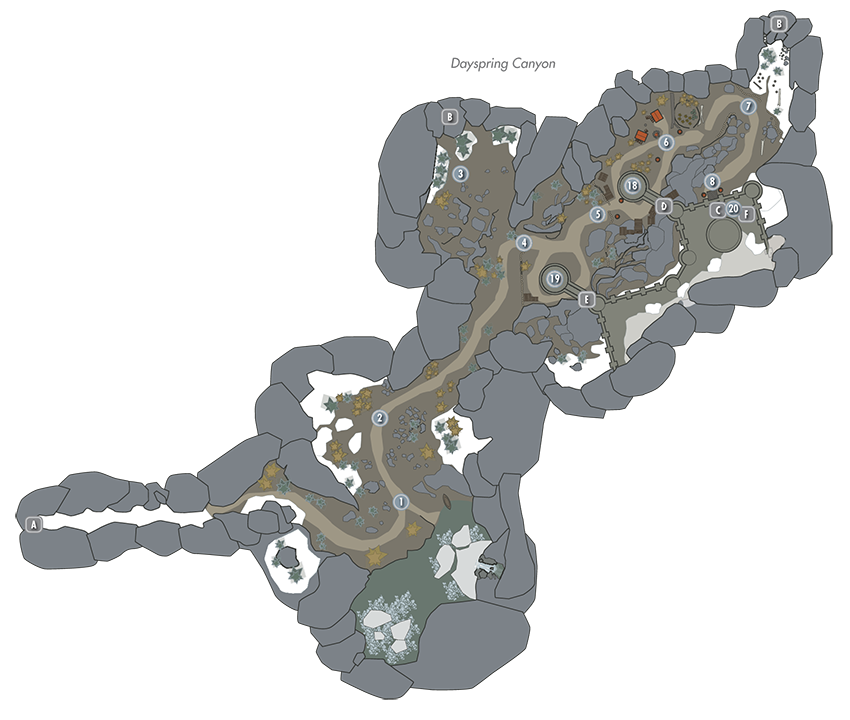
Dayspring Canyon (Exterior Ground Level)
Exit to Skyrim
This leads back to the entrance to Dayspring Canyon.
Dayspring Falls
The snowmelt from the Velothi Mountains cascades into a peaceful and picturesque lake. On your first visit here, you’ll meet Agmaer, who is also planning to join the Dawnguard. Although there are flowers to pick, a small fishing boat to inspect, salmon to grab in the lake, and a couple of Mudcrabs, there’s little else to gather here.
- Loose gear
Dawnguard Gorge
Vampires sometimes attack from this point, later into the Dawnguard Main Quests. Otherwise, expect wildlife such as rabbits, deer, and butterflies in this small gorge where you can see the first of the buttress towers of Fort Dawnguard.
Mossy Glen
This area offers a good view of the exterior of Fort Dawnguard, if you look back as you climb this embankment. The overlook has one of the entrances to Mossy Glen Cave.
Cave Entrance to Mossy Glen Cave
The interior of Mossy Glen Cave is detailed below. This is one of two entrances/exits to this cave.
Outer Wall Barricade
This location, around the base of the first Dawnguard tower buttress, is erected around the time of Dawnguard Main Quest: Bloodline, as the vampire attacks increase, before you return from meeting Harkon. It isn’t here when you first discover the area. A watcher named Ollrod guards these defenses from his platform behind and above the thick wooden wall.
Inner Wall Barricade
This defensive point, around the base of the second Dawnguard tower buttress, is completed around the time of Dawnguard Main Quest: Prophet, after vampire attacks occur close to the main fort entrance, while you’re out finding the Moth Priest. Only a simple wall is here when you first discover the area. Guards named Tilde, Mogrul, and Vori all patrol this area. Note the upper wooden platform just below the stone arch of the second tower buttress; this is another lookout spot.
Refugee Camp
Prior to Dawnguard Main Quest: Beyond Death, this is the small clearing where Durak practices with his crossbow (he gives a spare to you if you ask him). After the quest, a refugee camp is set up here, along with two tents. Alvide, Barknar, Jayri, and Sern all have their reasons for being here. Check the area for a book (which begins Side Quest: Lost to the Ages when read) and the following:
- Book: The Aetherium Wars
- Cooking Pot
- Wood Chopping Block
Dayspring Path
Vampires have been known to attack in this area, especially later in the Dawnguard Main Quest. The gap in the wooden wall leads to the second entrance (B) into Mossy Glen Cave.
Fort Dawnguard: Main Entrance
Expect to see Celann guarding this entrance on occasion, or another member of the Dawnguard. The imposing entrance is the only way into Fort Dawnguard.
Doors to Fort Dawnguard
Mossy Glen Cave
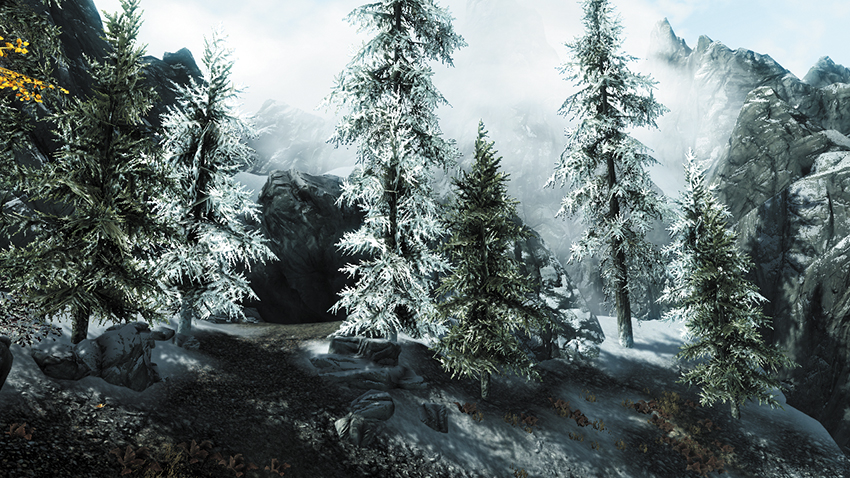
Mossy Glen Cave is a small location with three chests to uncover. Both entrances lead to a large cave with four bears and a small side tunnel. Watch for the odd lurking Skeever too.
- Chest (3)
Fort Dawnguard (Interior)
Lore: Fort Dawnguard Overview
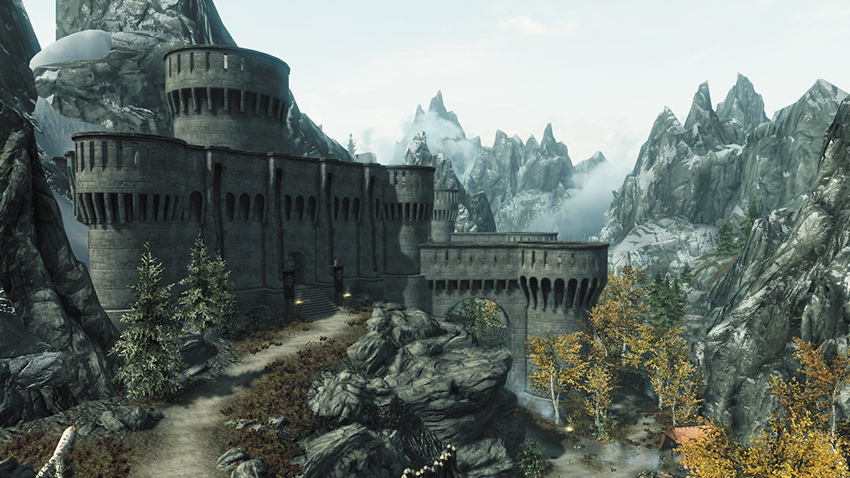
Tucked away in the southeastern Velothi Mountains of the Rift, in the hidden mountain valley called Dayspring Canyon, towers the old fortification of Fort Dawnguard. Long fallen to disrepair, this massive fortress will become home to a new faction of vampire hunters born from the ashes of the Vigilants of Stendarr. It is here where the agents of the Dawnguard, led by Isran, have begun to gather, where new recruits dedicate themselves to the eradication of vampires, and where a solution to the growing menace must be found.
Fort Dawnguard’s interior is upgraded in stages throughout the Dawnguard Main Quest:
Initially, the fort is filled with cobwebs and clutter, but it does have a few amenities, including a smelter and a workbench.
After Dawnguard Main Quest: A New Order, Gunmar and Sorine settle in and set up full smithing and enchanting stations. You can now accept their Radiant Quests, purchase items from them, and acquire the Armored Troll and Dawnguard Husky animal companions. The barracks area fills out to house the Dawnguard’s new recruits.
During Dawnguard Main Quest: Prophet, several Dawnguard Agents return to the fort. You can now ask the members of the Dawnguard to join you on your missions.
Once you complete Dawnguard Faction Quest: Bolstering the Ranks, Florentius moves in, adding an Alchemy Station.
During Dawnguard Main Quest: Beyond Death, a refugee camp is set up outside the fort.
After Dawnguard Main Quest: Kindred Judgment, you receive a private room on the fort’s upper level.
Notable Inhabitants
- Dawnguard Leader: Isran
- Dawnguard Blacksmith: Gunmar
- Dawnguard Tinkerer: Sorine Jurard
- Dawnguard Priest: Florentius Baenius
- Dawnguard Hunter: Durak
- Dawnguard Warrior: Celann
- Dawnguard Warrior: Ingjard
- Dawnguard Warrior: Mogrul
- Dawnguard Warrior: Ollrod
- Dawnguard Warrior: Tilde
- Dawnguard Warrior: Vori
- Dawnguard Recruit: Agmaer
- Dawnguard Recruit: Beleval
- Vigilant of Stendarr: Vigilant Tolan
- Dawnguard Armored Huskies: Bran and Sceolang
- Dawnguard Refugee: Alvide
- Dawnguard Refugee: Barknar
- Dawnguard Refugee: Jayri
- Dawnguard Refugee: Sern
The following Dawnguard personnel (who may not arrive until later into the Dawnguard Main Quest) offer the following services to you:
Animal Companion
- Armored Frost Troll
- Armored Troll
- Bran [DG2/13]
- Sceolang [DG3/13]
Follower
- Agmaer [DG4/13]
- Beleval [DG5/13]
- Celann [DG6/13]
- Durak [DG7/13]
- Ingjard [DG8/13]
Trader
- Florentius Baenius (Apothecary) [DG1/2] [DG&HF 2/23]
- Gunmar (Blacksmith) [DG1/2] [DG&HF 3/23]
- Sorine Jurard (General goods) [DG1/1] [DG&HF 4/23]
Trainer
- Florentius Baenius (Restoration: Master) [DG1/1]
- Gunmar (Smithing: Master) [DG1/1]
- Isran (Heavy Armor: Master) [DG1/1]
- Sorine Jurard (Archery: Master) [DG1/1]
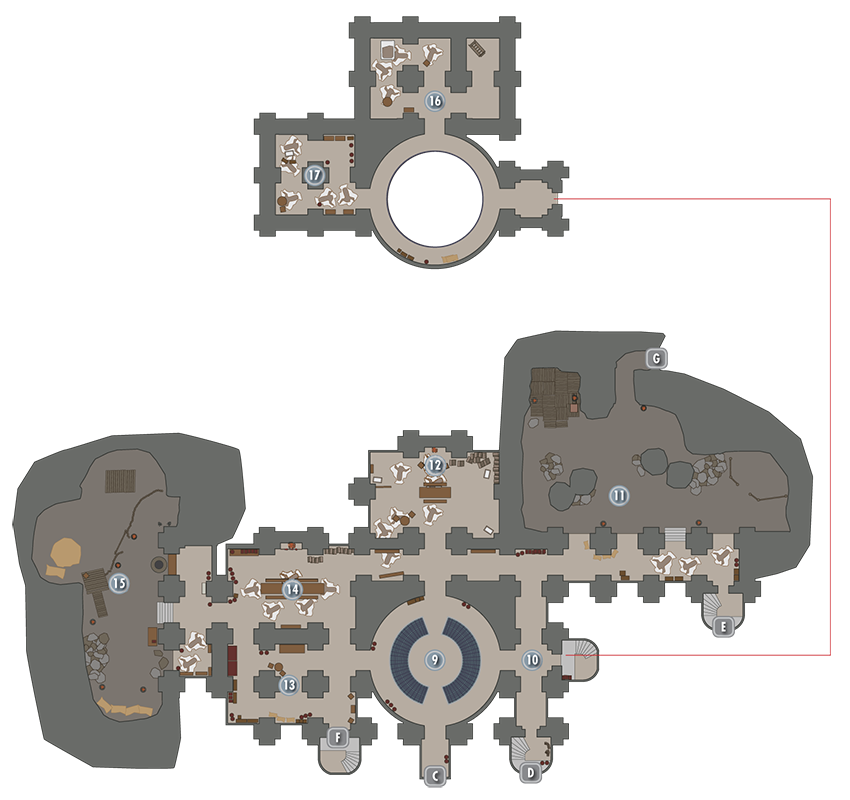
Doors to Dayspring Canyon
These lead back out to the Dayspring Canyon exterior, by the main Dawnguard Fort entrance.
Circular Hall and Upper Balcony
This is where Isran first greets you and has an impassioned discussion with Vigilant Tolan. This room is the fort’s main hub, with access in all directions. Head to the right (east) if you want to take the stairs to the upper balcony, which curves around the perimeter of this circular chamber.
- Loose gear
Eastern Corridor and Spiral Stairs
Linked to the Circular Hall, this north–south corridor allows access to the cave and the stairs (east) leading to the Upper Balcony. The other stairs (south, Location D) lead out to the exterior battlements.
Doors to Dayspring Canyon
The doors atop the spiral steps lead to the exterior North Tower and Crenellations.
 Training Cave and Husky Pen
A set of targets and some arrows and bolts are located in this large natural cave. In the kennel to the northeast, the Huskies are trained to hunt vampires. Take one of them with you (at no charge) if you wish. The entrance to Dead Drop Falls is to the north; this dungeon is accessible only from here.
- Chest
- Husky: Bran
- Husky: Sceolang
- Loose Gear
Doors to Dayspring Canyon
The doors atop the spiral steps lead to the exterior South Tower and Crenellations.
 Dawnguard Barracks
Isran has opened his hearth to his recruits, who have set up makeshift bunks in this room, once used as a reception and strategic planning area. During the night, many of the Dawnguard sleep here. As expected, there’s a lot of Dawnguard equipment to make use of here, as well as a copy of the Aetherium Wars, a book that starts Side Quest: Lost to the Ages.
- Book: The Aetherium Wars
- Loose gear
 Mead Storage and Waiting Area
Some members of the Dawnguard wait around in this area, which is dominated by the giant pillars and mead casks. There are a few books to read and a map of Skyrim, and the spiral steps to the south lead to the very top of the fort.
Doors to Dayspring Canyon
The doors atop the spiral steps lead to the exterior upper battlements.
 Banquet Hall
The mead tends to flow freely here, and you’ll almost always encounter a Dawnguard agent in this chamber with the long table and roaring fire. If you’re ever low on goblets, this is the place to look.
- Cooking Spit
 Workshop and Troll Pens
Gunmar, Sorine Jurard, and Florentius Baenius all use this area to further the Dawnguard’s chances at victory. There are several crafting stations here, as well as a Troll Pen (once Gunmar is brought into the Dawnguard fold) where you can hire an Armored Troll companion for 500 gold and practice your archery at a small range.
- Alchemy Lab
- Arcane Enchanter
- Book: The Aetherium Wars
- Forge
- Grindstone
- Iron Ingot (12)
- Loose gear
- Potions aplenty
- Smelter
- Tanning Rack
- Workbench
 Isran’s Room and Torture Chamber
Isran sleeps here, which may be one of the reasons why his personality is so...strained. The torture room is next to his bedroom.
- Chest
- Iron Ingot (3)
 Lavish Bedroom
This bedroom can be yours if you side with the Dawnguard and put an end to Lord Harkon’s schemes. There are weapon racks, a dummy, and a comfy bed here.
- Loose gear
- Steel Ingot (5)
Cave to Drop Dead Falls
Dayspring Canyon (Fort Dawnguard Towers)
The upper crenellations overlooking Dayspring Canyon are all accessible from the spiral staircases inside the fort.
Doors to Fort Dawnguard (Interior)
 North Tower and Crenellations
This exterior battlement has a couple of books, Dawnguard equipment and weapons, a coin purse, and an empty chest.
- Loose Gear
Doors to Fort Dawnguard (Interior)
 South Tower and Crenellations
This exterior battlement has some storage areas where Dawnguard equipment, a scroll, potions, and a book or two can be found.
- Loose Gear
- Potions
Doors to Fort Dawnguard (Interior)
 Upper Battlements
The highest exterior location in Dayspring Canyon is atop the fort. Roam the battlements to find several fine pieces of Dawnguard equipment and weapons, two chests (one is empty), and the following:
- Chest
- Grindstone
- Loose gear
- Tanning Rack
Dead Drop Falls
Related Quests
- None
Recommended Level: 8
Faction: Dawnguard
Dangers
- Bear Trap
- Dart Trap
- Spear Trap
Puzzle
- Pressure Plates
Miscellaneous
- Chest
- Corundum Ore Vein
- Loose Gear
- Potions
Dead Drop Falls
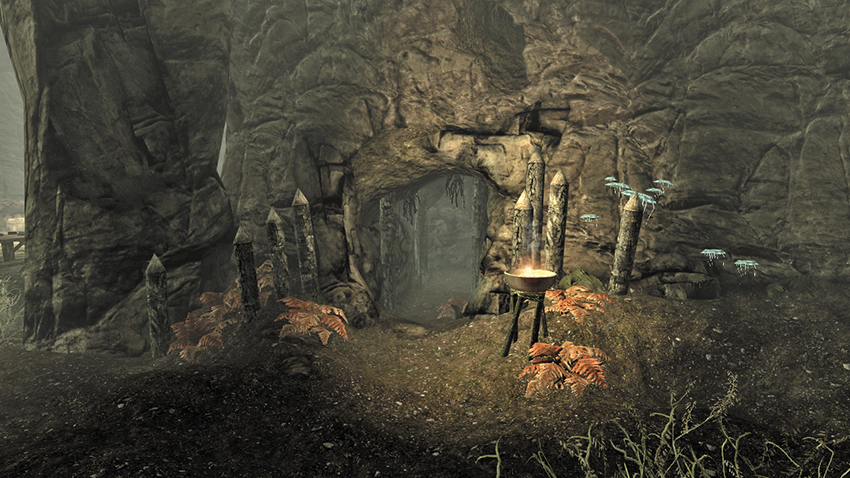
This series of increasingly impressive natural caverns starts with a plunge down a waterfall hole. There are numerous ways to test your Crossbow-aiming throughout this location, which is one of the ways the Dawnguard utilize this cave complex.
Exit to Fort Dawnguard
This leads back into the natural cavern and the Armored Troll pens area of Fort Dawnguard.

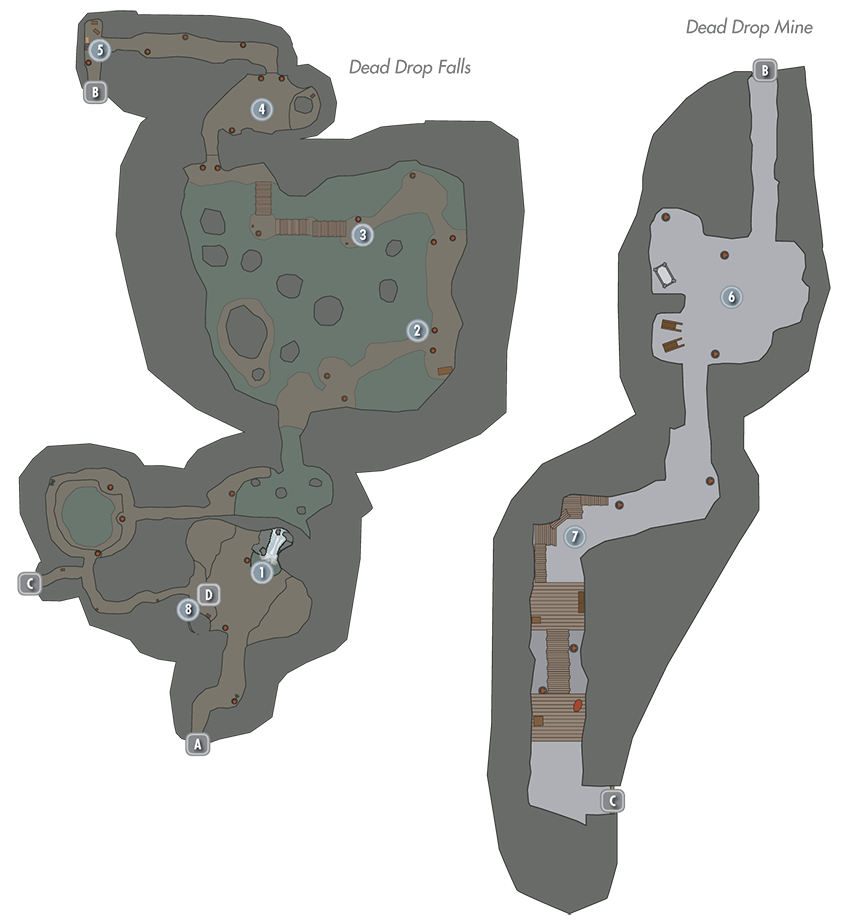
Drop Dead Falls Cavern and Grotto (Upper and Lower)
Upper: Water from the Velothi Mountains tumbles down a subterranean waterfall that dominates this cavern. The only way forward, is down, into the hole the cascading water has formed. Note the chest on the raised bank to the west, close to the exit door (D); scramble up or grab the chest on your way out.
- Chest
Lower: The lower grotto area is a large pool of water with natural pillars supporting the cavern above. There are two exits (to the north and west), but to fully explore this cave system, head north (as you’ll find your way blocked at the top of Location 8 if you go west).
Isran’s Cathedral: Eastern Walkway
Known colloquially as Isran’s Cathedral (after the leader of the Dawnguard who discovered this cavernous chamber), the ground level is comprised of a winding natural path of bridges up from a ruined jetty. Note the chest behind the massive columns at the water’s level, over on the western perimeter of this chamber. Watch for a bear trap (a Skeever didn’t)—the pressure plate and dart trap on the top of the first bridge as you head northeast. Turn right (south), watching for a trip wire near the table with the empty chest on it (which launches spears at you). There’s a second trip wire to the left (north) that triggers more darts.
- Chest
- Danger! Bear Trap
- Danger! Dart Trap (2)
- Danger! Spear Trap
Isran’s Cathedral: Northern Bridge
Farther along the ascending natural bridges is a group of wooden bridges that test your elementary puzzle-solving skills. There’s a lever on the left that raises one of the bridges but not the other; either way you’re left with a gap you can’t cross.
Puzzle solution: Take the steel bolts (or use your own arrows), and fire at the target hanging from the huge stalagmite to the south. This raises (or lowers, depending on where the lever is positioned) both bridges. If both bridges are raised, use the lever to lower them before crossing.
Puzzle solution: At the second, ramped bridge, pull the lever to lower it, which also lowers the exit portcullis to Location 4. Move to the portcullis, turn around to face south, and fire an arrow or bolt at the second target to the south, raising both bridge and portcullis so you can escape. But wait! Step under the first open portcullis to a second one. Turn around and fire at the target again, raising the second portcullis and lowering the first. Then step into Location 4.
- Loose gear
Portcullis Puzzle Cave
Ahead (north) of you is a closed portcullis, three pressure plates on the floor (one with the book Uncommon Taste on it), and one above the portcullis. There’s steel bolts on the barrel if you’re running low on crossbow ammunition.
Puzzle solution: All four pressure plates need to be pressed in. For this to happen, simply place any object (such as the food from the barrel or large sack in the room) on each of the two pressure plates you can’t stand on. Then fire an arrow at the fourth plate above the portcullis (while standing on the third, or positioning another item on it) to open it.
- Loose gear
Miners’ Supply Cave
Head up the corridor from Location 4, pausing to fire at the target above the wooden support ceiling to raise the portcullis, and step into a supply cave with a chest, satchels, Ebony Ore, and various bolts on the table. Be sure to check out Confessions of a Khajiit Fur Trader.
- Chest (3)
- Ebony Ore (2)
- Loose gear
Door to Dead Drop Mine
Dead Drop Mine
Door to Dead Drop Falls
Mine Face
Check the table and straw for Corundum Ore and Ingots. Mine the veins here if you wish.
- Corundum Ore Vein (3)
Southern Passage
There’s some Iron Ingots, loose gear, two crossbows, and a copy of a saucy read—The Sultry Argonian Bard, v1—on the upper platform where miners used to sleep. Below is a storage shelving area with many ingredients and a copy of The Aetherium Wars (which starts Side Quest: Lost to the Ages).
- Book: The Aetherium Wars
- Loose gear
- Potions
Door to Dead Drop Falls
(Return to) Dead Drop Falls
Door to Dead Drop Mine
The Dead Drop Sinkhole
This massive, ancient sinkhole is accessible from Location 1, but access to the mine is only available from the mine itself, as you need to activate a lever to open the portcullis in the upper tunnel. There’s a second lever leading to a secret wall section that opens, allowing access back to Location 1, above the waterfall drop, so you can leave. There’s nothing but a dangerous drop (and a ledge running around the perimeter) here.
Secret Door to Dead Drop Waterfall and Grotto
 [DB.02] Last Vigil
Related Quests
- Side Quest: The Ebony Warrior
Recommended Level: 80+
Habitation: Miner’s Camp
- The Ebony Warrior
Miscellaneous
- Area is locked
The Ebony Warrior
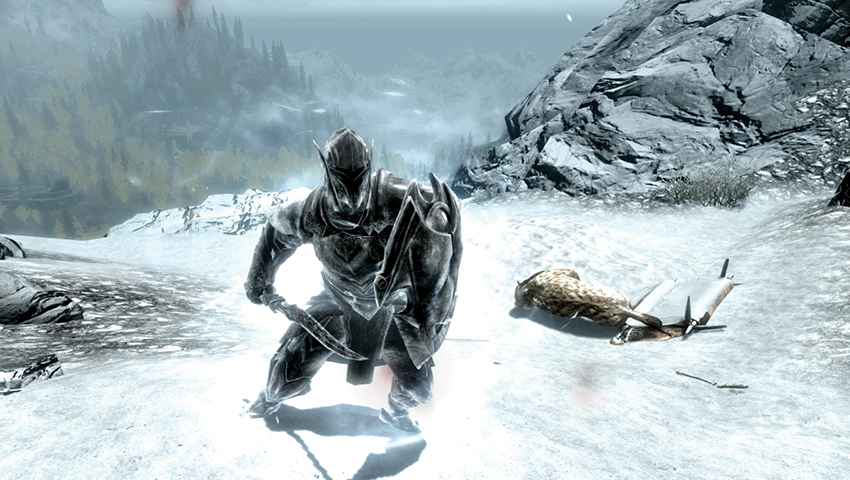
The vicious blizzards that race across the snow-swept peaks above the Rift have killed and half buried a lone miner. Nearby are two veins to attack with your pickaxe (or use the one nearby). Go west from the miner to find a Skill Book lying near the skeletal remains of another unfortunate soul. This windswept place of contemplation is the last vigil of an epic and powerful adventurer known as the Ebony Warrior. It is here that—assuming the Side Quest in question is active—you face him in ferocious mortal combat. Although his attire isn’t unique, it is of the highest quality.
- Ebony Armor of Regeneration
- Ebony Boots of Frost Suppression
- Ebony Bow of Winter
- Ebony Gauntlets of Extreme Wielding
- Ebony Helmet of Waterbreathing
- Ebony Shield of Fire Suppression
- Ebony Sword of the Vampire
- Necklace of Shock Suppression
- Potion of Vigorous Healing (5)
- Ring of Peerless Wielding
- Skill Book [Destruction]: The Art of War Magic
- Moonstone Ore Vein
- Quicksilver Ore Vein