
Elder Scrolls V: Skyrim Guide The Atlas Hold 9: The Rift
Primary Locations
[9.01] Ivarstead
Related Quests
Main Quest: The Way of the Voice
Temple Quest: The Book of Love
Dark Brotherhood Quest: Side Contract: Narfi
Dungeon Quest: Wilhelm’s Specter*
Miscellaneous Objective: Innkeeper Rumors (Vilemyr Inn)
Miscellaneous Objective: Lifting the Shroud* (Wilhelm)
Miscellaneous Objective: The Straw That Broke* (Narfi)
Miscellaneous Objective: Grin and Bear It* (Temba Wide-Arms)
Miscellaneous Objective: Climb the Steps* (Kimmek)
Favor (Activity): Harvesting Crops* (Boti)
Favor (Activity): The Gift of Charity* (Narfi)
Habitation: Town
Bassianus Axius
Boti
Fastred
Gwilin
Ivarstead Guard
Jofthor
Klimmek
Lynly Star-Sung (Bartender)
Narfi
Temba Wide-Arm (Marriage Prospect)
Wilhelm (Innkeeper; Marriage Prospect)
Crafting
Tanning Rack
Services
Marriage Prospect: Temba Wide-Arm [58/62]
Marriage Prospect: Wilhelm [59/62]
Trader (Bartender): Lynly Star-Sung [5/5]
Food
Trader (Innkeeper): Wilhelm [15/15]
Food, Room and Board
Innkeeper Rumors
Quest Items
Sapphire Dragon Claw
Wylandriah’s Spoon (Wylandria’s Satchel)
Collectibles
Dragon Claw: Sapphire Dragon Claw [8/10]
Unique Item: Reyda’s Necklace [96/112]
Chest(s)
Potions
Loose Gear
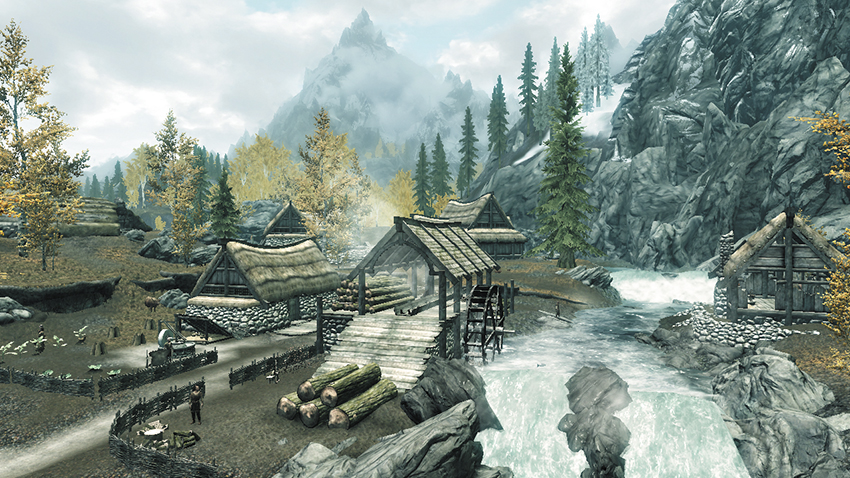
This idyllic logging and fishing village sits along the west bank of Lake Geir, right near the foot of Skyrim’s towering mountain, the Throat of the World [6.38]. Interesting things are occurring at Ivarstead, not the least of which being the supposedly haunted barrow that’s just outside of town.
Exterior
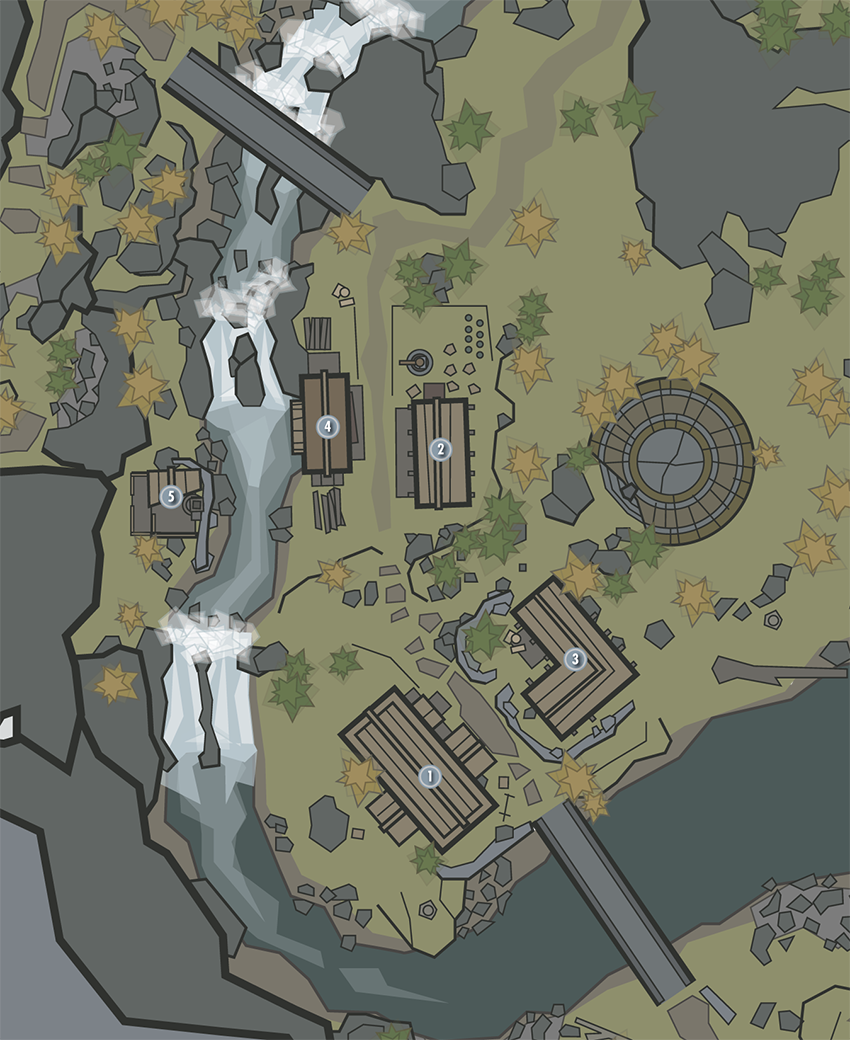
Speak with Klimmek, Narfi, and Temba Wide-Arm to obtain a set of Miscellaneous Objectives. Temba will also pay you for any firewood you happen to chop outside, and you can gain the Gift of Charity by giving poor Narfi a gold piece.
- Crafting: Tanning Rack
 Vilemyr Inn
The local innkeeper, Wilhelm, has plenty of information to impart. Chat him up to gain a new Side Quest involving the nearby haunted barrow, along with new map data and other random rumors. Bring the informative journal you discover within Shroud Hearth Barrow [9.02] to Wilhelm, and he’ll hand you a special Sapphire Claw that lets you explore more of the place.
Lynly Star-Sung is also here. You can ask her to play an instrumental song for 5 septims (unless you can persuade her to play for free). Lynly is the woman who Sibbi Black-Briar is searching for in the quest “The Lover’s Requital.” Temba Wide-Arm and Gwilin both reside at the inn as well.
- Dragon Claw: Sapphire Dragon Claw [8/10]
- Chests (2)
- Loose Gear
 Fellstar Farm
The farmhouse is commonly locked, and a woman named Boti is usually found inside, keeping the place neat and orderly. Her husband, Jofthor, can usually be found outside working the grain mill or feeding the livestock. Her daughter, Fastred, can be found helping her mother in the fields or complaining about being stuck in this backwater village.
- Area Is Locked (Apprentice)
- Wylandriah’s Satchel
- Wylandriah’s Spoon (Wylandriah’s Satchel)
- Chest
 Klimmek’s House
Bassianus Axius and Klimmek share this place. Klimmek allowed Bassianus to move in a long time ago, and their personalities have been clashing ever since.
- Area Is Locked (Apprentice)
- Chest
- Potion
- Loose Gear
 Temba Wide-Arm’s Mill
This is where Temba and Gwilin can be found during the day, chopping wood and working the mill.
 Narfi’s Ruined House
Narfi resides here, in the ruins of his family home. He can be found wandering around aimlessly calling for his sister or skulking about annoying the locals.
[9.02] Shroud Hearth Barrow
Related Quests
- Dungeon Quest: Wilhelm’s Specter*
Recommended Level: 6
Dungeon: Draugr Crypt
- Draugr
- Skeleton
- Wyndelius Gatharian
Crafting
- Alchemy Lab
Dangers
- Battering Ram Trap (pressure plate)
- Dart Trap (lever, pressure plate)
- Flamethrower Trap (trapped door)
- Oil Lamp Trap
- Oil Pool Trap
- Rockfall Trap (trip wire)
- Swinging Blade Trap (trip wire, wall chain)
- Spear Trap (pressure plate)
- Swinging Wall Trap (pressure plates)
Puzzles
- Claw Door (Sapphire Claw)
- Nordic Pillars
Quest Items
- Wyndelius’ Journal
Collectibles
- Skill Book [Illusion]: Before the Ages of Man [B2/10]
Special Objects
- Word Wall: Kyne’s Peace [3/3]
- Chests
- Potions
- Loose gear
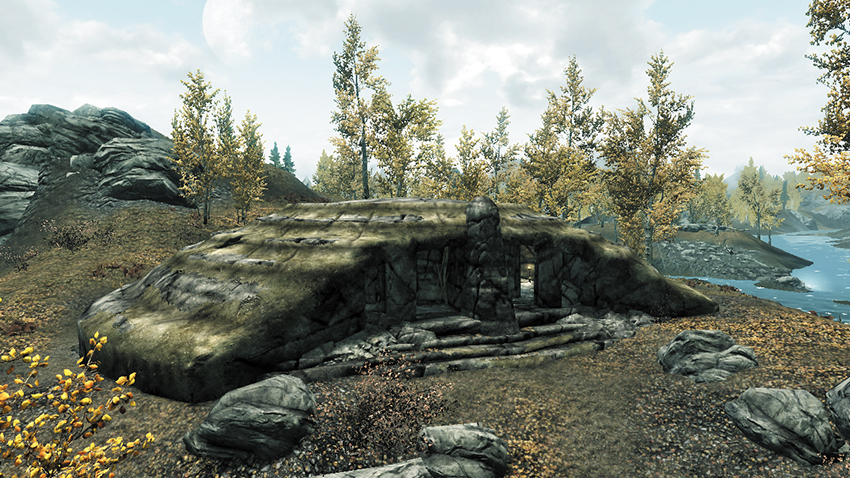
This barrow lies on the hill overlooking the village of Ivarstead. Speaking with Wilhelm, the town’s innkeeper, provides you with a Dungeon Quest that entices you to investigate this haunted place in search of treasure.
 Exit to Skyrim
Lever Puzzle Passage
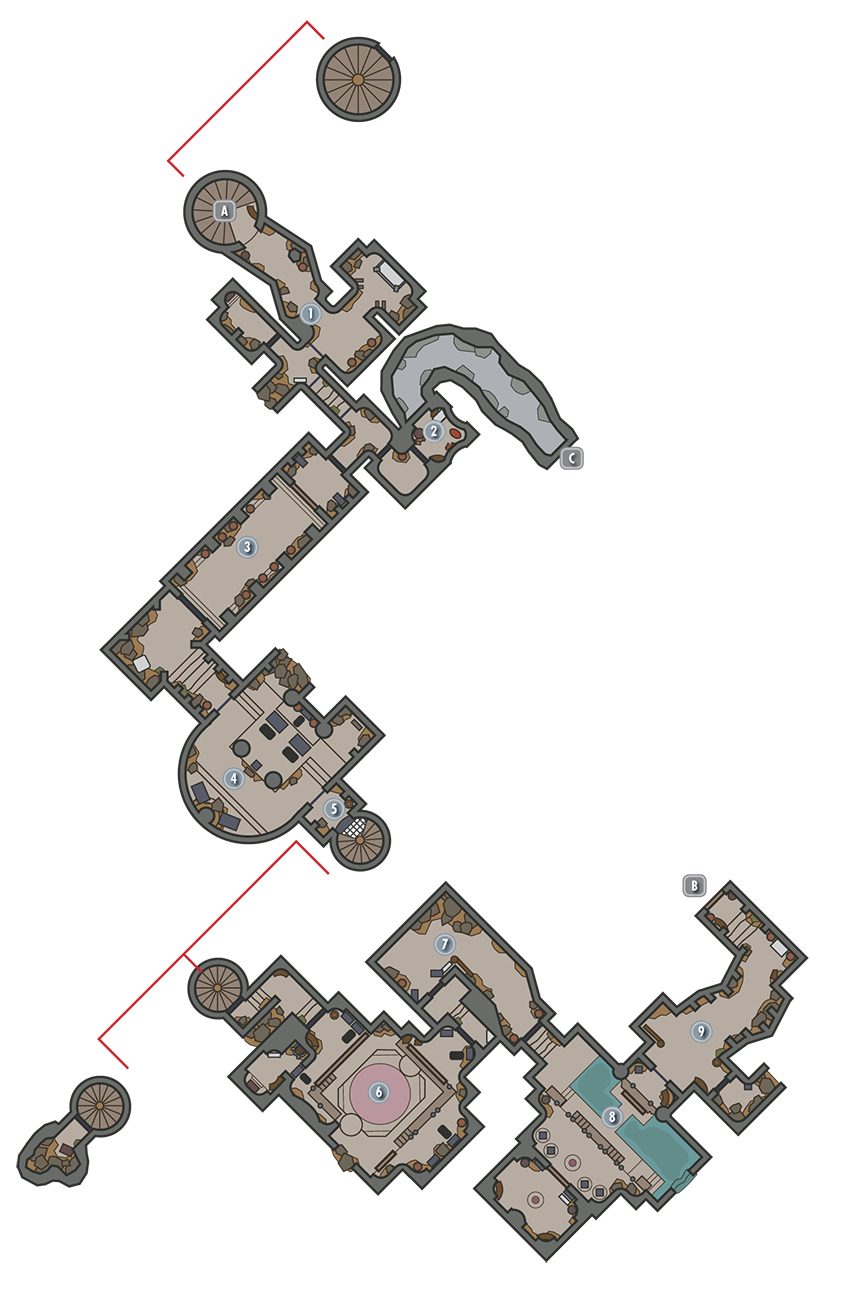
Obtain a bit of loot from a shelf on your way into this passage, where the ghost of Wyndelius Gatharian urges you to leave, then vanishes. Enter the nearby alcove, grab a Skill Book off the stone table, then face west, toward the far portcullis, so that two pairs of wall levers are visible. Looking at the portcullis, pull the leftmost lever, followed by the “inside” right lever, to manipulate the gates so that you may progress. Don’t touch the far-right lever—it triggers a trap. Pull the wall chain that follows to raise the next few portcullises, and optionally unlock an Adept-level iron door to access a dangerous nook with a trapped chest and a pressure plate trap.
- Danger! Dart Trap (lever, trigger hinge), Spear Trap (pressure plate, wall chain)
- Skill Book [Illusion]: Before the Ages of Man [B2/10]
- Potion
Wyndelius’s Study
Visit this room to catch up with the specter that warned you before. The ghost of Wyndelius Gatharian now lashes out at you. Lay it to rest to discover that it was never a ghost at all—just a man who’d been drinking a special potion to disguise himself as a specter. Collect the nearby journal and a few samples of the potion to gain new insight and advance the plot.
- Crafting: Alchemy Lab
- Wyndelius’s Journal
- Philter of the Phantom
- Satchel
- Potions
- Loose gear
Hall of Stories
Bring the journal that you find at [2] back to Ivarstead’s innkeeper, Wilhelm. In thanks, he’ll give you the Sapphire Claw, which you need to open the Nordic Puzzle Door here. Beware of gouts of flame as you open the door and enter the passage (or look to the floor and disarm that particular trap), then inspect the Sapphire Claw and notice three symbols etched on its palm (Moth, Owl, Wolf). Rotate the door’s three concentric rings to form the same pattern of symbols, then inspect the central keyhole to insert the claw and open the way forward.
- Danger! Flamethrower Traps (trapped door)
Draugr Ambush
A number of Draugr burst out of sarcophagi as you move through this chamber, and portcullises fall to trap you inside. Deal with the undead, then pull the lever in the east alcove to open the portcullises and continue on.
- Loose gear
Spiral Stairwell
A trapdoor plunges you into shallow water at the foot of this winding stairwell. Nab some gear from the bottom of the pool, then swim up and climb out (or pull the lever to lift yourself out). Go all the way upstairs to locate a Master-level locked door. If you can pick this tricky lock, you should have no trouble opening the large chest in the nook beyond.
- Chest (Locked: Expert)
- Loose gear
 Oil Pit Chamber
Leap two pressure plates and slay a skeleton as you descend into this chamber, where a mob of skeletons are gathered in the center of the room below. Quickly knock down one of the central hanging lamps to ignite the oily floor beneath them and decimate all of the skeletons at once. Before going downstairs, spy a handle near a sarcophagus and pull it to allow you to enter the treasure room. More Draugr awaken when you reach the room’s far side. Deal with them, then proceed through the northeast door. Beware of the trip wire stretched across the passage beyond.
- Danger! Battering Ram Trap (pressure plate), Dart Trap (pressure plate), Oil Lamp Trap, Oil Pool Trap
- Chest
- Potions
- Loose gear
 Trapped Passage
Avoid triggering a trip wire and pressure plate as you battle a bow-wielding Draugr here. Jump the trip wire and sneak around the plate to avoid stirring more undead. Once again, you find yourself locked in the room. Pick the lock on the far door, or take it from the corpse of the Draugr near the door once you kill it—again.
- Danger! Swinging Blade Trap (trip wire/wall chain), Swinging Wall Trap (pressure plate)
 Drawbridge Chamber
A waterfall pushes a gentle stream through this long, enemy-free chamber. Pull a nearby wall chain to open the portcullis at the end of the stream, then claim a coin purse from the bottom of the small pool beyond. Find some gear behind the waterfall as well, then go upstairs and open the large southwest door to enter a chamber with a lone Draugr guard. Step on the pressure plate here to rotate the walls and catch glimpses of four glyphs. Spin the four glyph pillars outside the room to mimic the same pattern (Whale, Hawk, Snake, Whale), then step on the central pressure plate to lower a drawbridge.
- Potion
- Loose gear
 Path to the Depths
Avoid the pressure plate just inside the door, then deliberately hit the trip wire to trigger a rockfall trap that smashes the Draugr in this passage. See if you can open the Apprentice-level locked door to access a small nook with a gold bar, but beware the flamethrower trap that fires when you remove it.
- Danger! Flamethrower Trap (pressure pedestal), Rockfall Trap (trip wire), Swinging Wall Trap (pressure plate)
- Potion
- Loose gear
 Door to Shroud Hearth Depths
Your trip through the barrow has brought you to a cavernous underground temple. Slaughter all skeletons and Draugr that rise from their sarcophagi here—the last few are quite powerful. Proceed to the back room when the northwest passage opens, and disarm the trap on the large chest (or carefully stand to the side) to avoid being shot by darts. Gain a new Word of Power from the far Word Wall before taking your leave of this haunted barrow.
- Danger! Dart Trap
- Word Wall: Kyne’s Peace [3/3]
- Potion
- Loose gear
 Door to Shroud Hearth Barrow
[9.03] Pinepeak Cavern
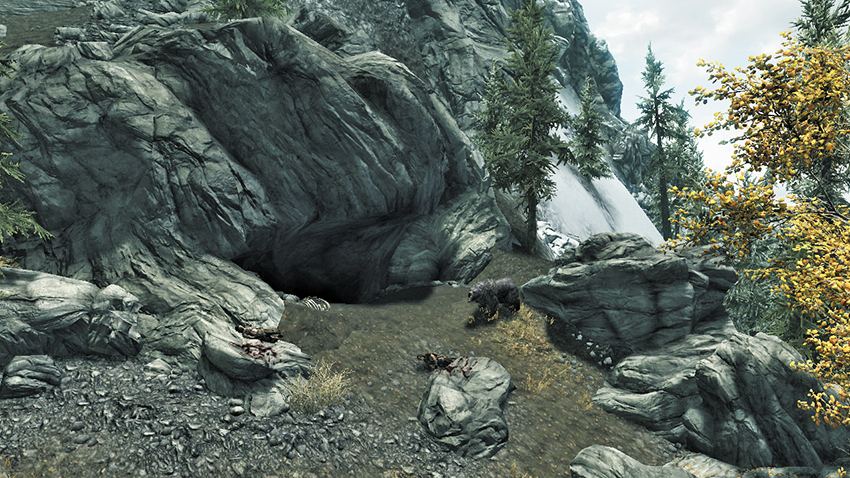
Dungeon: Animal Den
- Animal
Collectibles
- Skill Book [Smithing]: Heavy Armor Forging
- Chest
- Potion
- Loose gear
- Mineable ore (Corundum)
This small cave lies at the eastern base of Whiterun’s towering mountain, the Throat of the World [6.38], landing it within the Rift’s bounds. Slay the exterior Bear, then enter the cave and put down a second Bear to secure a Skill Book and a chest.
[9.04] Geirmund’s Hall
Related Quests
- Side Quest: Forbidden Legend
- Dungeon Activity
Recommended Level: 6
Dungeon: Draugr Crypt
- Animal
- Draugr
- Sigdis Gauldurson
Crafting
- Arcane Enchanter
Dangers
- Dart Trap (pressure plate)
- Flamethrower Trap (hinge trigger)
- Magic Caster Trap
- Mammoth Skull Trap (tabletop pressure plate)
- Spear Trap (lever)
- Swinging Blade Trap (pressure plate)
Puzzles
- Nordic Puzzle Pillars
Collectibles
- Skill Book [Two-Handed]: Words and Philosophy
- Unique Item: Gauldur Amulet Fragment (Geirmund’s Hall) [97/112] (Sigdis Gauldurson)
- Unique Weapon: Gauldur Blackbow [65/80] (Sigdis Gauldurson)
- Chests
- Potions
- Loose Gear
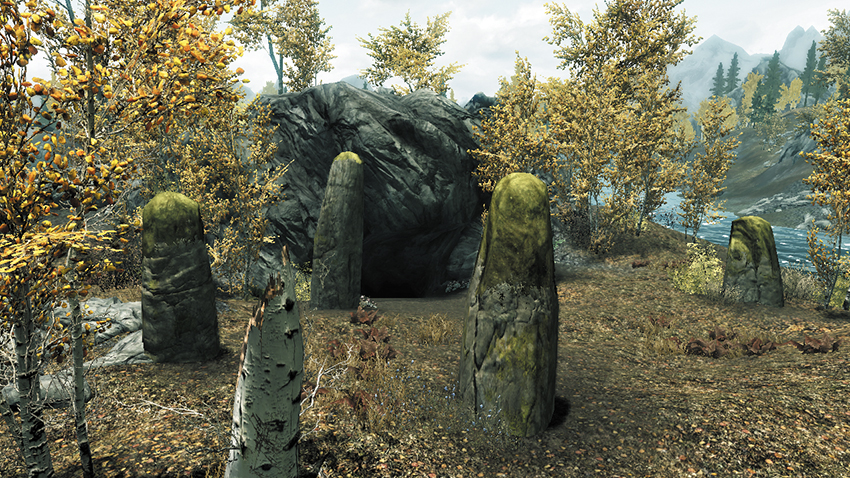
Explore the isle in the center of Lake Geir to discover this foreboding crypt. Geirmund’s Hall is home to Sigdis Gauldurson, one of the three brothers sealed away in ancient times.
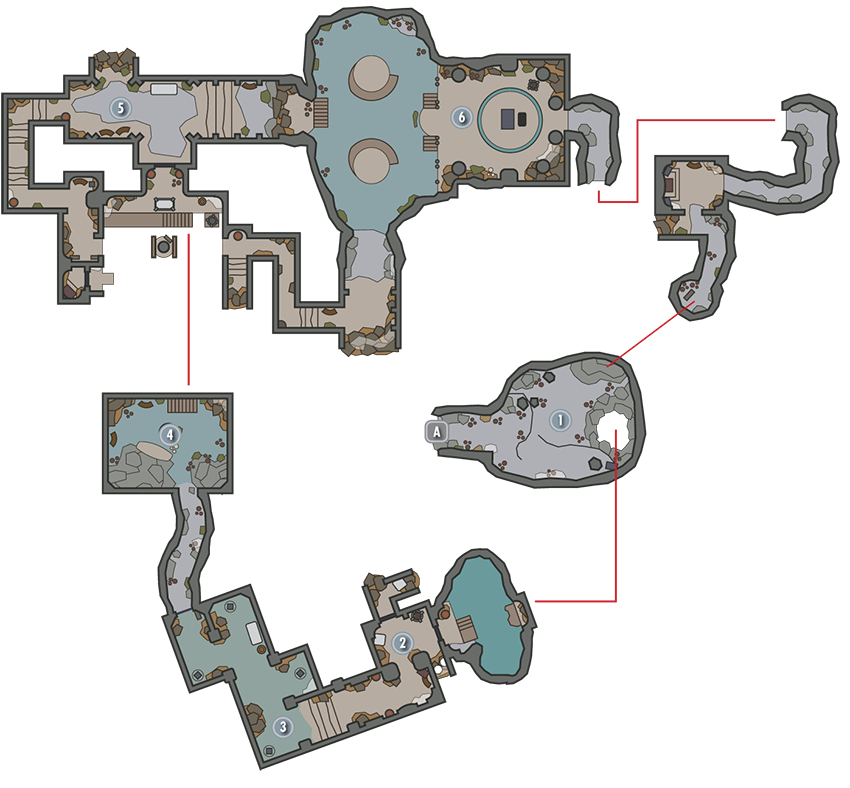
Exit to Skyrim
Entry Cavern
Eliminate a few pesky Skeevers in the first small cavern, then search the body of a fallen adventurer to discover a book that hints at the history behind this tomb. Steel yourself, then leap into the nearby pit, landing in a watery chamber below. Search a short underwater passage to locate a sunken chest before climbing onto dry land and proceeding through and iron door.
- Chest
Spiderweb Hall
Slay a couple of Frostbite Spiders in this webbed corridor, and unlock an Adept-level iron door to access a small nook with some potions and gear. Disarm the trapped chest on the shelf, or stand off to one side as you open it to dodge the flamethrower trap. Then skirt a nearby pressure plate as you head toward [3].
- Danger! Dart Trap (pressure plate), Flamethrower Trap (hinge trigger)
- Chest
- Potions
- Gear
Flooded Catacombs
Cut down the Draugr that arise from these waterlogged burial passages, note the four glyphs on the walls near the stairs as you enter, two on each wall. Spin the four pillars in the passage ahead so that their glyphs match the ones near the stairs (Hawk, Whale, Snake, Whale). With the pillars properly rotated, pull the lever near the far portcullis to open the way forward. Beware of taking the Soul Gem from the table here—removing it causes the giant mammoth skull to swing at you like a battering ram!
- Danger! Mammoth Skull Trap (pressure pedestal)
- Potion
Lord Geirmund’s Tomb
This tall chamber features plenty of Draugr and multiple tiers of walkways. Fight your way up some wooden stairs and collect an important key from the withered hand of Lord Geirmund on the altar. Inspect the nearby epitaph before using the key to open the nearby door and advance.
- Lord Geirmund’s Key
- Potion
- Loose Gear
Crafty Passages
Slay a powerful Draugr and his animal companion here, then search around to find a couple of potions. Take the west passage and go upstairs to battle another mighty Draugr. Don’t pull the lever by the bridge—it triggers a trap. Instead, turn around and pull a different lever that’s mounted on the wall to lower to lower the bridge.
Back out on the upper level of Lord Geirmund’s Tomb [4], look to your right to see a small ledge. Jump down and disarm the trap on the door, then enter the small alcove to find a locked chest.
Cross the bridge (pulling another lever on the far side of the central platform), then carefully avoid the pressure plate as you move on to the next chamber. It activates a nasty set of swinging blades that are difficult to dodge once triggered.
- Danger! Magic Caster Trap, Spear Trap (lever), Swinging Blade Trap (pressure plate)
- Crafting: Arcane Enchanter
- Chest (Locked: Expert)
- Potions
- Loose gear
Sigdis Gauldurson’s Tomb
An incredibly powerful undead archer rises to combat you in this flooded chamber. Throughout the battle, Sigdis Gauldurson summons two illusory duplicates of himself to confuse you. The “real” enemy is the one that wears a horned helmet. Attack this version of the Sigdis to inflict damage, eventually slaying the fiend to attain two powerful items from its remains. When Sigdis falls, a secret door opens, allowing you to take the east passage to locate a giant chest and other valuables, including a Skill Book found on the top of the nearby bookshelf. Follow the passage to its end and pull a lever to open a secret door that connects back to [1].
- Unique Item: Gauldur Amulet Fragment (Geirmund’s Hall) [97/112] (Sigdis Gauldurson)
- Unique Weapon: Gauldur Blackbow [65/80] (Sigdis Gauldurson)
- Skill Book [Two-Handed]: Words and Philosophy
- Chest
- Potions
- Loose Gear
[9.05] Nilheim
Related Quests
- Dungeon Quest: The Nilheim Scam*
Recommended Level: 6
Dungeon: Bandit Camp
- Guard
- Telrav
Collectibles
- Chests (2)
- Apothecary’s Satchel
- Potion
- Loose Gear
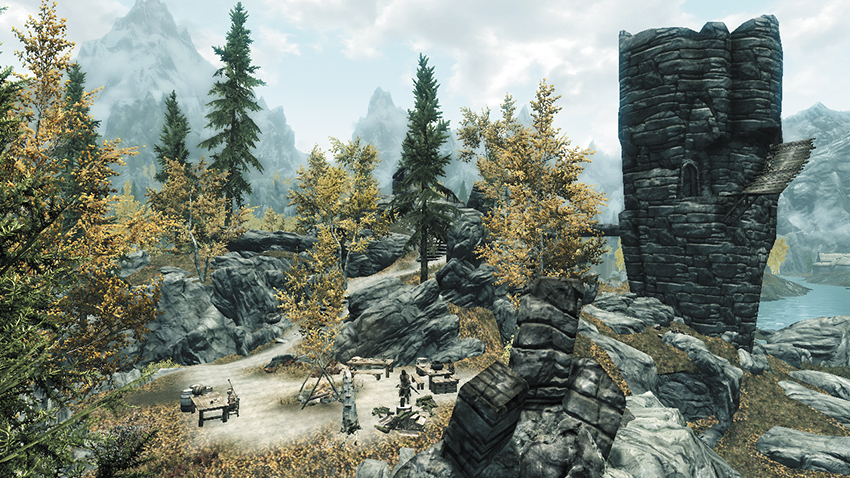
Little remains of this ruined fortress, which lies just east of Lake Geir, save some stone steps and a tower. An injured merchant named Telrav is found on the road outside of Nilheim. Agree to help Telrav, and he’ll lead you to the camp—and then springs an ambush! Slay the villains and then raid their campsite in just retribution.
[9.06] Sarethi Farm
Related Quests
- Side Quest: A Return to Your Roots
- Miscellaneous Objective: Smooth Jazbay* (Avrusa Sarethi)
- Favor (Activity): Harvesting Crops* (Avrusa Sarethi)
Habitation: Farm
- Aduri Sarethi
- Avrusa Sarethi (Marriage Prospect)
- Rift Guard
Crafting
- Alchemy Lab
- Tanning Rack
Services
- Marriage Prospect: Avrusa Sarethi [60/62]
Collectibles
- Potions
- Loose Gear
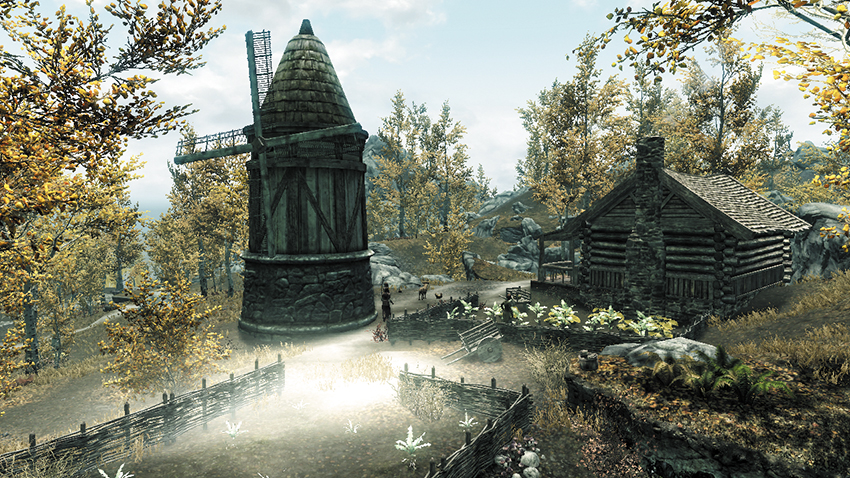
This quaint farm stands in the Rift’s central wilds, just north of the Treva River.
Exterior
Speak with the farm’s owner, Avrusa Sarethi, to learn how she managed to grow so much rare Nirnroot in her garden and obtain a Side Quest. Avrusa is also your final destination in the “Return to Your Roots” quest (see quest for details), and the remains of Sinderion’s living quarters can still be found in her basement.
- Crafting: Tanning Rack
Sarethi Farm (Interior)
Breaking into the farmhouse is profitable due to the many potions and additional Nirnroot found in the cellar.
- Area Is Locked (Novice)
- Crafting: Alchemy Lab
- Potions
- Loose Gear
[9.07] Rift Stormcloak Camp
Related Quests
- Civil War Quest (when active, depending on who you side with)
Habitation: Military: Stormcloak Camp
- Stormcloak Quartermaster (Blacksmith)
- Stormcloak Soldier
Services
- Trader (Blacksmith): Stormcloak Quartermaster [31/33]
- Weapons, Apparel, Misc
Crafting
- Alchemy Lab
- Anvil
- Grindstone
- Workbench
Special Objects
- Civil War: Map of Skyrim
- Chests
- Potions
- Loose Gear
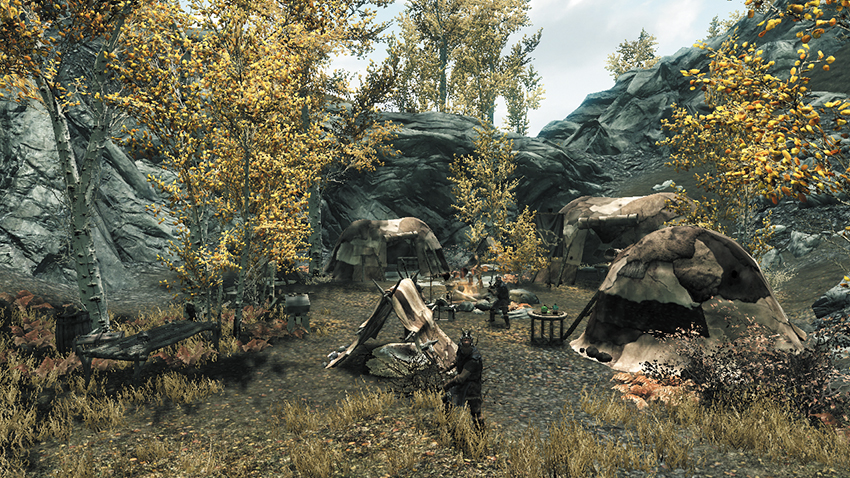
Depending on the status of the Civil War quest line, you may or may not be able to visit this small Stormcloak campsite. Here you may trade with the quartermaster or use his plethora of crafting stations. Examine the tabletop map in one of the tents to potentially gain new map data.
[9.08] Rift Watchtower
Related Quests
- Side Quest: The Forgemaster’s Fingers
Recommended Level: 6
Dungeon: Bandit Camp
- Bandit
- Orc
Crafting
- Tanning Rack
Collectibles
- Skill Book [Heavy Armor]: Hallgerd’s Tale [C2/10]
- Chest
- Potions
- Loose Gear
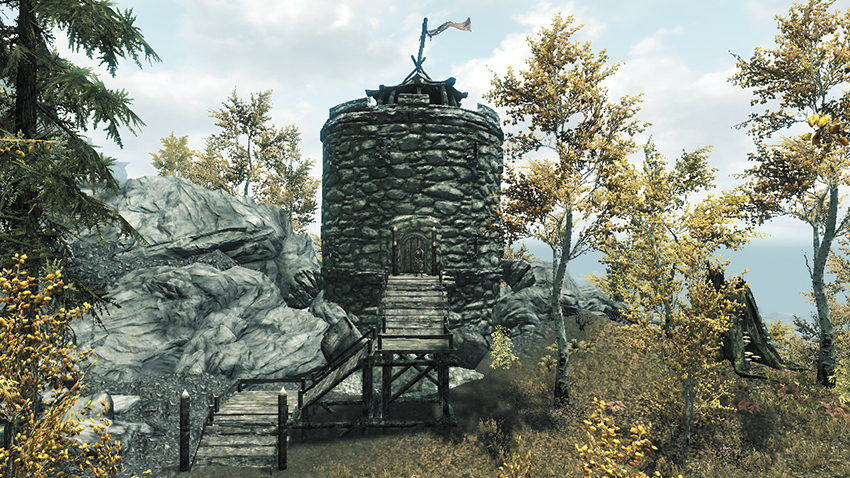
Orcish bandits occupy this tower, which stands in the Rift’s northern mountains, east of Lake Geir. Slay the ruffians to steal their plunder.
[9.09] Alchemist’s Shack
Related Quests
- Side Quest: Captured Critters*
Recommended Level: 8
Dungeon: Special
Crafting
- Alchemy Lab
Collectibles
- Caged Critter: Butterfly in a Jar [4/5]
- Apothecary’s Satchel
- Potion
- Loose Gear
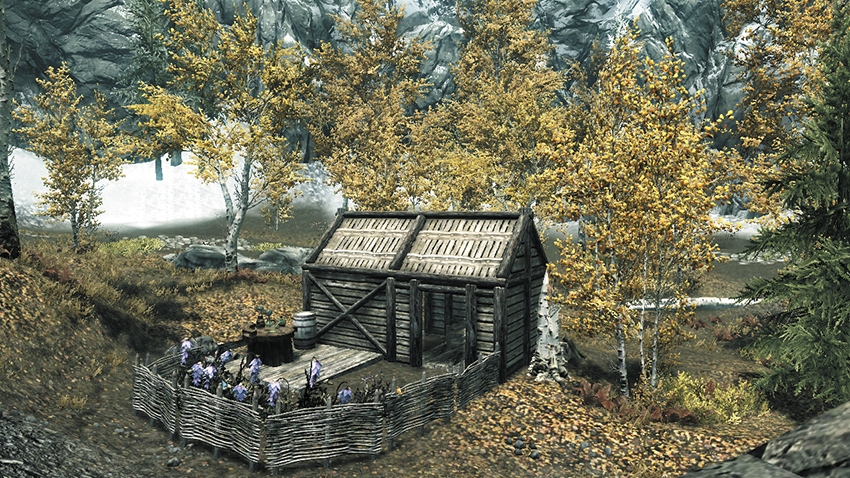
This open-air cabin stands in the Rift’s southwestern woods and contains several items of interest. Curiously, the cabin’s owner is nowhere to be found. Read the journal on the end table near the bed to learn where he might have gone.
[9.10] Honeystrand Cave
Dungeon: Animal Den
- Animal
Collectible
- Chest
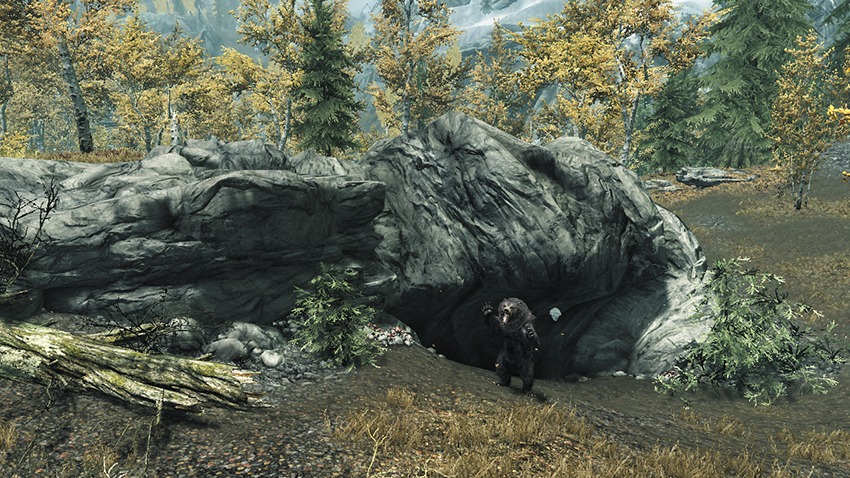
This small bear cave lies just off the Rift’s western main road. Slay the ferocious exterior Cave Bear, then enter the cave to battle two more of the beasts. Loot the body of a mauled bandit in the cave’s center, along with the nearby chest.
[9.11] Rift Imperial Camp
Related Quests
- Civil War Quest: Reunification of Skyrim
- Civil War Quest: Compelling Tribute
- Civil War Quest: The Battle for Fort Greenwall
- Dungeon Activity
Habitation: Military: Imperial Camp
- Legate Fasendil
- Imperial Quartermaster (Blacksmith)
- Imperial Soldier
Services
- Trader (Blacksmith): Imperial Quartermaster [32/33]
- Weapons, Apparel, Misc
Crafting
- Alchemy Lab
- Anvil
- Grindstone
- Workbench
Special Objects
- Civil War: Map of Skyrim
- Chest(s)
- Potions
- Loose Gear
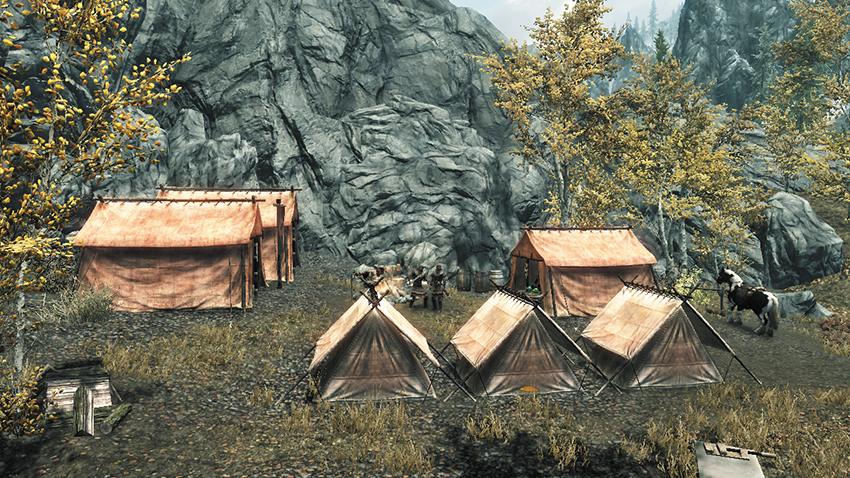
If you’re playing through the Civil War quest line, then you may be able to visit this Imperial campsite located deep in the Rift’s southwest forest. Trade with the quartermaster if you like, or hone your gear with his crafting stations. Inspect the tabletop map in the largest tent to potentially gain new map data.
[9.12] and
 [DG.17] Ruins of Bthalft: The Aetherium Forge
Related Quests
- Side Quest: Lost to the Ages
Recommended Level: 20
Faction: Bandit Camp/Dwarven Forge
- Bandit
- Dwarven Centurion
- Dwarven Sphere
- Dwarven Spider
- Forgemaster
Dangers
- Hanging Rattles
- Lava!
Puzzle
- Kinetic Resonators
Collectibles
- Unique Item: The Aetherial Crown [DG1/17]
- Unique Item: The Aetherial Shield [DG2/17]
- Unique Weapon: The Aetherial Staff [DG7/7]
- Miscellaneous
- Chest
- Loose gear
Exterior
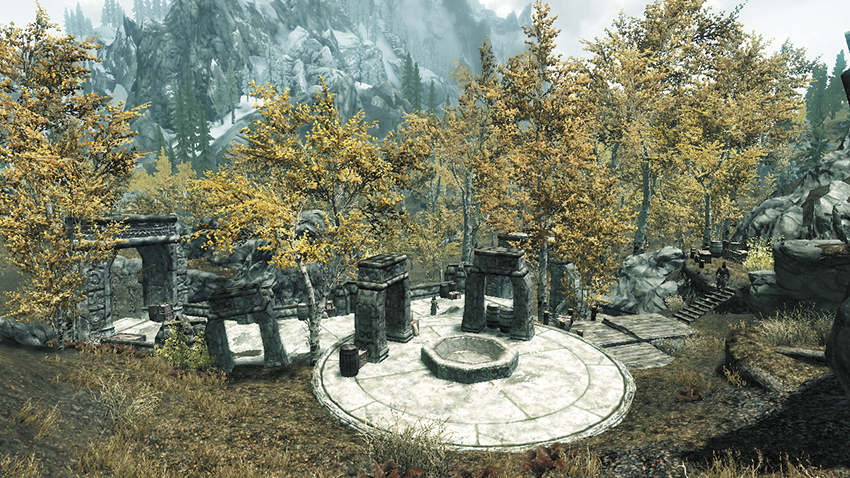
This small collection of open-air ruins lies in the Rift’s southwestern wilds. Cut down a handful of bandits here, then scale the narrow northern wooden stairs to locate a chest on a ledge. If Side Quest: Lost to the Ages is active and you have all four Aetherium Shards, Katria will meet you here. Insert the four Shards into the Dwarven Mechanism, fusing them into a single crest.
- Aetherium Crest
Take the Crest and retreat from the platform, and the flagstones rise up, forming the roof of a giant, circular tower and elevator entrance. This is the entrance to the Aetherium Forge.
Interior: The Aetherium Forge
Elevator to Skyrim
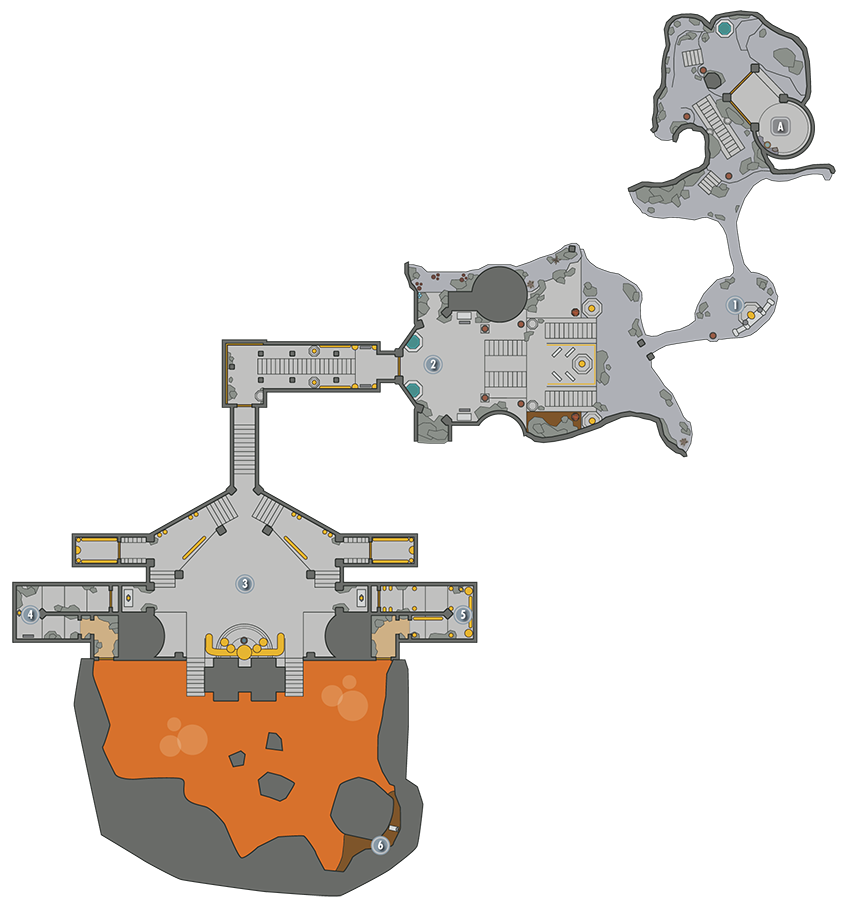
As you emerge from the elevator, jump over the railing to your right and skirt around the rubble to locate a chest. Then pull the lever to open the gate leading out to the Lantern Chamber.
- Chest [Locked: Apprentice]
Torchlit Chamber and Juniper Tree Treasure
This giant subterranean chamber is deeper than any other dwarven structure in Skyrim. Stay on the path as the torches alight ahead of you. Cross the first rock bridge out to the main “island” in the center of the lake.
If you like, you can take this opportunity to go hunting for treasure. Peer over the ledge behind the low wall on the island, and you can spot a lower ledge with a chest. Drop down to claim it, then dive into the water and swim behind the waterfall to find another small chest on a ledge. When you’re done, return to the island and continue across the second bridge leading up to the main ruin.
Before heading up the stairs, climb out onto the narrow ledge to your left, where a lone tree has found purchase among the rocks. There’s an enchanted battle-axe on the rock shelf behind it.
- Chest [Locked: Adept]
- Chest [Locked: Apprentice]
- Loose gear
Torchlit Ruins
Climb the grand staircase and enter the plaza in the center of the ruins. The gate ahead of you is sealed; to open it, simply fire an arrow at both of the resonators in the alcoves above (the order in which you shoot them doesn’t matter). If you forgot your bow or arrows, a Dwarven Bow and small quiver rest on the stone table to one side of the plaza.
Before heading down the passage and into the forge proper, there’s some more treasure to grab. The rubble-filled passage (to your left as you face the door) contains a chest. The archway opposite it leads out to the river that feeds the falls, where you can claim another chest and some loose Soul Gems in the streambed. And finally, there’s some silver to be mined on the rocky ledge that separates the streambed from the ruins.
- Chest [Locked: Adept]
- Chest [Locked: Expert]
- Loose gear
Forge Entryway and Aetherium Forge
When you’re ready to continue, head through the gate you opened earlier and continue down the stairs. Before opening the door at the end of the passage, make sure to claim the potions and loose gear on the low platform to the left.
- Loose gear
- Potions
The Forge proper is guarded by numerous Dwarven Automatons and the giant Forgemaster himself. Tactics on dealing with the enemies you will encounter here are detailed in the quest. When combat is done, you have just enough raw Aetherium to forge one of three unique items. Hunt through the rest of the chamber for additional items:
- Chest (2)
- Loose gear
- Potions
- Unique Item: The Aetherial Crown [DG1/17]
- Unique Item: The Aetherial Shield [DG2/17]
- Unique Weapon: The Aetherial Staff [DG7/7]
and
Hidden Lava Passage (East and West)
You may have noticed two inaccessible gates set high in the wall of the forge chamber, overlooking the two chests. Both of these are at the end of a U-shaped corridor whose entrance is out over the lava, at the extreme east and west ends of the forge cavern. To enter these passages, you’ll need some special skills.
The Ethereal Form Shout is the easiest way to reach them. Simply use the Shout to protect yourself from the lava, then swim out to the gates and head up the passages beyond. If you lack Ethereal Form, you may still be able to make it with a bit of luck and careful aim. Use your Bats (Vampire Lord) or Whirlwind Sprint (Shout) powers to dash out onto one of the low-lying rocks in the lava, then turn and dash again to reach the gate. Use any Resist Fire potions or similar gear you may have before trying this, as failure is usually fatal.
If you manage to reach these passages, you’ll find that each contains a chest and some dwarven scrap.
- Chest (2)
Molten Forge Chest
A large chest is hidden behind a pillar in the far left (southeast) corner of the lava pool. Use the Ethereal Form Shout or your Bats or Whirlwind Sprint powers to reach it. The latter is especially tricky, requiring extreme precision as you try to land on the rocky outcroppings along the way.
- Chest
[9.13] and
[DG.20] Arcwind Point
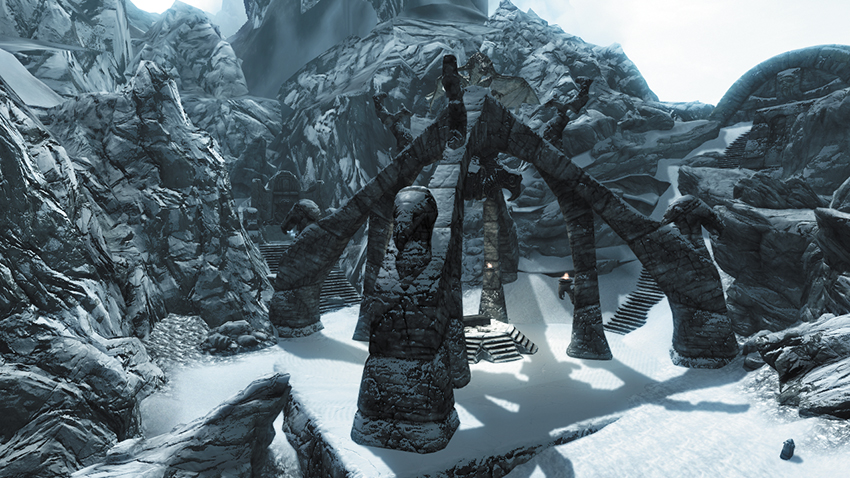
Recommended Level: 6
Faction: Draugr Crypt
Dangers
- Battering Ram Trap (pressure plate)
Collectibles
- Skill Book (Restoration): Withershins [E2/10]
- Word Wall: Drain Vitality [DG1/3]
Miscellaneous
- Chest
- Loose Gear
- Mineable Ore (Quicksilver)
- Potions
Explore the frigid mountains in the Rift’s far southwest corner to discover a breathtaking valley of Forgotten Ruins. Descend into the circular ruin to battle a mighty Draugr. Mine some Quicksilver Ore as you head toward a larger ruin, which is guarded by several skeletons. An even more powerful Draugr emerges from the sarcophagus here, close to some steps up to a Word Wall. Scale the long north stairs after the fight to reach a third, hutlike ruin. Beware of the pressure plate at the top of the stairs and the mighty Draugr that emerges from the sarcophagus as you exit the “hut.” Go west to mine more Quicksilver, then climb the east rocks and broken stairs to discover an old tower. Fight your way to the tower’s apex, where a large chest and reclusive Skill Book are found.
[9.14] Autumnwatch Tower
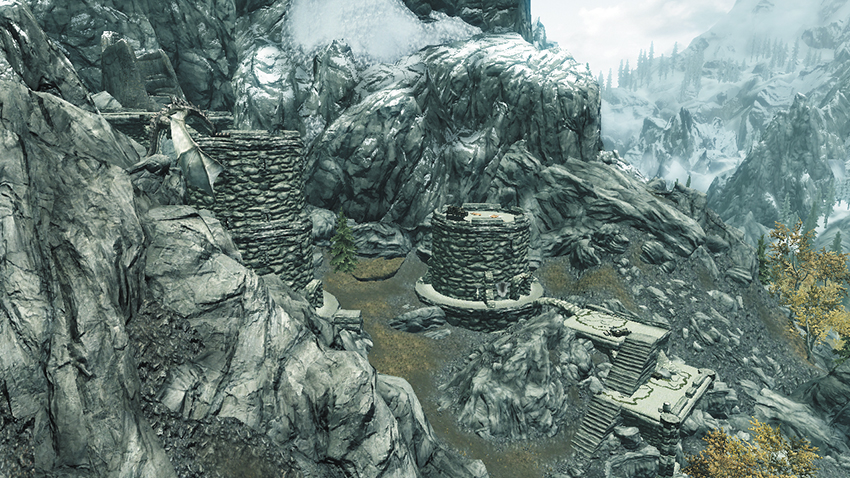
Dungeon: Dragon Lair
- Bandit
- Dragon (after Main Quest: Dragon Rising)
Crafting
- Tanning Rack (2)
Collectibles
- Skill Book [Light Armor]: Jornibret’s Last Dance [B2/10]
Special Objects
- Word Wall: Marked for Death [3/3]
- Chest
- Potion
- Loose Gear
Two open-air towers stand at this remote site in the Rift’s southwest mountains, one of which is tall enough to be seen from afar. After the “Dragon Rising” quest, a mighty winged beast can be fought here. Until then, the tower is home to dangerous bandits. Scale the taller tower to discover a large chest, then cross a stone arc to reach a sacred Word Wall. The smaller tower features two Tanning Racks, and there’s a Skill Book on its roof.
[9.15] Froki’s Shack
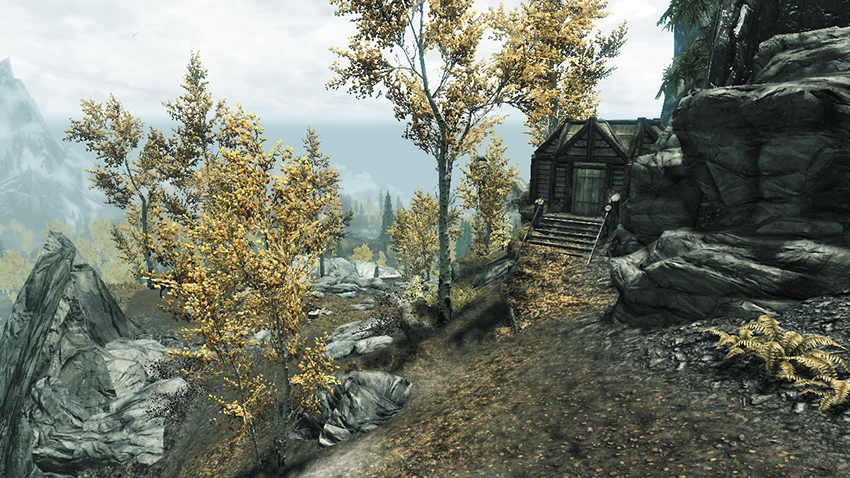
Related Quests
- Side Quest: Kyne’s Sacred Trials
Recommended Level: 6
Dungeon: Special
- Froki Whetted-Blade
Crafting
- Tanning Rack
Collectibles
- Skill Book [Archery]: Vernaccus and Bourlor [E2/10]
- Unique Item: Diadem of the Savant [98/112]
- Unique Item: Kyne’s Token [99/112]
- Chest
- Loose Gear
This small cabin stands in the Rift’s southwest mountains, just east of Autumnwatch Tower [9.14]. Head inside to speak with Froki and gain a new Side Quest. The old hunter doesn’t own much, but you can steal several pieces of gear, snatch a Skill Book off a shelf, and loot a chest here if you like. A unique item rests atop the exterior Wood Chopping Block as well.
[9.16] Treva’s Watch
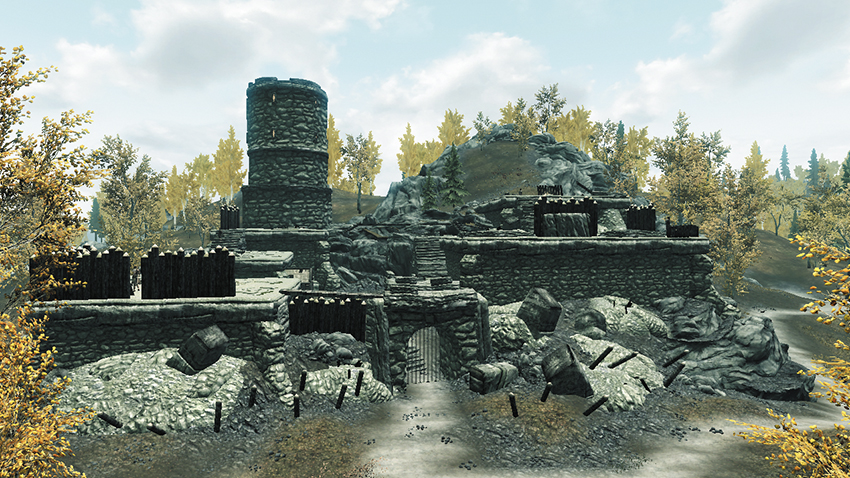
Related Quests
- Dungeon Quest: Infiltration
Recommended Level: 6
Dungeon: Bandit Camp
- Bandit
- Stalleo
- Stalleo’s Bodyguard
Crafting
- Anvil
- Arcane Enchanter
- Grindstone
- Workbench
Dangers
- Bear Traps
- Flail Trap (pressure plate)
- Oil Lamp Traps
- Oil Pool Traps
- Swinging Wall Trap (pressure plate)
Collectibles
- Skill Book [Enchanting]: Twin Secrets [E2/10]
- Area Is Locked (lever)
- Chests
- Potions
- Loose Gear
This sizeable stronghold stands along the bank of the Treva River, which flows between Lake Geir and Lake Honrich in the heart of the Rift.
Exterior
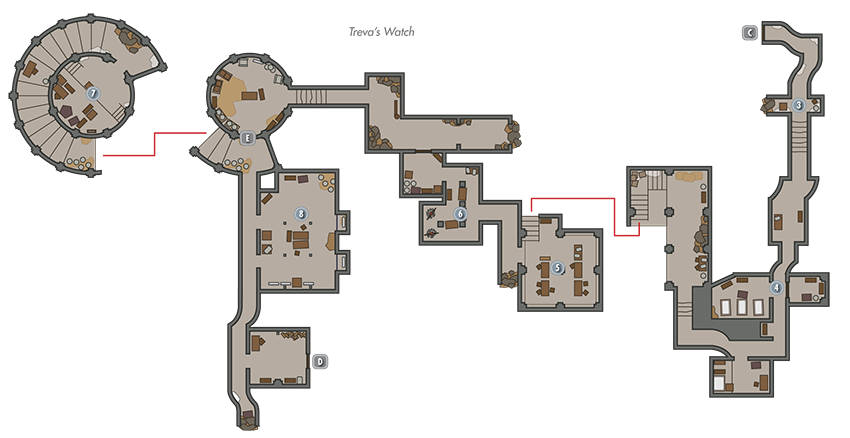
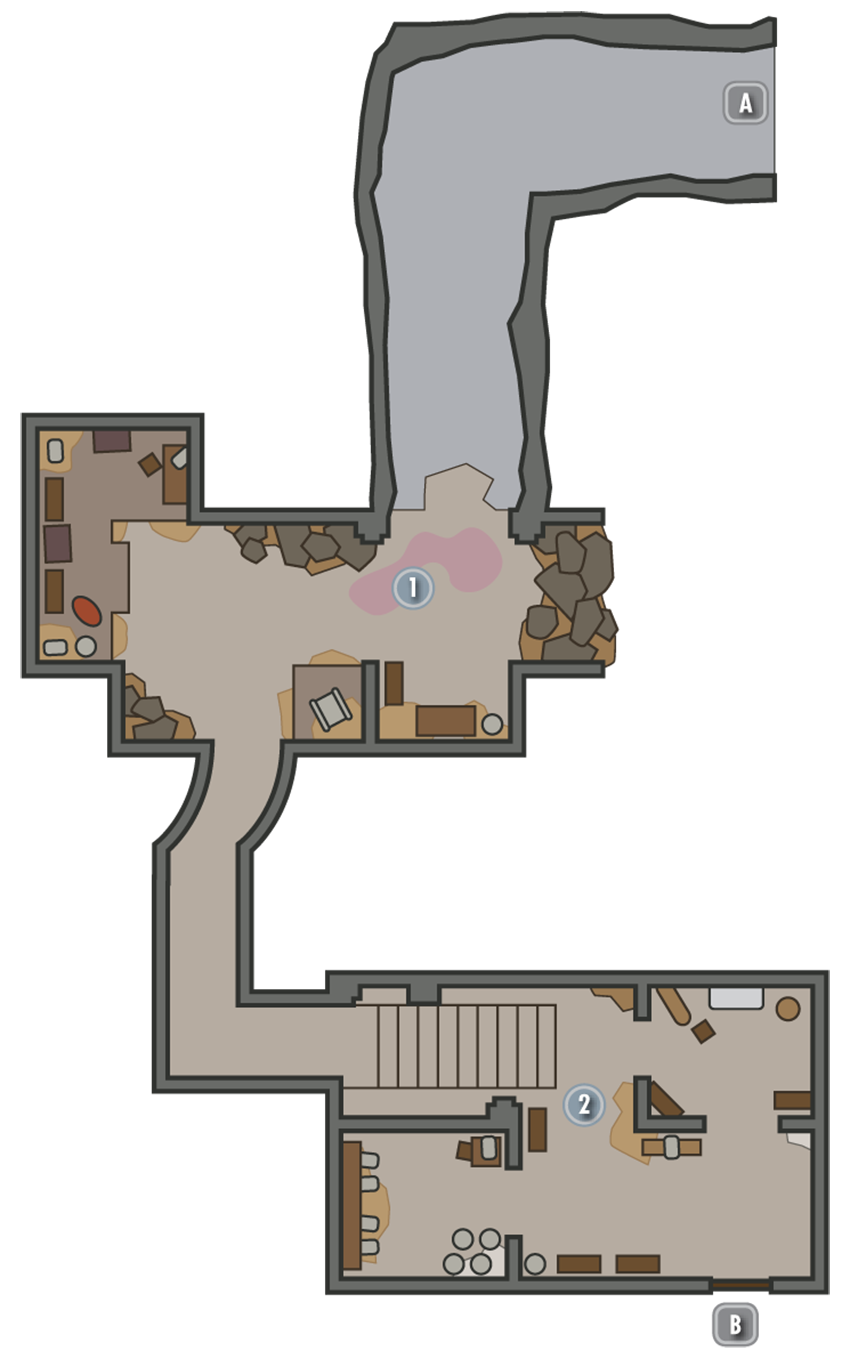
Bandits have overrun Treva’s Watch, and steel bars prevent a traditional frontal assault on the main gate. Travel west to locate a nearby campsite, where a soldier named Stalleo gives you a Side Quest that involves reclaiming Treva’s Watch from his enemies. Enter the nearby cave to begin your infiltration of the fort.
Later, when you reach the fort’s interior courtyard, make your way up its ramparts to discover a chest on the roof.
- Chest
Exit to Skyrim
Entry Tunnel
Get the drop on the bandits that guard the secret entry tunnel by knocking down an overhead lamp to ignite the oil at their feet. Slay the villains afterward, then loot a pair of chests before leaping a bear trap in the passage that follows.
- Danger! Bear Trap, Oil Lamp Trap, Oil Pool Trap
- Chests (2)
- Loose Gear
Crafting Area
Make use of a few crafting stations before entering Treva’s Watch.
- Crafting: Anvil, Grindstone, Workbench
- Potions
- Loose Gear
Door to Treva’s Watch
Door to Treva’s Watch Escape Tunnel
Entry Passage
Sidestep bear traps and slay a few rugged bandits in the keep’s first passage, then go upstairs and raid a knapsack on a shelf.
- Danger! Bear Traps
- Knapsack
- Loose Gear
Sleeping Area
Silence another bandit in this sleeping area, looting a chest for more plunder. The sound of battle may bring several bandits running in from the south room, including the gang’s leader. Unlock a nearby Adept-level door to access a storage closet with another chest, then loot a third chest as you make your way toward [5].
- Chests (3)
- Apothecary’s Satchel
- Potions
- Loose Gear
Great Hall
Snag a few potions before descending this chamber’s steps and proceeding to [6].
- Potions
Kitchen
Slay a spellcasting bandit here in the kitchen, then loot a chest that’s tucked away in the larder.
- Chest
- Potions
Tower
Avoid a lethal pressure plate trap in the hall that leads to this circular chamber. Go upstairs and battle more bandits, including another powerful chief. Try knocking down the overhead lamp to ignite the oil on the stairs and burn these foes. Loot a large chest upstairs, but don’t exit through the ceiling trapdoor. Instead, head back downstairs and visit the holding cell area to secure a bit more loot.
- Danger! Oil Lamp Trap, Oil Pool Trap, Swinging Wall Trap (pressure plate)
- Crafting: Arcane Enchanter
- Skill Book [Enchanting]: Twin Secrets [E2/10]
- Chest
- Knapsack
- Apothecary’s Satchel
- Potion
- Loose Gear
Holding Cells
The last few interior bandits lurk in these final rooms. Dispatch them so you may safely loot a chest. Proceed to the hall’s end, leaping a pressure plate to avoid triggering a trap. Loot the chest at the end of the passage, then exit through the nearby door to emerge outside near a lever—pull it to open the stronghold’s front gate, allowing Stalleo and his men to join you in the courtyard and fight to reclaim the fort.
- Danger! Flail Trap (pressure plate)
- Chests (2)
- Loose Gear
 Exit to Skyrim (lower courtyard)
 Exit to Skyrim (upper ramparts)
[9.17] Angarvunde
Related Quests
- Dungeon Quest: Medresi Dran and the Wandering Dead*
Recommended Level: 6
Dungeon: Draugr Crypt
- Draugr
- Medresi Dran
Dangers
- Battering Ram Trap (pressure plate)
- Floor Arrows (pressure plate)
- Spear Trap (pedestal pressure plate)
- Swinging Blade Trap (pressure plates)
- Trapped Chest
Collectibles
- Skill Book [Illusion]: Before the Ages of Man
- Skill Book [Speech]: A Dance in Fire, v7
Special Objects
- Word Wall: Animal Allegiance [3/3]
- Chest(s)
- Potions
- Loose Gear
This large, forgotten temple runs deep into the Rift’s southwest mountains, not far from the Dwarven ruins of Avanchnzel [9.18].
Exterior
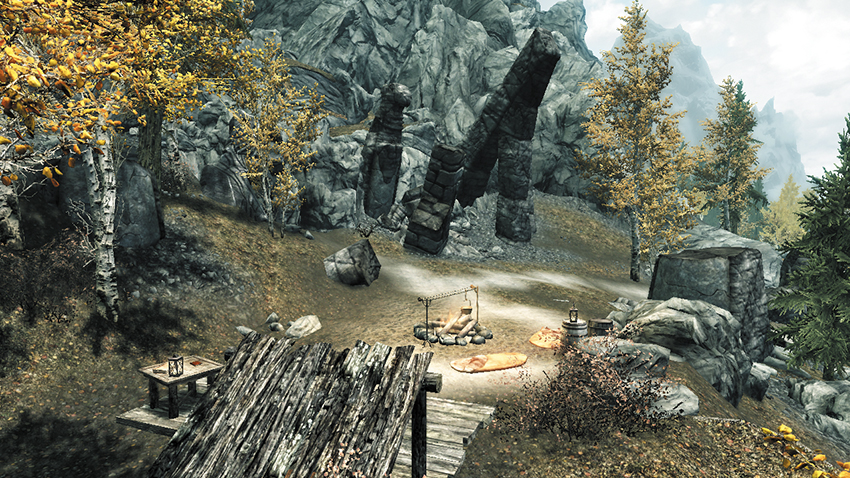
An abandoned camp lies just outside the Angarvunde’s cavelike entrance. Inspect the informative journal of Medresi Dran on the table and grab the nearby Skill Book before heading inside.
- Skill Book [Speech]: A Dance in Fire, v7
Exit to Skyrim
Entry Chamber
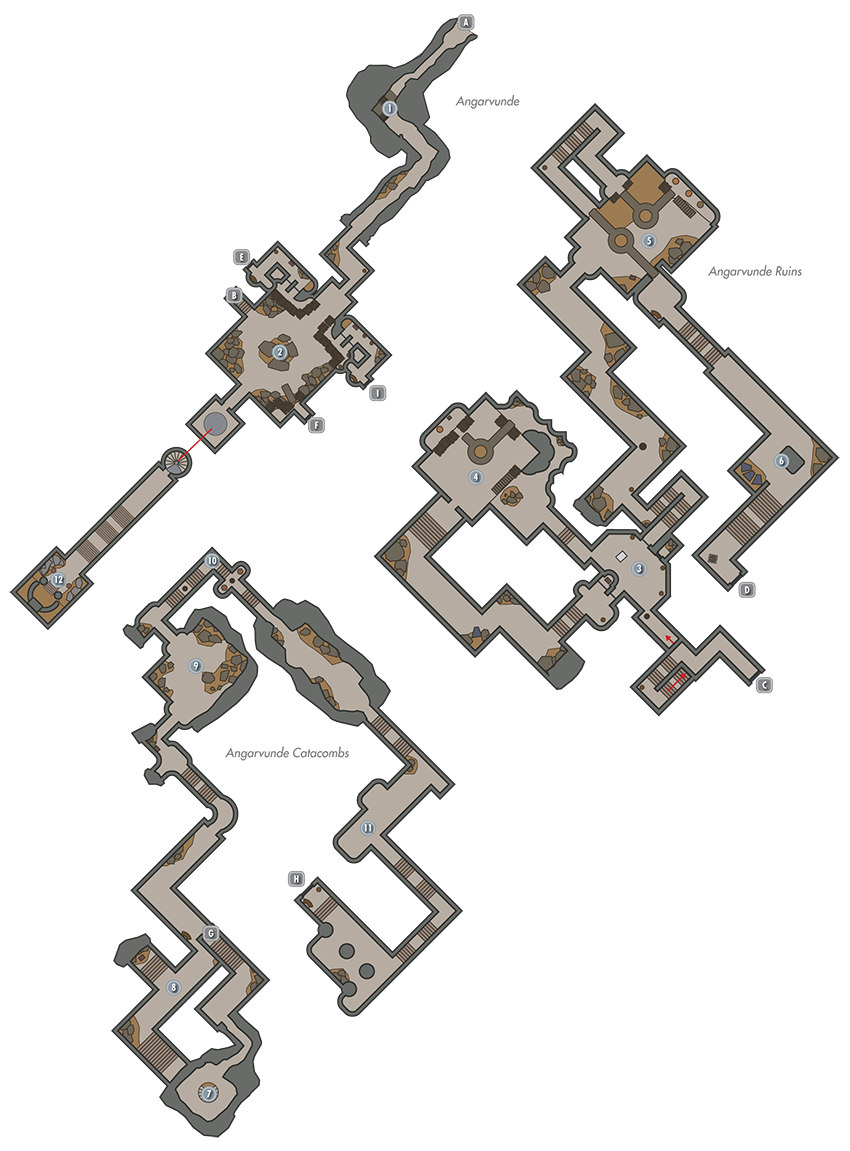
Speak with a woman named Medresi Dran in the very first chamber to gain a new Side Quest that involves killing three powerful Draugr in the next room.
Great Hall
Slay the three deadly Draugr in this wide cavern, then double back to inform Medresi of your success. Follow Medresi to a raised portcullis, then accept the key she gives you, which opens the northwest door to the ruins and the southeast door to the catacombs.
- Angarvunde Key (Medresi)
Door to Angarvunde Ruins
Door to Angarvunde
Junction Chamber
Jump and sidestep a series of pressure plates in the hall that leads to this room, where a lowly Draugr guards a chest. A Skill Book rests on a nearby stone table.
- Danger! Swinging Blade Trap (pressure plates)
- Skill Book [Illusion]: Before the Ages of Man
- Chest (Locked: Novice)
Broken Walkway Hall
Another group of powerful Draugr guards this chamber. Jump across the broken walkway to reach a valuable potion that sits atop a pedestal, but stand to one side of the pedestal when collecting the potion to avoid being impaled by spears. Take the lower passage to loop back around to [3].
- Danger! Spear Trap (pedestal pressure plate)
- Potion
Junction Chamber Revisited
Pull a lever to lower all of the portcullises in this chamber, then loot a locked chest you couldn’t have reached before. Cut across the room and take the east passage to [5].
- Chest (Locked: Novice)
Sarcophagi Chamber
Avoid a pressure plate as you cut down powerful Draugr in the passages that lead to this large chamber, where another group of fearsome undead burst out from wall sarcophagi to attack. Loot a chest on the ground floor before heading upstairs and taking a winding passage to [6].
- Danger! Battering Ram Trap (pressure plate)
- Chest
Ruins Exit Passage
Collect a few valuables and slay one last formidable Draugr as you navigate this passage, which leads back to the Great Hall.
- Potions
- Loose Gear
Door to Angarvunde
 Door to Angarvunde Ruins
Great Hall Revisited
Collect a bit of loot that you couldn’t have reached before as you reenter the Great Hall, then scale the southeast fallen pillar to reach the door that leads into the catacombs.
- Chest
- Potions
 Door to Angarvunde Catacombs
 Door to Angarvunde
Broken Stairwell Chamber
Descend into this room, slaying a Draugr from an elevated vantage before dropping from the broken stairwell and proceeding to [8].
Burial Passages
Dispatch a few powerful Draugr in this passage, and stand to one side of the chest that lies atop the northwest stairs to avoid a nasty trap when opening it (or try disabling its trigger hinge).
- Danger! Trapped Chest
Canis Tree Chamber
Loot a chest on your way to this chamber, then raid another chest that lies near one of the gnarled Canis trees.
- Chest
- Chest (Locked: Novice)
- Potion
 Arrow Trap Stairs
Beware of two pressure plates that trigger similar traps as you scale the stairs in this passage.
- Danger! Floor Arrows (pressure plates)
 Catacombs Exit Passage
Cut through a host of Draugr as you navigate the catacombs’ final passage, returning to the Great Hall.
- Potion
- Loose gear
Door to Angarvunde
 Door to Angarvunde Catacombs
Great Hall (Third Visit)
Loot a chest and throw a lever to lower the portcullises as you did before. With all portcullises open, return to Medresi, who foolishly rushes off and is slain by a deadly trap. Enter the raised section of floor afterward, and you’ll be lowered down to a secret passage.
- Chest
 Word Wall Chamber
The temple’s treasure is grand indeed, and there’s nothing left to guard it. Obtain a new Word of Power from the ancient Word Wall here, and loot a large chest for vast wealth, completing your quest.
- Word Wall: Animal Allegiance [3/3]
- Chest
[9.18] Avanchnzel
Related Quests
- Side Quest: Unfathomable Depths
Recommended Level: 16
Dungeon: Dwarven City
- Dwarven Centurion
- Dwarven Sphere
- Dwarven Spider
Crafting
- Alchemy Lab
Dangers
- Dwarven Thresher Trap (trapped door)
- Dwarven Thresher Trap (pressure plate)
- Spear Trap (trapped door)
Collectibles
- Skill Book [Restoration]: Racial Phylogeny
Special Objects
- Lexicon Receptacle
- Chests
- Potions
- Loose Gear
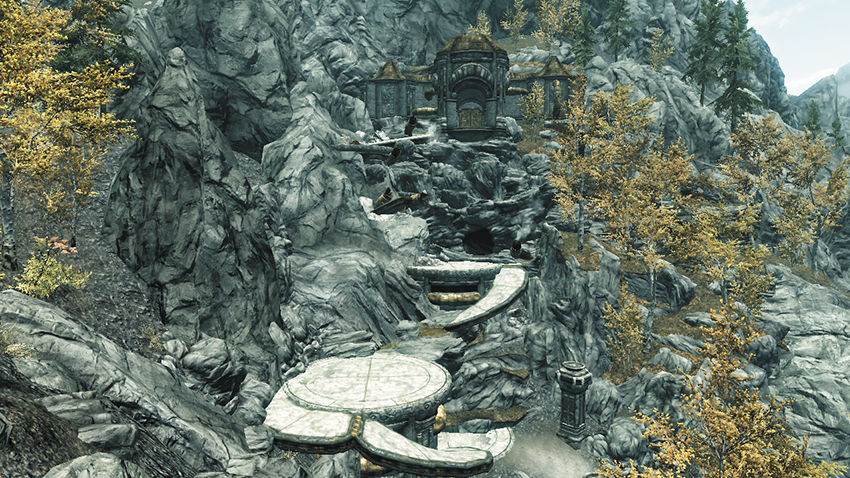
This impressive collection of dwarven ruins stands among the Rift’s southern mountains. This is a large area, for the ruins run deep into the rock. Scale a series of spiral pathways to locate Avanchnzel’s cavelike entrance, and head inside.
Exit to Skyrim
Central Cavern
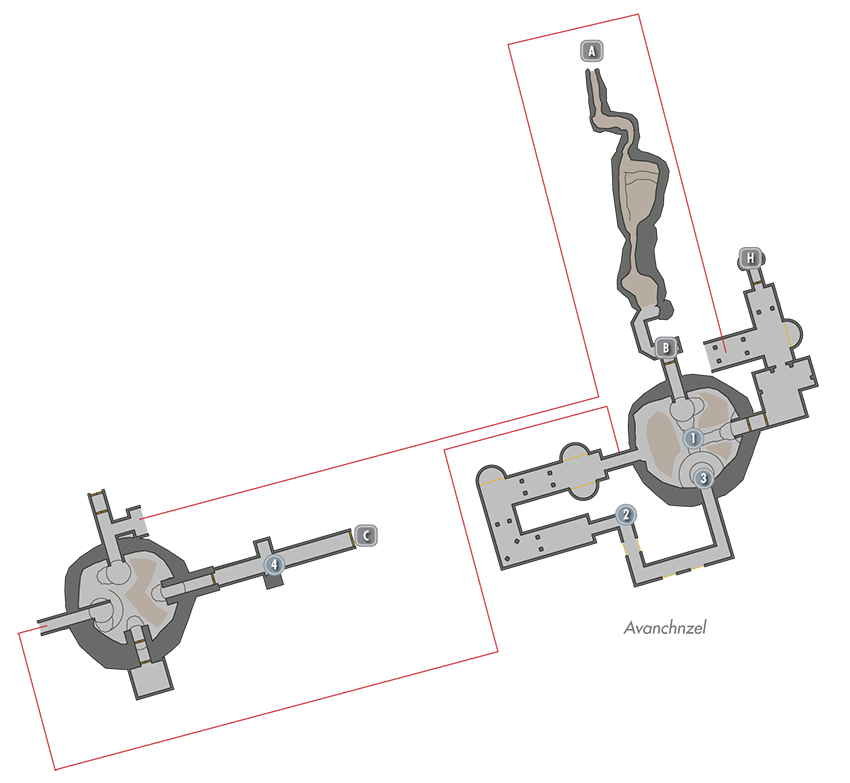
Destroy a couple of formidable Dwarven Spiders on your way to this massive, open-air cavern. Take the east passage and dismantle a Dwarven Sphere in the adjoining chamber, then scale a sloping passage and unbar a door so you may step out to the balcony and loot an outdoor chest. Head back inside and return to the large cavern. Loot another chest on a wall as you enter the south passage.
- Chest
- Chest (Locked: Apprentice)
Door to Avanchnzel Balcony
South Passage
Dispatch more Dwarven Spheres and Spiders as you navigate the long passage that leads down to the main chamber’s ground floor. Unlock an Apprentice-level gate along the way to access a nook with chest.
- Chest
Trapped Treasure Room
Annihilate a deadly group of Dwarven Spiders to secure the central chamber’s ground floor, then approach the south door. Look up to notice several slots on the ceiling—spears will stab out from these when you open the door, so stand back and to one side to avoid this nasty surprise, or try to pick the door’s trigger hinge. Loot two chests in the treasure room before backtracking out.
- Danger! Spear Trap (trapped door)
- Chests (2)
- Potion
- Loose Gear
Path to Animoncultory
From the base of the central chamber, take the east passage to locate the door that leads to the Avanchnzel Animoncultory. Raid a chest in the hall as you go.
- Chest
Door to Avanchnzel Animoncultory
Treasure Room
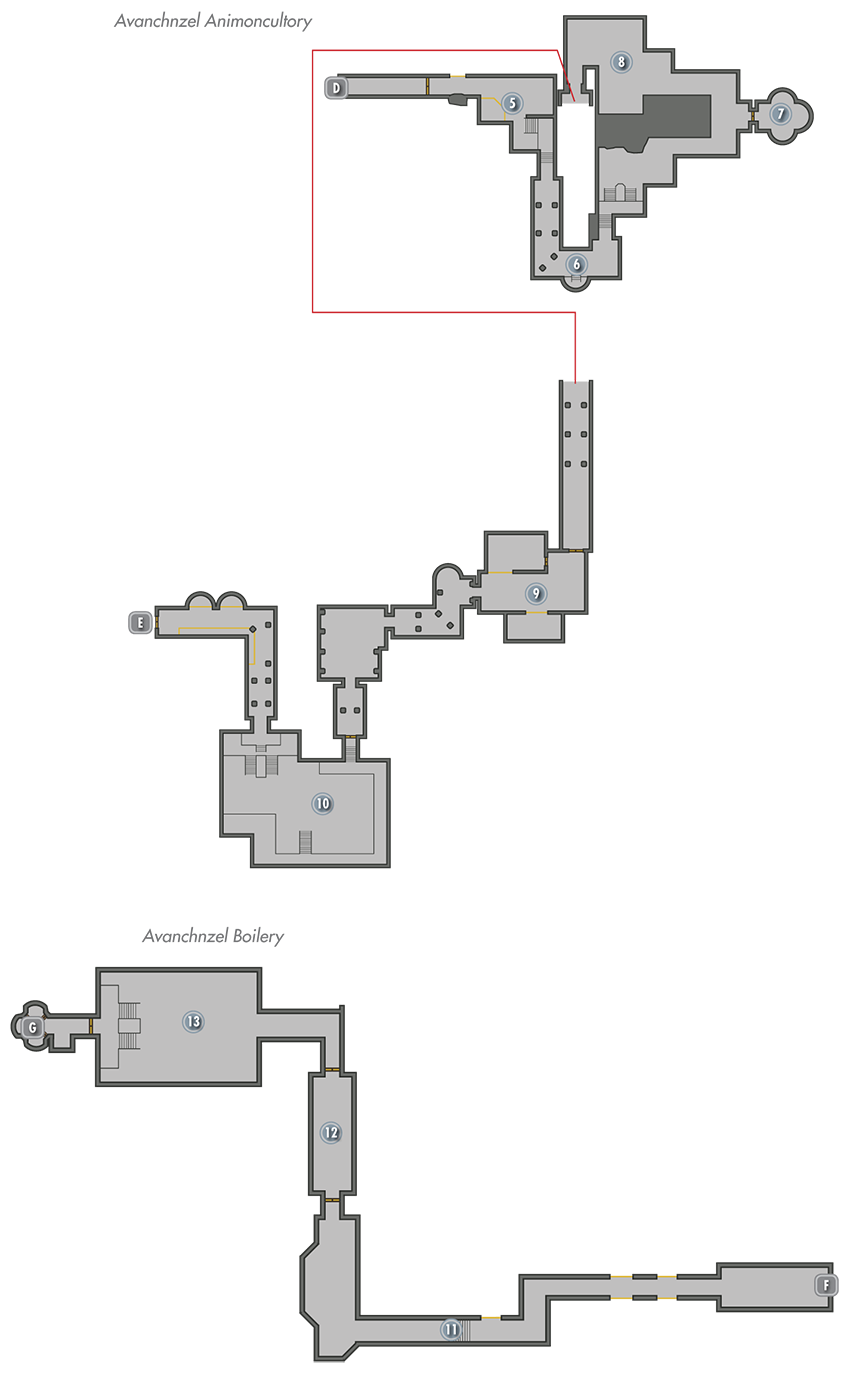
Smash some Dwarven Sentries in this first chamber, then unlock the Adept-level gate to reach a chest.
- Chest
Connecting Corridor
Loot a locked chest as you navigate this winding hall.
- Chest (Locked: Adept)
Study
To safely enter this room, stand close to the door and run forward as you open it. You’ll burst into the room before being hacked up by the blades that emerge from the ground when the door is opened.
- Danger! Dwarven Thresher Trap (trapped door)
- Skill Book [Restoration]: Racial Phylogeny
- Chest
- Loose Gear
Storage A
Make use of an Alchemy Lab here if you like.
- Crafting: Alchemy Lab
- Potion
Storage B
Bash through a few more dwarven automatons in this chamber, then unlock an Adept-level door and an Apprentice-level gate to access a pair of small treasure rooms.
- Chest
- Chest (Locked: Novice)
- Potions
- Loose Gear
Centurion Assembly
A large number of Dwarven Spiders guard this large chamber, where fearsome Dwarven Centurions were once built. Loot a chest that sits on a large shelf against the west wall on your way to the boilery.
- Chest
Door to Avanchnzel Boilery
Door to Avanchnzel Animoncultory
Access Corridor
Raid a pair of chests that sit on shelves as you move through this corridor, and grab a few potions from another shelf ahead.
- Chests (2)
- Potions
Spinning Blade Slope
Avoid the pressure plates that line this sloping hallway—stepping on one triggers a nasty spinning blade trap that must then be bypassed with care. Pull the lever at the bottom of the slope to deactivate the trap if need be.
- Danger! Dwarven Thresher Trap (pressure plates)
 Centurion Chamber
A tower Dwarven Centurion guards this final chamber. Defeat the mechanical monster easily by simply backing away until the brute becomes stuck on thick pipes. You may then unleash ranged attacks to bring it down.
- Lexicon Receptacle
Door to Avanchnzel
[9.19] Clearspring Tarn
Dungeon: Animal Den
- Animal
- Hunter (Food Vendor)
Services
- Traders (Food Vendors): Hunters (2) [12/13; 13/13]
- Food, Misc
Collectibles
- Skill Book [Archery]: Vernaccus and Bourlor
- Unique Weapon: Bow of the Hunt [66/80]
- Chest(s)
- Potions
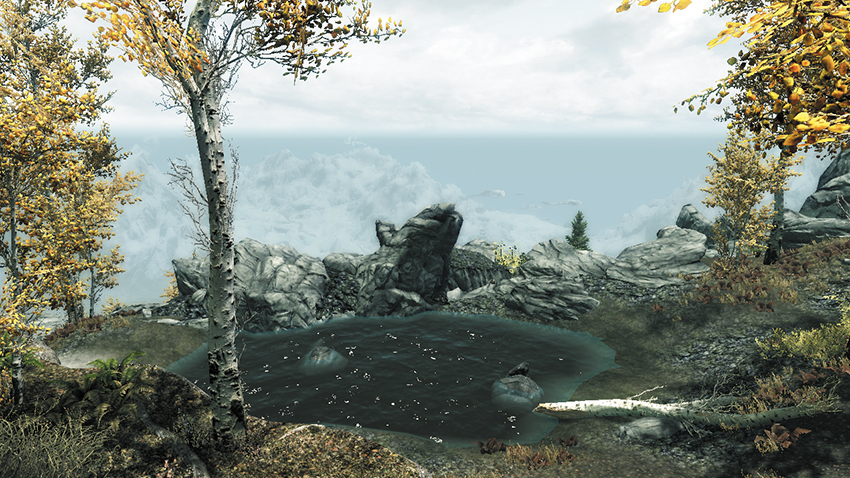
This small, tranquil mountain lake is nestled among the Rift’s northern mountains. Descend a dirt trail around the cliffside to reach a cave that lies just beneath the tarn.
Exterior
As you approach the pond, some hunters arrive and hunt the deer that gather here. If you like, trade with the hunters for food and pelts, then dive into the water to locate a sunken chest. Then follow the trail around the cliffside to enter a nearby cave.
- Chest (Locked: Apprentice)
Clearspring Cave
A lone predator guards this small cave. Kill the monster, then loot a chest here and claim a unique bow that inflicts bonus damage to animals. Check the Skill Book that also lies nearby.
- Skill Book [Archery]: Vernaccus and Bourlor
- Unique Weapon: Bow of the Hunt [66/80]
- Chest
- Potions
[9.20] Boulderfall Cave
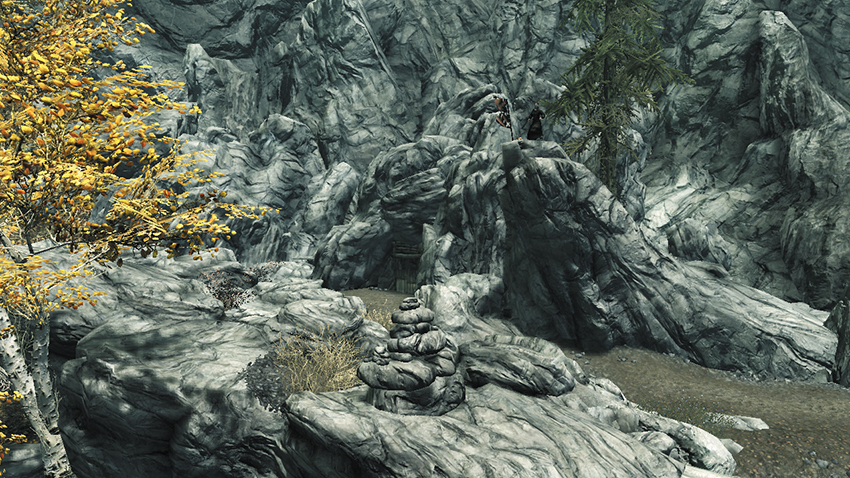
Recommended Level: 6
Dungeon: Warlock Lair
- Mage
Crafting
- Alchemy Lab
Dangers
- Bone Alarm Trap
- Trapped Chest
Collectibles
- Skill Book [Alchemy]: Herbalist’s Guide to Skyrim
- Potion
- Loose Gear
This small, abandoned mine lies in the mountains to the west of Shor’s Stone [9.25] and has become the home of a dangerous mage. Avoid the hanging rattles on your way in and, after slaying the mage, open the large chest from the side to dodge a dangerous flamethrower trap that fires from the wall above. Collect the Skill Book on the shelf before using the nearby Alchemy Lab.
[9.21] Northwind Mine
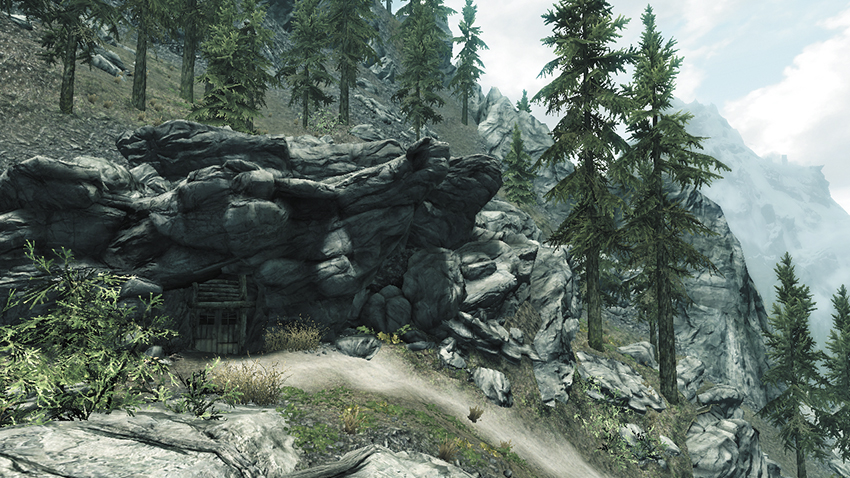
Recommended Level: 12
Dungeon: Special
- Skeleton
Dangers
- Rockfall (tripwire)
Underground Connection: Northwind Summit [9.22]
Collectibles
- Skill Book [Block]: Death Blow of Abernanit
- Chest
- Knapsack
- Loose Gear
This haunted mine has been tunneled into the Rift’s northern mountains. Make your way to a tall chamber, then dispatch skeletons as you scale the wooden ramps that lead to the higher passages. Swipe the Skill Book on the ground-floor table, and find a chest and knapsack hidden beneath the scaffolding on the first ledge. Stand back and safely trigger the trip-wire trap in the upper passage to avoid a dangerous trap, then follow the passage to its end to exit the mine, arriving at Northwind Summit [9.22].
[9.22] Northwind Summit
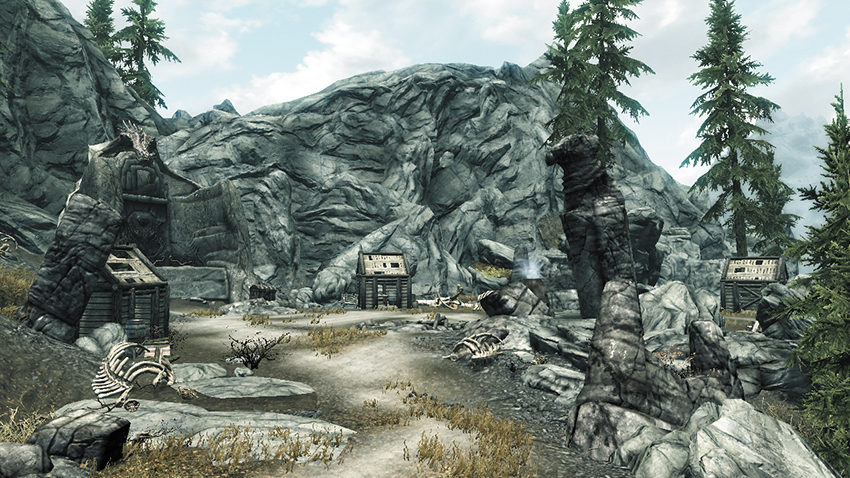
Dungeon: Dragon Lair
- Dragon (after Main Quest: Dragon Rising)
- Skeleton
Crafting
- Smelter
Underground Connection: Northwind Mine [9.21]
Special Objects
- Word Wall: Aura Whisper [3/3]
- Chest
- Chest (Locked: Apprentice)
- Loose Gear
This abandoned mining site sits high atop the Rift’s northern mountains. You must navigate the Northwind Mine [9.21] to reach this summit, where plenty of treasure and an ancient Word Wall are found. And that’s not all—after the “Dragon Rising” quest, an irritable dragon can be found and fought here as well!
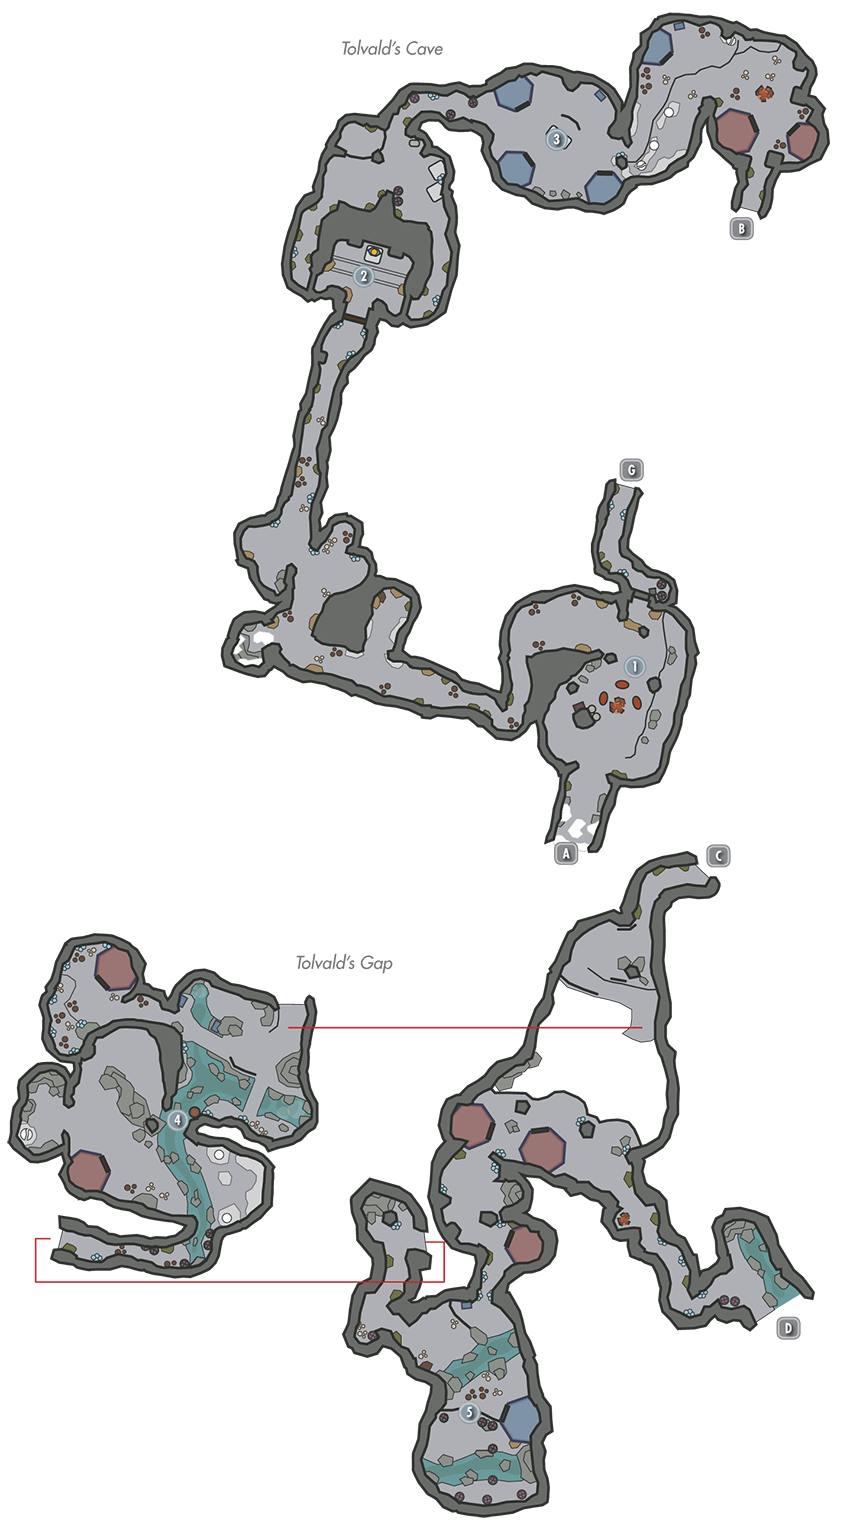
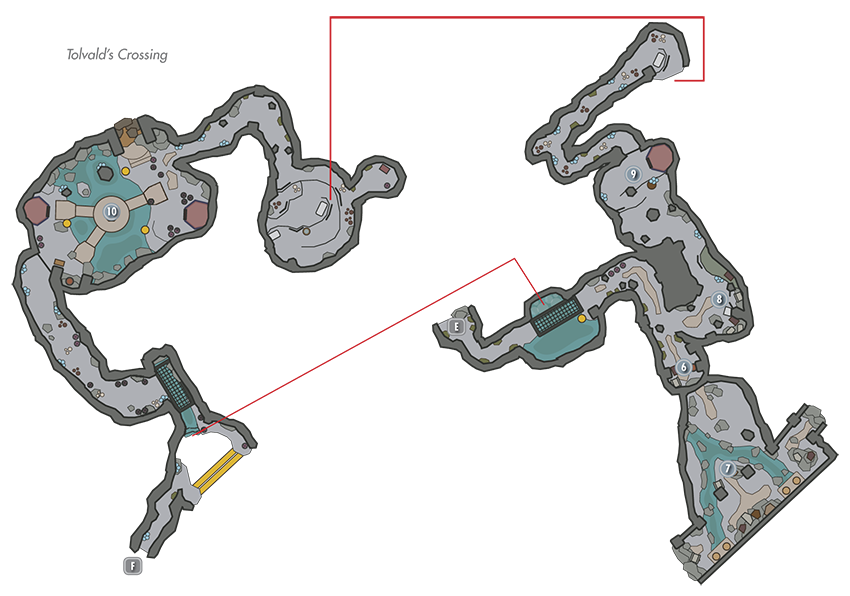
[9.23] Tolvald’s Cave
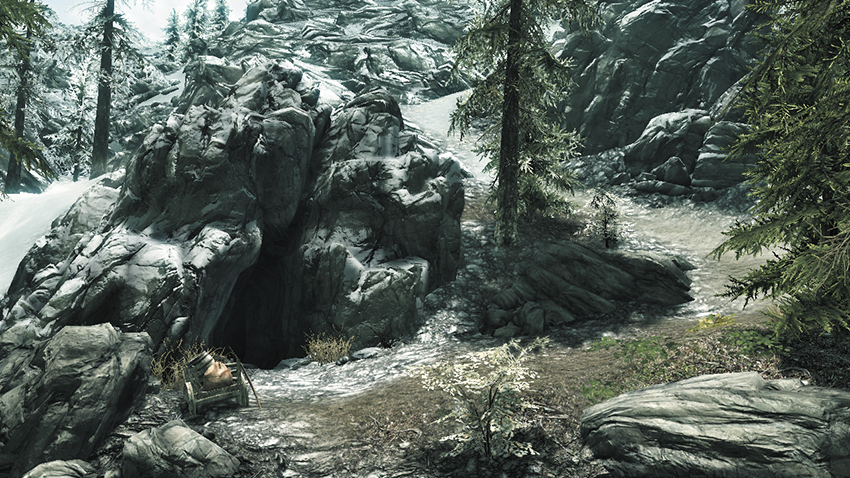
Related Quests
- Thieves Guild Radiant Quest: No Stone Unturned
- Dungeon Activity
Recommended Level: 18
Dungeon: Falmer Hive
- Animal
- Falmer
Crafting
- Alchemy Lab
- Tanning Racks (3)
Dangers
- Bear Traps
- Bone Alarm Trap
- Swinging Wall Trap (trip wire)
- Trapped Chest
Quest Items
- Crown of Barenziah
Collectibles
- Skill Book [Block]: Battle of Red Mountain [B2/10]
- Skill Book [Destruction]: Mystery of Talara, v3
- Chest(s)
- Potions
- Loose Gear
This sizeable cave lies northeast of Shor’s Stone [9.25] and runs deep into the Rift’s eastern mountains, eventually giving way to ancient dwarven ruins. After collecting all of the Unusual Gems that are scattered throughout Skyrim, you’re told to visit Tolvad’s Cave in search of a special crown, to which the gems belong.
Exit to Skyrim
Entry Cavern
Slaughter a few angry predators in the first cavern, then loot a locked chest near the central fire pit and flip through an informative journal that sits on a nearby stool. Beware of bear traps, hanging rattles, and many more predators as you make your way to the next room.
- Danger! Bear Traps, Bone Alarm Trap
- Chest (Locked: Apprentice)
Trapped Chest Chamber
An ornate metal door leads into this small, stone room. First, pull the chain on the west wall to open two side passages and slay a few Falmer. These villains would have ambushed you when you opened the room’s tantalizing trapped chest. If you can’t unlock the chest’s trap hinge, stand atop the chest when opening it to avoid being shot by arrows. Then use the Falmer passages to visit a higher chamber, where you find an Alchemy Lab and several potions.
- Danger! Trapped Chest
- Crafting: Alchemy Lab
- Potions
- Loose Gear
Falmer Lair
Kill the many Falmer in this cavern, then find a useful key on one of their bodies. Loot an odd-looking chest and then cut down an overgrown Frostbite Spider on your way to the back cavern, opening a locked chest along the way. Beware of additional Falmer emerging from small holes in the walls and find a third chest in a tent before taking the nearby passage to Tolvald’s Gap.
- Crafting: Tanning Racks (2)
- Shaman’s Key (Falmer)
- Chests (2)
- Chest (Locked: Adept)
Path to Tolvald’s Gap
Path to Tolvald’s Cave
Divided Cavern
Dispatch several Falmer and a Skeever or two as you descend into the Gap’s first cavern. Take a northwest passage to locate a small side cave with a chest in a Falmer tent and a large amount of mushrooms the Falmer have been cultivating. Backtrack out and locate another chest near a waterfall. Follow the stream to the cavern’s southern half, where many more Falmer lurk. Follow the stream to its end, then take a side passage up to the next cavern.
- Chest
- Chest (Locked: Apprentice)
- Potions
- Loose Gear
Chaurus Den
Dangerous Chaurus lurk in this far chamber. Find a chest atop the waterfall here, then take the nearby passage to arrive at the previous chamber’s high southern ledge, collecting a few potions from a nook along the way.
- Chest
- Potions
Divided Cavern Revisited
Loot another chest in a tent on this side of the cavern as you loop around to a passage that leads even deeper into the cave.
- Chest (Locked: Adept)
Path to Tolvald’s Crossing
Path to Tolvald’s Gap
Dead End
Beware of the powerful Falmer that lurks in the thick spray of the giant waterfall here, then head south when you reach a fork in the tunnel to reach this dead end, where a spirit materializes for a moment before vanishing. Inspect the interesting journal that lies near a skeleton here before looting the locked chest.
- Danger! Swinging Wall Trap (trip wire)
- Chest (Locked: Apprentice)
Old Road
If you’ve found all 24 Unusual Gems and are visiting this place as part of the “No Stone Unturned” quest, then the aforementioned dead-end passage will be opened, exposing a section of ancient underground dwarven road that’s been caved in. Sift through the rubble here to locate the Crown of Barenziah.
- Crown of Barenziah
Caravan Junkyard
Stand as far back as possible before intentionally triggering the trip wire at the start of the junction’s east passage, which leads to this treasure-filled passage. Treasured belongings pillaged from Dark Elf refugees lie heaped in a pile. You may not be able to open the giant locked chest here, but you can collect two valuable Skill Books, then explore an upper ramp to locate another locked chest before making your way to [8].
- Skill Book [Block]: Battle of Red Mountain [B2/10]
- Skill Book [Destruction]: Mystery of Talara, v3
- Chest (Locked: Expert)
- Chest (Locked: Master)
- Potion
- Loose Gear
Winding Ramp Cavern
Find a chest in a Falmer tent on your way to this tall cavern, where another mysterious Dark Elf spirit briefly appears to you once more. Inspect the nearby trailbook to uncover a bit more of the intrigue surrounding this place. Ascend the winding uphill path, being wary of the many overhead ledges from which Falmer archers can fire down at you. Find another chest in a tent before taking a high passage to [9].
- Crafting: Tanning Rack
- Chests (2)
- Loose Gear
Shallow Rapids Cavern
Several powerful Falmer and a hulking Chaurus lurk in this final cavern, which features a rushing stream. A large chest is attached to the wall near the makeshift throne the Falmer have erected here. Open the south gate and take a winding passage back to the Crossing’s first cavern. Carefully navigate the ledges and steam pipes without falling to make your way to an exit path that leads back to the start of Tolvald’s Cave.
Path to Tolvald’s Cave
Path to Tolvald’s Crossing
[9.24] Shor’s Watchtower
Related Quests
- Civil War Quest: Reunification of Skyrim
- Civil War Quest: Compelling Tribute
Recommended Level: 6
Dungeon: Special
Collectible
- Chest (Locked: Novice)
- Potion
- Loose Gear
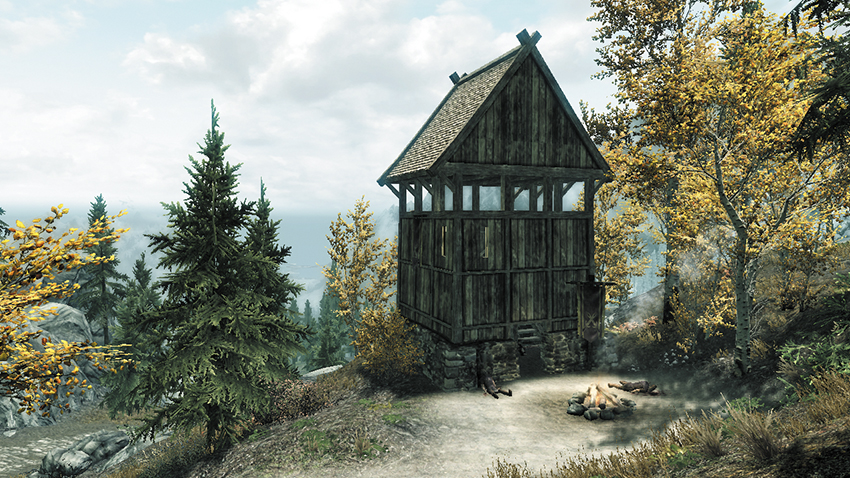
This wooden watchtower stands on the road north of Shor’s Stone, on the precipice of the cliffs that descend from the Rift into Eastmarch. The guards here been slain, so feel free to loot the tower, including the chest on its highest tier. A note on the tower’s ground floor hints at what befell the guards.
[9.25] Shor’s Stone
Related Quests
- Miscellaneous Objective: Mine or Yours* (Filnjar)
- Miscellaneous Objective: Letter for Mr. Rock-Chucker* (Sylgia)
- Favor (Activity): Mining Ore* (Grogmar gro-Burzag)
Habitation: Town
- Filnjar (Blacksmith; Marriage Prospect)
- Frostbite Spider
- Grogmar gro-Burzag
- Odfel
- Shor’s Stone Guard
- Sylgja (Marriage Prospect)
Crafting
- Blacksmith Forge
- Grindstone
- Smelter
- Tanning Rack
- Workbench
Services
- Marriage Prospect: Filnjar [61/62]
- Marriage Prospect: Sylgja [62/62]
- Trader (Blacksmith): Filnjar [33/33]
- Weapons, Apparel, Misc
- Chest(s)
- Potions
- Loose Gear
- Mineable ore (Ebony)
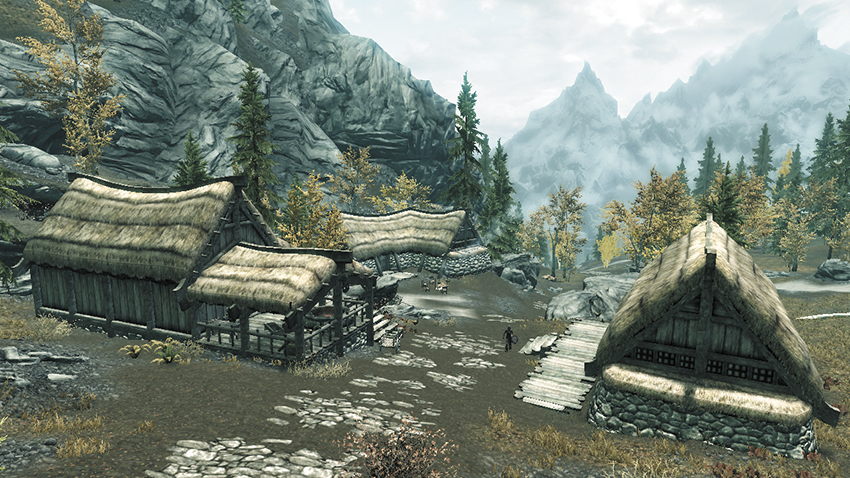
This quiet mining community lies along the Rift’s eastern road, making it a convenient stop for travelers heading between Eastmarch and the Rift. Unfortunately, the local mine has been overrun with giant spiders!
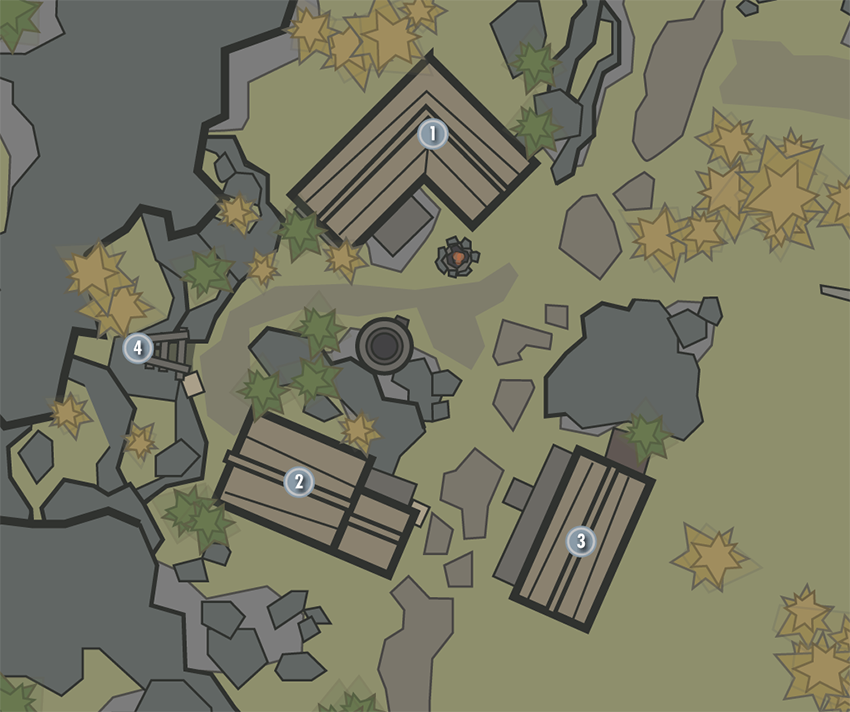
Exterior
Barter with Filnjar, the local blacksmith, or use his array of crafting stations. Speak with Filnjar to learn more about the trouble in the mine and gain a new Miscellaneous Objective.
- Crafting: Blacksmith Forge, Grindstone, Smelter, Tanning Rack, Workbench
Sylgja’s House
Breaking into Sylgja’s house is risky because she’s usually home.
- Area Is Locked (Novice)
- Chests (2)
Filnjar’s House
Filnjar has prospered over the years—raid his abode while he’s busy working outdoors to claim valuable plunder.
- Area Is Locked (Novice)
- Chests (2)
- Potions
- Loose Gear
Odfel’s House
With spiders overrunning the mine, Odfel just hangs at home. Clear out the mine so he can return to work—then plunder his vacant abode!
- Area Is Locked (Novice)
- Chest
Redbelly Mine
Slay a number of Frostbite Spiders as you descend this tall mine’s winding ramps. Splatter every arachnid to clear out the infestation, then optionally mine some valuable Ebony Ore from the veins at the bottom before backtracking out to inform Filnjar of your success.
- Knapsack
- Loose Gear
- Mineable ore (Ebony)
[9.26] Fort Greenwall
Related Quests
- Civil War Quest: Reunification of Skyrim
- Civil War Quest: The Battle for Fort Greenwall
Recommended Level: 6
Habitation: Military Fort
- Animal
- Bandit (pre-Civil War)
- Soldier (Imperial/Stormcloak, depending on the state of the Civil War)
Crafting
- Blacksmith Forge
- Grindstone
- Workbench
Collectibles
- Skill Book [One-Handed]: Mace Etiquette [C2/10]
Special Objects
- Shrine of Stendarr [4/5]
- Chest(s)
- Potions
- Loose Gear
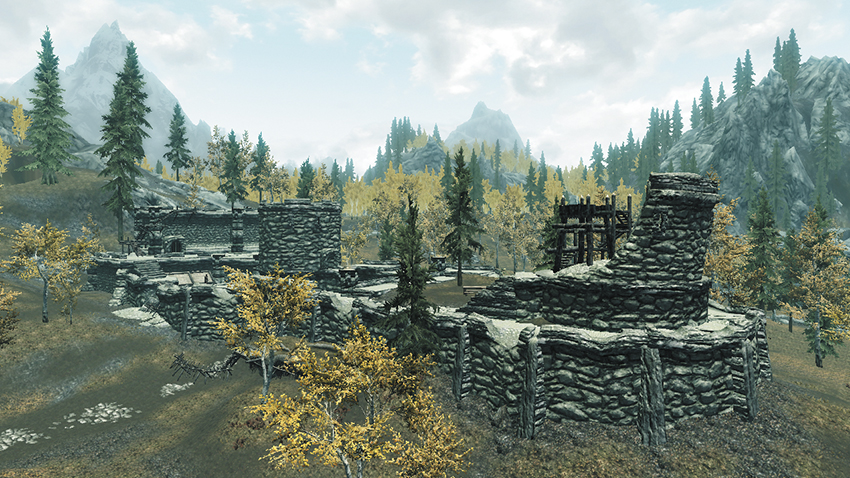
This imposing stronghold stands just south of the village of Shor’s Stone [9.25]. The Rift’s eastern road runs directly through the fort. You may therefore breach the fort quite easily, or opt to slip in through the cave. Fort Greenwall is a point of contention between the Stormcloaks and Imperials, so you may find soldiers occupying this space instead of bandits, depending on the status of the Civil War quest line.
Exterior
Dispatch a legion of bandits to secure the fort’s outer grounds. Then begin raiding its various interior sections.
- Crafting: Blacksmith Forge, Workbench
- Loose Gear
Fort Greenwall (Interior)
Slay more bandits within Fort Greenwall’s main interior. Find a grindstone in the basement and a knapsack near the tower’s upper door.
- Crafting: Grindstone
- Knapsack
- Loose Gear
Prison
The prison connects to the Captain’s Quarters, and its basement is infested with Frostbite Spiders. Cut through thick webs to make your way to the bottom, then unlock the Master-level door to access a chest.
- Chest
- Loose Gear
Captain’s Quarters
The bandit’s stalwart chief lies in the Captain’s Quarters and won’t go down without a fight. If you can’t break into this area via its locked trapdoor entrance, enter through the fort’s prison instead. Touch the small shrine you discover in here to instantly rid yourself of all diseases. A Skill Book sits on the shelf in the master bedroom.
- Area Is Locked (Master)
- Skill Book [One-Handed]: Mace Etiquette [C2/10]
- Shrine of Stendarr [4/5]
- Chest
- Potion
- Loose Gear
Cave
A small cave runs beneath Fort Greenwall. Enter via its northern mouth and pick an Expert-level gate to make your way through, emerging at a well within the fort. As you explore the cave, find a letter at the bottom of the southern pool that explains what fate befell the nearby floating corpse.
[9.27] Heartwood Mill
Related Quests
- Miscellaneous Objective: Fight or Flight* (Grosta)
Habitation: Lumber Mill
- Gralnach
- Grosta
- Rift Guard
Crafting
- Grindstone
- Tanning Rack
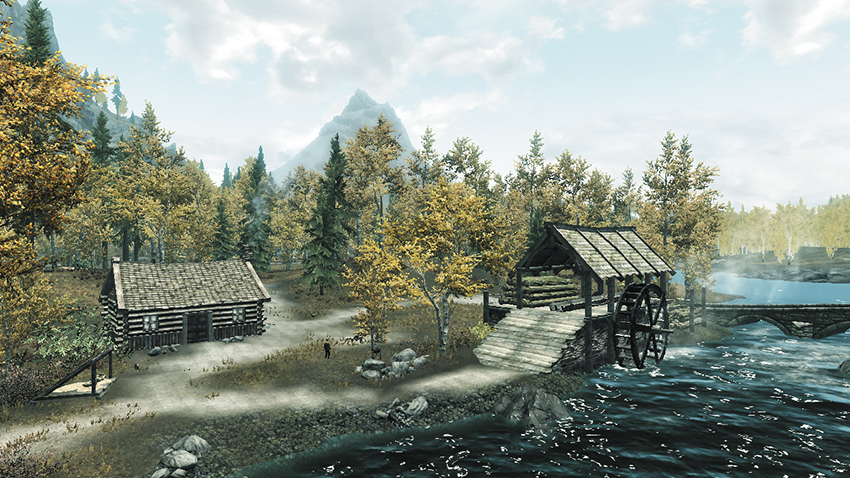
This small lumber mill, located at the west end of Lake Honrich, has fallen on hard times. Its owner has vanished, leaving his wife and child to run the place.
Exterior
Speak with Grosta to sell her any firewood you might be carrying and to gain a new Miscellaneous Objective.
- Crafting: Grindstone, Tanning Rack
Heartwood Mill (Interior)
The cabin sports a Novice-level lock, and there’s little of value inside beyond foodstuffs, ingredients, and a coin purse.
- Area Is Locked (Novice)
[9.28] Faldar’s Tooth
Recommended Level: 6
Dungeon: Bandit Camp
- Animal
- Bandit
Crafting
- Blacksmith Forge
- Grindstone
- Tanning Rack
Dangers
- Battering Ram Trap (trip wire)
- Bear Traps
- Bone Alarm Trap
- Oil Pool Trap
- Rockfall (trip wire)
- Spear Trap (pressure plates)
- Swinging Wall Trap (pressure plates/lever)
- Trapped Chest
Collectibles
- Skill Book [Alteration]: The Lunar Lorkhan
- Skill Book [Archery]: The Marksmanship Lesson
- Skill Book [Lockpicking]: Proper Lock Design [B2/10]
- Chests
- Potions aplenty
- Loose Gear
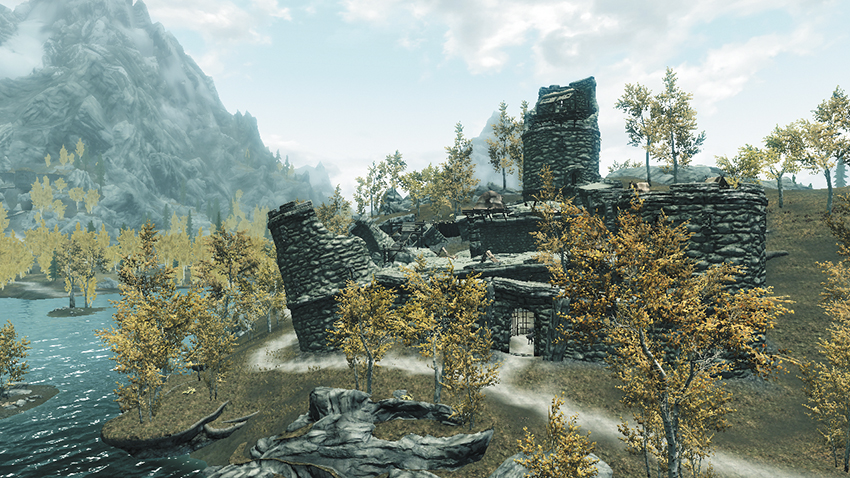
This mighty keep overlooks Lake Honrich from the north and has been overrun by lawless bandits who are running a wolf fighting ring.
Exterior
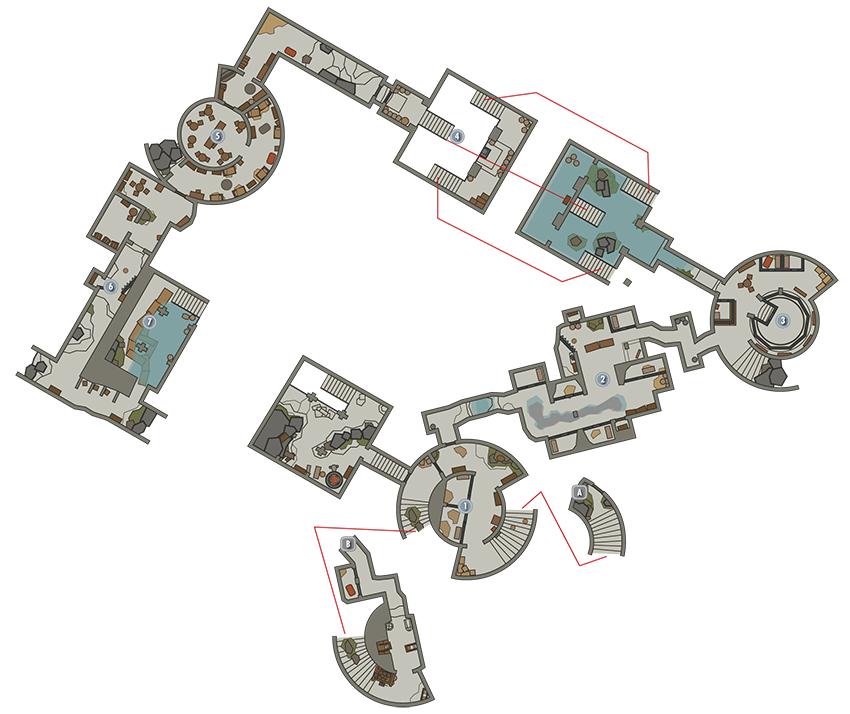
The bandits are quick to open the stronghold’s front gate when they see you approach, but it isn’t a warm welcome. They release vicious pit wolves to maul you! Slay the wicked beasts, then decide how you wish to enter the keep: either hurry inside the main gate and storm its interior, or remain outside the walls and circle around the fort’s west side to unlock an Adept-level gate and bypass the keep’s sizeable inner working altogether.
Later, after you’ve advanced to the fort’s upper ramparts, fight your way up its wooden stairs and walkways until you reach a large tent with a chest and useful key. Go back downstairs a few levels and use the key to unlock the Expert-level door of the keep’s eastern tower. Loot the chest within and proceed to the tower’s top, then follow a rampart to reach the next tower. Go in and head up to battle the bandits’ formidable leader, then loot the giant chest he was guarding and collect a couple of Skill Books.
- Skill Book [Alteration]: The Lunar Lorkhan
- Skill Book [Lockpicking]: Proper Lock Design [B2/10]
- Faldar’s Tooth Key
- Chest (Locked: Novice)
- Chest (Locked: Apprentice)
- Loose Gear
Exit to Skyrim (Lower Grounds)
Entry Tower
Avoid hanging rattles and pressure plates as you descend the keep’s first stairwell. Don’t free the caged pit wolf you encounter unless you wish to combat it. Simply go down to the lowest level and take the north passage to [2].
- Danger! Bone Alarm Trap, Spear Trap (pressure plates)
Cage Chamber
Ignite the oily floor here before you’re detected by the patrolling bandits—one of them is a mage whose fireballs may set the room ablaze if you don’t take advantage of the hazard first. Secure the room afterward, then optionally pick the Adept-level cages to free (and fight) a number of pit wolves. If you’re swift, carefully step on the pressure plate to trigger a swinging wall trap, then deftly slip around the spiked gate to reach a locked chest in the small nook beyond. Pull the lever afterward to unhinge the spiked gate and escape the nook. Finally, unlock the Novice-level north door to access a small closet filled with potions.
- Danger! Oil Pool Trap, Swinging Wall Trap (pressure plate/lever)
- Crafting: Tanning Rack
- Chest (Locked: Adept)
- Potions aplenty
- Loose Gear
Training Pit
The bandits use this wide chamber to train their wolves and bet on fights. Slaughter the distracted onlookers, then open the locked cage door and check behind the betting counter to discover loads of gold and a large chest.
- Chest
- Potion
- Loose Gear
Waterlogged Chamber
A few feet of water cover the floor of this chamber. Search behind the stairs to discover a submerged chest, then scale the southern steps to find worthy loot and a satchel. Tug the pullbar on the southern balcony to open the far portcullis so you may proceed to [5].
- Chest
- Apothecary’s Satchel
- Loose Gear
Kitchen and Quarters
Collect an interesting journal on your way to this area, where a slew of bandits await. Fight hard to slay this large group of scoundrels. Discover a Skill Book on a small table in the room with the firewood (west of the curved stairs).
- Skill Book [Archery]: The Marksmanship Lesson
- Potions
- Loose Gear
Exit Passage
Make a thorough search for loot as you navigate the keep’s last few corridors, claiming plenty of potions. Beware of a trapped treasure chest, opening it from the side to avoid being shot by arrows or deactivating its trigger hinge. Dodge the pressure plate in the following passage on your way to the fort’s final chamber.
- Danger! Bone Alarm Trap, Swinging Wall Trap (pressure plate), Trapped Chest
- Potions aplenty
- Loose Gear
Forge
Beware the trip wire that lies just underwater as you enter this final, waterlogged chamber. Numerous bear traps lie just beneath the water’s surface as well, so keep an eye to the ground as you carefully creep through. Go upstairs and slay one final bandit to secure a crafting area. Carry on to find yourself back at [1], in an area you couldn’t have reached before.
- Danger! Battering Ram Trap (trip wire), Bear Traps
- Crafting: Blacksmith Forge, Grindstone
- Chest (Locked: Novice)
- Loose Gear
Entry Tower Revisited
Pull the wall chain as you reenter this first chamber to lower the nearby portcullis. Now you’ll never need to take the long way around the keep again. Mind a trip wire as you head upstairs, and exit the keep via the upstairs door to reach the upper exterior ramparts (see the previous “Exterior” section for more.)
- Rockfall (trip wire)
Exit to Skyrim (Upper Ramparts)
[9.29] Goldenglow Estate
Related Quests
- Side Quest: Captured Critters*
- Thieves Guild Quest: Loud and Clear
- Thieves Guild Radiant Quest: Larceny Targets*
Recommended Level: 6
Dungeon: Special
- Animal
- Aringoth
- Mercenary
Dangers
- Flail Trap (trip wire)
- Oil Lamp Trap (trip wire)
- Oil Pool Traps
Quest Items
- Goldenglow Bill of Sale
Collectibles
- Captured Critter: Bee in a Jar [5/5]
- Larceny Target: Queen Bee Statue [7/7]
- Skill Book [Pickpocket]: Guide to Better Thieving
- Area Is Locked (quest required)
- Chest(s)
- Potions
- Loose Gear
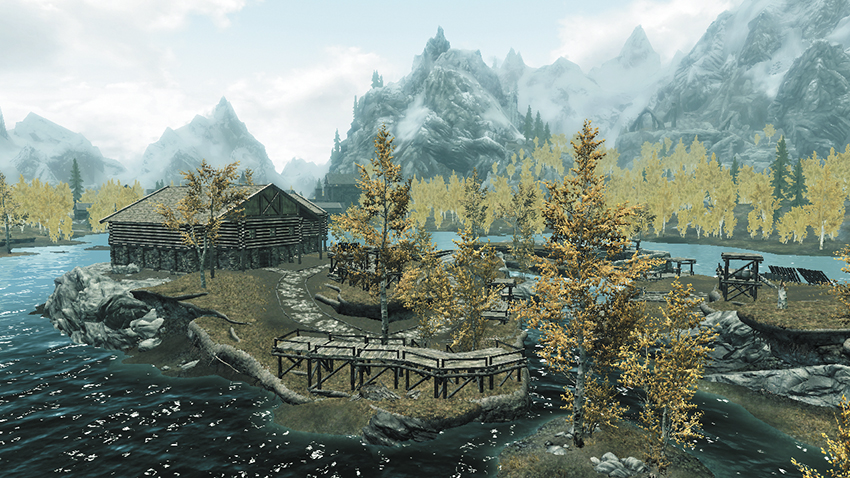
West of Riften, the sprawling Goldenglow Estate spans several islands across Lake Honrich. A small army of rugged Mercenaries guard the compound, and the south gate remains locked at all times; however, you discover means of slipping onto the premises during Thieves Guild Quest: Loud and Clear.
Main Gate
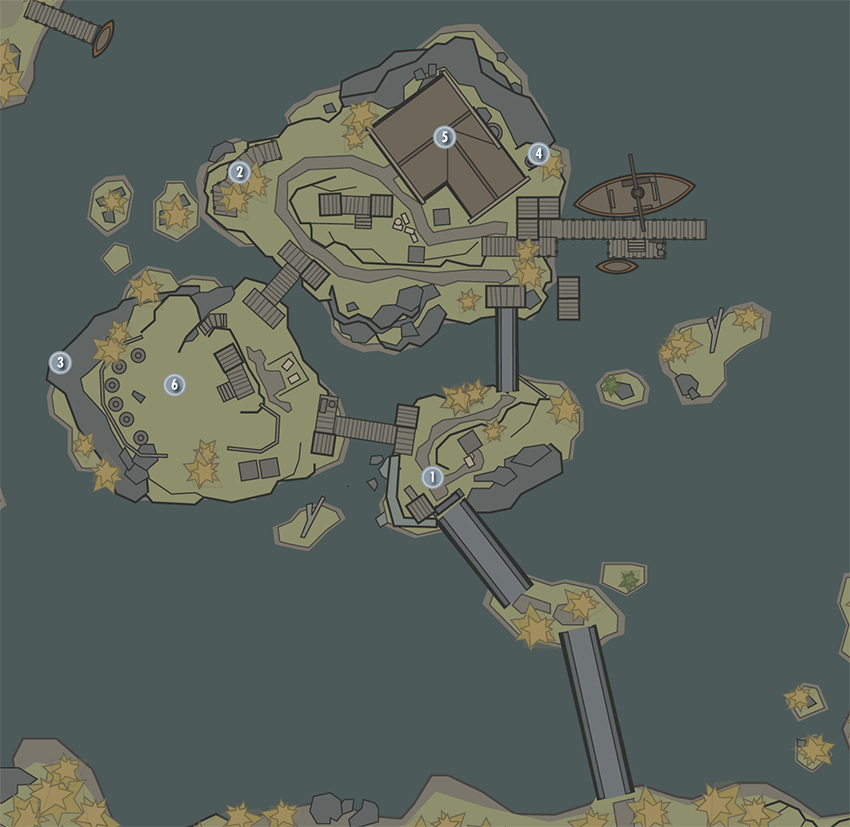
Goldenglow is a secure compound with only one entrance, and the guards aren’t about to let anyone in.
Sewer Access
Approach Goldenglow Estate from the north to discover a low bank that you can climb onto, which is located here. This means of entry is only available during the “Loud and Clear” quest. Enter the nearby sewer to begin your infiltration.
Nirnroot Nook
Before entering the sewer, optionally swim over here to find a rare sprig of tingling Nirnroot growing down by the water.
Goldenglow Estate Sewer
Slay the Skeevers that scutter about the sewer, and safely trigger the trip wire near the oily floor with a ranged attack to ignite the oil and torch some more. If you can, unlock the Adept-level door that follows to claim a Skill Book and loot a chest. Beware of another trip-wire trap as you advance.
- Danger! Flail Trap (trip wire), Oil Lamp Trap (trip wire), Oil Pool Trap
- Skill Book [Pickpocket]: Guide to Better Thieving
- Chest (Locked: Apprentice)
- Loose gear
Sewer Exit
The sewer spits you out behind the estate building, close to its rear door. Unfortunately, the door features an Expert-level lock—if you can’t pick it, you’ll need to risk sneaking around front and slipping in through the manor’s unlocked front door.
Goldenglow Estate (Main Floor)
The estate’s ground floor features two locked closets. Avoid the guards who patrol the halls and open both Adept-level doors to claim valuable loot from within. Cut through the central dining room to locate the stairs that lead up to the second floor, along with a Novice-level locked metal door that leads down to the basement.
- Strongbox (Adept)
- Chests (2)
- Knapsack
- Apothecary’s Satchel
- Potions
Goldenglow Estate (Second Floor)
Visit the second floor in search of useful keys and loot. Sneak through the central bedroom to avoid detection and open an Adept-level door to raid a closet with an apothecary satchel hidden atop a shelf. Open the Novice-level door to Aringoth’s bedchamber and quietly swipe a pair of keys from the wall hooks. Loot the chest by the bed as well, and take the unusual Bee in a Jar off the dresser. Lastly, nab the Queen Bee Statue from the nightstand—one of your fellow Thieves Guild comrades will be interested in this.
- Caged Critter: Bee in a Jar [5/5]
- Larceny Target: Queen Bee Statue [7/7]
- Goldenglow Cellar Key
- Goldenglow Safe Key
- Chest (Locked: Apprentice)
- Knapsack
- Apothecary’s Satchel
- Loose gear
Goldenglow Estate (Basement)
Still more Mercenaries guard the basement. Continue to sneak through here, or slay the men so you may loot the chest they guard. Both men carry a Goldenglow Cellar Key, if you didn’t obtain one from the second floor. Farther ahead, a seated guard can be barbecued by igniting a long patch of oil on the floor. Go downstairs to at last find the safe you seek, along with another chest.
- Danger! Oil Pool Trap
- Goldenglow Bill of Sale (Aringoth’s Safe)
- Goldenglow Cellar Keys (Mercenaries)
- Aringoth’s Safe (Locked: Expert)
- Chest (Locked: Novice)
- Chest (Locked: Apprentice)
Apiaries
Sneak over to this collection of beehives here—or simply sprint over at breakneck speed, hoping to outrun the guards—and use any fire-based attack to burn three of the apiaries. This completes a quest objective, but you’d better clear out of here fast!
[9.30] Autumnshade Clearing
Recommended Level: 14
Dungeon: Spriggan Grove
- Animal
- Spriggan
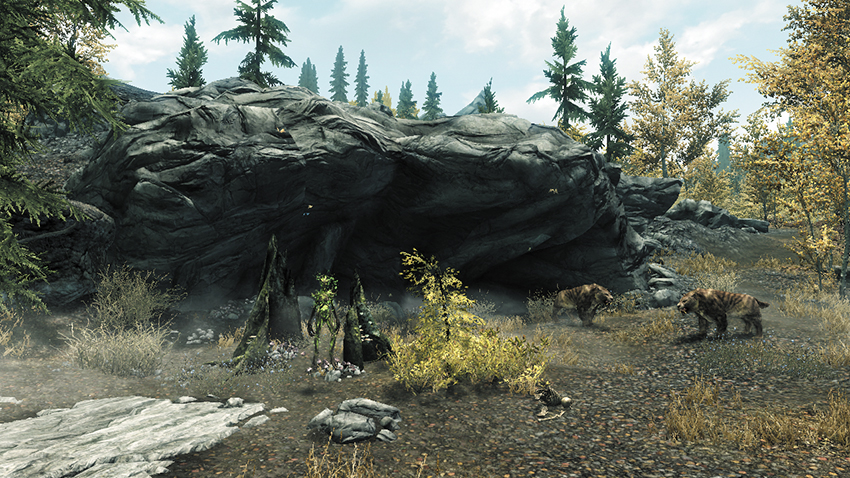
Located north of Lake Honrich, this seemingly tranquil clearing is actually home to ferocious animals and reclusive forest spirits that may well attack trespassers. Loot the bodies of two slain hunters here, which lie in the brush near the west rock, to obtain some worthy gear.
[9.31] Merryfair Farm
Related Quests
- Miscellaneous Objective: Bow to the Master* (Dravin Llanith)
- Favor (Activity): Harvesting Crops* (Synda Llanith)
Habitation: Farm
- Dravin Llanith
- Rift Guard
- Synda Llanith
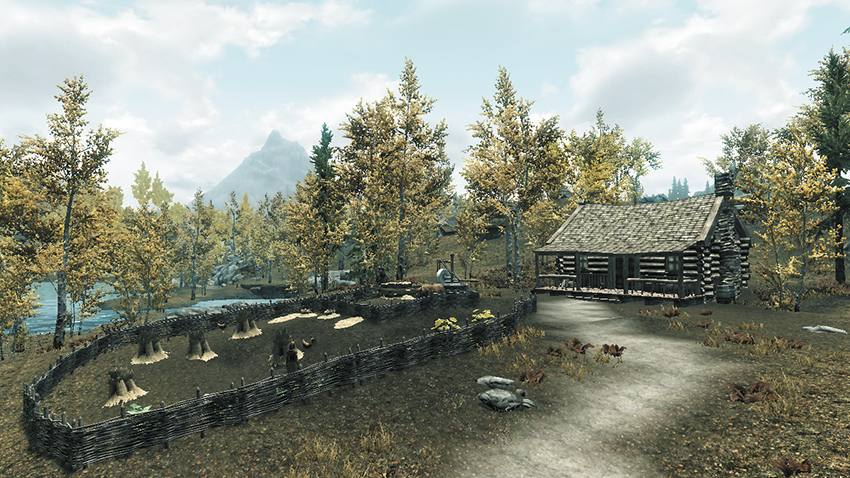
This quiet farm lies just northwest of Riften. Speak with the farm’s owner, Dravin Llanith, to gain a new Side Quest.
Merryfair Farm (Interior)
The farmhouse is locked, and there’s little reason to break in. The only item of particular value is a coin purse tucked away near the basement bed.
- Area Is Locked (Novice)
[9.32] Riften Stables
- Hofgrir Horse-Crusher (Stablemaster)
- Sigaar (Carriage Driver)
Services
- Trader (Carriage Driver): Sigaar [5/5]
- Trader (Stablemaster): Hofgrir Horse-Crusher [5/5]
- Potions
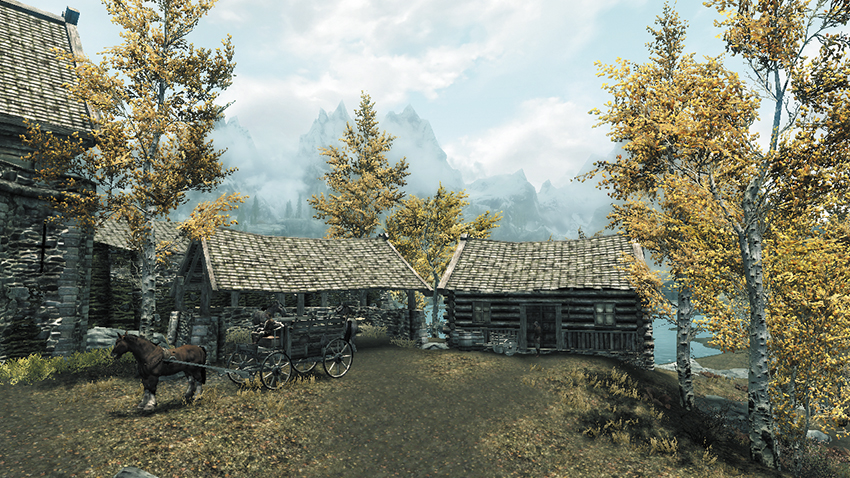
Swing by the stables that lie just outside Riften’s main gate to purchase a horse or rent a carriage ride to another of Skyrim’s bustling capitals. You can also speak with Hofgrir to participate in a challenging fistfight that can earn you 100 gold if you manage to KO the burly braggart.
Riften Stables (Interior)
Hofgrir’s home is securely locked, but valuable treasure awaits those who manage to break in. Reading a certain book inside the cabin can potentially update your map with new locations.
- Area Is Locked (Adept)
- Strongbox (Apprentice)
[9.33] Fallowstone Cave [9.33] Giant’s Grove
Related Quests
- Daedric Quest: The Cursed Tribe
- Dungeon Activity
Dungeon: Animal Den/Giant Camp
- Animal
- Giant
Quest Items
- Shagrol’s Warhammer
Collectibles
- Unique Weapon: Shagrol’s Warhammer [67/80]
- Unique Weapon: Volendrung [68/80]
- Chest(s)
- Potions
- Loose Gear
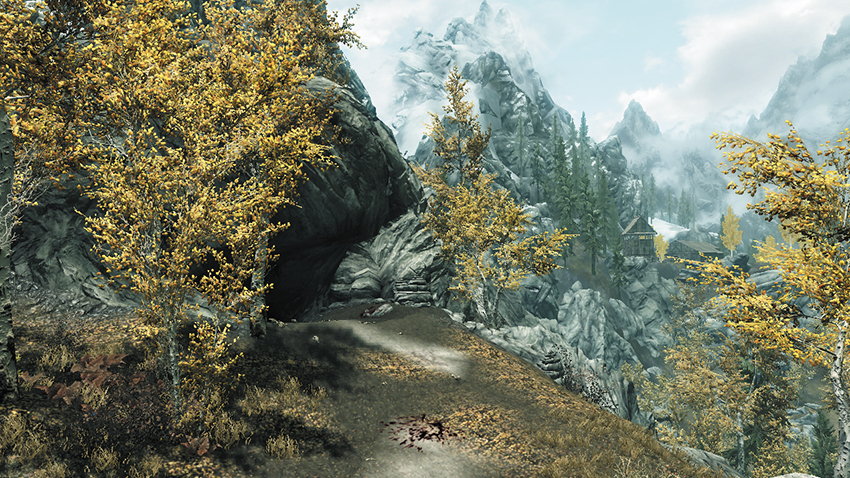
This cavernous cave is located east of Riften, near the mountains that form Skyrim’s border. Normally, Fallowstone Cave is filled with vicious predators, but during Daedric Quest: The Cursed Tribe, you’ll find towering giants roaming the cave instead. You’re also able to delve deeper into the cave during this quest, visiting a remote grove that’s home to Giants.
Fallowstone Cave (Normal)
Beware of hungry predators as you follow the rushing stream. Stick to the south wall to discover a bandit’s corpse inside a web-covered nook—collect the nearby potions after looting the body. Kill or avoid more predators as you follow the stream into an east passage. You can loot another slain bandit that lies in a southwest nook if you slay the nearby bear. Proceed up the path that follows, slaughtering more bears on your way up to a high, narrow trail that overlooks the main cavern. Unlock a large chest on this narrow ledge here as you proceed back to where you entered the cave.
- Chest (Locked: Apprentice)
- Potions
- Loose Gear
Fallowstone Cave (During “The Cursed Tribe”)
All of the aforementioned goodies are still present within Fallowstone Cave when you visit the place with Chief Yamarz. Follow the Orc as he charges recklessly into the cave and battles a hulking giant. Help Yamarz bring down the brute, then loot the giant’s remains, along with the chest near the firepit, which wasn’t present in Fallowstone Cave before. Then simply continue following Yamarz as he battles another giant and a few Cave Bears. The Orc Chief leads you up a path to the Giant’s Grove, which does not exist until you come here with Yamarz.
- Chest (Locked: Novice)
- Potions
Giant’s Grove
The Giant’s Grove is a large, outdoor area that can only be accessed by traveling through Fallowstone Cave; however, the trail that leads to the grove isn’t present within Fallowstone until you come here with Chief Yamarz as part of “The Cursed Tribe” quest. Decide if you wish to slay the mighty giant here, or let Yamarz do it. The chief will die if you tell him to go, forcing you to finish his work, but he’ll also attack you if you agree to slay the giant for him, hoping to keep your mouth shut about who really completed the task. If you choose to battle this mighty brute, exploit the rocks and trees here to keep distance from him. Relieve the Giant of Shagrol’s Warhammer to advance the quest, then raid the large chest near the bloodstained altar before making your way back to Largashbur [9.36].
- Area Is Locked (quest required)
- Shagrol’s Warhammer (Giant)
- Chest
- Potions
[9.34] Lost Prospect Mine
Related Quests
- Dungeon Activity
Recommended Level: 6
Collectible
- Potion
- Loose Gear
- Mineable ore (Gold)
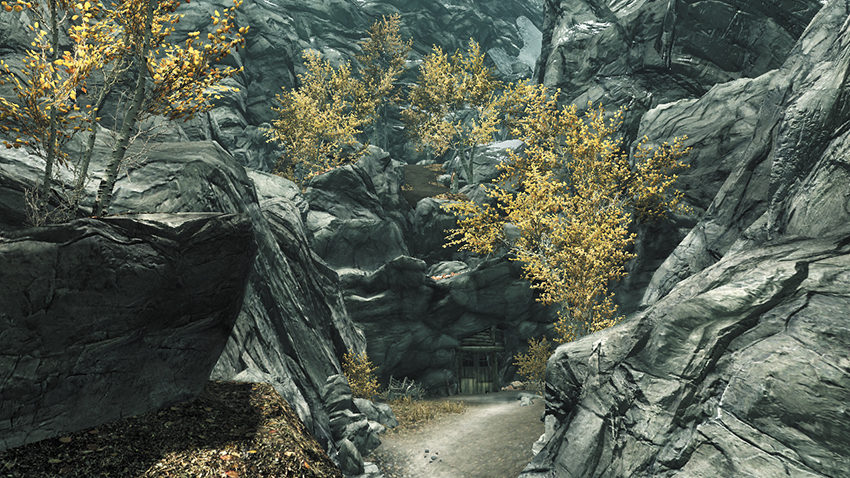
This small mine, located in a valley on the Rift’s far eastern edge, is believed to be depleted and has thus been abandoned. The intrepid explorer can still find value in this forgotten place, however.
Lost Prospect Mine (Interior)
Find an interesting journal on a table in the mine’s central cavern, then locate some loose gear in the short side passages. Use the Whirlwind Sprint Shout (or make a very challenging jump) to reach the tunnel that stretches beyond the waterfall. Explore the tunnel’s far end to discover a thick vein of precious Gold Ore, along with the skeletal remains of the missing miner.
[9.35] Black-Briar Lodge
Related Quests
- Side Quest: Promises to Keep
Dungeon: Special
- Black-Briar Mercenary
- Frost (horse)
Quest Items
- Frost’s Identity Papers
Collectibles
- Skill Book [Sneak]: Legend of the Krately House [B2/10]
- Unusual Gem: [24/24]
- Chest(s)
- Potions
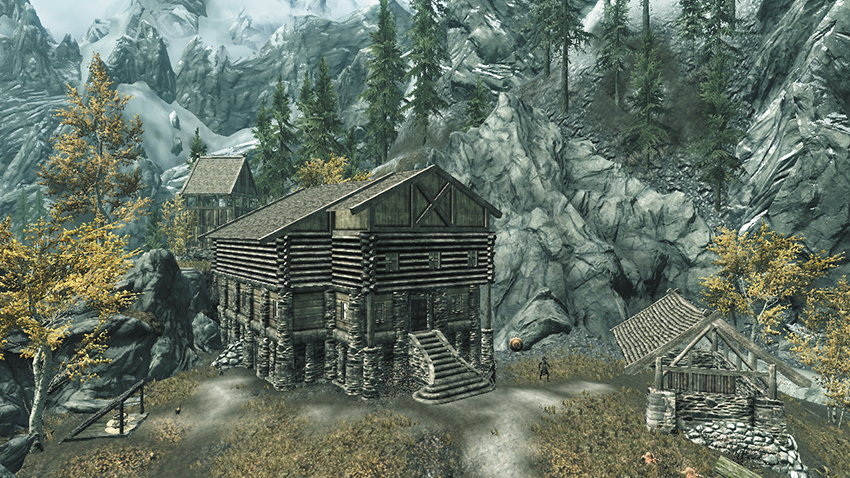
This sizable estate is nestled among the Rift’s eastern mountains and is home to the Black-Briar family—a renowned lineage of proud brewers who have grown wealthy enough to hire formidable mercenaries to protect their interests. You must break into Black-Briar Lodge to steal a horse during Side Quest: Promises to Keep.
Exterior
Frost is kept in the southeast stables, but you first need to steal his Identity Papers. Wait for cover of night, then slip around and enter the lodge via the unlocked side door along its west wall—this leads into the manor’s largely unguarded basement. Or take a more direct approach by slaying the exterior guards to obtain keys from their corpses, which unlock the lodge’s Master-level front door. Once you’ve acquired Frost’s Identity Papers, slip back out and sneak around behind the stables to approach Frost without being noticed.
- Black-Briar Lodge Key (Black-Briar Mercenaries)
Black-Briar Lodge (Basement)
A lone mercenary guards the basement. Wait a while and he’ll go to sleep if it’s late. Pick the nearby Adept-level wooden door, or pickpocket a key from the basement guard who opens it. Swipe Frost’s Identity Papers from the end table in the small room beyond, which also features a chest.
- Black-Briar Lodge Key (Black-Briar Mercenary)
- Frost’s Identity Papers
- Chest (Locked: Apprentice)
- Apothecary’s Satchel
- Potions
Black-Briar Lodge (Upper Floors)
The lodge’s main floor holds little of interest. Slay or slip past the guards in the dining hall, then go upstairs and visit the south bedroom to discover a Skill Book and an Unusual Gem that pertains to Thieves Guild Radiant Quest: No Stone Unturned. Lastly, backtrack out of the bedroom and search near the north upstairs door to spy a small chest that’s tucked away on a shelf. The north door leads to a backyard area that’s patrolled by more guards.
- Skill Book [Sneak]: Legend of the Krately House [B2/10]
- Unusual Gem: [24/24]
- Chest (Locked: Novice)
[9.36] Largashbur
Related Quests
- Daedric Quest: The Cursed Tribe
- Side Quest: The Forgemaster’s Fingers
Recommended Level: 6
Habitation: Orc Stronghold
- Atub (Trainer: Illusion)
- Garakh
- Gularzob
- Lob
- Ogol
- Shagrol
- Ugor
Crafting
- Alchemy Lab
- Blacksmith Forge
- Grindstone
- Workbench
Services
- Follower: Lob [43/47]
- Follower: Ogol [44/47]
- Follower: Ugor [45/47]
- Trainer [Illusion: Expert]: Atub [2/2]
Collectibles
- Skill Book [Block]: Battle of Red Mountain
- Area Is Locked (quest required)
- Chest(s)
- Potions
- Loose Gear
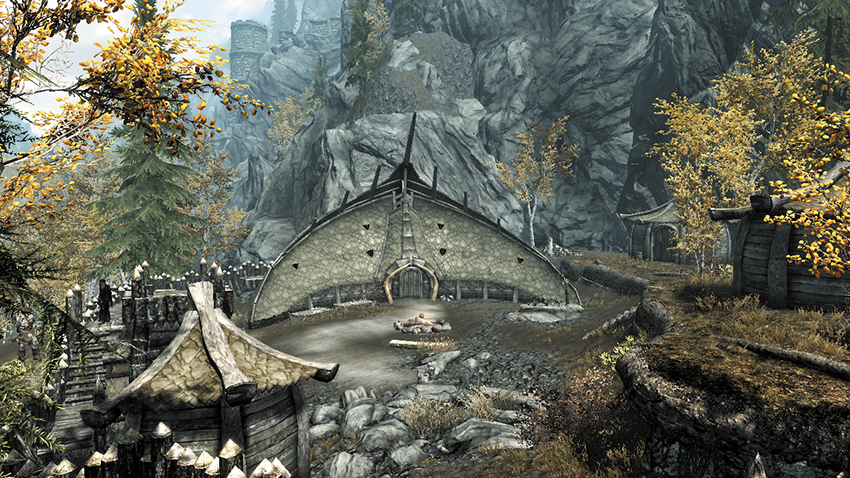
This Orc stronghold stands in the Rift’s southern mountains, to the southwest of Lake Honrich. The Orcs here have fallen under a dreadful curse and will reluctantly accept the aid of an outsider.
Exterior
The first time you visit Largashbur, you’ll witness the Orcs defending their stronghold from an enraged giant. Speak with the Orcs after the battle to learn of their current plight with the giants and gain a new Side Quest. The Orcs won’t allow you to enter Largashbur until you’ve gathered several items that Atub needs to cure his cursed chief, Yamarz. (See the quest walkthrough for “The Cursed Tribe” for help in tracking these down.) Once you’re granted entry, you can utilize a number of crafting stations and locate a locked chest near the entrance to the Largashbur Cellar.
- Crafting: Alchemy Lab, Blacksmith Forge, Grindstone, Workbench
- Chest (Locked: Master)
- Loose Gear
Longhouse
If you dare to steal from the Orcs, you’ll find the Longhouse packed with valuables.
- Chests (2)
- Chest (Locked: Master)
- Potions
- Loose Gear
Cellar
Enter the Longhouse’s cellar via an exterior trapdoor and loot the place without being seen. The middle book on the shelf is a Skill Book.
- Skill Book [Block]: Battle of Red Mountain
- Chest (Locked: Novice)
- Potions
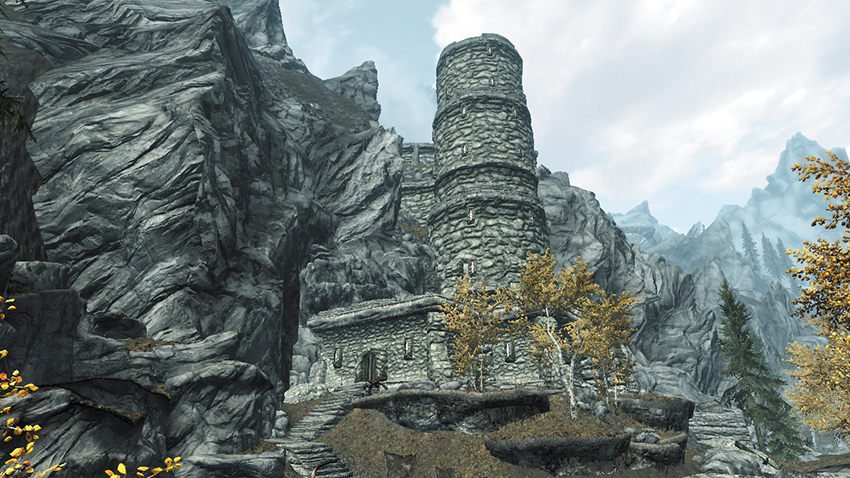
[9.37] Darklight Tower
Related Quests
- Dungeon Quest: Repentance
Recommended Level: 8
Dungeon: Hagraven Nest
- Animal
- Hag
- Hagraven
- Illia (Follower)
- Silvia
Crafting
- Alchemy Lab
- Arcane Enchanter
Services
- Follower: Illia [46/47]
Dangers
- Swinging Wall Trap (pressure plate)
Collectibles
- Skill Book [Destruction]: Horrors of Castle Xyr
- Skill Book [Destruction]: Mystery of Talara, v3
- Skill Book [Illusion]: 2920, Sun’s Dawn, v2 [A2/10]
- Unique Weapon: Staff of Hag’s Wrath [69/80]
- Chests
- Potions aplenty
- Loose Gear
This stronghold, which stands nestled against the Rift’s southern mountains to the southwest of Riften, derives its name from its tall central tower, which can be observed from a great distance. With the keep’s outer wall in ruins, breaching the tower isn’t nearly as challenging as it might have been in days of yore—simply scale the outer steps and head inside.
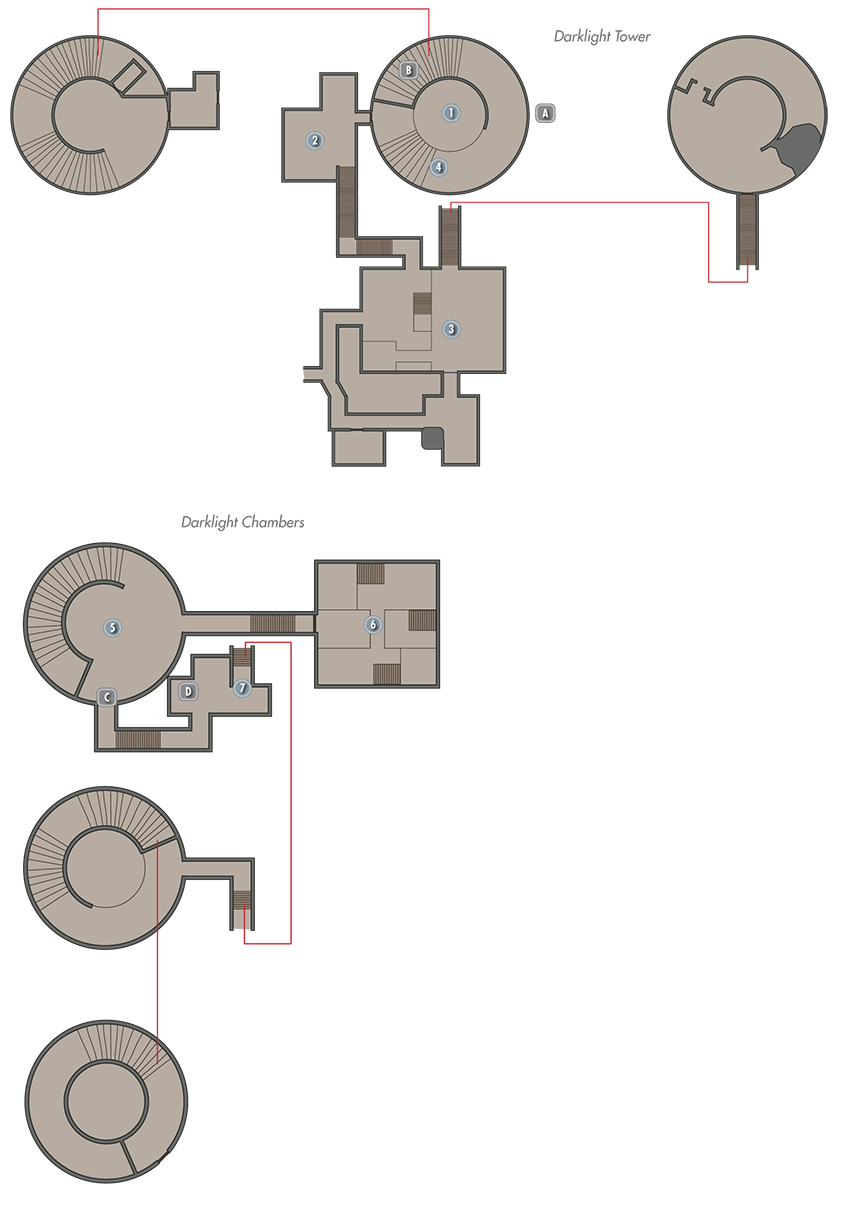
Exit to Skyrim
Entry Chamber
Speak with a woman named Illia in the tower’s first cavern to learn that her mother is about to be made a part of some nefarious ritual. Agree to help Illia to gain a new Side Quest that involves rescuing her mother from the Darklight coven, then head upstairs to the room’s balcony and slay a few Frostbite Spiders on your way to [2].
Lab
Kill a skillful witch in this chamber, then loot the small chest that’s tucked away in the northwest corner.
- Crafting: Alchemy Lab
- Chest
- Potions
- Loose Gear
Beast Chamber and West Passage
Another dangerous witch lurks in this large room, along with a fierce predator. Scale the steps and cross an arc to reach a platform with a few potions. Avoid the pressure plate here. Drop to the ground floor and follow Illia into the west passage. Destroy some thick webs as you go to expose a hidden chest. Open the locked south door that requires a special key by pickpocketing the needed key from Illia—you’ll find valuable potions in the small closet beyond. Pull a lever to return to the main chamber, then cut straight across and head upstairs to find yourself in a high room that lies directly above [1].
- Danger! Swinging Wall Trap (pressure plate)
- Chest
- Potions aplenty
Hagraven Chamber
Battle ferocious monsters and a Hagraven in this room, which lies directly above [1]. Raid the room after things settle down before proceeding through the door that leads to the Darklight Chambers.
- Skill Book [Illusion]: 2920, Sun’s Dawn, v2 [A2/10]
- Chest
Door to Darklight Chambers
Door to Darklight Tower
Locked Door Chamber
Cut down a pair of witches on your way up the initial staircase. The door that leads toward Illia’s mother is locked. Take the east passage and enter the adjoining chamber instead. A Skill Book rests on a table that overlooks the central spike pit.
- Skill Book [Destruction]: Mystery of Talara, v3
Hagraven Lair
Defeat another dangerous Hagraven and a monster in this chamber to obtain a key, then raid a couple of chests and swipe several potions before returning to [5] to open the locked door.
- Darklight Tower Key (Hagraven)
- Chest
- Chest (Locked: Master)
- Potions
Study
Slay another witch in this crafting area, then loot a chest before proceeding upstairs. You soon emerge on high balcony back at [5]. Kill a Hag and two trolls up here, then proceed upstairs and head outside to face off against Illia’s corrupted mother at the tower’s apex.
- Crafting: Arcane Enchanter
- Chest
- Potions
- Loose Gear
Exit to Skyrim
Tower Apex
Illia’s mother, Silvia, awaits just outside the tower. Sit in the chair when instructed and wait for Illia to attack her mother by surprise, then join in and slay Silvia to complete Illia’s quest. Invite Illia to continue adventuring with you if you like—she’s a worthy companion. Raid a large chest in the nearby tent and claim the Skill Book on the table before setting off to new adventure.
- Skill Book [Destruction]: Horrors of Castle Xyr
- Unique Weapon: Staff of Hag’s Wrath [69/80]
- Chest
- Potions
[9.38] Ruins of Rkund
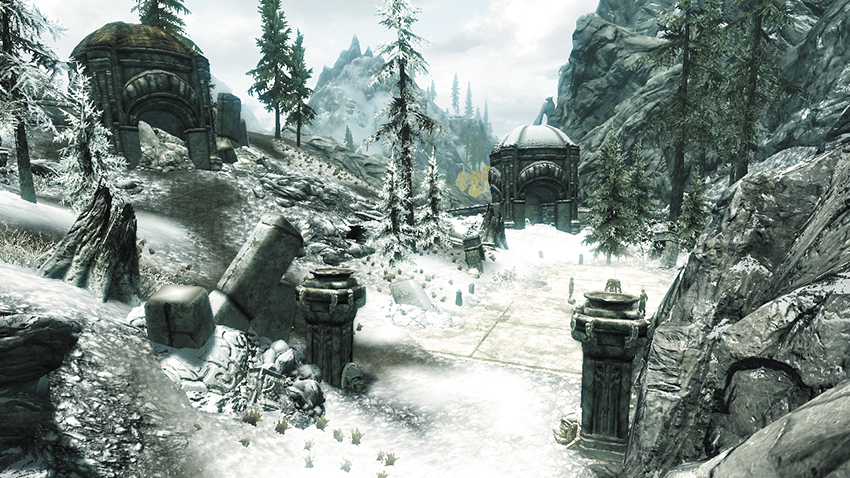
Recommended Level: 6
Dungeon: Special
- Wisp
- Wispmother
Collectible
- Chest
These remote Dwarven ruins lie within the Rift’s southern mountains, on the edge of Skyrim. The best way to reach this site is by navigating Darklight Tower [9.37] and exiting in the mountains. The ruins here are guarded by several wisps and a formidable Wispmother. Slay these enemies so you may safely loot a dwarven chest that’s tucked away in the far tower.
[9.39] Crystaldrift Cave
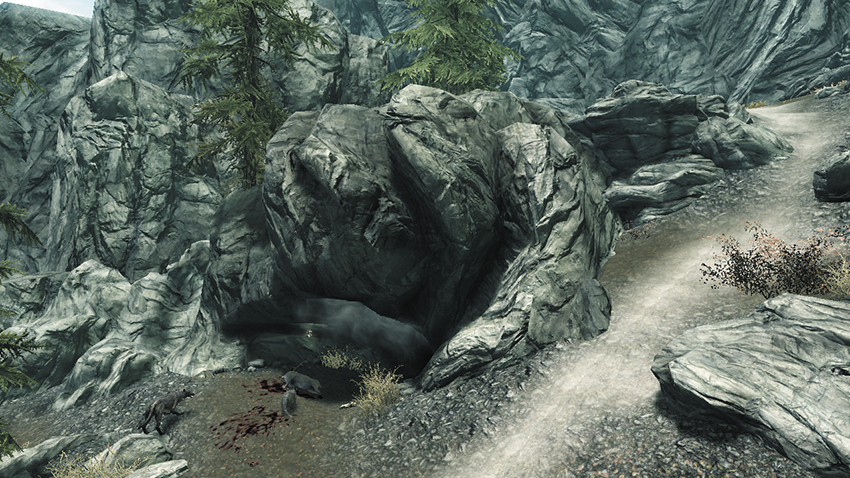
Related Quests
- Dungeon Activity
Dungeon: Animal Den
- Animal
- Gadnor (deceased)
Collectibles
- Unique Weapon: Gadnor’s Staff of Charming [70/80]
Special Objects
- Shrine of Kynareth [6/6]
- Chest
- Apothecary’s Satchel
- Potions
- Loose Gear
This small animal cave lies in the mountains south of Riften. Slay the bear that lurks just outside, then go in to find several ravenous Sabre Cats and wolves. Kill the beasts and then inspect the body of Gadnor, who lies atop the central boulder, and collect the nearby staff to obtain a unique weapon. Raid a chest here as well, and touch the small Shrine of Kynareth to instantly cure any diseases you might have.
[9.40] Lost Tongue Overlook
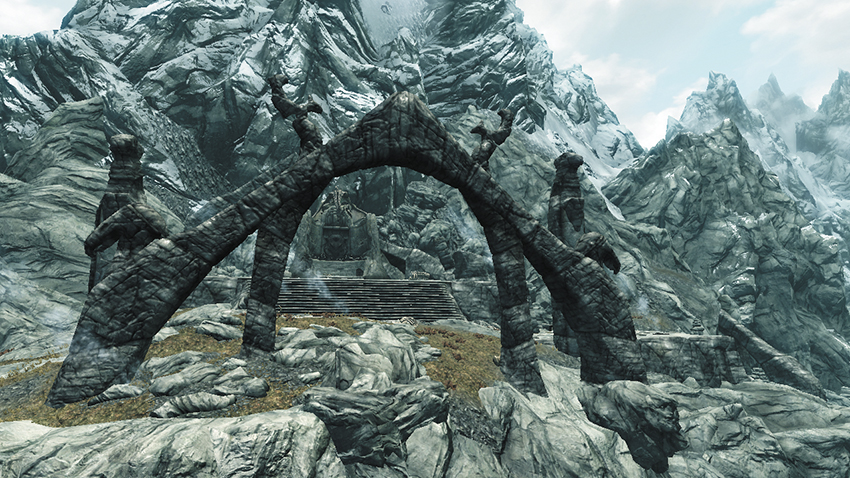
Dungeon: Dragon Lair
- Dragon (after Main Quest: Dragon Rising)
- Master Necromancer (pre-Dragon Rising)
- Skeleton
Dangers
- Rune Traps
Special Objects
- Word Wall: Dismaying Shout [3/3]
- Chest
- Potion
In the mountains south of Riften, on the very edge of Skyrim, long stone steps lead up to a breathtaking overlook. Use a ranged attack to detonate a rune trap from afar as you make your ascent. You may encounter a mage here unless you’ve advanced past the “Dragon Rising” quest—then you’ll find a far more intimidating dragon on the premises! Cut down the beast so you may benefit from the nearby Word Wall, and loot the large chest that’s also found here.
[9.41] Snow-Shod Farm
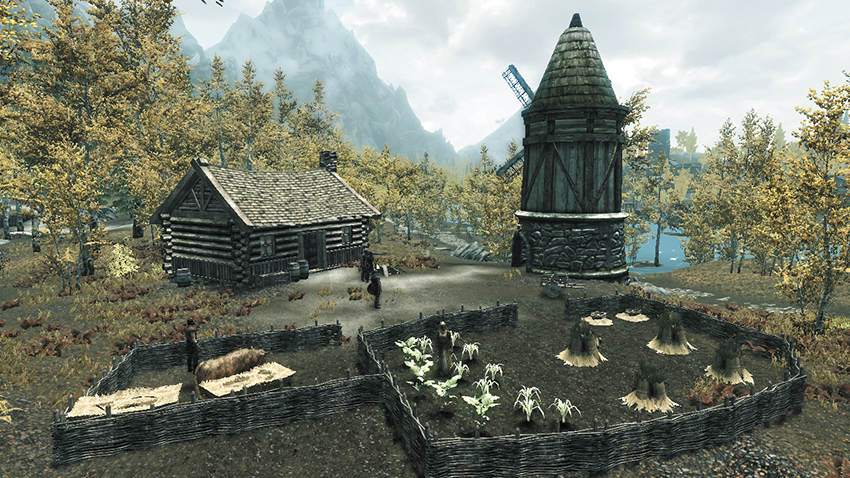
Related Quests
- Favor (Activity): Harvesting Crops* (Addvild)
Habitation: Farm
- Addvild
- Leonara Arius
- Riften Guard
Collectibles
- Skill Book [Alteration]: Reality & Other Falsehoods [C2/10]
This small farm lies just southwest of Riften. Harvest the growing crops and then sell them back to the farm’s owner, Addvild, for some honest coin.
Snow-Shod Farm (Interior)
The cabin’s lock is easy enough to pick, and there’s a Skill Book on the bottom of the shelf in the basement.
- Area Is Locked (Novice)
- Skill Book [Alteration]: Reality & Other Falsehoods [C2/10]
[9.42] The Shadow Stone
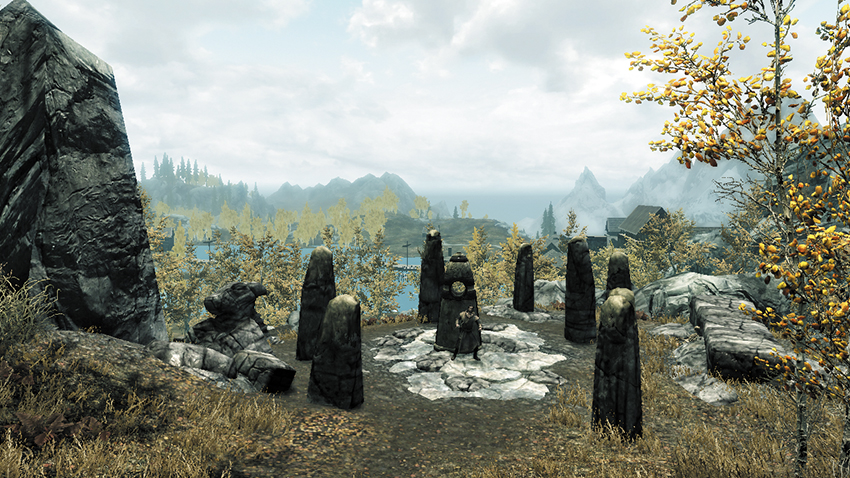
Recommended Level: 6
Dungeon: Special
- Warlock
Special Objects
- Standing Stone: The Shadow Stone [13/13]
South of Riften, these ancient stones stand atop a short hill. Defeat the guardian mage and inspect the central Standing Stone to accept a new sign blessing. Once a day, those under the sign of the Shadow can become invisible for 60 seconds. Note that you can have only one sign blessing at a time, so activating this Standing Stone will override your current sign blessing (if any).
[9.43] Nightingale Hall
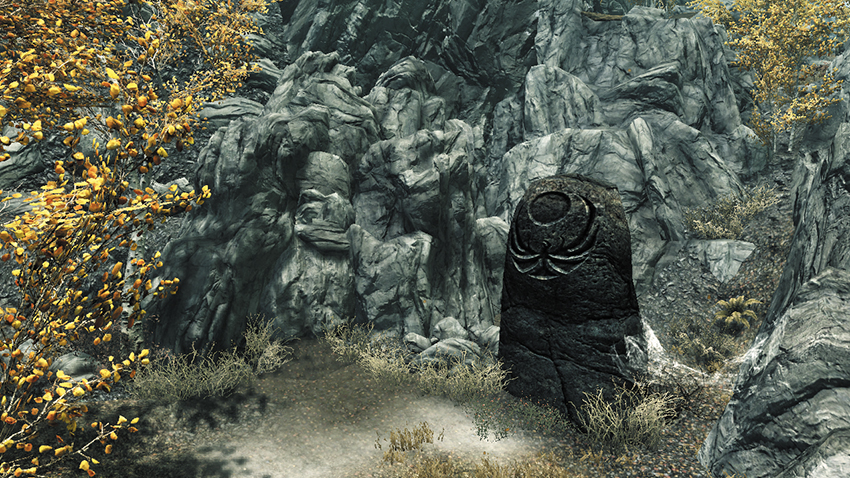
Related Quests
- Thieves Guild Quest: Trinity Restored
Recommended Level: 8
Dungeon: Special
Collectibles
- Skill Book [Pickpocket]: Purloined Shadows
- Skill Book [Sneak]: The Red Kitchen Reader
- Unique Item: Nightingale Armor [100/112]
- Unique Item: Nightingale Boots [101/112]
- Unique Item: Nightingale Gloves [102/112]
- Unique Item: Nightingale Hood [103/112]
- Area Is Locked (quest required)
- Chests (Locked: Novice) (2)
This derelict temple is the ancient home to the Nightingales—clandestine followers of the Daedric Prince Nocturnal. You can’t enter this site until you gain Thieves Guild Quest: Trinity Restored. Follow Karliah through the area, claiming a Skill Book that lies near a bed in the waterfall cavern. Next, acquire and don the special armor of the Nightingales. After Karliah explains the terms involved in becoming a member of the Nightingales, search the east and west side rooms to locate a couple of chests and another Skill Book. Then follow Karliah to the far chamber and complete your initiation.
Once you complete the “Darkness Returns” quest (thus ending the Thieves Guild quest line), the living quarters overlooking the waterfall here is restored, and you may freely use this location as a place to rest and gather supplies. Karliah can also be found here postquest as well.
[9.44] Broken Helm Hollow
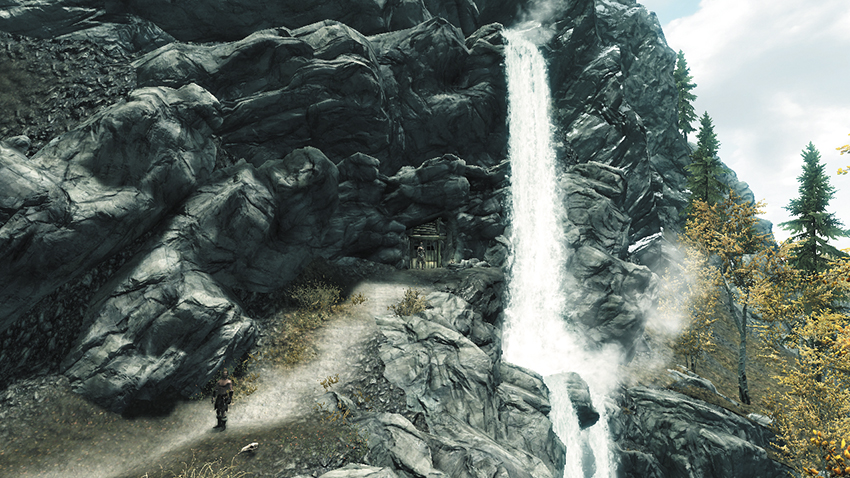
Recommended Level: 6
Dungeon: Bandit Camp
- Bandit
- Leifnarr (deceased)
Crafting
- Tanning Rack
Dangers
- Bone Alarm Trap
- Trapped Chest
Collectibles
- Skill Book [Two-Handed]: Battle of Sancre Tor
- Potions
- Loose Gear
- Mineable ore (Corundum)
Bandits reside in this small cave, which lies in the Rift’s southeast corner, on the east side of the tall peak that stands southeast of Riften. Dispatch the exterior guards, along with the bandits inside the cave, which include a formidable leader. Stand back before opening the giant chest on the ledge—it’s trapped. Collect a nearby Skill Book from the nearby stand, then head back down the ramp and pull a chain on the south wall to open a secret passage that leads to the body of a slain Nord. This is Leifnarr’s body, which you’re sent to find by Grosta at Heartwood Mill [9.27].
[9.45] Forelhost
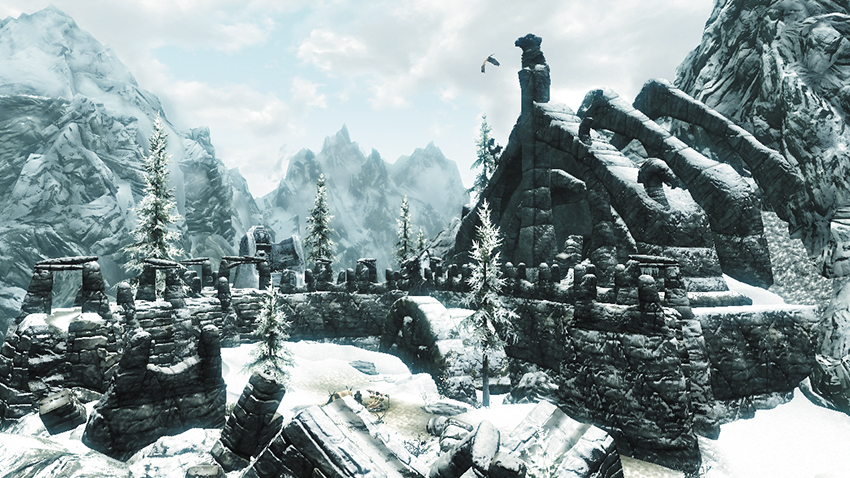
Related Quests
- Side Quest: Masks of the Dragon Priests*
- Dungeon Quest: Siege on the Dragon Cult
- Dungeon Activity
Recommended Level: 24
Dungeon: Dragon Priest Lair
- Animal
- Captain Valmir
- Dragon Cultist (ghost)
- Draugr
Rahgot Crafting
- Alchemy Labs (2)
- Arcane Enchanter
Dangers
- Battering Ram Trap (pressure plate)
- Dart Trap (pressure plates)
- Flamethrower Traps (pressure plates)
- Oil Lamp Traps
- Oil Pool Traps
- Rising Floor Trap
- Rune Traps (wall/floor)
- Spear Trap (pedestal pressure plates)
- Swinging Blade Trap
- Swinging Wall Trap (pressure plates)
- Trapped Chests
Puzzles
- Claw Door
Quest Items
- Rahgot’s Mask
- Skorm Snow-Strider’s Journal
Collectibles
- Dragon Claw: Glass Claw [9/10]
- Dragon Priest Mask: Rahgot [9/10]
- Skill Book [Restoration]: The Exodus
- Unique Weapon: Dragon Priest Staff [71/80]
Special Objects
- Word Wall: Storm Call [2/3]
- Chests
- Potions aplenty
- Loose Gear
This massive stronghold stands in the snowy peaks of the mountains that lie southeast of Riften—a bit of climbing is required to get here. Forelhost is the tomb of one of eight fearsome Dragon Priests whose masks are part of a special quest.
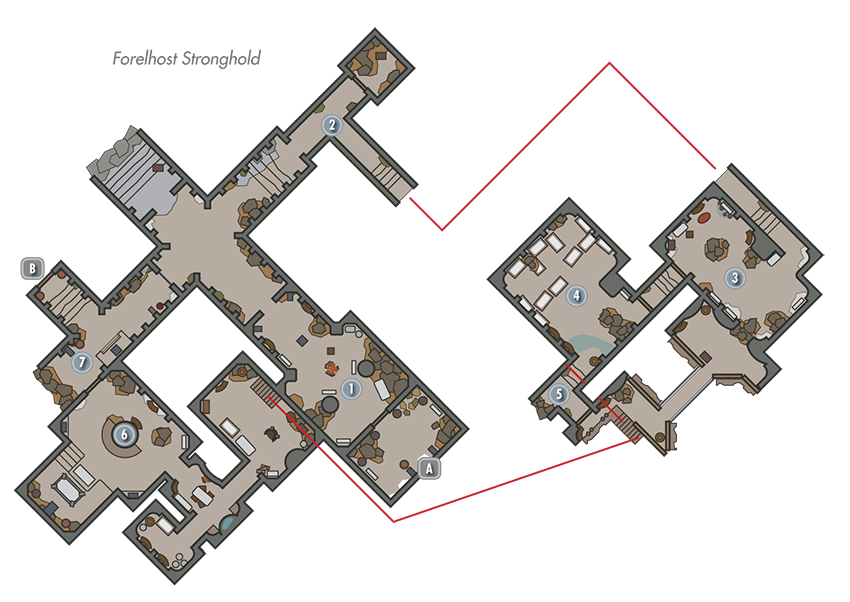
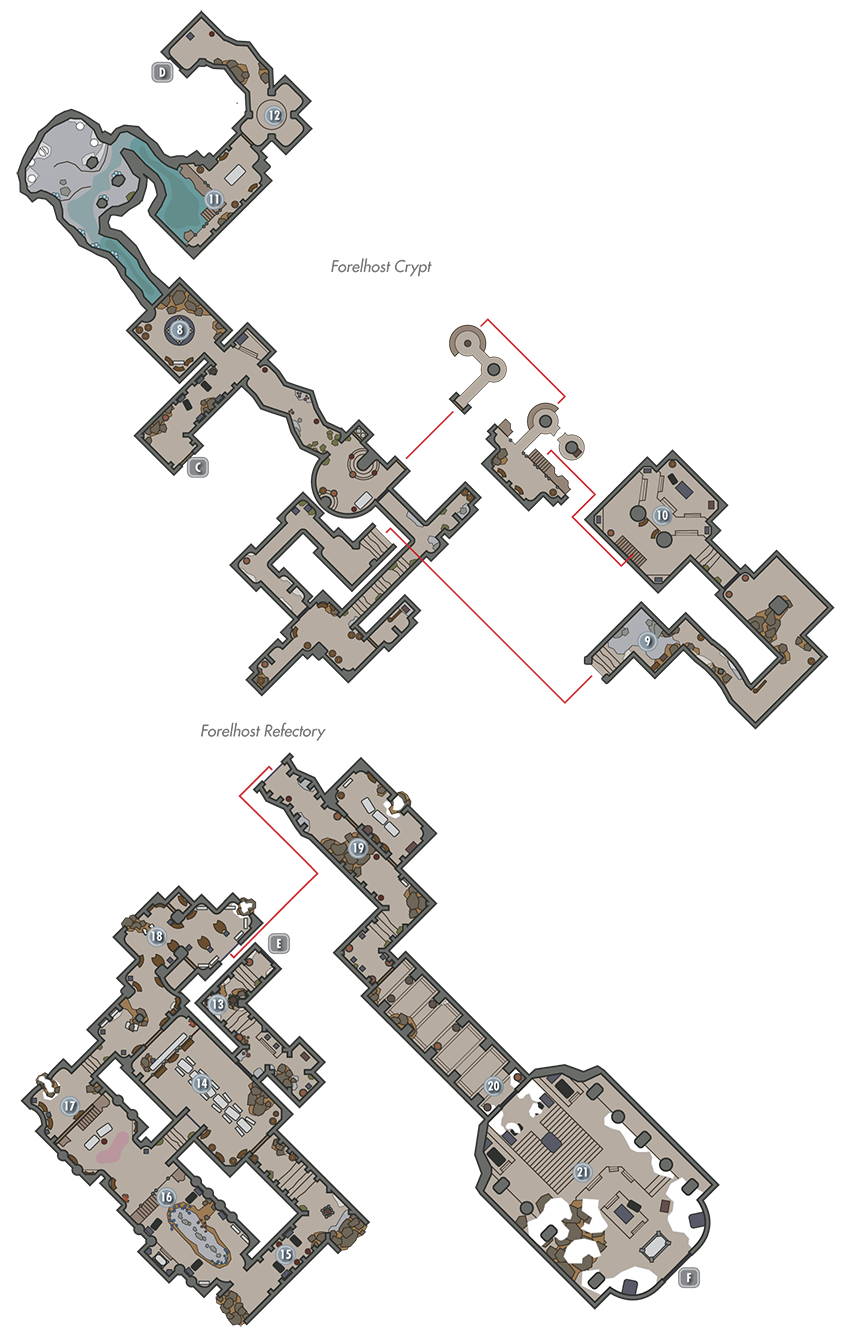
Exterior
Speak with an soldier named Captain Valmir, who has made camp just outside the stronghold, to gain a new Side Quest that involves clearing the stronghold. (If you accidentally killed Captain Valmir before speaking with him, the key can be found on his body.) Don’t let the captain catch you plundering his campsite before heading into the stronghold.
- Chest
- Potions
Exit to Skyrim
Entry Hall
Dispatch the ghost of a Dragon Cultist in this first wide chamber. Carefully sidestep a pressure plate as you enter the north passage on your way to [2].
- Danger! Battering Ram Trap (pressure plate)
Swinging Blade Passage
Slay a few more Dragon Cultist ghosts on your way to this passage of swinging blades. Raid the chest in the nearby nook before carefully darting past each swinging blade in turn.
- Danger! Swinging Blade Trap
- Chest (Locked: Novice)
- Loose Gear
Journal Chamber
The informative journal that Captain Valmir hinted about is found in this quiet chamber. Collect it to complete an optional objective. If you return to Captain Valmir at this point, he’ll give you a rundown of what he learns from the journal.
- Skorm Snow-Strider’s Journal
- Chest (Locked: Apprentice)
- Potions aplenty
Sleeping Quarters
The poisons that the Dragon Cultists used to kill themselves long ago are still potent. Collect them as you pass through here.
- Potions
Entry Hall/Smithing Area: West Side
Explore the Entry Hall’s upper walkways to discover a chest, then double back and descend into its western half, where a Dragon Cultist ghost awaits. Progress through the Smithing Area into a small kitchen.
- Crafting: Anvil, Grindstone, Workbench
- Chest
- Chest (Locked: Adept)
- Potions
- Loose gear
Worship Chamber
Swipe a few valuables from the kitchen on your way to this large chamber, which features a central stairwell. Slay a few powerful Draugr here, and skirt the pressure plate atop the central platform to avoid triggering a trap. Avoid standing directly in front of the room’s chest when opening it—spikes will stab up from the floor below! Try disabling the chest’s trigger hinge if you’re skilled at lockpicking.
- Danger! Dart Trap (pressure plate), Trapped Chest
- Potions
Fire Trap Passage
Beware of a pair of pressure plates in this final passage—they trigger nasty fire traps. Slay another mighty Draugr here and throw a lever to open a gate so you may quickly exit this place later. For now, go downstairs and through a door to delve deeper into the keep.
Door to Forelhost Crypt
Door to Forelhost Stronghold
Well
Collect a few potions in this room, then see if you can pick the Master-level cage door in its center. Doing so allows you to skip areas [9] and [10], which you only need to visit to search for the key that opens the cage door. The watery passage beneath the trapdoor leads to [11].
- Potions
Burial Passages
Loot plenty of urns and slay a host of Draugr as you navigate this long, winding passage. Beware of removing items from pedestals, which triggers traps, and move with caution to avoid a variety of other traps along the way.
- Danger! Dart Trap (pressure plates), Rune Traps (wall/floor), Swinging Blade Trap, Spear Trap (pedestal pressure plates), Swinging Wall Trap (pressure plates)
- Chest (Locked: Master)
- Potions
Overlord’s Tomb
A vastly powerful Draugr warrior rises from a central sarcophagus as you enter this large cavern. Slay it, along with its minions, to secure a needed key from a chest. Go upstairs and leap to a second chest afterward, then scale a winding ramp to reach a high door that leads back to the start of the burial passages, but watch out for the magic casting trap at the top! Dodge when it fires, then run across to loot the Soul Gem, or knock it off the pedestal with an arrow.
- Forelhost Well Key (chest)
- Danger Magic Trap
- Chests (2)
- Potions
- Loose Gear
Poison Chamber
Kill a few Skeevers on your way to this cavern, where the cultists who once lived here poisoned their water supply—don’t worry, it’s had several hundred years to dissipate. Collect a selection of leftover poisons and swipe a Skill Book off a shelf.
- Danger! Oil Pool Trap
- Skill Book [Restoration]: The Exodus
- Potions aplenty
Rising Floor Passage
The bend in this passage features a nasty trap—stepping in the middle causes a large section of floor to rise, slamming you into long spikes on the ceiling. Avoid the center of the passage while rounding the corner.
- Danger! Rising Floor Trap
Door to Forelhost Refectory
Door to Forelhost Crypt
Entry Passage
Dispatch powerful Draugr in the very first passage, and find a chest tucked away in the corner. Stand to one side of the pedestal near the chest when removing the item from it to avoid being shot by arrows.
- Danger! Dart Trap (pedestal pressure plate)
- Chest
 Dining Area
This dining hall turned makeshift embalming area was used by the Cultists to hastily embalm their members after they destroyed the hallway during the siege. Loot a host of urns to pad your coin purse before taking the south passage to [15].
 Oily Tunnel
Ignite the oil on the ground in this passage to help you kill the powerful Draugr that lurks here.
- Danger! Oil Lamp Traps, Oil Pool Trap
 Open-Air Chamber
Dispatch more Draugr in this wide room, and loot the chest that lies beneath the wooden stairs. A large amount of deadly flowers can be harvested here, and the half-buried bodies of several Draugr can be looted as well. Go upstairs afterward and throw a lever in the east passage to open a portcullis, allowing for faster navigation of the floor. Backtrack out afterward and head north to [17].
- Chest (Locked: Adept)
- Potions
 Lab
Lab
Lure a mighty Draugr toward the oil slick on the ground in this chamber, then knock down the overhead lamp to set the undead warrior ablaze. Read the informative note on the table near the Alchemy Labs and collect a host of potions before proceeding upstairs.
- Danger! Oil Lamp Trap, Oil Pool Trap
- Crafting: Alchemy Labs (2)
- Potions aplenty
 Library
As you move into the Library, watch out for the magic casting trap that sits across the room. Either snipe the gem with a bow or time your movement and run from cover to cover to cross the room. Swipe a special Glass Claw off a pedestal as you move through this cluttered area. Stand back and to one side of other pedestals before removing their contents to avoid traps. Unlock Master and Expert-level doors here to access a small, potion-filled closet and a little alcove with a Soul Gem. Loot a locked chest on your way to [19].
- Danger! Spear Trap (pedestal pressure plate)
- Dragon Claw: Glass Claw [9/10]
- Chest (Locked: Apprentice)
- Potions aplenty
- Loose Gear
 Arcane Workroom
Slay a deadly Draugr in this small chamber, then stand back and to one side when opening the far chest to avoid being stabbed by spears (or simply disable its trigger wire). Dodge a pressure plate in the south passage that follows, collecting a few potions on your way to [20].
- Danger! Flamethrower Trap (pressure plate), Trapped Chest
- Crafting: Arcane Enchanter
- Potions
 Claw Door Passage
Inspect the Glass Claw you found back at [18] and notice three symbols on its palm. Rotate the three concentric rings of this passage’s far door to imitate the same sequence of symbols, then inspect the central keyhole to insert the Glass Claw and gain access to the tomb’s final chamber.
 Rahgot’s Tomb
An immensely powerful Dragon Priest named Rahgot rises from this chamber’s central sarcophagus when you enter. Fight hard to slay the deadly villain, then obtain a valuable staff, key, and Dragon Priest Mask by sifting through Rahgot’s remains. Use Rahgot’s key to open the large door and head outside.
- Dragon Priest Mask: Rahgot [9/10] (Rahgot)
- Unique Weapon: Dragon Priest Staff [71/80]
- Forelhost Balcony Key (Rahgot)
- Chest
Exit to Skyrim
Exterior (Balcony)
Back outside, cross a few snowy ramparts to locate an ancient Word Wall. Learn your new word of power, then descend to the fort’s main courtyard to find Captain Valmir speaking with an enemy soldier. It turns out that Valmir is an imposter. Kill him to complete your quest, then inspect his corpse to discover an informative letter. Your work here is complete.
- Word Wall: Storm Call [2/3]
[9.46] Stendarr’s Beacon
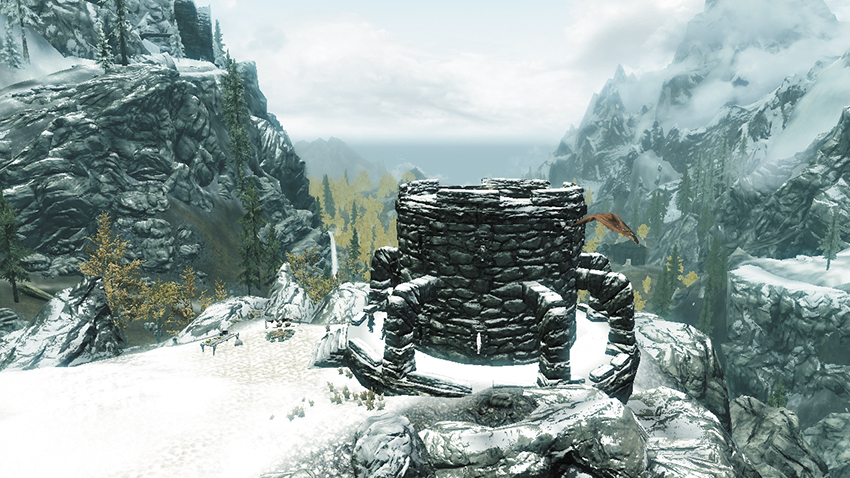
Recommended Level: 6
Habitation: Special
- Vigilant of Stendarr (Blessing)
Collectibles
- Skill Book [Restoration]: The Exodus [D2/10]
Special Objects
- Shrine of Stendarr [5/5]
- Chest
- Knapsack
- Satchel
- Loose Gear
This sizeable tower, located in the far southeastern corner of Skyrim, has been occupied by the Vigil of Stendarr—zealous followers of the Divines who seek to eradicate the vile Daedra. Speak to any of the Vigilants here, or touch the small shrine on the interior altar, to instantly rid yourself of all diseases. Collect the Skill Book that lies on a bedroll here, and carefully loot the chest found atop the vigil without being caught. Find a valuable piece of gear near a skeleton that lies in the snow north of the tower as well.