
Elder Scrolls V: Skyrim Guide The Atlas Hold 1: Haafingar
Hold Capital: Solitude
Related Quests
Main Quest: Diplomatic Immunity
Main Quest: Season Unending
Civil War Quest: Joining the Legion
Civil War Quest: The Jagged Crown
Civil War Quest: Message to Whiterun
Civil War Quest: Reunification of Skyrim
Civil War Quest: A False Front
Civil War Quest: Rescue from Fort Kastav
Civil War Quest: The Battle for Fort Dunstad
Civil War Quest: The Battle for Fort Greenwall
Civil War Quest: Liberation of Skyrim
Civil War Quest: Battle for Solitude
Daedric Quest: The Mind of Madness
Side Quest: The Man Who Cried Wolf
Side Quest: The Wolf Queen Awakened
Side Quest: Lights Out!
Other Factions: Bards College Quest: Tending the Flames
Other Factions: Bards College Quest: Finn’s Lute
Other Factions: Bards College Quest: Pantea’s Flute
Other Factions: Bards College Quest: Rjorn’s Drum
Dark Brotherhood Quest: Bound Until Death
Dark Brotherhood Quest: Breaching Security
Dark Brotherhood Quest: To Kill an Empire
Thieves Guild Quest: Scoundrel’s Folly
Thieves Guild Radiant Quest: No Stone Unturned (x2)
Thieves Guild City Influence Quest: The Dainty Sload
Dungeon Activity (Solitude Jail)
Miscellaneous Objective: Innkeeper Rumors (the Winking Skeever)
Miscellaneous Objective: Angeline and Aldis* (Angeline Morrard)
Miscellaneous Objective: Looking Radiant* (Taarie)
Miscellaneous Objective: Spiced Wine Shipment* (Evette San)
Favor (Activity): The Gift of Charity* (Svari)
Favor (Activity): The Gift of Charity* (Noster One-Eye)
Favor (Activity): The Gift of Charity* (Dervenin)
Favor: A Good Talking To* (Octieve San)
Favor: The Bandit Slayer* (Ahtar)
Favor: The Vampire Slayer* (Sybille Stentor)
Favor: Rare Item Hunt* (Captain Aldis)
Favor: Item Retrieval (Cave)* (Noster One-Eye)
Thane Quest: Thane of Haafingar*
Habitation: Hold Capital (Major)
Crafting
Alchemy Lab
Arcane Enchanters (2)
Blacksmith Forge
Grindstones (3)
Workbench
Services
Follower: Belrand [1/47]
Follower: Ahtar the Jailor [2/47]
Follower: Jordis the Sword-Maiden [3/47]
House for Sale: Proudspire Manor [1/5]
Marriage Prospect: Belrand [1/62]
Marriage Prospect: Sorex Vinius [2/62]
Marriage Prospect: Taarie [3/62]
Marriage Prospect: Jordis the Sword-Maiden [4/62]
Marriage Prospect: Octieve San [5/62]
Trader (Apothecary): Angeline Morrard [1/12]
Trader (Apothecary): Vivienne Onis [2/12]
Trader (Blacksmith): Beirand [1/33]
Trader (Carriage): Thaer [1/5]
Trader (Fence): Gulum-Ei [1/11] (after Thieves Guild Quest completion)
Trader (Fetcher): Fihada [1/3]
Trader (Food Vendor): Addvar [1/9]
Trader (Food Vendor): Jala [2/9]
Trader (Food Vendor): Evette San [3/9]
Trader (General Store Vendor): Endarie [1/19]
Trader (General Store Vendor): Sayma [3/19]
Trader (Innkeeper): Corpulus Vinius [1/15]
Trainer (Alteration: Journeyman): Melaran [1/3]
Trainer (Speech: Master): Giraud Gemane [1/4]
Trainer (Spell Vendor): Sybille Stentor [1/12]
Collectibles
Skill Book [Alchemy]: Song of the Alchemists [E1/10]
Skill Book [Archery]: The Gold Ribbon of Merit [C1/10]
Skill Book [Light Armor]: The Rear Guard [D1/10]
Skill Book [Light Armor]: The Refugees [E1/10]
Skill Book [Speech]: Biography of the Wolf Queen [D1/10]
Skill Book [Speech]: The Buying Game [E1/10]
Skill Book [Two-Handed]: Song of Hrormir [C1/10]
Unique Item: Asgeir’s Wedding Band [1/112]
Unique Item: Vittoria’s Wedding Band [2/112]
Unique Item: Shield of Solitude [3/112]
Unique Weapon: Headsman’s Axe [1/80]
Unique Weapon: Firiniel’s End [2/80]
Unusual Gem: [1/24]
Unusual Gem: [2/24]
Special Objects
Shrine of Akatosh [1/6]
Shrines of Arkay (2) [1/12; 2/12]
Shrine of Dibella [1/8]
Shrine of Julianos [1/5]
Shrine of Kynareth [1/6]
Shrine of Mara [1/5]
Shrine of Stendarr [1/5]
Shrine of Talos [1/17]
Shrine of Zenithar [1/5]
Business Ledgers
Civil War: Map of Skyrim
Chest(s)
Potions aplenty
Loose gear
Lore: City Overview
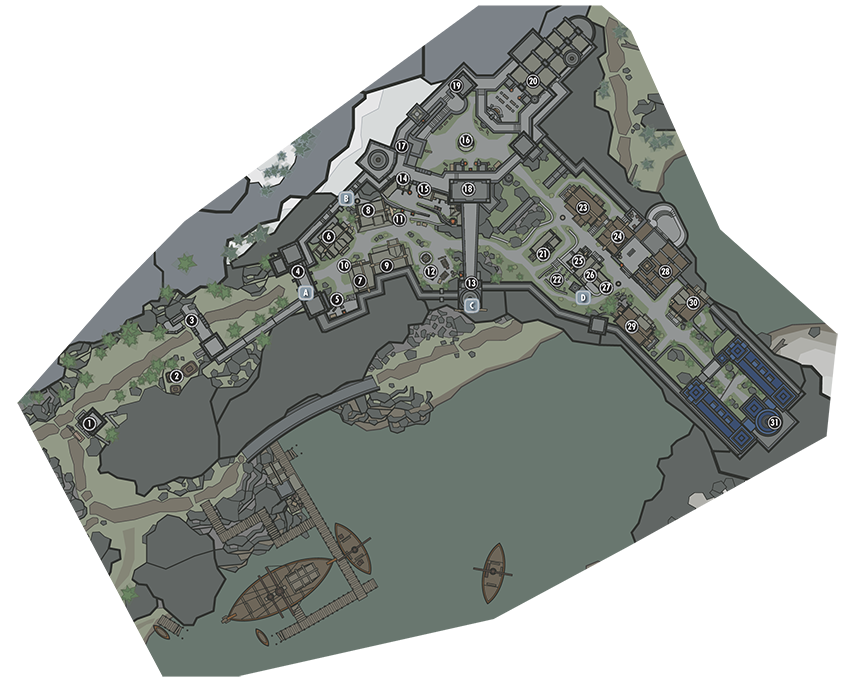
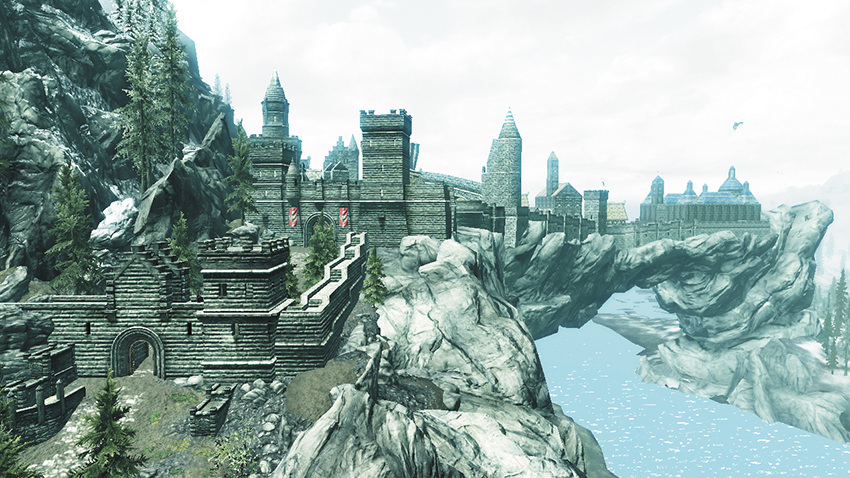
Solitude is the jewel of Imperial Skyrim. Ruled by Jarl Elisif the Fair, widow of the late High King, it is home to the headquarters of both the Legion and the Thalmor. Part of the reason for this is the eminently defensible nature of Solitude itself. Set upon a great stone arch that towers above the mouth of the Karth River, and surrounded by the soaring peaks of the Haafingar Mountains, Solitude is both a reinforced and breathtaking stronghold. Given the city’s name, it may be ironic that over 80 percent of the Hold’s population lives within Solitude’s walls, but this is testament to the city’s political importance, formidable defenses, and diverse population. The Bard’s College is located here, as well as the sumptuous Blue Palace. Both are constructed atop the huge, natural arch that the city rests on, affording spectacular views over the Sea of Ghosts and Hjaalmarch to the east. Solitude’s accessible docks and wharfs are in relatively calm waters, making trade one of the many reasons why the wealthiest Nords hail from this capital city. Solitude is the one, true cosmopolitan city of Skyrim.
Important Areas of Interest
 Lower Watchtower
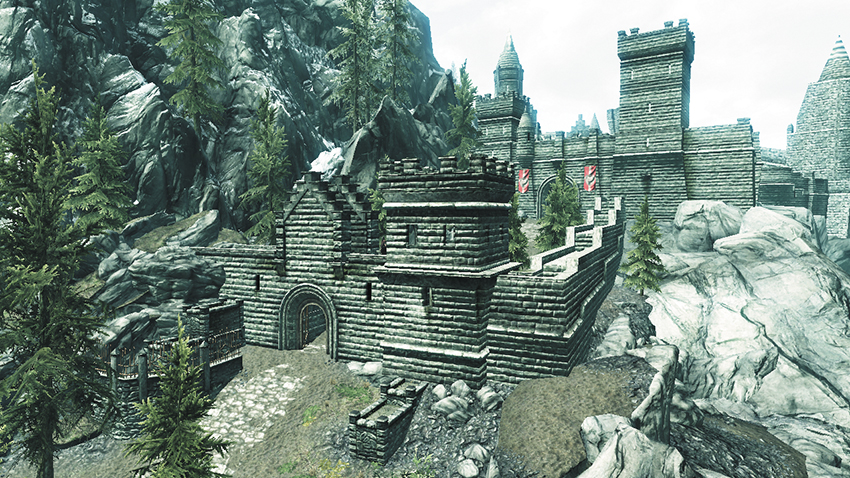
Close to Katla’s Farm and the Solitude Stables is a single watchtower at the base of the western (and main) entrance to Solitude. Thaer’s carriage waits here for customers; you can take it to any other Hold City.
- Trader (Carriage): Thaer [1/5]
 Ma’dran’s Caravan
When they aren’t traveling, Ma’dran and his Khajiit brethren set up camp here. You can purchase a variety of wares from them. They also become Fences for you during the Thieves Guild Quests.
- Trader (Caravan Vendor): Ma’dran [19/19]
- Weapons, Apparel, Potions, Food, Ingredients, Misc
 Outer Gate
 Main Gate
Market District
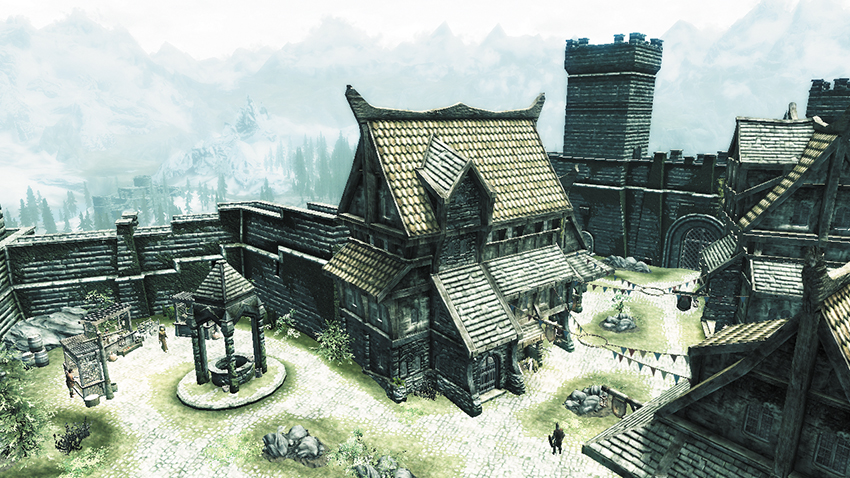
A variety of traders ply their wares in this southwestern district of the city. Aside from the traders, the marketplace is dominated by executioner’s platform and the market stalls, which features a well said to be one of the oldest structures in Solitude.
 Main Gate: Exit to Skyrim
 Executioner’s Platform
The first time you enter Solitude, a small crowd has gathered to watch the execution of Roggvir for crimes against the Empire; he allowed Ulfric Stormcloak to escape the city after killing the High King. Unless you interrupt (a crime), Roggvir is beheaded while the citizens watch, some cheering. There is an entrance up onto the crenellations above the main gate, allowing you to move (or sneak) around the city’s perimeter walls.
- Crafting: Grindstone
 The Winking Skeever
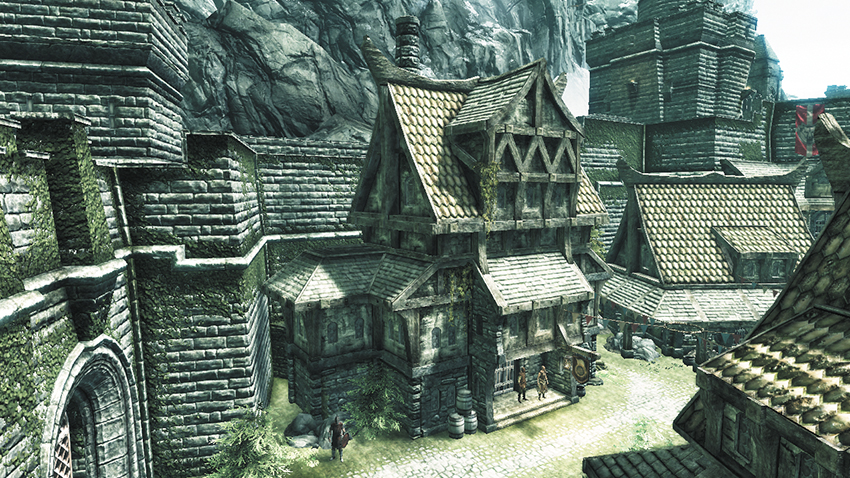
- Corpulus Vinius
- Sorex Vinius
- Minette Vinius
- Lisette
- Belrand
- Gulum-Ei
The Winking Skeever is the only tavern in town and is sometimes host to a variety of interesting (and undesirable) folks. Corpulus Vinius runs this establishment. The minstrel Lisette plays here in the afternoons and evenings. The place is famous for wine and mead imported from Riften. Should Corpulus die, his son Sorex Vinius will run the inn. You can hire Belrand here. The upstairs rooms have numerous books to read. The wine cellar has a chest to steal from.
- Follower: Belrand [1/47]
- Marriage Prospect: Belrand [1/62]
- Marriage Prospect: Sorex Vinius [2/62]
- Trader (Fence): Gulum-Ei (after Thieves Guild Quest completion)
- Trader (Innkeeper): Corpulus Vinius [1/15]
- Food, Room and Board
- Quest Rumors
- Business Ledger
- Strongbox (Adept)
- Chest
- Potions
 Radiant Raiment
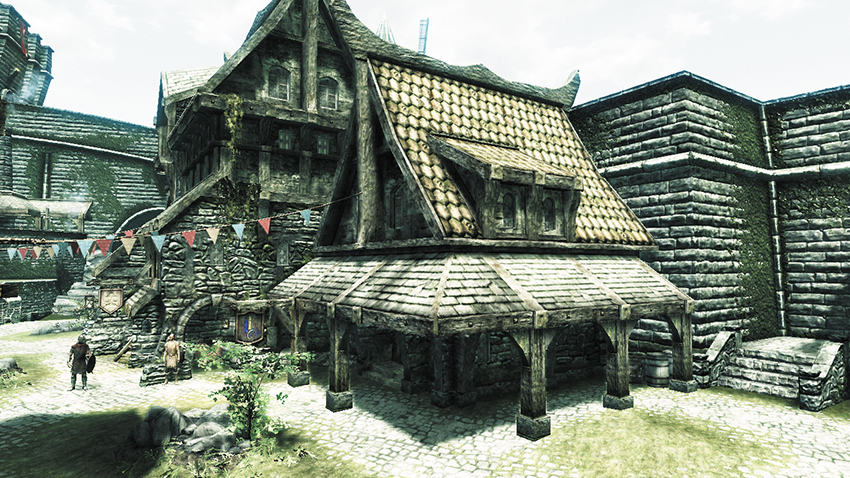
- Endarie
- Taarie
Taarie runs this shop with her twin sister, Endarie. They live above the shop. There are two chests (one in the cellar, the other upstairs) and a large amount of food and some books to peruse.
- Shadowmark: “Loot”
- Marriage Prospect: Taarie [3/62]
- Apparel
- Trader (General Store Vendor): Taarie [2/25]
- Apparel
- Business Ledger
- Strongbox (Adept)
- Chest (2)
- Business Ledger
 Angeline’s Aromatics
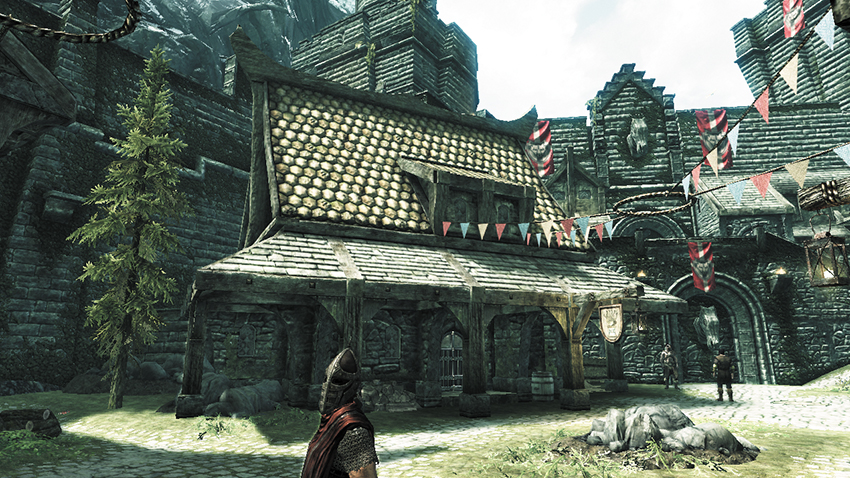
- Angeline Morrard
- Vivienne Onis
Angeline Morrard runs this shop with her niece Vivienne Onis. They live above the shop. The shop itself is a tiny affair, consisting of a simple small room with a counter. The walls behind the counter are lined with strange ingredients, potions, and dead animals. There’s a large number of potions and ingredients to purchase (or steal) here, an alchemy table, a chest in the cellar, and a strongbox upstairs near the ledger.
- Crafting: Alchemy Lab
- Trader (Apothecary): Angeline Morrard [1/14]
- Potions, Food, Ingredients
- Trader (Apothecary): Vivienne Onis [2/15]
- Potions, Food, Ingredients
- Business Ledger
- Strongbox (Apprentice)
- Chest
- Potions aplenty
 Bits and Pieces
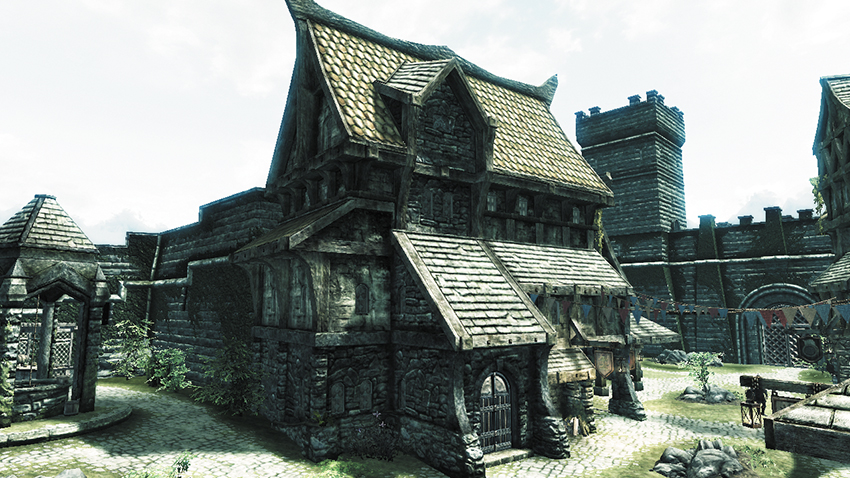
- Sayma
- Kayd
Sayma runs this shop. Her son, Kayd, is there to help her but ends up underfoot more often than not. They live above the shop. Sayma’s home has food, books to read, a chest in the cellar, and a strongbox and ledger in an upstairs room.
- Shadowmark: “Loot”
- Trader (General Store Vendor): Sayma [2/25]
- Weapons, Apparel, Potions, Scrolls, Food, Ingredients, Books, Misc
- Business Ledger
- Strongbox (Apprentice)
- Chest
- Potions
- Loose gear
 Noster One-Eye
- Noster Eagle-Eye
This beggar requests a gold coin from you. Oblige, and you receive the Gift of Charity.
- Ability: The Gift of Charity
 Jaree-Ra
- Jaree-Ra
An Argonian with a variety of interesting (and illegal) schemes. He usually mooches around this area, sometimes visiting Angeline’s Aromatics.
 Market Stalls and the Well
- Addvar
- Jala
- Evette San
These stalls sell a variety of wares: Addvar sells fish from his cart. His wife, Greta, will take over for him should he die. Jala sells fruit and vegetables from her cart. Evette San sells spiced wine from her cart. The old well isn’t used anymore.
- Trader (Food Vendor): Addvar [1/9]
- Potions, Food, Ingredients
- Trader (Food Vendor): Jala [2/9]
- Potions, Food, Ingredients
- Trader (Food Vendor): Evette San [3/9]
- Potions, Food, Ingredients
 Castle Dour Dungeon Exit
This grating is inaccessible from the street. It is an escape route leading from a secret exit inside one of the prison cells in the Castle Dour Dungeon.
 South Gate
 South Gate Exit to Skyrim
This windmill landmark can be seen from miles around. The ground-level gate leads to a spiral staircase down to the docks and out into Skyrim. The staircase up leads to a battlement and the rear (and unlocked) entrance to the Emperor’s Tower.
Castle Dour
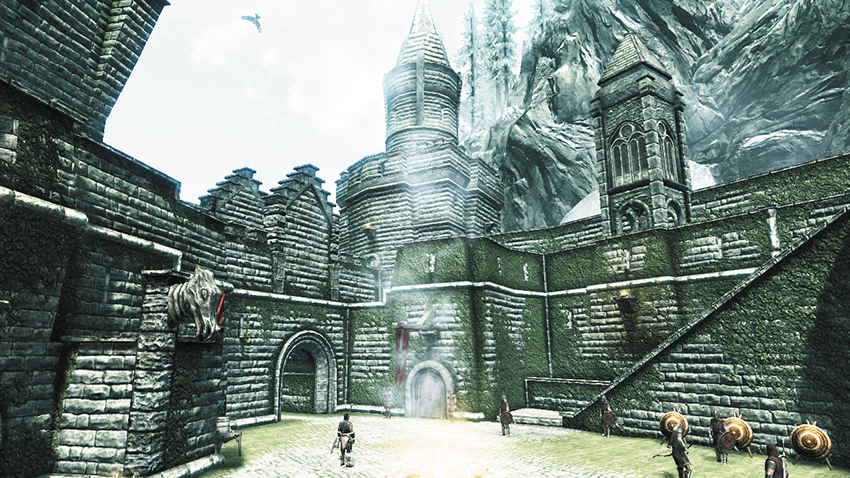

 Dominating the city’s northern district is Castle Dour. Thick-walled and imposing, it protected its inhabitants from invaders. As the city grew, walls were added to surround the other, newer buildings. During a long period of peace, the Blue Palace was built for the Jarl, and Castle Dour became a secondary fortress. It now houses the Imperial Garrison and the Temple of the Divines. Find a couple of Skill Books around the sleeping area here:
- Skill Book [Light Armor]: The Rear Guard [D1/10]
 Fletcher
- Fihada
- Jawanan
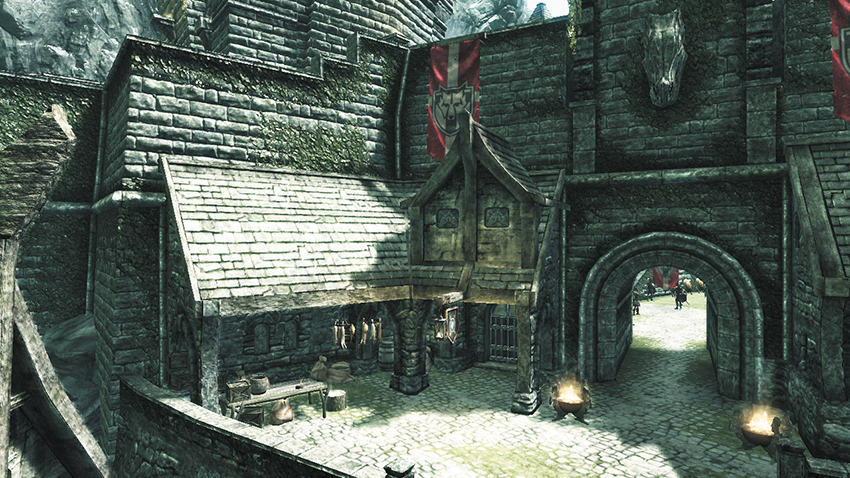
Fihada runs this shop with his apprentice Jawanan. There are a large number of fine weapons to buy (or to steal) here. There’s a chest in the ground-floor bedroom and a ledger and strongbox upstairs.
- Trader (Fletcher): Fihada [1/3]
- Weapons and Misc
- Skill Book [Archery]: The Gold Ribbon of Merit [C1/10]
- Business Ledger
- Strongbox (Adept)
- Chest
- Potions aplenty
- Loose gear
 Solitude Blacksmith
- Beirand
- Helmvar
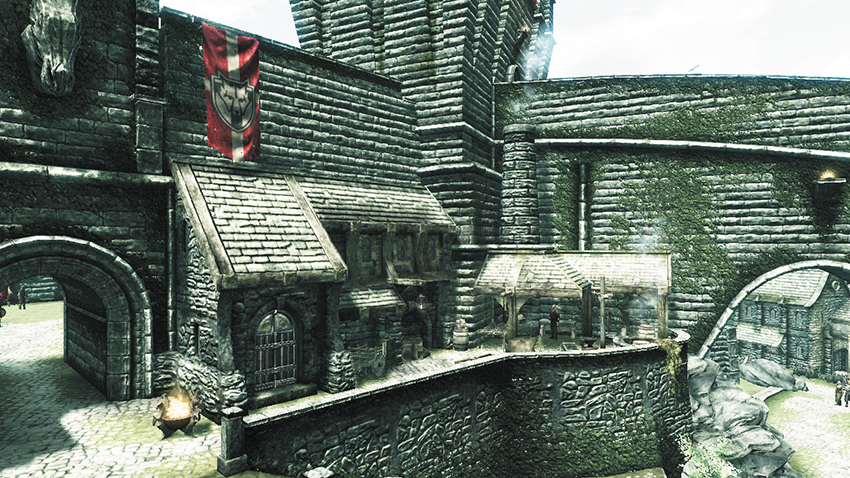
Beirand works for the army and the city guard. However, he has permission to do work on the side, making and repairing weapons and armor for anyone who comes in. However, he can’t let it interfere with his other work. Should Beirand die, his apprentice Helmvar will take over. Beirand is married to Sayma and has a son named Kayd. Outside his shop is a full complement of crafting locations and a second grindstone inside the Blacksmith’s. Up in Beirand’s bedroom, there’s a ledger, Skill Book, and strongbox.
- Crafting: Blacksmith’s Forge
- Crafting: Grindstones (2)
- Crafting: Workbench
- Trader (Blacksmith): Beirand [1/33]
- Weapons, Apparel, and Misc
- Skill Book [Light Armor]: The Refugees [E1/10]
- Business Ledger
- Strongbox (Adept)
 Courtyard and Crenellations
- Captain Aldis
The ground-level features Solitude Guards practicing archery and sword strikes. Captain Aldis presides over this training, along with the execution you saw as you walked in. Head up the stone ramp to the crenellations, allowing quick (and more stealthy) access above the castle grounds to an upper entrance into Castle Dour and the Thalmor Headquarters, the Temple of the Divines, and then back into the market district. You can even drop off these crenellations, grabbing hanging moss or a bird’s nest if you’re facing southeast.
 Castle Dour (Interior)
- General Tullius
- Legate Rikke
- Ahtar the Jailor
- Gianna
In ages gone by, there was just the castle keep. Thick walled and imposing, it protected its inhabitants from invaders. As the city grew, walls were added to surround the other, newer buildings. During a long period of peace, a separate palace was built for the Jarl. Castle Dour became an oversized gatehouse. It was eventually converted into the city’s Imperial Garrison. General Tullius is in charge of the Imperial forces in Skyrim. He lives and works here along with his second in command, Legate Rikke.
- Follower: Ahtar the Jailor [2/47]
- Unique Weapon: Headsman’s Axe [1/80]
General Tullius’s War Room (Ground Floor)
The main level of the castle is given over to a battle map of Skyrim, where General Tullius and Legate Rikke plan the countermeasures against the Stormcloaks. It is here you can join with them during the Civil War Quests.
- Civil War: Map of Skyrim
- Loose gear
Legate Rikke’s Room (Ground Floor)
A simple dining table and bed.
General Tullius’s Room (Upper Floor)
This connects to the War Room and the crenellations exit via a corridor and stairs. A large bed dominates this chamber.
- Potions
- Loose gear
Garrison Barracks (Lower Floor)
Legate Aventus Caesennius runs a tight ship down here where the city guards and conscripts sleep. There’s a kitchen here filled with food and an armory of Imperial weapons and equipment.
- Skill Book [Light Armor]: The Rear-Guard [D1/10]
- Loose gear
Castle Dour Dungeon (Lower Floor)
Commit a crime in Haafingar and the guards will throw you in the dungeons of Castle Dour. Ahtar the Jailor (who was part of the execution when you first arrived in Solitude) runs this place. The upper level is a circular balcony overlooking the dungeon level. There are guards, scattered food and weapons, and three chambers along the outer wall to your right. The first is an interrogation room, the second is a torture room, and the third is Ahtar’s office, with steps leading down to the evidence chamber on the lower level. Notice the hole in the wall near the belongings chest? This allows you to recover your equipment when escaping through the secret passage.
- Evidence Chest
- Prisoner Belongings Chest
- Loose gear
Castle Dour Dungeon (Dungeon Floor)
The roughly circular lower level features seven cells, most of them locked. Bjartur, a Stormcloak Soldier, is held in one of the cells if the Imperials control the city. You’re usually placed in a cell on the jail’s south side.
Instead of serving out your sentence, check the crumbling mortar on the wall behind you. It falls away, enabling you to flee into a dungeon corridor. Check the small hole, allowing you to reach into the Prisoner Belongings Chest in the evidence room. Then flee to the ladder, bringing you up into the Market District, [B] Castle Dour Dungeon Exit. Note that you can only do this once; after you escape, the guards repair the wall, and you’ll have to serve your time or escape in the usual way in the future.
- Prisoner Belongings
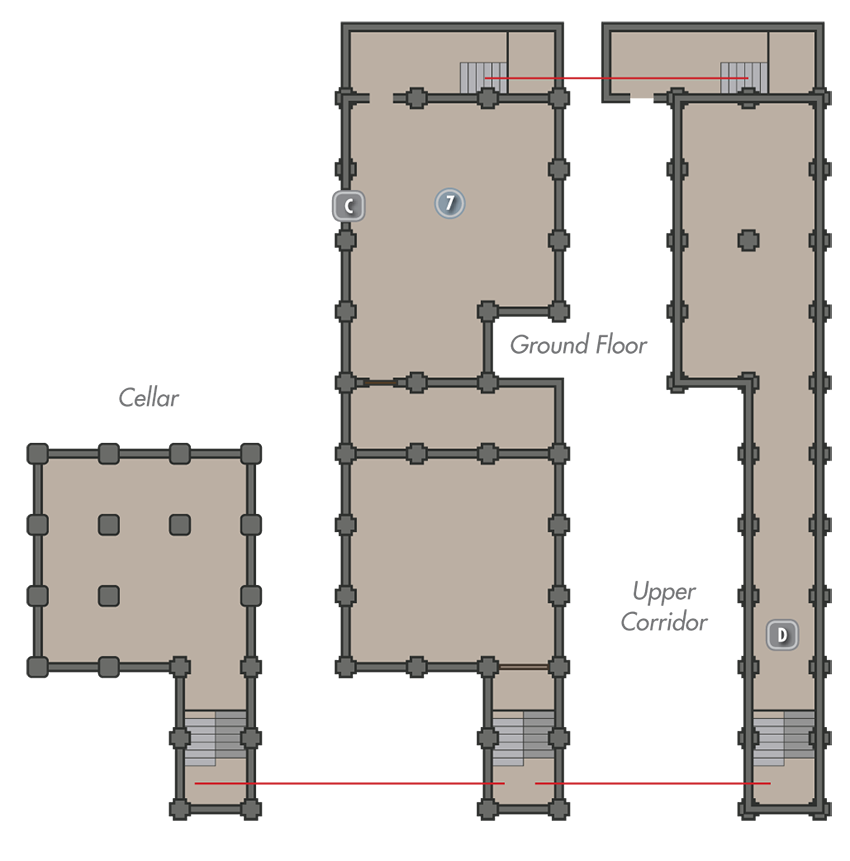
 Emperor’s Tower (Interior)
- Emperor Titus Mede III
Reviled by the Stormcloaks for his “betrayal” in the Markarth Incident and admired by the Imperials and Loyalists for his steadfastness during the Great War, Titus Mede is somewhat of a tragic figure, being forced by the weakness of the Empire to make deals with those he despises (the Thalmor) in order to preserve the Empire from total destruction.
This is the residence of the Emperor when he is in Solitude. You will come here for Dark Brotherhood Quest: To Kill an Empire.
Throne Room (Ground Floor)
Emperor Titus Mede III isn’t usually here. This offers access to the kitchens and the upper floor.
Kitchens (Ground Floor)
As you’d expect, there’s an abundance of food, tended to by the chef.
Upper Landing (Upper Floor)
There’s an empty bedroom and a door requiring a key, unlocked by the chef during the quest. A Skill Book rests on a table in the small sitting area.
- Skill Book [Enchanting]: Catalogue of Weapon Enchantments
Banqueting Hall (Upper Floor)
This is where the Emperor and his trusted cohorts eat and talk about politics. There is an exit out to the South Gate (windmill).
 Thalmor Headquarters
The hated Justiciars are headquartered in the garrison. Effectively run by the Thalmor, they oversee the terms of the peace accords signed by the Empire. Principally, this means rooting out Talos worshippers. Elenwen is the head of the Justiciars. Sometimes she forces her opinion on General Tullius as well. He has little use for her advice, but his emperor has commanded him to follow her orders on matters related to the treaty. Mostly this location is relatively empty, with the Thalmor more content to rule Skyrim from the remote Embassy in the mountains above Solitude. Check inside for a number of books to read, and the following:
- Civil War: Map of Skyrim
- Potions aplenty
- Loose gear
 Temple of the Divines
- Rorlund
- Freir
- Silana Petreia
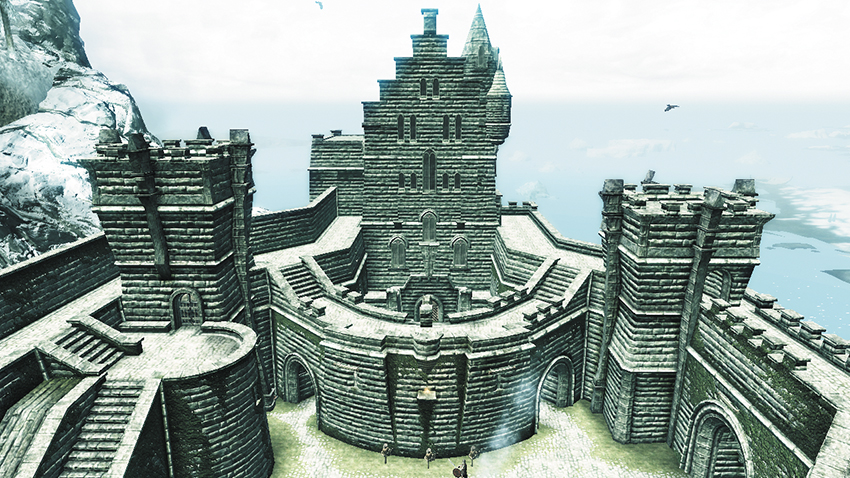
Formerly the Temple of the Nine Divines, this is the largest temple in all of Skyrim. Unlike the other temples, it reflects the Imperial view of all eight divinities being equal and represented. Outside is a small courtyard where Vittoria Vici’s marriage will take place. There are several doors leading to and from the roof if you want a better look down onto this courtyard. Inside are shrines for each of the eight gods, plus an empty place where the Shrine to Talos once stood. If you side with the Stormcloaks during the Civil War Quests and take Solitude for Ulfric, the Shrine to Talos is reinstated. Each provides a Blessing.
Upstairs is a withdrawing area and exit to the crenellations. Downstairs is a storage room and a firmly sealed door, which can only be opened during Side Quest: The Wolf Queen Awakened. It leads to a second, dust-filled wine cellar, past a Health Potion to a hole in the wall and into Potema’s Catacombs.
- Unique Item: Asgeir’s Wedding Band [1/112]
- Unique Item: Vittoria’s Wedding Band [2/112]
- Unique Weapon: Firiniel’s End [2/80]
- Shrine of Akatosh [1/6]
- Shrine of Arkay [1/12]
- Shrine of Arkay [1/12]
- Shrine of Dibella [1/8]
- Shrine of Julianos [1/5]
- Shrine of Kynareth [1/6]
- Shrine of Mara [1/5]
- Shrine of Stendarr [1/5]
- Shrine of Talos [1/17]
- Shrine of Zenithar [1/5]
The Avenues District
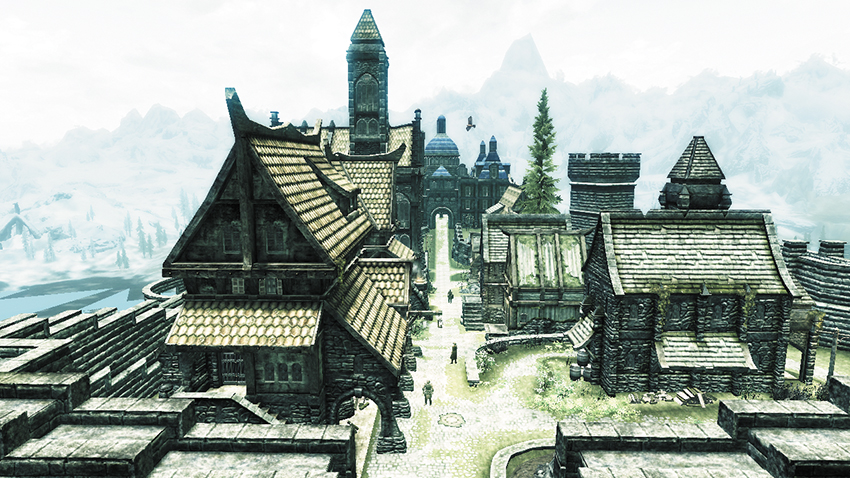
Sometimes referred to as “the Stately Avenues of Old Solitude,” it’s more commonly just called the Avenues. This is the residential section of the city.
 Hall of the Dead (Solitude Catacombs)
- Styrr
This mausoleum is filled with vaults. The dead of Haafingar are buried here. As the local priest of Arkay, Styrr is the cemetery caretaker. Although this could just be his demeanor, Styrr believes that darkness is drawn to Solitude. Upstairs, Styrr’s room has a long chest to pilfer from and a small chest behind the door. Into the cellar, there’s the corridor to Solitude Catacombs.
- Shrine of Arkay [2/12]
- Chest (2)
- Potions aplenty
- Loose gear
Solitude Catacombs (Interior)
This houses the remains of the dead from across Haafingar. Expect three skeletons roaming these catacombs and an exit leading back out, onto the graveyard [D].
 Dervenin the Mad
- Dervenin the Mad
This lunatic beggar wanders around the Hall of the Dead graveyard and down the Avenues. He talks about his abandoned master, which is the prelude (and way to begin) Daedric Quest: The Mind of Madness. He also requests a gold coin from you. Oblige, and you receive the Gift of Charity.
- Ability: The Gift of Charity
 Solitude Catacombs Exit
 Vittoria Vici’s House
- Vittoria Vici
Vittoria Vici heads down from this house to supervise the shipping and distribution of goods from the port. She is a wealthy woman, about to be married. Her house reflects this opulence, as do the Shadowmarks etched near the main doorway. There are three entrances.
The main floor of the house is comprised of a hallway, living area, and kitchen. There are books to read and food to eat. Upstairs is a small balcony library and a bedroom with a chest to check. In the cellar, there’s an exit and a display case with a valuable weapon in it to steal.
- Shadowmark: “Loot”
- Chest (2)
- Loose gear

 [HF.01] Proudspire Manor
Related Quests
- Thane Task: Thane of Haafingar
- Hearthfire Task: Adoption
Crafting
- Alchemy Lab
- Arcane Enchanter
- Cooking Pot
Collectibles
- Unusual Gem
Miscellaneous
- Area is locked
- Chest
- Potions aplenty
- Loose gear
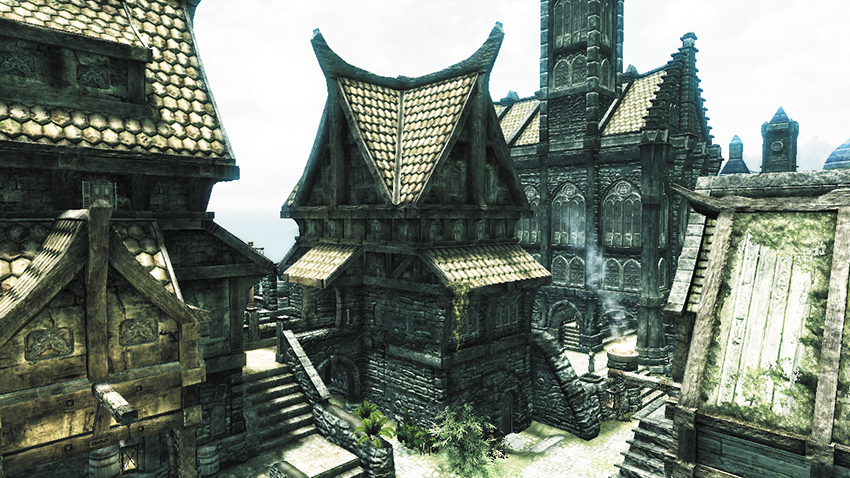
Should you become the Thane of Haafingar (by completing Favors for the citizens and the Jarl), you can purchase this abode from Jarl Elisif the Fair’s Steward, Falk Firebeard—you’ll then find one of the Unusual Gems that pertains to the Thieves Guild Radiant Quest: No Stone Unturned. Consult the quests chapters for more information.
- Follower: Jordis the Sword-Maiden (Housecarl) [4/62]
- House for Sale [1/5]
- Marriage Prospect: Jordis the Sword-Maiden [4/62]
- Unusual Gem: Stone of Barenziah [1/24]
Purchase Price: 25,000 gold
Jarl: Jarl Elisif the Fair
Steward: Falk Firebeard
Available Decorations
- Alchemy Laboratory (2,500 gold)
- Bedroom (2,000 gold)
- Children’s Bedroom (3,000 gold)
- Enchanting Laboratory (2,500 gold)
- Kitchen (1,500 gold)
- Living room (2,000 gold)
- Patio Decorations (500 gold)
Total cost: 39,000 gold
 Addvar’s House
- Greta
- Svari
This is the first of three terraced houses and flagged with a Shadowmark. Addvar the street vendor lives here. It’s a small place, bordering on run-down. His wife, Greta, and daughter Svari live here with him. Unlock the door (Novice), entering a modest home with a large amount of stored cheese and a cooking pot and chest. Upstairs is a small bedroom and second chest.
- Shadowmark: “Loot”
- Chest (2)
 Evette San’s House
- Octieve San
This is the middle terraced house, flagged with a Shadowmark. Evette San the street vendor lives here with her invalid father, Octieve San. It’s not a hovel, but it wouldn’t have to fall apart much more to become one. Open the door (Novice): Inside is another cheese stockpile and a knapsack in the storage area to the rear. There are two chests upstairs in the balcony bedroom.
- Shadowmark: “Loot”
- Marriage Prospect: Octieve San [5/62]
- Chest (2)
- Knapsack
- Loose gear
 Jala’s House
Jala the street vendor lives here with her friend and lover, Ahtar. It’s a poor home, reflecting her lack of wealth. There’s a pile of Iron Ingots to steal on the ground floor and two chests upstairs.
- Shadowmark: “Empty”
- Skill Book [Two-Handed]: Song of Hrormir [C1/10]
- Chest (2)
- Knapsack
 Bard’s College
- Viarmo
- Giraud Gemane
- Inge Six-Fingers
- Pantea Ateia
- Jorn
- Aia Arria
- At-Af-Alan
- Illdi
- Bendt
- Giraud Gemane
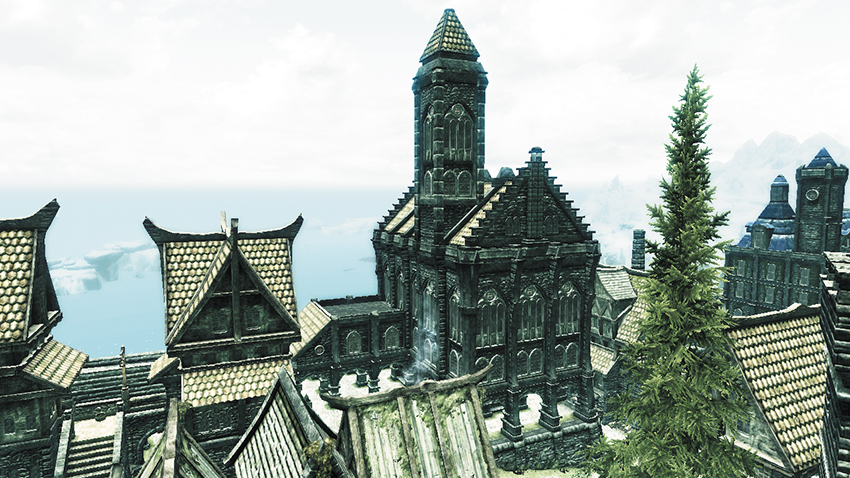
A large building where bards come from all parts of Skyrim and beyond to learn how to sing and play instruments. There are two entrances, and all are welcome. Outside is a large stone courtyard where the Burning of Old King Olaf festival was historically held. Each student works with all the different teachers during the course of a week. However, each has preferred instruments or instructors.
Cellar (Lower Floor)
This contains a sleeping area with four beds for the current students. There is a common area, Brendt’s small bedroom, and a kitchen here too.
Main Entrance Hall (Main Floor)
The main entrance here is made to receive guests and is built to impress. Giraud Gemane and Viarmo are usually here. Nearby is a well-stocked library and a bar. If you are on Favor: Rare Item Hunt for Lami in Morthal, you can find a skill book on the counter in the library.
- Skill Book [Alchemy]: Song of the Alchemists [E1/10]
Bedrooms (Main Floor)
There are four bedrooms here, each with a variety of books and instruments, and a bed for each of the teachers.
Classrooms (Upper Floor)
The top floor of the College has two large classrooms filled with more books and instruments. Find another Skill Book secreted among a stack of common tomes on the top tier of a tall metal shelf up here.
- Skill Book [Speech]: The Buying Game [E1/10]
 Erikur’s House
- Erikur
- Melaran
Erikur is a Thane of Solitude, and his house is a large, grand structure. Notice the Shadowmarks near the entrances. Inside, the cellar has little more than barrels and some stocked food. The main floor is dominated by the Arcane Enchanter, various potions, and a few ingredients. Upstairs is a balcony running around the entire perimeter, a small library, and a single bedroom with a long chest to steal from.
- Shadowmark: “Protected”
- Crafting: Arcane Enchanter
- Trainer (Alteration: Journeyman): Melaran [1/3]
- Chest
- Potions aplenty
 Bryling’s House
- Bryling
- Irnskar Ironhand
Bryling is an important Thane, and the house reflects this, although her treasury is getting empty. Irnskar Ironhand is her retainer and likely to be guarding inside this place. The wine cellar has a knapsack and some scattered weaponry and clothes. The main floor has an extensive library and a variety of food. Upstairs there are two bedrooms, one with a chest.
- Shadowmark: “Loot”
- Chest
- Loose gear
 Blue Palace
- Jarl Elisif the Fair
- Falk Firebeard
- Bolgeir Bearclaw
- Sybille Stentor
- Odar
- Erdi
- Una
 The following leaders of Solitude are loyal to the Imperials at the start of the Civil War. They remain in place, even if Solitude falls to the Stormcloaks, at the end of the Civil War Quests.
Jarl Elisif the Fair
With the recent death of Jarl Torygg, his beautiful widow, Elisif, rules Solitude for now. She is a young Nord woman, wholly unsuited to rule. The real power lies with General Tullius, technically an Imperial advisor. Personally, Elisif is sympathetic to the Imperial cause. She has a personal hatred for the Stormcloak leader Ulfric, who killed her husband, Torygg, and is just politically savvy enough to realize that her rule, and probably her head, are in place only so long as she is useful to the Empire. She believes that should the Empire regain control of Skyrim, she would be made High Queen.
Falk Firebeard (Steward)
Falk also serves as treasurer when necessary. He is a skilled bureaucrat, despite his years as a member of the Companions. He is loyal to Elisif but frequently gets frustrated at her foolishness. His hair is bright red, although shot with gray, hence his name.
- Unique Item: Shield of Solitude [3/112]
Bolgeir Bearclaw (Housecarl)
Jarl Elisif never goes anywhere without Bolgeir. He is utterly loyal and highly competent. What he lacks in creativity and social sensitivity, he makes up for in ferociousness. As a youth, he hunted bears. Once, when a bear turned on him, he cut its paw off with a single blow of his axe.
Sybille Stentor (Court Wizard)
Although she has served the Jarls of Solitude for over 20 years, Sybille looks no more than 18. Palace gossip has a multitude of theories for her unnatural youth. The one about her being a vampire may hold most credence. Her role as Court Wizard is a convenience.
- Trainer (Spell Vendor): Sybille Stentor [1/12]
Exterior
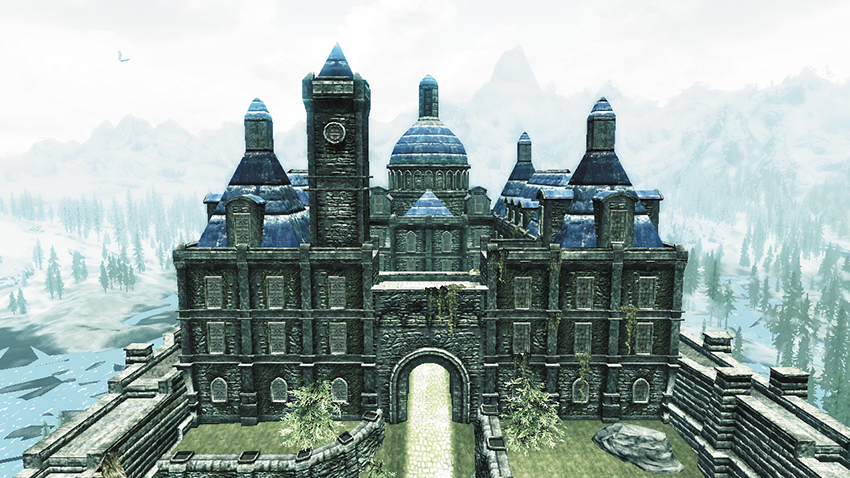
Solitude’s other awe-inspiring landmark is its ornate palace, where the newly appointed Jarl Elisif the Fair resides. It is built on the ruins of the old palace, which was burned to the ground when Queen Potema was finally defeated in the War of the Red Diamond. There is only one entrance: from the cloisters at the end of the Avenues District.
Interior
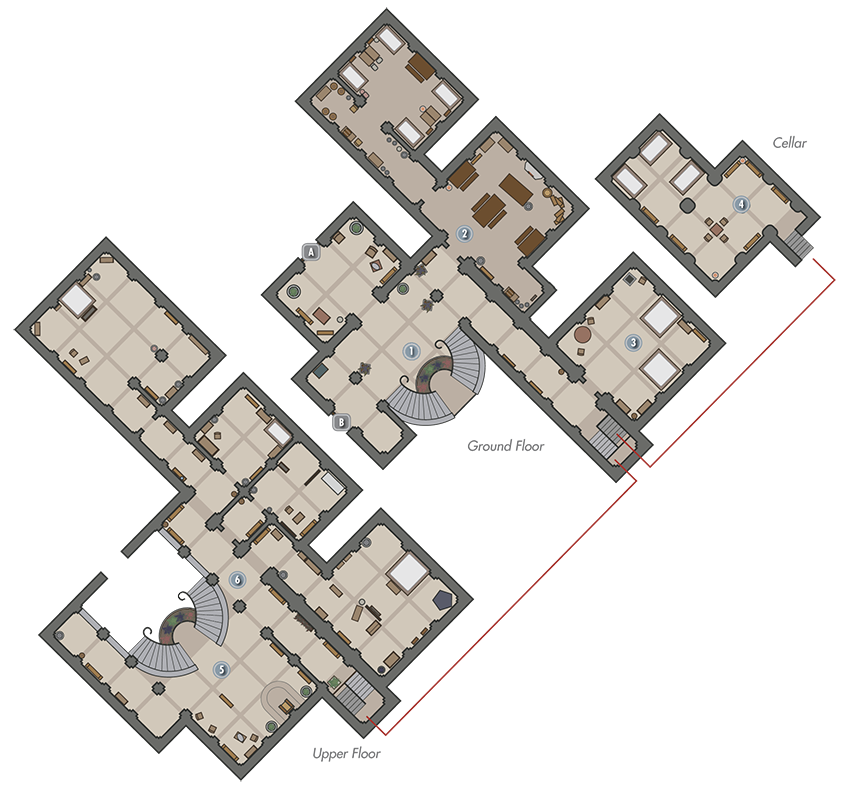
Door to Skyrim
Entrance Staircases (Ground Floor)
Through the Receiving Hall is a pair of impressive curved staircases and guards dotted around. To the right (southwest) is a chest and a door to the Pelagius Wing, which is firmly sealed. To the left (northeast) is a corridor to the kitchens and private staircase.
Door to Pelagius Wing (Sealed)
Kitchens (Ground Floor)
A large array of food is stocked here, presided over by Odar the chef. There’s a storage corridor to the northwest leading to wine barrels and a servants’ bedroom.
Large Bedroom (Ground Floor)
Close to the private steps, there are two large beds in here but little to steal.
Cellar (Lower Floor)
Head down the private steps to a chamber of beds and a chest.
- Chest
Jarl’s Throne Room (Upper Floor)
Atop the curved stairs (or the private ones) is the main chamber where Jarl Elisif the Fair resides and listens to the news of the day and any worries her subjects may have. She is guarded by Bolgeir Bearclaw, her Housecarl. She is flanked by Sybille Stentor (Court Wizard), Falk Firebeard (Steward), and the two Thanes Erikur and Bryling.
Northeast Corridor (Upper Floor)
To the left (northeast) is a corridor where you’ll find a book named Lost Legends on a low table (read it to start a quest). The corridor leads to the Court Wizard’s bedroom. There’s an Arcane Enchanter and some impressive staffs, potions, and books on show here. To the north is Falk’s small bedroom and the Jarl’s bedchamber. This impressive room has a small alcove with a Skill Book and an Unusual Gem on the bedside cabinet.
- Crafting: Arcane Enchanter
- Skill Book [Speech]: Biography of the Wolf Queen [D1/10]
- Unusual Gem: Stone of Barenziah [2/24]
- Chest
- Potions aplenty
Door to Blue Palace (Sealed)
Pelagius Wing (Ground Floor)
This part of the palace is sealed off and uninhabited. This wing is where Pelagius the Mad lived before becoming Emperor and is said to be cursed. No one will set foot in there. If you begin Daedric Quest: The Mind of Madness and obtain the key from Falk Firebeard, you can journey into the depths of the long-dead ruler’s mind itself!
Portal to the Mind of Pelagius the Mad
Potema’s Catacombs
Related Quests
- Side Quest: The Man Who Cried Wolf
- Side Quest: The Wolf Queen Awakened
Dungeon: Vampire Lair
- Draugr
- Vampire
Crafting
- Alchemy Lab
- Grindstone
Dangers
- Flamethrower Trap (pressure plate)
- Oil Lamp Trap
- Oil Pool Trap
- Swinging Wall Trap (pressure plate)
- Trapped Chest
- Quest Items: Potema’s Skull
Collectibles
- Skill Book [Lockpicking]: Surfeit of Thieves
- Area Is Locked (quest required)
- Chest(s)
- Potions
- Loose gear
- Potema, the Wolf Queen
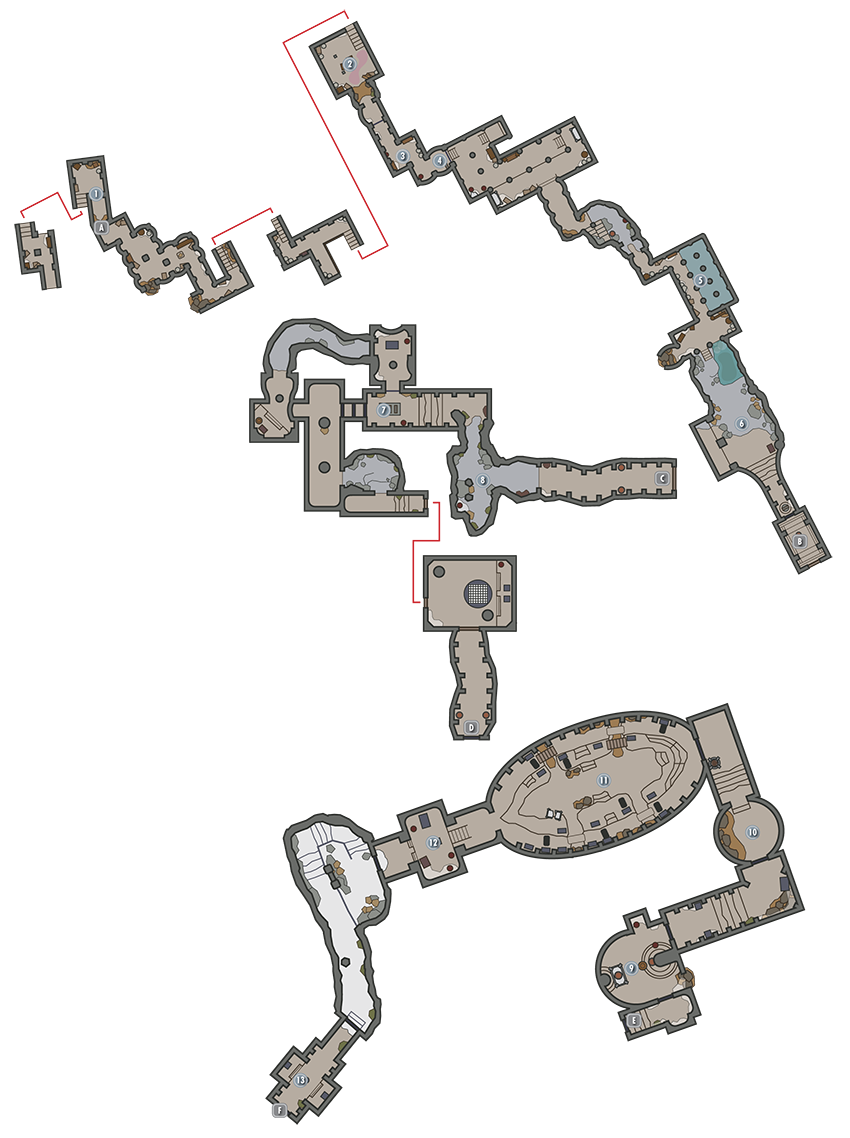
A hidden and vast underground set of corridors under Solitude, this place of evil is only accessible during Side Quest: The Wolf Queen Awakened. You reach the Catacombs via the cellar of the Temple of the Divines. It is otherwise completely sealed off.
Potema’s Catacombs (Interior)
Passage to Temple of the Divines
Wolf Queen Frieze
Potema mocks and threatens you at this wall frieze of the Wolf Queen and removes the archway spears blocking your path. Your first Draugr attack occurs just afterward, in the cobwebbed and abandoned dungeon bar.
Banquet Chamber
There are two small chests at the bottom of the stone steps leading to a balcony and a hanging lamp and oil spill. Find a Skill Book resting atop a small table in this area.
- Danger! Oil Lamp Trap
- Danger! Oil Pool Trap
- Skill Book [Lockpicking]: Surfeit of Thieves
Draugr Vaults
Watch out for the fire trap and pressure plate close to one Draugr alcove.
- Danger! Flamethrower Trap (pressure plate)
Portcullis
Use the wall lever to the right to raise it.
Flooded Vaults
Your first vampire combat occurs here. Watch for a swinging gate trap; check that floor!
- Danger! Swinging Wall Trap (pressure plate)
Potema’s Refuge Entrance
This arched barrow has a grindstone and a trap chest; unlock the trap trigger or feel flames in your face! Then activate the lever, wait for your moment to step through the rotating wall, and access the Alchemy Lab if you wish, before proceeding.
Door to Potema’s Refuge
Potema’s Refuge (Interior)
Door to Potema’s Catacombs
Three-Lever Puzzle and Secret Room
Fight Draugr and watch for vampires as you reach three levers and three rotating walls. Make sure all three levers are pointing to the right (if you’re facing the walls), as that activates the walls’ rotations. Then step through each wall when the portcullises rise. Watch out for Soul Gems striking you with magical damage in the chamber beyond.
Before accessing the three levers, open the gate to the north, fight a Vampire and look for a lever on the ground behind the coffin. This opens a stone wall leading around to a secret room with a chest to plunder
- Chest
Floor Grating Trapdoor Chamber
You are challenged to a fight with a vampire and a Draugr. Potema’s Sanctum Key is resting on the arm of the empty throne. There’s another on the vampire’s corpse. Or you can unlock the door normally (Master). The grating below is simply the start of this interior area, near the three-lever puzzle.
- Potema’s Sanctum Key
Door to Potema’s Sanctum
Potema’s Sanctum (Interior)
 Door to Potema’s Refuge
Embalming Room
Potema’s Corpse Shrine
Draugr on a throne and a skeleton attack as you reach a circular shrine of corpses and a beckoning from Potema herself. She summons some of the dead to attack you. Grab the potions of Resist Shock in an alcove just beyond; You’ll need them shortly.
- Potions
- Loose gear
Potema’s Sanctum Chamber
The final battle against Potema’s inner council (Draugr) begins and ends here. You must slay 12 Draugr of increasing ability. Do your best to avoid getting zapped by the beam of power arcing from Potema’s floating essence, and take cover in the antichamber if you must.
Potema’s Throne
You fight the remaining energy from Potema here and collect her skull and any other items you wish. Check the large chest behind her throne.
- Potema’s Skull
- Chest
- Loose gear
Secluded Chamber
Exit via the door behind Potema’s throne, and scale the snowy interior to a small Draugr corridor with two thrones. Then emerge out onto the Secluded Chamber, into the wilds of Skyrim’s exterior, north of Solitude and just east of the Dainty Sload.
 Door to Skyrim