
Elder Scrolls V: Skyrim Guide The Atlas Solstheim: Northern Mountains
Primary Locations
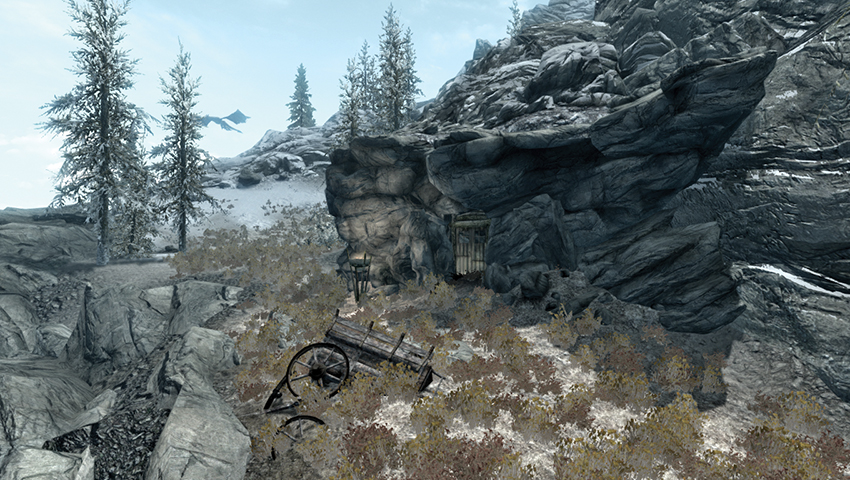
[S.N01] Damphall Mine
Related Quests
- None
Recommended Level: 10
Dungeon: Mine
- Reaver
Crafting
- Alchemy Lab
- Anvil
- Smelter
- Tanning Rack
- Wood Chopping Block
Dangers
- Danger! Oil Lamp Trap (5)
- Danger! Rockfall Trap
Miscellaneous
- Chest
- Potions
- Loose gear
- Lots o’ gold
Exterior
An abandoned iron and silver mine has been repurposed by a band of Reavers. It is located on the lower rocky abutments overlooking the Sea of Ghosts, just below the snow line. The entrance is slightly precarious; bring your best Reaver-killing equipment and slay the single foe outside, near the half-buried cart.
- Reaver
Interior
 Door to Solstheim
 Grotto Entrance
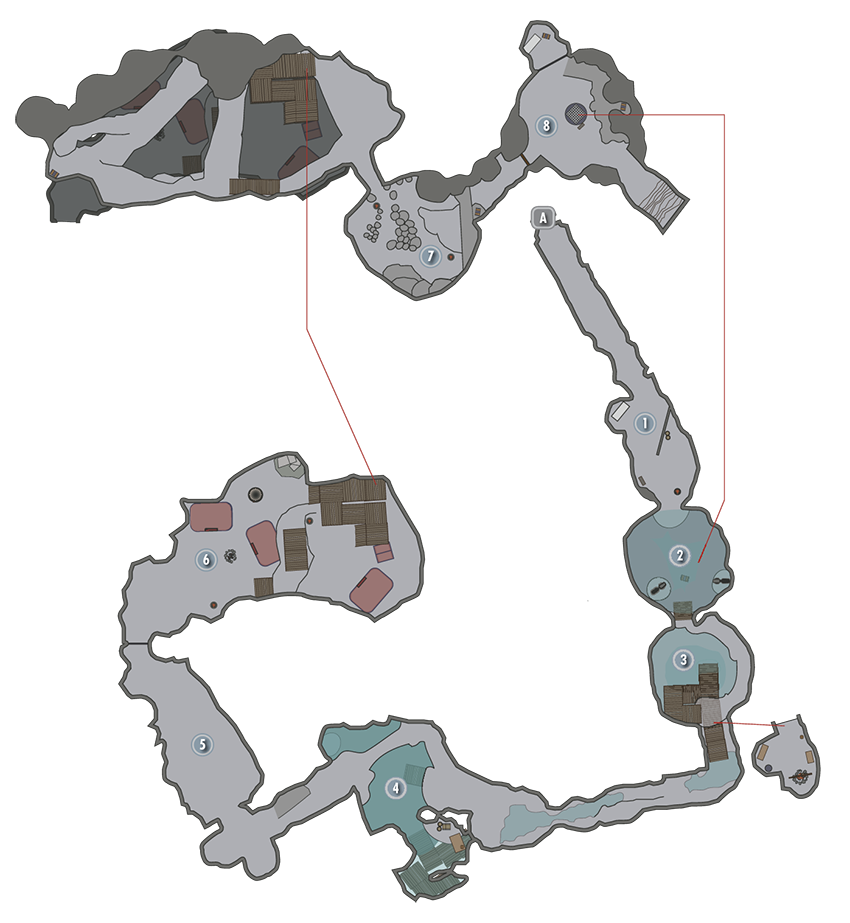
Head down from the entrance, starting combat with two Reavers behind the fallen fencing. There’s a single potion and purse to collect and some optional mining to attempt.
- Potions
- Pickaxe
- Iron Ore Vein
 Grotto and Plunge Pool
This roughly circular and waterlogged mine shaft chamber is extremely steep. Look up at the square-shaped trapdoor two floors above you; this is your spectacular exit route! The pool is deep and has a chest, six skeletal remains, and two Reaver corpses to find.
- Chest
 Lower Pool and Alchemist’s Alcove
For a more stealthy and safer way to remove the Reaver threats in this area, use the ledge left of the waterfall and work your way around, passing a tunnel to your left; fight two foes here near an Alchemy Lab and shelf of potions. The rickety mine platforms lead down to a second tunnel directly under the first. The water below is devoid of items, save a Nordic Barnacle Cluster.
- Crafting: Alchemy Lab
- Potions
- Pickaxe
- Reaver
 Bridge Cavern
Head through the lower tunnel, passing the spiky grass and an old campfire (watch for the tripwire trap!). Head into a cave with a low ceiling and a natural rock bridge ahead (west). Expect a silver ore vein and two Reavers on this bridge (shoot the oil lamp to splatter them with fire). Before continuing, take a dip in the water; there is a gap to swim through to the southeast leading to a cave alcove with the following:
- Danger! Oil Lamp Trap (2)
- Danger! Rockfall Trap
- Reaver
- Silver Ore Vein
- Book: Ahzidal’s Descent
- Statue of Dibella
- Gold Ingot (3)
- Chest
 Old Miners’ Camp
Cross the bridge, climb over the skeletal feet of a crushed miner, and pass the wood chopping block and old Nordic carving to reach a cell door. Crafting: Wood Chopping Block
 Reavers’ Camp
Two pelt tents and at least five Reavers are waiting in this cavern, which grows vertically with two bridges ahead of you and ramps and ledges to ascend. The lower camp has a chest [Novice] and some potions in one tent and a smelter with iron ore behind it. Use the oil lamp traps if you wish. Climb the wooden ramps past a third and fourth tent to the ledge above and another ancient Nord carving. There’s a narrow tunnel entrance ahead (southeast) and a moss-walled ledge to your right (west), leading to a natural arch where a skeletal victim paid the price for inaccurate Reaver archery! The ledges to the west lead to a bloody executioner’s stump and another chest.
- Danger! Oil Lamp Trap (3)
- Reaver
- Crafting: Anvil, smelter, tanning rack
- Pickaxe
- Chest (2) [1 = Novice]
- Potions
- Loose Gear
 Stalagmite Ascent
Climb the narrow, steep, and winding path with stalagmites around you, pausing to edge up the narrow path to your right (northeast) to a well-hidden chest. Slay the Reaver at the top. Then pull the chain to release the rock wall.
- Reaver
- Chest
 Rock Waterfall and the Long Drop
The remaining Reavers (around three, including a leader carrying a Treasure Room Key) are in this final chamber, consisting of a rocky waterfall (which you can climb to reach a chest). The cell door [Master] is more easily opened with the key, leading to a chest and some excellent gear and valuables. When you’re ready to leave, retrace your steps or fall down the trapdoor into the plunge pool (Location [2]), then head northwest.
- Reaver
- Treasure Room Key
- Lots o’ gold
- Loose gear Chest (2)
[S.N02] Water Stone
Related Quests
- Dragonborn Main Quest: Cleansing the Stones
Recommended Level: 25
Habitation: All-Maker Stone
- Benkum
- Hjalfar
- Liesi
- Palevius Lex
Special Area
- Standing Stones
Miscellaneous
- Area is locked
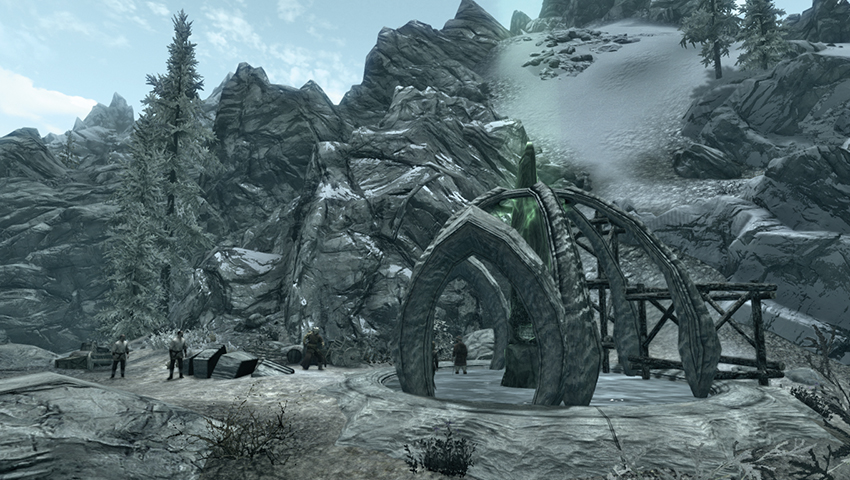
Once used in rituals during the time of the Bloodmoon, this is one of the All-Maker Stones sacred to the Skaal. Currently, its power is being siphoned by Miraak and stone arches constructed by four enthralled sailors who were only supposed to take a short shore leave on Solstheim. The Bend Will Shout is required to remove the trance the sailors are under and to cleanse the stone of Miraak’s influence. After this, the sailors depart. Beware the dragon that is released out to the west, once the Lurker is summoned; both must be defeated or you must run from them.
- Power: Waters of Life
[S.N03] Fahlbtharz
Related Quests
- Solstheim Side Quest: The Challenges of Kagrumez*
Recommended Level: 25
Dungeon: Dwarven City
- Albino Spider
- Dwarven Ballista
- Dwarven Centurion
- Dwarven Sphere
- Dwarven Spider
- Oil Spider
- Riekling
Dangers
- Dwarven Fire Pillar Trap
- Dwarven Swinging Trap
Puzzle
- Dwarven Puzzle
Collectibles
- Kagrumez Resonance Gem [DB2/5]
- Unique Item: Visage of Mzund [DB20/31]
Miscellaneous
- Chest
- Loose gear
- Lots o’ gold
Exterior
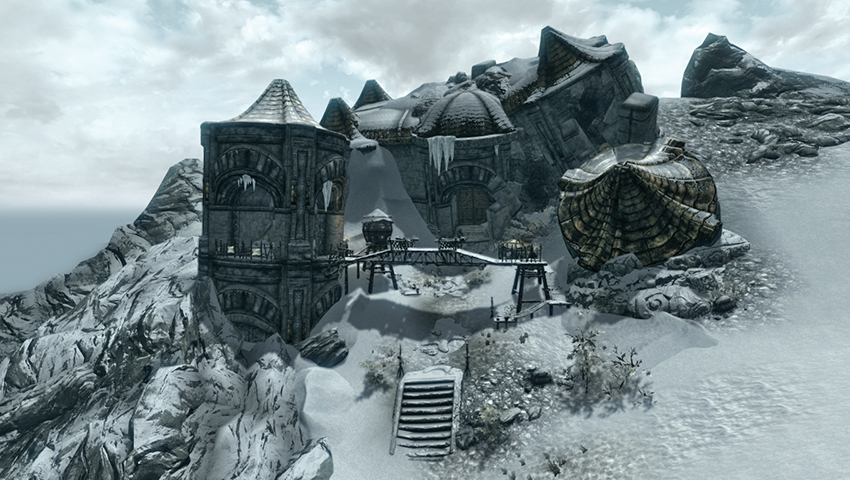
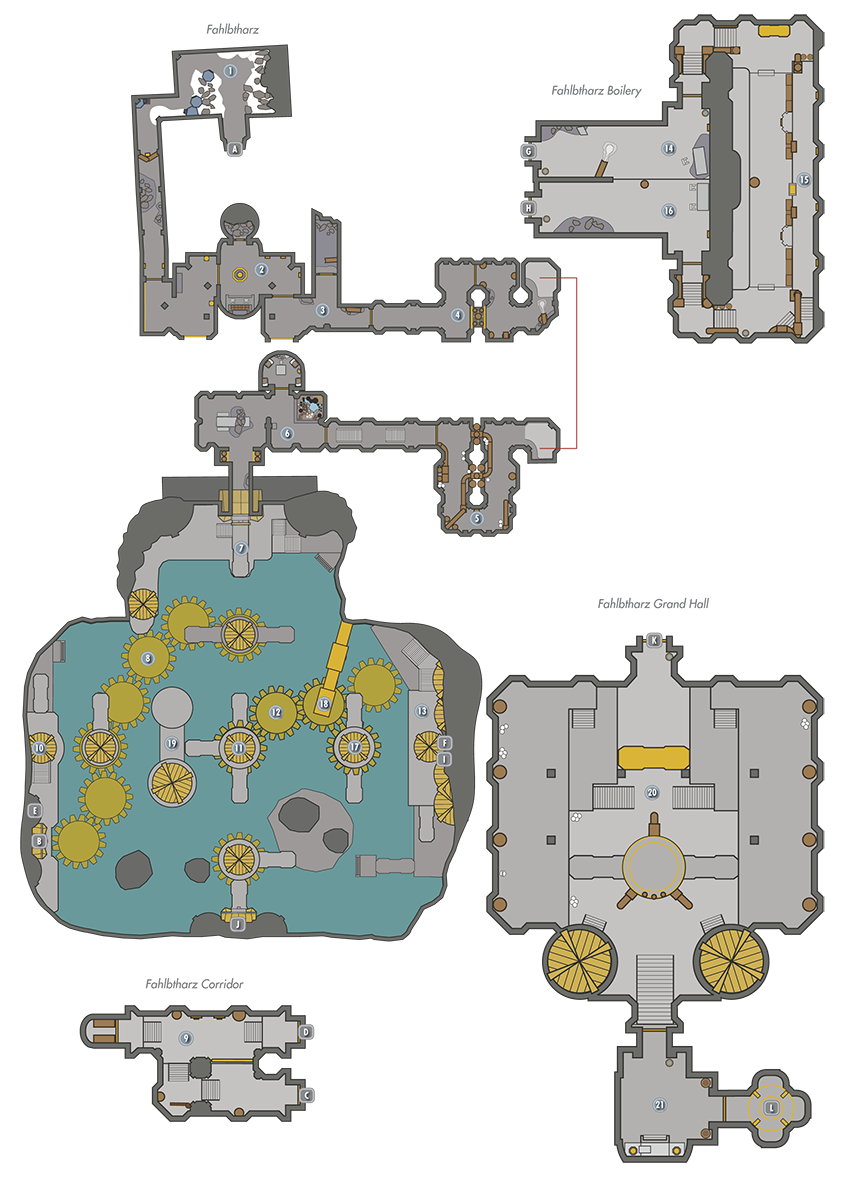
This extensive Dwarven dungeon complex is guarded by new squatters, appropriated by Rieklings. Head through the high mountains to the northwest and approach the Rieklings heading north, or south from the sagging rooftops of the ruins. The nearby Fahlbtharz Elevator to the south is where you exit. Defeat the rider and three or four spear-throwing foes on the rickety battlements, check the area for a chest, then enter the door to the north.
- Chest
- Mounted Riekling
- Riekling
Interior
Door to Solstheim
Riekling Camp
Enter the sloping stone corridor, fight through a Riekling camp with three or four foes, and descend south, passing the Riekling corpses and engaging Automatons farther down.
- Riekling
- Dwarven Sphere
Control Room
Besides a locked door [Novice] with some items behind it, this chamber features barred windows overlooking the gigantic cranking mechanisms of the waterlogged chamber, and also a shut gate. Activate the gate at the bank of buttons; look for the second button from the right side, along the bottom row, to open it (the rest launch traps or nothing at all).
- Danger: Dwarven fire pillar trap
- Loose gear
Connecting Passage
Check the dead end before you open the door for a chest.
- Chest [Adept]
- Dwarven Automatons
Kinetic Resonator
Hit the Kinetic Resonator with a weapon or arrow to unlock the gate around the corner. Then continue, looting a wall chest [Expert] as you wind around and down.
- Chest [Expert]
Leaking Oil Corridor
This is an oil-filled corridor with scuttling Oil Spiders to squash. Light the trail of oil first to avoid any potential dangers. Slash a second Kinetic Resonator encased in cobwebs to open a subsequent gate and access a lower set of chambers.
- Oil Spider
Fungal Chambers
These chambers contain glowing fungi and Dwarven Automatons. Deal with them, then head to the south, opening the door to reach the Water Chamber.
- Chest
- Dwarven Automaton
Water Chamber (First Visit: Entrance)
This area is initially bewildering, so stop and work out where you are in this chamber (check the adjacent map). Face south, and check your location; ahead is a pointed gatehouse with a gap you can’t reach. So head right (west) and through a second (open) gatehouse to peer down to a set of giant cogs.
Water Chamber (First Visit: Lower Cogs)
Initially you can’t access these from the water, so face south and drop down onto the cogs, heading southwest (ignoring or fighting the Automatons). Stay on the cogs until you reach the door to Fahlbtharz Corridor.
- Dwarven Automation
 Door to Fahlbtharz Corridor
Fahlbtharz Corridor
 Door to Fahlbtharz
Corridor Stairs and Storage
Ascend the steps, watching for the pressure plate that releases a swinging trap. Pass the gate [Adept] leading to an alcove chest, and ascend back to the door to Fahlbtharz.
- Danger! Dwarven swinging trap
- Chest
- Loose gear
 Door to Fahlbtharz
Fahlbtharz
 Door to Fahlbtharz Corridor
 Water Chamber (Second Visit: Western Balcony)
Turn left (north), up the steps to a valve that lowers a ramp, allowing you quicker access back here if you fall. Pull the adjacent lever, opening up a bridge to the east.
 Water Chamber (Second Visit: Connecting Bridges)
Head along the connecting bridges and gatehouses, then turn left (north) and engage a ballista. Now face east.
 Water Chamber (Second Visit: Second Cogs)
Look down at the whirring cogs and drop to the bloody remains of a bandit adventurer named Eydis. Her journal reveals she was searching for an enchanted Dwarven Helm with her friend Ulyn. Head east along the cogs to the edge of the Water Chamber and up the steps to a door leading to Fahlbtharz Boilery.
- Dwarven Ballista
- Eydis’s Journal
 Water Chamber (Second Visit: Eastern Balcony)
Ignore the door for the moment, and head to the end of the balcony you’re on to activate a valve that lowers two more ramps. This allows you to come back here if need be.
 Door to Fahlbtharz Boilery
Fahlbtharz Boilery
 Door to Fahlbtharz
 Boilery Entrance Corridor
Enter the Boilery door, heading east, then north, and east again.
- Loose gear
- Dwarven Automaton
 Boilery Piston Gate
Move around to the south through a strange chamber of pistons, pipes, and embedded machinery. Slay the ballista and climb the steps in the southeast corner. This leads to a balcony with a corpse clutching a bow; arrows are nearby. These are the remains of Ulyn, and his journal reveals clues to the secrets of the boilery puzzle you face.
Puzzle Solution: Face the circular piston lock to the west, and view the six kinetic resonators (the propeller devices glowing turquoise, three on either side of the main lock). To open the subsequent gate, you must pull all 20 fuel cylinders into place, activating the boiler. This is achieved by shooting an arrow at some of the resonators. Each resonator activates a specific number of cylinders. Shoot too few and nothing happens. Shoot too many and you release an increasingly dangerous number of Automatons and must defeat them. Each resonator has a set number of cylinders that it releases:
| Cylinders Released | Resonator |
|---|---|
| 3 | Far left |
| 4 | Middle Left |
| 6 | Near Left |
| 9 | Near Right |
| 13 | Middle Right |
| 18 | Far Right |
To reach 20 fuel cylinders, you need to shoot the far left (3), middle left (4), and middle right (13) tonal locks.
- Ulyn’s Journal
- Dwarven Automation
- Loose gear
 Boilery Exit Corridor
Exit via the open gate to the southwest, climbing the stairs and swiping another resonator to open the adjacent gate (saving time if you have to retake this route), and move back into the Water Chamber of Fahlbtharz.
 oor to Fahlbtharz
Fahlbtharz
 Door to Fahlbtharz Boilery
 Water Chamber (Third Visit: Upper Western Alcove)
Activate the lever and head across the bridge that grinds your way, moving west to the edge of the bridge, then turning right (north).
 Water Chamber (Third Visit: Upper Cogs)
Jump onto the cogs, moving west.
 Water Chamber (Third Visit: Second Bridge and Tonal Lock)
Leap to a second bridge and gatehouse section, heading west to a battle with a ballista near a chest and a resonator (in the gatehouse with a skeleton) to shoot (there’s a bow by the skeleton in case you don’t have ranged magic or weapons). This aligns the bridges you were on at the previous lever.
Wait! Make sure you’re standing on the bridge section facing west, with the kinetic resonator diagonally left (southwest) of you! When you hit the resonator, ride the bridge. If you aren’t standing correctly, you need to retrace your steps. Now turn and run south across the bridges to the Fahlbtharz Grand Hall.
- Dwarven Ballista
- Chest
 Door to Fahlbtharz Grand Hall
Fahlbtharz Grand Hall
 Door to Fahlbtharz
 Grand Hall
Clear away the Albino and Oil Spiders, and battle two Dwarven Ballistas immediately. There are two Centurions in this chamber; it is wise to weed out your foes before you face them! Move to the walkway on the upper level and inspect three pedestals (known as Dynamo Actuators) that require a core to operate. If you already have two Dynamo Actuators, you can bypass the Dwarven Centurions; if not, you will need to wrench them from their corpses. Attack the nearby Centurions and scrounge a Centurion Dynamo Core from each, allowing you to raise the steps and remove two sets of bars to the treasure room.
- Albino Spider
- Oil Spider
- Dwarven Ballista
- Dwarven Centurion
- Centurion Dynamo Core (2)
 Grand Hall Treasure Room
Inspect the treasure room thoroughly. Aside from piles of gold, chests, and the unique dwarven helm Visage of Mzund, a Kagrumez Resonance Gem is on a plate. Take what you wish, then leave via the dwarven elevator to the left (east), appearing outside at the Fahlbtharz Elevator.
- Unique Item: Visage of Mzund [DB20/31]
- Kagrumez Resonance Gem [DB2/5]
- Loose gear
- Lots o’ gold
 Elevator to Solstheim
[S.N04] Hvitkald Peak
Dangers
Falling Adventurer!
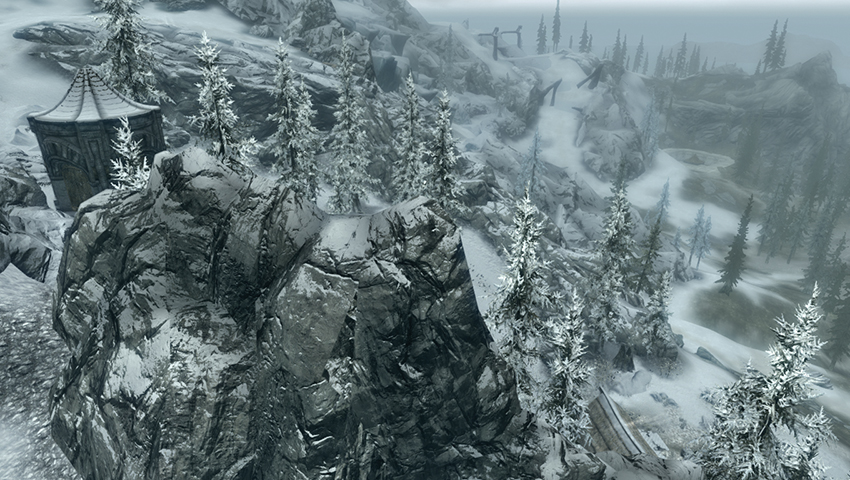
Hvitkald Peak is one of four mountains on Solstheim you can climb. When you reach the summit, a landmark icon appears to reflect this (optional) accomplishment. Begin at the Abandoned Lodge and climb west, up behind the building to the sharp mountain ridge. Turn right (north) and maneuver up the ridgeline, then circle around to face south when you’re almost at the top. Once at the summit, you have commanding views of the following locations:
North: Fahlbtharz elevator is very close, with the main entrance to Fahlbtharz a little farther away.
Northeast: Mount Moesring
East: The path up to Temple of Miraak. The circular indent is the entrance to Kagrumez.
Southeast: Abandoned Lodge, Brodir Grove, and Highpoint Tower.
South: Raven Rock
Southwest: Bloodskal Barrow
[SN.05] Abandoned Lodge
Related Quests
- Solstheim Side Quest: A New Source of Stalhrim
Habitation: Thalmor
- Baldor Iron-Shaper
- Thalmor
Crafting
- Grindstone
Miscellaneous
- Chest
Exterior
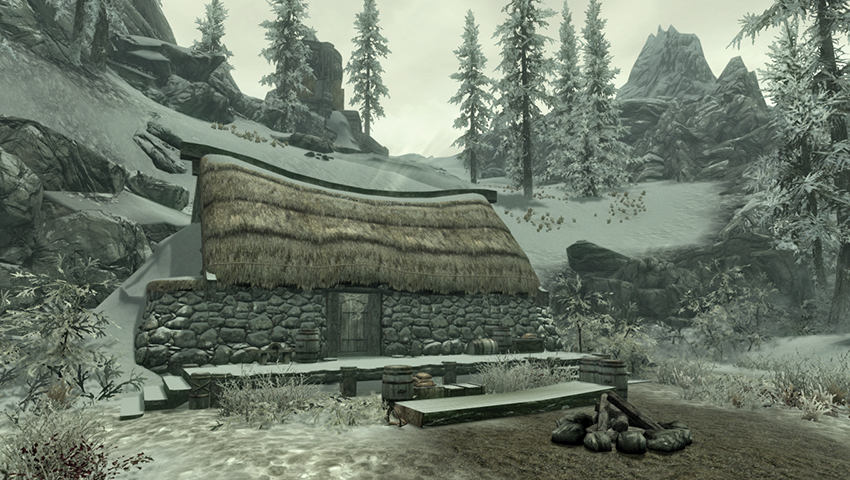
A well-kept but sealed lodge with a grindstone, scattered barrels, and an impressive view of Red Mountain to the southeast. Normally, this place is silent. During the Side Quest, four Thalmor are guarding this location. Find a key on one of their corpses, allowing you to enter.
- Key to Abandoned Lodge
Interior
Inside are two beds, a few scattered coins, and steps down into a cellar bar area where Baldor Iron-Shaper is kept prisoner, near a chest [Novice].
- Baldor Iron-Shaper
- Chest [Novice]
[S.N06] Bristleback Cave
Related Quests
- Solstheim Side Quest: The Great Skyrim Strongbox Hunt*
Recommended Level: 10
Dungeon: Riekling Camp
- Bristleback
- Mounted Riekling
- Riekling
Collectibles
- East Empire Strongbox [DB1/33]
Miscellaneous
- Chest
- Loose Gear
Exterior
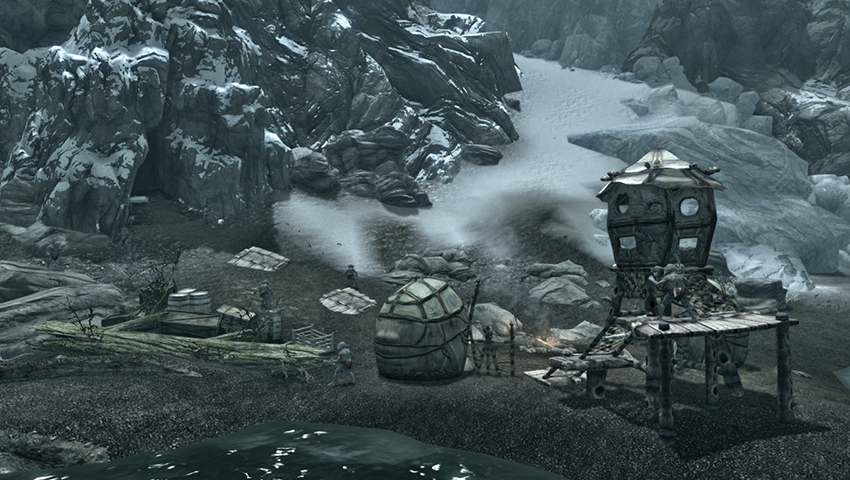
Enter here to see how the Rieklings train their Bristlebacks and observe the Rieklings’ hoarding tendencies. Your exploration begins at the rocky beach entrance, where the Rieklings have erected a rickety watchtower. Slay the three foes here before entering, and be on the lookout for an ambush if you approach the chest. It’s empty.
- Riekling
Interior
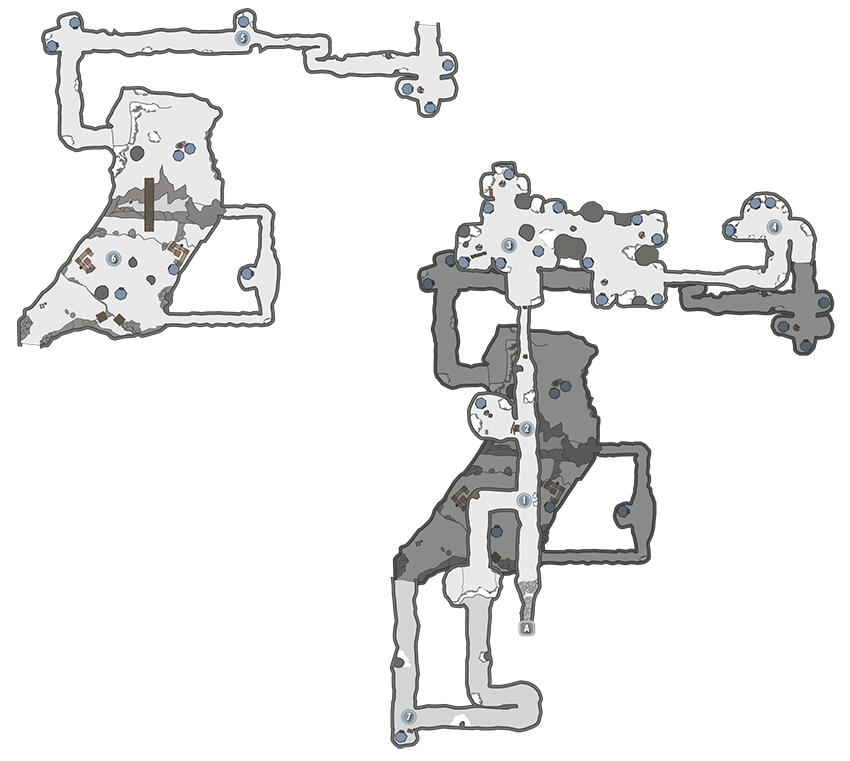
Exit to Solstheim
Entrance Tunnel
Expect an ambush in the entrance tunnel, near the dead Reavers. Just after, the tunnel forks left (west) to the cave exit tunnel and drops north, farther into the icy cave system.
- Loose gear
- Riekling
Upper Camp
There are two ambushes and three or four foes here, along with a large number of low-value trinkets.
- Loose gear
- Riekling
Upper Village
Along with tents and huts, expect at least 12 Rieklings in this elongated ice cavern, which spreads out a little to the east. Search thoroughly for two chests and a Strongbox.
- Loose Gear
- Riekling
- Chest (2) [1 = Adept]
- Strongbox
East Tunnel Camps
Watch for two more ambushes in the tunnel and another one in the small camp. Don’t overlook the tunnel continuing down and to the south; this leads to a lower camp where you’ll find an East Empire Company Strongbox [Expert] on a barrel in the southeast item alcove.
- Loose gear
- Riekling
- East Empire Strongbox [Expert] [DB1/33]
- East Empire Pendant
Western Winding Tunnel
Beware of three ambushes as you make your way through the winding tunnels and occasional huts.
- Loose gear
- Riekling
Low Camp and Bristleback Pens
There is a sizable Riekling presence in this ice chamber, with at least four Bristlebacks, one Mounted Riekling, and five warriors ready to repel your advances. Navigate the fissure and the enemies to the exit tunnel in the southwest part of the chamber. If you fall down the fissure, there’s a chest [Expert] and a narrow exit tunnel that leads back to the southeast part of this location, or you can venture down the tunnel into the fissure to avoid any falling damage.
- Loose gear
- Chest (2) [1 = Expert]
- Riekling
- Mounted Riekling
- Bristleback
Exit Tunnel
Climb this lengthy, winding tunnel with few enemies and a chest to open along the way, and you’re able to drop down near the entrance and escape.
- Chest
- Loose Gear
[S.N07] Northshore Landing
Related Quests
- Solstheim Side Quest: A New Source of Stalhrim
Recommended Level: 25
Habitation: Dock
- Ancarion
- Mudcrab
- Old Salty
- Thalmor Soldier
Crafting
- Tanning Rack
Collectibles
- East Empire Strongbox [DB2/33]
Miscellaneous
- Area is locked
- Chest
Exterior
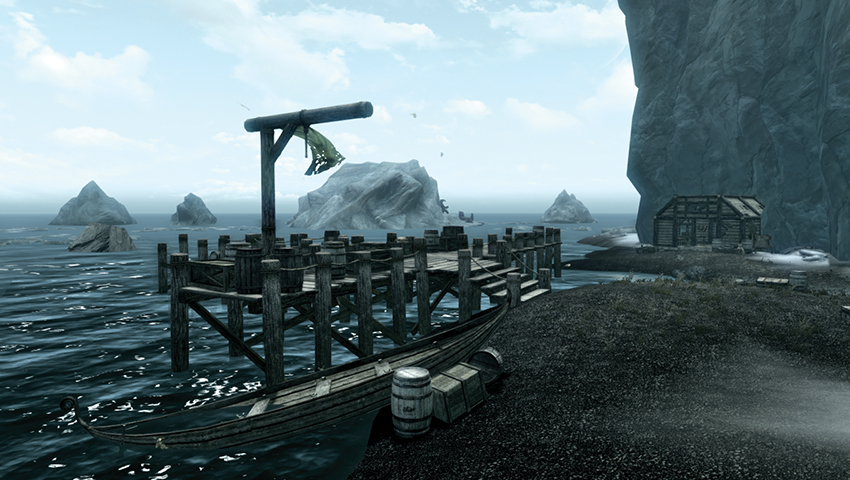
If Solstheim Side Quest: A New Source of Stalhrim isn’t active, this small dock is deserted, save for a few Mudcrabs and a particularly huge specimen named Old Salty. Check the dock for a chest [Novice], and look under the dock in the water for a submerged boat with a chest [Apprentice] next to it. Inspect the small shack with the tanning rack outside; inside is a chest and an East Empire Strongbox [Expert], close to an ebony vein. There’s an empty chest along the stream and another chest at the base of the rushing waterfall. If the quest is active, a Thalmor boat is moored here, along with three soldiers and a leader named Ancarion, all looking for Stalhrim on this blasted isle.
- Chest (5) [1 = Novice, 1 = Apprentice]
- East Empire Strongbox [Expert] [DB2/33]
- East Empire Pendant
- Ebony Ore
- Tanning Rack
- Ancarion
- Stalhrim Deposit (2)
[S.N08] Broken Tusk Mine
Recommended Level: 6
Dungeon: Mine
- Riekling
Collectibles
- East Empire Strongbox [DB3/33]
Miscellaneous
- Chest
- Lots o’ gold
Exterior
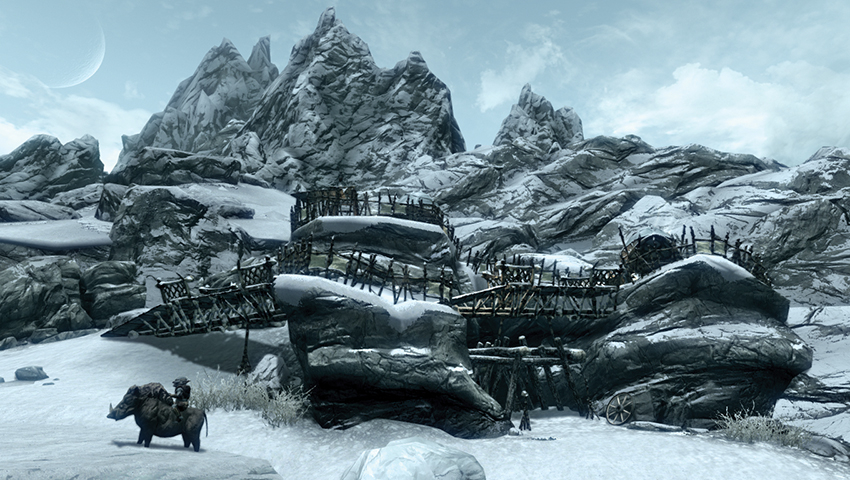
A section of rickety ramparts guarded by five or six Rieklings (one mounted) await you on this snowy climb. Ascend from the entrance area below to the top watchtower, which has a chest and an East Empire Company Strongbox [Expert] to open.
- Chest
- East Empire Strongbox [Expert] [DB3/33]
- East Empire Pendant
Interior
The mine didn’t yield much before it was abandoned by the Skaal. Now the single chamber is home to three Rieklings and their camp. However, they have collected some gold ingots, coin, silver, and gold rings and necklaces for your coffers. The back of the cave has the unpleasant remains of a Reaver.
- Chest (2)
- Ore: Heart Stone (2)
[S.N09] Stalhrim Source
Related Quests
- Solstheim Side Quest: A New Source of Stalhrim
Recommended Level: 25
Habitation: Draugr Crypt
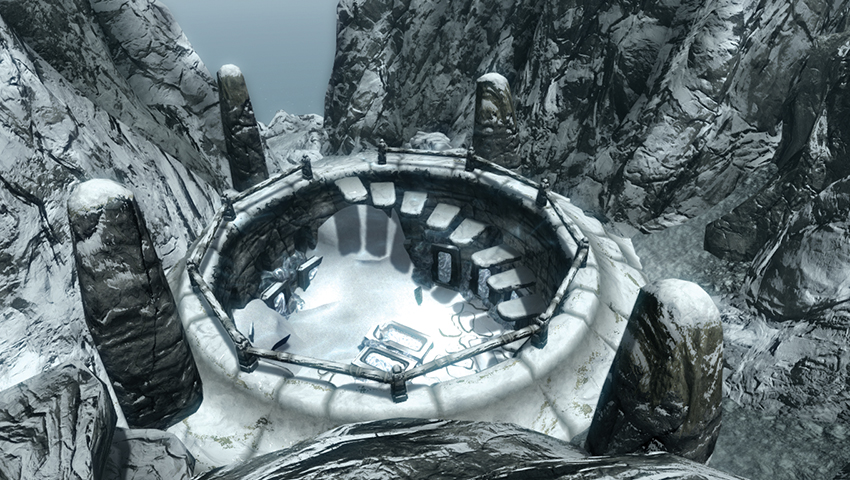
Hidden in a circular burial mound below (west of) White Ridge Barrow is a huge quantity of Stalhrim. If you wish to craft weapons and armor of immeasurable quantity, you may want to come here with an Ancient Nordic Pickaxe. Note that this area, when discovered as part of the Side Quest, will appear on your world map with a landmark icon.
- Stalhrim Deposit (10)
[S.N10] Castle Karstaag Ruins
[S.N11] Castle Karstaag Caverns
Related Quests
- Solstheim Side Quest: Karstaag’s Resurrection*
- Solstheim Regional Activity: Thievery and the Karstaag Connection*
Recommended Level: 50
Dungeon: Riekling Camp
- Karstaag
- Mounted Riekling
- Riekling
Miscellaneous
- Area is locked
- Chest
- Loose gear
Exterior: Both Locations
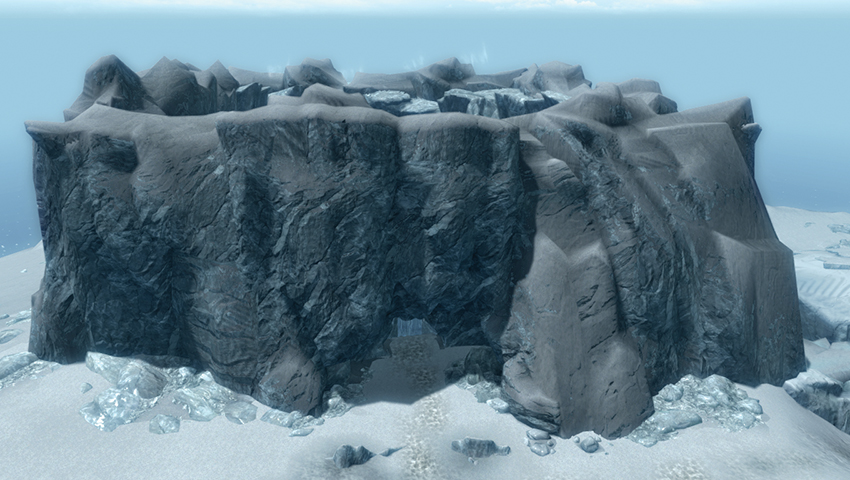
Solstheim’s ancient tales speak of a frost giant both frightening and furious. But this brute is said to have died more than 200 years ago, during the time of the Bloodmoon. Head up the steep snowy slopes toward Castle Karstaag Caverns and Castle Karstaag Ruins. The castle is a massive mound of sculpted ice and looks almost like a mountain.
Although the interior of Castle Karstaag has long since collapsed, its remains, worn down to glacial slabs, still form a near-impenetrable wall. Unless you can pick the lock on the massive front doors [Master], the only open path to the central courtyard (the Ruins) is through the icy, partially flooded tunnels under the castle (the Caverns), where a clan of Rieklings still defends its ancient home.
Interior: Castle Karstaag Caverns
Exit to Solstheim
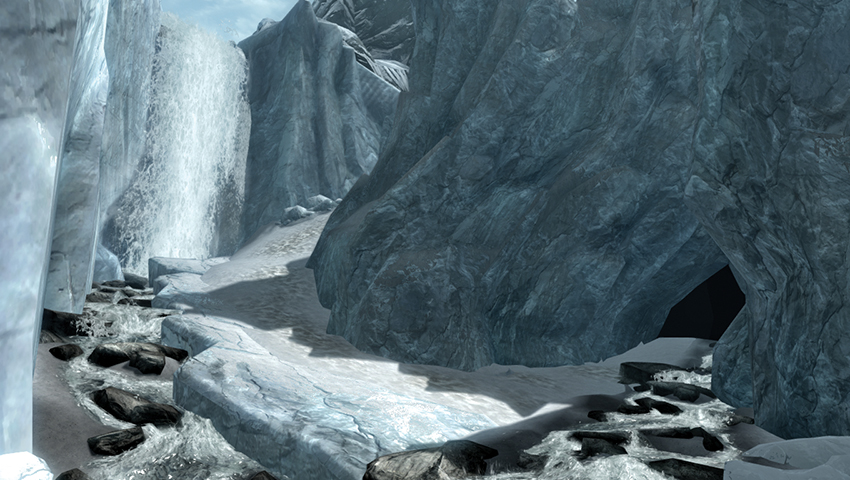
After following the raging mountain stream in the ravine to the castle’s east, you enter the caverns here.
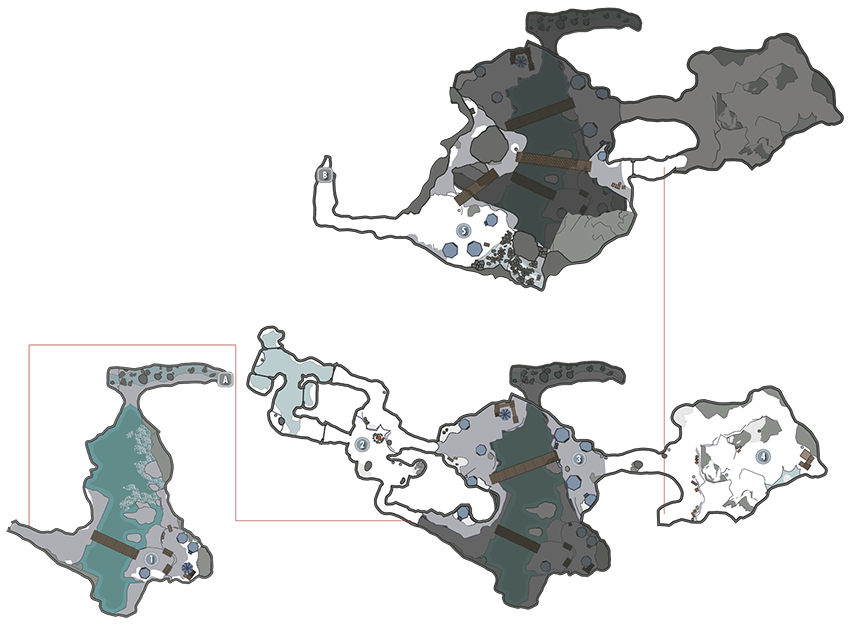
Ice Cavern (First Visit)
Venture into a massive ice cavern with at least five Rieklings. Head along the broken ice, passing the corpse of Esmond Tyne (who has an excellent formula for Bonemold Armor, which Glover Mallory is interested in). Dive down and swim under the bridge to secure items from a sunken chest [Apprentice]. Now climb the icy banks, fighting Rieklings and checking their small camp for coin purses before crossing a bridge heading west into a narrow vertical fissure passage.
- Esmond Tyne
- Bonemold Formula
- Chest [Apprentice]
- Loose gear
- Riekling
Campfire and Ice Doors
Navigate the ice chamber with the campfire and more Rieklings. Open the ice door to the west and unlock any of the other doors [Apprentice, Novice, and Novice] to reach small alcoves with minor items. Head east, through another ice door, up the passage to the top of the camp room, and head left (southeast) through the exit.
- Potions
- Loose gear
- Riekling
Ice Cavern (Second Visit)
Move back out onto an upper walkway of the massive ice cavern. Deal with three or four more Rieklings, check the hut on the narrow ledge around to the south, then cross the long wooden bridge heading east. Slay two more Rieklings on the bridge’s far side, then head up the ice tunnel.
- Loose gear
- Riekling
Bristleback Pen
Peer down to a Bristleback pen with four animals and a Riekling to ignore or slay. If you do head down, don’t forget to claim the chest [Novice] under the overhang.
- Chest [Novice]
- Loose gear
- Riekling
Ice Cavern (Third Visit)
Head out to the highest part of the central ice cavern. Dispatch two foes, cross the bridges heading southwest toward a couple more foes, and check the waterfall area for a chest and skeletal remains. An open ice door to a tunnel leads up into Castle Karstaag Courtyard.
- Chest
- Loose gear
- Riekling
 Exit to Castle Karstaag Courtyard
Interior: Castle Karstaag Courtyard
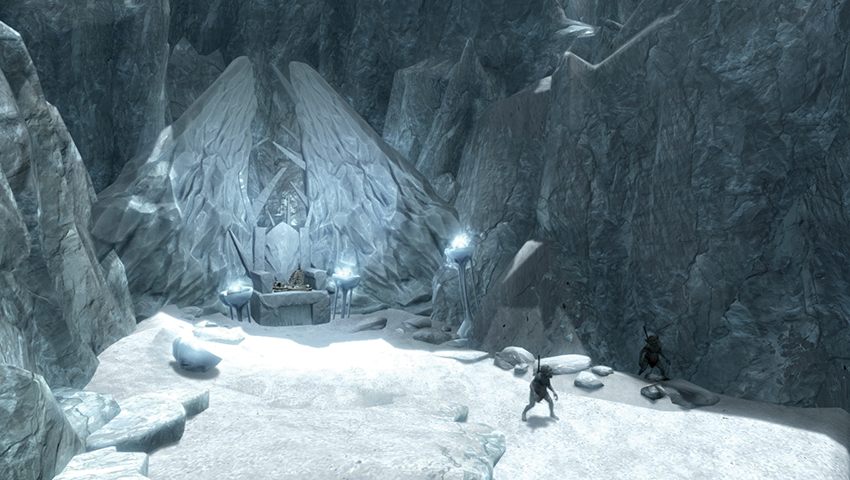
Only the exterior walls remain of this once-mighty castle, forming an arena where three Rieklings await you. Engage the Mounted Riekling before slaying the two on foot. It is important to search the Mounted Riekling, as he is carrying the key. This allows a swift exit through the ice door in the south wall [Master], which is otherwise exceptionally difficult to open. Next, edge over to Karstaag’s ice throne, where a scattering of giant bones rests between two ice torches.
Are you ready to meet Karstaag? If you have Karstaag’s Skull (from Glacial Cave, [S.N12]) activate the throne to place it and prepare yourself!
- Castle Karstaag Key
- Karstaag
- Power: Summon Karstaag
[S.N12] Glacial Cave
Related Quests
- Soltheim Side Quest: The Resurrection of Karstaag*
Recommended Level: 6
Dungeon: Riekling Camp
- Horker
- Riekling
Collectibles
- East Empire Strongbox [DB4/33]
Exterior
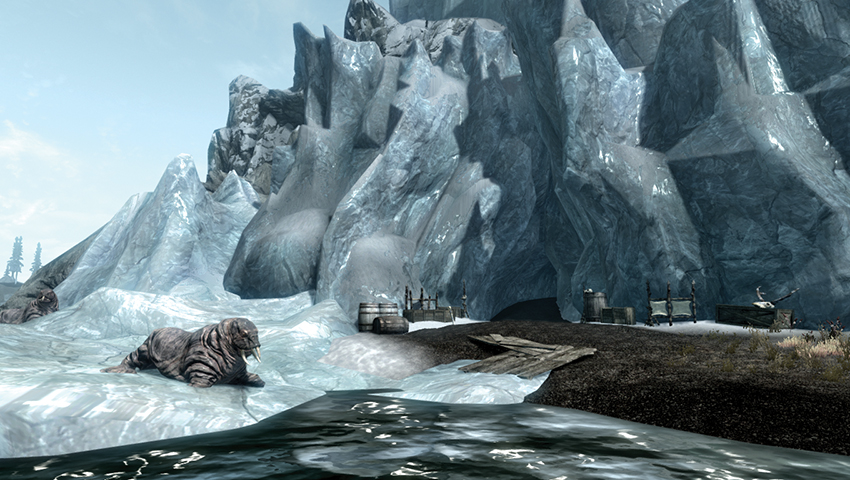
This cave is a naturally occurring fissure, located on Solstheim’s northeastern coast. Outside, expect a few Horkers, a small Malachite ore vein, and a Strongbox to open.
- East Empire Strongbox [Expert] [DB4/33]
- East Empire Pendant
- Malachite Ore
Interior
After a short tunnel with old crates, barrels, and a pickaxe set against the walls, the cave opens up to a small Riekling lair. Check the walls for another Malachite vein and engage three Rieklings in combat. On the far wall is a strange skull embedded into the ice; it belongs to a fabled (and frightening) frost giant....
- Karstaag’s Skull
- Malachite Ore
- Pickaxe
[S.N13] Mortrag Peak
Dangers
- Falling Adventurer!
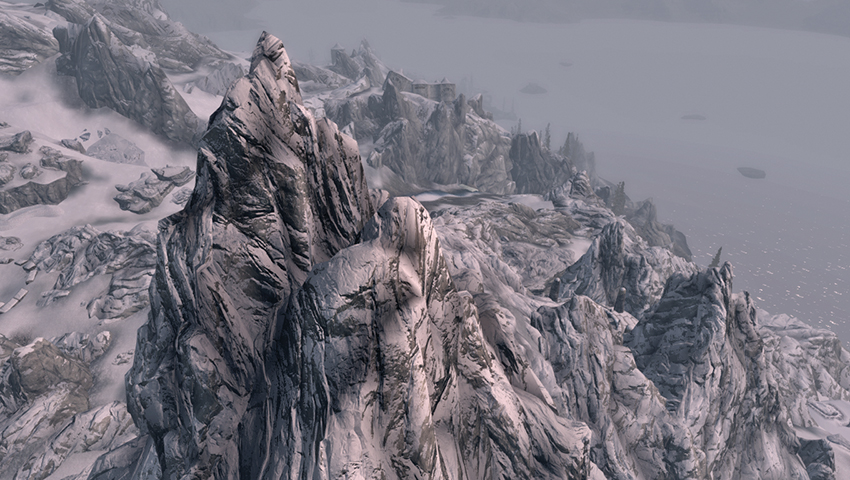
Mortrag Peak is one of four mountains on Solstheim you can climb. When you reach the summit, a landmark icon appears to reflect this (optional) accomplishment. Begin by climbing the rocks above White Ridge Barrow, heading roughly north. Work your way around to the left (northwest) before heading northeast, jumping among the small secondary peaks. The trek is exceptionally difficult but possible. Once at the top, you have commanding views of the following locations:
North: Castle Karstaag Ruins
Northeast: Saering’s Watch
East: Frykte Peak
Southeast: Hrothmund’s Barrow and Red Mountain
South: White Ridge Barrow (below) and Fahlbtharz (in the distance)
Southwest: Secondary Location: Stalhrim Source
[S.N14] Frykte Peak
Dangers
- Falling Adventurer!
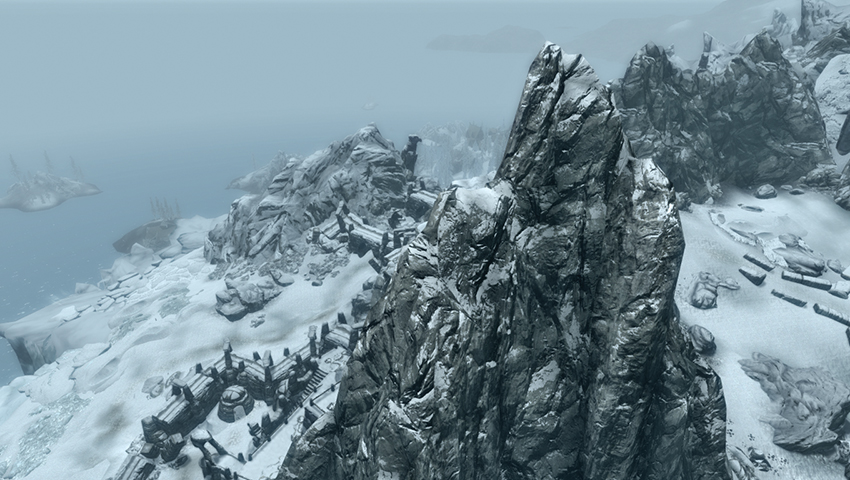
Frykte Peak is one of four mountains on Solstheim you can climb. When you reach the summit, a landmark icon appears to reflect this (optional) accomplishment. Try starting your climb from the henge just north of Horthmund’s Barrow, before you head east and around to Saering’s Watch. Look northwest and carefully scramble up the rocks to the top. From there, you have commanding views of the following locations:
Northeast: Saering’s Watch
Southeast: Hrothmund’s Barrow
Southwest: White Ridge Barrow and Fahlbtharz in the distance
West: Mortrag Peak
Northwest: Castle Karstaag Ruins
[S.N15] Saering’s Watch
Related Quests
- Dragonborn Main Quest: The Fate of the Skaal
Recommended Level: 25
Dungeon: Dragon Lair
- Dragon
- Draugr
Special Area
- Word Wall: Bend Will [DB1/3]
Miscellaneous
- Chest
- Potions
- Loose gear
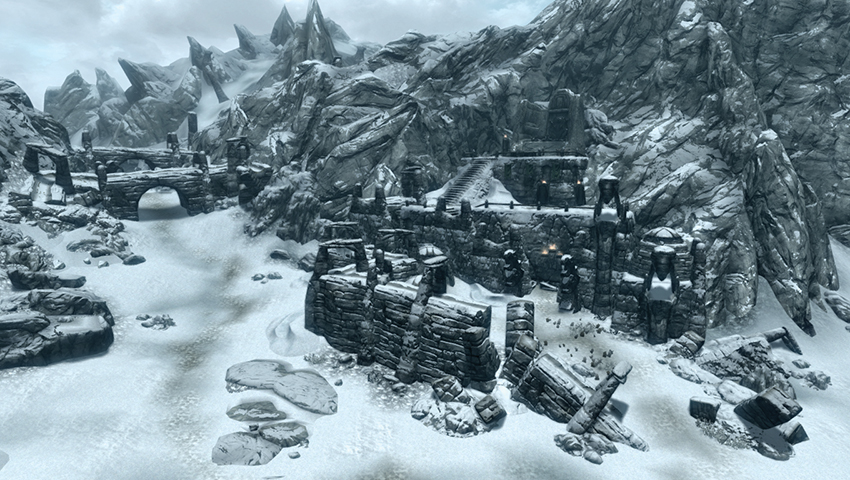
The only dragon lair on the island, this ancient and once-venerated place still has a small guard of Draugr. This is one of the few times you fight them in the open air. Watch for a dragon guarding the Word Wall here. There is a chest behind one of the stone guard huts in the lower-level snow courtyard. The right (northwest) set of steps leads to an upper guard hut and a table with potions. The left (southeast) steps lead up to the Word Wall, a ceremonial altar, and a large chest. Expect at least eight Draugr (plus the dragon) as you explore here.
- Chest (2)
- Loose gear
- Potions
- Word Wall: Bend Will [DB1/3]
[S.N16] Benkongerike
Related Quests
- Solstheim Side Quest: Black Book: Untold Legends
- Solstheim Side Quest: The Great Skyrim Strongbox Hunt*
Recommended Level: 6
Dungeon: Draugr Crypt (Riekling Camp)
- Bristleback
- Mounted Riekling
- Riekling
Collectibles
- East Empire Strongbox [DB5/33]
Special Area
- Black Book: Untold Legends
- Word Wall: Cyclone [DB1/3]
Dangers
- Swinging Wall Trap (3)
Puzzle
- Nordic Puzzle Pillars
Miscellaneous
- Chest
- Potions
- Loose Gear
Exterior
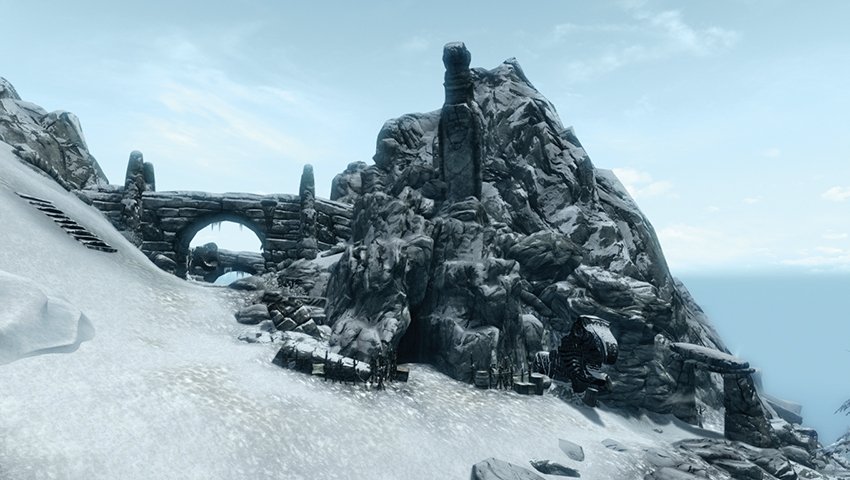
A vast and icy cave system that intrudes into an ancient Nord crypt, Benkongerike is one of the largest locations in the upper mountains that you can explore. The entrance is along a narrow bluff southeast of Saering’s Watch. Claim the chest before you enter.
- Chest [Novice]
Interior: Benkongerike
Exit to Solstheim
Entrance Tunnel
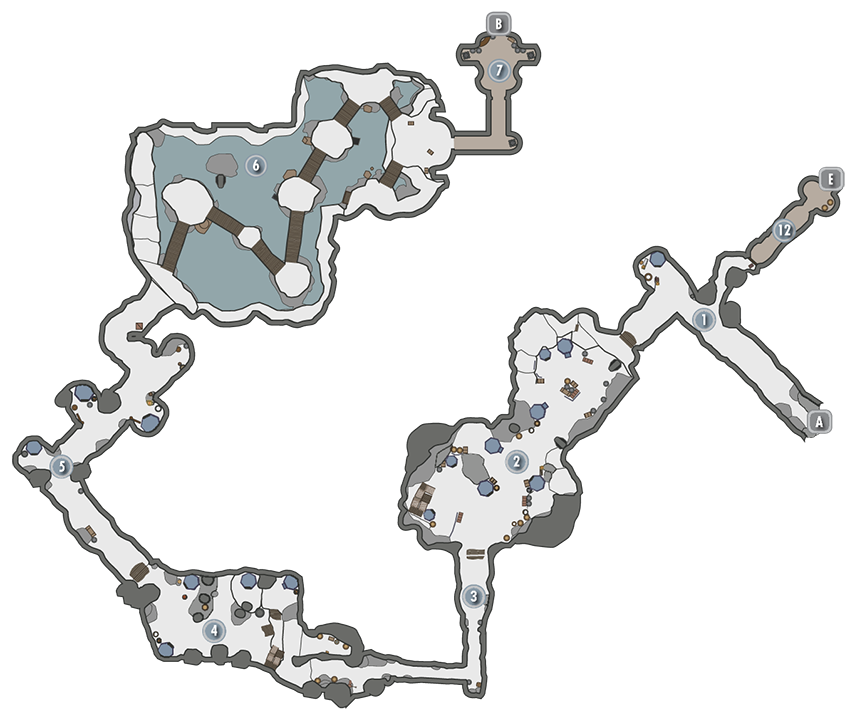
The stone here shows signs of workmanship, unlike the naturally occurring ice tunnels. There’s a very narrow side tunnel to your right (north), leading to a chest; this is the exit from Location [12].
- Chest [Novice]
Stone Pillars Riekling Camp
There are four or five Rieklings and a Bristleback in this long chamber of a half-dozen huts, with fallen Nord pillars helping to steady the crumbling roof. The camps have a variety of detritus but nothing of high value.
- Riekling
- Bristleback
Ice Tunnel
Meander down here, watching for a couple of foes as you emerge overlooking the ice cavern camp. There’s a small, dead-end ice tunnel with a chest to inspect.
- Chest
- Riekling
Ice Cavern Riekling Camp
Aside from two or three foes, there’s little to worry about here; in fact, one of the huts has a flawless sapphire to grab. Continue deeper into these tunnels.
- Flawless Sapphire
- Riekling
Trap Tunnel
Carefully tread down this narrow ice tunnel, as there are three ambushes and two tripwires (trigger them then back up to avoid the swinging wall) before you reach the small hut to your right (east) with the statue of Dibella. Turn left (northwest) and avoid another tripwire and ambush as you exit this tunnel.
- Danger! Swinging wall trap (3)
- Loose gear
- Potions
- Statue of Dibella
- Riekling
Cavern of Bridges
The Rieklings have been busy constructing bridges across this large cavern; there are six foes to avoid or remove as you head across, pausing just before the exit to cross over a bridge to the southwest. Spin back around the ledge just below the exit, to a pair of silver ore veins. Optionally, drop into the ankle-deep water below: there is a chest to the northeast [Novice] and two silver ore veins to the north.
- Chest [Novice]
- Silver Ore Vein (4)
- Riekling
Antechamber
Door to Benkongerike Great Hall
Three Rieklings explode from their hiding spots on either side of this door.
- Potions
- Riekling
Exit Tunnel
Escape from Hermaeus Mora’s chamber down a narrow tunnel to a pull chain; this allows access to the narrow tunnel in Location [1].
Interior: Benkongerike Great Hall
Door to Benkongerike
Entrance and Spiral Steps
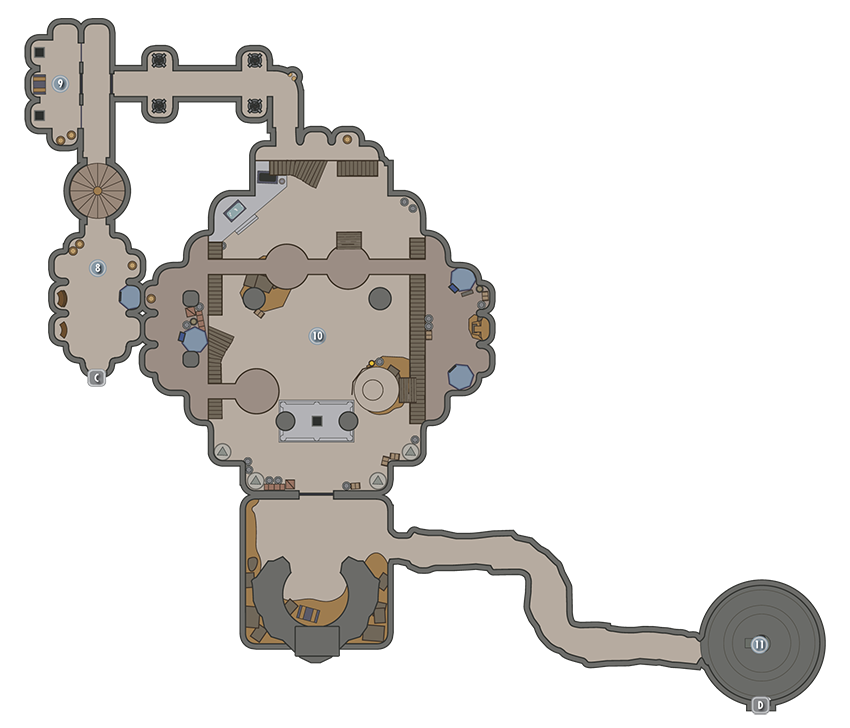
Someone has been hoarding copies of The Lusty Argonian Maid in this tent. You can also find a Spell Tome here.
- Spell Tome: Telekinesis
Caged Pedestals
Across from the corridor to Location [10] are two barred arches with a door [Expert] leading to pedestals and a chest. If you can cast the Telekinesis spell, pull the key through the bars toward you and use it to open the door. You can also just pick the lock, but the key is useless to you if you do.
- Chest
- Benkongerike Key
Great Hall and Word Wall
A Bristleback-mounted Riekling and a half-dozen infantry foes present a temporary problem. After you slay anything with blue skin, head south to inspect the Nordic Puzzle.
Puzzle Solution: Ignore the pedestal with the handle (it’s a dart trap), and instead search the walls for petroglyphs corresponding to the moveable cylinders below. The correct order from left to right is Hawk, Whale, Whale, and Serpent. The second petroglyph clue is missing; find it as part of the tent decoration on this chamber’s eastern upper ledge. Check the chest by the Word Wall, then absorb the Cyclone Word of Power.
- Danger! Dart Trap
- Mounted Riekling
- Riekling
- Stalhrim Deposit
- Chest
- East Empire Strongbox [Expert] [DB5/33]
- Word Wall: Cyclone [DB1/3]
Hermaeus Mora’s Chamber.
Head east down the narrow tunnel and into a circular chamber where a Black Book awaits. This begins Solstheim Side Quest: Black Book: Untold Legends.
- Black Book: Untold Legends
[S.N17] White Ridge Barrow
Related Quests
- Solstheim Side Quest: Black Book: The Sallow Regent
- Solstheim Side Quest: Masks of the Acolyte Priests*
- Solstheim Side Quest: Spider Crafting*
Recommended Level: 50
Dungeon: Draugr Crypt
- Albino Spider
- Bandit
- Draugr
- Dukaan
- Flame Cloaked Spider
- Jumping Flame Spider
- Merilar Rendas
- Servos Rendas
Special Area
- Black Book: The Sallow Regent
- Word Wall: Cyclone [DB2/3]
Underground Connection
Collectibles
- Unique Item: Dukaan (Mask) [DB7/31]
Miscellaneous
- Chest
- Potions
- Loose gear
- Lots o’ gold
Exterior
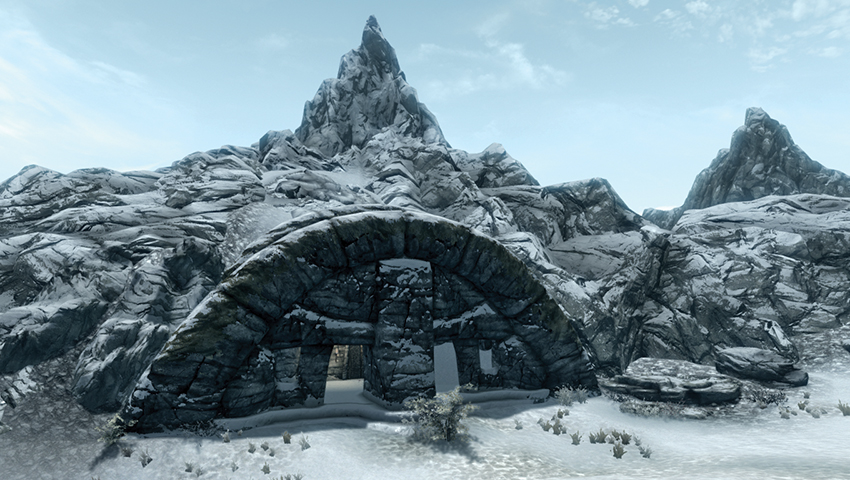
In the snow below Mortrag Peak is a familiar barrow entrance, behind which is a door leading to the tomb of the Dragon Priest Acolyte Dukaan. White Ridge Barrow is also home to some more recent inhabitants: a gang of bandits and some strange dark elven spider magic.
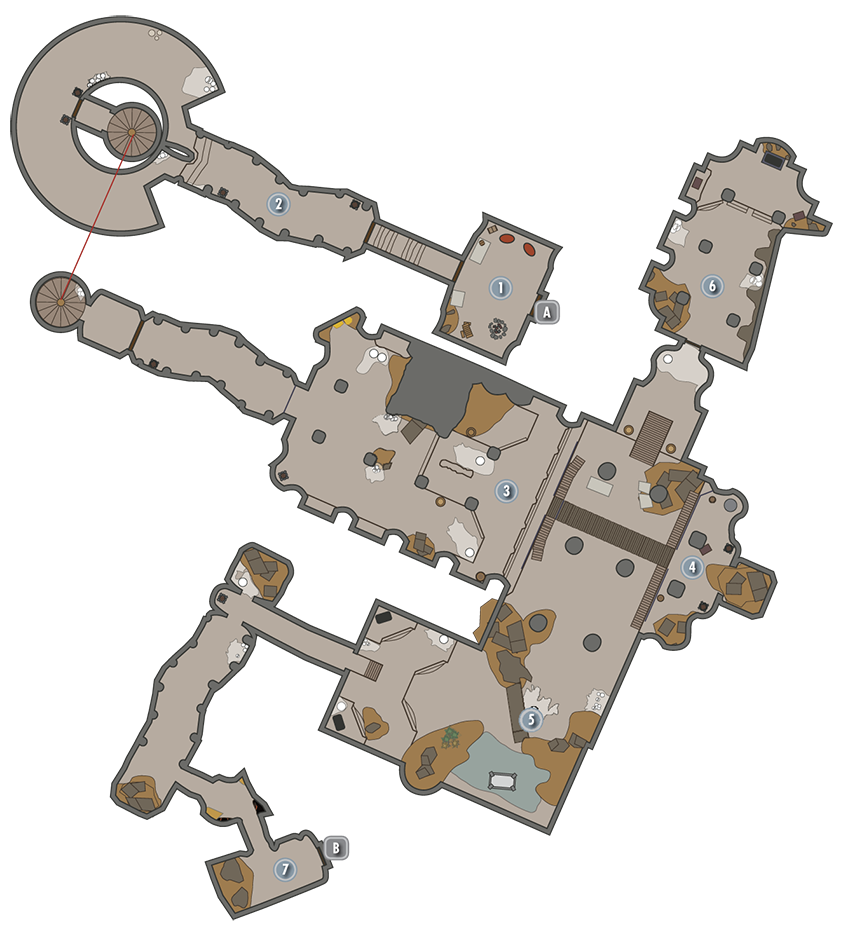
Interior: White Ridge Barrow
Door to Solstheim
Entrance Room
There are signs of violence at the entrance, where two dead Reavers have barred the wooden door shut. Remove the bar and open the door.
- Chest
- Loose gear
Entrance Corridor
Pass two dead Albino Spiders and three dead Reavers before encountering live arachnids. Circle around the spiral steps leading deeper into the tomb.
Tomb Tunnel
Head east down the tomb tunnel and engage more spiders (including Flame Cloaked Spiders) as the passage separates into two parallel corridors. Beware of exploding egg sacs, and mine any geodes you see; there are two Ruby Geodes to the north. Continue east down the corridors, past additional egg sacs. There is a chain on one of the two end pillars, which releases a bridge platform ahead (east).
- Pickaxe
- Ruby Geode (2)
Eastern Balcony
The chamber’s far side is inaccessible unless you use the Whirlwind Sprint Shout (or a similar ability, like the Vampire Lord’s Bats power), enabling you to hurtle across the chamber, circle behind the wooden buttresses, lower the rest of the bridge using the chain near the chest, and check the area for items.
- Chest
Hallway Chamber
You’re attacked by spiders and a bandit under the control of a parasitical spider clinging to his shoulders. There are exits here to the north and west. In the sloping southeast of the room, work your way around to the west, hacking through more spiders, watching for egg sacs and more possessed bandits, and continuing down the corridor south and then east.
- Bandit
- Loose gear
Upper Burial Chamber
Cut through thick cobwebs to open an iron door and enter a burial chamber with a nasty Draugr at the far end. There are two chests to pilfer from.
- Chest (2)
Natural Cave
The corridor from the hallway chamber leads here, past Heart Stone and ruby deposits, to the door to White Ridge Sanctum.
- Heart Stone deposit (2)
- Ruby Geode (2)
Door to White Ridge Sanctum
Interior: White Ridge Sanctum
Door to White Ridge Barrow
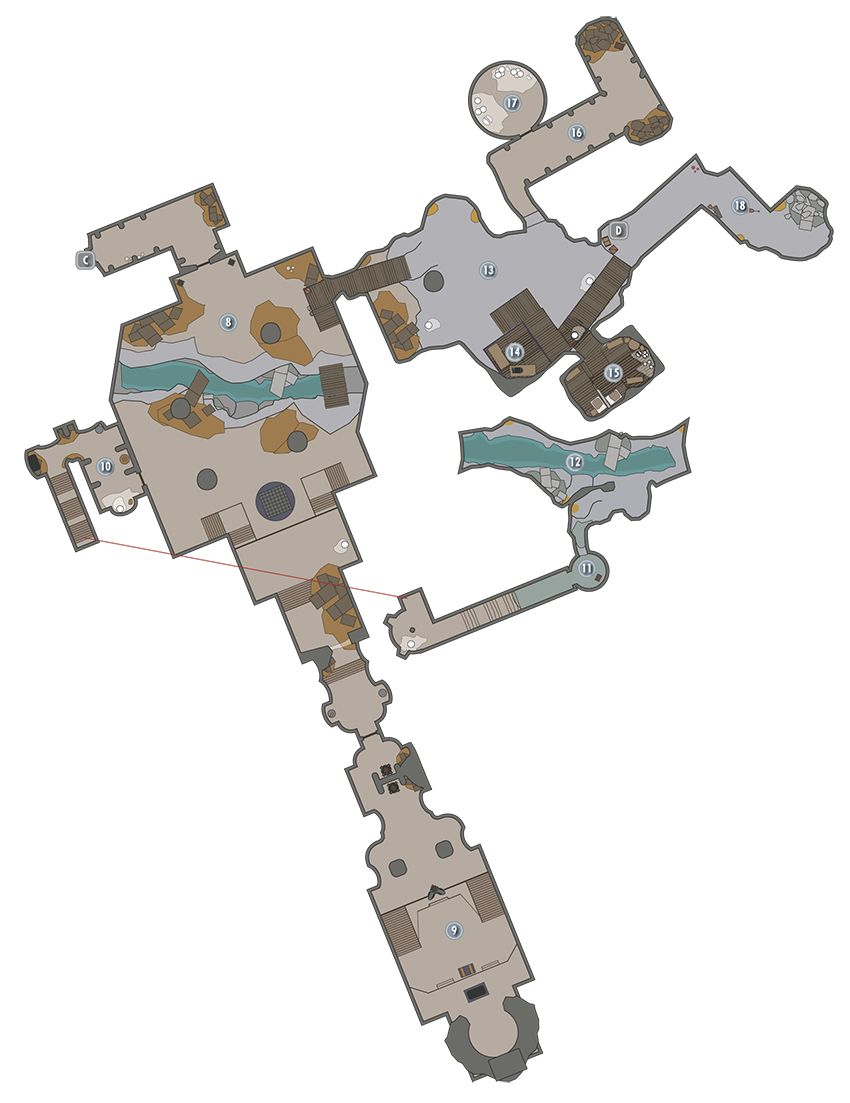
Grand Cavern
Move east and south, removing a bar from the door leading to a grand cavern where you’re set upon by bandits, Flame Spiders, and a sorcerer named Merilar Rendas, who actually throws spiders at you! Remove the key and journal (revealing a difference of opinion with another mage) from her corpse before you move on. Slay her fast enough, and you can lob Flame Cloaked Spiders and Jumping Flame Spiders at incoming foes after taking them from her corpse. Then inspect the four exits (including the one you entered from):
- Merilar Rendas
- Merilar’s Cage Door Key
- Merilar’s Journal
- Pickaxe
Tomb of Dukaan
If you feel up to the challenge, optionally continue south to a Word Wall and crypt with a frightening Acolyte Priest named Dukaan, who guards the Black Book: The Sallow Regent. Consult the Solstheim Side Quests for more information on them.
- Chest
- Dukaan
- Unique Item: Dukaan (Mask) [DB7/31]
- Word Wall: Cyclone [DB2/3]
- Black Book: The Sallow Regent
,
, and
Side Passage, Well, and Stream
West of the Grand Cavern is a narrow winding crypt passage leading down and eventually out to a waterlogged well directly below Location [6], with a chest. There’s a fissure and stream running through it with more geodes to mine too.
- Chest
- Ruby Geode (4)
and
Mine and Imbuing Chamber
These are the remains of a disused mining chamber, with more geodes, spiders, and possessed bandits to cull. In the north wall is a cell door [Adept], which Merilar’s key opens. Climb the wooden ramps to the cage [Expert]; you must reach here to begin Spider Crafting. The cage holds the remains of Servos Rendas, a Dunmeri mage with a journal explaining how badly wrong his friendship with Merilar went. Of greater importance is the odd metal device and Spider Experiment Notes near it. This is the Imbuing Chamber, where the Dark Elves’ research can be put into practice!
- Ruby Geode (3)
- Servos Rendas (Deceased)
- Servos’ Journal
- Imbuing Chamber
- Spider Experiment Notes
Servos Rendas’ Quarters
The dead mage’s bedroom is quickly filling with cobwebs, but there are some handy items, including gems and books.
- Merilar’s Cage Door Key
- Potions
- Lots o’ gold
and
Dead-End Corridor and Bandit Incubation Chamber
Head through some webs to a dead-end corridor with a chest and a barred door to a circular chamber filled with possessed bandits and spiders.
Ladder to Solstheim
This leads to Secondary Location: White Ridge Hut, a small hut with spiders and a sapphire geode; this is a great alternate entrance to the imbuing device on subsequent returns.
Northern Tunnel
Chip away at the deposits here before returning to the main mine room and imbuing chamber.
- Potions
- Rube Geode (2)
[S.N18] Hrothmund’s Barrow
Related Quests
- Solstheim Side Quest: Retaking Thirsk
Dungeon: Draugr Crypt
- Hrothmund
Miscellaneous
- Area is locked
- Chest
Exterior
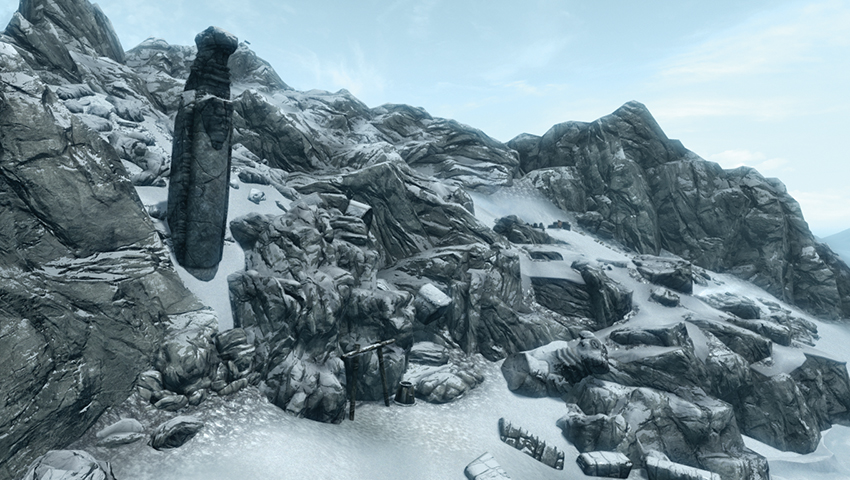
On the eastern side of the plateau between Solstheim’s high peaks rests Hrothmund’s Barrow. Hrothmund was the founder of Thirsk Mead Hall. The remains of a stone formation in the shape of a wolf are spread across the snow.
Interior
A dripping wet initial cavern has steps that lead you up to a set of double iron doors. Before entering, check to the right (east) for a hidden pull chain and rock wall that opens to a tunnel. At the end of the tunnel is a second chain that opens an entrance to a small grotto with a chest and scattered gold and gems. Through the iron doors is a ceremonial burial crypt, half submerged in water. This recedes during the quest, when you take Bujold the Unworthy to meet the spirit of Hrothmund, who appears only as an unearthly voice. You cannot take his axe. There are two chests here.
- Chest (3)
- Gold ore
- Silver ore
[S.N19] Moesring Pass
Habitation: Riekling Camp
- Mounted Riekling
- Riekling
Collectibles
- East Empire Strongbox [DB6/33]
Miscellaneous
- Chest
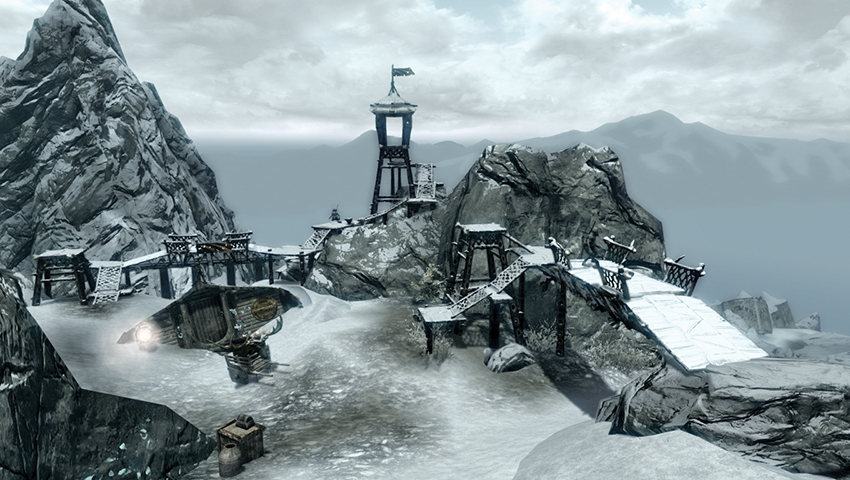
To the northwest of the Temple of Miraak is a mountain pass now guarded by a group of Rieklings and their rickety attempt at fortifications. Drawn by the strange vessel (perhaps the remains of a Dwemer Patchwork Airship that was here some 200 years ago?), there are remains of machinery and a small interior to the vessel containing two chests. Outside, across from a cart with an elk head on it, is a strongbox. Expect to find veins and geodes northeast of the pass.
- Chest (2)
- East Empire Strongbox [Expert] [DB6/33]
[S.N20] Snowclad Ruins
Related Quests
- Solstheim Side Quest: Filial Bonds
Recommended Level: 25
Habitation: Werebear Lair
- Werebear
Miscellaneous
- Chest
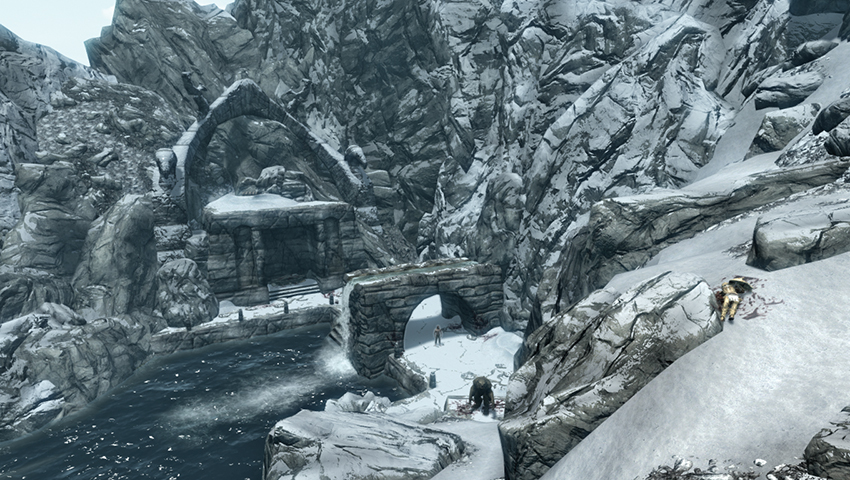
Snowclad Ruins is home to a pack of ferocious werebears. Aside from three tough foes, there are two chests to find. The first is underwater, directly under the waterfall by the steps. The second, a large chest, is on the snowy balcony above the altar to Hircine. It is accessible via a precarious rock climb northwest from the Temple of Miraak or by ascending the rocks to the left of this altar.
- Chest (2)
[S.N21] Mount Moesring
Dangers
- Falling Adventurer!
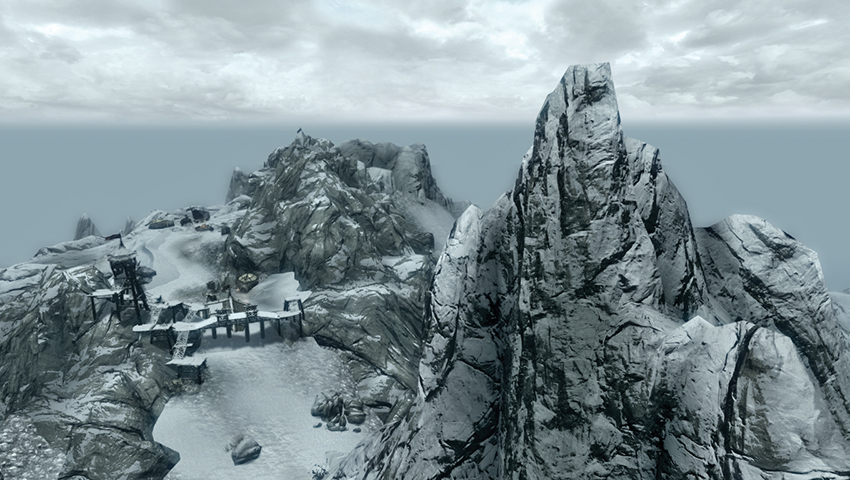
Mount Moesring is one of four mountains on Solstheim you can climb. When you reach the summit, a landmark icon appears to reflect this (optional) accomplishment. Start by heading down the snow between Moesring Pass and Fahlbtharz, and look to the east. Scramble up the rocky slopes heading northeast and then north to the secondary peak. The final few steps are the hardest. Once at the top, you have commanding views of the following locations:
North: Moesring Pass
Southeast: Altar of Thrond and parts of the Temple of Miraak
South: Almost the entire southern half of Solstheim, from Tel Mithryn to Raven Rock. The small stone turret is Highpoint Tower.
Southwest and West: Fahlbtharz elevator and Fahlbtharz.
Northwest: The two tall peaks are Mortrag and Frykte.
[S.N22] Frostmoon Crag
Related Quests
- Solstheim Side Quest: Rings of the Werewolves*
- Recommended Level: 10
- Habitation: Hunter Camp (Werewolf)
- Akar
- Hjordis
- Majni
- Rakel
Services
- Trader (Special): Majni [DB14/16]
Crafting
- Tanning Rack
Collectibles
- Unique Item: Ring of Bloodlust [DB8/31]
- Unique Item: Ring of Instinct [DB9/31]
- Unique Item: Ring of the Hunt [DB10/31]
- Unique Item: Ring of the Moon [DB11/31]
Miscellaneous
- Area is locked
- Chest
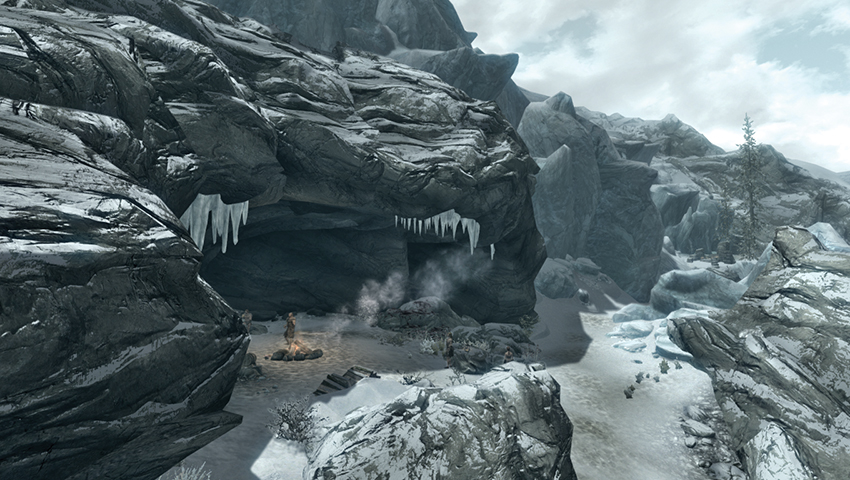
A small group of Nords have set up camp under the rocky cliffs in this area. A strange, bare-bones retreat with a lot of blood, raw meat, and fresh kills. Majni, the current leader, and his brother Akar are the sons of the former pack leader, who was killed in a skirmish with werebears. If you are also a werewolf, Majni welcomes you, and you can purchase rings from these lycanthropes. Otherwise, you’re met with disapproving grunts and (eventually) violence if you refuse to leave or try to steal from them.
- Chest [Adept]
- Tanning Rack (2)
- Trader (Special): Majni [DB14/16]
- Unique Item: Ring of Bloodlust [DB8/31]
- Unique Item: Ring of Instinct [DB9/31]
- Unique Item: Ring of the Hunt [DB10/31]
- Unique Item: Ring of the Moon [DB11/31]
[S.N23] Altar of Thrond
Related Quests
- None
Recommended Level: 10
Dungeon: Hagraven Coven
- Ettiene
- Fallaise
- Isobel
Faction: Hagraven Nest
Crafting
- Alchemy Lab
- Arcane Enchanter
- Cooking Pot
Dangers
- Bone Alarm Traps
Miscellaneous
- Chests
Exterior
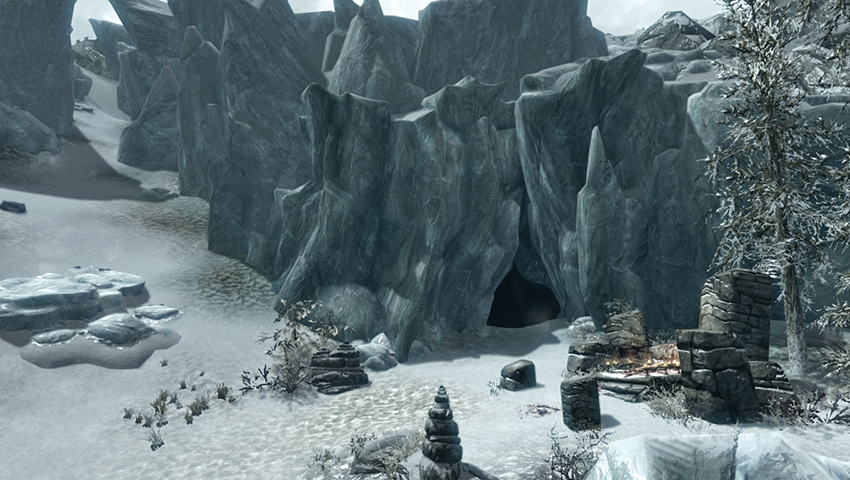
A small rocky bluff with a recently sacrificed victim on the altar. A windswept cave mouth beckons....
Interior (Altar of Thrond Cave)
The entrance tunnel has five bone alarm traps leading to a cave with a second altar, upon which a dead alchemist lies. Three Hagravens—Ettiene, Fallaise, and Isobel—lurk in this cave and attack as soon as they see you. From left to right, Fallaise’s tent contains an Arcane Enchanter and a chest [Adept]. There is a second chest on an icy alcove nearby [Novice]. Ettiene’s tent contains a large chest. Isobel’s tent contains an Alchemy Lab and two Apothecary’s Satchels. Check the cave for ore deposits too. It appears that the sisters—originally part of the Glenmoril Wyrd during the time of the Bloodmoon—were corrupted and transformed into their gnarled and wretched current forms.
- Bone Alarm Trap (5)
- Arcane Enchanter
- Alchemy Lab
- Chest (3) [1 = Adept, 1 = Novice]
- Cooking pot
- Ore: Moonstone
- Ore: Quicksilver
- Ore: Silver
[S.N24] Temple of Miraak (and Tree Stone)
Related Quests
- Dragonborn Main Quest: Dragonborn
- Dragonborn Main Quest: The Temple of Miraak
Recommended Level: 30
Dungeon: All-Maker Stone, Draugr Crypt
- Cultist
- Draugr
- Frea
- Gatekeeper
- Oslaf
- Yrsa
Special Area
- Black Book: Waking Dreams
- Word Wall: Dragon Aspect [DB1/3]
Crafting
- Alchemy Lab
Dangers
- Danger! Battering Ram Trap (2)
- Danger! Bone Alarm Trap
- Danger! Dart Trap (2)
- Danger! Flamethrower Trap
- Danger! Oil Lamp Trap
- Danger! Rockfall Trap (2)
- Danger! Swinging Blade Trap
- Danger! Swinging Wall Trap
Special Area
- Standing Stones
Miscellaneous
- Area is locked
- Chest
- Loose gear
- Potions
Door to Temple of Miraak (Interior)
Door to Temple of Miraak Sanctum (Sealed)
This is Secondary Location [S.NQ] Temple of Miraak: Secret Exit.
Exterior: Tree Stone
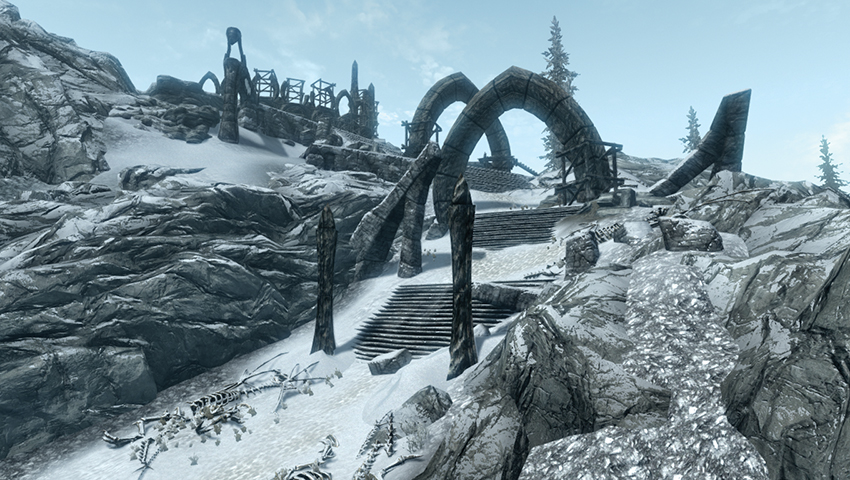
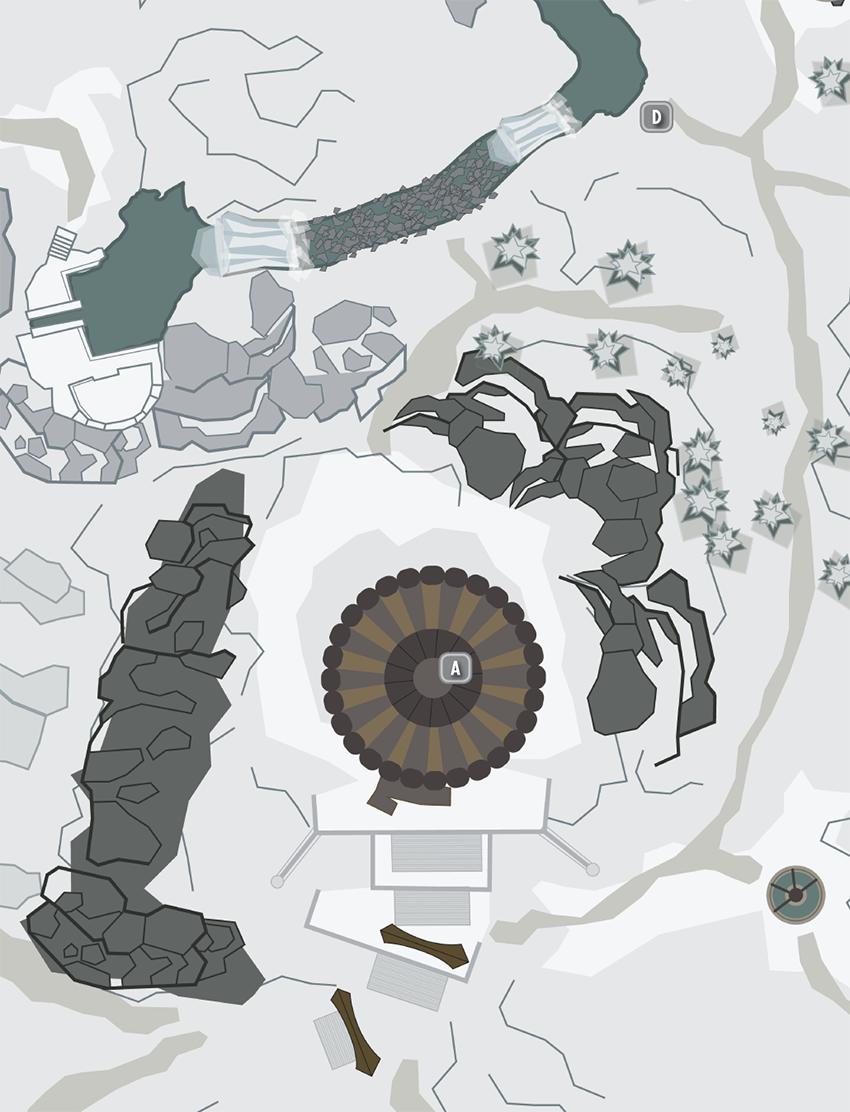
A lengthy subterranean crypt lies under one of the All-Maker stones, where the bones of dragons and recently constructed arches reveal the true extent of Miraak’s power. Currently, the construction is built around a central stepped courtyard, where the ancient Tree Stone stands. Miraak is siphoning its power, and stone arches are being constructed by enthralled Reaver and Skaal workers, including Yrsa and Oslaf. Frea is here, hoping to remove the curse that has befallen her people. The completion of the Dragonborn Main Quest is required to remove the trance the Reavers and Skaal are under and cleanse the entire area of Miraak’s influence. After you meet with Frea, you can enter the temple here via a curved path carved into the edge of the courtyard.
- Power: Root of Power
- Reaver (enthralled)
- Skaal (enthralled)
- Oslaf (enthralled)
- Yrsa (enthralled)
- Frea
- Cultist
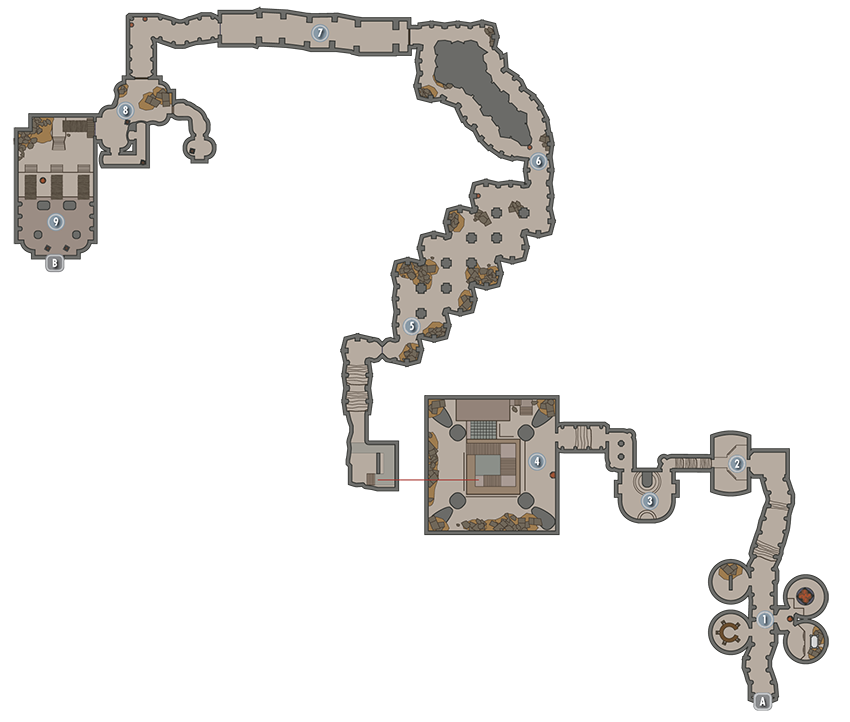
Interior: Temple of Miraak
Door to Solstheim
Upper Burial and Antechambers
Work your way down the stone corridor and check the antechambers on each side for supplies, as Frea advises. Aside from the burned and caged corpses, expect potions and poisons before you descend farther.
- Chest
- Potions
Formal Entrance
Watch the dart trap just before the narrow stairs where two more cultists appear. Defeat them and any Draugr you disturb if you stumble to the sides of this room.
- Danger! Dart trap
- Cultist
- Draugr
Embalming Room and Trap Passage
There are floor plates to avoid in the subsequent connecting chamber (unless you’re ready to receive a battering ram to the stomach) and steps down to a portcullis that opens via the adjacent chain.
- Danger! Battering ram trap (2)
Pit Chamber
There is a stone viewing abutment and throne overlooking the vast steps in the center of the chamber. Repel Draugr threats that burst from their vertical coffins. After two or three Draugr, you face three or four Cultists ascending from the pit steps. After the fight, maneuver up the rubble and coffins under the pillar and then clamber atop the pillar, scrambling up to a large treasure chest.
- Cultist
- Draugr
- Chest
- Danger! Oil lamp trap
Portcullis Entrance
Activate the handle next to the small portcullis door and step through into a small tomb where the walled coffins contain a variety of long-dead Nords to cut down.
- Draugr
- Potions
- Chest
Split Passage
Avoid the swinging wall trap’s floor plates as the passage splits into two narrower corridors. Both meet up farther along the crypt, both have Draugr infesting them, and both have a floor plate and a battering ram to avoid as you enter. The lower chamber offers higher ground as you go in, making it slightly easier to navigate.
- Draugr
- Danger! Swinging wall trap
- Danger! Battering ram trap (2)
Long Hallway
The corridors merge at the entrance to a long hall with swinging blades. Beware the floor plate and fire trap as you reach the double doors. Enter this long hall of swinging axe traps and make short, quick sprints between the swings to avoid any nasty contusions. A Whirlwind Sprint Shout can see you to the hall’s end, but don’t dash too early and stop at a blade’s arcing cut. Pull the lever to remove the spear bars.
- Danger! Swinging blade trap
- Danger! Flamethrower trap
Bridge Handle
Bars block the way to the west, so head down the narrow passage, ignoring the dead Draugr that collapses out of its tomb. Pull the handle to remove the barrier.
Three-Ramped Chamber
A Cultist and two Draugr minions are waiting to repel you. Watch the floor plate and dart trap as you descend the steps to meet them. Tackle any ranged foes, then the Cultist, and split or combine your attacks with Frea if you wish.
- Danger! Bone Alarm Trap
- Danger! Dart Trap
- Cultist
- Draugr
Door to Temple of Miraak Sanctum
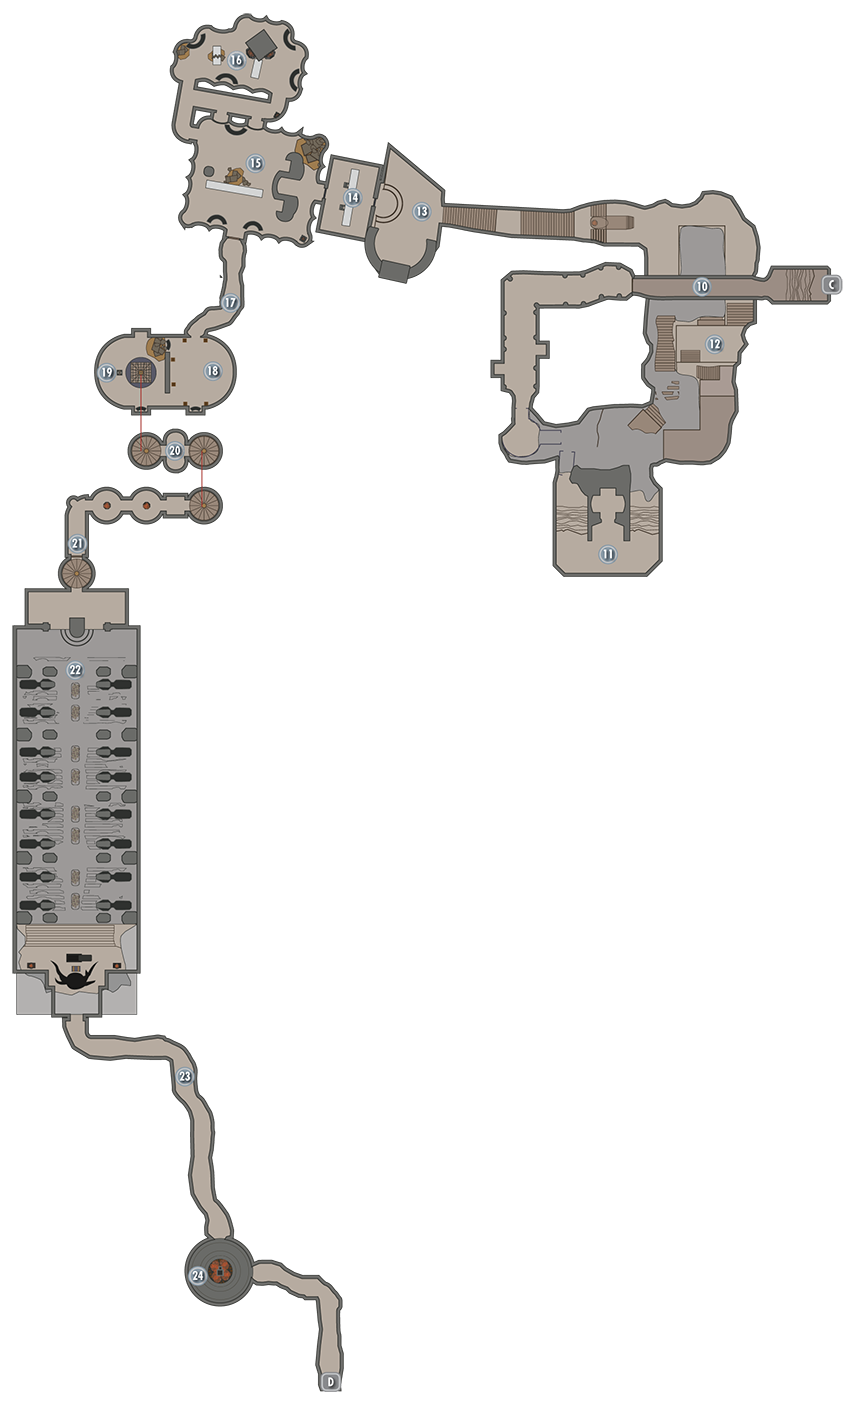
Interior: Temple of Miraak Sanctum
Door to Temple of Miraak
Connecting Cage Bridge
Step across the scattered bones, into the connecting area, and wind around, slaying four to six skeletons and a couple of Draugr who step out of their coffins and onto a floor plate that activates battering rams.
- Skeleton
- Draugr
- Danger! Battering ram trap (2)
Mage’s Alcove
A gap in the south wall leads to a U-shaped tunnel, in the middle of which is a mage’s alcove, stocked with purses, Soul Gems, and the following:
- Potions
- Spell Tome: Magelight
- Spell Tome: Soul Trap
Cavern of the Guardians
Watch for Draugr and bursting coffins as you go. Descend the steps across the stone crypt, heading to the cavern’s right (northeast) side so you don’t end up in a small dead-end pit. Watch for a floor plate and battering ram, and work your way around the stone ledge to face down more Cultist threats.
- Cultist
- Danger! Battering Ram Trap
Crypt of the Gatekeeper
Step up to the Word Wall on your left (south) and learn part of the Dragon Aspect Shout. The transference of power from the wall triggers a Draugr appearance; expect two or three annoyances from the row of coffins and a particularly nasty foe known as the Gatekeeper to burst from the tomb below the dragon skeleton. Inspect the Gatekeeper’s corpse to claim the key to gain deeper progress into the temple. The door is encased behind the Gatekeeper’s sarcophagus.
- Chest
- Gatekeeper
- Temple of Miraak Key
- Draugr
- Word Wall: Dragon Aspect [DB1/3]
Banqueting Hall
Pass the banqueting table and its long-dead feasters, opening a second iron door with the key.
- Loose gear
Feasting Hall
After a connecting corridor with a window, move into another feasting hall, devoid of foes but featuring strange carved totems you haven’t seen before.
Kitchens
Pass by these weird fishlike heads into the kitchens, which hold a few ingredients and a narrow windowed passage with a handle to pull. This opens a secret door between two sets of shelves in the feasting hall.
- Crafting: Alchemy Lab
- Potions
Winding Tunnel
Continue down this hall to reach the Reading Nook.
and
Ruined Reading Nook and Trapdoor Room
This circular chamber has a large spiral staircase below, but it is currently barred. There’s also a secondary chamber with a square-shaped trapdoor and more menacing statuary. Activate the handle in front of the fish-faces to open the trapdoor. Descend the spiral steps, which connect to the ones you could see if you looked down from the reading nook.
Wooden Spiral Steps and Connecting Corridor
Descend to the connected circular corridors with the fiery maws lighting your path. At the end is a stone wall with a handle to pull.
Stone Spiral Steps
Descend even lower, opening a wooden door.
 Altar to Hermaeus Mora
This massive and lengthy stepped chamber is adorned with dragon bones and falling boulders as you slowly ascend. Prepare to be embroiled in a fast-paced battle with some skeletons, three falling boulder traps (stay mobile and leap to the side if you trigger any), and a nasty veteran Draugr with a sharp blade.
- Skeleton
- Draugr
- Danger! Rockfall Trap (2)
 Winding Tunnel
A narrow stone tunnel leading to a strange, circular room.
 Chamber of the Black Book
An ominous final chamber, circular in nature and dominated by a thickly hewn altar of stone, upon which rests a weighty Black Book.
- Black Book: Waking Dreams
Door to Solstheim
This leads to Secondary Location Temple of Miraak: Secret Exit.
[S.N25] Beast Stone
Related Quests
- Dragonborn Main Quest: Cleansing the Stones
Recommended Level: 25
Habitation: All-Maker Stone
- Lurker
- Riekling
Special Area
- Standing Stones
Miscellaneous
- Area is locked
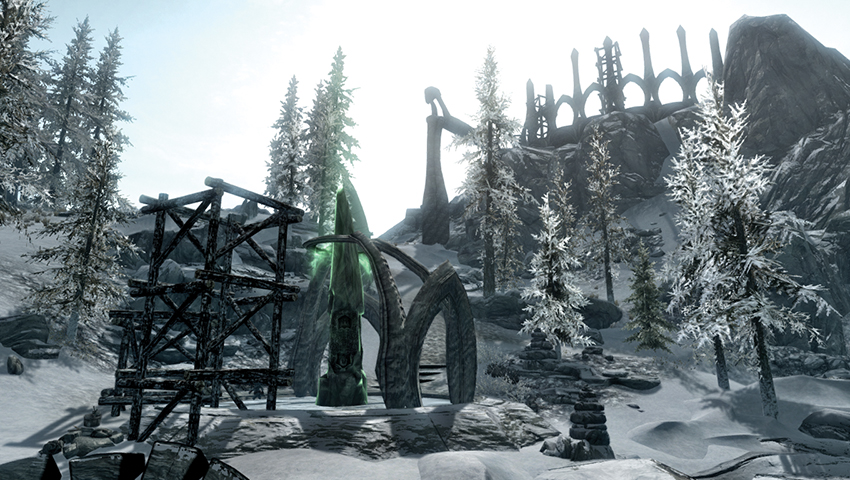
This All-Maker Stone stands just west of Thirsk Mead Hall. Currently, its power is being siphoned by Miraak, and mysterious stone arches are being constructed by enthralled Riekling workers. The Bend Will Shout is required to remove the trance the Rieklings are under (after which, they may be hostile) and to cleanse the stone of Miraak’s influence.
- Power: Conjure Werebear
[S.N26] Thirsk Mead Hall
Related Quests
- Solstheim Side Quest: The Chief of Thirsk Hall
- Solstheim Side Quest: Retaking Thirsk
- Solstheim Regional Activity: A Thirst in Thirsk*
- Solstheim Regional Activity: Berries out of Reach*
- Solstheim Regional Activity: Ore Inspired*
- Solstheim Regional Activity: Primitive Pointy Sticks*
Recommended Level: 15
Habitation: Nord Mead Hall
- Bujold the Unworthy†
- Elmus†
- Halbarn Iron-Fur†
- Herkja‡
- Hilund†
- Kuvar†
- Riekling
- Riekling Chief
- Sirkjorg‡
Services
- Follower: Rieklings [DB2/7]
- Marriage Prospect (Halbarn Iron-Fur): [DB1/3]
- Marriage Prospect (Hilund): [DB2/3]
- Trader (Blacksmith): Halbarn Iron-Fur [DB5/16]
- Trainer (Heavy Armor: Master): Kuvar [DB1/1]
Crafting
- Blacksmith forge
Miscellaneous
- Area is locked
- Loose gear
Exterior
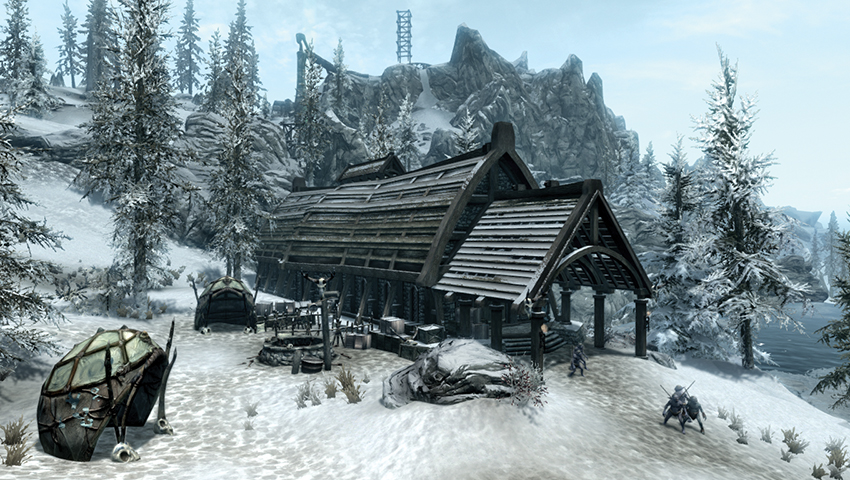
Thirsk is located on the snowy slopes of eastern Solstheim. It sits beyond the northern edge of the ash and was spared the devastation that occurred on the southern part of the island. Previously, it was a welcome oasis in the middle of a harsh wilderness; it has much the same feeling 200 years later. Since the time of Bloodmoon, the number of warriors at Thirsk has waxed and waned, and they’ve grown a little softer in their isolation. A group of Rieklings took advantage of their weakness and have taken over Thirsk, driving out the Nords. The place is an absolute mess, filled with strange Riekling artifacts and random clutter. When you first approach, the Rieklings welcome you if you don’t attack them. If the Nords retake this location, the forge outside is relit and becomes usable.
- Blacksmith Forge
Interior
Initially, the interior is jammed full of Riekling detritus; their chief sits on the throne at the far end. If Bujold and her Nords retake Thirsk, the hall is tidied up, beds are made available to sleep in, and cooking pots are lit. Aside from some Ashfire Mead, you can also scavenge some bottles of Black-Briar Reserve, which is worth 100 coins each.
- Ashfire Mead (5+)
- Black-Briar Reserve (20+)
- Cooking pot (2)
- Follower: Reiklings [DB2/7]
- Marriage Prospect (Halbarn Iron-Fur): [DB1/3]
- Marriage Prospect (Hilund): [DB2/3]
- Trader (Blacksmith): Halbarn Iron-Fur [DB5/16]
- Trainer (Heavy Armor: Master): Kuvar [DB1/1]
[S.N27] Headwaters of Harstrad
Related Quests
- Solstheim Side Quest: Healing a House
Recommended Level: 25
Habitation: Spriggan Grove
- Spriggan
Exterior
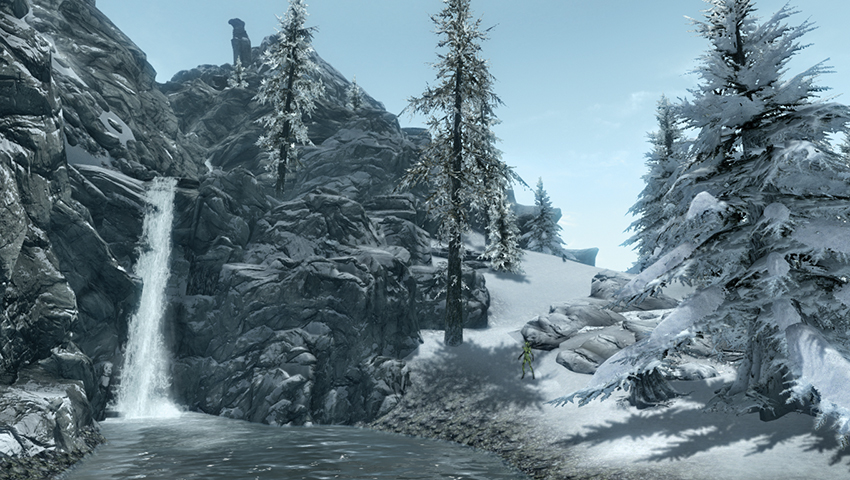
Offering majestic views to the northeast, the Headwaters catch the cascading glacial waters from the mountains above. There are two waterfalls at this clearing; the smaller of the two hides a cave behind it. Expect a Spriggan to stalk the snowbanks close to here.
Interior (Harstrad Cave)
Enter the cave behind the waterfall to the west. This small grotto offers a large chest, a very dead skeleton, and a nasty Spriggan to battle. The water in this flowing pool is where taproots are soaked during the quest.
- Chest
[S.N28] Wind Stone
Related Quests
- Dragonborn Main Quest: The Fate of the Skaal
Recommended Level: 25
Habitation: All-Maker Stone
- Baldor Iron-Shaper
- Deor Woodcutter
- Edla
- Fanari Strong-Voice
- Morwen
- Tharstan
Special Area
- Standing Stones
Miscellaneous
- Area is locked
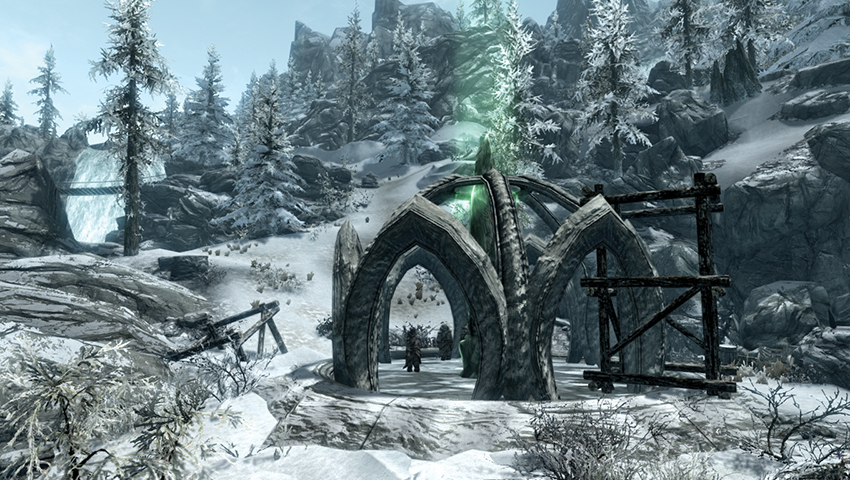
This All-Maker Stone protrudes from the snowy ground northwest of the Skaal Village. Currently, Miraak is siphoning the stone’s power, and stone arches are constructed by enthralled villages. At various times, Baldor Iron-Shaper, Deor Woodcutter, Edla, Fanari Strong-Voice, Morwen, and Tharstan work here, and their quests aren’t accessible until the stone is cleansed. The Bend Will Shout is required to remove the trance the population is under and cleanse the stone of Miraak’s influence.
- Power: North Wind
[S.N29] Haknir’s Shoal
Related Quests
- Solstheim Side Quest: Deathbrand
Recommended Level: 36
Habitation: Pirate Camp
- Pirate
- Pirate Captain
- Pirate Mage
Special Area
- Ancient Chest [1/4]
Collectibles
- Deathbrand Treasure Map
- East Empire Strongbox [DB7/33]
- Unique Item: Deathbrand Helm [DB12/31]
Miscellaneous
- Area is locked
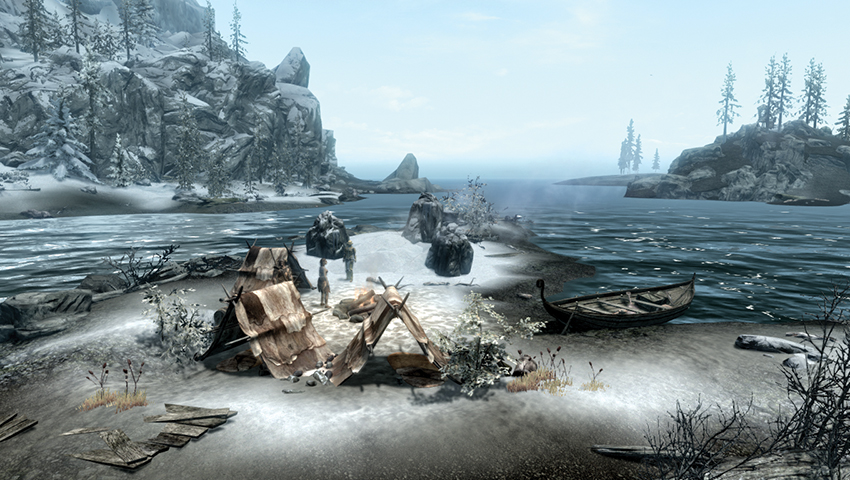
Just off the rocky northeastern shore of Solstheim is a sandbank with three pirates desperately searching for the lost treasure of Haknir Death-Brand. When you are Level 36 or above, Solstheim Side Quest: Deathbrand will begin, and the pirates here will dig up an ancient treasure chest. Deal with them, then take the map from the body of the pirate leader and the helm from the chest to continue the quest. While you’re here, don’t forget to pry open an East Empire Strongbox [Expert] with a pendant and other valuables inside; it’s hidden in one of the tents to the south of the campfire. There’s a satchel to rummage in too.
- Ancient Chest
- Deathbrand Treasure Map
- East Empire Strongbox [Expert] [DB7/33]
- East Empire Pendant
- Orichalcum Ore (2)
- Unique Item: Deathbrand Helm [DB12/31]
[S.N30] Frossel
Recommended Level: 6
Dungeon: Riekling Camp
- Riekling
- Mounted Riekling
Dangers
- Danger! Swinging Wall Trap
Collectibles
- East Empire Strongbox [Expert] [DB8/33]
- Imperial War Horn
Miscellaneous
- Chest
- Potions
- Loose gear
- Lots o’ gold
Exterior
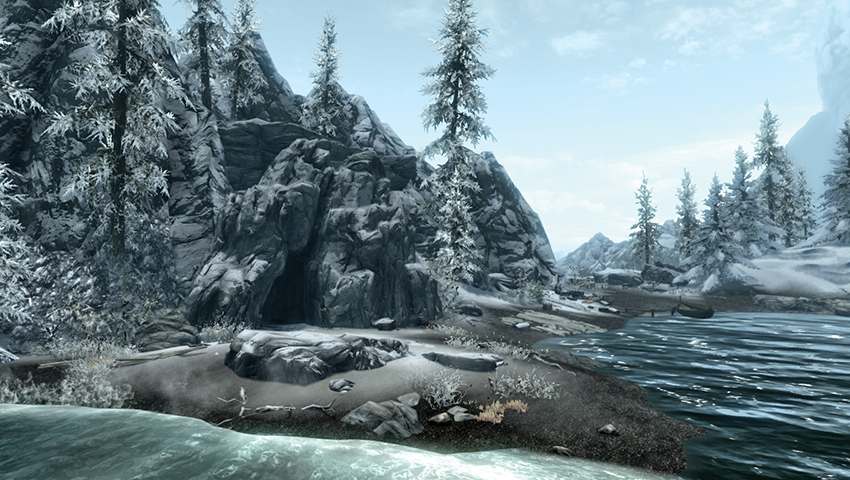
Used as the breeding ground for Riekling mounts known as Bristlebacks since the time of Bloodmoon, the tribe has since expanded the size of these caverns. In addition to the Bristleback pens, they now include a larger meeting room dedicated to the worship of a strange device they recovered from a recent raid.
Just south of the entrance to Frossel, you’ll find the bodies of the bandits involved in the raid and a note explaining what happened up until the attack. You can also learn more about the raid in Wilderness Encounter: The Rabbiting Reaver. Inside, you’re able to battle the Rieklings and recover the actual loot from the heist, which has been discarded in the back of the cave to make room for the wonderful cart!
- Loose gear
- Gold ore vein
Interior
Exit to Solstheim
Bristleback Pens
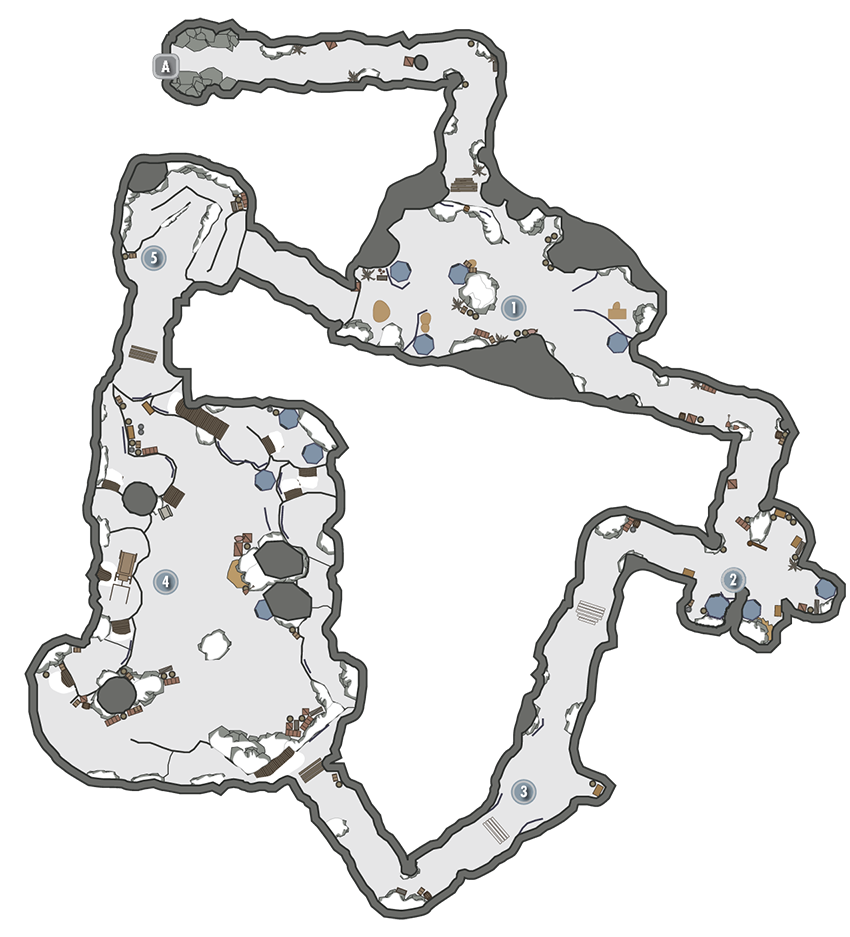
Wander down the tunnel and out into this long ice chamber with three Rieklings and two Bristlebacks to contend with. There are scattered items everywhere, including ingredients, iron ingots, a refined moonstone ingot, and a strong box.
- Riekling
- Bristleback
- Loose gear
- Strongbox
Ice Tunnel and Small Camp
Pass a second strongbox and watch for the tripwire activating a swinging wall trap. Check the southeast tent area for an East Empire Strongbox [Expert], half buried in the snow near crates and a barrel. Of the chests, only one is closed.
- Riekling
- Strongbox
- Danger! Swinging wall trap
- East Empire Strongbox [Expert] [DB8/33]
- East Empire Pendant
- Chest
- Loose gear
- Potions
- Gold ore vein
Ice Corridors
Continue down the narrow corridors of ice, passing more Rieklings and an alcove with a chest (and ambush) to check out. Next to the chest is an object of value overlooked by the Rieklings: a fabled Imperial War Horn!
- Riekling
- Chest
- Loose gear
- Imperial War Horn
Chamber of the Sacred Cart
The tunnel opens up to a huge cavern. You can sneak along the right ledges, avoiding foes if you wish, or head left and down the snow ledge into the main area where seven Rieklings and a Mounted Riekling are worshipping a strange contraption: a sacred cart, painted on and adorned with trinkets and a horse sculpture made from ice, rocks, and refuse saddled to the wagon. Around the sides (and particularly to the northwest) are various bits and pieces of the Reavers’ haul.
- Riekling
- Mounted Riekling
- Chest
- Loose gear
- Ingots
- Dibella Statue
- Gold ore vein (2)
Ice Ledges
Climb up the meandering ledges, passing more discarded items from the haul. This drops you back at the initial Bristleback Pens (Location [1]).
- Gold ore vein
- Potions
[S.N31] Bujold’s Retreat
Related Quests
- Solstheim Side Quest: The Chief of Thirsk Hall
- Solstheim Side Quest: Retaking Thirsk
Recommended Level: 10
Habitation: Hunter Camp
- Bujold the Unworthy
- Elmus
- Halbarn Iron-Fur
- Hilund
- Kuvar
Miscellaneous
- Chest
Exterior
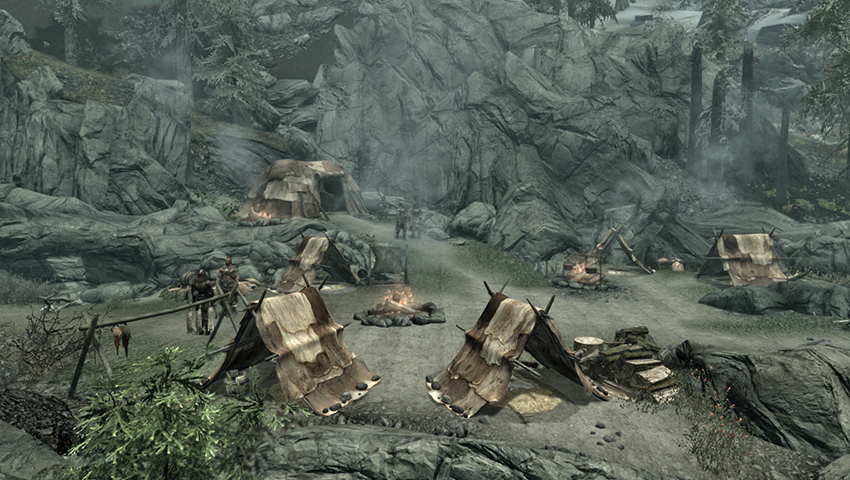
This temporary refugee camp was set up by the Nord residents of Thirsk Mead Hall after the Rieklings drove them out. The Nords’ leader is the inept Bujold the Unworthy (known as Bujold the Intrepid prior to the attack). You may speak with her or her kin to understand more about their predicament, and then work with (or against) them. Steal from the tents if you wish; the largest one has a chest [Apprentice] and knapsack to loot.
- Chest [Apprentice]
[S.N32] Gyldenhul Barrow
Related Quests
- Solstheim Side Quest: Deathbrand
Recommended Level: 40
Dungeon: Draugr Crypt
- Reaver
- Haknir Death-Brand
- Haknir’s Crew
- Garuk Windrime
- Thalin Ebonhand
Collectibles
- Unique Weapon: Bloodscythe [DB1/11]
- Unique Weapon: Soulrender [DB2/11]
Miscellaneous
- Area is locked
- Chest
- Potions
- Loose gear
- Lots o’ gold
Exterior
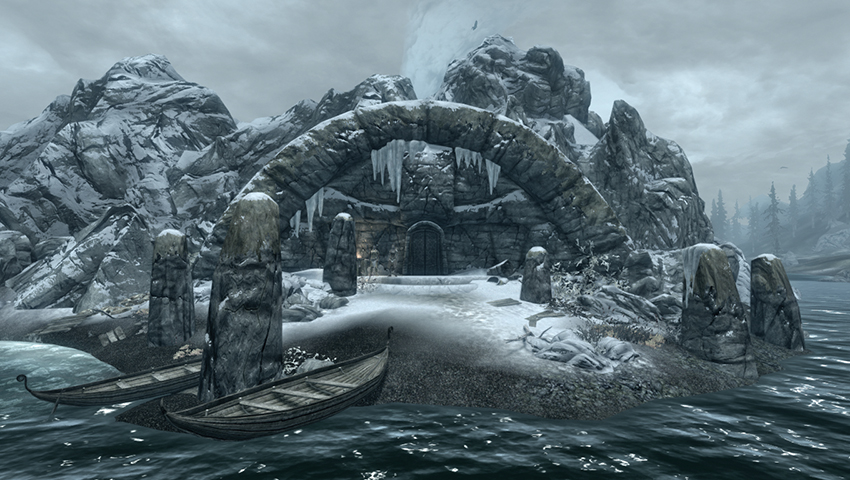
Gyldenhul Barrow is the long-lost tomb of Haknir Death-Brand, the legendary pirate king who also serves as the namesake for Haknir’s Shoal. The entrance to the barrow is difficult to open [Master], although you can obtain a key for it (and all of the other locks within) by completing the Solstheim Side Quest: Deathbrand, which begins at Haknir’s Shoal nearby. The fourth and final treasure chest you find in that quest always contains the barrow key. There are a pair of Reavers camped outside the entrance.
- Reaver
Interior
Door to Solstheim
Barrow Entrance
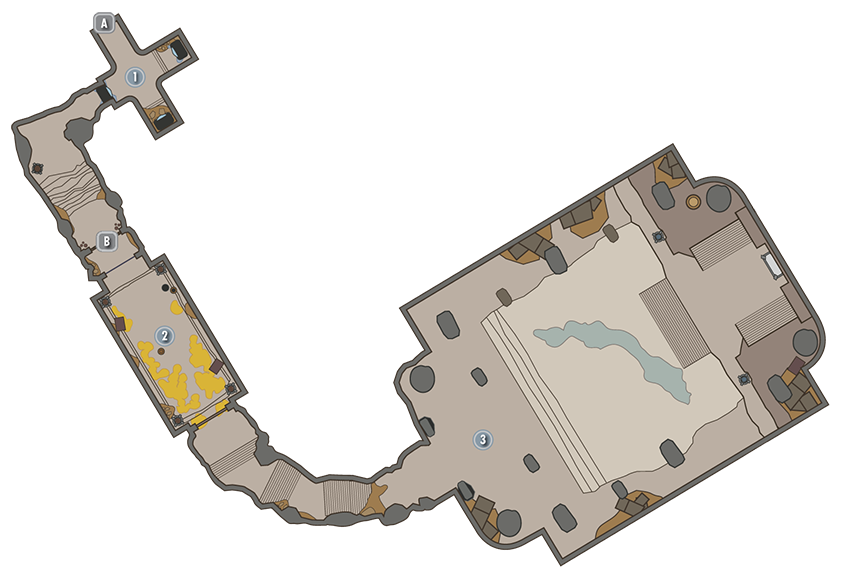
Check the corpse of the adventurer in front of you and obtain the Torn Note from him. The tomb continues past the sarcophagus to the southwest, which is covered in Stalhrim deposits. Produce your Ancient Nordic Pickaxe, and chip away until you make a hole big enough to squeeze through.
- Adventurer
- Torn Note
- Stalhrim Deposit (2)
Door to Barrow Treasure Room
This requires the Gyldenhul Barrow Key to open.
Barrow Treasure Room
What a haul! Aside from armor, two chests, potions, precious stones, and weapons, there are numerous piles of septims that total approximately 10,000 gold! Open the second pair of iron doors and continue down a damp tunnel. Is there more treasure to steal?
- Chest (2) [1 = Adept, 1 = Master]
- Potions
- Gold (10,000, approximate)
- Loose gear
Haknir Death-Brand’s Tomb
The tunnel ends in a grand and eerie tomb chamber. As you edge toward the steps, and the ceremonial coffin with the skeleton lying on it, a sword should catch your eye: the fabled Bloodscythe! Claim it for yourself, then prepare for a fight: Haknir Death-Brand’s ghost appears and calls for you to join the dead. Fight off Haknir and all his crew to claim the equally impressive Soulrender!
- Chest
- Haknir Death-Brand
- Haknir’s Crew
- Garuk Windrime
- Thalin Ebonhand
- Unique Weapon: Bloodscythe [DB1/11]
- Unique Weapon: Soulrender [DB2/11]
[S.N33] Horker Island
Recommended Level: 25
Habitation: Animal Den
- Horker
- Lord Tusk
- Saden
Collectibles
- East Empire Strongbox [DB9/33]
- Unique Weapon: Horksbane [DB3/11]
Miscellaneous
- Chest
- Loose Gear
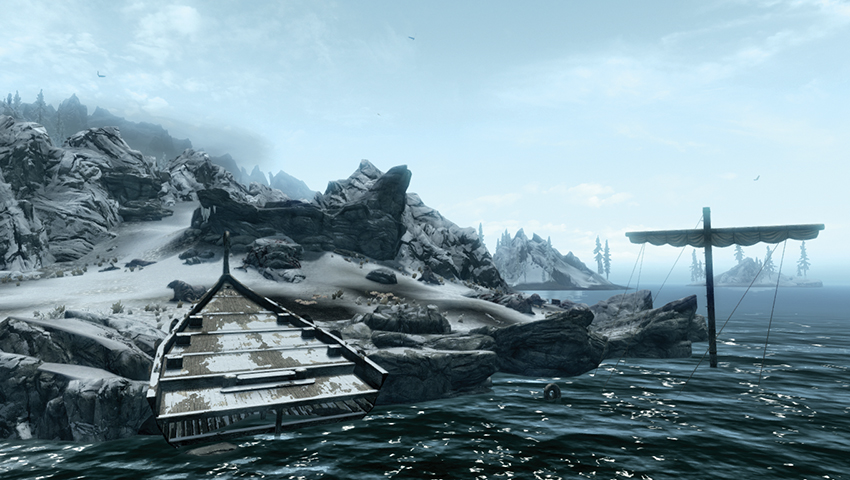
On this small island off the northeastern coast of Solstheim, east of Gyldenhul Barrow, is a rookery of Horkers; expect at least two to be roaming this rocky outcrop. Working southeast (clockwise) around the island is a blood-splattered chest [Adept], two dead Reavers, the mast of a longboat, and a second longboat half submerged in the water. Dive in to find a chest and an East Empire Strongbox [Expert]. Back on dry land are three more corpses, including a skewered Reaver named Saden; his unique mace is still protruding from a dead Horker. Head up the gap in the rocks to a promontory of bloody skulls and offal, presided over by Lord Tusk, a particularly large Horker. Loot the chest here too. Farther southwest along the island shore is an upturned rowboat with Saden’s Journal, explaining his predicament.
- Chest (2) [1 = Adept]
- East Empire Strongbox [Expert] [DB9/33]
- East Empire Pendant
- Unique Weapon: Horksbane [DB3/11]
- Ebony Ore
- Saden’s Journal