
Elder Scrolls V: Skyrim Guide The Atlas Hold 5: The Reach
Primary Locations
[5.01] Mor Khazgur
Related Quests
Side Quest: The Forgemaster’s Fingers
Favor (Activity): Mining Ore* (Shuftharz)
Favor: Sparring Partners* (Larak)
Recommended Level: 6
Habitation: Orc Stronghold
Bagrak
Borgakh the Steel Heart (Follower, Marriage Prospect)
Chief Larak (Trainer: Block)
Ghamorz
Gul
Olur
Sharamph (Apothecary Vendor)
Shuftharz
Services
Follower: Borgakh the Steel Heart [16/47]
Marriage Prospect: Borgakh the Steel Heart [20/62]
Trader (Apothecary Vendor): Sharamph [7/14]
Potions, Food, Ingredients
Trainer (Block: Master): Chief Larak [1/2]
Crafting
Alchemy Lab
Blacksmith Forge
Grindstone
Smelter
Collectibles
Skill Book [Smithing]: The Armorer’s Challenge [E1/10]
Chest(s)
Potions
Loose gear
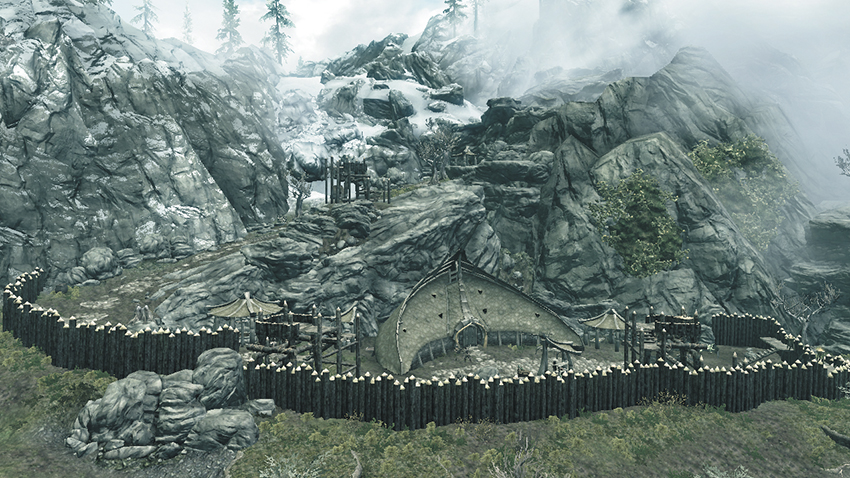
This Orc stronghold stands at the Reach’s far northwest tip, on the edge of Skyrim. The Orcs here are mistrustful, but the first guard that spots you will call out and offer you a Side Quest, which can help you curry favor with the Orcs. If you like, test your fistfighting aptitude in a friendly wager against the chief.
Exterior
Even if the Orcs are giving you the cold shoulder, you can still explore their stronghold and make use of several Crafting stations. Grab a Skill Book off a shelf near the Blacksmith forge.
- Crafting: Alchemy Lab, Blacksmith Forge, Grindstone, Smelter
- Skill Book [Smithing]: The Armorer’s Challenge [E1/10]
- Chest
- Apothecary’s Satchel
- Potions
Larak’s Longhouse
The Orc chief’s longhouse holds some worthy loot, but you risk angering the Orcs if you break inside.
- Area Is Locked (Novice)
- Chests (2)
- Potions
- Loose gear
Mor Khazgur Cellar
Unlock the trapdoor near Larak’s Longhouse to access a small cellar with a handful of valuables.
- Area Is Locked (Novice)
- Chest
- Potions
Mor Khazgur Mine
This small mine is worked by the Orcs and features thick veins of Orichalcum Ore.
- Chest
- Loose gear
- Mineable ore (Orichalcum)
[5.02] Deepwood Redoubt
Related Quests
Dark Brotherhood Quest: The Feeble Fortune*
Recommended Level: 14
Dungeon: Forsworn Redoubt
Forsworn
Crafting
Alchemy Lab
Arcane Enchanter
Anvil
Blacksmith Forge
Grindstone
Workbench
Dangers
Bone Alarm Trap
Dart Trap (pressure plate)
Rune Traps (floor)
Swinging Blade Trap (lever)
Swinging Wall Trap (pressure plate)
Collectibles
Skill Book [Sneak]: Sacred Witness [C1/10]
Trapped Chest
Chest(s)
Potions
Loose gear
Exterior
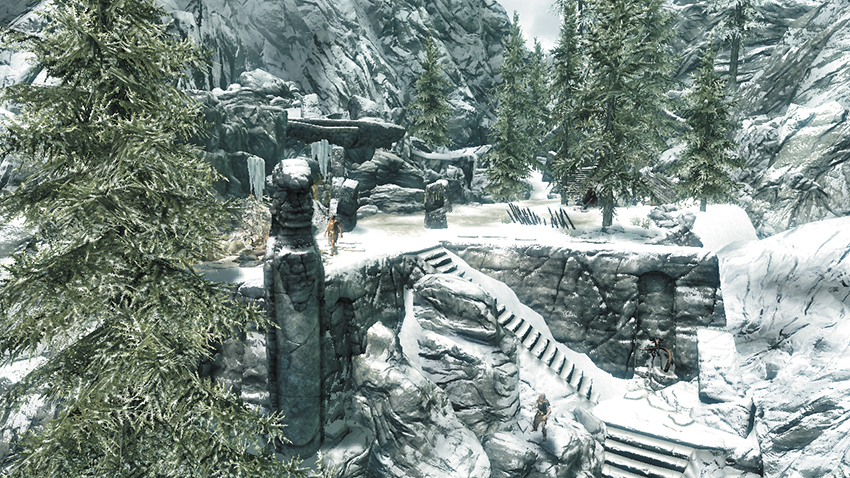
A band of Forsworn have taken over this ancient ruin, located atop a rocky rise at the northern tip of the Reach. Deepwood Redoubt leads to a larger Nordic ruin on the far side of a secret vale—Hag’s End [5.03].
Fight your way up the outer stone steps to locate the entrance to the ruins. Swipe some potions from the nearby altar and lean-to before heading inside.
- Potions
- Loose gear
Interior
 Door to Skyrim
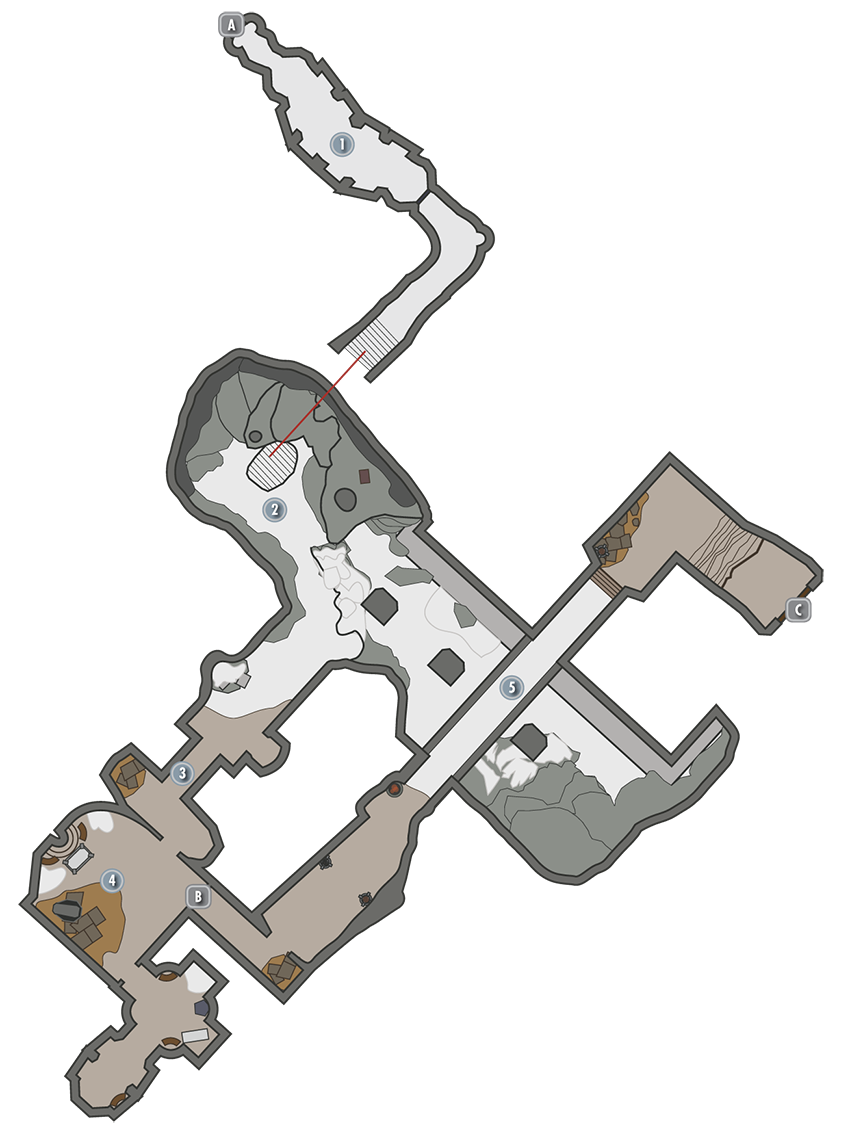
 Trapped Passages: Part 1
Beware the Hinge Trigger when opening the first chest that you discover in a recessed alcove. Long spears will stab out from the wall beneath the chest if you set off the trap. Disarm it or stand to one side to safely claim your treasure.
- Trapped Chest
 Trapped Passages: Part 2
Stand on the pressure plate that follows to trigger a trap just ahead, then simply move up through the stairway hole after the darts stop firing. Check the cavern and up the rocks for a hidden chest, and a sprawled skeleton (as well as bone traps) as you head southeast.
- Danger! Bone Trap, Chest
 Trapped Passages: Part 3
After dealing with the first batch of Forsworn, sprint straight through the stretch of swinging blades that follows. You can make it through unscathed if you time it just right.
- Danger! Swinging Blade Trap (lever), Dart Trap (pressure plate), Trapped Chest
 Room of Doom
A small chamber lies beyond the swinging blades. Beware the many Rune Traps on the floor here. Summon a Familiar to set off the traps and absorb the damage, or draw out the Forsworn Shaman in the far room and kill her with her own traps. Take the key from the Shaman’s corpse, then unlock the nearby iron door to advance.
- Danger! Rune Traps (floor)
- Crafting: Arcane Enchanter
- Deepwood Redoubt Key (Forsworn)
- Potions
 Iron Door [Master]
 Exit Passage
Hop over a pressure plate to avoid a nasty trap as you enter the passage beyond the iron door. The Bone Alarm traps can give away your location to nearby Forsworn, if any remain. Proceed through the far door to head into Deepwood Vale.
- Danger! Bone Alarm Trap, Swinging Wall Trap (pressure plate)
- Potion
- Loose gear
 Door to Deepwood Vale
Deepwood Vale
 Door to Deepwood Vale
 Deepwood Vale Entrance
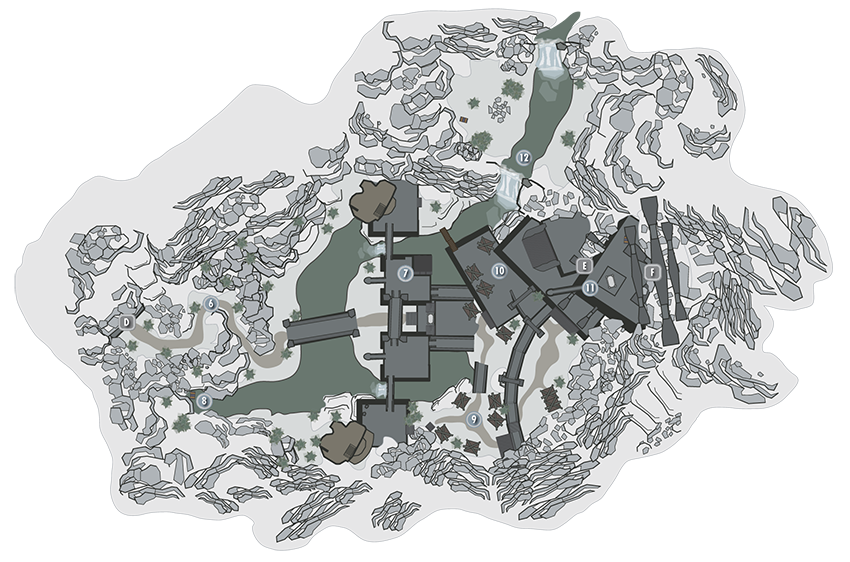
Deepwood Redoubt leads out into a secret vale nestled in the mountains, where a much larger ruin awaits.
 Vale Ramparts
Forsworn archers patrol the ramparts. The ramparts lead to Hag’s End ([5.03]), the towering structure on the vale’s east side.
 Waterfall
River Channel -- Look for a chest amid the rapids here.
 Tent
Tent
There’s also a Skill Book in the tent with the Alchemy Lab; one of many in this makeshift Forsworn camp.
 The Towering Edifice: Hag’s End
Make your way east toward Hag’s End (see the next location in this Atlas for the interior information), slaying the Forsworn and claiming the treasure they guard. See Dark Brotherhood Radiant Quest: The Feeble Fortune for some strategies on assaulting this formidable fortress.
- Crafting: Alchemy Lab, Anvil, Blacksmith Forge, Grindstone, Workbench
- Skill Book [Sneak]: Sacred Witness [C1/10]
- Chests (2)
- Chest (Locked: Apprentice)
- Potions
- Loose gear
 Door to Hag’s End
 Door to Hag’s End
 Deepwood Vale Summit
You exit out onto the upper level of Hag’s End after navigating the interior of it, and overlook Deepwood Vale below. Face the Hagraven and her summoned minions for a final time and cut them down. Then claim the unique dagger from the corpse on the altar and the large chest nearby.
- Unique Weapon: Bloodthorn [31/80]
- Chest
 Hidden Chest Atop Waterfall
If you have the Whirlwind Sprint Shout (or are good at rock climbing), head to the upper level of the Vale from which the waterfall descends. There, you can find one more chest and a unique pair of boots.
- Unique Item: Predator’s Grace [54/112]
- Chest (Locked: Expert)
[5.03] Hag’s End
Related Quests
Dark Brotherhood Quest: The Feeble Fortune*
Dungeon Activity
Recommended Level: 14
Dungeon: Hagraven Nest
Animal
Hagraven
Witch
Crafting
Alchemy Lab
Arcane Enchanter
Dangers
Battering Ram Trap (pressure plate)
Dart Trap
Flamethrower Trap
Rune Trap
Oil Lamp Trap
Oil Pool Trap
Collectibles
Skill Book [Illusion]: Mystery of Talara, Part 4
Unique Item: Ancient Shrouded Armor [50/112]
Unique Item: Ancient Shrouded Boots [51/112]
Unique Item: Ancient Shrouded Cowl [52/112]
Unique Item: Ancient Shrouded Gloves [52/112]
Unique Item: Predator’s Grace [53/112]
Unique Weapon: Bloodthorn [31/80]
Special Objects
Word Wall: Slow Time [3/3]
Chest(s)
Potions
Loose gear
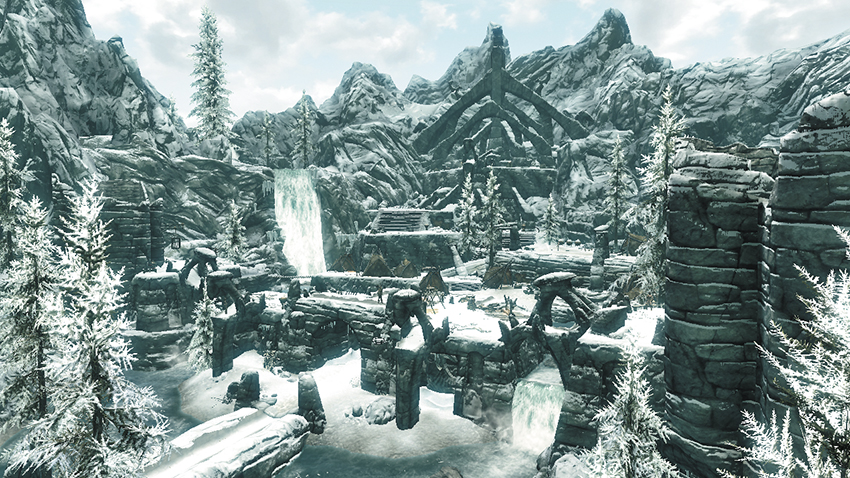
The ruins of Deepwood Redoubt [5.02] protect the tower of Hag’s End, home to the formidable Hagraven that’s revered by this band of Forsworn. You must brave Deepwood Redoubt in order to reach Deepwood Vale and challenge the Hagraven of Hag’s End.
Door to Deepwood Vale
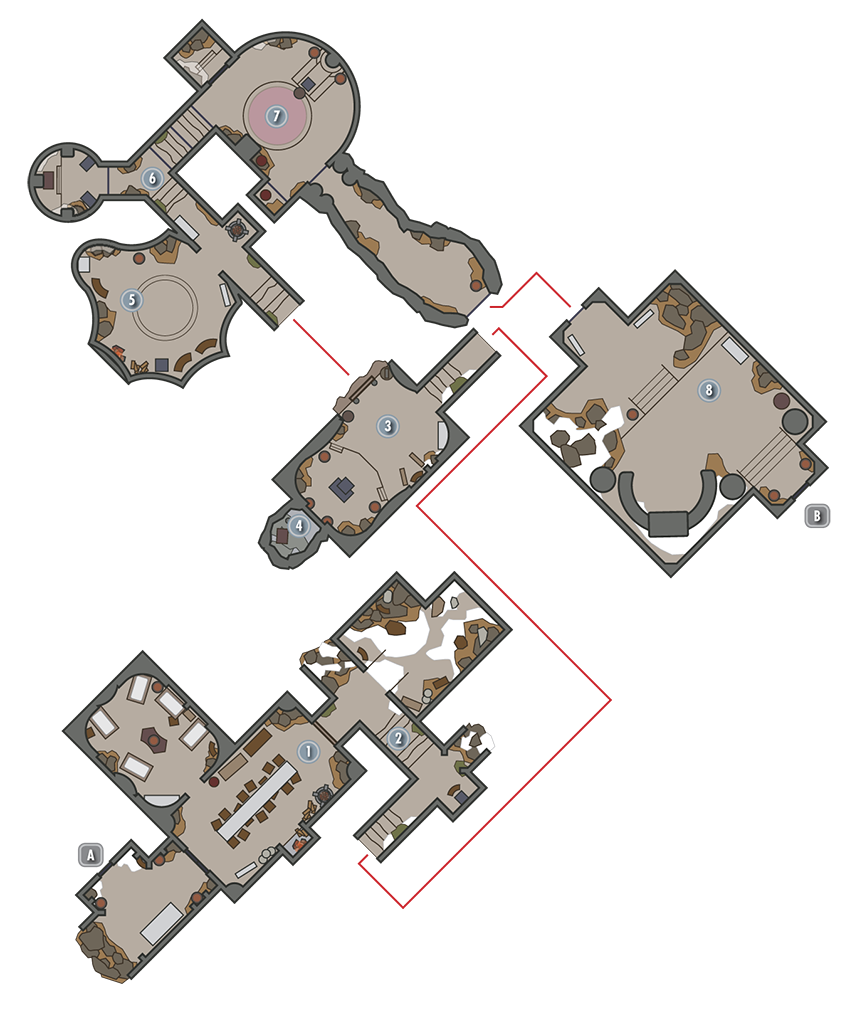
Dining Room and Side Chambers
Slay vicious witches and battle the Hagraven in the first few chambers.
- Crafting: Alchemy Lab
- Potions
- Loose gear
Trapped Staircase
Explore the ice-filled room at the hall’s end for some loot, but be careful of the Rune Traps. Then continue up the stairs, avoiding the pressure plate at the top, or wait a moment to let the battering ram swing by. Note the hinge trigger on the nearby chest; disarm it to disable the dart trap, which is otherwise difficult to avoid.
- Danger! Battering Ram Trap (pressure plate), Rune Trap, Dart Trap (hinge trigger)
- Loose gear
Throne Room
Slay more witches in the small throne room that follows. Collect a Skill Book before pulling a nearby lever to lower a drawbridge.
- Skill Book [Illusion]: Mystery of Talara, Part 4
- Potion
Assassin’s Alcove
If you’ve come here for Dark Brotherhood Quest: The Feeble Fortune, you can open this secret alcove by pulling a handle on the wall behind the throne in the Throne Room [3] (it doesn’t exist unless you’re on the quest). Inside, take the Ancient Shrouded Armor from the body of the fallen assassin, and claim the loot in the large chest.
- Unique Item: Ancient Shrouded Armor [50/112]
- Unique Item: Ancient Shrouded Boots [51/112]
- Unique Item: Ancient Shrouded Cowl [52/112]
- Unique Item: Ancient Shrouded Gloves [53/112]
- Chest
Matriarch’s Chamber
Beware the circular chamber beyond the drawbridge—a Frostbite Spider silently descends from the ceiling as you explore the room. Slay the spider and swipe an important key from near the fireplace.
- Hag’s End Key
- Potions
Two-Gate Junction
Use the key you found back at [5] to unlock the Master-level west gate here, then approach the giant chest in the nook beyond. Carefully disarm the hinge trigger or stand aside to avoid being singed by the trio of flamethrower traps. Exit the nook and turn a handle on the wall to raise the east portcullises and advance. When the portcullis opens, wait for a moment to avoid the spear traps before heading up the stairs.
Danger! Flamethrower Trap, Spear Trap
Fire Chamber
Use the hanging oil lamp to ignite the central pool of oil and singe the witches and Hagraven in this chamber. Again, use the key you found at [5] to open the locked door here and access a treasure nook. Pull the chain that hangs above the oil to open the way forward.
- Danger! Oil Lamp Trap, Oil Pool Trap
- Loose gear
Sunlit Chamber
This chamber has a massive hole in its ceiling, allowing soft light and frigid air to flow in. Follow the sound of chanting to locate an ancient Word Wall that yields a new Word of Power.
- Crafting: Arcane Enchanter
- Word Wall: Slow Time [3/3]
Door to Deepwood Vale
Deepwood Vale Summit
You exit out onto the upper level of Hag’s End, overlooking Deepwood Vale below. Face the Hagraven and her summoned minions for a final time and cut them down. Then claim the unique dagger from the corpse on the altar and the large chest nearby.
- Unique Weapon: Bloodthorn [31/80]
- Chest
Deepwood Vale holds one final secret. If you have the Whirlwind Sprint Shout (or are good at rock climbing), head to the upper level of the Vale from which the waterfall descends. There, you can find one more chest and a unique pair of boots.
- Unique Item: Predator’s Grace [54/112]
- Chest (Locked: Expert)
[5.04] and
 [DG.14] Deep Folk Crossing
Related Quests
College of Winterhold Radiant Quest: Arniel’s Endeavors
Side Quest: Lost to the Ages
Recommended Level: 8
Dungeons: Special
Special Objects
Aetherium Shard [2/4]
Chest
Dwemer Convector
Loose gear
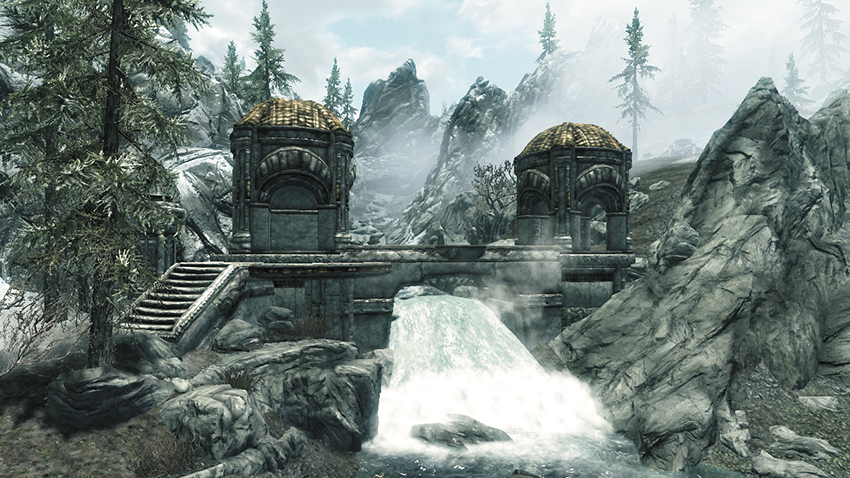
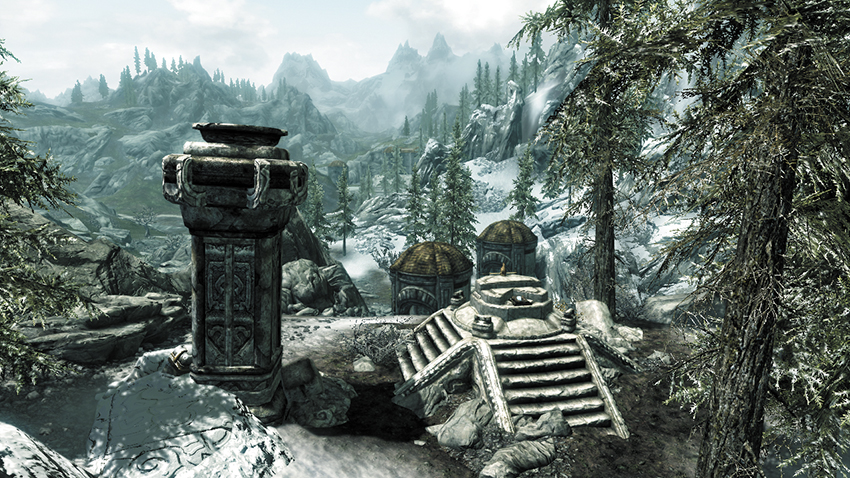
Along the Reach’s western border, an ancient stone bridge stretches across a waterfall at a serene location. Cross the bridge to discover a small shrine with a unique chestlike object—this is a Dwarven Convector, used during a college of Winterhold Radiant Quest. On the rear side of the shrine is a display stand holding a strange Glowing Crystal Shard. If Side Quest: Lost to the Ages is active, you may recognize this as an Aetherium Shard.
[5.05] Bruca’s Leap Redoubt
Recommended Level: 14
Dungeon: Forsworn Redoubt
Forsworn
Crafting
Tanning Rack
Dangers
Bear Trap
Collectibles
Skill Book [Enchanting]: A Tragedy in Black
Chest(s)
Potions
Loose gear
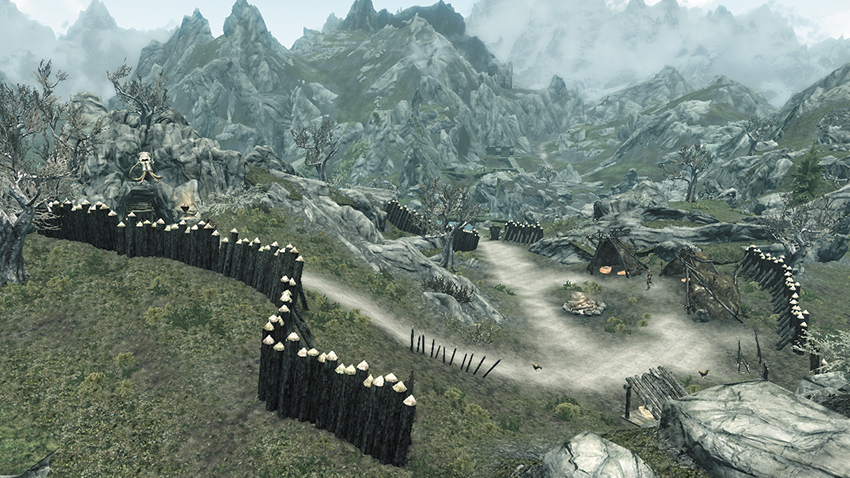
This small Forsworn camp lies near a cave, inside of which lurks a powerful Forsworn Chief. Eradicate the vicious brigands and then claim a Skill Book from a shelf. Search a dark corner to discover a large chest, but beware of the bear trap on the ground before it.
[5.06] Bthardamz
Related Quests
Daedric Quest: The Only Cure
Recommended Level: 16
Dungeon: Dwarven City
Afflicted
Dwarven Sphere
Dwarven Spider
Orchendor
Dangers
Dwarven Thresher (pressure plate/levers)
Swinging Blade Trap (lever)
Collectibles
Skill Book [Speech]: Biography of the Wolf Queen
Unique Item: Spellbreaker [55/112]
Chests
Potions
Loose gear
Mineable ore (Gold, Quicksilver)
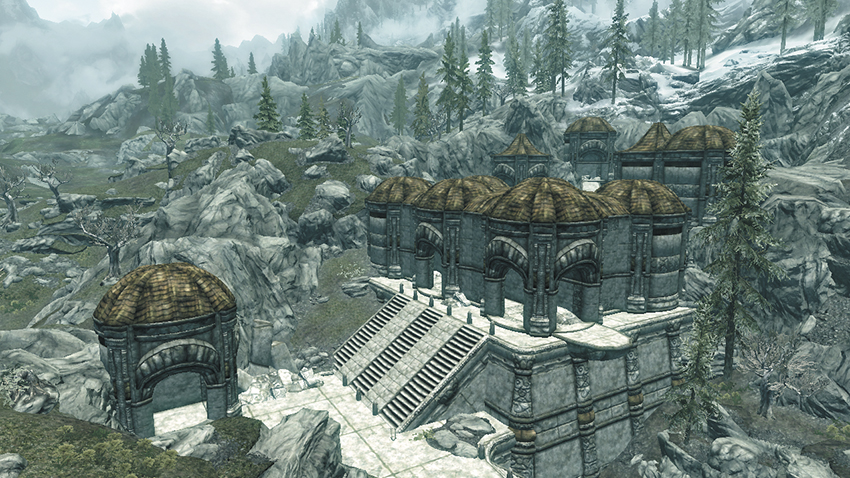
This massive dwarven city stands among the Reach’s western mountains and serves as the main adventuring site for a Daedric Quest.
Exterior
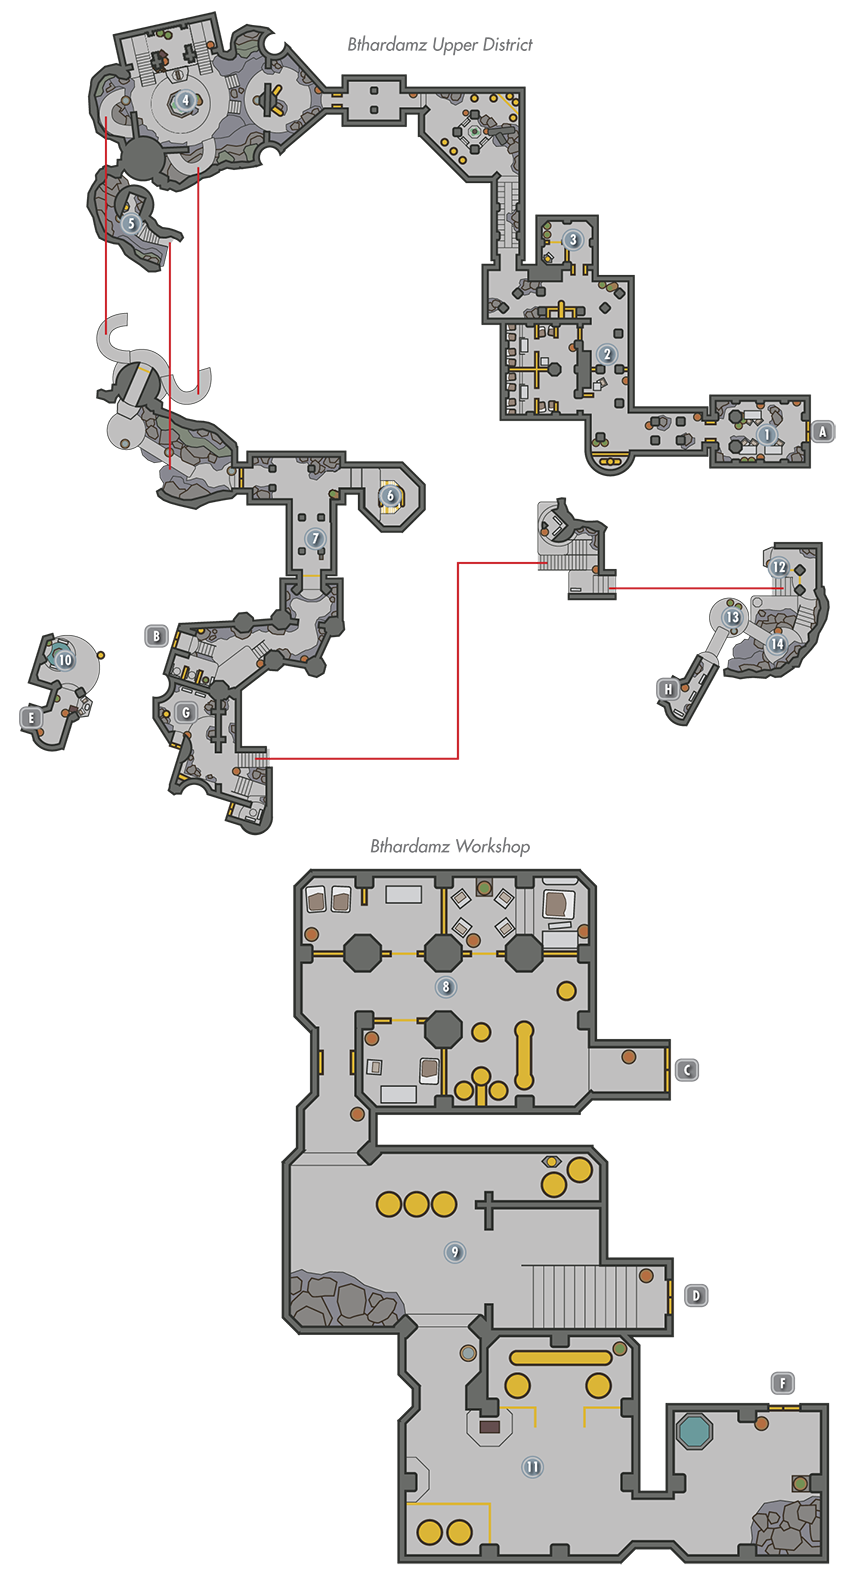
Navigate the city’s sprawling yet simple Exterior, descending a long set of stairs and pulling the farther of two levers to open the way into the Bthardamz Upper District. The other lever activates a dangerous trap and is best left alone. Continue exploring the Exterior ruins before heading inside, venturing upstairs to discover a pair of chests tucked away near the first tower at the top. Backtrack down and enter the Upper District to begin your exploration of the city’s interior.
- Danger! Dwarven Thresher (lever)
- Chests (2)
Exit to Skyrim
Entry Chamber
Find a bit of plunder atop the tables in the Upper District’s first room.
- Chest
- Potion
- Loose gear
Two Routes
Pick a Novice-level gate to slip through this passage without incident. If you can’t pick the lock, you must navigate an Afflicted-filled sleeping area in order to circumvent the gate instead.
- Potion
Storage
Pick an Adept-level gate in this small room to access a potion and chest.
- Chest
- Potion
Public Square
Kill or avoid a group of Afflicted on your way to this cavernous area, where many more Afflicted are gathered. Scale some stairs to locate a chest on the north balcony, then pull the nearby lever to lower the far south gate. Sprint up a winding ramp on your way to [5].
- Chest
Sloping Passage
Descend a sloping ramp that leads toward a metal door, but double back before going through, and loot a hidden chest at the end of the lower trail.
- Chest
Treasure Chamber
Sneak as you make for this room’s far chest; otherwise you risk alerting a pair of Dwarven Spheres here.
- Chest
Spinning Blade Slope
Avoid a pressure plate as you descend a ramp here, which leads to the door to the Bthardamz Workshop.
- Danger! Dwarven Thresher (pressure plate/lever)
- Potion
Door to Bthardamz Workshop
Door to Bthardamz Upper District
Worker’s Quarters
More Afflicted lurk within the Bthardamz Workshop. Read the note on the southwest table to learn where your quest-related quarry might have gone.
Spider Pit
Beware of alerting dangerous Dwarven Spiders in this chamber—you can be quickly overwhelmed. Loot the chest in the northeast corner, then scale the east stairs to return to the Upper District.
- Chest
Door to Bthardamz Upper District
Door to Bthardamz Workshop
Balcony
Duck out of the Bthardamz Workshop just for a moment to raid a chest on this balcony, then head back inside.
- Chest
- Potion
Steam Room
Raid one last chest from this steamy area of the Bthardamz Workshop before taking the southeast door back to the Upper District.
- Chest
Door to Bthardamz Upper District
 Door to Bthardamz Workshop
Lower District Access
At last, you’ve reached the Upper District’s southern end. Before scaling the first set of stone stairs, leap up the rocks to the right (south) and keep going to reach a rooftop, where you discover a hidden chest. Go back down and return to the stairs—again, don’t climb them. Explore the north alley to find another chest, then scale the stairs and open a door to visit a dwelling.
- Chests
 Bthardamz Dwelling
Make a quick stop here to raid a chest that’s guarded by a few Afflicted. If possible, unlock an Apprentice-level gate to access another chest and a Skill Book. If you don’t alert the Afflicted here, you can overhear one of them explaining how she wants to leave this place.
- Skill Book [Speech]: Biography of the Wolf Queen
- Chests (2)
 Stairs and Balconies
Explore this network of stairs and walkways thoroughly to locate a vein of valuable Gold Ore on a rocky ledge and a chest tucked away near a tower’s high balcony to the north. Scale some ramps to reach the tallest tower afterward and proceed through the south door to the Bthardamz Lower District.
- Chest
- Mineable ore (Gold)
 Door to Bthardamz Lower District
 Door to Bthardamz Upper District
 Lower District Entry
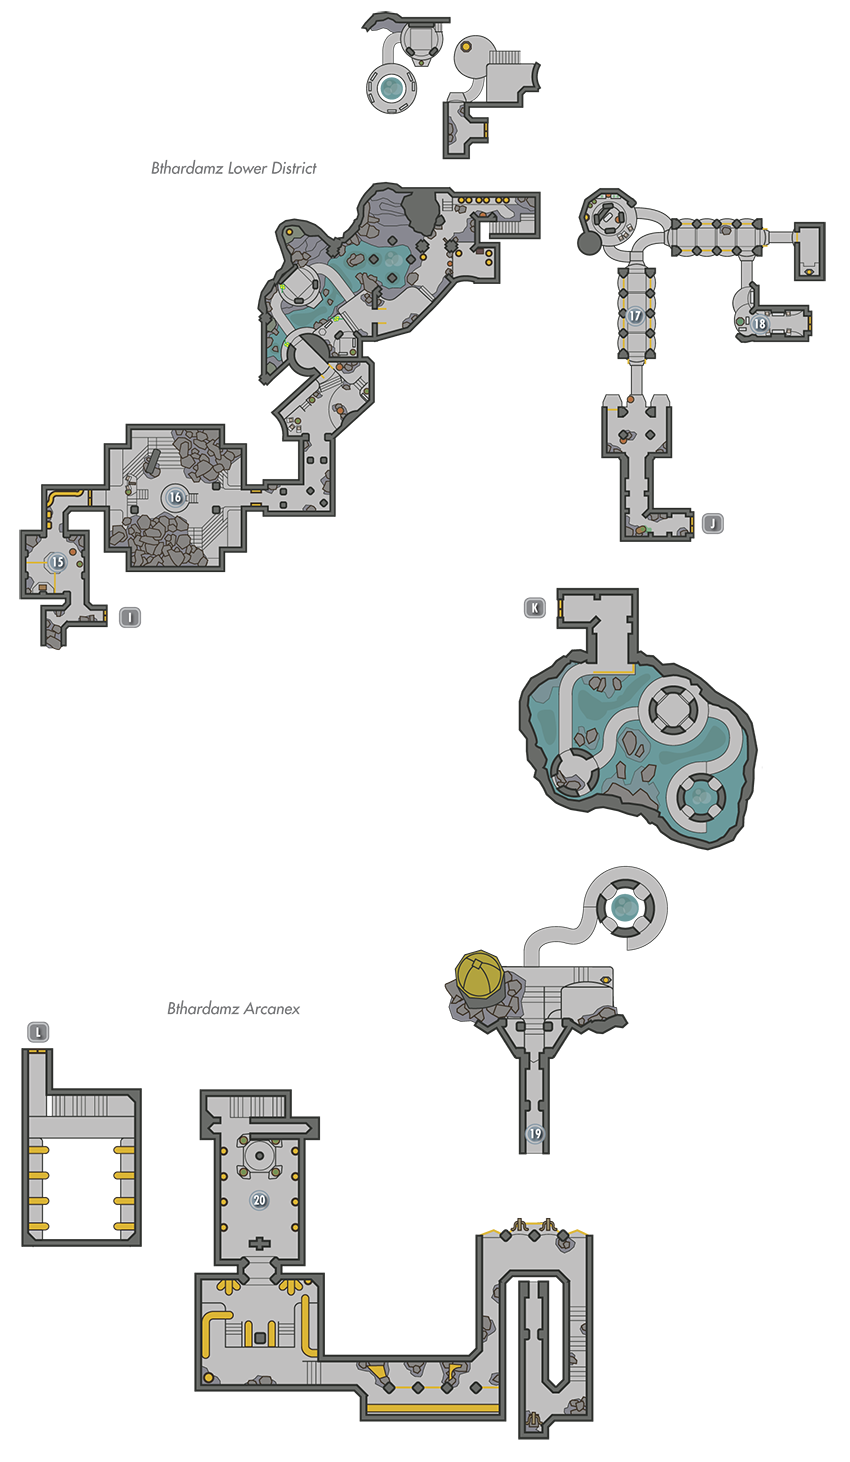
Open an unlocked gate in the Lower District’s first area to raid a chest before sneaking through the passage that follows to avoid alerting Dwarven Spiders.
- Chest
 Amphitheater
Pull the lever on the balcony as you enter this wide cavern to slice up the unwary Afflicted below. Eliminate any stragglers so you may safely descend and raid the central chest.
- Danger! Dwarven Thresher (lever)
- Chest
 Grand Cavern
A river rushes through the middle of this massive cavern, where a network of stairs and walkways connect several towers. Stealth tactics help you avoid the patrolling Afflicted and various Dwarven sentries. Raid a wooden chest in a downstairs room, then head upstairs and check behind the north tower to find a small dwarven chest stashed near a skeleton. Backtrack a bit and scale the east stairs to reach walkways that lead to the Bthardamz Study.
- Danger! Swinging Blade Trap (pressure plate/lever)
- Chests (2)
- Minable ore (Gold)
 Bthardamz Study
Open a gate in the Study’s first room to locate a chest, then avoid a pressure plate before scaling a long ramp. Beware of the Sphere Centurion that comes out of the pipe at the ramp’s top. Open another gate at the top and pillage a chest. Head through the door that follows to exit back out to the Grand Cavern’s highest walkways.
- Danger! Dwarven Thresher (pressure plate)
- Chests (2)
Grand Cavern Revisited (Upper Walkways)
Before crossing the first sloping walkway, turn right and cross the nearby east roof to discover a hidden chest. Cross the sloping walkway afterward and open the east gate to loot another chest in a small room. Venture west afterward and scale the winding ramps to find a third chest affixed to the northwest wall—this one’s guarded by several Afflicted. Either clear them out or forgo the chest and loop around, taking the long southern passage to the Bthardamz Arcanex.
- Chests (3)
 Door to Bthardamz Arcanex
 Door to Bthardamz Lower District
 Arcanex Grand Cavern
If Bthardamz’s beauty has escaped you up to this point, you’ll certainly appreciate it when you enter this huge, sunlit cavern. Continue to sneak through here, or risk alerting a host of Dwarven Spiders and Spheres. Scale a winding ramp to climb a tower, then cross a curved walkway and find a chest that lies just east of some stone stairs. Climb the stairs and check to the east again to discover a Quicksilver Ore vein, but beware of alerting the formidable Dwarven Centurion and host of Dwarven Spiders that lurk in the south passage. Ignore the south passage’s ballistae—you can’t interact with them.
- Chest
- Mineable ore (Quicksilver)
 Orchendor Showdown
Do your best to avoid the patrolling Dwarven Spheres on your way to this final chamber, where you must slay a powerful mage named Orchendor as part of Daedric Quest: The Only Cure. Obtain a useful key from Orchendor’s corpse after the deed is done and use it to quickly exit Bthardamz via the upstairs elevator.
- Key to Bthardamz Elevator (Orchendor)
 Exit to Skyrim
[5.07] Druadach Redoubt
Related Quests
Dungeon Activity
Recommended Level: 14
Dungeon: Forsworn Redoubt
Forsworn
Crafting
Anvil
Forge
Grindstone
Tanning Rack
Collectibles
Skill Book [Light Armor]: The Rear Guard [D2/10]
Special Objects
Reachmen’s Rebellion Map
Shrine of Arkay [6/12]
Chest
Chest (Locked: Expert)
Potions
Loose gear
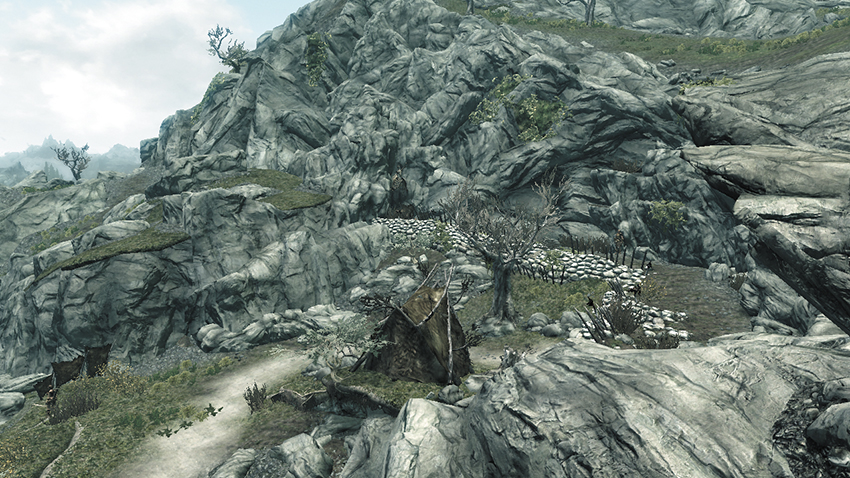
In the Reach’s northern section, a swarm of Forsworn have fortified their position within a shallow cave. Enter to battle a host of the scrappy scavengers—for this is one of the larger Forsworn redoubts in the Reach. Find a large chest in one of the tents, and don’t miss the smaller, locked chest that’s hidden below the east ramp. After the Side Quest: No One Escapes Cidhna Mine, if Madanach survives the escape, he will return here. His presence will keep the Forsworn from attacking you, though they will still be hostile at other locations. A Skill Book rests on a shelf near a cage.
[5.08] Dragontooth Crater
Dungeon: Dragon Lair
Dragon (after Main Quest: Dragon Rising)
Forsworn
Hagraven
Crafting
Arcane Enchanter
Special Objects
Word Wall: Elemental Fury [2/3]
Chest
Chest (Locked: Expert)
Potions
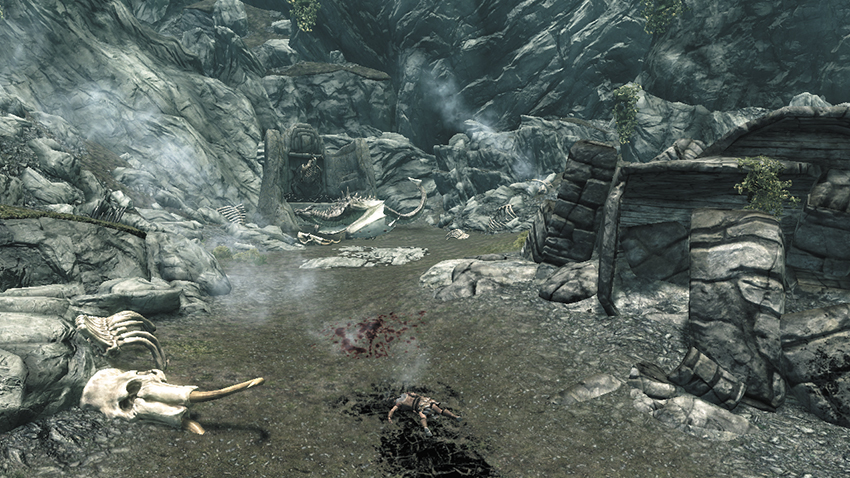
In the Reach’s northern mountains, the Forsworn have made a campsite next to a collapsed tower—unless a dragon has roosted here, in which case, only the mighty beast must be contended with. Slay the dragon and loot the giant chest. You’ll also gain a new Word of Power, as the chest sits right near a Word Wall. Enter the ruined tower afterward here to pillage some potions, and loot the upstairs chest if your Lockpicking skill is high enough.
[5.09] Harmugstahl
Related Quests
Dungeon Activity
Recommended Level: 8
Dungeon: Warlock Lair
Adventurer
Animal
Kornalus
Crafting
Alchemy Lab
Arcane Enchanter
Puzzles
Lever Puzzle
Collectibles
Skill Book [Alchemy]: A Game at Dinner
Special Objects
Shrine of Julianos [3/5]
Chest(s)
Potions aplenty
Loose gear
Exterior
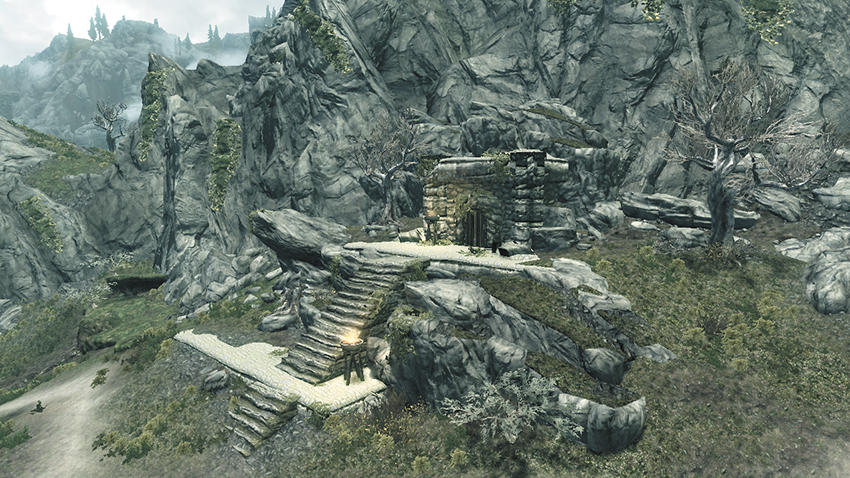
This unassuming stronghold is built into the north side of the Reach’s central mountains.
Interior
Door to Skyrim
Entry Cavern
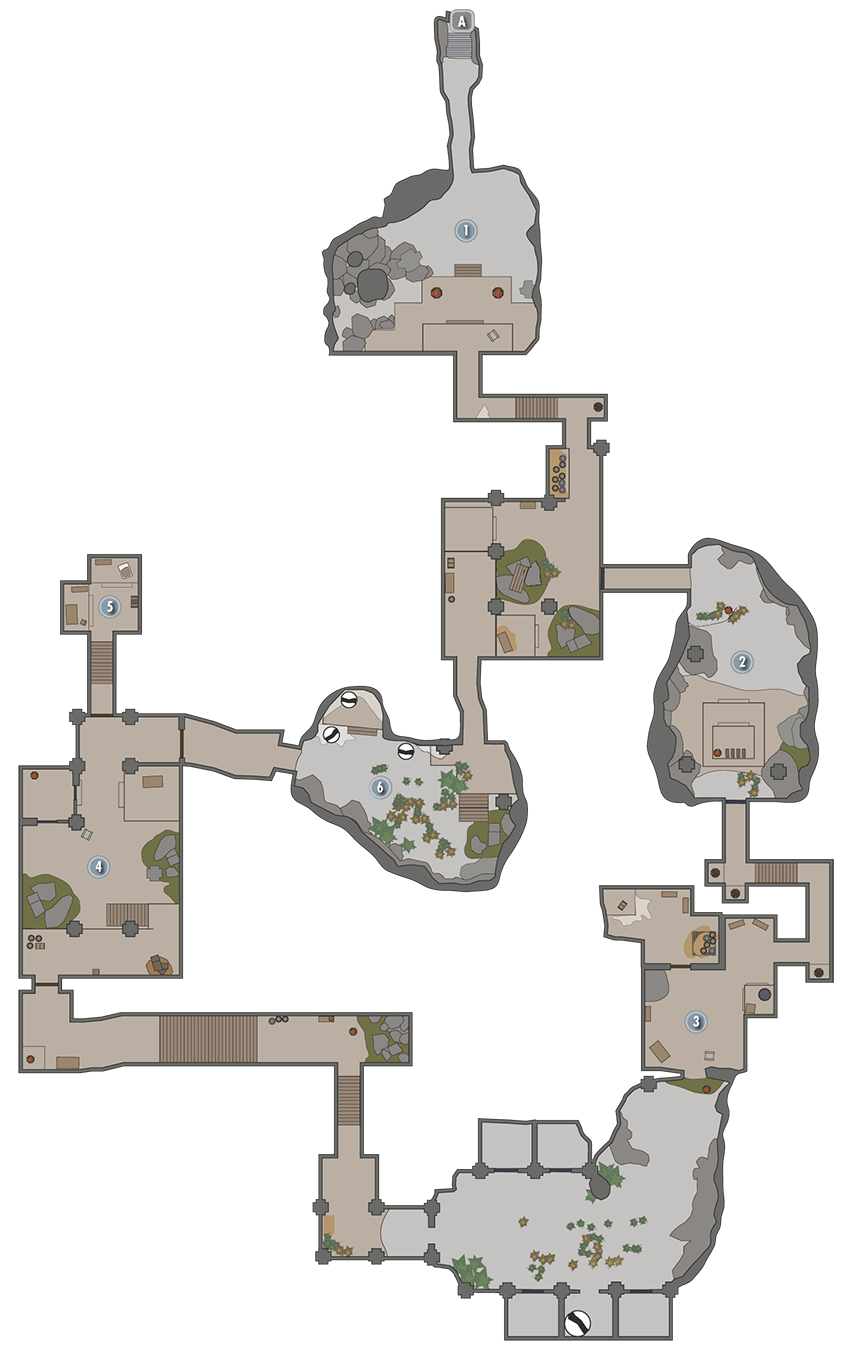
Witness an adventurer dispatch an overgrown spider in the first cavern, then speak to the man to learn that this place is supposedly overrun with the pests. You can loot a chest atop this room’s balcony when you eventually make your way back around.
- Chest
- Satchel
Lever Cavern
Progress until you encounter a room with four levers. Pull only the far left and far right levers to open the way forward.
Alchemy Room
If you can, unlock this chamber’s Expert-level door to access a small storage room filled with potions and a Skill Book.
- Crafting: Alchemy Lab
- Skill Book [Alchemy]: A Game at Dinner
Chest
Potions aplenty
Kornalus’s Lab
Slay a dangerous mage named Kornalus in the next chamber, who’s conducting some sort of nefarious study on the spiders. Claim a key from Kornalus’s corpse and use it to open the nearby north door [Master].
- Crafting: Arcane Enchanter
- Kornalus Frey’s Key (Kornalus)
- Potions
Kornalus’s Quarters
Loot the giant chest in the small room beyond to claim valuable treasure. Touch the pyramid-shaped shrine to instantly cure any diseases you may have.
- Shrine of Julianos [3/5]
- Chest
- Potions
Giant Spider Cavern
This cavern’s two Giant Frostbite Spiders are not only massive, but they’ve also been enchanted by Kornalus to make them even more formidable.
- Loose gear
[5.10] Reach Stormcloak Camp
Related Quests
Civil War Quest: Liberation of Skyrim
Civil War Quest: Compelling Tribute
Civil War Quest: The Battle for Fort Sungard
Habitation: Military: Stormcloak Camp
Kottir Red-Shoal
Stormcloak Quartermaster (Blacksmith)
Stormcloak Soldier
Services
Trader (Blacksmith): Stormcloak Quartermaster [13/33]
Weapons, Apparel, Misc
Crafting
Alchemy Lab
Anvil
Grindstone
Workbench
Special Objects
Civil War: Map of Skyrim Chests (2)
Potions
Loose gear
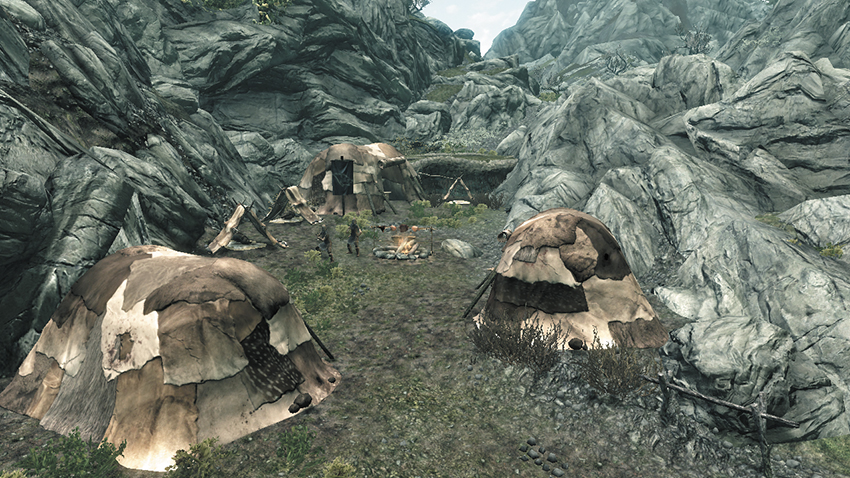
The Sons of Skyrim have erected a camp in the Reach’s eastern mountains. Use the array of Crafting stations here, and inspect the tabletop map in the largest tent to potentially gain new map data. If your stealth skills are sharp, loot a few chests before moving on.
[5.11] Liar’s Retreat
Related Quests
Dungeon Activity
Recommended Level: 18
Dungeon: Falmer Hive
Animal
Bandit
Falmer
Collectibles
Skill Book [Speech]: Biography of the Wolf Queen
Unique Weapon: The Longhammer [32/80]
Chest(s)
Potions
Loose gear
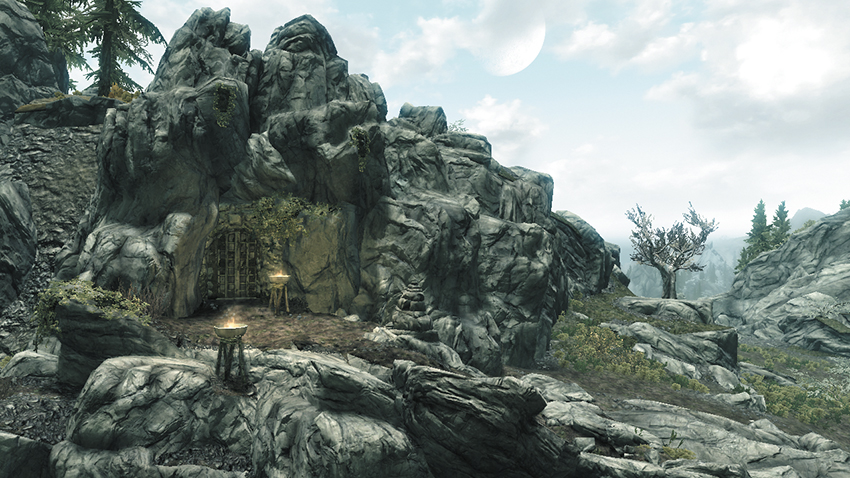
This medium-sized cave, which is situated within the Reach’s eastern mountains, is being used as a bar and gambling hall by bandits. However, the bandits have recently found themselves faced with an overwhelming adversary—Falmer have invaded the cave!
Dining Hall
Sneak into the cave’s first chamber to watch a few bandits battle against several Falmer. Slay the victors afterward, and beware of many more Falmer that emerge from the room’s northern entrances. Claim a few potions from behind the bar.
- Potions
- Loose gear
Sleeping Quarters
Find a few potions and some loose gear in the various rooms that connect off the dining hall. Find a locked chest in the northwest room and pick the Novice-level southwest door to free a powerful bandit and obtain even more wealth. A Skill Book sits atop a high stone shelf near the locked chest.
- Skill Book [Speech]: Biography of the Wolf Queen
- Chest
- Chest (Locked: Adept)
- Potions
- Loose gear
Spider Tunnels
Slay a ravenous Frostbite Spider in the webbed passages that follow, and find a locked chest in a Falmer tent. Beware of additional spiders that may descend from the ceiling, as well as the Falmer archer who stands in an elevated position as you exit the tunnel. Loot the chest on the Falmer’s perch.
- Chest
- Chest (Locked: Apprentice)
- Potions
Chaurus Den
Slay some poorly equipped bandit prisoners on your way to the cave’s large, final chamber, where a massive Chaurus lurks. Loot a chest here, collect the Longhammer from near the bar owner’s splayed body, then backtrack outside. Beware: a handful of powerful bandits will ambush you back in the dining hall, thinking that you’re to blame for their hideout’s destruction!
- Unique Weapon: The Longhammer [32/80]
- Chest
- Loose gear
[5.12] Cliffside Retreat
Recommended Level: 8
Habitation: Hunter Camp
Hunter
Crafting
Tanning Rack
Collectibles
Skill Book [Archery]: The Marksmanship Lesson
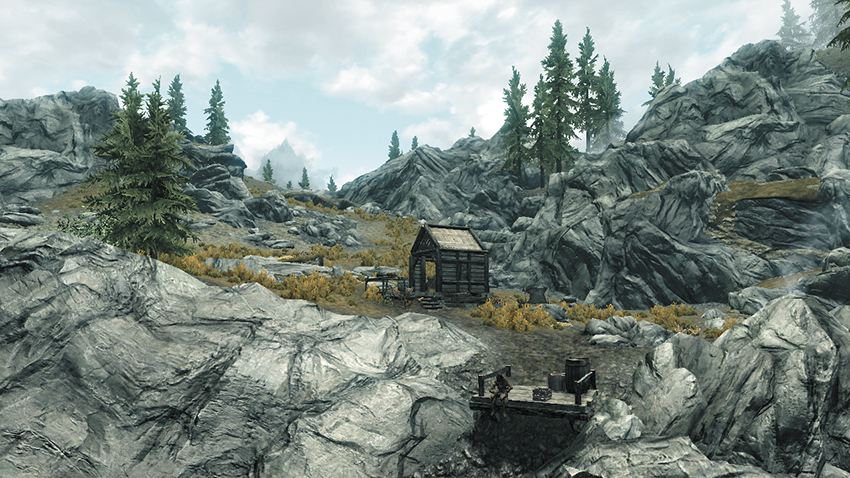
A lone hunter makes his home at this humble shack, which stands on the Reach’s eastern cliffs. A Skill Book is the main attraction here.
[5.13] Dragon Bridge Overlook
Recommended Level: 8
Dungeon: Forsworn Redoubt
Forsworn
Chest (Locked: Novice)
Potion
Loose gear
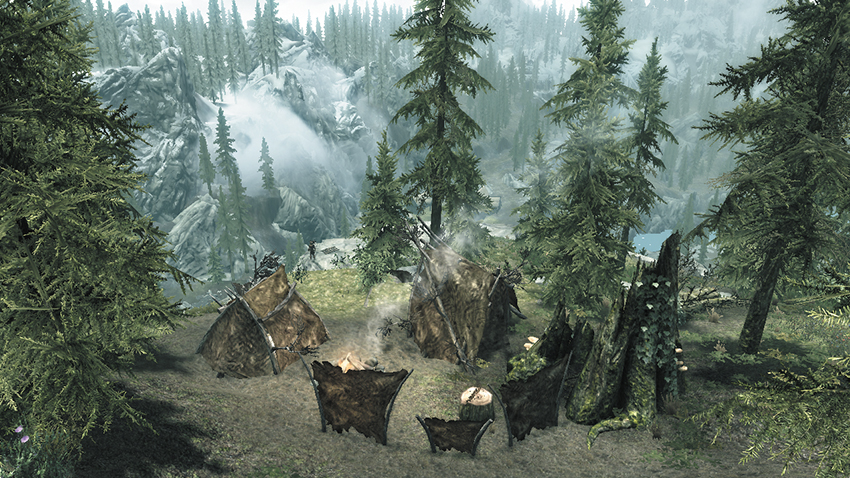
This Forsworn campsite overlooks Haafingar’s infamous Dragon Bridge [1.17]. Slay the dangerous ruffians and then plunder their valuables.
[5.14] Ragnvald
Related Quests
Side Quest: Masks of the Dragon Priests*
Dungeon Quest: Otar’s Mad Guardians*
Recommended Level: 24
Dungeon: Dragon Priest Lair
Draugr
Guardian Saerek
Guardian Torsten
Otar the Mad
Crafting
Arcane Enchanter
Dangers
Dart Trap (pressure plates)
Flamethrowers (iron door)
Oil Lamp Traps
Oil Pool Traps
Swinging Blade Trap
Trapped Chest
Quest Items
Saerek’s Skull Key
Torsten’s Skull Key
Collectibles
Dragon Priest Mask: Otar [7/10]
Skill Book [Restoration]: Mystery of Talara, v2
Special Objects
Word Wall: Kyne’s Peace [1/3]
Chest(s)
Potions
Loose gear
Exterior
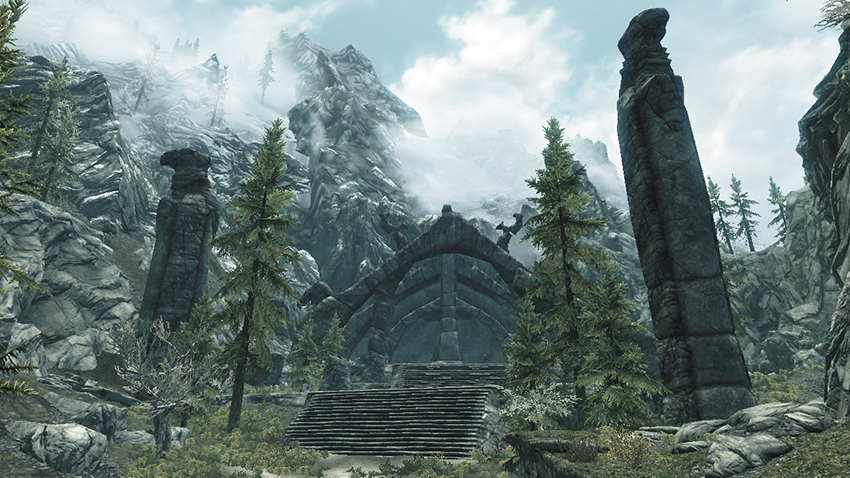
These ancient ruins lie within the reach’s western mountains, on the edge of Skyrim. Dispatch a few Draugr as you scale the massive stone steps that lead into the temple. Before you enter, check to the left (southwest) of the main entrance; the narrow side hides a dead bandit with some loot.
Interior (Ragnvald Temple)
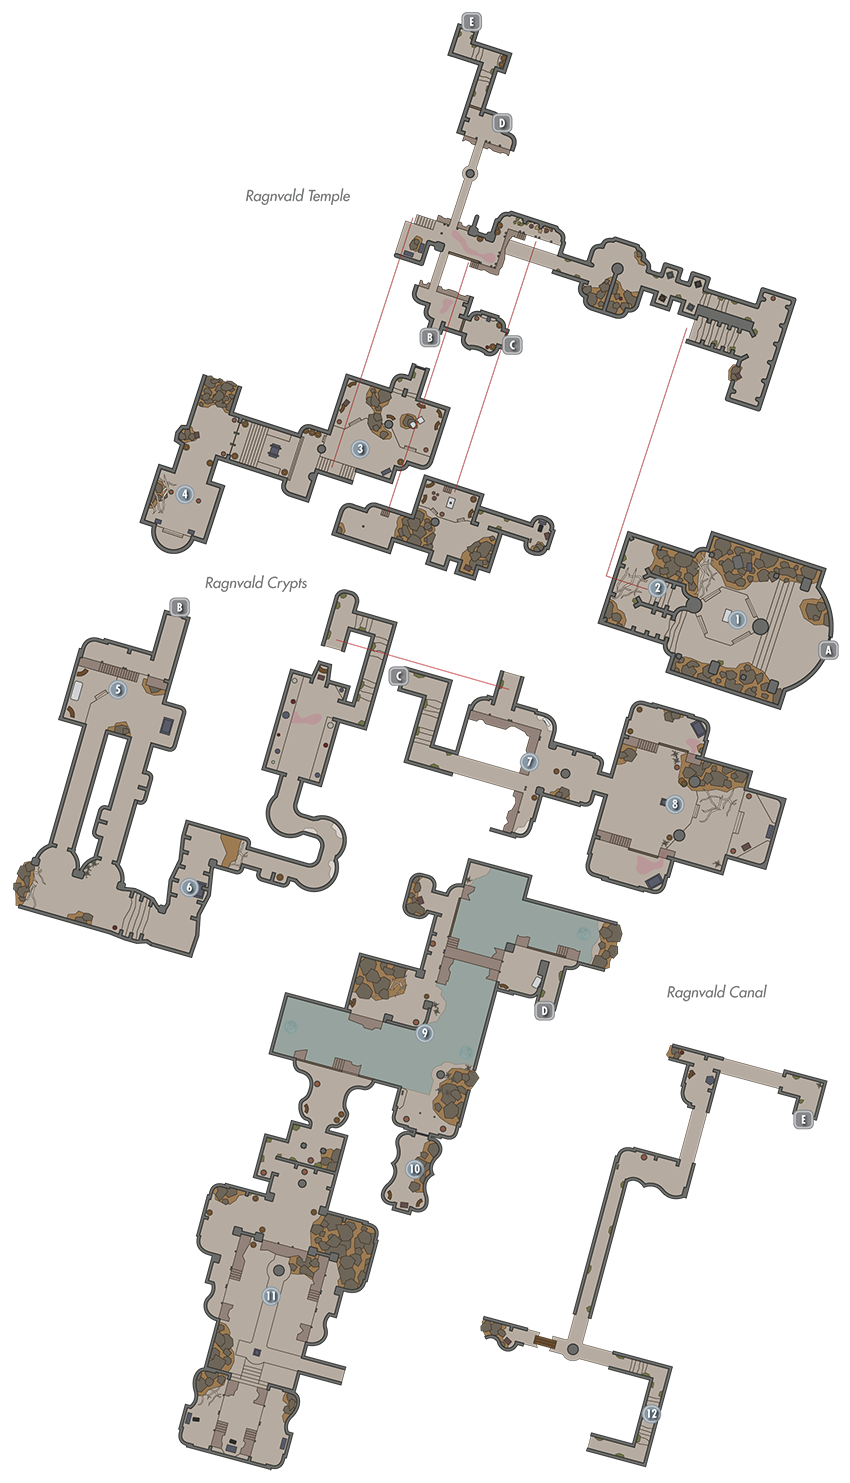
Door to Skyrim
Grand Embalming Chamber
The cavernous temple is silent. Pass by the desiccated form on the table to the narrowing tunnel steps ahead (west) of you.
Dead Draugr Steps
The tunnel steps lead to a small landing with a dead Draugr. The next landing (with the two ceremonial stone torch burners, and chest) has a further tunnel that’s narrower still. This winds along to the large hub chamber of Otar.
- Potion
- Chest
Tomb of Otar
This sprawling chamber has exits to both side catacombs (the Crypts and Canal), and Draugr both on the walkways and the stone ground below (some are standing below Oil Lamps you can smash). Check this area for some scattered potions and two chests. Continue west to a strange and ornate sarcophagus with two odd slots in them. Return with two Skulls (one from each catacomb), insert them into the slots, and open the sarcophagus, summoning the mighty Dragon Priest Otar!
- Danger! Oil Lamp Traps, Oil Pool Traps
- Chest (2)
- Loose gear
- Potions
- Otar Mask
Word Wall of Kyne
Once Otar is defeated, the spears preventing you from accessing this chamber retract. Aside from the Word Wall, there are two chests (a locked one is found in a northern nook).
- Word Wall: Kyne’s Peace [1/3]
- Chest
- Chest [Apprentice]
Door to Ragnvald Crypts (upper)
Door from Ragnvald Crypts (upper)
This has a door bar behind it, meaning you can only access it from the Crypts area, the first time you exit.
Door to Ragnvald Canal (lower)
Door from Ragnvald Canal (upper)
This has a door bar behind it, meaning you can only access it from the Canal area, the first time you exit.
Interior (Ragnvald Crypts)
Door to Ragnvald Temple
Draugr Guard Chamber
Awaken the Draugr as you descend into this first chamber, then take the right (west) passage to avoid the left passage’s traps.
- Danger! Dart Trap (Pressure Plates)
Burial Passages
Slay a host of powerful Draugr as you progress.
Offering Chamber
Kill any foes, then watch out of the trapped chest that tempts you; open it from as far away as possible to avoid being impaled by spears. Then head to the walkways above this room to reach the final chamber, temporarily ignoring the upper tunnel and steps to the west, which lead you back into the Temple, after you face Saerek.
- Danger! Trapped chest
- Chest
- Skill Book (Restoration): Mystery of Talara, v2
Guardian Saerek’s Tomb
This two-storey chamber has Draugr to slay first, before you inspect and take the strange skull on the pedestal in front of you. Then take it, and face the fearsome Guardian Saerek in combat!
- Danger! Oil Lamp Trap, Oil Pool Trap
- Saerek’s Skull Key
- Chest
Door to Ragnvald Temple
Interior (Ragnvald Canal)
Door to Ragnvald Temple
North Canal Chamber
Search northwest to discover a chest. Then pull a southeast lever to lower a drawbridge ahead, but before you cross, open the nearby iron door from as far away as possible (or unlock the Trap Trigger [Expert]): a fire trap activates when the door opens.
- Chest
- Potions
Nook
Gather the items you need from the chest in here.
- Chest
Guardian Torsten’s Tomb
Escape Route
Advance through the small maze of corridors and into this two-storey tomb. Swipe another skull from the central pedestal here to battle Guardian Torsten, who emerges from the far sarcophagus. Slay his brethren first, if you want fewer enemies to face at a time. Go upstairs to loot a locked chest, take the upper north corridor back to the previous cavern, jumping the pressure plate at the corridor’s start to avoid activating a nasty trap. open one last chest near the arcane Enchanter before following the walkways back to the temple.
- Danger! Flamethrowners (Iron Door), Swinging Blade Trap (Pressure Plate)
- Arcane Enchanter
- Chest
- Chest [Novice]
- Torsten’s Skull Key
Door to Ragnvald Temple
[5.15] Reach Imperial Camp
Related Quests
Civil War Quest (when active, depending on who you side with)
Habitation: Military: Imperial Camp
Imperial Quartermaster (Blacksmith)
Imperial Soldier
Services
Trader (Blacksmith): Imperial Quartermaster [14/33]
Weapons, Apparel, Misc
Crafting
Alchemy Lab
Anvil
Grindstone
Workbench
Special Objects
Civil War: Map of Skyrim Chests (2)
Potions
Loose gear
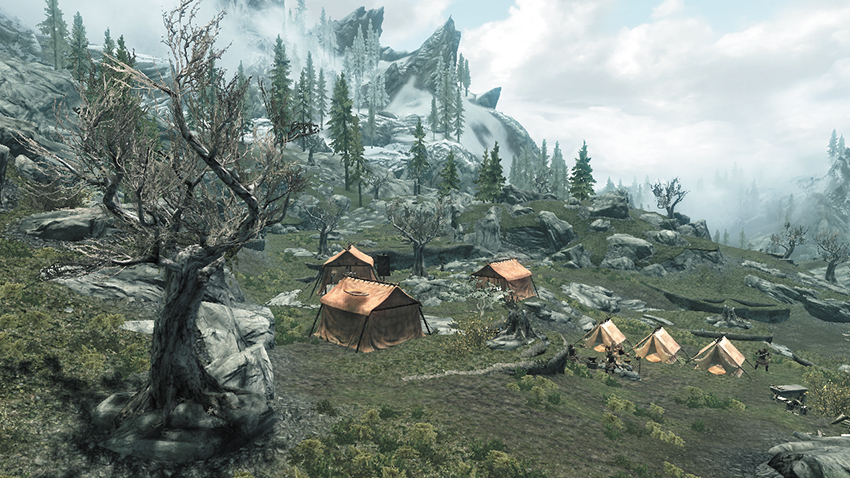
Imperial forces have erected a small camp in the Reach’s eastern mountains, though this site may not exist, depending on the status of the Civil War quest line. Use the array of Crafting stations here, and inspect the tabletop map in the largest tent to potentially gain new map data. If you like, loot a few chests before moving on.
[5.16] Shrine to Peryite
Related Quests
Daedric Quest: The Only Cure
Recommended Level: 12
Dungeon: Special
Kesh the Clean
Crafting
Alchemy Lab
Collectibles
Skill Book [Speech]: The Buying Game [E2/10]
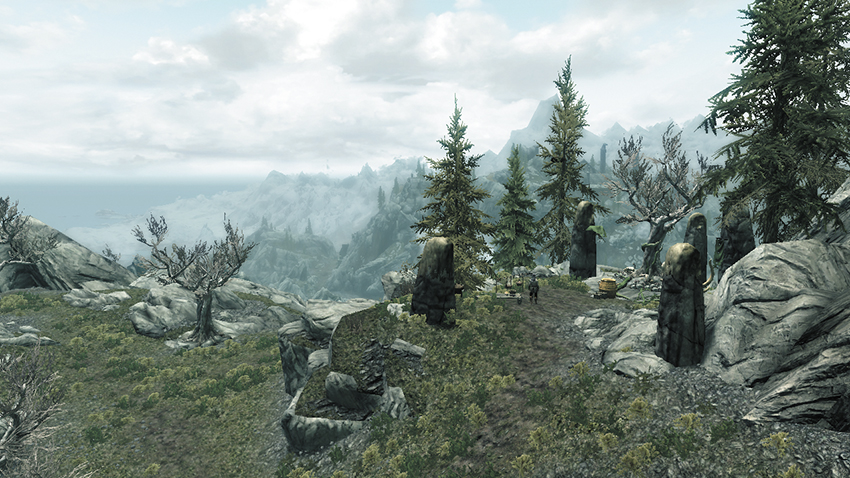
This quaint shrine is perched high atop the Reach’s northern mountains. Speak with the lone individual here, an alchemist named Kesh, to begin a Daedric Quest if you are Level 10 or higher. A Skill Book sits on the table near the Alchemy Lab.
[5.17] Karthwasten
Related Quests
Temple Quest: The Heart of Dibella
Miscellaneous Objective: Sauranach’s Mine!: Helping Atar* (Atar or Ainethach)
Miscellaneous Objective: Sauranach’s Mine!: Helping Ainethach* (Atar or Ainethach)
Habitation: Town
Ainethach (Marriage Prospect)
Atar
Belchimac
Enmon
Lash gra-Dushnikh
Mena
Ragnar
Crafting
Grindstone
Smelters (2)
Services
Marriage Prospect: Ainethach [21/62]
Collectibles
Chest(s)
Potions
Loose gear
Mineable ore (Silver)
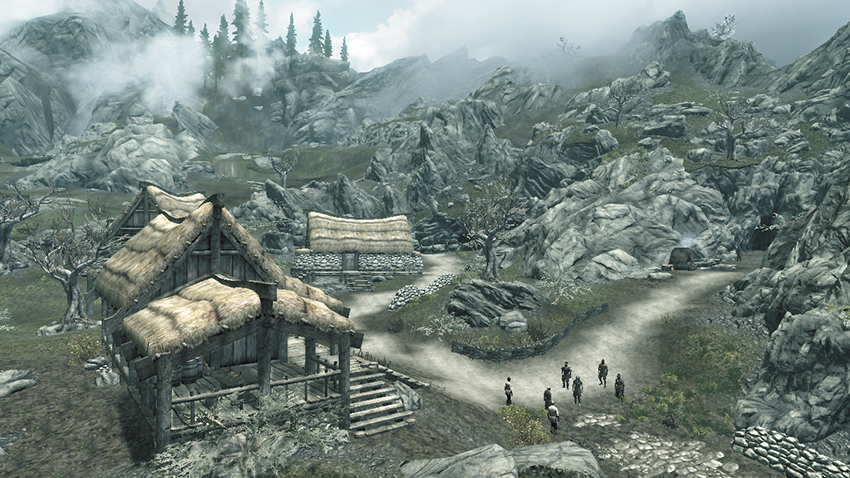
This bustling mining community lies in the Reach’s north-central region. You visit this village during “The Heart of Dibella” in search of an important child.
Exterior
When you first arrive at Karthwasten, you witness a verbal dispute between some Silver-Blood soldiers and a man named Ainethach, who owns the nearby Sanuarach mine. Speak to either person afterward to gain a Side Quest that involves the settling of their dispute.
- Crafting: Grindstone, Smelter (2)
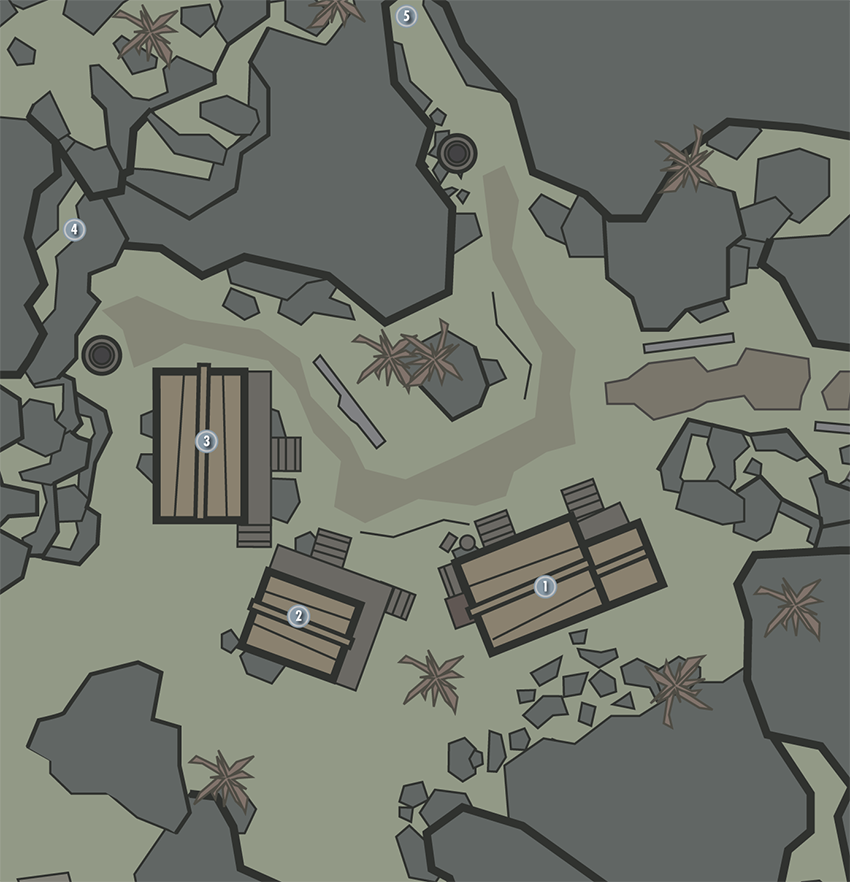
Karthwasten Hall
This small area sports a chest and some loose coin, making it worth breaking into.
- Area Is Locked (Novice)
- Chest
Enmon’s House
Pillage this humble abode for several potions and a chest.
Area Is Locked (Novice)
- Chest
- Potions
- Loose gear
Miner’s Barracks
Break into the barracks to raid a few chests.
- Area Is Locked (Novice)
- Chests (2)
- Loose gear
Fenn’s Gulch Mine
This small silver mine has been largely mined out, but there’s a bit of ore to be found in the northern nook.
- Loose gear
- Mineable ore (silver)
Sanuarach Mine
Silver-Blood soldiers guard this newer mine, and they won’t let anyone harvest its precious silver until the situation between Atar and Ainethach here at Karthwasten has been resolved.
- Loose gear
- Mineable ore (Silver)
[5.18] Broken Tower Redoubt
Related Quests
Temple Quest: The Heart of Dibella
Recommended Level: 14
Dungeon: Forsworn Redoubt
Forsworn
Crafting
Grindstone
Dangers
Rockfall Trap (tripwire)
Rune Trap (floor)
Swinging Wall Trap (pressure plate)
Collectibles
Skill Book [Block]: The Mirror [D1/10]
Skill Book [Conjuration]: Liminal Bridges
Special Objects
Shrine of Dibella [4/8]
Chest(s)
Potions aplenty
Loose gear
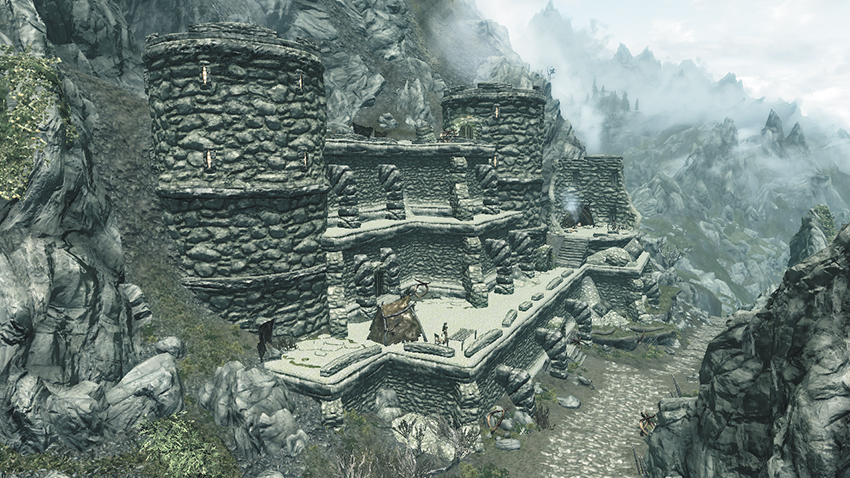
This battered fortress stands in a valley between the Reach’s rocky eastern hills. While Temple Quest: The Heart of Dibella is active, a band of Forsworn will be guarding an important child here, whom you must free.
Great Hall
Unlock the first chamber’s Adept-level northwest door to access a stockroom with a chest. Proceed through the upstairs door and sidestep a pressure plate trap in the corridor on your way to the next room.
- Danger! Swinging Wall Trap (pressure plate)
- Chest
- Potions
Tower A
Unlock the chest within this circular chamber and swipe several potions off shelves. Claim a Skill Book from a table in the sleeping area before opening the east door and navigating a long passage to another tower.
- Skill Book [Block]: The Mirror [D1/10]
- Chest (Locked: Novice)
- Potions
Tower B
Slay more Forsworn in the second tower, and beware of a tripwire that’s stretched across the stairs as you make your ascent. Loot a chest on the second level and then continue upstairs. Exit through the door at the top to access the fort’s upper ramparts.
- Chest
- Potions
Exterior Ramparts
Exit the keep via any of its northern doors to visit the Exterior ramparts, where more Forsworn await. Access the highest ramparts by exiting through the upstairs door in Tower B, then cut across and enter the top of Tower A.
- Crafting: Grindstone
- Potion
- Loose gear
Tower A (Top Level)
Beware: a powerful Forsworn mage lurks at the top of this tower, and the center of the room features a dangerous rune trap. Keep away from the room’s center as you battle the mage. The key you find on his corpse opens the nearby holding cell, where the child you seek as part of “The Heart of Dibella” quest is imprisoned. Claim the Skill Book on the nearby table and touch the shrine near the altar to banish any diseases you might have.
- Danger! Rune Trap (floor)
- Skill Book [Conjuration]: Liminal Bridges
- Shrine of Dibella [4/8]
- Broken Tower Prison Key (Forsworn mage)
- Chest
- Potions aplenty
[5.19] Markarth Stables
Related Quests
Favor: Special Delivery* (Banning)
Habitation: Farm
Banning (Special)
Cedran (Stables)
Kibell (Carriage)
Services
Follower: Vigilance [17/47]
Trader (Carriage): Kibell [2/5]
Trader (Stables): Cedran [2/5]
Trader (Stablemasters): Cedran [2/5]
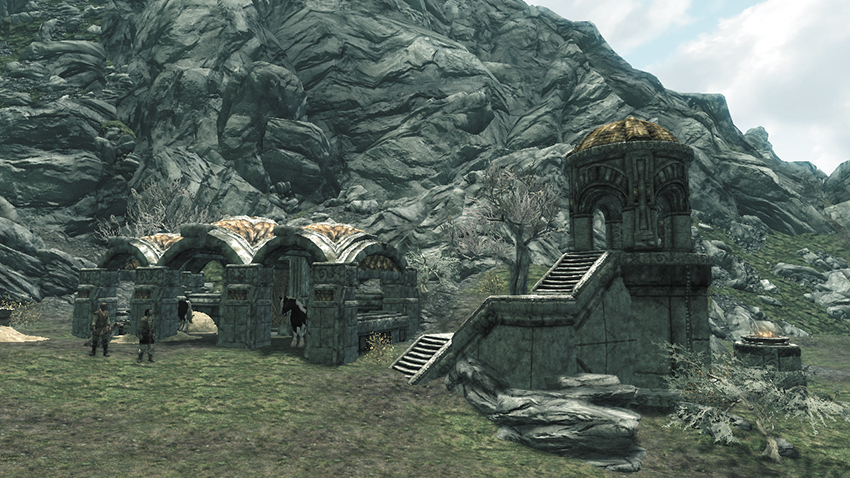
Stop by these fine stables to buy a steed or purchase a carriage ride to any Hold’s capital. For 500 gold, you may also buy a trusty war dog named Vigilance to serve as your Follower – speak with Banning for assistance.
[5.20] Salvius Farm
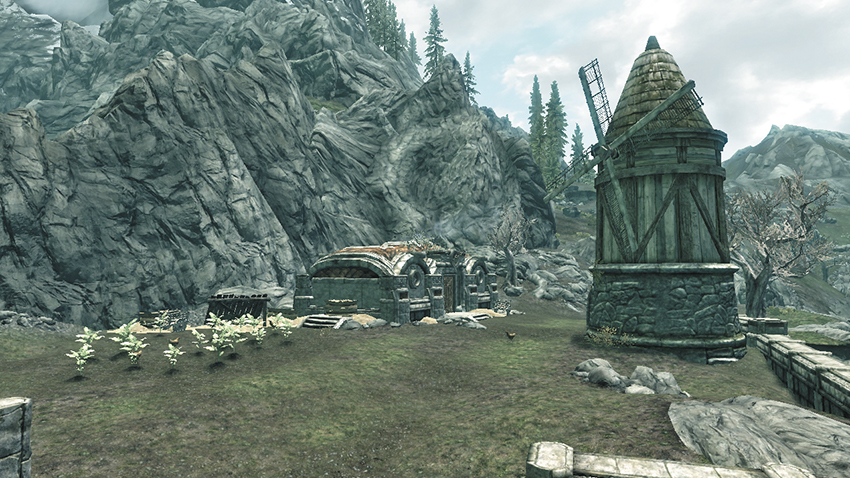
Related Quests
Miscellaneous Objective: Letter to Leonitus* (Rogatus Salvius)
Favor (Activity): Harvesting Crops* (Vigdis Salvius)
Habitation: Farm
Rogatus Salvius
Vigdis Salvius
Collectibles
Area Is Locked [Novice]
Chest
This small farm stands just outside of Markarth’s front gate. Speak with the farm’s owner, Rogatus Salvius, to gain a new Side Quest. Break into the farmhouse and raid it for valuables if you dare.
[5.21] Left Hand Mine
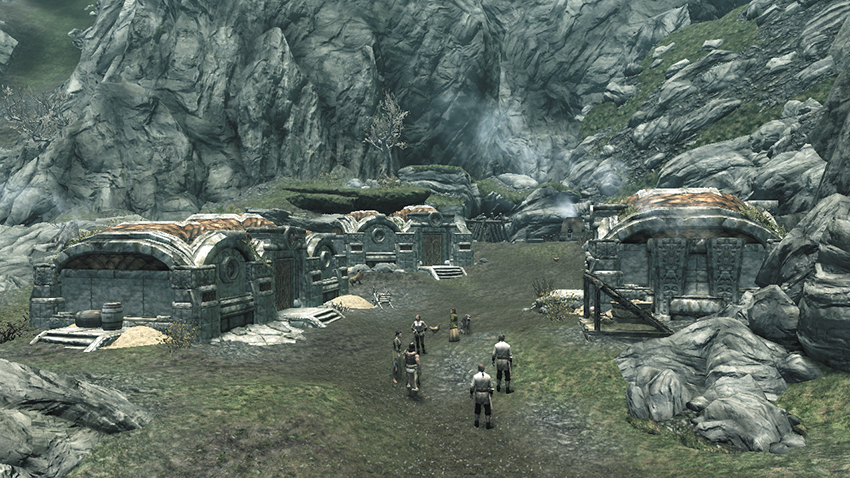
Related Quests
Favor (Activity): Mining Ore* (Skaggi Scar-Face)
Habitation: Mine
Adeber
Daighre
Erith
Gat gro-Shargakh (Marriage Prospect)
Pavo Attius (Marriage Prospect)
Skaggi Scar-Face
Sosia Tremellia
Torom (dog)
Willem
Crafting
Smelter
Services
Marriage Prospect: Gat gro-Shargakh [22/62]
Marriage Prospect: Pavo Attius [23/62]
Collectibles
Chest(s)
Loose gear
Mineable ore (Iron)
This bustling mining community is located just outside of Markarth’s gates. It’s busier than normal due to an influx of miners who have fled from the nearby Kolskeggr Mine [5.22], which has been overrun by Forsworn raiders.
Exterior
Chat with the villagers outside, including the mine’s owner, Skaggi Scar-Face, to acquire a Side Quest involving another mine to the north. Skaggi will also purchase Iron Ore for a fair price.
- Crafting: Smelter
Miner’s Barracks
If you like, raid a chest in the miner’s barracks to claim some ill-gotten loot.
- Chest
Daighre’s House
These humble miners don’t have much, but you can steal what little they’ve got.
- Chest
Skaggi’s House
The mine’s owner isn’t a rich woman, but you can break into her house and steal her life savings if you like.
- Area Is Locked (Novice)
- Chest
Left Hand Mine
There’s plenty of iron to be claimed from this mine’s thick ore veins.
- Loose gear
- Mineable ore (iron)
[5.22] Kolskeggr Mine
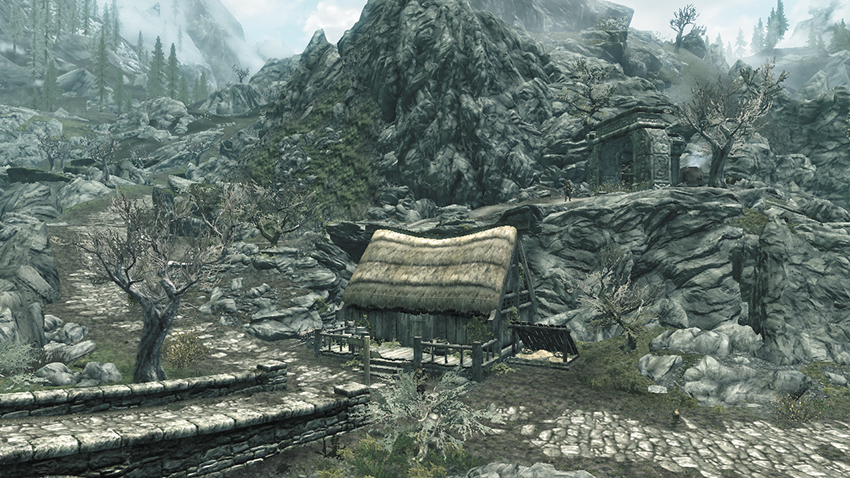
Related Quests
Miscellaneous Objective: Kolskeggr Clear Out* (Pavo)
Dungeon: Forsworn Redoubt
Forsworn
Crafting
Smelter
Potions
Loose gear
Mineable ore (Gold)
This valuable mining site has been overrun by Forsworn—its former workers have fled to the nearby Left Hand Mine [5.21]. Pick the easy front door lock to break into the cabin if you wish—you’ll find pickaxes within. Go up the hill and enter the mine, slaying the remaining Forsworn there to secure it and its rich supply of valuable Gold Ore. Once the Forsworn are no more, the miners who fled to Left Hand Mine will return here to work.
[5.23] The Lover Stone
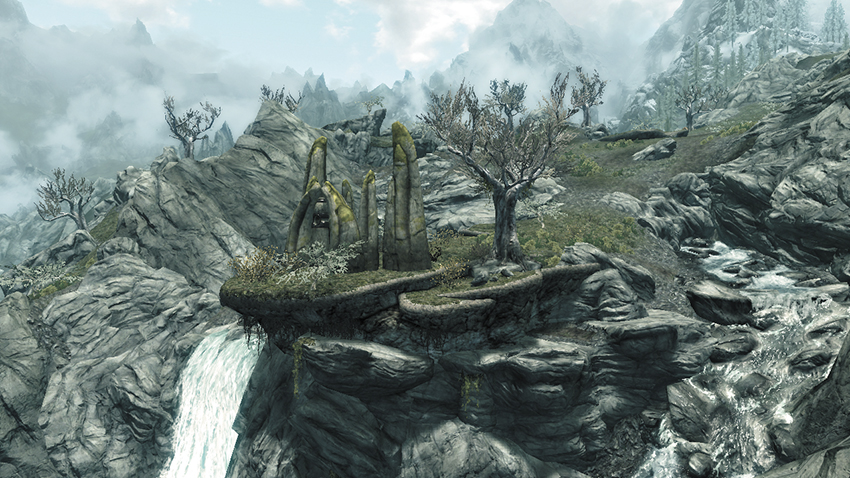
Recommended Level: 6
Dungeon: Special
Special Objects
Standing Stone: The Lover [6/13]
A small collection of ancient stones stands atop the mountains northeast of Markarth. Inspect the central Standing Stone to receive a new sign blessing. Those under the sign of the Lover can master all skills 15 percent faster. Note that you may only have one sign blessing at a time, so activating this Standing Stone will override your current sign blessing (if any).
[5.24] Blind Cliff Cave
Related Quests
Dungeon Quest: Melka and Petra*
Recommended Level: 14
Dungeon: Hagraven Nest
Forsworn
Melka
Crafting
Alchemy Lab
Dangers
Oil Lamp Traps
Oil Pool Traps
Puzzles
Handle Puzzle
Collectibles
Skill Book [Illusion]: Mystery of Talara, Part 4
Skill Book [Light Armor]: The Refugees [E2/10]
Unique Weapon: Eye of Melka [33/80]
Chest(s)
Potions
Loose gear
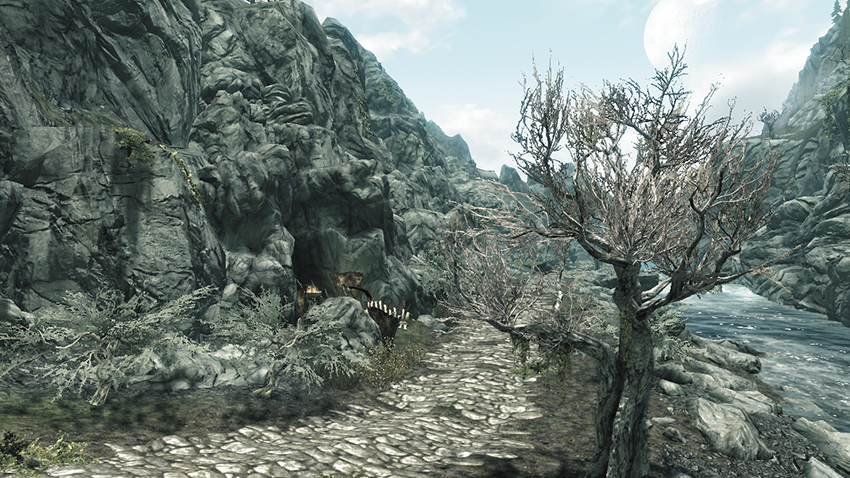
This small cave is located in the heart of the Reach, not far from the main road, and passing through it allows you to reach a pair of secluded, crumbling towers. The twisted Forsworn are using this area as a hideout.
Blind Cliff Cave (Interior)
Bring down a hanging lamp to ignite the oil in the cave’s first passage and sear a lone Forsworn guard. Slay more Forsworn in the wide cavern that follows as you work your way up to a collapsed tower. Smiths should be on the lookout for ore veins throughout. Before entering the tower, check around behind it to locate a hidden chest, along with a Skill Book. Exit the cave via the tower’s top door to return outside, near a pair of twin Exterior towers.
- Skill Book [Light Armor]: The Refugees [E2/10]
- Danger! Oil Lamp Traps, Oil Pool Trap
- Chest
Blind Cliff Towers
Head to the top of the first Exterior tower, slaying a few more Forsworn and looting a chest along the way. Cross the elevated walkway to reach the neighboring tower, looting a chest as you enter. Proceed into the bastion.
- Chests (2)
- Potion
Blind Cliff Bastion
You encounter a caged Hagraven named Melka in the bastion’s entry passage. Speak to Melka to gain a new Side Quest, then pull the nearby chain to free Melka, who will guide you from this point forward. Melka can hold her own in most fights, but she is not invincible. Just ahead, turn the middle of three handles to safely raise a portcullis. Just beyond, allow Melka to expose a hidden lever, then pull it to deactivate the swinging blades in the next corridor. Just before Melka’s alchemy parlor, you may spy a handle on the wall beyond the swinging blades and turn it to reveal a secret passage that leads to several urns and a chest. Backtrack out and proceed to the final cavern, where two Forsworn and a Hagraven named Petra await. Slay Petra to complete Melka’s quest, and search Petra’s remains to discover a Skill Book. Be sure to talk to Melka (or scavenge her corpse!) to claim your reward—a unique staff, the Eye of Melka.
- Crafting: Alchemy Lab
- Skill Book [Illusion]: Mystery of Talara, Part 4
- Unique Weapon: Eye of Melka [33/80]
- Chests (2)
- Potions
- Loose gear
[5.25] Four Skull Lookout
Related Quests
College of Winterhold Radiant Quest: Destruction Ritual Spell
Recommended Level: 8
Dungeon: Bandit Camp
Bandit
Collectibles
Chest(s)
Loose gear
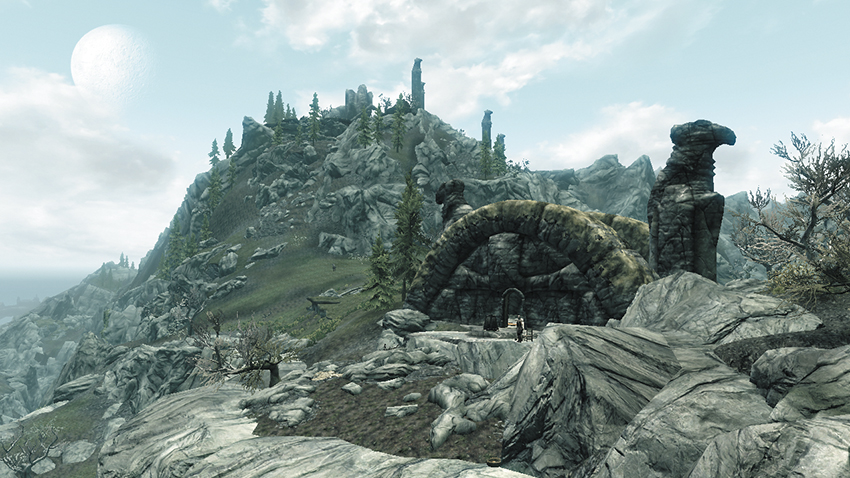
Bandits have taken over this small stone ruin, located in the heart of the Reach. Clear out the villains, then loot the chest they’re guarding. The special pedestal here is used during a College of Winterhold Quest.
[5.26] Red Eagle Redoubt
Related Quests
Side Quest: Repairing the Phial
Dungeon Quest: The Legend of Red Eagle
Recommended Level: 14
Dungeon: Forsworn Redoubt
Forsworn
Crafting
Alchemy Lab
Blacksmith Forge
Tanning Rack
Workbench
Dangers
Dart Trap
Oil Lamp Trap
Oil Pool Trap
Rockfall Trap
Quest Items
Red Eagle’s Fury
Collectibles
Skill Book [Alteration]: Reality & Other Falsehoods
Unique Weapon: Red Eagle’s Fury [34/80]
Chest(s)
Potions
Loose gear
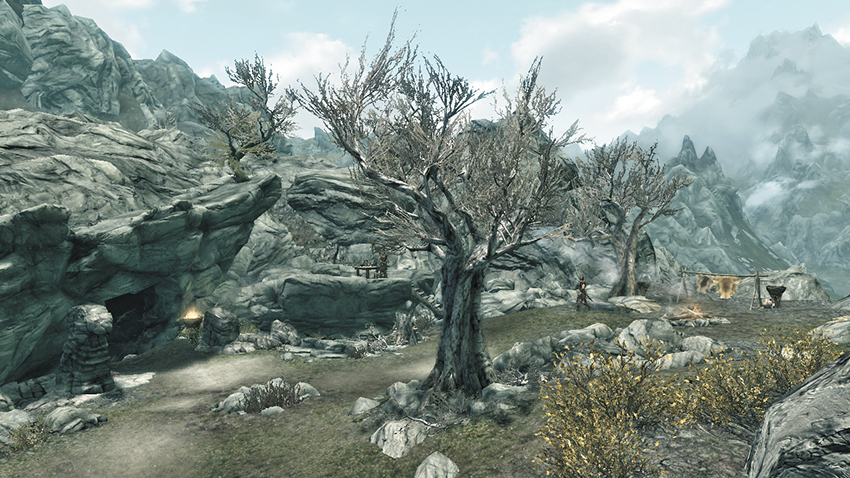
Red Eagle Redoubt is perched on the precipice of the Tundra Plateau, just as the land plummets into the depths of the Reach. Millennia of erosion have all but destroyed the immense Nordic temple that once stood here, but a few remnants of its stairs and foundations remain. The Forsworn have built an impressive camp here, taking advantage of the area’s natural defenses and commanding view of the Reach. The leader of this clan wields Red Eagle’s Fury, an ancient blade that seals the tomb of Rebel’s Cairn [5.28].
Exterior (Lower Area)
Slay the guards near the entrance and claim a few potions and a coin purse before continuing into the nearby cave.
- Potions
Red Eagle Ascent
This winding cave leads up to Red Eagle Redoubt’s upper half. Avoid the oil pool (or shoot down the oil lamp above to ignite it), then look for a few potions next to a large brazier and a locked chest hidden behind some vines nearby. As you climb the first set of stairs, watch out for the rockfall and dart traps. A second chest can be found beneath the wooden stairs that lead up to the exit.
- Danger! Dart Trap, Oil Pool Trap, Oil Lamp Trap, Rockfall Trap
- Chest
- Chest (Locked: Adept)
- Potions
Exterior (Ascent Area)
As you emerge from the Red Eagle Ascent cave, travel south to find a lone chest sitting near a small yet unique statue that catches the eye [5.U]. Return to the cave exit entrance and scale a long flight of stone steps to reach a sizable Forsworn camp on the hill above. Find a Skill Book in a tent up here, along with a few Crafting stations. Slay the mighty Forsworn leader to find a special key on his corpse, along with Red Eagle’s Fury, a unique sword. When you have finished in the camp, use the key to open the nearby iron door and enter the Sundered Towers [5.27]. Pull a wall chain to lower the drawbridge and pillage the neighboring tower as well.
- Crafting: Alchemy Lab, Blacksmith Forge, Tanning Rack, Workbench
- Skill Book [Alteration]: Reality & Other Falsehoods
- Unique Weapon: Red Eagle’s Fury [34/80] (Forsworn leader)
- Red Eagle Tower Key (Forsworn leader)
- Chests (2)
- Chest (Locked: Novice)
- Chest (Locked: Adept)
- Potions
- Loose gear
[5.27] Sundered Towers
Related Quests
Side Quest: Repairing the Phial
Dungeon: Forsworn Redoubt
Collectibles
Area Is Locked (Barred)
Chest (Locked: Novice)
Potions
Loose gear
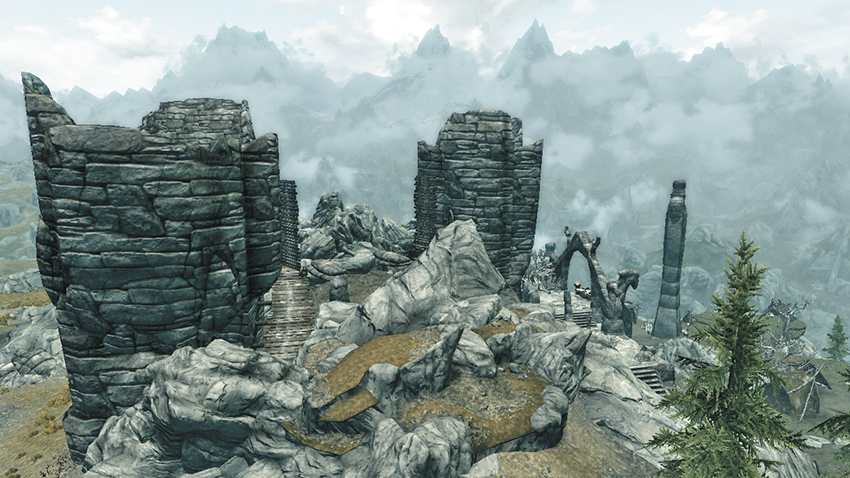
These two towers are a major landmark, visible from much of the Reach and the western Tundra. The eastern tower is initially barred and all but inaccessible because of the surrounding cliffs. To explore them, claim the key from the boss in Red Eagle Redoubt [5.26], then enter the western tower from the entrance near the boss. Loot a few urns on your way up, then pull a wall chain to lower a drawbridge to the eastern tower. Raid a locked chest here, take in the spectacular view from atop both towers, and then unbar the eastern door as you leave.
[5.28] Rebel’s Cairn
Related Quests
Dungeon Quest: The Legend of Red Eagle
Recommended Level: 14
Dungeon: Draugr Crypt
Red Eagle
Skeleton
Collectibles
Unique Weapon: Red Eagle’s Bane [35/80]
Area Is Locked (Red Eagle’s Fury required)
Chest
Potion
Loose gear
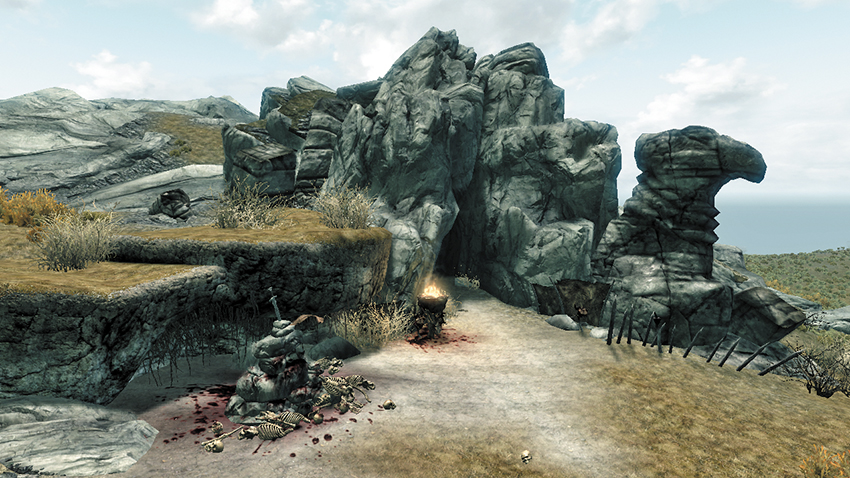
A common sword imbedded in a stone cairn marks the entrance to this secluded cave. Find the legendary blade called Red Eagle’s Fury by slaughtering the Forsworn leader in nearby Red Eagle Redoubt [5.26], then place the sword into the pedestal in the main chamber to open a secret passage. Enter the tomb of Red Eagle, a powerful Draugr Warrior who raises skeletons to aid him. Lay Red Eagle to rest and loot his remains—along with a giant chest—to complete your quest and amass plenty of plunder. On your way out, reclaim Red Eagle’s sword, which has been transfigured into an even more powerful blade—Red Eagle’s Bane.
[5.29] Karthspire Camp
Related Quests
Main Quest: Alduin’s Wall
Main Quest: The Throat of the World
Recommended Level: 14
Dungeon: Forsworn Redoubt
Dragon
Forsworn
Crafting
Blacksmith Forge
Grindstone
Tanning Rack
Workbench
Collectibles
Skill Book [Block]: A Dance in Fire, v2
Chest
Apothecary’s Satchels (2)
Potion
Loose gear
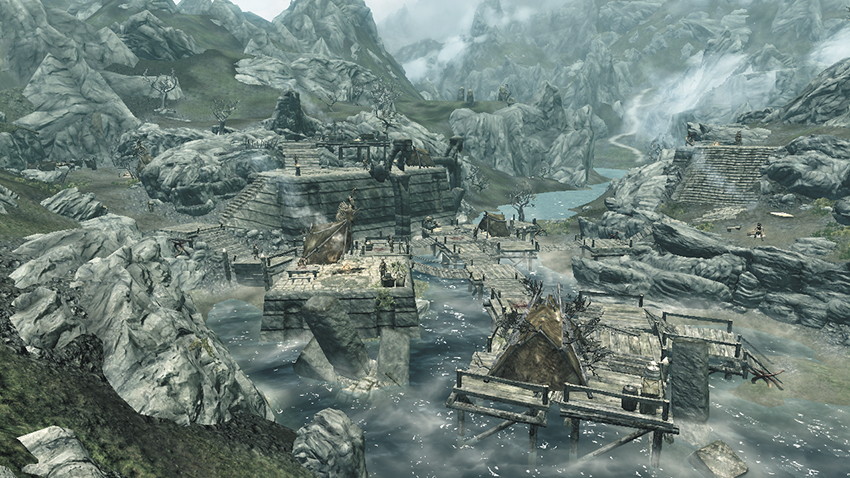
This sprawling Forsworn encampment lies just outside of Karthspire [5.30]. This dangerous camp must be braved in order to reach Karthspire and explore Sky Haven Temple [5.31] as part of the Main Quest. Search the lower walkways and tents thoroughly to discover a Skill Book. Make your way up to a high platform, where a chest and a number of Crafting stations are found. You also obtain a Dragon’s Soul here during the Main Quest. Scale the west rocks afterward to locate a large cave entrance that leads into Karthspire.
[5.30] Karthspire
Related Quests
Main Quest: Alduin’s Wall
Recommended Level: 14
Dungeon: Forsworn Redoubt
Forsworn
Dangers
Flamethrower (pressure plates)
Puzzles
Spinning Pillars Puzzle
Pressure Plates Puzzle
Underground Connection: Sky Haven Temple [5.31]
Chests (2)
Potions
Loose gear
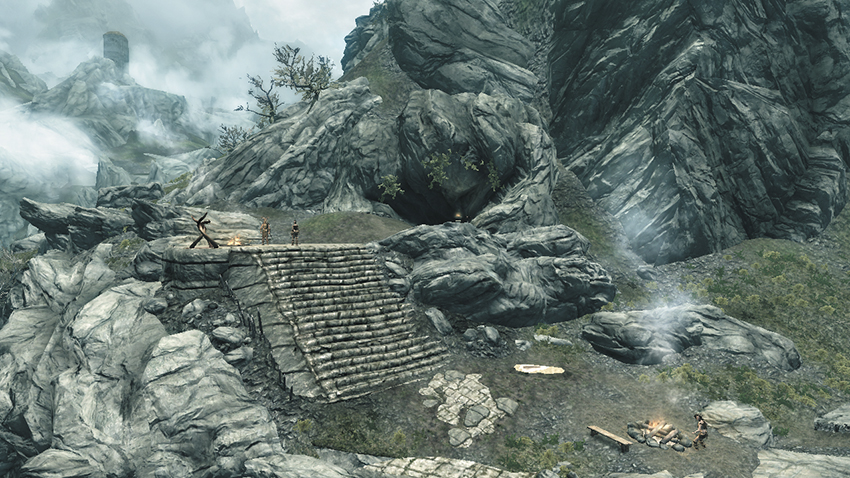
Located due east of Markarth, Karthspire is a cave that you must navigate to reach Sky Haven Temple [5.31] during the Main Quest. Battle more Forsworn to secure the interior, finding a chest and several potions in the entry encampment. During the Main Quest, Esbern helps you solve a simple puzzle in the cavern that follows: spin the three pillars so that they each show the symbol of the Dragonborn, which resembles a circle. Cross the drawbridge that lowers and proceed to a room filled with pressure plates—step only on the path of Dragonborn tiles to safely reach a far wall chain that deactivates the trap. Proceed to the final chamber afterward to raid a large chest and locate the entrance to the Sky Temple, which Esbern helps you open.
[5.31] Sky Haven Temple
Related Quests
Main Quest: Alduin’s Wall
Main Quest: The Throat of the World
Main Quest: Paarthurnax
Main Quest: Epilogue
Main Quest: Elder Knowledge
Other Factions: The Blades Quest: Rebuilding the Blades*
Other Factions: The Blades Quest: Dragon Hunting*
Other Factions: The Blades Quest: Dragonslayer’s Blessing*
Other Factions: The Blades Quest: Dragon Research*
Habitation: Special
Delphine (the Blades)
Esbern (the Blades)
Underground Connection: Karthspire [5.30]
Collectibles
Skill Book [One-Handed]: Mace Etiquette
Unique Weapon: Dragonbane [36/80]
Special Objects
Alduin’s Wall
Area Is Locked (quest required)
Chests (10)
Loose gear
Lots o’Gold!
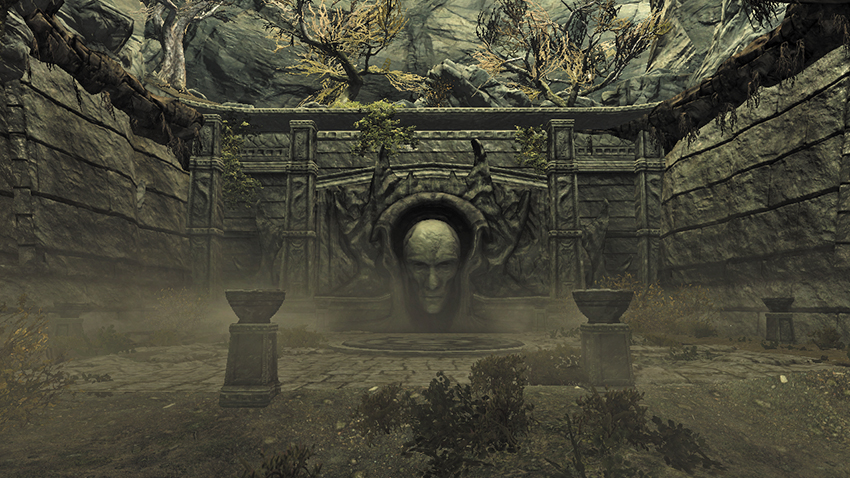
This sacred sanctum lies east of Markarth and cannot be entered until you progress to Main Quest: Alduin’s Wall. Inspect the central mural with Esbern to complete that quest and begin a new one. Search the west alcove to find a chest and Skill Book, then head upstairs and search the northwest sleeping area to discover a whopping seven more chests. Explore the armory to find a unique weapon lyinh on the table. Exit through any of the northeast doors to reach an Exterior courtyard that offers breathtaking views, along with quick access to the world map’s Fast-Travel option. Far below the upper Exterior courtyard is the Karth River, and an abandoned rowboat containing scattered gems, an underwater chest, and a strongbox.
Blades Occupation
The Blades repurpose the Sky Haven Temple as their base of operations during the Main Quest. After finishing Main Quest: Alduin’s Wall (and once you’ve sided with the Blades and completed Main Quest: Paarthurnax, meaning you’re in good standing with them), you’re able to return to Delphine and Esbern and commence the following:
During Other Factions Quest: Rebuilding the Blades,* you can bring up to three of your Followers (or Hirelings) and have Delphine train them to be Blades, after which they remain here.
During Other Factions Quest: Dragon Hunting, once you’ve brought three Followers to be trained, you can speak to Esbern and hunt a dragon with the newly trained Blades.
During Other Factions Quest: Dragonslayer’s Blessing, you can receive a blessing from Esbern if you’re in good standing with the Blades, which grants you +10 percent Critical Hit versus dragons for five days.
During Other Factions Quest: Dragon Research, bring back any Dragon Scales or Dragon Bones to Esbern and he concocts Esbern’s Potion, imbuing you with a 10 percent damage reduction from dragon attacks.
[5.32] Soljund’s Sinkhole
Related Quests
Miscellaneous Objective: Making It Hole Again* (Perth)
Recommended Level: 6
Dungeon: Draugr Crypt
Draugr
Perth (Marriage Prospect)
Crafting
Smelter
Services
Marriage Prospect: Perth [24/62]
Dangers
Dart Trap (lever)
Spear Trap (pressure plates)
Collectibles
Skill Book [Light Armor]: Jornibret’s Last Dance
Chest(s)
Potions
Loose gear
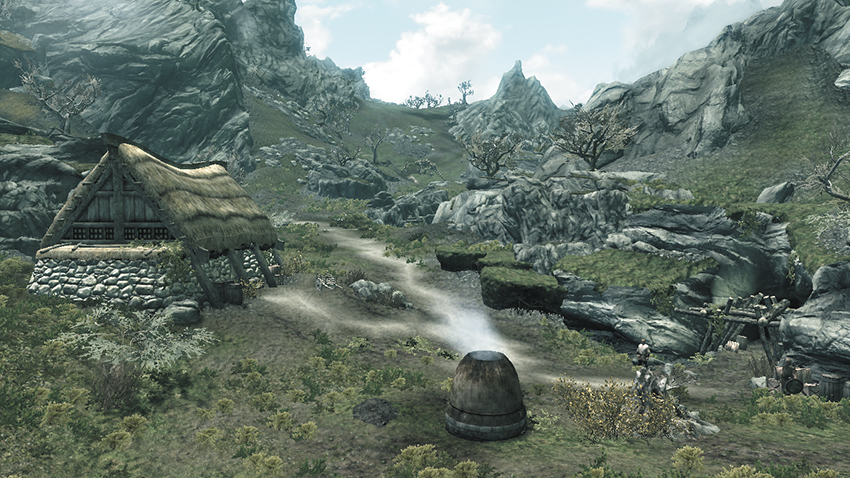
Located in the heart of the Reach, this old mine has recently been invaded by Draugr and has since stopped working.
Exterior
Outside the mine, a man named Perth explains that the miners dug too deeply and accidently unearthed a Draugr-filled tomb. This gains you a Side Quest that you can satisfy by clearing out the undead within the mine.
- Crafting: Smelter
Miner’s House
Breaking into the miner’s house puts you within easy reach of two chests and a few potions.
- Area Is Locked (Novice)
- Chests (2)
- Potions
Soljund’s Sinkhole (Interior)
These sizeable mines have been filled with undead ever since the miners accidentally tunneled into a forgotten crypt. Turn left at the first junction and slay the Draugr at the dead end, where a Skill Book sits atop a table on the overlook. Then backtrack and go right, dropping down a giant hole and slaughtering a host of powerful Draugr in the chamber below.
- Skill Book [Light Armor]: Jornibret’s Last Dance
- Potion
- Loose gear
Draugr Tunnels
Wipe out undead on your way through the tunnels that follow, but don’t touch the lever you soon locate—you’ll only spring a nasty trap. Instead, pull two hidden levers that are affixed to the nearby walls to open the way forward. Scale some winding steps afterward and sidestep a couple of pressure plates upstairs. After passing the second pressure plate, climb more steps and search the dark west nook to discover an ornate chest. Slay a mighty Draugr in the large chamber that follows, then raid a large chest before following an elevated passage back to the mine’s entrance.
- Danger! Spear Trap (pressure plates), Dart Trap (lever)
- Chests (2)
- Potions
- Loose gear
[5.33] Bleakwind Bluff
Dungeon: Hagraven Nest
Forsworn
Hagraven
Collectibles
Skill Book [Two-Handed]: King [B2/10]
Chest
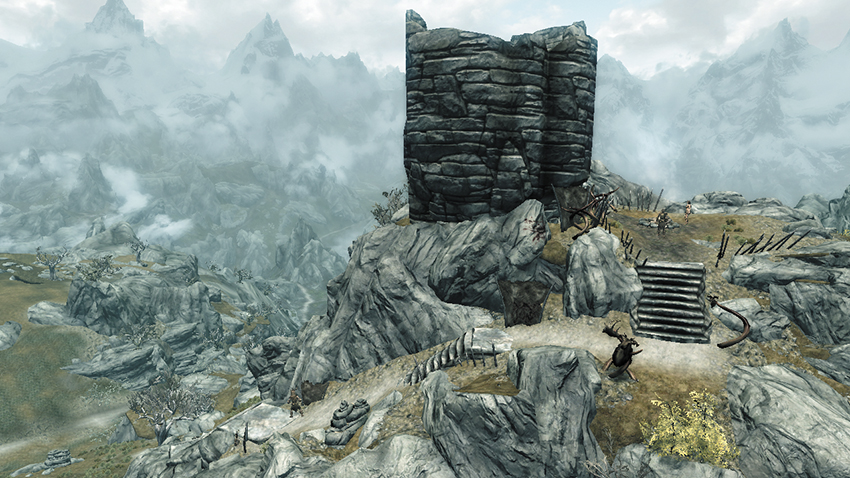
Scale the crumbling stone steps that encircle this fallen tower, which protrudes from the Reach’s eastern hills. Slay powerful Forsworn and Hagraven as you make your way up to the tower, where a large chest and Skill Book are found.
[5.34] Old Hroldan
Related Quests
Miscellaneous Objective: The Ghost of Old Hroldan* (Eydis/Ghost of Old Hrolden)
Habitation: Inn
Eydis (Innkeeper)
Leonitus Salvius
Skuli
Services
Trader (Innkeeper): Eydis [7/15]
Collectibles
Skill Book [Two-Handed]: Battle of Sancre Tor [A1/10]
Chest
Chests (Locked: Novice) (2)
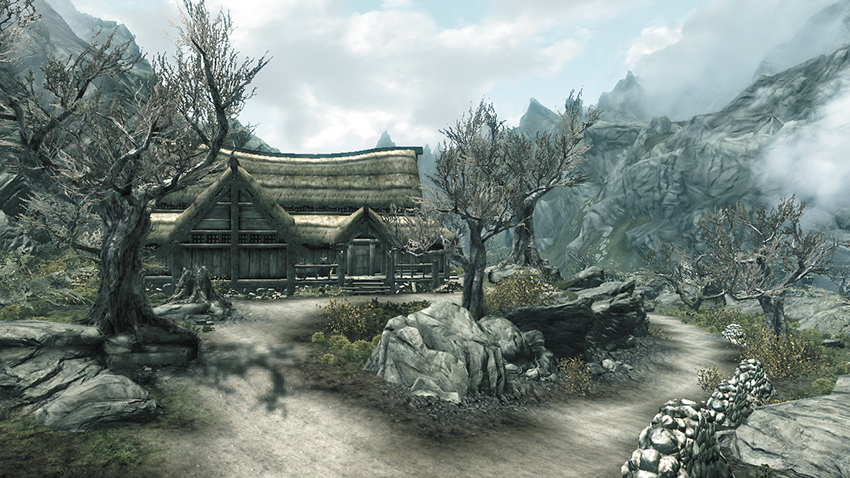
Nestled along the west bank of the Reach’s eastern hills, this small inn offers room and board to weary travelers. Speak to the innkeeper to buy a meal or rent a room, and search the place to loot a number of chests and discover a Skill Book on a nightstand.
[5.35] Hag Rock Redoubt
Related Quests
Daedric Quest: Pieces of the Past
Recommended Level: 14
Dungeon: Forsworn Redoubt
Forsworn
Crafting
Alchemy Lab
Anvil
Tanning Rack
Workbench
Dangers
Rockfall Trap (tripwire)
Collectibles
Skill Book [Sneak]: 2920, Last Seed, v8
Chest(s)
Potions aplenty
Loose gear
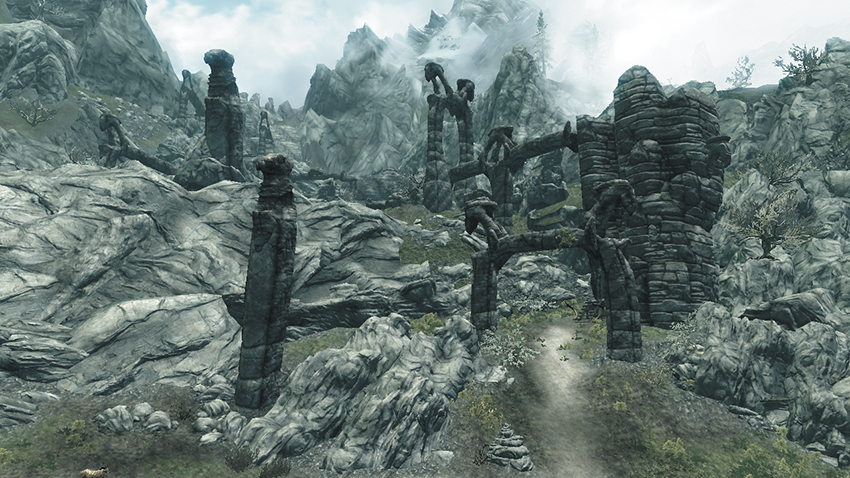
Located along the Reach’s southwest edge, this large collection of mountainous ruins has been exploited by the Forsworn and fortified into a military encampment. You must pass through Hag Rock Redoubt in order to reach Dead Crone Rock [5.36] as part of Daedric Quest: Pieces of the Past.
Exterior
Scale the Exterior tower, looting a chest and slaying a Forsworn on your way to the top. Cross the narrow aqueduct and dispatch more Forsworn, raiding a dome-shaped outdoor shack to obtain several potions and sack another chest. Beware the tripwire that’s stretched across the steps of the east ruins, and keep going up to eventually reach Dead Crone Rock [5.36].
- Danger! Rockfall Trap (tripwire)
- Crafting: Alchemy Lab, Anvil, Tanning Rack, Workbench
- Chests (2)
- Chest (Locked: Adept)
- Apothecary’s Satchels (2)
- Potions aplenty
Hag Rock Redoubt Ruin
Enter the west structure via any of its three entrances to explore a small network of interior ruins. Lay waste to more Forsworn here as you plunder even more loot. Search the shelves of the cupboard near the holding cells to find the key that unlocks them. Downstairs, find a Skill Book on a table that’s covered with potions, along with a chest that’s tucked away in a dark southeast nook.
- Skill Book [Sneak]: 2920, Last Seed, v8
- Hag Rock Ruin Jail Key
- Chest
- Chest (Locked: Adept)
- Potions
- Loose gear
[5.36] Dead Crone Rock
Related Quests
Daedric Quest: Pieces of the Past
Thieves Guild Radiant Quest: No Stone Unturned
Recommended Level: 14
Dungeon: Hagraven Nest
Drascua
Forsworn
Crafting
Arcane Enchanter
Dangers
Flamethrowers (floor)
Quest Items
Pommel Stone of Mehrunes’ Razor
Collectibles
Skill Book [Alchemy]: A Game at Dinner
Unusual Gem: [10/24]
Special Objects
Word Wall: Dismaying Shout [2/3]
Chest(s)
Potions
Loose gear
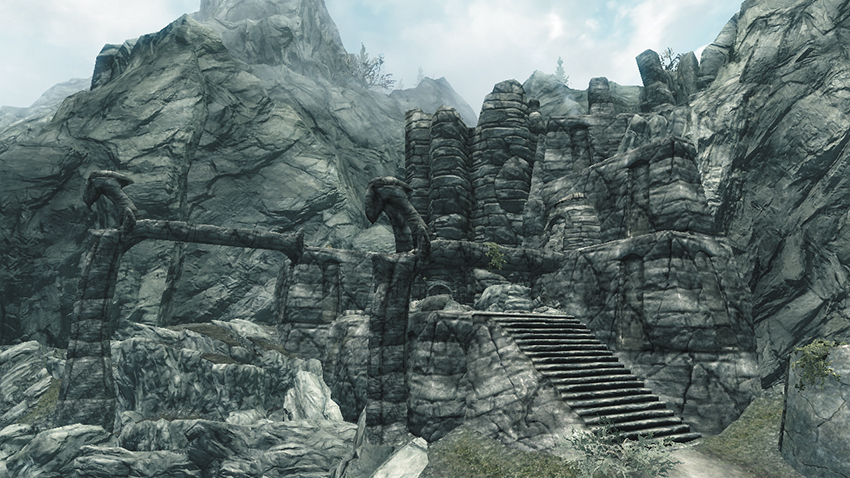
To reach this remote Forsworn outpost, which lies at the southwest corner of the Reach, one must first deal with leagues of bloodthirsty Forsworn in the surrounding Hag Rock Redoubt [5.35].
Dead Crone Rock (Interior)
Loot a chest in the first passage, then slay Forsworn and snatch up potions on your way into a large cavern, where a large spiral staircase leads upstairs. Visit the west dining room to find another chest, more potions, and an Arcane Enchanter. Sprint down the following passage to avoid being burned by flamethrowers on the floor. Find a Skill Book in the next room and pull the nearby lever to raise a portcullis back in a previous chamber. Backtrack and take the southern stairs up to a door that leads outside.
- Danger! Flamethrowers (floor)
- Crafting: Arcane Enchanter
- Skill Book [Alchemy]: A Game at Dinner
- Chests (2)
- Potions
Exterior
Climb the Exterior steps to find another chest, then keep going up to face a powerful Hagraven named Drascua on the hill. Slay the fiend and obtain a key from its corpse, along with a quest-related item. Then loot a giant chest before approaching the nearby Word Wall to gain a new Word of Power. Collect the Unusual Gem from the table to potentially gain a new Side Quest as well. Go back inside afterward and return to the spiral stairwell chamber. Unlock the southeast door with Drascua’s key and head back outside to locate a third Exterior chest.
- Pommel Stone of Mehrunes’ Razor (Drascua)
- Unusual Gem: Stone of Barenziah [10/24]
- Word Wall: Dismaying Shout [2/3]
- Dead Crane Rock Key (Drascua)
- Chests (2)
- Potions
[5.37] Purewater Run
Dungeon: Animal Den
Animal
Collectibles
Chests (2)
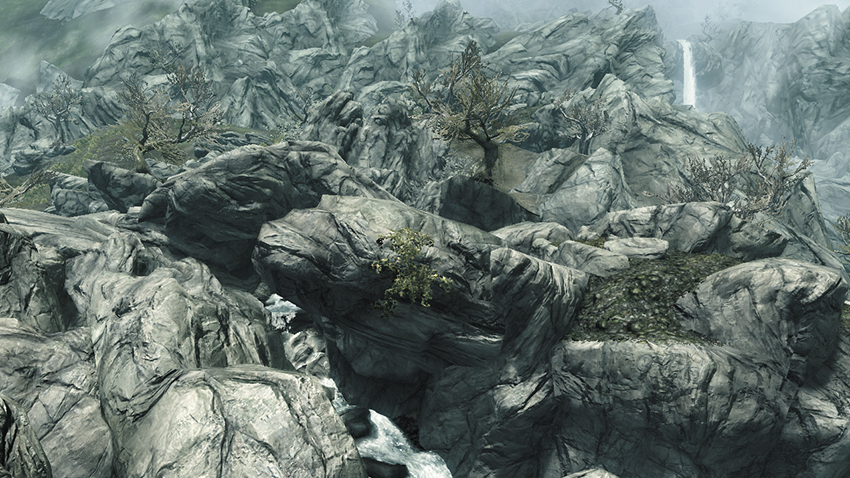
Follow a stream into this watery cave, and swim quickly to the bottom of the deep water to loot a pair of dwarven chests before you’re chewed up by aggressive Slaughterfish.
[5.38] Dushnikh Yal
Related Quests
Side Quest: The Forgemaster’s Fingers
Side Quest: Captured Critters*
Miscellaneous Objective: The Sword of Gharol* (Gharol)
Favor (Activity): Mining Ore* (Gharol)
Favor: Sparring Partners* (Burguk)
Recommended Level: 6
Habitation: Orc Stronghold
Arob
Chief Burguk
Dulug
Ghak
Gharol (Blacksmith)
Ghorbash the Iron Hand (Follower, Marriage Prospect)
Mahk
Murbul (Apothecary)
Nagrub
Oglub
Umurn
Services
Follower: Ghorbash the Iron Hand [18/47]
Marriage Prospect: Ghorbash the Iron Hand [25/62]
Trader (Apothecary): Murbul [8/14]
Potions, Food, Ingredients
Trader (Blacksmith): Gharol [15/33]
Weapons, Apparel, Misc
Trainer (Heavy Armor: Expert): Gharol [1/3]
Trainer (One-Handed: Master): Burguk [1/3]
Crafting
Alchemy Labs (2)
Blacksmith Forge
Grindstone
Smelter
Tanning Racks (2)
Workbench
Collectibles
Captured Critter: Dragonfly in a Jar [3/5]
Skill Book [Heavy Armor]: Orsinium and the Orcs [D2/10]
Chest(s)
Potions
Loose gear
Mineable ore (Orichalcum)
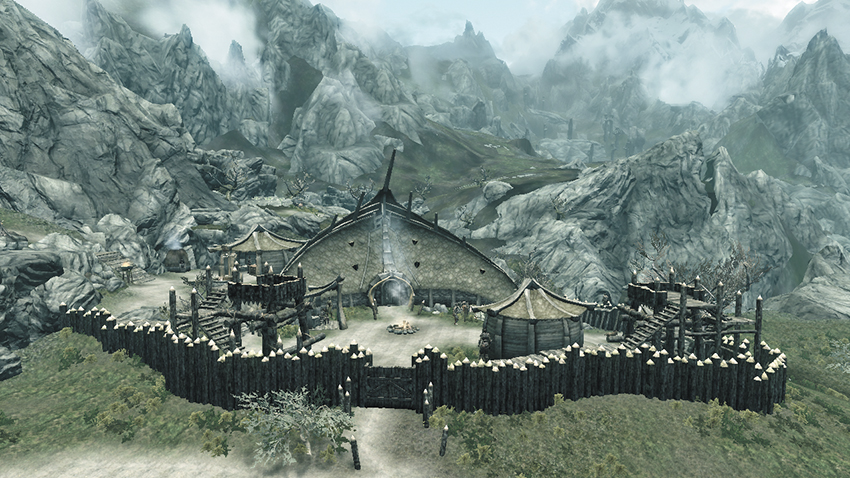
The Reach boasts two Orc strongholds—this one lies far to the south, on the high cliffs of the southern Reach. As always, the Orcs will loathe your presence if you’re an outsider, but you can gain their acceptance by completing a Side Quest that just about any of the local Orcs will bestow during conversation.
Exterior
Use any of the Crafting stations outside. Check behind the chief’s Longhouse to find a chest under some stairs. The blacksmith, Gharol, will buy any ore you collect from the nearby mine at a fair price. Test your fistfighting prowess in a friendly wager against the chief if you like.
- Crafting: Alchemy Lab, Blacksmith Forge, Grindstone, Smelter, Tanning Racks (2), Workbench
- Chest (Locked: Apprentice)
- Potions
- Loose gear
Burguk’s Longhouse
If you dare, enter the Orc chief’s Longhouse and plunder the place. Unlock the Novice-level trapdoor to enter the cellar and claim a Skill Book, along with a Dragonfly in a Jar that pertains to Side Quest: Captured Critters. Loop around the cellar’s circuitlike tunnel to locate an Alchemy Lab and a locked chest that’s hidden beneath the stairs.
- Area Is Locked (Novice)
- Crafting: Alchemy Lab
- Captured Critter: Dragonfly in a Jar [3/5]
- Skill Book [Heavy Armor]: Orsinium and the Orcs [D2/10]
- Chests (2)
- Chest (Locked: Apprentice)
- Apothecary’s Satchel
- Potions
- Loose gear
Dushnikh Mine
Grab a pickaxe and collect Orichalcum Ore from the mine. There’s a chest and a couple of potions here as well.
- Chest
- Potions
- Loose gear
- Mineable ore (Orichalcum)
[5.39] Reachwater Rock
Related Quests
Side Quest: Forbidden Legend
Dungeon Activity
Recommended Level: 15
Dungeon: Draugr Crypt
Gauldur
Jyrik Gauldurson
Mikrul Gauldurson
Sigdis Gauldurson
Puzzles
Nordic Puzzle Door (Emerald)
Nordic Puzzle Door (Ivory)
Collectibles
Dragon Claw: Emerald Dragon Claw [5/8]
Unique Item: Gauldur Amulet [56/112]
Chest(s)
Potion
Loose gear
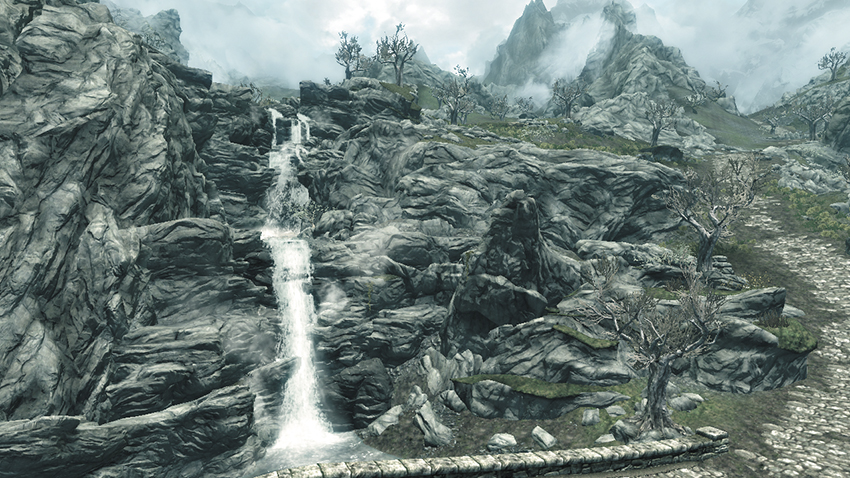
Follow the main road east out of Markarth and you’ll eventually reach a bridge. Look up to spy this waterfall cave, which is perched on a high cliff, hidden beneath a spray of water. Reachwater Rock is the long-forgotten tomb of the Arch-Mage Gauldur, a powerful First Era wizard. Visit this site after you’ve obtained all three Gauldur Amulet Fragments to reforge the Gauldur Amulet.
Reachwater Cavern
First, dive underwater to locate worthy gear and a locked chest. A second chest is perched on a high ledge on the room’s east side; to reach it, stand by the Puzzle Door and use the Whirlwind Sprint Shout. Then climb the central spire and collect the Emerald Dragon Claw from the cavern’s pedestal. Inspect the claw closely to notice three markings on it. Approach the nearby puzzle door and rotate its three rings to match the symbols on the claw: Bear, Whale, Snake. Examine the door’s central keyhole to insert the claw and open the way forward.
- Dragon Claw: Emerald Dragon Claw [5/10]
- Chest
- Chest (Locked: Adept)
- Loose gear
Sealed Passage
Continue down the sealed passage as the doors open ahead of you until you reach another Puzzle Door. This one requires the Ivory Claw from Folgunthur [2.08] to solve. If you have the claw, inspect it to find the symbol sequence as you did before, then mimic the same pattern on the door: Hawk, Hawk, Dragon. Insert the Ivory Claw to open the way forward. Loot a few urns and grab a potion on your way to the final cavern.
- Potion
Amulet Chamber
Approach the altar and place the three Gauldur Amulet Fragments onto the pedestals to battle the three Gauldurson Brothers once more and receive the reforged Gauldur Amulet as a reward (see Side Quest: Forbidden Legend for tips). You’ll find a secret nook has opened as you backtrack out of the chamber. Raid the large chest within.
- Unique Armor: Gauldur Amulet [55/112]
- Chest
- Loose gear
[5.40] Reachwind Eyrie
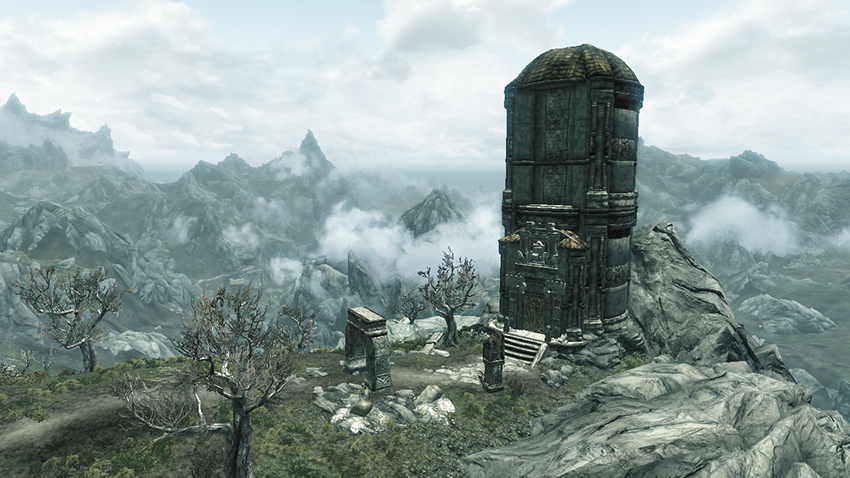
Recommended Level: 8
Dungeon: Special
Collectibles
Skill Book [Heavy Armor]: Chimarvamidium
Chest (Locked: Apprentice)
Chest (Locked: Expert)
Loose gear
This striking dwarven tower is visible for miles, standing tall among the Reach’s rocky south-central hills. The tower is free of danger and contains a number of valuables. Stop by and have a look. The view from the balcony is spectacular.
[5.41] Reachcliff Cave
Related Quests
Daedric Quest: The Taste of Death
Recommended Level: 6
Dungeon: Draugr Crypt
Draugr
Services
Follower: Eola [19/47]
Dangers
Trapped Chest
Collectibles
Skill Book [Conjuration]: The Doors of Oblivion [D1/10]
Unique Item: Ring of Namira [57/112]
Area Is Locked
Chest(s)
Potions
Loose gear
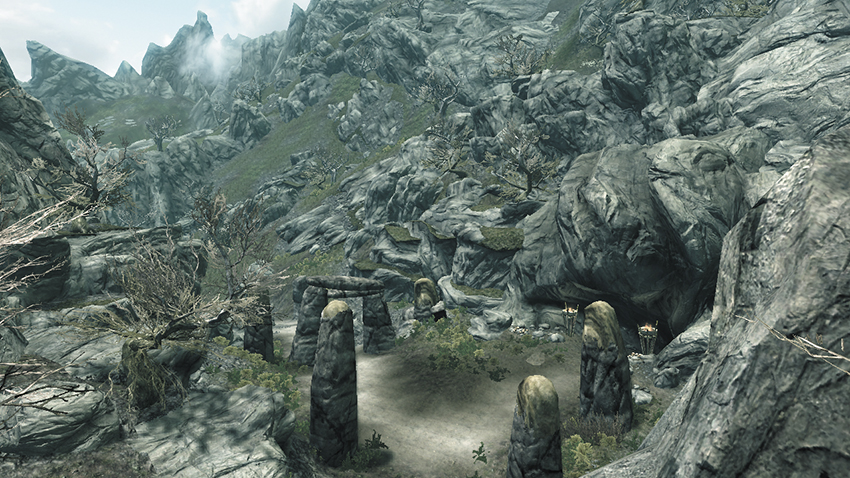
Stone ruins line the path that leads to this sizable cave, where restless undead dwell. You cannot fully explore this site until you visit it as part of Daedric Quest: The Taste of Death, during which you can obtain a unique ring. Complete the quest, and Eola will offer to join you as a Follower.
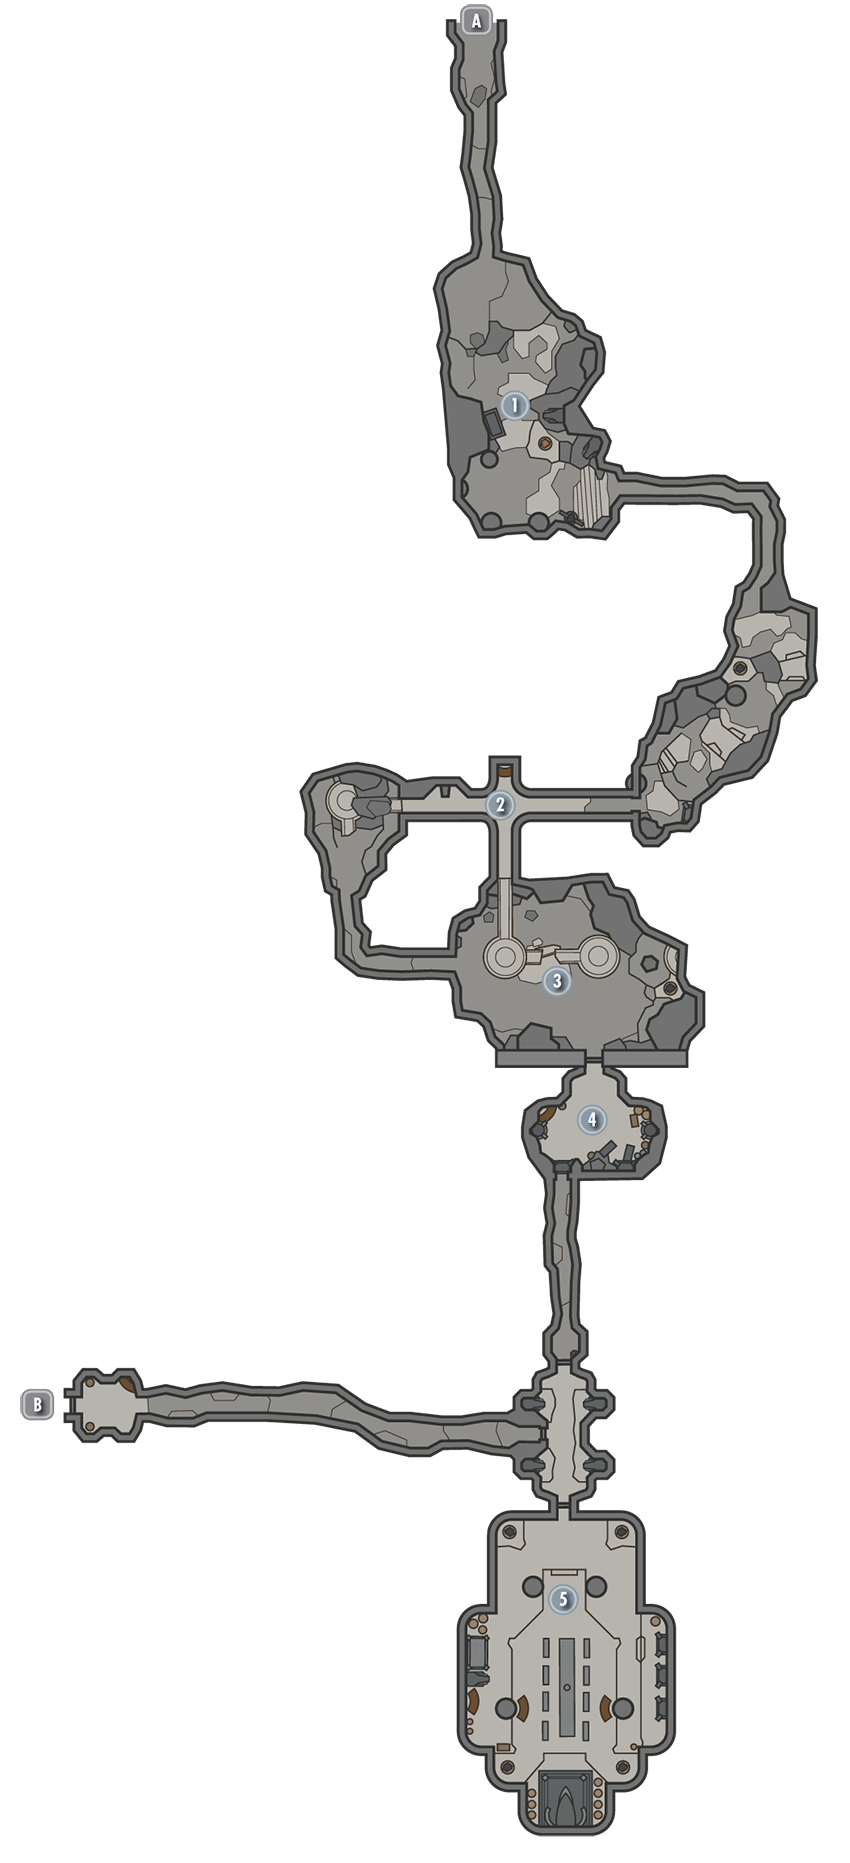
Exit to Skyrim
Entry Passages
Slay a handful of mighty Draugr as you navigate these winding passages.
Junction
Loot an urn and grab a potion and some gear in these burial passages. Beware of waking the resting dead.
- Potion
- Loose gear
Walkway Chamber
Go south from [2] to explore this chamber’s upper walkways and discover a trapped chest. Open the chest from the side or from behind to avoid begin punctured by arrows.
- Danger! Trapped Chest
Checkpoint Chamber
Slay the Draugr that emerges from a standing sarcophagus in this small room, then loot another chest and find a Skill Book on a shelf. If you’re not playing Daedric Quest: The Taste of Death, then this is as far as you can go. Proceed to [5] otherwise.
- Skill Book [Conjuration]: The Doors of Oblivion [D1/10]
- Chest
- Potions
- Loose gear
Feasting Hall
Slay a trio of rugged Draugr to secure this final chamber, then search around to acquire plenty of plunder. If you’ve slaughtered all Draugr up to this point, then your quest advances when these last three fall. Backtrack out of the room and take the west passage, which is now open, to quickly exit out to Skyrim.
- Chest
- Potion
Exit to Skyrim
[5.42] Valthume
Related Quests
Side Quest: Masks of the Dragon Priests*
Dungeon Quest: Evil in Waiting
Recommended Level: 24
Dungeon: Dragon Priest Lair
Animal
Draugr
Hevnoraak
Valdar
Crafting
Alchemy Lab
Dangers
Battering Ram Trap (pressure plate)
Dart Trap (lever)
Oil Lamp Traps
Oil Pool Trap
Swinging Blade Trap (pressure plate)
Swinging Wall Trap (pressure plate)
Puzzles
Nordic Puzzle Door (Iron Claw)
Quest Items
Opaque Vessels (3)
Collectibles
Dragon Claw: Iron Claw [6/10]
Dragon Priest Mask: Hevnoraak [8/10]
Skill Book [Restoration]: Withershins
Unique Weapon: Hevnoraak’s Staff [37/80]
Special Objects
Word Wall: Aura Whisper [2/3]
Chest(s)
Potions aplenty
Loose gear
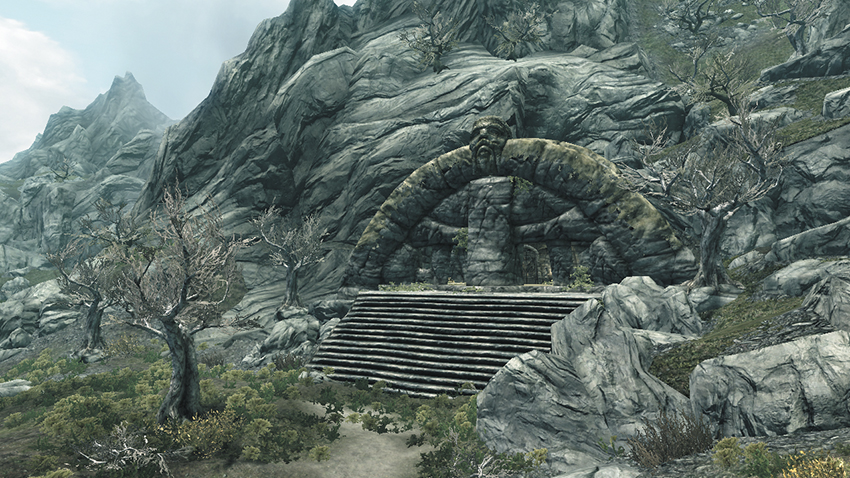
This large network of burial chambers lies at the Reach’s southeast end. Braving this ancient tomb can earn you a precious Dragon Priest Mask, among other valuable prizes.
Vestibule
The vestibule serves as the ruins’ entrance. Speak with a ghost named Valdar here to learn that an ancient evil named Hevnoraak is stirring within the depths of this place and gain a new Side Quest. Proceed into Valthume afterward.
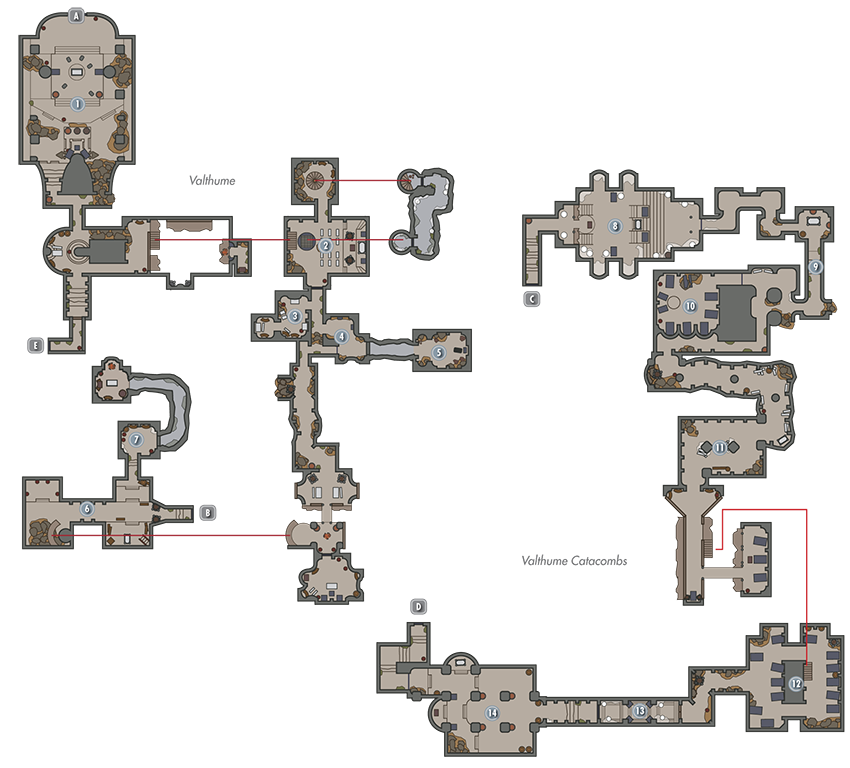
Door to Vestibule
Throne Room
This cavernous chamber is completely void of loot. Beware the pressure plate trap in the south passage on your way to [2].
- Danger! Battering Ram Trap (pressure plate)
Trapdoor Chamber
Beware the large trapdoor in the center of this wide chamber. It will open as you battle powerful Draugr here, potentially dropping you into an underground passage filled with Frostbite Spiders. Secure the room and loot a chest, then return upstairs and make a couple of daring jumps along a narrow balcony to reach the ledge where Hevnoraak’s specter is spectating. Ignore Hevnoraak’s specter and loot a second chest in the nearby nook. If you fall into the central pit, slay a Draugr and search its remains to find a key that’ll help you escape.
- Valthume Cellar Key (Draugr)
- Chests (2)
- Apothecary’s Satchel
- Loose gear
Embalming Chambers
Explore these small side rooms to discover a Skill Book on a table.
- Danger! Oil Lamp Traps
- Skill Book [Restoration]: Withershins
- Knapsack
- Loose gear
Trapped Passages
Beware the oil that runs through this passage. Knock down a hanging lamp from a safe range to burn away the potential hazard. Then simply sidestep pressure plates as you advance. When you reach a dead end, turn a small handle on the nearby wall to open passages to the east and west.
- Danger! Oil Lamp Traps, Oil Pool Trap, Dart Trap (pressure plates)
Vessel Chamber 1
Dispatch a powerful Draugr in this small chamber, then claim the Opaque Vessel he leaves behind.
- Opaque Vessel [1/3]
Two-Tier Chamber
Dispatch more Draugr here, then optionally pick the Adept-level south door to access a room filled with potions and a chest. If you like, follow the lower northeast passage to obtain more plunder on your way to [7] before taking the lower east passage to reach the Valthume Catacombs.
- Chest
- Potions aplenty
Treasure Run
Turn the handle on the wall here to open a secret passage that leads to a small chamber with an Alchemy Lab and a chest.
- Crafting: Alchemy Lab
- Chest
- Potions
- Loose gear
Door to Valthume Catacombs
Door to Valthume
Spider Lair
Beware: a Giant Frostbite Spider descends from the Catacombs’ first wide chamber, along with several of her young. Slay these dangerous creatures from your elevated vantage, then raid the nearby chest and urns before opening the far portcullis (pull the nearby chain) and advancing.
- Chest
Burial Passages
Slay Draugr and sidestep a pressure plate trap in these undead-filled passages.
- Danger! Swinging Blade Trap (pressure plate)
Vessel Chamber 2
Pull a wall chain to gain entry to this small chamber, then exploit the hanging lamps to help you slay a powerful Draugr Knight. Collect the second of three vessels from the room’s altar afterward.
- Area Is Locked (wall chain)
- Danger! Oil Lamp Traps
- Opaque Vessel [2/3]
Burial Chamber
Loot a host of urns on your way into this wide burial chamber, where more powerful Draugr await. Secure the place and pull the wall chain to advance.
- Danger! Swinging Wall Trap (pressure plate)
Sarcophagi Chamber
Find plenty of urns and a chest to loot in this large sarcophagi-filled chamber.
- Chest
Iron Claw Passage
Eradicate a few Frostbite Spiders in this chamber, then quickly retreat after collecting the Iron Claw from this passage’s central pedestal; fire soon spews forth from the surrounding statues. Inspect the Iron Claw carefully in your inventory, and notice its three special markings. Mimic this same sequence of patterns (Dragon, Hawk, Wolf) on the nearby Puzzle Door by spinning its three rings. Inspect the central keyhole afterward to insert the Iron Claw and open the way forward.
- Draqgon Claw: Iron Claw [6/10]
Vessel Chamber 3
Dispatch a swarm of mighty Draugr in this chamber, then collect the final vessel from the central pedestal. Follow the sound of chanting afterward to locate a Word Wall and gain a new Word of Power. Loot the nearby chest before taking the passage back to [1]. Follow Valdar’s instructions to complete his quest, slaying the Dragon Priest Hevnoraak and obtaining his unique mask.
- Opaque Vessel [3/3]
- Dragon Priest Mask: Hevnoraak [8/10]
- Unique Weapon: Hevnoraak’s Staff [37/80]
- Word Wall: Aura Whisper [2/3]
- Chest
[5.43] Gloomreach
Recommended Level: 18
Dungeon: Falmer Hive
Animal
Falmer
Crafting
Smelter
Dangers
Swinging Wall Trap (tripwire)
Collectibles
Skill Book [Restoration]: Withershins
Chest(s)
Loose gear
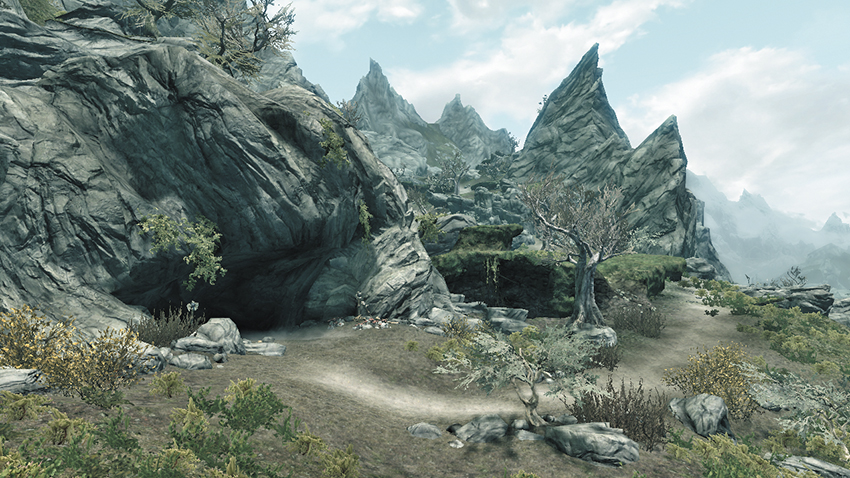
This widemouthed cave is found at the Reach’s southeast edge and is home to dangerous Falmer. If you’re in the area, brave this relatively short cave for a bit of sport and plunder.
Gloomreach Cavern
Slay a handful of Falmer and Chaurus inside the cavern as you work your way around in clockwise fashion. About halfway through, spy a Skill Book resting atop a barrel near some scaffolding. Unlock a pair of Adept-level cages in the southern chamber to free a few caged critters, but beware: The vicious Saber Cat may attack you. Find a chest in a Falmer tent before taking the upper passage to reach the Gloomreach Hive, looting another chest along the way.
- Crafting: Smelter
- Skill Book [Restoration]: Withershins
- Chests (2)
- Loose gear
Gloomreach Hive
Stand back and safely trigger the tripwire that’s stretched across the Hive’s first passage. Dispatch more Falmer in the tall cavern that follows, then find a sunken chest deep underwater. Head to a second cavern afterward and loot a chest before descending and slaying a powerful Falmer down below. Raid a third chest as you continue to descend, then take the bottom passage back to the Gloomreach Cavern—you’ll find you’re right back near the entrance.
- Danger! Swinging Wall Trap (trip wire)
- Chests (3)
[5.44] Lost Valley Redoubt
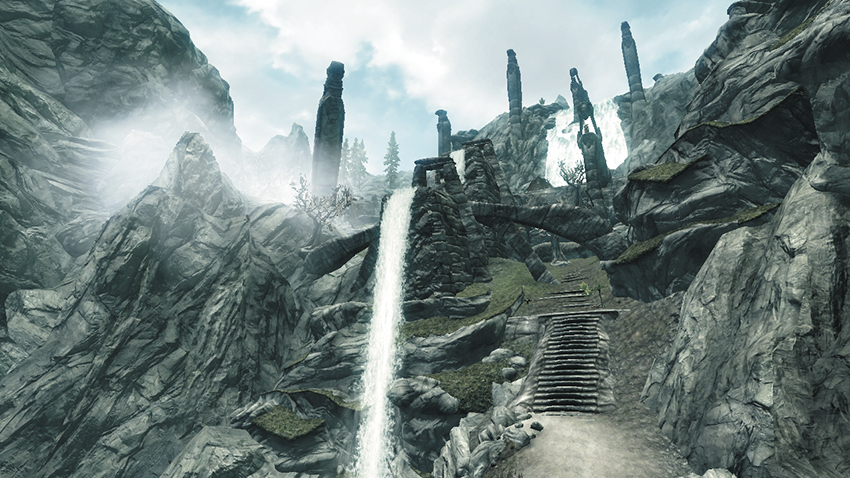
Related Quests
Dungeon Activity
Recommended Level: 14
Dungeon: Forsworn Redoubt
Forsworn
Crafting
Blacksmith Forge
Grindstone
Workbench
Special Objects
Word Wall: Become Ethereal [3/3]
Chests (2)
Chest (Locked: Expert)
Potions
Loose gear
At the southern end of the Reach, stone steps lead up to ancient ruins that overlook a tall, majestic waterfall. These ruins have been fortified by the Forsworn and transformed into a sprawling military campsite. Scale the hillside and eliminate these scavengers as you raid their camp for an array of plunder. Reach the top of the waterfall and go south to locate a pair of Hagraven conducting a ritual to raise a powerful Forsworn Briarheart. These are all powerful foes, so if you had trouble on your way up here, you may want to leave them be. If you are feeling confident, slay the wicked creatures, then approach the nearby Word Wall to acquire a new Word of Power.
[5.45] Bard’s Leap Summit
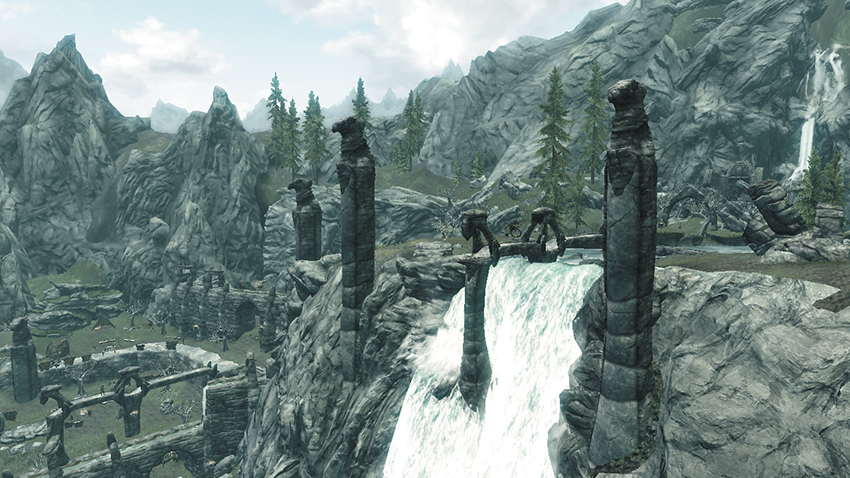
Related Quests
Dungeon Quest: Leap Before You Look*
Dungeon: Hagraven Nest
Forsworn
Hagraven
Collectibles
Chest
Apothecary’s Satchel
Loose gear
Scale the ruin-covered hills of the Lost Valley Redoubt [5.44], slaying Forsworn on your way to the top of this serene waterfall, which lies at the Reach’s south end. Enjoy the view from the top of the waterfall, and leap off to land safely in the pool below. This is best accomplished by using Whirlwind Sprint to clear the waterfall and land safely in the water or by using Become Ethereal just before jumping off to ensure you take no damage. After making a splash, you encounter the ghost of an impressed bard, who increases your Speech skill!
[5.46] Cradle Stone Tower
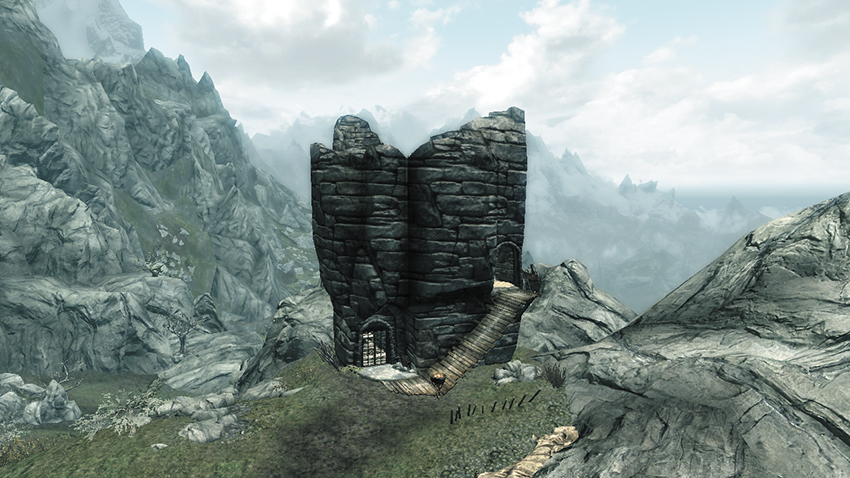
Recommended Level: 8
Dungeon: Hagraven Nest
Hagraven
Collectibles
Skill Book [Alteration]: Sithis
Chest
Chest (Locked: Apprentice)
Potions
Loose gear
After scaling the Forsworn-filled hills of the Lost Valley Redoubt [5.44] and crossing the waterfall at Bard’s Leap Summit [5.45], follow the trail up the west hill, looting a chest along your way to this remote tower. Unlock the downstairs gate to reach a burial urn and chest, and scale the tower to slay a Hagraven and claim even more loot.
[5.47] Fort Sungard
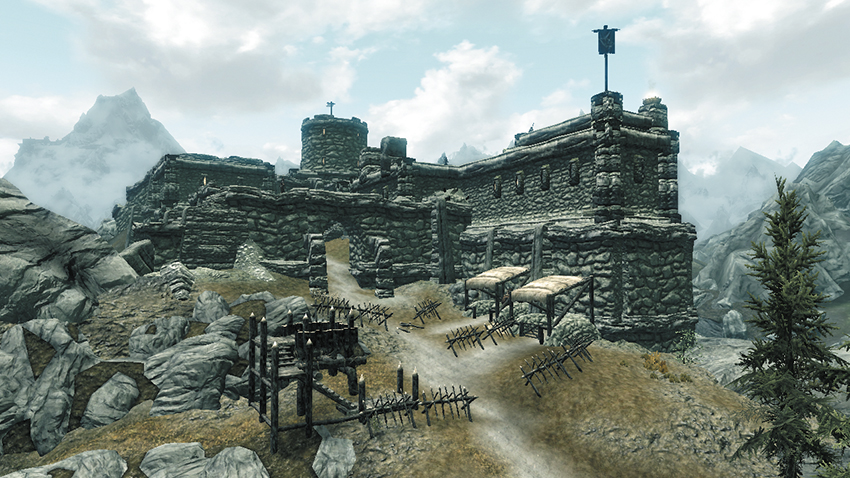
Related Quests
Civil War Quest: Liberation of Skyrim
Civil War Quest: The Battle for Fort Sungard
Recommended Level: 6
Habitation: Military Fort
Forsworn
Crafting
Anvil
Workbench
Forge
Collectibles
Skill Book [Pickpocket]: Wulfmare’s Guide to Better Thieving [E1/10]
Skill Book [Smithing]: Last Scabbard of Akrash [C1/10]
Special Objects
Shrine of Akatosh [3/6] (only during Imperial occupation)
Shrine of Kynareth [4/6] (only during Forsworn occupation)
Shrine of Talos [7/17] (only during Stormcloak occupation)
Chest(s)
Potions
Loose gear
This mighty stronghold, located at the Reach’s southeast corner, teems with Forsworn. You may attack through the front gate, which lies to the west, or you may breach the fort more covertly by several methods, such as the southwest sewer entrance, which leads into the muster.
Note that Fort Sungard is a point of contention between the Stormcloaks and Imperials during the Civil War quest line, and therefore may be populated by either Stormcloak or Imperial troops instead of Forsworn.
Exterior
A host of Forsworn warriors and archers guard this stronghold, so don’t rush in. Remain just outside the main gate, picking off archers from afar and luring out warriors to cut them down in turn. Fight hard to secure the outer grounds, swipe a potion from a cart inside the walls, then begin storming the fort’s many separate interior sections.
- Crafting: Anvil, Workbench, Forge
- Potion
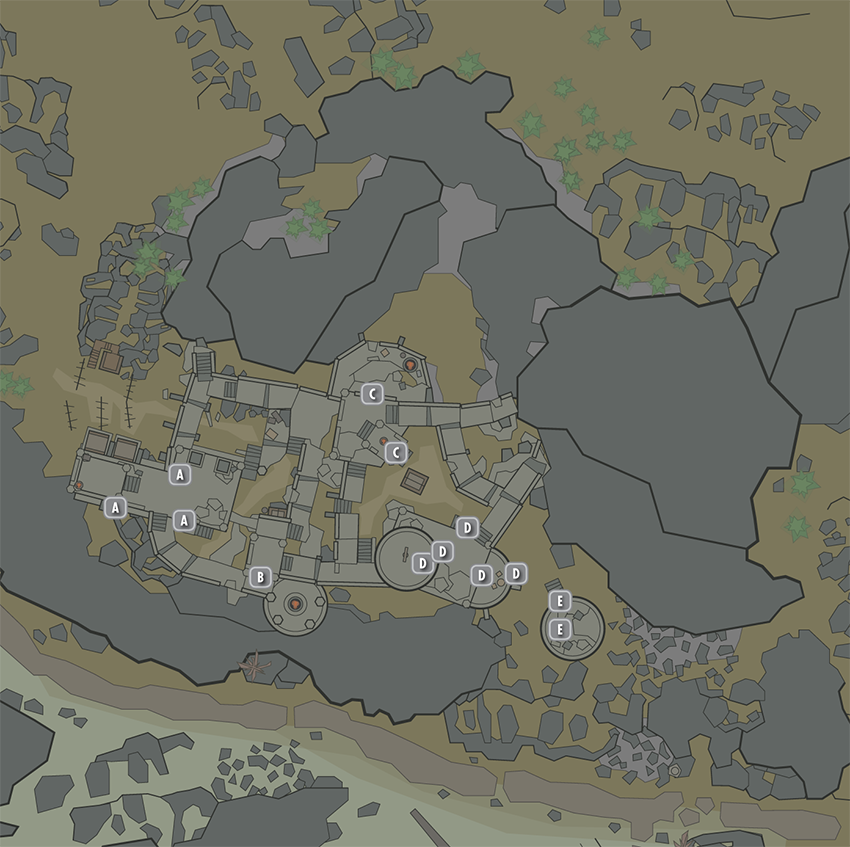
Fort Sungard Muster
Bust into the muster to raid numerous chests. A Skill Book sits on a small table in the weapons room.
- Skill Book [Smithing]: Last Scabbard of Akrash [C1/10]
- Chests (3)
- Loose gear
Fort Sungard Shrine
This small room holds a shrine and some common foodstuffs. The shrine changes depending on who controls the fort.
- Shrine of Akatosh [3/6] (only during Imperial occupation)
- Shrine of Kynareth [4/6] (only during Forsworn occupation)
- Shrine of Talos [7/17] (only during Stormcloak occupation)
Fort Sungard Annex
This three-story structure features two chests on its bottom floor. There’s nothing in the middle floor’s holding cell, but you can get some good lockpicking practice. Exit via the ground floor door to access an exterior Crafting area.
- Chests (2)
- Potion
- Loose gear
Fort Sungard Tower
Loot the chest on the tower’s entry level, then go upstairs to find a bit more loot on its upper floor. Head all the way downstairs afterward and exit via the basement door to go outside, close to the stronghold’s oubliette.
- Chest
- Knapsack
- Potions
- Loose gear
Fort Sungard Oubliette
The oubliette stands outside of the fort’s walls, just to the east. There’s little of interest inside the structure, but if you survive the fall into the pit (the Become Ethereal Shout helps), a Skill Book will be yours. Use the key found near the Skill Book to open the nearby gate and make your way out to fresh air.
- Skill Book [Pickpocket]: Wulfmare’s Guide to Better Thieving [E1/10]
- Fort Sungard Jail Key
- Loose gear