
Gears of War 4 Guide Campaign Arsenal
Heavy Weapons
- Heavy weapons can be picked up in addition to your two equipped primary weapons.
- True to their name, heavy weapons encumber the player, slow movement speed, and limit the ability to maneuver in and out of cover.
- Heavy weapons disappear from the battlefield once the last of their ammo has been used. Ammo can only be replenished by picking up an identical heavy weapon.
- These weapons are positioned throughout the battlefield strategically, often where a large influx of Locust is fast-approaching.
- Heavy weapons are often obtained by scavenging downed Guardians and by defeating larger foes such as Scions.
- Heavy weapons can be fired from the hip or rested on low cover for greater accuracy and control. They can also be placed on the ground, but this reduces the aiming angle.
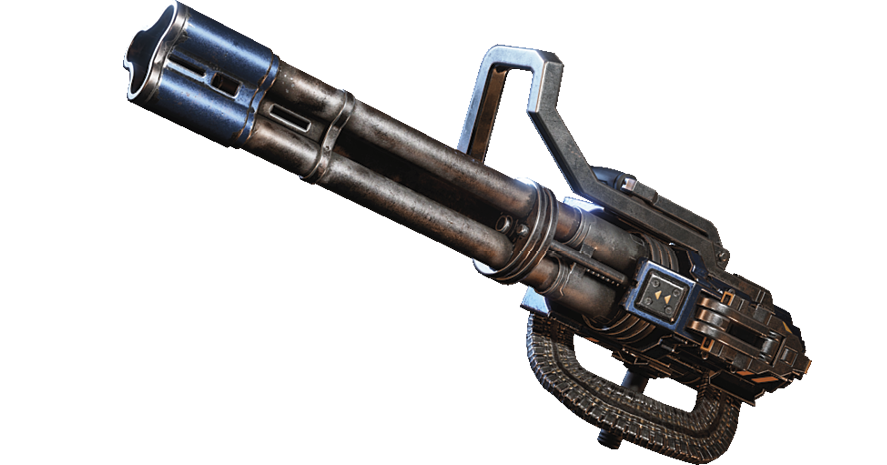
Tri-Shot
| Mag. Size | Ammo Capacity | Rate of Fire (RPM) | Recoil | Trigger Type | Base Dmg. | Headshot | Active Reload | Damage Radius |
|---|---|---|---|---|---|---|---|---|
| 140 | 140 | 600 | Low | Auto | 220 | 1.0x | N/A | N/A |
The Tri-Shot is a proprietary DeeBee weapon carried into battle by some DR-1 units and occasionally mounted to the underside of Guardians. The Tri-Shot is similar to the Mulcher, but delivers greater damage per round, albeit at a slower rate of fire and with less total ammo. What makes the Tri-Shot unique is that each of its three barrels heat and cool independently. As such, the rate of fire drops as the barrels overheat. This happens to each barrel as they rotate, and eventually oveheats the weapon. Nevertheless, the Tri-Shot is at its deadliest when the weapon is running cool. It’s important to hold the Reload Button periodically to vent the heat and cool the weapon. The Tri-Shot has greater precision and less spread than the Mulcher.
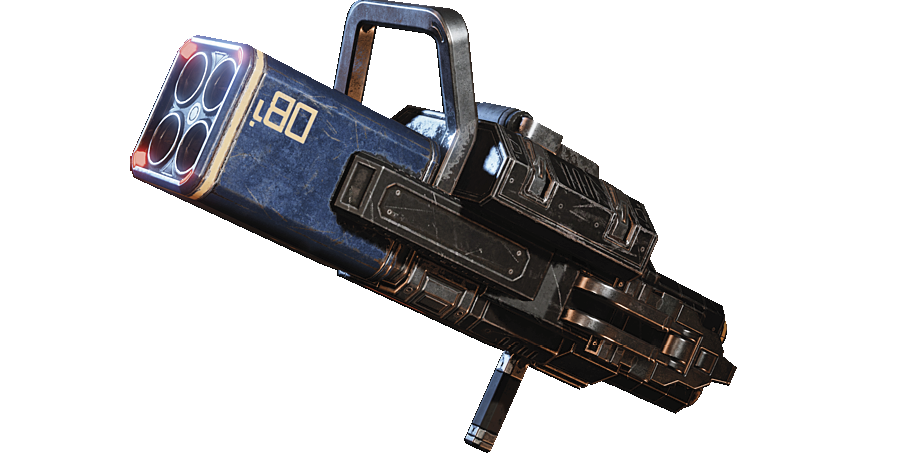
RL4-Salvo
| Mag. Size | Ammo Capacity | Rate of Fire (RPM) | Recoil | Trigger Type | Base Dmg. | Headshot | Active Reload | Damage Radius |
|---|---|---|---|---|---|---|---|---|
| 20 | 20 | 180 | Moderate | Auto | 900 | N/A | N/A | 2.5m |
Like the Tri-Shot, the RL-4 Salvo is a DeeBee weapon used by DR-1 units and Guardians. This rocket launcher fires a barrage of rockets at a surprising rate of speed—three per second—with adequate accuracy. Individual rockets deliver heavy damage and can be used to destroy other Guardians, flying craft such as Kestrel helicopters, or even larger Swarm enemies if the opportunity arises. The RL-4 Salvo isn’t a very common weapon and you’ll often need to rip it from the wreckage of a downed Guardian to find one, but it has a way of showing up when you need it most.
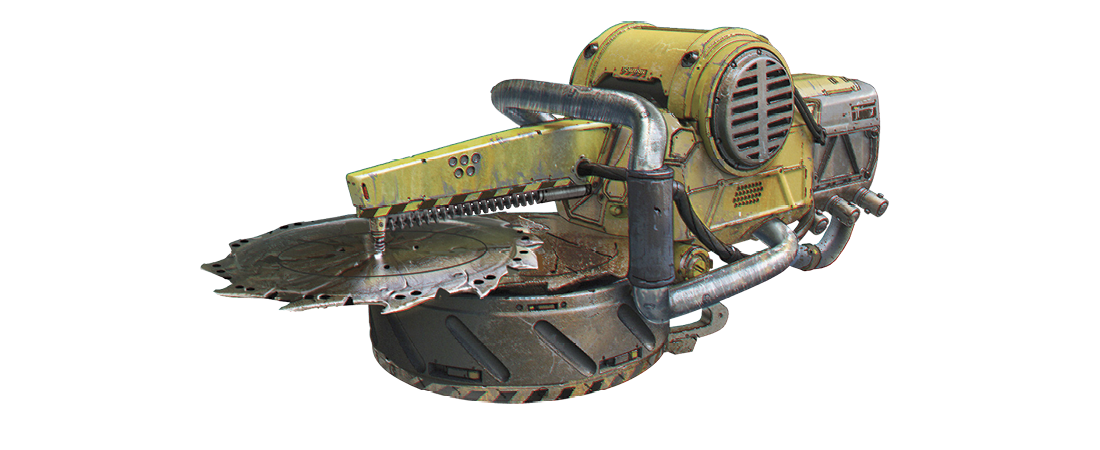
Buzzkill
| Mag. Size | Ammo Capacity | Rate of Fire (RPM) | Recoil | Trigger Type | Base Dmg. | Headshot | Active Reload | Damage Radius |
|---|---|---|---|---|---|---|---|---|
| 15 | 30 | 180 | Low | Auto | 180 | 1.0x | +20% Damage | N/A |
The Buzzkill fires high-velocity circular saw blades that slice straight through enemies, ricochet off solid objects, and wreak havoc on the battlefield. Buzzkills are carried into the battlefield by Scions or are found abandoned when you need one most. The Buzzkill’s strength is that a single blade can cut through multiple enemies, especially low-level enemies like Juvies and Drones. The blades also bounce off walls and solid obstacles with predictability, making it possible to bank shots off walls to strike enemies behind cover or manning a turret. Be careful, however, as those same blades may bounce off a wall and come right back at you. Many a COG has injured himself by firing a Buzzkill in close spaces, only to be downed by his own weapon.
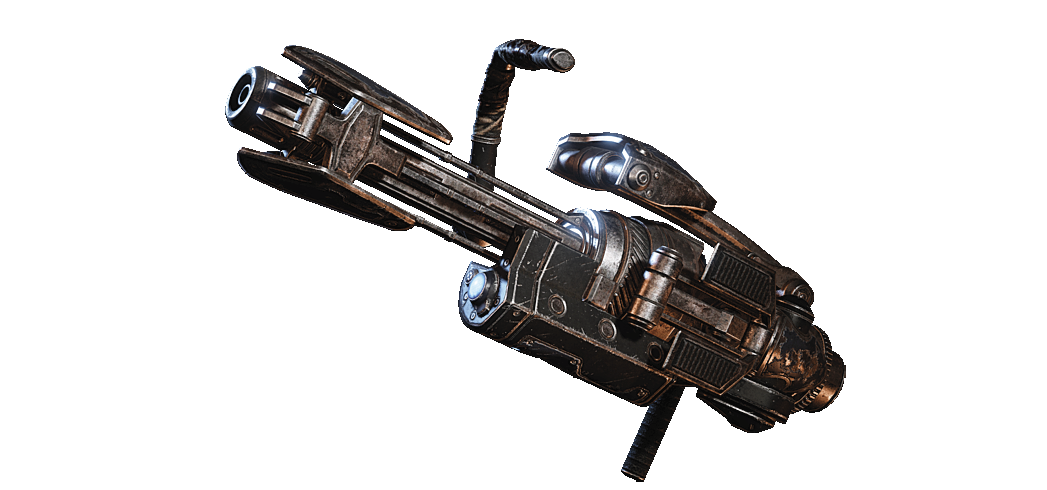
Mulcher
| Mag. Size | Ammo Capacity | Rate of Fire (RPM) | Recoil | Trigger Type | Base Dmg. | Headshot | Active Reload | Damage Radius |
|---|---|---|---|---|---|---|---|---|
| 250 | 250 | 1200 | Low | Auto | 77 | 1.0x | N/A | N/A |
The Mulcher is an un-mounted chaingun that can be fired from the hip, placed on the ground, or atop cover. This heavy machine gun fires a blistering 1200 rounds per minute and can rip apart nearly any enemy in seconds. The Mulcher has a brief wind-up period as its barrels begin to rotate and has to be cooled off periodically, or else it will overheat. Hold the Reload Button to manually cool the weapon off before the temperature gauge fills and a forced three-second cooldown initiates. The Mulcher is best used from cover, while resting the weapon down atop a piece of wall or other object, since its accuracy diminishes when being fired while walking. The Mulcher is best used against close and medium-range enemies.