
Far Cry 5 Guide John’s Region: Holland Valley
Story Mission: Blow Their Mine
- Prerequisites: Complete Story Mission: Razing the Steaks. Optionally bring additional ammunition, especially projectiles.
- Rewards: Dynamite (Enhanced Recipe), Medium Resistance (Holland Valley)
- Details: Zip says the government funds the Project at Eden’s Gate through an old gold mine whose veins aren’t as dry as we think. Kill the cash flow and it’ll all be over. Right?
MISSION Commencement
GO TO the Gold Mine
Start this mission by speaking with Zip Kupka again. He reckons the source of the cult’s wealth comes from the old Catamount Mines in the wooded hills southeast of here. Hop in a vehicle and head there.
RIG the Four Gold Crates with Explosives (4)
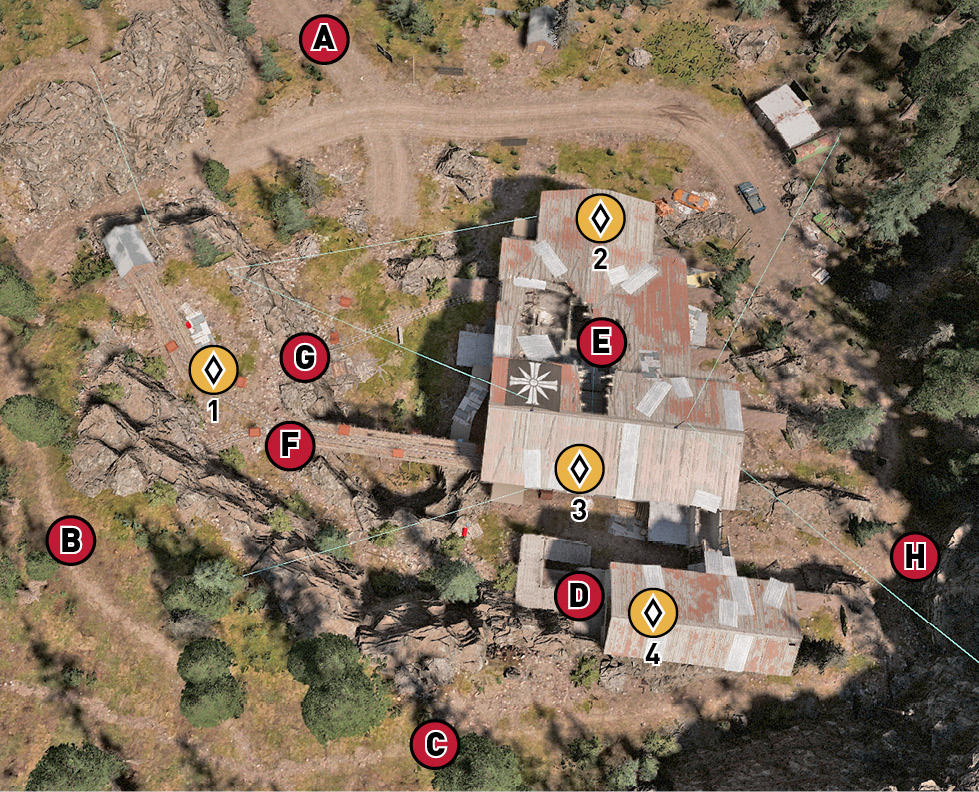
The mine is set into a quarry and hillside to the south. There’s currently around eight enemies dotted around this mine complex. Driving in from the main dirt road  simply reveals yourself to the enemy and isn’t recommended.
OPTIMAL Path
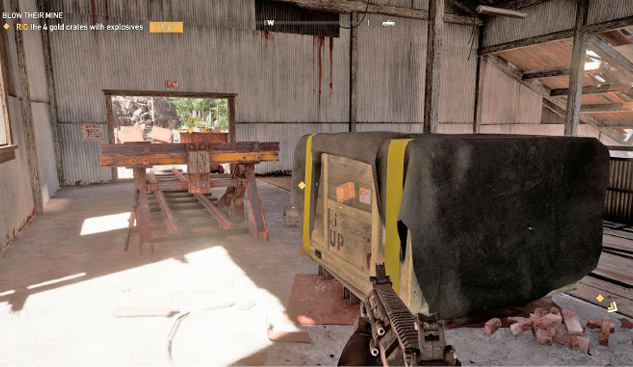
Instead, take the western trail  that runs around the mine’s perimeter to the upper cliff path
  , where you can silently dispatch a patrolling foe. From here, you have a commanding view of most mine structures and can easily access the four gold crates (
 1-4). Remain close to the mounted machine gun near the upper shack
  , and place the first charge at (4). Then head into the main interior structure
  , place the second and third charges at (2) and (3), before finally walking the rusty mine cart bridge
  to plant the final charge near the second mounted machine gun (1).
Throughout your placement, you should be tackling enemies one or two at a time. Make a thorough sweep of the entire area, using your binoculars and compass (top of the screen) to check for foes, ensuring no enemies are here prior to prepping three of the four crates.
Important!Don’tprepthelastcrateyet! It’s most helpful to make sure you learn the topography of the area first, as you’ll be defending these crates during your next objective. Prior to rigging your last gold crate, and after defeating all foes, perform the following optional preparatory maneuvers:
OPTIONAL Preparations
Plant ground explosives on the main road and in the parking turnout just south of  .
.
Plant ground explosives on the ground near each of the rigged charges, so any enemies trying to deactivate them (during the next objective) are blown up, essentially giving you a “free defense” for each crate.
Learn the access points for this location. For example, the upper mine tunnel behind (1) is a dead end, but the lower mine tunnel  winds around and allows access into the main building
  . This isn’t usually used (as it takes too long to travel), but it’s helpful if you find yourself outgunned and outside and need to rush the main building.
The main building  has a few levels and some rickety plank flooring to navigate. Learn how to quickly move up, down, and around this structure, as it’s where you’ll spend most of your time while defending the crates.
Know how to quickly reach the upper two crates—(1) and (4)—usually via the ladders and scaffolding attached to the rusty mine cart bridge. But you can also exit the main building and sprint up the eastern side trail  ; this is normally not accessed, as it’s out of the way and has a height disadvantage when battling foes.
Learn the grapple spots and zip lines that allow access to and from the main structure. However, don’t use these during the firefight, as they usually take you away from the action or make you easily spotted.
Also learn to access the structure’s roof, usually from the southern upper trail  , to get onto the smaller upper shack east of
  . Or climb the scaffold platform between the upper shack, attached to the main structure.
PREVENT the Cultists from Defusing the Bombs (04:00)
After you rig the last of the crates, a timer begins and more reinforcements begin to arrive. Expect quad, truck, flatbed, and infantry foes to swarm the mine works, mostly incoming from the north road  . You should have adequately prepared for this eventuality. However, as the countdown progresses, expect more foes and a helicopter to attempt to thwart your progress.
OPTIMAL Path
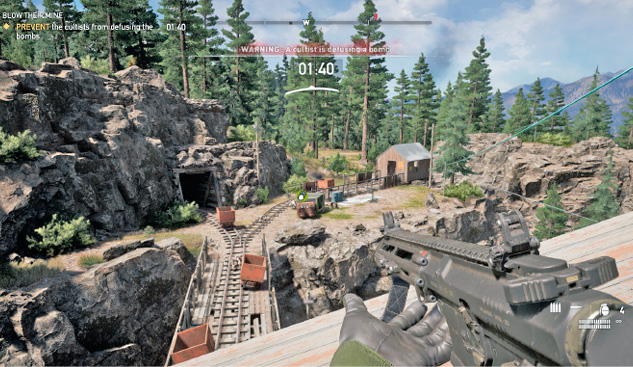
Begin on the high ground, ideally on the roof of  . You have protection, and you can easily see or reach all four crates quickly. If the foes breach (1), lob a grenade, shoot the explosive canister or barrel, or shoot the foes from this vantage.
If (2) is breached, you can fire down through the holes in the roof or lob a grenade. If (3) is breached, drop down through a hole or the south alley between  and
and  and execute; then use the scaffold platform to reach the roof again. If (4) is breached, lob a grenade or fire through the open window. When the chopper arrives, aim at the pilot immediately and shoot him, and the helicopter leaves. Keep this up, with some possible variations and maneuvering into the structure if you start getting overwhelmed. You can manage this defending without a second ally. Watch for foes climbing up the scaffold platform behind you, though.
OTHER Paths
This objective is extremely chaotic, and you may be tempted to immediately rush to a crate that’s being defused. But hang back; it takes time for the foes to deactivate an explosive, and you can “reactivate” the crate afterward anyway. As long as you have one working explosive, this mission does not fail. This allows you to more easily guard one or two locations.
There’s no need to physically rush to each location, especially the crate by the upper mine tunnel (1). Use projectiles or ranged weaponry, or fire at explosive scenery instead.
Mounted machine guns have limited pivoting range, making them cumbersome compared to your other weapons. Use the one near the mine tunnel crate (1) to demolish the incoming vehicles or chopper if you must.
Rig the rusty mine bridge and deck at  with explosives so foes rushing these heavily trafficked areas are blown sky-high.
Another option is to hole up at the western trail  close to the rocks above the mine tunnel crate (1); you have good views of the open windows, though not all of the interior crates. Still, you can launch RPG rounds into the main buildings. This is a good spot for an ally to back you up from.
MOVE OUT and Get to a Safe Spot
When the counter reaches zero, ensure all four explosives are active at each crate, and then disengage the enemy, fleeing away from the location. Head toward the main dirt road  if you want to look and see the mine structures go up in a massive series of explosions. Zip’s whooping and hollering over the radio indicates the mission was a success.