
Far Cry 5 Guide Faith’s Region: Henbane River
Story Mission: Friendly Skies
- Prerequisites: Liberate Drubman Marina
- Rewards: Adelaide Drubman (Guns for Hire), Medium Resistance (Henbane River)
- Details: Adelaide’s treasured helicopter, Tulip, has been stolen. Find her chopper and eliminate the traitorous pilots she used to call friends.
MISSION Commencement
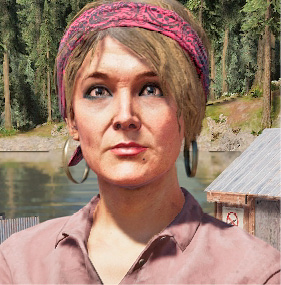
After you liberate the Drubman Marina (cult outpost), speak to the owner, Adelaide Drubman. You’ve three locations where her beloved helicopter may be. Start investigating them in any order you like, looking for a male pilot. They are listed here in order of proximity to the marina.
GO TO the Hunting Shack
KILL the Pilot
The hunting shack is actually the McCoy Cabin, where four foes are keeping a citizen tied up. A few moments after you arrive, a helicopter descends, with a female pilot (VIP), a bodyguard (heavy), and a regular foe inside.
The chopper isn’t Tulip, so quickly dispatch the VIP. There are two main plans to try:

- Approach from the road (to the west). Bail from your vehicle, and survey the area from the wooded rock edge on the location’s west side. Tag the foes, but don’t start firing at them until the chopper lands; that way you can lob an explosive projectile at the chopper and catch the main foes in the blast, before skirting the higher ground around the cabin and mowing down the rest of the enemies.
- Melee takedowns are recommended after the VIP enters the cabin. Remove the single enemies by the northwest outbuilding first. Then the foe near the southwest road entrance. Drag both bodies and hide them. Then enter the cabin and strangle the VIP and heavy while they are both looking away and inside the cabin. Mop up the remaining foes with ease, securing the cabin with no gunshots (from either side) being fired.
If you can remove the VIP pilot, you can flee without defeating the others. You can also steal the helicopter for a quicker route to the next location.
GO TO the Fire Tower
KILL the Pilot

The fire tower is actually the Taft Lookout Tower to the east, at the foot of Raptor Peak. Though you can head there in a helicopter, you’re easily spotted. The enemies at this location have a mortar (as well as an active sniper and possible additional helicopter backup), easily shooting you out of the air. If you must use a chopper, land it to the east, farther up the mountain; then head down to attack using the height advantage.
A better plan is to approach from the west, driving a quad up the trail. Bail around 200 meters away from the tower. Tag the immediate area, as there may be cultists (and bison!) in the vicinity. Circumvent them; make any noise and you’re spotted by the five foes at the fire tower, including a sniper and the female VIP pilot (who is your primary target). Though you can certainly lurk around the rocks below the lookout and shoot at foes, the clandestine approach works well here too.
Use the lower rocks to the west as cover. Sneak up to the structure’s western corner, dropping one of the patrolling foes on the deck. Others may suspect foul play. Hide under the deck (southwest) or move around the bottom deck so no one sees you. When anyone investigates, shoot them until only the sniper and VIP remain. They are usually on the tower’s upper deck. Shoot up through the deck to kill them both, using silenced weaponry, or grapple up and charge them.
GO TO the Lookout
LOCATE Adelaide’s Chopper from the Lookout Point

Equidistant from the Grimalin Radon Mine (west), Lydia’s Cave (north), and McCallough’s Garage (south) is a grassy hillside lookout. Head here in a helicopter or vehicle. Step onto the lookout and utilize your binoculars to scan the immediate vicinity. The chopper appears, flying east, above the garage a second or two later. It then lands on an eastern hilltop Bliss field by a watchtower (where three foes are located). You can tag them from the lookout with your binoculars. After inspecting that field, the target flies across the valley to the south field, landing by a lookout tower near three more foes. Tag the ground foes from the vantage point too. Do this before the chopper lands at the first field.
TAKE CONTROL of Adelaide’s Chopper
KILL Tulip’s Thieving Pilot

Though you may be tempted to charge the first field, the chopper lands to the east. Ignore that, and use the zip line from the lookout. Zip down to the ground, grapple the cliff, and climb up to the southern field. Make quick and silent work of strangling the two guards and Angel in the area. Then wait; if you’re quick, the VIP lands Tulip without seeing you and gets out. Gun them down (or strangle them) with ease. This is by far the most proficient method of obtaining Adelaide’s beloved vehicle.
PROTECT Adelaide’s Chopper
KILL the Remaining Pilot(s)

If you ignored the McCoy Cabin or Taft Lookout Tower, you may have one or both locations to visit on your return trip, as you must take down the female VIPs at these locations. However, you’re in a gunship now, so the plan is slightly more straightforward. Fly to each location, rake the area with gunfire, and take out the VIP easily. This involves strafing an incoming chopper at the McCoy Cabin and optionally raking the area to remove all the ground foes (watch for the citizen in the cabin though!). However, at the Taft Lookout Tower, there’s a sniper (with an RPG) and a mortar to worry about; it’s better to land Tulip away from the action and perform the previously described takedown here; unless you can take quick, evasive maneuvers, aim at foes using the mortar and take out the sniper and VIP.
You can also try destroying any cult vehicles, outposts, and other enemies you see as you fly back to the Drubman Marina. However, Adelaide needs the vehicle back in one piece, so ignore any unnecessary combat (especially without the Auto-Repair perk).
SECURE the Marina
RETURN Tulip to the Marina

The cult hasn’t quite left the Drubman Marina alone. Drop down to tree level and follow the road toward the marina. Let rip at the ground foes milling about the area, backing up Resistance fighters as they repel this attack. Short bursts of Tulip’s machine guns can easily remove threats; blast their trucks so they explode too. This helps remove enemies hiding. Land after you complete the “secure” objective. Adelaide is overjoyed. She’s now available as a pilot and gun for hire as the mission concludes.