
Just Cause 3 Guide Collectibles Daredevil Jumps
Insula Dracon
Complete all 10 of the Daredevil Jumps in Insula Dracon to unlock the Custom Kletterer 300 (Quad) in the Rebel Drop list.
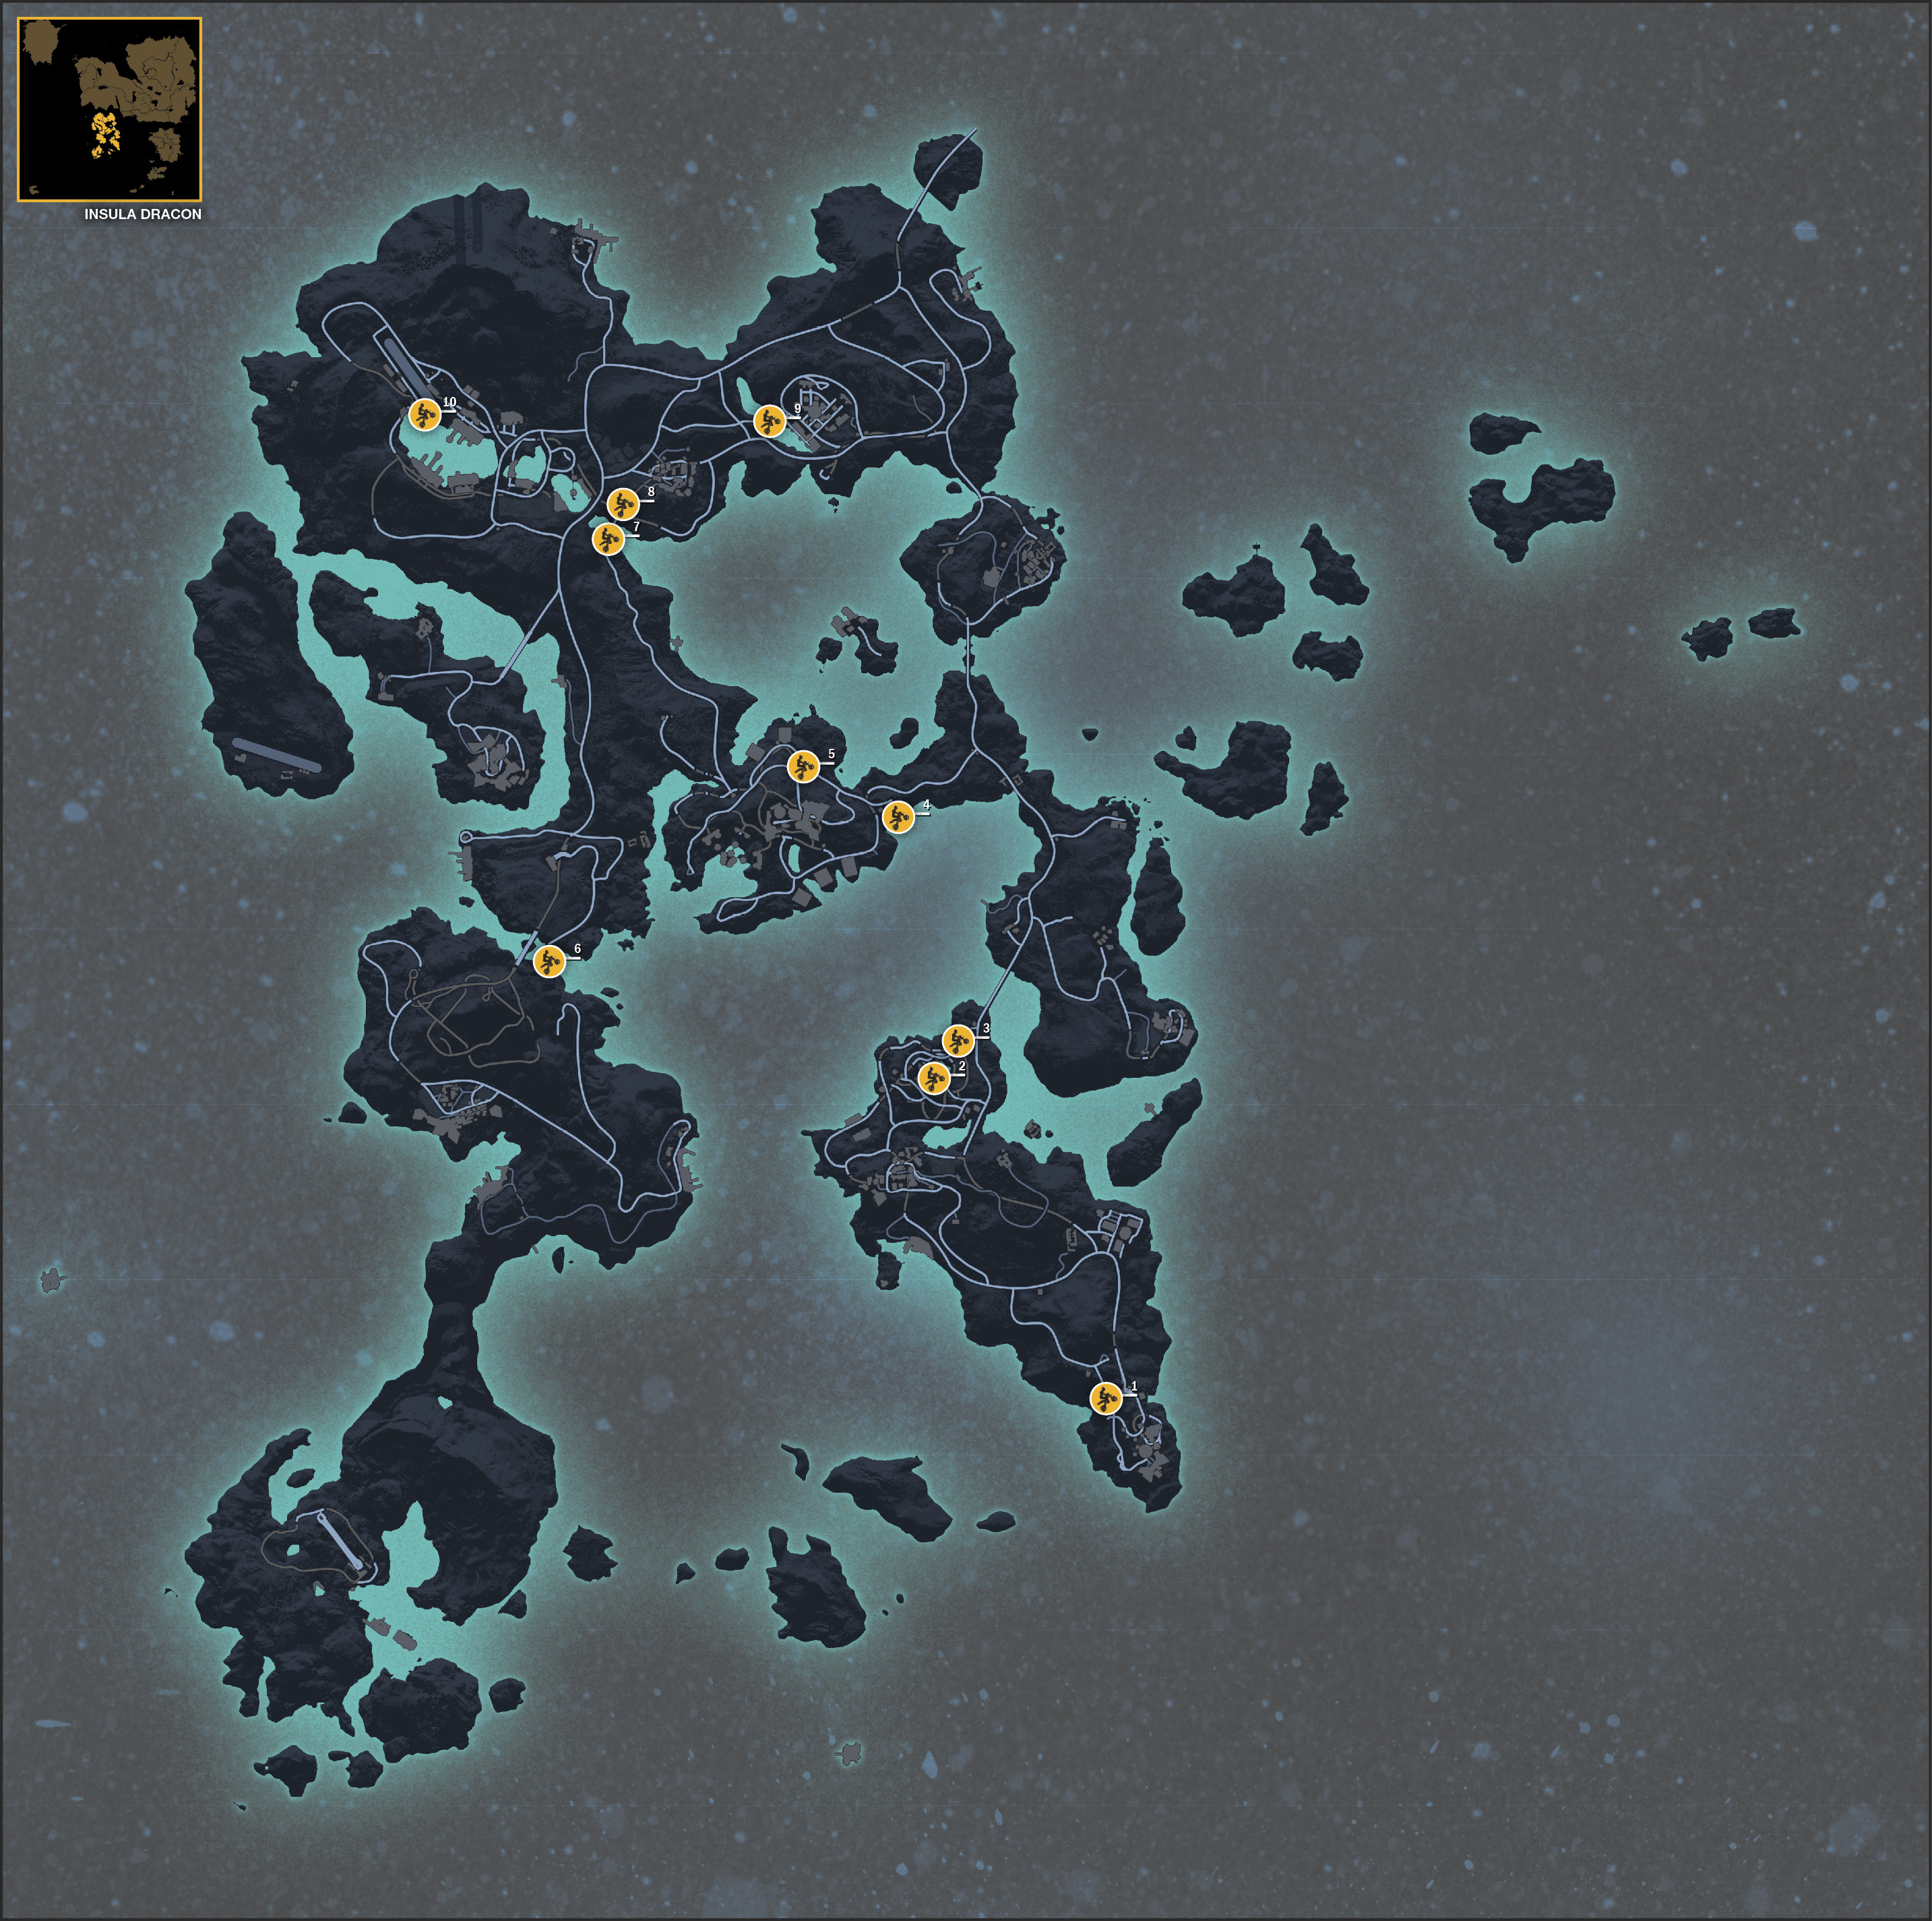
Insula Dracon – Daredevil Jumps
| Map Number | Province | Coordinates | Description | |
|---|---|---|---|---|
| N 40 | E 5 | |||
| 1 | Petra | 41.24 | 37.34 | A car can be found in the small guarded area to the north of the jump. Take the ramp south of the landing in Puncta Sud. If you haven’t yet liberated Puncta Sud, the guard tower you land beside may attack. |
| 2 | Petra | 42.06 | 36.76 | You need some serious speed to land this jump, so plan accordingly. The jump sends you south over the large open area in Espia Bassa. If you don’t want to end up at the bottom, pull your parachute and grapple to the other side after the jump. |
| 3 | Petra | 42.15 | 36.83 | Follow the road to the upper-north side of Espia Bassa. The road dead ends into the ramp, so maintain your speed to land on the road below to the north. If you don’t have enough speed, you may crash into one of the buildings below. |
| 4 | Corda Dracon | 42.79 | 36.59 | Follow the road east out of Corda Dracon: Centcom, hitting the ramp that the road eventually dead ends into. Landing the jump is very easy as the road below lines up with the jump perfectly. |
| 5 | Corda Dracon | 42.89 | 36.29 | Take the north road out of Corda Dracon: Centcom, following it around to the jump that lines up with the road leading to Jump 4. If you can cleanly land it on the road below, you’ll easily continue straight on to Jump 4. |
| 6 | Trio | 42.40 | 35.37 | Take the east road out of Guardia Trio I and follow it north as it begins to shift into a dirt road. The landing for this one is a bit tricky as you attempt to land on a two-lane bridge. As you launch off the jump, begin to shift your car to the left in air. It’s easy to under or overshoot this jump, but hitting a speed of 140 km/h should land you right on the bridge. |
| 7 | Capite West | 43.49 | 35.58 | A dirt road leads up to the jump. Since there generally aren’t any cars lining this road, it may be easier to start Jump 8 and launch the car over to the ramp for Jump 7. To land either one, you need a good amount of speed to clear the gap and land it. If you fail you’ll end up in the shallow water below. |
| 8 | Capite West | 43.51 | 35.60 | This jump is very easy as cars are plentiful and a long paved road lines the way to the jump. The ramp on the other end is the same ramp that you would use to initiate Jump 7. |
| 9 | Capite Est | 43.79 | 36.15 | The road to this jump is east of Espia Alta. If you haven’t liberated Espia Alta yet, be ready for a fight when you land as you’ll be right in the heart of the base. If you don’t want to fight, you can use your parachute once you’ve gone far enough to complete the jump, then glide away from the base, landing on the road to the south. |
| 10 | Capite West | 43.80 | 34.94 | Launch this jump from the south end of the air strip in Porto Cavo. There’s nowhere to land safely since you’re jumping into the large body of water below. Pull your chute early, then steal a car on either side of this lake and make your get away. This jump is much easier to complete when the Base is liberated since the water below contains boats armed with cannons and other weapons. |