Prima Games eGuides
primagames.com Browse Redeem a code Help
The Elder Scrolls Online: Summerset eGuide
Sign in My Guides

Sign in or create an account

We'll email you a link. No password needed, and if you don't have an account yet, the link makes one.

By creating an account or signing in, you agree to our Terms of Service and Privacy Policy.

Have a password?

Had an account on the old eGuides site, or a code from a printed guide? Help and troubleshooting

Sign in with a password

By signing in, you agree to our Terms of Service and Privacy Policy.

Check your email

A sign-in link is on its way. It works once and expires in 15 minutes. Open it and you're in, with an account if you didn't already have one.

Contents

  • Crafting and Armor
    • Introduction
    • Jewelry Crafting
    • Armor Sets
    • Craft Works Locations
    • Crafting Quests
  • The Psijic Order
    • Introduction
    • Unlocking the Psijic Order Skill Line
    • Rank 1
    • Rank 2
    • Rank 3
    • Rank 4
    • Rank 5
    • Rank 6
    • Rank 8
    • Rank 9
    • Rank 10
    • The Psijic Order Quest Line
  • Abyssal Geysers
    • Introduction
    • Minor Geysers
    • Geyser Locations
    • Geyser Bosses
  • Quests
    • Quest Index
    • Story Quests
      • Introduction
      • The Mind Trap
      • The Queen’s Decree
      • A Pearl of Great Price
      • Buried Memories
      • The Tower Sentinels
      • The Dreaming Cave
      • Lost in Translation
      • A Necessary Alliance
      • The Crystal Tower
      • A New Alliance
    • Side Quests
      • Introduction
      • A Duelist’s Dilemma
      • A Tale of Two Mothers
      • Aicessar’s Invitation
      • Bantering with Bandits
      • King’s Haven Pass
      • Culture Clash
      • Curinure’s Invitation
      • The Ebon Sanctum
      • The Forest Vandal
      • Gjadil’s Legacy
      • Gryphon Grievance
      • His Final Gift
      • The Hulkynd’s Heart
      • Illusions of Grandeur
      • Lauriel’s Lament
      • Lost Libations
      • Manor of Masques
      • Murder in Lillandril
      • Obedience Issues
      • Old Wounds
      • The Perils of Art
      • Room to Spare
      • The Taste of Fear
      • Untamed and Unleashed
      • Wasting Away
      • Storming the Walls
      • The Vaults of Moawita
      • Whispers from the Deep
    • Daily Solo Quest
      • Introduction
      • The Divine Deputation
    • Daily Group Quests
      • Introduction
      • The Sickening Sea
      • Taming the Wild
      • The Abyssal Alchemist
      • Never Forgotten
      • Run Aground
      • Birds of a Feather
      • Sinking Summerset (Daily)
  • Delves
    • Introduction
    • Completing a Delve
    • Archon’s Grove
    • Tor-Hame-Khard
    • Traitor’s Vault
    • Wasten Coraldale
    • King’s Haven Pass
    • Eton Nir Grotto
  • Dungeons and Trials
    • Introduction
    • Sunhold
    • Karnwasten
    • Cloudrest (Trial)
  • The Atlas of Summerset Isle
    • An Overview of the Lands of the High Elves
    • Summerset Isle: Region 1 (Northwest)
    • Summerset Isle: Region 2 (Southwest)
    • Summerset Isle: Region 3 (Northeast)
    • Summerset Isle: Region 4 (Southeast)
    • Summerset Isle: Region 5
  • Interactive World Maps
    • Summerset
    • Artaeum
  • Summerset Bestiary
    • Overview
    • Coral Crab
    • Giant Salamander
    • Gryphon
    • Indrik
    • Reef Viper
    • Sea Sload
    • Yaghra (Varieties)
    • Gloam Knight (Shadow of Nocturnal)
  • Appendices
    • Overview
    • Collections: Preorder
    • Collections: Collector’s Edition
    • Crafting Motifs
    • Crafting Sets
    • Equipment Sets
    • Jewelry Sketches
    • Furnishings
    • Quest Rewards
    • Rare Fish
    • Treasure Maps
    • Housing
    • Merchants
    • Crafting Stations
    • Skyshards
    • Thieves Guild Dead Drop Chests
  • Summerset Achievements
    • Overview
    • General Achievements
    • Exploration Achievements
    • Quest Achievements
    • Abyssal Geyser Achievements
    • Cloudrest Achievements
    • New Crafting Achievements
    • Achievement Rewards List
    • Achievement Furnishings
    • New Dragon Bones Achievements
    • New Midyear Mayhem Achievements

The Elder Scrolls Online: Summerset Guide › Quests › Story Quests

Buried Memories

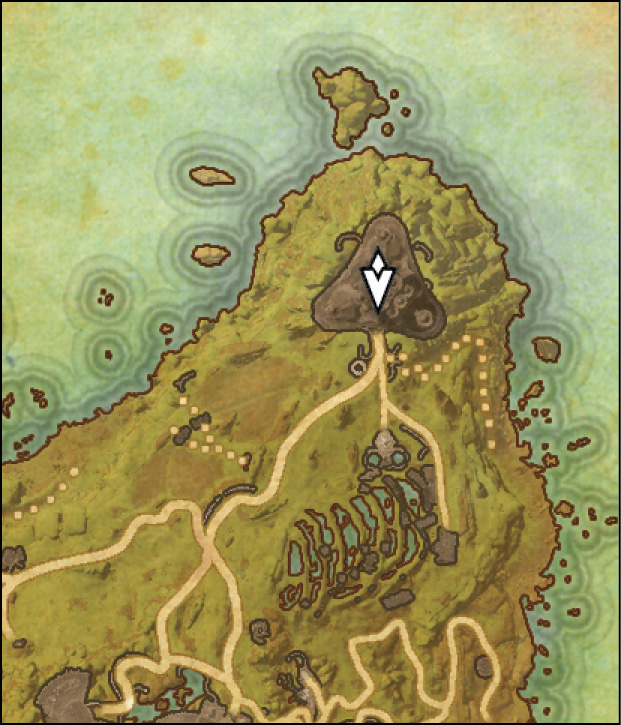
  • Location: Artaeum, Ceporah Tower
  • Quest-giver: Ritemaster Iachesis or Valsirenn
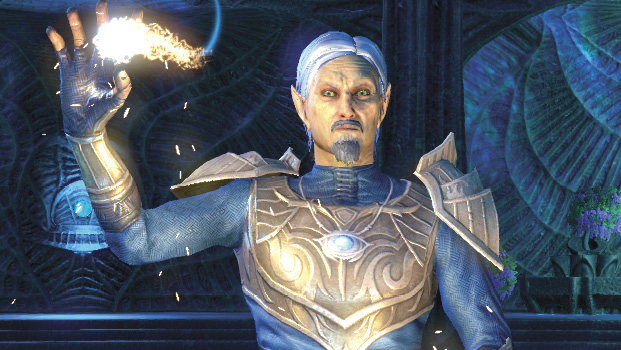
Description: Ritemaster Iachesis has knowledge of our newly discovered enemies; it would seem that he’s encountered them before. He hatches a plan to strike back, but our enemy is one step ahead. Valsirenn will appear in Shimmerene, Alinor, Lillandril, and Artaeum to offer you the quest if you don’t take it from Ritemaster Iachesis.

Go to the Southeast Beach

Speak to the Ritemaster and he’ll send you to Artaeum’s southeast beach. Before you go, you can speak with Oriandra to get her input on your current predicament. Once you’re ready, head to the College of Psijics Ruins. You’ll find Valsirenn and the Ritemaster waiting for you when you arrive. Head in and approach the Ritemaster—he’ll lead you to the beach. Once you’re outside, speak with the Ritemaster again.

Destroy the Abyssal Pearl

Head to the beach and continue south to find the Abyssal Pearl. You’ll have to face another Yaghra Monstrosity in order to reach it, so be on guard.

Once you defeat the Yaghra Monstrosity, continue along the path until you reach the Psijic Relic Vaults. Head inside and speak with the Ritemaster.

Psijic Relic Vaults

The Psijic Relic Vaults aren’t big, but they are densely packed with enemies. Follow the Ritemaster up the stairs and defeat the daedra on the room’s opposite end.

Once you clear the room, approach the red spiderweb-like netting surrounding the door behind where they were standing. You’ll need to destroy this webbing. A button prompt will appear to allow you to attempt the feat. When that fails, the Golden Knight, in all of his tricky, teleporting whimsy, will appear to lend a hand. When he finishes his task, head through the door to enter the central rotunda.

Find the Ul’vor Staff

The Ritemaster will face off with a foe, leaving you to fend for yourself. Head back out the way you came in and speak with Valsirenn. She suggests finding the Ul’vor Staff in order to help the Ritemaster with his battle. Head through the west door in the room where Valsirenn is to reach the Western Wing Vaults. Go to the northeast corner of the Relic Vaults to find a safe containing the staff. With staff in hand, head south and continue back to Valsirenn, who is now waiting in the central rotunda.

Yaghra Monstrosities

Take care while progressing through the Relic Vaults. While the path is straightforward, you’ll find Yaghra Monstrosities on the second floor. They shouldn’t pose a real threat to you anymore, but they still pose enough of a threat that you should battle them carefully.

Speak with Valsirenn and she’ll show you how to use the staff to open a way into the Mindscape.

Mindscape

The realm of the subconscious made manifest before your very eyes. A realm of sparking, branching neural pathways and nightmares long thought locked away.

Verdangu

Make your way up the path and you’ll encounter an Elite Yaghra Spewer named Verdangu. While it has significantly higher stats than your standard Yaghra Spewer, its move set isn’t much different. Get in close if you can to help mitigate the amount of ranged attacks Verdangu performs. Most of them are unavoidable, so you’ll find most of the fight is just a race against time.

Dissonance

Dissonance is well rounded and has attacks for all occasions, but she is overall a melee-based fighter. Stay on the move while fighting her; a lot of her melee attacks have extended AoE range that can be hard to avoid. She’ll constantly chase you down and shoot projectiles at you until she closes the gap; those projectiles can take a decent amount of health unexpectedly.

K’Tora will drop orbs along your path up the Mindscape in hopes of slowing you down. Destroy them, then press on ahead.

K’Tora

K’Tora isn’t a hard fight if you prioritize his orbs and Yaghra first. His ranged attacks are pretty slow and have a red AoE ring around them to make them visible, even in this dimly lit place, so try to stick to ranged attacks, if you have the option. He will consistently create Alchemical Globules (orbs that look like Abyssal Pearls), fire a few projectiles at you, then dig into the ground and appear somewhere else. Destroy anything he summons, attack him, and keep your distance. If there are no additional enemies on the field, his attack options will be severely limited. A patient approach is better than an all-out attack in this fight.

Once you defeat K’Tora, run up and grab the Ul’vor Staff to leave the Mindscape. Speak with Sotha Sil, then backtrack to Ceporah Tower and speak with Ritemaster Iachesis to finish this quest. You’ll earn a Ritemaster’s Gifted Staff and a Skill Point for your efforts.

The Abyssal Cabal Side Quest

The Abyssal Cabal Dungeon Quest is now available in Alinor. Head to the Karnwasten section of the “Dungeons and Trials” chapter in this book for more information.

Keep reading with a free account

The first 3 sections of The Elder Scrolls Online: Summerset are open to everyone. An account opens the rest of it, and every other guide in the archive. It's free, and there's nothing to buy.

Bought guides on the old Prima Games site? Your account and every guide you own moved here, so there's nothing to buy again. Sign in.

Create a free account Or browse our free guides

PreviousA Pearl of Great Price NextThe Tower Sentinels