Prima Games eGuides
primagames.com Browse Redeem a code Help
The Elder Scrolls Online: Summerset eGuide
Sign in My Guides

Sign in or create an account

We'll email you a link. No password needed, and if you don't have an account yet, the link makes one.

By creating an account or signing in, you agree to our Terms of Service and Privacy Policy.

Have a password?

Had an account on the old eGuides site, or a code from a printed guide? Help and troubleshooting

Sign in with a password

By signing in, you agree to our Terms of Service and Privacy Policy.

Check your email

A sign-in link is on its way. It works once and expires in 15 minutes. Open it and you're in, with an account if you didn't already have one.

Contents

  • Crafting and Armor
    • Introduction
    • Jewelry Crafting
    • Armor Sets
    • Craft Works Locations
    • Crafting Quests
  • The Psijic Order
    • Introduction
    • Unlocking the Psijic Order Skill Line
    • Rank 1
    • Rank 2
    • Rank 3
    • Rank 4
    • Rank 5
    • Rank 6
    • Rank 8
    • Rank 9
    • Rank 10
    • The Psijic Order Quest Line
  • Abyssal Geysers
    • Introduction
    • Minor Geysers
    • Geyser Locations
    • Geyser Bosses
  • Quests
    • Quest Index
    • Story Quests
      • Introduction
      • The Mind Trap
      • The Queen’s Decree
      • A Pearl of Great Price
      • Buried Memories
      • The Tower Sentinels
      • The Dreaming Cave
      • Lost in Translation
      • A Necessary Alliance
      • The Crystal Tower
      • A New Alliance
    • Side Quests
      • Introduction
      • A Duelist’s Dilemma
      • A Tale of Two Mothers
      • Aicessar’s Invitation
      • Bantering with Bandits
      • King’s Haven Pass
      • Culture Clash
      • Curinure’s Invitation
      • The Ebon Sanctum
      • The Forest Vandal
      • Gjadil’s Legacy
      • Gryphon Grievance
      • His Final Gift
      • The Hulkynd’s Heart
      • Illusions of Grandeur
      • Lauriel’s Lament
      • Lost Libations
      • Manor of Masques
      • Murder in Lillandril
      • Obedience Issues
      • Old Wounds
      • The Perils of Art
      • Room to Spare
      • The Taste of Fear
      • Untamed and Unleashed
      • Wasting Away
      • Storming the Walls
      • The Vaults of Moawita
      • Whispers from the Deep
    • Daily Solo Quest
      • Introduction
      • The Divine Deputation
    • Daily Group Quests
      • Introduction
      • The Sickening Sea
      • Taming the Wild
      • The Abyssal Alchemist
      • Never Forgotten
      • Run Aground
      • Birds of a Feather
      • Sinking Summerset (Daily)
  • Delves
    • Introduction
    • Completing a Delve
    • Archon’s Grove
    • Tor-Hame-Khard
    • Traitor’s Vault
    • Wasten Coraldale
    • King’s Haven Pass
    • Eton Nir Grotto
  • Dungeons and Trials
    • Introduction
    • Sunhold
    • Karnwasten
    • Cloudrest (Trial)
  • The Atlas of Summerset Isle
    • An Overview of the Lands of the High Elves
    • Summerset Isle: Region 1 (Northwest)
    • Summerset Isle: Region 2 (Southwest)
    • Summerset Isle: Region 3 (Northeast)
    • Summerset Isle: Region 4 (Southeast)
    • Summerset Isle: Region 5
  • Interactive World Maps
    • Summerset
    • Artaeum
  • Summerset Bestiary
    • Overview
    • Coral Crab
    • Giant Salamander
    • Gryphon
    • Indrik
    • Reef Viper
    • Sea Sload
    • Yaghra (Varieties)
    • Gloam Knight (Shadow of Nocturnal)
  • Appendices
    • Overview
    • Collections: Preorder
    • Collections: Collector’s Edition
    • Crafting Motifs
    • Crafting Sets
    • Equipment Sets
    • Jewelry Sketches
    • Furnishings
    • Quest Rewards
    • Rare Fish
    • Treasure Maps
    • Housing
    • Merchants
    • Crafting Stations
    • Skyshards
    • Thieves Guild Dead Drop Chests
  • Summerset Achievements
    • Overview
    • General Achievements
    • Exploration Achievements
    • Quest Achievements
    • Abyssal Geyser Achievements
    • Cloudrest Achievements
    • New Crafting Achievements
    • Achievement Rewards List
    • Achievement Furnishings
    • New Dragon Bones Achievements
    • New Midyear Mayhem Achievements

The Elder Scrolls Online: Summerset Guide › Quests › Side Quests

Storming the Walls

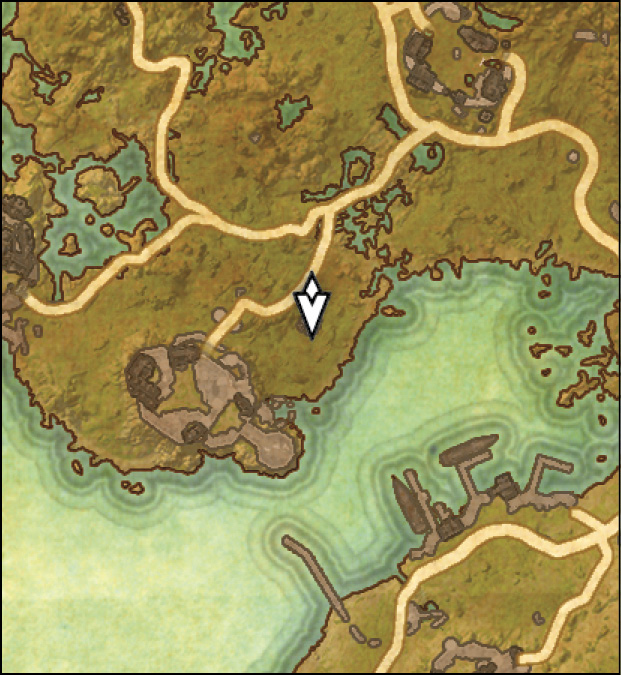
  • Location: East of the Sea Keep
  • Quest-giver: Pandermalion

Description: The Sea Keep was invaded by Sea Elves, forcing all of its residents out. To make matters worse, a tempest conjured by the Sea Elves has engulfed the keep and seems to be growing larger with every passing hour. Pandermalion is convinced that it’s only a matter of time before it begins moving down the coast, destroying everything in its path. Help Pandermalion reach the Sea Elf mage and put a stop to this tempest before that can happen.

Meet Pandermalion at the Ruins

Make your way south of the camp to find Pandermalion. Speak with him and he’ll show you a way into the keep. Once inside the ruin, speak with Pandermalion once again.

Sea Keep

Pass through the ruins to eventually come to an empty room. Pandermalion will approach the north wall and reveal a secret passage. Talk to Castire on the other side of the wall, then speak with Pandermalion. Castire will join you and Pandermalion from here on.

Pandermalion will fight alongside you for a majority of this quest, so most combat encounters will be a lot easier.

Seal the Magicka Fonts

Exit the cell and head to the right in the next hall. You’ll come to an open room with a glowing blue crystal lantern called a Magicka Font. You must extinguish three of these—one in this room and two on the floors above.

Tenerive

Tenerive isn’t a particularly fast enemy, but he is custom built for dealing with you and your group. Aside from a basic sword swing, his attacks all focus on hitting wide or multiple areas at once. At the start of the fight, he’ll shoot lightning in the air that will come down and strike you or one of your allies. After it lands, it will begin producing small lightning AoE attacks that shoot out around the room. If it hits you, it applies a temporary movement speed debuff on you.

Tenerive will also create a cone in front of him, then slam down his sword and shock everything in that cone with lightning. You’ll have a good amount of time to escape this attack if you move as soon as you see it.

His final move is much harder to avoid. He’ll create an AoE circle around him, then immediately shock everything in it. You’ll have no choice but to defend against this attack, since the wind-up time is nearly nonexistent.

After defeating Tenerive, extinguish the last Magicka Font and head out the back door. You can speak with Castire before leaving the room if you want more information about Tenerive postmortem.

Raise Either the Outer or Inner Gate

You’ll have a choice of raising the inner or outer gate at this point. Whatever gate you choose to raise, Castire will raise the other on your behalf. We suggest going for the inner gate on the keep’s southeastern side, as it will give Pandermalion some additional dialogue, while activating the outer gate just involves flipping the switch and moving on.

Inner Gate

The inner gate controls are located at the top of the stairs on the keep’s southeast side. When you enter the room, Pandermalion will react to a body lying on the floor. Speak with him to learn more about the previous owner of this body.

Reach the Battlements

Head back outside and go to the small gate on the ground floor, stationed comfortably between the towers holding the gate control rooms. Once there, you can speak with both Castire and Pandermalion before heading through the gate. Go to the tempest at the keep’s far side. Enter it and get ready to fight Urlsar.

Urlsar

Castire and Pandermalion will sit this fight out, as they can’t find the strength to breach the tempest.

Urlsar will hurl lightning from his staff as his basic attack. Guarding will negate it with little trouble. Where things get a bit trickier is when Urlsar teleports to you. Whenever you see this, immediately back away from him. He’ll follow up every teleportation with a large lightning AoE attack.

Urlsar can also shoot a flurry of tornadoes your way, which will sweep you off your feet if you make contact with them. If you’re not in melee range, this attack is easy enough to avoid, but close range will leave you maybe a second and a half of reaction time to get away from it.

Urlsar’s remaining attack will start after his left hand begins glowing with lightning. He’ll shoot out several waves of electric balls, which will all move robotically around the ground, shifting angles in unexpected ways as they move. They are easy enough to avoid if they have your undivided attention, but you’ll have to disengage from Urlsar to give them the attention they demand.

Once you defeat Urlsar, speak with Castire on the outer walls of the keep. Talk to Pandermalion afterward, then head through the keep’s front gate and speak with Battlereeve Farwenya to complete the quest. She’ll ask you about the events that led to this catastrophe. You can choose whether to tell the truth. You’ll receive a Sea Keep Siege Cuirass for completing the quest, regardless of your answer.

Keep reading with a free account

The first 3 sections of The Elder Scrolls Online: Summerset are open to everyone. An account opens the rest of it, and every other guide in the archive. It's free, and there's nothing to buy.

Bought guides on the old Prima Games site? Your account and every guide you own moved here, so there's nothing to buy again. Sign in.

Create a free account Or browse our free guides

PreviousWasting Away NextThe Vaults of Moawita