
Prima Games eGuides
primagames.com Browse Redeem a code Help
The Elder Scrolls Online: Summerset eGuide
Sign in My Guides

Sign in or create an account

We'll email you a link. No password needed, and if you don't have an account yet, the link makes one.

By creating an account or signing in, you agree to our Terms of Service and Privacy Policy.

Have a password?

Had an account on the old eGuides site, or a code from a printed guide? Help and troubleshooting

Sign in with a password

By signing in, you agree to our Terms of Service and Privacy Policy.

Check your email

A sign-in link is on its way. It works once and expires in 15 minutes. Open it and you're in, with an account if you didn't already have one.

Contents

  • Crafting and Armor
    • Introduction
    • Jewelry Crafting
    • Armor Sets
    • Craft Works Locations
    • Crafting Quests
  • The Psijic Order
    • Introduction
    • Unlocking the Psijic Order Skill Line
    • Rank 1
    • Rank 2
    • Rank 3
    • Rank 4
    • Rank 5
    • Rank 6
    • Rank 8
    • Rank 9
    • Rank 10
    • The Psijic Order Quest Line
  • Abyssal Geysers
    • Introduction
    • Minor Geysers
    • Geyser Locations
    • Geyser Bosses
  • Quests
    • Quest Index
    • Story Quests
      • Introduction
      • The Mind Trap
      • The Queen’s Decree
      • A Pearl of Great Price
      • Buried Memories
      • The Tower Sentinels
      • The Dreaming Cave
      • Lost in Translation
      • A Necessary Alliance
      • The Crystal Tower
      • A New Alliance
    • Side Quests
      • Introduction
      • A Duelist’s Dilemma
      • A Tale of Two Mothers
      • Aicessar’s Invitation
      • Bantering with Bandits
      • King’s Haven Pass
      • Culture Clash
      • Curinure’s Invitation
      • The Ebon Sanctum
      • The Forest Vandal
      • Gjadil’s Legacy
      • Gryphon Grievance
      • His Final Gift
      • The Hulkynd’s Heart
      • Illusions of Grandeur
      • Lauriel’s Lament
      • Lost Libations
      • Manor of Masques
      • Murder in Lillandril
      • Obedience Issues
      • Old Wounds
      • The Perils of Art
      • Room to Spare
      • The Taste of Fear
      • Untamed and Unleashed
      • Wasting Away
      • Storming the Walls
      • The Vaults of Moawita
      • Whispers from the Deep
    • Daily Solo Quest
      • Introduction
      • The Divine Deputation
    • Daily Group Quests
      • Introduction
      • The Sickening Sea
      • Taming the Wild
      • The Abyssal Alchemist
      • Never Forgotten
      • Run Aground
      • Birds of a Feather
      • Sinking Summerset (Daily)
  • Delves
    • Introduction
    • Completing a Delve
    • Archon’s Grove
    • Tor-Hame-Khard
    • Traitor’s Vault
    • Wasten Coraldale
    • King’s Haven Pass
    • Eton Nir Grotto
  • Dungeons and Trials
    • Introduction
    • Sunhold
    • Karnwasten
    • Cloudrest (Trial)
  • The Atlas of Summerset Isle
    • An Overview of the Lands of the High Elves
    • Summerset Isle: Region 1 (Northwest)
    • Summerset Isle: Region 2 (Southwest)
    • Summerset Isle: Region 3 (Northeast)
    • Summerset Isle: Region 4 (Southeast)
    • Summerset Isle: Region 5
  • Interactive World Maps
    • Summerset
    • Artaeum
  • Summerset Bestiary
    • Overview
    • Coral Crab
    • Giant Salamander
    • Gryphon
    • Indrik
    • Reef Viper
    • Sea Sload
    • Yaghra (Varieties)
    • Gloam Knight (Shadow of Nocturnal)
  • Appendices
    • Overview
    • Collections: Preorder
    • Collections: Collector’s Edition
    • Crafting Motifs
    • Crafting Sets
    • Equipment Sets
    • Jewelry Sketches
    • Furnishings
    • Quest Rewards
    • Rare Fish
    • Treasure Maps
    • Housing
    • Merchants
    • Crafting Stations
    • Skyshards
    • Thieves Guild Dead Drop Chests
  • Summerset Achievements
    • Overview
    • General Achievements
    • Exploration Achievements
    • Quest Achievements
    • Abyssal Geyser Achievements
    • Cloudrest Achievements
    • New Crafting Achievements
    • Achievement Rewards List
    • Achievement Furnishings
    • New Dragon Bones Achievements
    • New Midyear Mayhem Achievements

The Elder Scrolls Online: Summerset Guide › Quests › Side Quests

The Taste of Fear

  • Location: South of Cey-Tarn Wayshrine, west of Cey-Tarn Keep
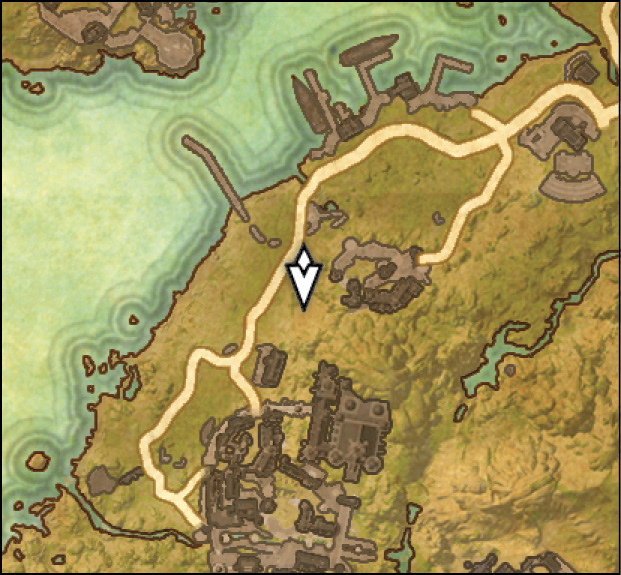
  • Quest-giver: Silurie

Description: Soldiers at Cey-Tarn Keep have been getting taken and slaughtered in the night and no one knows why. Help Silurie work around the slow-to-action Divine Prosecution and get to the bottom of this case.

Distract Revelator Lindafwe

Head up the hill to Cey-Tarn Keep and speak with Revelator Lindafwe to distract her. After Silurie enters the building, follow suit by entering through the main gate. Turn left to find Silurie behind a stack of boxes. Talk to her, then wait for her to cast her spell.

Follow the Light of Stendarr

As soon as she finishes her spell, you must chase after an orb of light. It will take you east to the upper levels of the keep; then it will head inside the keep proper. Follow the orb into the Cey-Tarn Keep barracks.

As soon as you enter, the orb will quickly race to a vase on the second floor. Inspect it and you’ll be transported to a room with a desiccated corpse. Inspect all of the items in the room, then exit by examining the vase once more.

Meet Silurie in the Refectory

Head back downstairs and exit through the door you entered from. Outside, head left to reach the refectory. Inside the refectory, go into the next room and speak with Justiciar Hyircil. Head down the stairs and through the door to reach the cellar.

Head through the portal on the room’s other side.

This area is full of enemies, so be on your guard. As soon as you enter Shadow Cey-Tarn, head to the room on the right and go downstairs. You face off with an Ogrim and Ogrim Firebelly. The Ogrim will come right at you with melee attacks, while the Firebelly will hang back and sling ranged fire-based attacks. You’ll have no choice but to focus on the Ogrim first. After you defeat it, attack the Firebelly. Watch for the Firebelly’s AoE attacks. Basic Ogrim can already deal a decent amount of damage; getting hit by fire attacks will make this fight significantly harder.

Just behind the Ogrim is a note on the ground. Read it, then move down the hall and turn right through the door ahead. Head down the stairs and try to stay close to the room’s north side. There are several Ogrim on this side of the room that you need to clear out, as there’s another enemy in the center of the room that you should fight with undivided attention.

Watcher

The Watcher’s attack patterns are far from complicated, but if you allow the Ogrim on the room’s north side to get involved in the fight, defeating it will become a much more dangerous feat. At the start of the fight, immediately go behind it and stick to the room’s south side. If you’re unlucky enough to be fighting the Watcher long enough to allow for the Ogrim to respawn, you’ll be in deep netch leavings. Sticking to the room’s south side completely negates this risk.

The Watcher will spend most of its time pelting you with a basic eye-laser attack, but periodically it will reel back and shoot out a three-pronged eye laser, which it will drag across the ground in front of it. You can’t do much about the base laser attack, save for blocking, but you can absolutely get out of the way of the second one. If the second attack hits you, you’ll be temporarily stunned. Roll to shake it off, then get back into the fight.

Talk to Justiciar Hyircil

After defeating the Watcher, speak with Justiciar Hyircil, who is lying on the ground behind where the Watcher was positioned.

Head into the keep cellar once you’re done talking. Go down the stairs and enter the lair of the Insatiable.

The Insatiable

You’ll have to fight the Insatiable in this room in order to save Revelator Lindafwe. The Insatiable will mostly rely on chasing you and performing melee attacks, but it will also spit out a wide-spreading acid attack in front of it. It can be hard to see the path of the AoE on the ground because of the color of the floor, but if the Insatiable stops attacking, assume it’s about to spit and get behind it or to its side.

It can also summon two other Hungers to join the fight and help it temporarily. You can kill these, but not if it means being surrounded by all three of them. Instead, focus on evasion until the Hungers disappear, then get back to your attack on the Insatiable.

The Insatiable will also grab you on occasion and begin draining your health and healing itself in the process. Knock it off of you immediately to stop it from healing and to free yourself from its grasp.

Meet Your Allies Outside the Lair

Exit the lair through the marked door, then head through the portal on the opposite side of the room. Speak with Revelator Lindafwe in the next room.

You’re currently on the top floor of the entry room in the Vaults of Heinarwe. You’ll bump into a gryphon on the other end of the bridge ahead. You can try and fight it, or you can run straight past it and through the door to avoid the fight altogether. Gryphons are challenging enemies, so if you’re sporting for a fight, make sure you have a heal ability slotted in your action bar.

Gryphon

Like the Insatiable, gryphons are very aggressive and prefer a close, melee-based fight. It will occasionally rear back on its hind legs and come slamming down on the ground, hitting anything in a wide radius in front of it. If an AoE field appears in front of it, either race to its side or run away from it immediately.

The only other attack you absolutely must be on the lookout for is its lunge. It will leap back from time to time, which is a sign to get moving out of its path. When it jumps back, it will pause for a minute, then jump forward at a blindingly fast speed.

Find the Source of the Magicka Ripple

Enter the altar room behind the gryphon and head down to its lower level. Speak with Revelator Lindafwe when she appears on the lower level with you. Examine the book behind the large monument in the center of the room. It will give you instructions on how to use the monument. If you want the solution, read the “Using the Monument” note.

Using the Monument

You need to use the sigils in the following order: Anima, Ego, Incalescence, and Mortification.

Enter the portal once you’ve completed the ritual.

Teraniel

Teraniel is a powerful battlemage who can summon a Flame Atronach to her aid. She’ll spend most of her time trying to attack you at close range with her two-handed sword, but she will also cast a variety of spells, the most of dangerous of which has her charging up an interruptible attack that shoots trails of fire in a cross pattern across the floor. She doesn’t have a ton of health, so you can decide on whether to attack the Atronach based on how much health you’re losing during the fight. If you can manage it, focus exclusively on Teraniel and try to end the fight quickly. Once she’s dead, the Atronach will go with her.

Once Teraniel dies, head back through the portal you came through and speak with Silurie. You will be rewarded with Greaves of the Insatiable for completing the quest.

Keep reading with a free account

The first 3 sections of The Elder Scrolls Online: Summerset are open to everyone. An account opens the rest of it, and every other guide in the archive. It's free, and there's nothing to buy.

Bought guides on the old Prima Games site? Your account and every guide you own moved here, so there's nothing to buy again. Sign in.

Create a free account Or browse our free guides

PreviousRoom to Spare NextUntamed and Unleashed