Prima Games eGuides
primagames.com Browse Redeem a code Help
The Elder Scrolls Online: Summerset eGuide
Sign in My Guides

Sign in or create an account

We'll email you a link. No password needed, and if you don't have an account yet, the link makes one.

By creating an account or signing in, you agree to our Terms of Service and Privacy Policy.

Have a password?

Had an account on the old eGuides site, or a code from a printed guide? Help and troubleshooting

Sign in with a password

By signing in, you agree to our Terms of Service and Privacy Policy.

Check your email

A sign-in link is on its way. It works once and expires in 15 minutes. Open it and you're in, with an account if you didn't already have one.

Contents

  • Crafting and Armor
    • Introduction
    • Jewelry Crafting
    • Armor Sets
    • Craft Works Locations
    • Crafting Quests
  • The Psijic Order
    • Introduction
    • Unlocking the Psijic Order Skill Line
    • Rank 1
    • Rank 2
    • Rank 3
    • Rank 4
    • Rank 5
    • Rank 6
    • Rank 8
    • Rank 9
    • Rank 10
    • The Psijic Order Quest Line
  • Abyssal Geysers
    • Introduction
    • Minor Geysers
    • Geyser Locations
    • Geyser Bosses
  • Quests
    • Quest Index
    • Story Quests
      • Introduction
      • The Mind Trap
      • The Queen’s Decree
      • A Pearl of Great Price
      • Buried Memories
      • The Tower Sentinels
      • The Dreaming Cave
      • Lost in Translation
      • A Necessary Alliance
      • The Crystal Tower
      • A New Alliance
    • Side Quests
      • Introduction
      • A Duelist’s Dilemma
      • A Tale of Two Mothers
      • Aicessar’s Invitation
      • Bantering with Bandits
      • King’s Haven Pass
      • Culture Clash
      • Curinure’s Invitation
      • The Ebon Sanctum
      • The Forest Vandal
      • Gjadil’s Legacy
      • Gryphon Grievance
      • His Final Gift
      • The Hulkynd’s Heart
      • Illusions of Grandeur
      • Lauriel’s Lament
      • Lost Libations
      • Manor of Masques
      • Murder in Lillandril
      • Obedience Issues
      • Old Wounds
      • The Perils of Art
      • Room to Spare
      • The Taste of Fear
      • Untamed and Unleashed
      • Wasting Away
      • Storming the Walls
      • The Vaults of Moawita
      • Whispers from the Deep
    • Daily Solo Quest
      • Introduction
      • The Divine Deputation
    • Daily Group Quests
      • Introduction
      • The Sickening Sea
      • Taming the Wild
      • The Abyssal Alchemist
      • Never Forgotten
      • Run Aground
      • Birds of a Feather
      • Sinking Summerset (Daily)
  • Delves
    • Introduction
    • Completing a Delve
    • Archon’s Grove
    • Tor-Hame-Khard
    • Traitor’s Vault
    • Wasten Coraldale
    • King’s Haven Pass
    • Eton Nir Grotto
  • Dungeons and Trials
    • Introduction
    • Sunhold
    • Karnwasten
    • Cloudrest (Trial)
  • The Atlas of Summerset Isle
    • An Overview of the Lands of the High Elves
    • Summerset Isle: Region 1 (Northwest)
    • Summerset Isle: Region 2 (Southwest)
    • Summerset Isle: Region 3 (Northeast)
    • Summerset Isle: Region 4 (Southeast)
    • Summerset Isle: Region 5
  • Interactive World Maps
    • Summerset
    • Artaeum
  • Summerset Bestiary
    • Overview
    • Coral Crab
    • Giant Salamander
    • Gryphon
    • Indrik
    • Reef Viper
    • Sea Sload
    • Yaghra (Varieties)
    • Gloam Knight (Shadow of Nocturnal)
  • Appendices
    • Overview
    • Collections: Preorder
    • Collections: Collector’s Edition
    • Crafting Motifs
    • Crafting Sets
    • Equipment Sets
    • Jewelry Sketches
    • Furnishings
    • Quest Rewards
    • Rare Fish
    • Treasure Maps
    • Housing
    • Merchants
    • Crafting Stations
    • Skyshards
    • Thieves Guild Dead Drop Chests
  • Summerset Achievements
    • Overview
    • General Achievements
    • Exploration Achievements
    • Quest Achievements
    • Abyssal Geyser Achievements
    • Cloudrest Achievements
    • New Crafting Achievements
    • Achievement Rewards List
    • Achievement Furnishings
    • New Dragon Bones Achievements
    • New Midyear Mayhem Achievements

The Elder Scrolls Online: Summerset Guide › Quests › Daily Group Quests

Taming the Wild

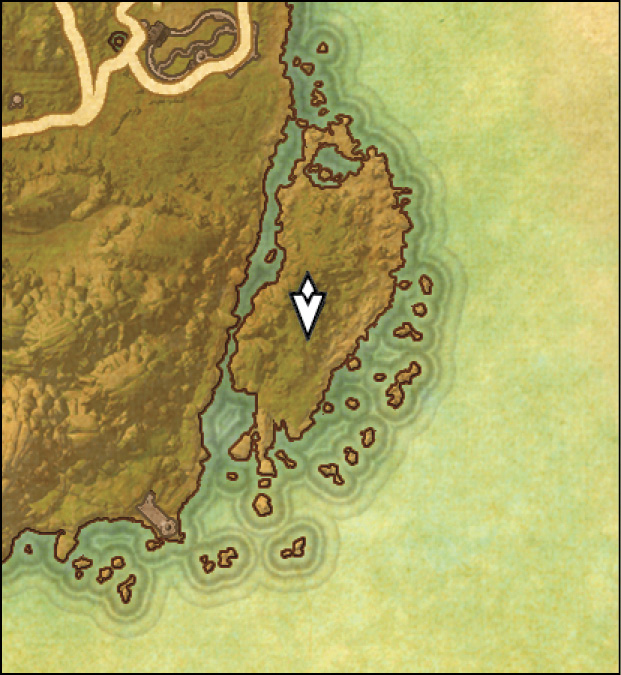
  • Location: Just north of central Alinor
  • Quest-giver: Justiciar Farowel

Description: Justiciar wants you to head to the Indrik Frolic and kill Caanerin. She also requests that you activate four Warding Stones surrounding the outside of the Frolic, then return to her.

Activate the Warding Stones

All four Warding Stones are located on the outer four corners of Caanerin’s dwelling. There are no tricks or traps to avoid. Simply activate each of them, then head into Caanerin’s dwelling. Each Warding Stone will cause an Indrik to spawn after activation; don’t let them catch you off guard.

Kill Caanerin

Most of Caanerin’s attacks revolve around the pools of water in its domicile. Caanerin can also teleport around the map through blue portals it creates, which can be surprising at first but is quite easy to follow if you know to look for both portals to determine where Caanerin will go next.

As we mentioned before, most of Caanerin’s attacks revolve around the water spread around the Indrik Frolic. Almost all of her attacks are elemental based and each element turns the water into hazards. One such move is Caanerin’s lightning attack, which has Caanerin hopping up and down while shooting lightning from her antlers. She will repeatedly strike a member of your group and also electrify every pool of water, making it damaging to step foot in one.

You’ll need to stick to the plots of land to avoid taking damage.

Caanerin can also turn all of the water poisonous after she shoots out four poison projectiles simultaneously. These projectiles will travel slow for a moment, then turn into elite Returned. Don’t leave the Returned to run amok. Defeat them immediately and avoid touching the water, then get back to attacking Caanerin directly.

Caanerin can also turn the water into flames while she runs around the area leaving a trail of flame behind her. Caanerin kind of goes her own way during this attack, not specifically targeting anyone. Aside from the pools of water being dangerous, this attack isn’t hard to avoid.

Her last elemental attack has her turning the water to ice while charging toward you with an ice vortex surrounding her. The water is still deadly, making it harder to keep your distance from her as she charges forward.

Every now and then she’ll begin floating in the air. While she floats, a stampede of spectral Indrik will pour out of her, charging in every direction and knocking anyone down who gets hit by one. While this attack seems completely chaotic, it’s important that you hold still during it. The spectral Indrik may be spreading in every direction, but they won’t attack a singular direction very frequently. If you just watch Caanerin while holding still, you’ll be able to see which Indriks are actually coming toward you while you ignore the others. On top of that, you can just put your guard up and avoid getting knocked over altogether.

Caanerin’s last major attack is easily the most difficult to avoid. She will begin spinning up a giant AoE around her. When it reaches critical mass, anyone in it will get blasted backward. If you get hit by the first blast, another, smaller AoE will begin forming around you. If you can’t avoid that one either, a third, even smaller AoE will form around you to blast you a third time. Blocking doesn’t stop this attack, so you’ll have to run as soon as you see the AoE begin to form around you.

Return to Justiciar Farowel

Once you’ve completed both objectives, head back to Justiciar Farowel in Alinor to claim your reward.

Keep reading with a free account

The first 3 sections of The Elder Scrolls Online: Summerset are open to everyone. An account opens the rest of it, and every other guide in the archive. It's free, and there's nothing to buy.

Bought guides on the old Prima Games site? Your account and every guide you own moved here, so there's nothing to buy again. Sign in.

Create a free account Or browse our free guides

PreviousThe Sickening Sea NextThe Abyssal Alchemist