
Prima Games eGuides
primagames.com Browse Redeem a code Help
The Elder Scrolls Online: Summerset eGuide
Sign in My Guides

Sign in or create an account

We'll email you a link. No password needed, and if you don't have an account yet, the link makes one.

By creating an account or signing in, you agree to our Terms of Service and Privacy Policy.

Have a password?

Had an account on the old eGuides site, or a code from a printed guide? Help and troubleshooting

Sign in with a password

By signing in, you agree to our Terms of Service and Privacy Policy.

Check your email

A sign-in link is on its way. It works once and expires in 15 minutes. Open it and you're in, with an account if you didn't already have one.

Contents

  • Crafting and Armor
    • Introduction
    • Jewelry Crafting
    • Armor Sets
    • Craft Works Locations
    • Crafting Quests
  • The Psijic Order
    • Introduction
    • Unlocking the Psijic Order Skill Line
    • Rank 1
    • Rank 2
    • Rank 3
    • Rank 4
    • Rank 5
    • Rank 6
    • Rank 8
    • Rank 9
    • Rank 10
    • The Psijic Order Quest Line
  • Abyssal Geysers
    • Introduction
    • Minor Geysers
    • Geyser Locations
    • Geyser Bosses
  • Quests
    • Quest Index
    • Story Quests
      • Introduction
      • The Mind Trap
      • The Queen’s Decree
      • A Pearl of Great Price
      • Buried Memories
      • The Tower Sentinels
      • The Dreaming Cave
      • Lost in Translation
      • A Necessary Alliance
      • The Crystal Tower
      • A New Alliance
    • Side Quests
      • Introduction
      • A Duelist’s Dilemma
      • A Tale of Two Mothers
      • Aicessar’s Invitation
      • Bantering with Bandits
      • King’s Haven Pass
      • Culture Clash
      • Curinure’s Invitation
      • The Ebon Sanctum
      • The Forest Vandal
      • Gjadil’s Legacy
      • Gryphon Grievance
      • His Final Gift
      • The Hulkynd’s Heart
      • Illusions of Grandeur
      • Lauriel’s Lament
      • Lost Libations
      • Manor of Masques
      • Murder in Lillandril
      • Obedience Issues
      • Old Wounds
      • The Perils of Art
      • Room to Spare
      • The Taste of Fear
      • Untamed and Unleashed
      • Wasting Away
      • Storming the Walls
      • The Vaults of Moawita
      • Whispers from the Deep
    • Daily Solo Quest
      • Introduction
      • The Divine Deputation
    • Daily Group Quests
      • Introduction
      • The Sickening Sea
      • Taming the Wild
      • The Abyssal Alchemist
      • Never Forgotten
      • Run Aground
      • Birds of a Feather
      • Sinking Summerset (Daily)
  • Delves
    • Introduction
    • Completing a Delve
    • Archon’s Grove
    • Tor-Hame-Khard
    • Traitor’s Vault
    • Wasten Coraldale
    • King’s Haven Pass
    • Eton Nir Grotto
  • Dungeons and Trials
    • Introduction
    • Sunhold
    • Karnwasten
    • Cloudrest (Trial)
  • The Atlas of Summerset Isle
    • An Overview of the Lands of the High Elves
    • Summerset Isle: Region 1 (Northwest)
    • Summerset Isle: Region 2 (Southwest)
    • Summerset Isle: Region 3 (Northeast)
    • Summerset Isle: Region 4 (Southeast)
    • Summerset Isle: Region 5
  • Interactive World Maps
    • Summerset
    • Artaeum
  • Summerset Bestiary
    • Overview
    • Coral Crab
    • Giant Salamander
    • Gryphon
    • Indrik
    • Reef Viper
    • Sea Sload
    • Yaghra (Varieties)
    • Gloam Knight (Shadow of Nocturnal)
  • Appendices
    • Overview
    • Collections: Preorder
    • Collections: Collector’s Edition
    • Crafting Motifs
    • Crafting Sets
    • Equipment Sets
    • Jewelry Sketches
    • Furnishings
    • Quest Rewards
    • Rare Fish
    • Treasure Maps
    • Housing
    • Merchants
    • Crafting Stations
    • Skyshards
    • Thieves Guild Dead Drop Chests
  • Summerset Achievements
    • Overview
    • General Achievements
    • Exploration Achievements
    • Quest Achievements
    • Abyssal Geyser Achievements
    • Cloudrest Achievements
    • New Crafting Achievements
    • Achievement Rewards List
    • Achievement Furnishings
    • New Dragon Bones Achievements
    • New Midyear Mayhem Achievements

The Elder Scrolls Online: Summerset Guide › Quests › Side Quests

Murder in Lillandril

  • Location: On the north side of Lillandril
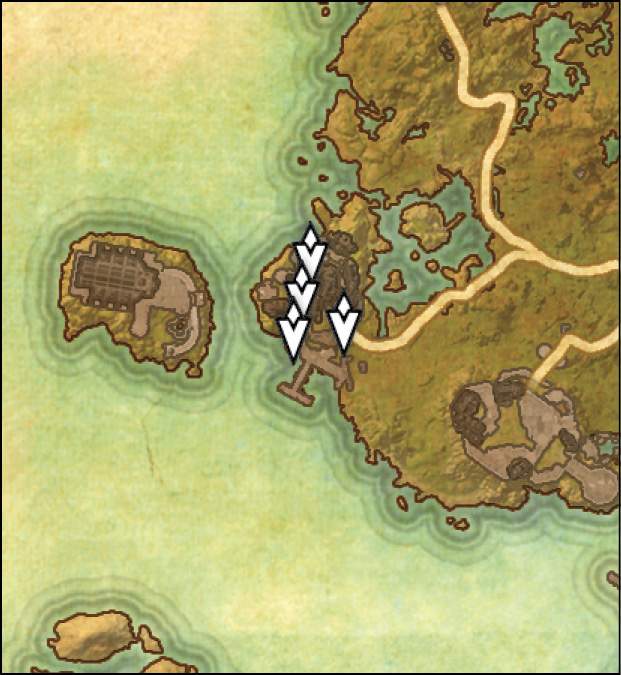
  • Quest-giver: Vivienne Muric

Description: The Sapiarchs are convinced that Vivienne Muric’s best friend committed murder most foul—though, he certainly didn’t help his case when he told them that he’s the guilty party. Vivienne claims that her friend is a pacifist, which makes his confession all the more confusing. Get to the bottom of this strange case and find out what’s really going on.

Speak with Emile

After speaking with Vivienne, enter the Fighters Guild. Head through the second door on the right and speak with Emile. Afterward, speak with Calawende just outside Emile’s room.

Enter Galidor’s Room

Exit the Fighters Guild and head to the Shrewd Brew inn on Lillandril’s east side. Go to the top floor and examine the items in Galidor’s room. Note the words in all capital letters in each of his writings. Once you’ve examined all three, head to the room’s southern corner and investigate Galidor’s Warded Ledger. You’ll need to use clues from the three letters to break through Galidor’s ward. We’ll leave the code cracking to you, but if you want to get right to the point, read the “Breaking Galidor’s Ward” note for the solution.

Breaking Galidor’s Ward

Each letter has a written number and word in capital letters. The word is part of the password and the number is the order it needs to be selected in to open the ledger. The password is: Mischief for Money

After you read the ledger, exit the building and speak with Calawende, who is conveniently waiting out front.

Make your way to the docks on the south end of Lillandril. Look for Milerond, Emile’s arresting officer. After speaking with Milerond, make your way along the beach southeast to the Saltbreeze Cave.

Saltbreeze Cave

Saltbreeze Cave is a pretty simple place to get around enemy-wise, but you will need to be on constant alert to avoid bumping into the handful of Wispmothers that inhabit its waters. To reach the objective, stick to the east wall and wrap around the entire horseshoe-shaped cave.

Gerwerdel

Once you arrive at the objective marker, you must defeat a warrior clad in what appears to be stone. She may be an elite enemy, but she only has a standard warrior’s skill set. Just keep your eyes open for AoE attacks and you’ll be fine. Everything she does is heavily telegraphed, so you’ll have more than enough time to move out of the way when the time comes.

Once you defeat her, investigate the Sapiarch’s Chest in the corner of the room. Now enter the door on the room’s opposite side to reach the Sapiarch’s Laboratory. A woman named Norasea is on the room’s far side. Speak with her.

Search the room for Haladan’s notes, then leave Saltbreeze Cave and head back to Emile.

You’ll be given the choice on how to wrap up this quest. If you’re struggling with the decision, you can speak with both Vivienne and Calawende to get views on both sides of the situation. Ultimately the choice is yours. Speak with Emile to let him know what choice you’ve made.

Speak with Sapiarch Soraturil

After speaking with Emile, talk to Sapiarch Soraturil to let him know the results of your investigation. You’ll receive Fallen Scholar’s Epaulets for your efforts.

Keep reading with a free account

The first 3 sections of The Elder Scrolls Online: Summerset are open to everyone. An account opens the rest of it, and every other guide in the archive. It's free, and there's nothing to buy.

Bought guides on the old Prima Games site? Your account and every guide you own moved here, so there's nothing to buy again. Sign in.

Create a free account Or browse our free guides

PreviousManor of Masques NextObedience Issues