
Evolve Official Strategy Guide HUNTER Support
Cabot
“Everyone gear up. Let’s find this thing and earn our keep.” — Cabot

If we judge a man by the friends he keeps, then Cabot has some explaining to do. As the wrangler of this motley crew, Cabot helps teammates by using his Dust Tagging to track the Monster and his Rail Cannon to put it down. But there’s nothing more helpful than his trusty Damage Amp, which makes his squad pack an even bigger punch.
Skins
| Skin | How to Unlock |
|---|---|
| Default | Unlocked with Cabot. |
| Cabot Elite Skin | Earn 3 stars in all items in Character Mastery. |
Loadout
| Iconw | Item | Description |
|---|---|---|
 |
Rail Cannon | Prey can’t hide when you can fire through objects with your trusty Railgun. |
 |
Damage Amplifier | Target your enemy to boost the damage done by your teammates’ weapons. |
 |
Dust Tagging | Drop tagging dust in an area to mark all life forms. |
 |
Cloaking Field | Grants temporary invisibility to Cabot and nearby Hunters. |
Character Mastery
| Tier 1 Requirements | Tier 2 Requirements | Tier 3 Requirements | ||||
|---|---|---|---|---|---|---|
| Requirement | Buff | Requirement | Buff | Requirement | Buff | |
| Rail Cannon | Do 12,000 damage | Damage increase | Do 34,000 damage to the Monster | Damage increase | Do 26,000 headshot damage to the Monster | Damage increase |
| Damage Amplifier | Amplify 9,000 damage | Energy pool increase | Amplify 24,000 damage to the Monster | Energy pool increase | Amplify 54 damage in a single use 250 times | Energy pool increase |
| Dust Tagging | Reveal 70 creatures | Radius increase | Reveal the Monster 60 times | Radius increase | Reveal the Stage 1 Monster 25 times | Radius increase |
Mastery Unlocks
You must complete all mastery challenges within the same tier set before moving on to the next set. Progress toward the next challenges will not be accrued before being unlocked.
- Tier 1: Badge Foreground
- Tier 2: Badge Foreground
- Tier 3: Badge Foreground, Cabot Elite Skin
Awards
| Award | Description | XP Earned |
|---|---|---|
| Hypersonic | Deal 2000 damage to the Monster with the Rail Cannon. | 50 |
| Amped Up | Provide 1000 Damage Amplification. | 50 |
| Tag and Bag | Reveal the Monster two times with Dust Tagging. | 100 |
| Now You See Me | Cloak two Hunters at once with the Cloaking Field. | 100 |
Loadout
Cabot is in charge of this odd bunch of Hunters and is equipped with one of the more interesting loadouts in the game. His Dust Tagging ability allows him to mark the Monster and all wildlife within the dust’s radius. Pair that with a Rail Cannon that can shoot through walls, and many a Monster will be surprised. Finally, you can use a Damage Amplifier in combat to boost everyone’s damage output.

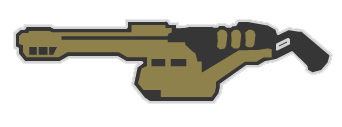 Rail Cannon

Mastery Reward: Increased Damage
Max damage: 210 Damage on a Direct Hit
Max Obstacle Penetration: 40 Meters
Ammo Capacity: 1 Round
The Rail Cannon is a powerful single-shot weapon that can fire through walls. Press the Primary button to equip the rifle, and squeeze the Fire trigger to discharge the instantaneous blast. The gun is automatically reloaded after every shot, giving it a poor fire rate.


This weapon pairs very well with Cabot’s Dust Tagging ability. Being able to see a highlight of marked wildlife or the Monster allows Cabot to injure an enemy that believes they are safe behind an object. Note that it is at a reduction of damage because the shot is weakened as it travels through an obstacle.
In combat, when near the Monster, it is best to use the Damage Amplifier to support the rest of the team. But it is worth switching over to the Rail Cannon to get in the occasional shot, especially as the other ability recharges.
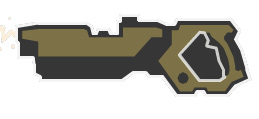 Damage Amplifier

Mastery Reward: Increased Energy Pool
Max Amount of Bonus Damage: 1000
Recharge Time from Empty: 17 Seconds
Max Range: 35 Meters

The rest of the team can get a nice boost in damage output when Cabot uses the Damage Amplifier. Tap the Secondary button to switch to the device. Aim at the enemy, and squeeze the Fire trigger. A ray between the gun and target indicates that it is working. Anyone who fires on the foe gets a damage bonus. Hold the button down to maintain the effect. Once released, there is no bonus.
Coordinate this ability with your Assault Hunter since he will be engaged most with the Monster. Call it out when available, and release the trigger when nobody attacks. Learn to use it efficiently to maximize the effect. Switch to the Rail Cannon when the Damage Amplifier does not make sense.

Using the Damage Amplifier is typically more important during a fight than doing damage yourself with the Rail Cannon. Remember that using this device reveals your location when cloaked.

 Dust Tagging

Mastery Reward: Increased Radius
Outline Duration: 20 Seconds
Cooldown:70 Seconds
Effective Radius: 60 Meters
Dust Tagging allows Cabot to do his own Monster tracking. Tap the Equipment button to equip the radioactive dust. Using the ability is similar to Hank’s Orbital Barrage. A green graphic of a bomb indicates that the dust can be dropped at that location. The reticle must be placed on the ground. To drop it on a higher location, aim at the edge of the structure or cliff. Hold the Fire trigger down until the red bar fills up.


Just like Orbital Barrage, you cannot use this ability under cover. A red graphic of a bomb crossed out signifies when it cannot be used. Dust Tagging does not knock teammates away, but you don’t want to waste the stuff by dropping it next to anyone.
The Dust Tagging outlines any creatures within the dust cloud, allowing you to see where they go through any objects. Ideally, this is used to find a hiding Monster, but it is also good to see what wildlife lies ahead. If a feeding zone is found, there is a chance the big guy is going to pass through at some point.
If you are at a loss, toss some dust into a probable location in hopes of getting a lucky find. At the very least, you can figure out where the Monster is not. Remember that there is also a Trapper on the team who is doing their own tracking.
“And you all know what happens if we mess this up…”— Cabot


