
Evolve Official Strategy Guide HUNTER Medic
Lazarus
“They know you are unnatural, and it displeases them.” — lazarus

What kind of Medic purposely lets his comrades die? One with a badass gun and the ability to restore life to the dead. Slipping past predators with a Silenced Sniper Rifle and Personal Cloak, Lazarus brings fallen allies back from death—even if they’re now technically zombies.
Skins
| Skin | How to Unlock |
|---|---|
| Default | Unlocked with Lazarus |
| Lazarus Elite Skin | Earn 3 stars in all items in Character Mastery. |
Loadout
| Icon | Item | Description |
|---|---|---|
 |
Silenced Sniper Rifle | Semi-automatic rifle that creates weak points in the Monster’s armor. |
 |
Lazarus Device | Slightly illegal device that instantly revives dead comrades. |
 |
Personal Cloak | Temporary invisibility allows Lazarus to sneak past threats. |
 |
Healing Burst | Short burst of rejuvenating energy that heals Lazarus and nearby allies. |
Character Mastery
| Tier 1 Requirements | Tier 2 Requirements | Tier 3 Requirements | ||||
|---|---|---|---|---|---|---|
| Requirement | Buff | Requirement | Buff | Requirement | Buff | |
| Silenced Sniper Rifle | Place 200 targets on the Monster | Damage increase | Teammates must do 270 damage by hitting Lazarus’s targets on the Monster | Damage increase | Place 150 headshot targets on the Monster | Damage increase |
| Lazarus Device | Use the Lazarus Device 4 times | Recharge rate increase | Use the Lazarus Device 28 times on teammates | Recharge rate increase | Use the Lazarus Device on 3 teammates in a single match 25 times | Recharge rate increase |
| Personal Cloak | Cloak revive 7 creatures with the Lazarus Device | Duration increase | Cloak revive 22 teammates with the Lazarus Device | Duration increase | Cloak revive 3 teammates in a single match 25 times with the Lazarus Device | Duration increase |
Mastery Unlocks
You must complete all mastery challenges within the same tier set before moving on to the next set. Progress toward the next challenges will not be accrued before being unlocked.
- Tier 1:Caira
- Tier 2: Badge Foreground
- Tier 3: Badge Foreground, Lazarus Elite Skin
Awards
| Award | Description | XP Earned |
|---|---|---|
| Silent and Deadly | Mark the Monster four times with the Silenced Sniper Rifle. | 50 |
| Revivified | Revivify two Hunters with the Lazarus Device. | 100 |
| Friendly Ghost | Revive or revivify multiple Hunters while using Personal Cloak. | 50 |
| Medic! | Heal two Hunters at once with the Healing Burst. | 100 |
Loadout
Lazarus is the only Medic who doesn’t possess a second healing ability. Instead, his Lazarus Device brings a character back from the dead, an extremely valuable skill—provided the team can keep him alive. Lazarus also carries a sniper rifle similar to Val’s, but his has a faster fire rate.

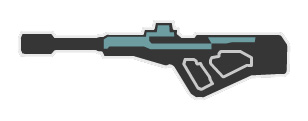 Silenced Sniper Rifle

Mastery Reward: Increased Damage
Damage per Bullet: 30
Weak Spot Damage Multiplier: 1.5X
Ammo Capacity:10 Rounds
Lazarus’ Silenced Sniper Rifle is a semi-automatic rifle that creates weak spots in the Monster’s armor. Press the Primary button to equip the gun, and squeeze the trigger to fire. The Aim button allows you to zoom in through the built-in scope, granting more accurate shots. You can press the Reload button any time before the 10-bullet clip runs out to fill it back up.

Hitting wildlife or the Monster with Lazarus’ sniper rifle places diamond-shaped targets on the enemy. The Hunters can then hit these marks for extra damage. This pairs nicely with high-powered guns like the Rail Cannon.


This may sound similar to Val’s sniper rifle, but Lazarus’ weapon is semi-automatic and produces no tracers. It shoots as fast as you can tap the Fire button. This allows you to spread out many weak spots in the Monster’s armor, while spending less time doing so. However, the damage bonus is less than what Val’s gun produces.
When the Monster is first found and the Mobile Arena is deployed, hit the beast with as many shots from your sniper rifle as possible. Line the foe up in your sights, and rapidly tap the Fire button to lay down as many weak spots as you can. Spread them out so that inaccurate weapons have a better shot of getting the damage boost.
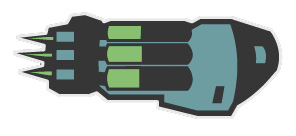 Lazarus Device

Mastery Reward: Increased Recharge Rate
Cooldown: 12 Seconds
Trigger Time: 1 Second
The Lazarus Device is what makes Lazarus who he is. With it, he can bring dead Hunters back to life. Tap the Secondary button to equip the device. Approach a downed or dead character, and hold the Fire button until the red charging meter fills up. Reviving a Hunter with this device does not add a strike to his or her health.


When a Hunter dies, an icon appears above with a semi-circle meter over the top. This slowly counts down until that Hunter can no longer be revived. Get to the victim before the body disappears. Remember that you can use the device on an incapacitated character.
When Lazarus is on the team, it is important to avoid picking up downed Hunters, unless of course it is the Medic who has been incapacitated. Avoiding strikes against the Hunters helps greatly down the road.
Be patient with your revives. There is plenty of time to get to the Hunter once he or she has been incapacitated. Wait for the Monster to lose interest, use the Personal Cloak, and sneak over to the Hunter corpse unnoticed.

Note that a Hunter’s health will be low after being revived. Immediately use a Healing Burst if available.
When Lazarus is teamed up with Maggie, Daisy tends to avoid reviving the Hunters unless necessary. This helps when trying to avoid strikes.
 Personal Cloak

Mastery Reward: Increased Duration
Cooldown: 35 Seconds
Max Duration: 12 Seconds
The Support class has the Cloaking Field ability, but Lazarus has his own personal one. Tap the Equipment button to go invisible temporarily. This allows Lazarus to sneak past enemies or walk over to a helpless Hunter.


Call out to your team when deploying the Personal Cloak. That way, your Support Hunter doesn’t double up with his Cloaking Field. When a fight turns bad, Lazarus needs as much invisibility time as he can get.
Whenever possible, save the Personal Cloak for revives. Frequently, the Monster will keep an eye on downed Hunters, especially when Lazarus is on the team, so stealth is vital for getting to them. Go invisible, sneak over to the incapacitated character, perform the resurrection, and quickly get out.
Watch out, as Goliath’s Fire Breath can reveal a cloaked Hunter’s location. Try to stay out of reach of his attacks. Water puts out the flame, if there happens to be any nearby.
“The Reviver is fully charged! You may die as often as you wish!” — Lazarus


“What possible reason would I have to bend the laws of life and death in this manner?” — Lazarus