
The Witcher 3: Wild Hunt Guide Appendices and Compendiums The Bestiary
Special Bosses
The Wild Hunt commanders you face throughout your adventure are technically humanoids, but they are nothing like the humanoids you normally face out in the world. The crones may have once been human, but their twisted rituals and magic have in turn twisted their bodies into the most dangerous relicts a witcher can face. These special encounters have specific tactics that differ from other combat encounters you will face, and so we have separated them into their own section of the Bestiary.
The Crones: Brewess, Whispess, and Weavess
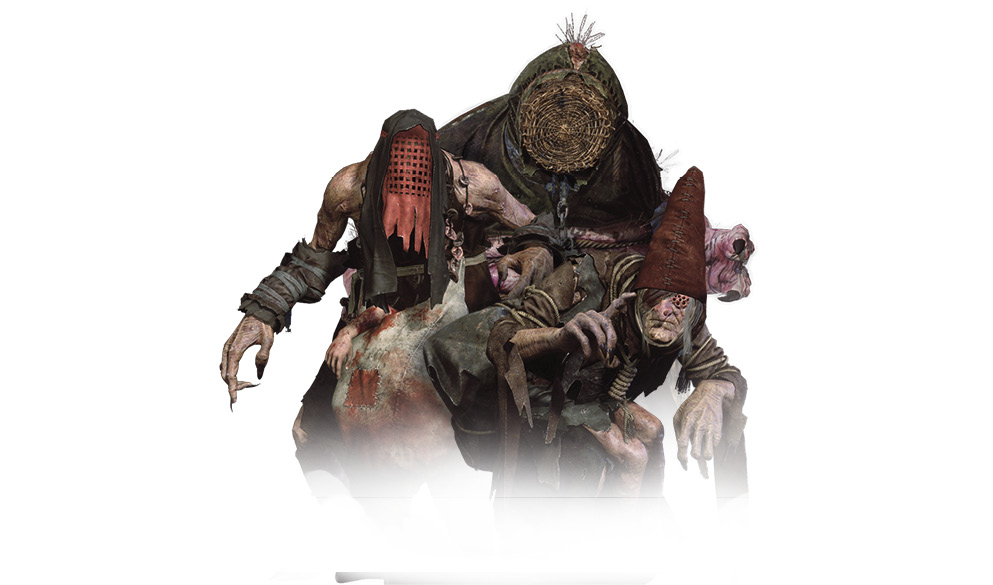
| Environments: Velen, Bald Mountain |
| Vulnerabilities: Relict Oil, Quen |
“Sister crones, hand in hand, terrors of the sea and land, thus do go about, about: thrice to thine and thrice to mine, and thrice again, to make up nine.”—Macveth, Act 1, Scene 3
The isolated corners of our world harbor creatures older than humans, older than academies and mages, older even than elves and dwarves. The Crones of Crookback Bog are such creatures. No one knows their true names, nor what breed of monstrosity they in fact are.
Common folk have given these three sisters the names Weavess, Brewess and Whispess, and call the whole threesome “The Ladies of the Wood,” or simply “The Good Ladies.” The crones act as the true sovereigns of Velen, whose inhabitants they help survive through harsh times in return for unquestioning obedience. They wield powerful magic, but one different from that of mages. They draw power from water and earth and are bound to the land in which they live. The crones can hear everything that happens in their woods, predict the future, twist the threads of human lives and bring blessings as well as curses.
The Crones seem for all intents and purposes to be immortal. Magic elixirs keep them from aging and allow them to take the appearance of young women. These elixirs and their mystical ties to the swamps in which they live also give them supernatural strength and Vitality.
Combat Tactics
The crones are the true rulers of Velen, and are as powerful as they are wicked and hideous. In the aftermath of the assault on Kaer Mohren, Ciri and Geralt strike at the crones in hopes of also reaching one of the Wild Hunt’s commanders, Imlerith.
Ciri vs The Crones
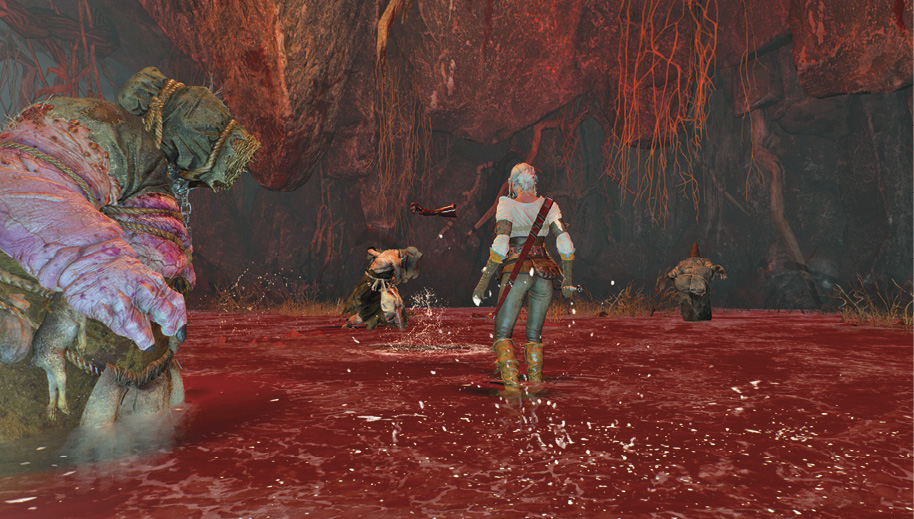
Fighting the three “Good Ladies” at once would be a tall order for Geralt. For Ciri, newly awakened to a portion of the powers she possesses, this is a good fight. Which is not to say that you can afford to be lax in your defenses.
Brewess, the large rotund crone, should be Ciri’s first target. She’s the easiest target due to her size, and Ciri can easily evade her melee attacks while attacking relentlessly. You can also use Ciri’s teleport slashes to wreck havoc on all three crones at once, but you will defeat them faster by focusing your melee attacks on one at a time, using a mix of fast and heavy attacks.
Whispess, the crone with the red hood hanging over her face, will reach into the bloody water at her feet to throw the limbs of her unfortunate victims at Ciri. Watch out for this and teleport out of the way. Keep your eyes out of disturbances in the water, and avoid standing in them. They can also seemingly explode into a flock of crows that distract Ciri and interrupt her attacks, typically in response to damage they sustain.
For all their bluster, the greatest threat when dealing with the three crones is overconfidence. They do hit fairly hard, if they are allowed to hit. Ciri’s speed and ability to teleport can make her safe from anything the crones can throw at her. Stay on the offense, but not to such an extent that defense is neglected.
Geralt vs Weavess
This optional battle occurs only during one of the ending paths. See page 334 for details on the version of Something Ends, Something Begins leading into slaying the last crone.
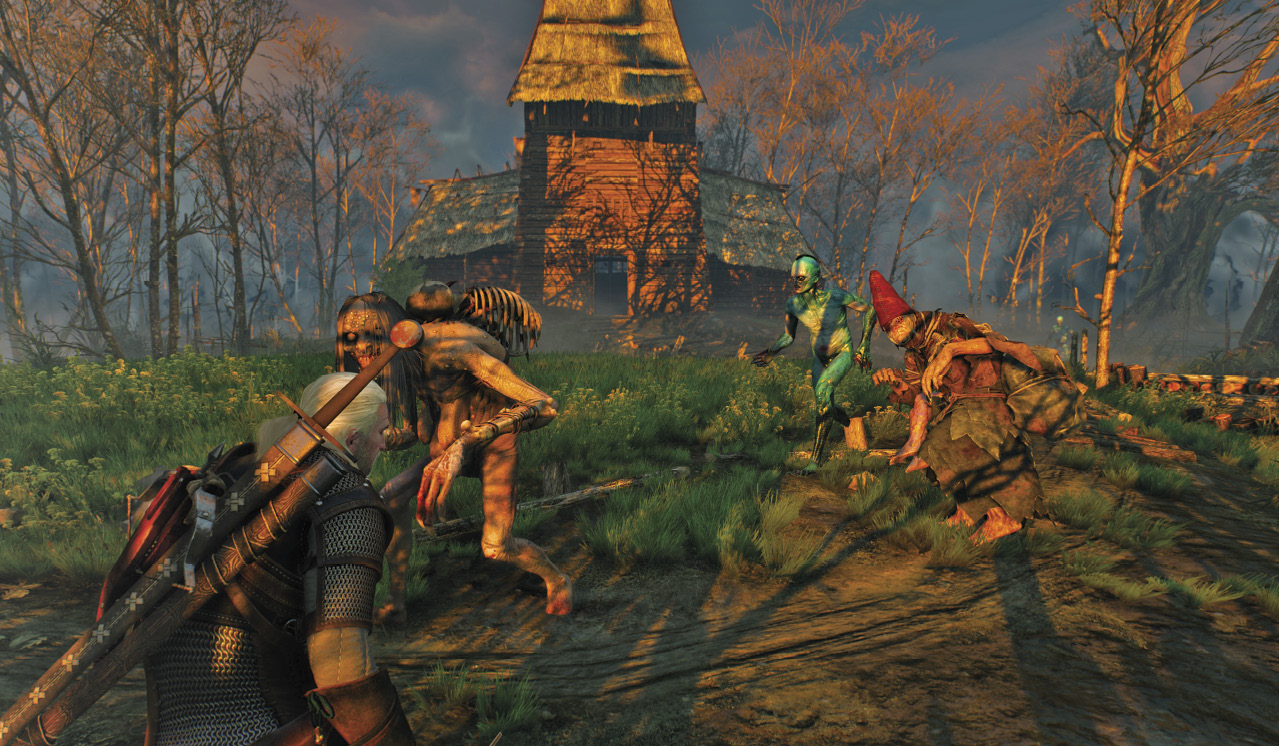
Weavess is far from alone in this battle. Drowners are an almost constant presence, and will continue to arrive in support of Weavess. The fight also begins with a grave hag in the mix. Focus on slaying the other monsters before focusing on Weavess. It helps to come into the fight with necrophage oil already applied to your silver sword, if only to facilitate the prompt removal of Weavess’ allies.
Surprisingly fast on her feet, Weavess can quickly escape Geralt without resorting to teleportation. This also makes her a serious threat while Geralt fights off her necrophage allies: she can and will use that distraction to flank the witcher with powerful melee strikes. She can still use her teleport after taking damage, as she did during the battle against Ciri.
This fight can get chaotic very quickly if you do not eliminate the initial wave of necrophages early. Use Yrden to slow down the mob, and blast them with Igni to set them aflame. The time they spend burning is time they spend not moving or attacking Geralt. Tawny Owl is an excellent potion to use throughout this fight, as you will want to make as much use of signs to keep things under control. Black Blood is a way to weaken the drowners and hags that come to the Crone’s aid.
Igni is also useful against Weavess, even if she is not explicitly weak to its effects. Weavess will trans form into a flock of crows to distract Geralt and escape his melee range. Use Moon Dust bombs on her to prevent this. Like the drowners and grave hag that assist her, when on fire Weavess is temporarily disabled and you can score several free hits before she recovers.
Use bombs like Dancing Star or Grapeshot to clear the field of lesser creatures. Try to make sure you strike groups of targets with the bombs, rather than wasting one bomb for one monster. The key to fighting Weavess in melee is to make good use of the dodge roll, rolling away from her attacks while still staying in range to exploit opportunities for strong attacks. If you have any strong, explosive crossbow bolts to spare, now is an excellent time to make use of them.
So long as you remain calm, focus on preventing taking damage while maintaining pressure on Weavess, without losing control of the number of enemies that come to support her, vengeance will be yours. It’s a tall order to juggle all these factors at once.
Nithral
| Environments: Velen, Elven Ruins |
.jpg)
Combat Tactics
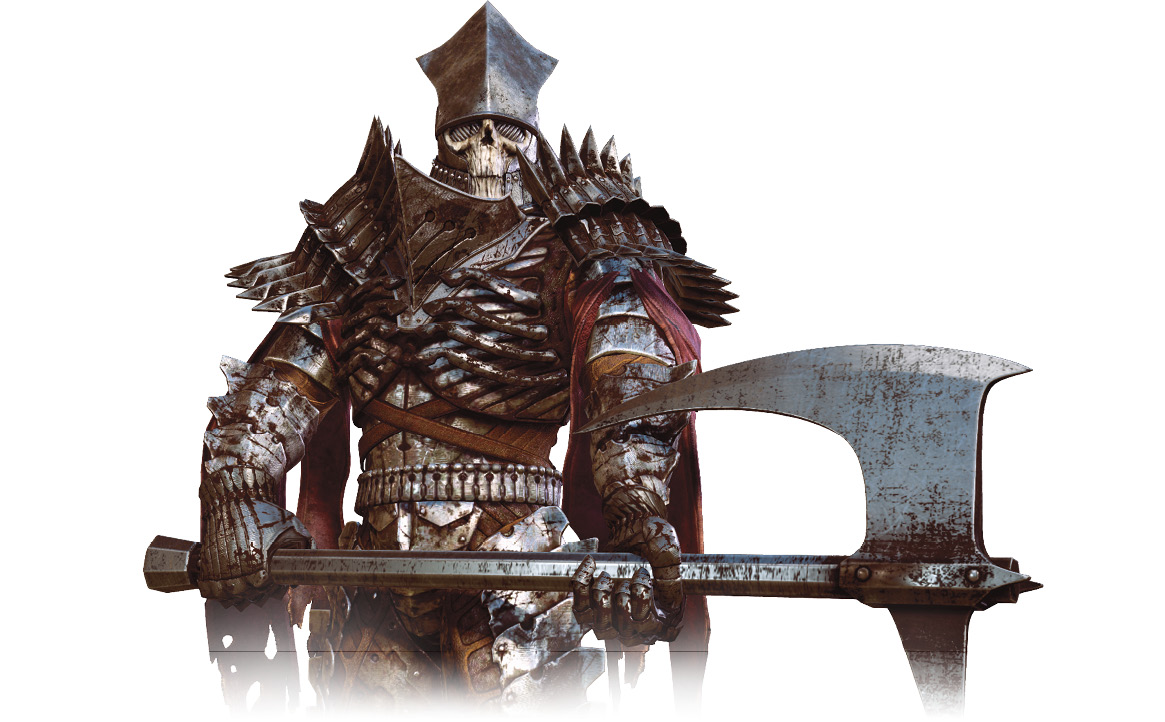
Nithral is a Wild Hunt commander encountered in the Main Quest ”Wandering In The Dark’,” and he is a very dangerous opponent early in the adventure. Try going into this fight with elementa oil coating your silver sword.
At first, Nithral takes on Geralt and Keira alone. His two-handed axe cannot be parried or countered; dodges and evasive rolls will keep you in one piece. The trick to beating Nithral is to bait him into attacking, dodging away from the attack, and striking with your sword. There is a rhythm to the fight, and if you get it right, between your sword and Keira’s magic, Nirthal should not be able to touch you.
After sustaining enough damage, Nithral falls to his knees, summoning a protective shield, and calling forth a portal that summons hounds of the Wild Hunt. This is why it is important to apply the elemental oil! Quickly smash the hounds, the longer your take, the more Vitality Nithral restores while behind the shield!
Once the first wave of reinforcements is defeated Nithral drops his protective energy shield to face you once again. Unfortunately for him, he hasn’t learned how not to fall prey to the previous strategy while behind the shield. Once you wittle down his Vitality once more, he summons the shield again, as well as another portal that sends more hounds after you.
This part of the fight can get difficult if you are reckless. Use Samum to blind the warriors, then flank and kill them. Be especially careful around the spear wielding foes, they have a reach advantage on Geralt.
Throughout this fight, the Melt Armor ability that enhances Igni is invaluable. All Wild Hunt warriors and their commanders wear thick armor, and being able to cut down their protection permanently can do wonders.
After the second wave of reinforcements is brought down, Nithral stands alone. Finish him off!
Imlerith
Combat Tactics
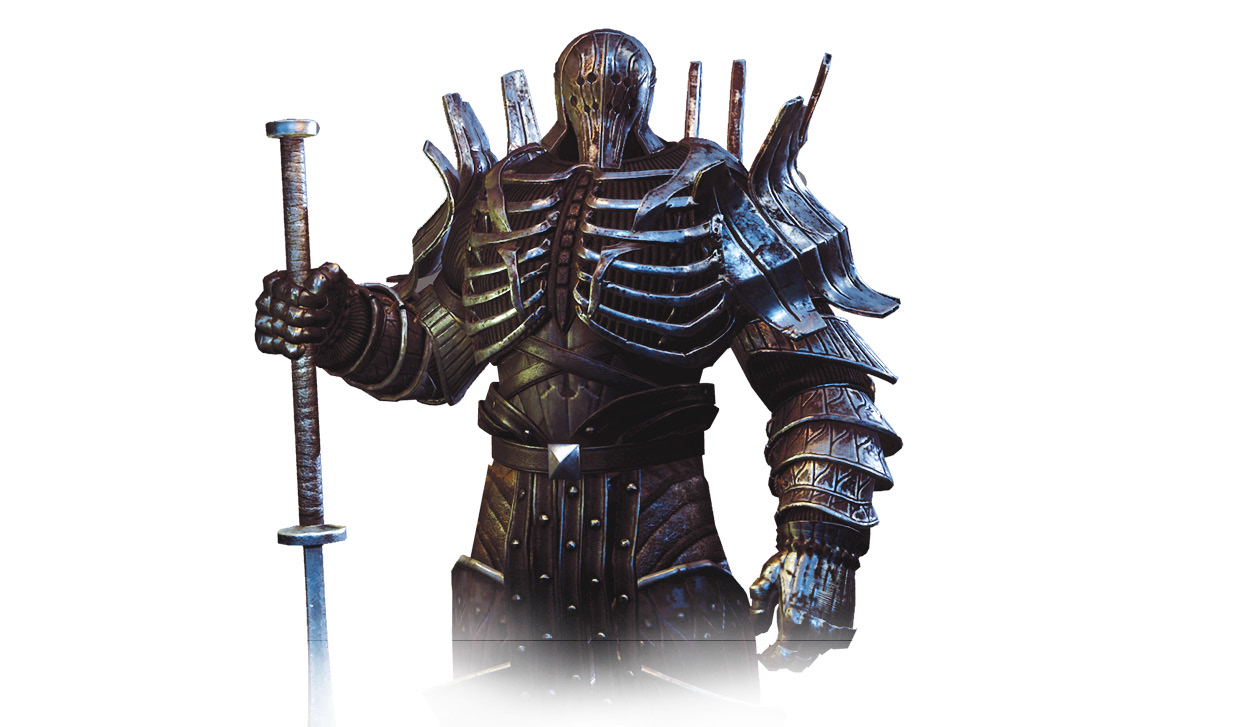
Imlerith’s heavy armor, war mace, and shield all serve to make him look intimidating and slow. That illusion should be forgotten as soon as the monstrous Wild Hunt commander teleports behind Geralt at the start of the fight to take a swing for his head with that massive mace. As soon as you can, make use of any potions that can boost your survivability, Tawny Owl, Swallow, Full Moon, and blizzard are all good choices. Players confident in their ability to keep damage to a minimum can imbibe Thunderbolt to make each strike count.
Every time Imlerith teleports, he gains Ice Armor, evidenced by frost growing over his outfit. Melt this off with Igni when openings allow for it. During the final phase of the fight, when Imlerith teleports near incessantly between every attack, you may not have the time to blast off the Ice Armor, and will have to settle with scoring strong attacks though his increased defenses.
The mace cannot be parried or countered, only dodged or rolled away from. Stay relatively close to Imlerith, dodging his swipes and jabs of the mace. The goal initially is to flank him so you can strike at the huntsman behind the shield.
Roll at Imlerith just as he starts to teleport, this will put you out of range of his attacks after he reappears right behind where you were standing.
Imlerith’s shield stops nearly everything you can throw at it. He will occasionally use the shield in the middle of melee combinations to knock Geralt to the ground. You can use bombs such as Grapeshot to bypass the shield and buy yourself some breathing room.
Attacking Imlerith is about taking advantage of openings. You can either evade, then strike, or you can catch him in between his own attacks with a fast attack of your own. The latter strategy can go very poorly if your timing is at all off.
Repeated strikes against his shield will cause it to warp and bend, eventually making it possible to knock it aside, leaving an opening to attack.
Dancing Star and Grapeshot bombs can deal damage and break him out of his combination attacks. Samum is incredibly effective at blinding Imlerith, allowing you a chance to flank him and possibly set up a good Rend, if you have that ability.
At roughly 20 percent of his Vitality, Imlerith throws down his shield in a fury, abandoning defense for an all-out assault. He begins swinging the mace wildly, interspersing his attacks with teleports behind Geralt. Again, do not attempt to parry or counter these attacks.
With the right activated Ability from the Signs tree, Igni can reduce Imlerith’s effective defense for the rest of the fight. In this final phase of the fight, focus on dodging and rolling to keep Geralt out of harm’s way, until Imlerith takes a massive overhead swing that gets the mace stuck in the ground. That is the opening to score a heavy strike on the general. He recovers the instant you strike him, so be prepared to evade another attack from behind when he teleports.
If you have the Fleet Footed Combat Ability activated, you can reduce damage taken if you’re caught by the mace in mid-roll.
Above all else, remain patient. Imlerith cannot be interrupted from his furious swipes and teleports in the final phase, so wait for him to make himself vulnerable before attacking.
Tawny Owl is a good potion to have ready, allowing you to quickly regain Stamina for the repeated uses of Igni and Quen needed for this fight.
Caranthir
Combat Tactics
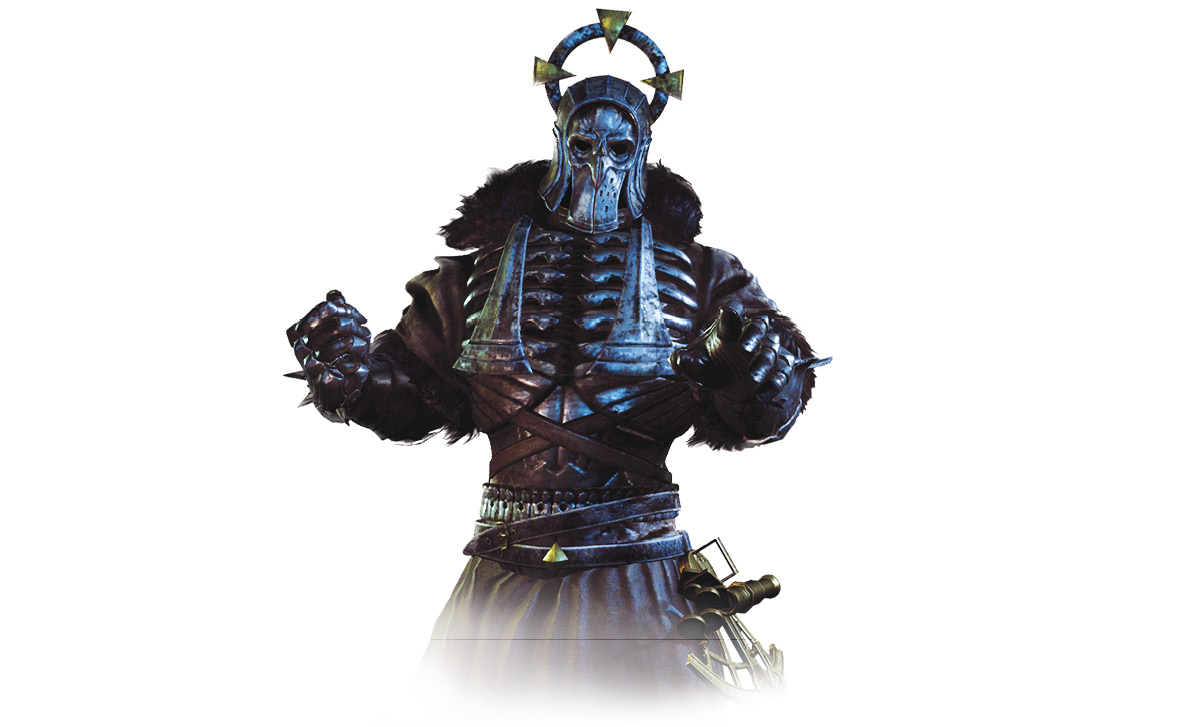
There are two parts to this fight, beginning with Ciri. Caranthir attempts to engage in melee combat against the swordswoman, but as you are by now very familiar with, she is incredibly skilled and powerful. Rush him down and slash away with her sword.
He teleports when he takes enough damage, usually far enough away from Ciri that she cannot reach him during her lunging sword strikes. You can either sprint over to him to continue the offensive, or use Ciri’s teleport slash to reach him even faster. Beware that Caranthir can also teleport directly behind Ciri for a surprise attack, but this can easily be countered with a fast attack or the teleport slash.
As with Imlerith, Caranthir gains Ice Armor when he teleports. Ciri cannot do anything about that, but Geralt can use Igni to melt the ice and temporarily stagger Caranthir.
Once you deal enough damage to Caranthir as Ciri, an impressive cutscene plays out, with Ciri ending the spell Caranthir has been maintaining. After more drama unfolds, Geralt arrives to finish off the Wild Hunt sorcerer.
Caranthir steps up his efforts to defend himself with Geralt on the scene. One of his new attacks is to summon five lances of light over his head, and after a short delay he will fire them en masse at the witcher. Should he be struck by this barrage, Geralt will be partially frozen, slowing him down and making it harder to avoid other attacks.
Caranthir can also fire singular bolts of this powerful ice magic in fairly quick succession at Geralt. Roll to evade these targeted spells.
As when he fought Ciri, Caranthir teleports after sustaining damage from Geralt. After teleporting, he uses either version of his ice bolts. Work your way to Caranthir as quickly as possible to attack him, lest he teleports again. Striking him as he is preparing his ice bolts will cancel his attacks.
As you wear Caranthir down, he summons ice elementals into the arena. He is vulnerable during the summoning, so take that opportunity to hit him as much as possible before switching your focus to the ice elementals. Use Dimeritium Bombs on the elementals to help weaken them, but don’t forget that Caranthir will still be firing his magic at Geralt. You’ll have to be mindful of his attacks, while also dealing with the ice elementals own abilities. Try to get rid of these foes first before returning your attention to Caranthir. If you allow multiple elementals to be summoned, it will be that much harder to address the sorcerer.
The ice elementals can be used as cover from Caranthir’s ranged magic, if they are standing between Geralt and him.
This can be a punishing and long fight to deal with, so stay focused on limiting the amount of harm Geralt endures. Once you do manage to defeat Caranthir, he will attempt one last suicidal attack, teleporting both himself and Geralt into the waters beneath the ice. Swim for the surface as fast as you can to avoid drowning!
Eredin
Combat Tactics
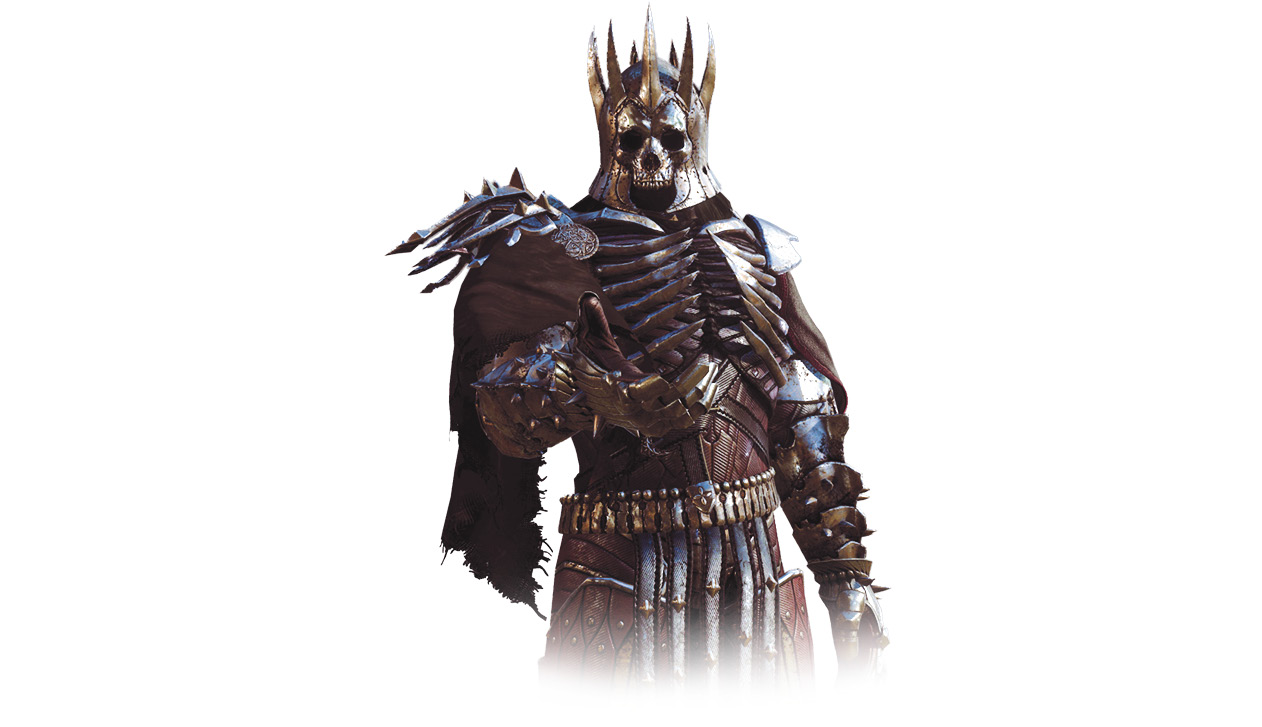
The battle against the Wild Hunt overlord begins with him taunting you. Take that time to duck into your items menu and use potions that will help you stay in the fight. Tawny Owl, Swallow, and Full Moon are all good choices if you’ve made the higher quality brews.
The first phase of the fight can be very short, depending on your skill and your gear. Eredin hits quite hard even against a well-armored witcher.
Eredin’s defenses are quite stiff. Reckless attacking will only serve to get you killed when he inevitably counterattacks one of your swings. When he has his sword up in a defensive stance, he will block your attacks unless you manage to flank him.
Remember, if you have Igni boosted with the Melt Armor ability, it helps to blast him early in the fight to permanently lower his defenses.
Like Ciri, Eredin can teleport. He will appear behind Geralt to try and score a fatal series of sword strikes. Roll away from him in those circumstances, it’s possible a simple dodge will not get you out of range.
Samum can blind Eredin long enough that Geralt can quickly flank and strike him. He does recover quickly from the bomb’s effects, so work fast.
Facing Eredin head on is a dangerous proposition. Not only is he a skilled defender with his sword, he is more than a match on the offense. His strikes come fast enough that it is almost completely unsafe to attempt heavy strikes unless it is after a counter-attack and he is temporarily off balance. If you cannot perform counters, parry or roll out of the way.
Watch for him to raise his sword overhead with both hands. That attack cannot be parried or countered, only evaded. The attack comes quickly, and can be done in the middle of his sword combos, after a teleport, or after he counters Geralt.
The key to fighting Eredin, at any point in the fight, is to dodge or parry any melee attacks, while remaining close enough to score a heavy strike when the opening presents itself. This is a fight won by inches, blow by blow. Getting greedy can be extremely painful for you. Sometimes, it is best to simply wait and parry through his combinations, rather than attempting fancy counters.
Yrden can make parrying and countering his sword strikes easier, but remember that he can teleport out of Yrden to flank Geralt.
Watch out for him to try backhanding or kicking Geralt. These attacks cannot be parried or countered, and if they land will stun the witcher long enough that he may not be able to roll or dodge the follow-up sword slashes.
After losing roughly a quarter of his Vitality, Eredin creates a portal and sends Geralt and himself to an otherworldly arena. This marks the beginning of the second, and most difficult phase of the battle.
In addition to his melee prowess, Eredin gains several new attacks in this arena. The first is the ability to fire shockwaves from his sword. This is often telegraphed by him teleporting to a far point in the area, and holding his sword overhead. He will fire one shockwave first, then three waves in a fan pattern, followed by five. It’s a simple matter of running around Eredin to evade the attack, but if you are too far away, the last set of shockwaves can be hard to evade. Use the delay between each attack to close in and score a hit.
After a teleport, Eredin can also call down a storm of ice-laden meteors. Stay on the move, and avoid the projected impact zones, appearing as a patch of ground glowing brighter that the rest. If you get hit, you will be partially frozen and move much slower, making it more likely that you suffer multiple hits. You can run up to Eredin while he channels this spell, and get him to hurt himself with the meteors for a good amount of damage. This immediately cancels the spell, and leaves him open for an attack.
His final new attack is the ability to summon magical spheres at Geralt’s feet, which explode after a short delay. As with the meteors, getting harmed by this will partially freeze Geralt and make him much slower on his feet. Keep moving, ideally towards Eredin, and land a heavy strike to cancel the spell. After Eredin falls below a third of his total Vitality, he taunts Geralt again, and he becomes significantly more aggressive. Remain calm, and continue to concentrate on minimizing how much he hits you, while scoring hits whenever he presents the opportunity.
Just before defeat, Eredin will open a portal back to the ship the fight began on, while more ice meteors rain down from above. Follow the elf back through the portal, and finish him off!