
World of Warcraft: Warlords of Draenor Signature Series Strategy Guide PROVING YOURSELF
Proving Yourself
The dungeons of Draenor are a daunting prospect to even the mightiest of Azeroth’s heroes. In order to prove yourself worthy of entering Draenor’s dungeons on Heroic difficulty, you must complete a series of solo trials that test your ability to handle the toughest of challenges. These trials take place in a solo scenario located in the Temple of the White Tiger in Pandaria, called the Proving Grounds.

Challenging Trials
The Proving Grounds test your ability in one of three roles in the game: tanking, healing, or dealing damage. Each trial has its own set of unique challenges designed to test your knowledge and skill. There are three different levels of difficulty for each role challenge: Bronze, Silver, and Gold. To participate in Draenor’s dungeons on Heroic difficulty, you need to complete Silver difficulty for your specialization.
To begin, simply speak to your Mission Specialist, Lieutenant Thorn (Alliance) or Warmaster Zog (Horde), in your Garrison to enter the Proving Grounds. Once there, speak to Trial Master Rotun to begin the trial. Don’t worry about getting your gear to a particular item level or quality; the Proving Grounds scale to a difficulty that best suits the gear you already have equipped, so no special gear or items are necessary. There are three different types of challenges in the Proving Grounds:
Basic Damage Challenge
The challenge for damage dealing players is fairly straightforward. Various groups of enemies appear in the Temple, and you must defeat them in a set time period. If you do not defeat the enemies before the timer expires, you lose the challenge.
Basic Tank Challenge
For the tank challenge, players must protect an NPC healer and damage dealer, picking up all enemies that spawn and keeping them off of the NPC. If either you or the NPC are damaged down to zero health, you lose the challenge.
Basic Healer Challenge
Healers encounter a group of four NPCs in their challenge. The group will need to be healed through several encounters. If any member of your group is allowed to reach zero health, you lose the challenge.
Basic Damage Challenge
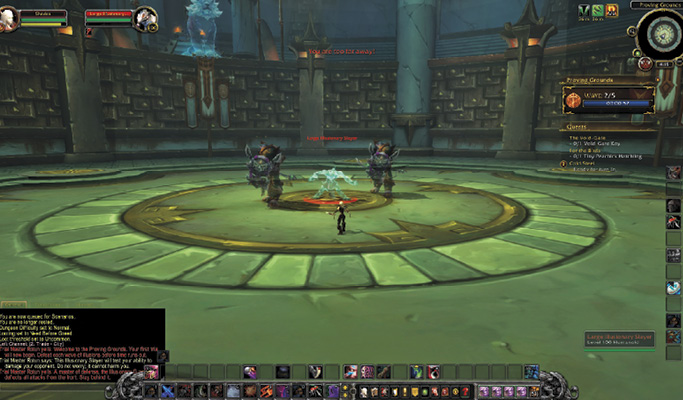
The Damage Challenge is a timed challenge in which you need to defeat all enemies as quickly as possible. If the timer expires, you must start the challenge again from round one. Before you begin, take a look at your talents and glyphs. Choose options that enhance your damage and movement speed, rather than anything that prevents damage. Enemies do not attack you directly, but several types have plenty of health or abilities that can slow you down.
All enemies come in two versions, Small and Large. Larger enemies have more health and take longer to defeat. Some enemies have spells and abilities that might seem counterproductive, but can actually help you kill other enemies faster. There are eight different types of enemies.
|
Enemy |
Description |
Note |
|---|---|---|
| Illusionary Amber-Weaver | Amber-Weavers create Amber Globules. The Globule explodes when it strikes an enemy, encasing it in amber and increasing damage taken by 50%. | Avoid being hit by the Amber Globule, but use its effect to your advantage by kiting it over your enemies. |
| Illusionary Banana-Thrower | Banana-Throwers run around the room and cast Fan of Bananas, which will slow down your attacks. | Use your stuns, slows, and crowd-control abilities to halt these enemies in their tracks and prevent them from casting Fan of Bananas. |
| Illusionary Banshee | Banshees are lethal. After 10 seconds, Banshees detonate the timer and instantly end your challenge. Large Banshees do so after 15 seconds. | Kill these enemies immediately. They should be top priority if they appear. |
| Illusionary Mystic | Mystics are healers that quickly overcompensate for any damage you put out. | The healing spell that Mystics cast can be interrupted. Most crowd-control and stun abilities also work against these enemies. |
| Illusionary Guardian | Guardians like to hide behind a projected shield that deflects all damage taken. | You can damage these enemies by standing behind them, negating the effect of their shield. |
| Illusionary Sha | Sha have two phases: one with a Protection Shield, during which they take 50% less damage; and one in which the shield drops and they take 300% more damage. They also have a considerable amount of health. | Save your big abilities and cooldowns for when the Protection Shield drops and the enemy is vulnerable. |
| Illusionary Slayer | Slayers do no damage at all; they simply stand in one place with no special attacks. | Slayers are fairly low priority, as they do no damage. |
| Illusionary Varmint | Varmints have no attacks or special abilities, but they always appear in groups. | These enemies have fairly low health. Use your AoE abilities to quickly take them out. |
Basic Tank Challenge
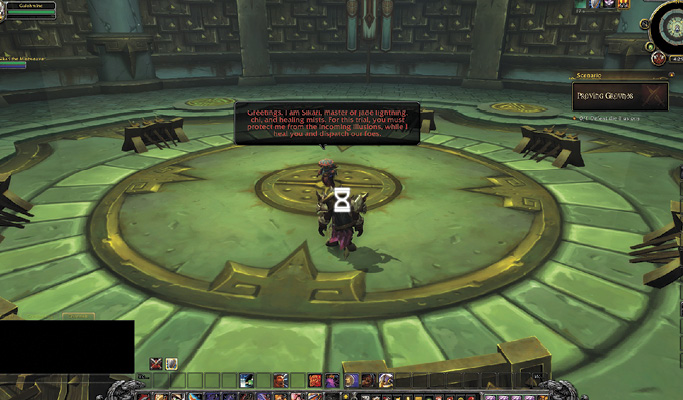
The Tank Challenge involves protecting an NPC, Sikari the Mistweaver, who assists you in the fight as both healer and DPS. If either you or Sikari reach zero health, you fail the challenge. Mobs spawn in waves that must be picked up and effectively tanked before they reach Sikari. Before beginning, take a look at your talents and glyphs. Sikari only provides a heal over time, so choose abilities that can help mitigate or prevent burst damage, or abilities that increase self-healing.
Enemies in the Tank Challenge come in both Large and Small versions. Large enemies have far more health and do more damage. Almost every mob you encounter immediately runs to Sikari, so for the most part, keep close to her. AoE crowd-control abilities, kiting, and abilities that spawn NPCs can all be fairly helpful. There are six different types of enemies to defeat in the Tank Challenge.
|
Enemy |
Description |
Note |
|---|---|---|
| Illusionary Ripper | Rippers do not have any kind of special attacks. | Rippers are fairly low-priority targets and are only really threatening when they appear in packs. |
| Illusionary Forager | Foragers like to Chomp their targets. This attack has a stacking debuff that does increasing amounts of damage. | While Foragers can be difficult to defeat in larger packs, they can be crowd-controlled to diminish Chomp’s devastating damage. |
| Illusionary Flamecaller | Flamecallers create Lava Pools. Standing in the Laval Pool burns you, but it also burns enemies. Small Flamecallers also cast Fireball, while Large Flamecallers cast Pyroblast. | Avoid any Lava Pools on the ground. Kite your enemies into the pools to defeat them more efficiently. |
| Illusionary Wind-Guard | Wind-Guards cast a spell called Wing Blast, which not only knocks you back across the room, it also reduces the threat you have generated by 99%. | A taunt negates Wind Blast’s threat-reduction effect. However, you’ll want to position yourself so that you are knocked towards Sikari, to taunt the enemies back quickly. |
| Illusionary Ambusher | Ambushers use Fan of Bananas, which deals a large amount of AoE damage. | You must tank the Ambushers far away from Sikari, so the Fan of Bananas doesn’t hit her. |
| Illusionary Conqueror | Conquerors have two fairly deadly abilities. Powerful Slam deals large amounts of damage and stuns, and Enrage causes the Conqueror to gain 200% increased damage, 50% increased attack speed, 150% increased movement speed, and immunity to crowd-control. | Powerful Slam is a cone effect cast in front of the Conqueror. Move out of the way before it goes off. Save your big defensive cooldowns in order to survive the Conqueror’s Enrage damage. |
Basic Healer Challenge
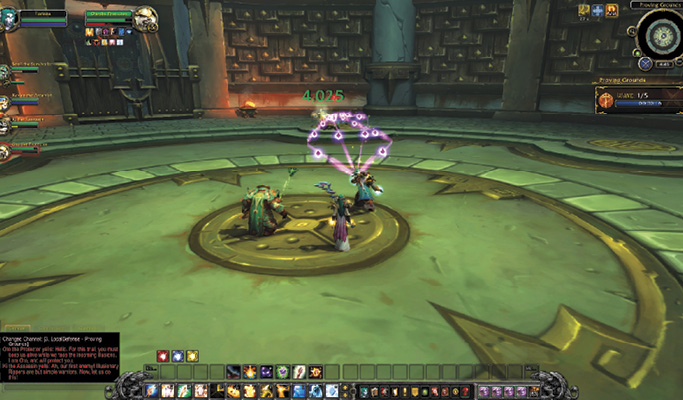
The Healer Challenge places you in a party with four NPCs. Oto the Protector is a Warrior tank, Sooli the Survivalist is a Hunter, Kavan the Arcanist is a Mage, and Ki the Assassin is a Rogue. In order to pass the Healer Challenge, you and all four NPCs must survive waves of incoming mobs that spawn on a timer. Before beginning, take a look at your talents and glyphs. You will not be out of combat long enough to drink and replenish your mana, so any talents or glyphs that help with regeneration or efficient healing should be considered.
Enemies in the Healer Challenge come in Large and Small versions. Large enemies typically do more damage and have more health. The key to the Healer Challenge lies in choosing the right heals at the right time in order to heal efficiently without draining your mana pool. There are six different types of mobs your group faces during the challenge.
|
Enemy |
Description |
Note |
|---|---|---|
| Illusionary Ripper | Rippers have no special attacks. They are the only mobs that can be crowd-controlled. | Rippers are the only mobs that can be crowd-controlled by anything other than a stun. If you have any crowd-control abilities, use them freely on the Rippers to help negate any damage being dealt. |
| Illusionary Hive-Singer | Hive-Singers cast an AoE spell called Sonic Blast that does damage to the entire party. | Sonic Blast requires spells that heal the entire group at once. The spell can be interrupted, however. If your class has a stun or interrupt ability, use it on these mobs to help offset the damage being dealt. |
| Illusionary Flamecaller | Flamecallers cast a spell that causes Lava Pools to collect on the ground. After casting this, they switch to casting Fireball if they are Small, or Pyroblast if they are Large. | Make sure to stay out of Lava Pools, and watch your party closely to heal anyone that may have taken damage from one. Pyroblast tends to do a lot of damage, so make sure you’re watching whom the Flamecallers are targeting, and keep that person healed. |
| Illusionary Aqualyte | Aqualytes mainly focus on damaging the tank, but they also cast Aqua Bomb on a random party member who then takes damage every second for 6 seconds, until they explode, dealing damage and knocking back anyone nearby. | Dispel Aqua Bomb as quickly as possible to negate any possible explosion damage or knockback effects. |
| Illusionary Tunneler | Tunnelers tunnel under the ground to a random party member and cast Chomp. This ability leaves a damage over time debuff on the target that will not be removed until the target is healed up to 90% of their health. | Healing the Chomp target as quickly as possible is top priority, especially if the Tunnelers are targeting the tank. Use your fastest heals, and keep people topped off between waves of Tunnelers. |
| Illusionary Conqueror | Conquerors hit very hard, and also have an Enrage that increases their melee damage for 10 seconds. Usually, Conquerors are only up long enough to cast one Enrage, but sometimes they can get away with two before they are defeated. | Save your biggest healing cooldowns for Oto the Protector, as he will be getting hit very hard during the Conqueror’s Enrage. Oto does have a Shield Wall ability, and he uses it if it’s available, so watch to make sure you aren’t casting any of your important cooldowns while his Shield Wall is up and active. |