
Disney Infinity 2014 Revised Edition Guide Toy Box
Travel

When you want to leave a Toy Box and go somewhere else, you can step on the red button at the Disney Infinity Hub or select Travel from the Pause menu. Either way, this takes you to the Travel menu where you can choose to try out Mastery Adventures, or other Adventures. You can also go to one of the Prebuilt Toy Box Worlds, or even save or load a Toy Box of your own. When you first begin Disney Infinity, it is a good idea to go through the Mastery Adventures to help you learn the ropes of not only playing the game, but using the many different features of the Toy Box.
Mastery Adventures
Think of the Mastery Adventures as tutorials for learning the ways to manipulate and build in the Toy Box, as well as how to play Disney Infinity whether you are in the Toy Box or one of the Play Sets. There are six different Mastery Adventures, but you only have access to three at the start. The other three are unlocked as you complete Building Mastery and then the other Mastery Adventures related to building in sequential order. Also be sure to do the Combat Mastery and Driving Mastery Adventures so you can learn the moves and mechanics of fighting and driving. Both of those come in handy throughout the game. Completing these two Mastery Adventures unlocks several Adventures, which are essentially challenges where you can put what you have learned to work.
Building Mastery
There be no better way to build up your world than by goin’ on a treasure hunt! Place pieces in your Toy Box to help get to the gold!
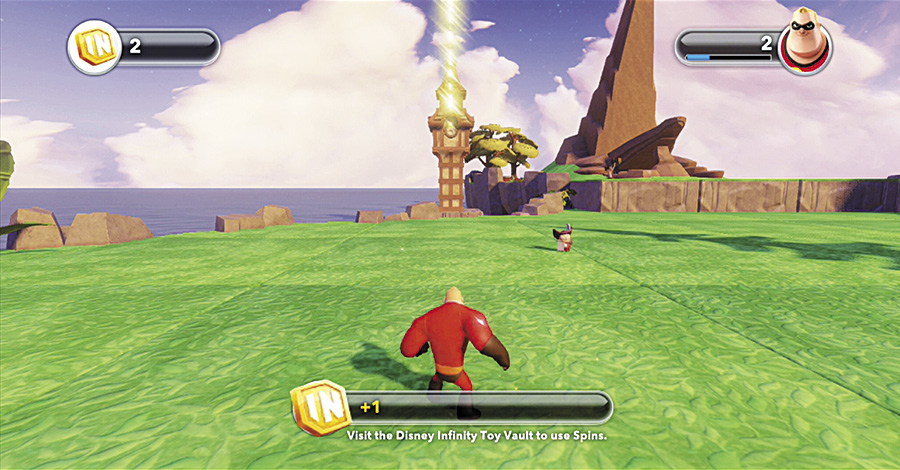
The Building Mastery Adventure is a brief tutorial on using the editor for building and manipulating the Toy Box. When the Adventure begins, you must help a Captain Hook townsperson find some treasure. Follow him to the highlighted area to continue.


Your fist task is to use the editor to place three trees. Follow the on-screen instructions to open the editor and then choose one of the trees. Select it and then position it where you want to place it. Repeat this process two more times with different trees so that there are three trees in total.

There is no way for Captain Hook to get up onto a higher level. Therefore, open the editor and select a Bluff. Line it up with the hillside so that it is within the blue box and place it. Now the Bluff can serve as a ramp for you and your friend to get up to the next area.

Once you get to the top of the level, you need to get across a gap. Bring up the editor and select the Super Cannon. Position it along the edge of the gap. However, since it is facing the wrong direction, you need to rotate it so it is facing across the gap. Once you have rotated the cannon, place it, walk into it, and launch yourself across the gap to the other side.

The bridge to the castle is missing a section. Bring up the editor and drop a Castle Bridge segment into position. Follow the on-screen directions to change the elevation of the bridge so that it lowers into the correct spot. You can also move the camera around to get a better view on your construction.

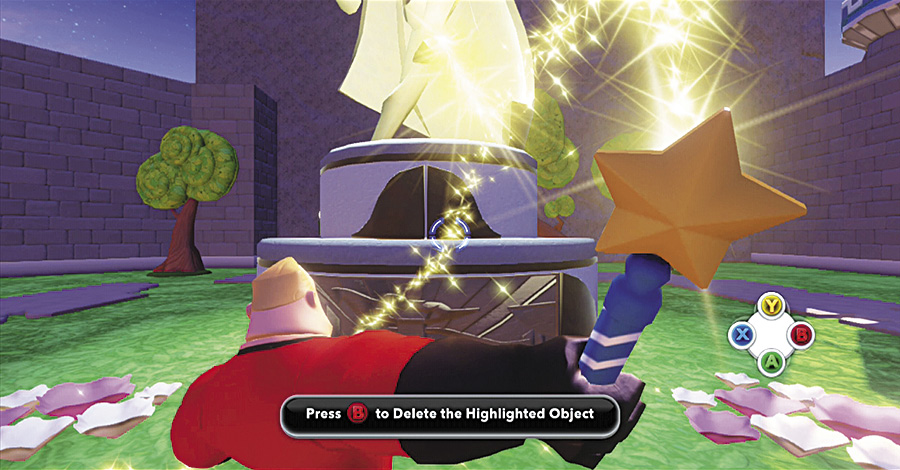
Your next task is to remove a Statue. Open up the Tools/Packs menu following the directions on the screen. Then scroll through your available tools to select the Magic Wand. Hold down the aim button to select the Statue. Finally press the delete button to send the Statue back to the inventory and get it out of your way.

Continue to the next highlighted spot. You need to enter a cave, but there is no entry. Therefore, open the editor and place the Cave of Wonders at the indicated spot. You can then hop through the opening and enter the cave.

Follow the cave to the Treasure Grotto, however you find it is not in the correct place. Use your Magic Wand and select the Treasure Grotto. Then press the Move button. Now move the Treasure Grotto towards you so that it is adjacent to the block on which you are standing. Walk into the Treasure Grotto to complete the Adventure, earn a Spin you can use to unlock a toy from the Disney Infinity Vault, and receive a Mastery Star. This also unlocks the Dynamics Mastery and Creativi-Toy Mastery Part 1 Adventures.
Combat Mastery
We’ll pit you against the pros and teach you how to battle all the baddies in the Toy Box.

The Combat Mastery Adventure is a great way to learn the different ways you can fight against enemies. To get started, walk up to the wooden doors and press the attack button to knock down the door that is.

Enter the training area and begin clearing out the crates and other objects by pressing the attack button. Then try using the alternate attack button to destroy several items in front of you. Finally, jump up into the air and then press the attack button to come down with a slam attack that can destroy several objects in the area around you.

Next you have to try getting a moving target. Follow after the Gaston townsperson and pick him up by pressing the action button. Then follow the directions on the screen to throw him out of the training area. In combat, picking up an enemy not only can cause damage to the enemy you pick up, but also to any enemies you throw that enemy at. Unfortunately, Gaston is not so easy to get rid of. Now that you have learned how to throw, follow the directions on the screen to kick Gaston out of the training area. During combat, you can pick up enemies and throw them for damage. You can also use them as a projectile and throw them into other enemies.

You are now ready for the battle arena. Gaston has put together a number of enemies to take you on. It starts off with a single Zurgbot. Rush forward and attack to destroy it. Then defeat two more that appear.

A Blaster appears in the middle of the area. Move over and pick it up—it will come in handy. Press the alternate attack button to fire the Blaster at enemies and hit them from longer range. Then, as they get close, finish them up with normal attacks. Gaston sends more and more enemies to attack. Defeat them all using a variety of attacks.

Now you have to knock Gaston into the arena. Take aim with the Blaster and fire at him. Once he is in the arena, he calls in a bunch of enemies. However, this time you get some allies to help you. Defeat all of the enemies to get the Mastery Star as well as a Spin. In addition, you also unlock three new Adventures—Sumo, Gladiator Arena, and Dome Defense.
Driving Mastery
Become a pro at driving and doing tricks with this driving Adventure.

One of the fun things to do in the Toy Box is racing. Complete this Mastery Adventure to earn a Mastery Star and a Spin, as well as to unlock five Adventures—Battle Race, Lap Race, Battle Race Reverse, Lap Race Reverse, and Off Road. At the start, you learn the basics of driving. Press the accelerator button to start driving and steer through the first couple of turns.

Now you need to drift through the next three turns. Follow the directions on the screen. As you drift, your car builds up energy that you can then use to activate turbo. Drifting can take some practice and, for these turns, you don’t want to drift through the entire turn.

As soon as you hit the straightaway, activate the turbo for a burst of speed. Do this through the next two straightaways as well. Try hitting the jumps while using turbo to get some extra air.

There is more to the Toy Box than just driving around on tracks. You can also do stunts. In the next part of the Adventure, you must get 10 collectibles. These are yellow balloon-like spheres that you break by running into them. The driving arena is filled with ramps and other obstacles. While jumping in the air, follow the directions on the screen to do different tricks. Landing a trick builds up energy, just like drifting.

Try driving up the halfpipe ramps. When you get to the top and into the air, your car will automatically rotate and come back down. This is a good time to pull off a trick as well. Play around as you try different tricks while you finish getting all of the collectibles to complete the Driving Mastery Adventure.
Dynamics Mastery
Learn how and what the Physics Blocks can do in the Toy Box.

This quick Mastery Adventure teaches you about a certain category of objects known as Physics Blocks. They are called this because they react according to the laws of physics. There are three main types of these blocks—Glass, Wood, and Steel.

Your first task is to knock down a tower made up of Glass Blocks. Move towards it and press the attack button to destroy individual blocks. As the blocks on top fall to the ground, they also break since they are made of glass.


Now you must take down a tower made of Wooden Blocks. Wooden Blocks break when you attack them or they fall, however they are tougher than Glass Blocks. This time you are going to use objects to do it rather than attack it yourself. Off to one side of the tower, balls are being launched. Open the editor and use Bumpers and Flippers as found in a pinball game to hit the balls into the tower to knock it down. Try placing a bumper in the middle of the grass at the foreground end so the ball will bounce off the side of the bumper and move towards the tower. All it takes is a few hits with some balls and the tower falls.

The next task features Steel Blocks. While they will fall like Glass or Wooden Blocks, Steel Blocks are indestructible. As you approach the steel tower, it falls down. Notice that the blocks remain intact however.

To quickly reassemble the steel tower, find the Reset-O-Matic and step on it. This switch is a great way to restore a structure to its original construction.

Now place an Explosive Block into one of the gaps in the steel tower. Explosive Blocks blow up when they are hit by something. This time you are going to use a Slingshot.

After putting the Explosive Block into position, move over to the Slingshot and take control of it. Take aim and follow the directions on the screen to fire the Slingshot. Hit the Explosive Block to knock down the steel tower and complete the Mastery Adventure. For your efforts you are awarded a Mastery Star and a Spin, and you also unlock an Adventure—Castles and Slingshots.
Creativi-Toys Mastery Part 1
Your Creativi-Toys are the key to making your own games in the Toy Box.

Creativi-Toys are powerful toys that you can use to create actions and reactions within the Toy Box. Start off by moving towards the stadium. Pick up the Wand and then use it to select the Trigger in front of the gate. This will act as a trigger. Choose to connect the Trigger, and then select “Stepped On”. This sets the Trigger to send a trigger signal when someone steps on it.

Now select the Stadium Gate to connect it to the Trigger. From the menu, select “Open”. This instructs the gate to open when someone steps on the Trigger. You have just completed your first connection. Step on the plate and then move through the now open gate to enter the stadium.

Next you need to connect another Trigger. Do the same thing you did before, however this time, connect it to the Boom Box. Now choose the song you want it to play.

Now select the Boom Box again. We are going to use it as a trigger. Select “Started” as the trigger. Then select the Party Cannon to connect it. For the Party Cannon, choose “Confetti” as the behavior.
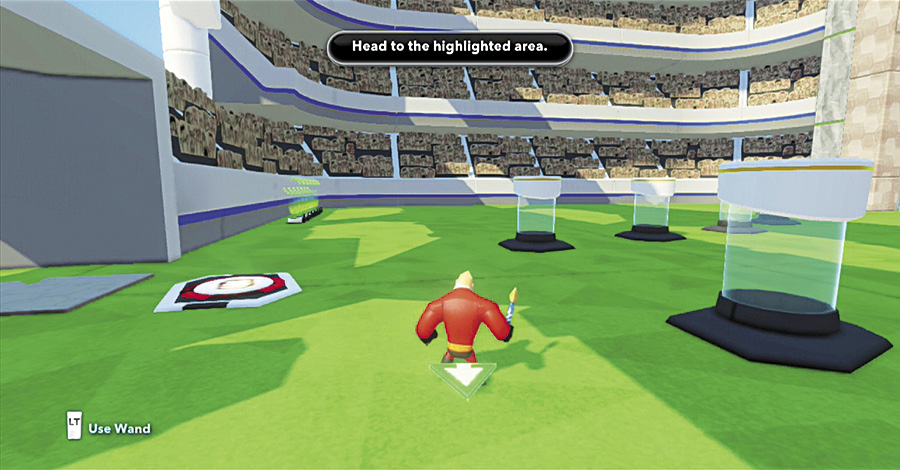
The Adventure then connects several more Party Cannons as well as Time Delay toys together to make an even more impressive show. Walk over to The Teleporter and step on it to travel to another Teleporter outside of the stadium.

Move back through the gate and step on the Trigger. As you do, the Boom Box begins playing and the Party Cannons begin firing in succession.

If you want, you can play around with a number of Creativi-Toys and other objects. Just open the editor to select and place them in the Toy Box, and then try connecting them. When you are done, follow the directions to a second Trigger past the Boom Box and the first Party Cannon to finish the Mastery Adventure. You not only earn a Mastery Star and a Spin, but also unlock the Creativi-Toys Mastery Part 2 Adventure.
Creativi-Toys Mastery Part 2
Use even more Creativi-Toys to make your own games in the Toy Box.

Now that you have learned the basics of placing and assigning orders or behaviors to Creativi-Toys, it is time to see how you can use them to create a game. Phineas and Ferb townspeople have already built the beginnings of a platforming game. They just need you to finish it and then play it.

To get started, pull out your Magic Wand, select the Trigger, and set it to “Stepped On”.

Next target the Repeater and turn it on. Now step onto the Teleporter and use it to get to the top of the game.

At the top, you can see a Falling Object Generator. Since you already have the Repeater selected, connect it to the Falling Object Generator and then select the ESPN Bowling Ball. The Trigger now activates the Falling Object Generator and the Repeater causes it to drop a ball every few seconds. Take the Teleporter back down to the ground level.

To help you play this game, you have been given a Star Command Boost Pack. Press the attack button and the Boost Pack will shoot you up into the air. Move to the Trigger in the game to get it started.
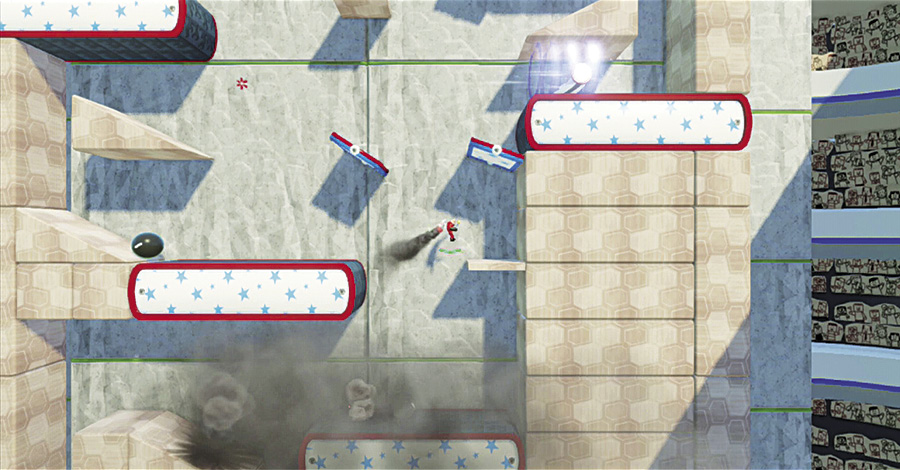

Make your way up through the game while trying to avoid being hit by the bowling balls. The key is to get to the small gray platform on the right. Then from there, boost your way up to the Flipper above. From there, boost up to another small gray platform—but you have to watch out for bowling balls here. Then move on to another Flipper, wait for a bowling ball to pass over your head, and then boost on up to the highest small gray platform to complete the game. At the end, you get a Mastery Star and a Spin.
Adventures
Adventures are like short challenges where you have to put the skills you need to know to succeed in Disney Infinity into action. They are unlocked by completing the Mastery Adventures. Each Adventure has three different medals you can earn—Bronze, Silver, and Gold. Each time you earn a medal for the first time in an Adventure, you receive not only Sparks but also a Spin. In addition, you can play all of the Adventures in multiplayer. Two players on the same system can play them together with a split screen, while up to four players can play together over a network connection.
Castles and Slingshots
Try to keep your spheres whole while searching out and destroying the spheres in the other castles.
- Gold: 3 Spheres
- Silver: 2 Spheres
- Bronze: 1 Sphere
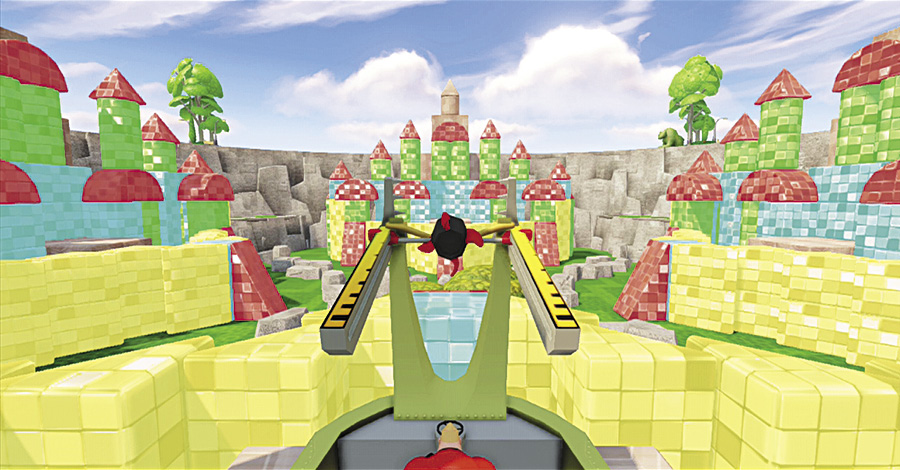
For this adventure, you have 1 minute to break down the walls of your opponents’ castles, find the hidden spheres, and then destroy the spheres. To accomplish this, you have a Slingshot. The Slingshot can be rotated and elevated. Then pull back and release to fire the rocket projectiles.

As you hit the colored walls of the castles, you break them down. Keep firing until you can see one of the spheres and then shoot at it to destroy it. The key to getting a gold medal for this adventure is to immediately start pulling back on the Slingshot as soon as you release. Novices will wait to see where the first projectile hit before pulling back on the Slingshot. By pulling back as soon as you release it, you can have a second shot in the air by the time the first one hits. The faster you can fire, the more blocks you can break down and the more spheres you can destroy.
Sumo
Stay on solid ground as long as possible while the ground disappears out from underneath you.
- Gold: Survive over 3:00 minutes
- Silver: Survive over 2:10 minutes
- Bronze: Survive over 1:00 minutes

This is a combat Adventure where you have to fight against several different enemies. However, the blocks on which you are standing randomly disappear. Therefore, you have to keep moving and avoid being knocked off of the blocks. Random tools such as Blasters or balls appear, which you can shoot or throw at enemies to help you keep them away from you.

As the timer progresses, blocks begin to disappear. They turn transparent a second or two before they vanish, so be quick to move to solid ground or risk falling. Also watch out for the Wooden Block with the skulls on it bouncing around. If it hits you, you take damage. Enemies are destroyed when the Wooden Block blows up near them. Shoot at it while it is near enemies to take them out. If you want to get the gold medal, try using Power Discs that increase the damage you inflict so you can more easily defeat the enemies. Also stay away from the edges since some of the enemy’s attacks can push you back over the edge and end the adventure for you.
Gladiator Arena
Players can use all their packs and tools to survive increasingly difficult waves of enemies in a gladiatorial arena setting.
- Gold: Survive 3 enemy waves
- Silver: Survive 2 enemy waves
- Bronze: Survive 1 enemy wave
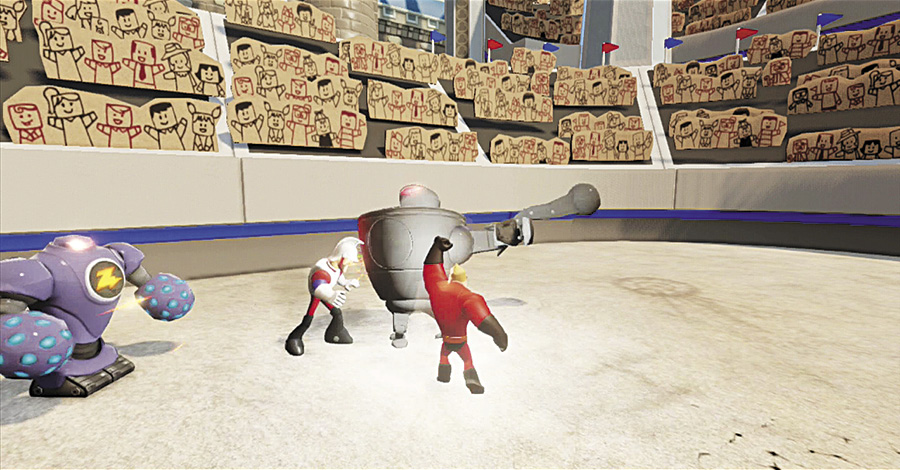
Think you are good at combat? Test out your skills in the arena. While it begins with just a single enemy, you then have to take on two, three, four, or even more enemies at a time. A Zurg spaceship flies around and then teleports enemies into the arena, so be sure to keep an eye on the ship once you clear out the latest batch of baddies so you are ready for more. Be sure to use all your character’s different attacks.

Use Power Discs that increase your damage, increase your health, and/or give you some invincibility. Also don’t forget to use the tools and packs you have collected. You should at least have the Toy Box Blaster from the Toy Box Launch. This gives you a ranged attack so you can pick off enemies before they get in close. A few of the enemies have their own ranged attacks, so be sure to keep moving to avoid getting hit.
Dome Defense
Help! Stop the Disney Infinity enemies from smashing through the domes and taking the townspeople inside! One destroyed dome ends the Adventure. Use your packs and tools to keep ’em safe!
- Gold: 6 enemy waves
- Silver: 4 enemy waves
- Bronze: 2 enemy waves

There are three domes with Princess townspeople in them. Each has a number that represents the health of the dome. If the number ever reaches 0, the Adventure is over. Omnidroid enemies come out of the towers and make their way towards the closest dome. Your job is to defeat them before they can break open a dome. Be sure to use Blasters or other tools to attack the enemies, as well as use any Power Discs you have.

At the start, the enemies come out of the towers at a slower rate. However, as you move on to subsequent waves, they come faster and from different towers. Watch the sky above the towers. A beam of light shines down on the towers that are spawning enemies. Therefore, by looking for the beam, you can set yourself up to hit the enemies as they emerge from the towers.
Battle Race
Ready…Get set…Go! Be the fastest in this three-lap race with weapons!
- Gold: Finish in under 2:05
- Silver: Finish in under 3:00
- Bronze: Finish in under 4:30

This is a race where you can use weapons to help you get ahead—or stay in the lead. Pick up weapons by running over the surprise boxes with the “?” on them. To build up turbo, run over the blue gas cans in addition to drifting and doing tricks.

You can fire your weapons forward as well as behind you—so if you have an opponent behind you, open fire to keep them behind you. Also, be sure to look for the shortcut. It can be tough to find in this race and involves jumping up onto a blue and white striped platform to get to a higher track area. It is fairly easy to get a bronze in this race. Silver is a bit tougher. However, if you want to get gold, you need to use the shortcut and drive a perfect race without crashing into anything. While you are racing against other cars, you are also racing against the clock to earn the medals.
Lap Race
Ready…Get set…Go! Be the fastest in this three-lap race!
- Gold: Finish in under 2:05
- Silver: Finish in under 3:00
- Bronze: Finish in under 4:30

This race is on the same track at the Battle Race, but this time you have no weapons. Rapidly press the accelerator button while waiting to start the race to rev up. Then when the race starts, you burst from the starting line with turbo. Drift and do tricks while racing to build up power so you can use turbo on the straightaways.

As you are moving next to another car, nudge the other car off the course and hopefully into a wall or off the edge. Also try combining the Fix-It Felix Repair Power Disc with the Pieces of Eight Power Disc to create the Turbo Charge ability, which provides bonus turbo energy. The Turbo Charge Power Coin Bonus can also be acquired using Fix It Felix’s Repair Power and Scrooge McDuck’s Lucky Dime.
Battle Race Reverse
Get set…Go! Be the fastest in this three-lap race with weapons!
- Gold: Finish in under 2:05
- Silver: Finish in under 3:00
- Bronze: Finish in under 4:30

This race takes place on the same track as the Battle Race but in reverse. Pick up weapons and use them freely to slow down the competition.

The shortcut is in the same place as before—you just have to access it from a different spot. Once again, look for the blue and white striped platform.
Lap Race Reverse
Get set…Go! Be the fastest in this three-lap race!
- Gold: Finish in under 2:05
- Silver: Finish in under 3:00
- Bronze: Finish in under 4:30
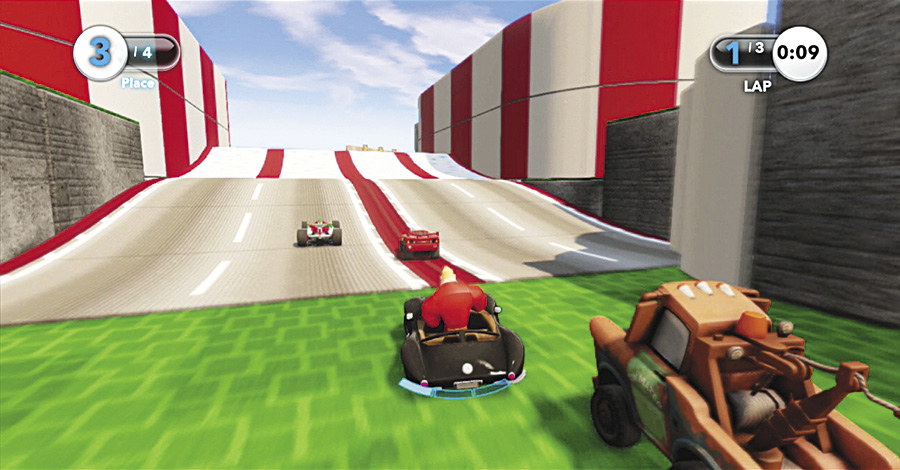
This race takes place on the same track as the Lap Race but in reverse. Hit the shortcut and turbo on the straightaways to get ahead and keep your time low enough to get the gold medal.
Off Road
Sure, the raceway is awesome. But how are your skills on this off-road course?
- Gold: Finish in under 0:40
- Silver: Finish in under 0:50
- Bronze: Finish in under 1:10

The track for this race is short and has weapons you can pick up. However, it is played from a top-down view, making it a bit tougher to play. You can see exactly where your opponents are located, which makes it easier to target them—especially when they are behind you. The key to finishing the race with a good time is to avoid overcorrecting as you go around the turns. Plus when you are going down along the left side of the track, you have to remember that the controls are reversed. If you need to go to the right, you have to turn to the left.
Character Adventures
When selecting Adventures, in addition to the common Adventures, there are also Character Adventures. These appear in the Adventures menu, but only for the character you currently have on the Infinity Base. Therefore, if you have Mr. Incredible on the Base, then the “Mr. Incredible, the Hero” Adventure will be available to play. Like the other Adventures, these can be played by yourself or with 1 to 3 other players. You can also earn three levels of medals based on your performance. The more character toys you have, the more Adventures you can play.
Mr. Incredible, the Hero
You have all your packs and tools to help you smash domes to release the townspeople caught in them before the time runs out.
- Gold: Release 3 townspeople
- Silver: Release 2 townspeople
- Bronze: Release 1 townsperson

Unlike the Dome Defense Adventure, this time you are the one trying to smash the domes. You have only 1 minute to smash as many as possible. However, it will not be easy. Syndrome has positioned Omnidroids around each one. Quickly get to the first dome and then clear out the enemies while attacking the dome as much as possible. More Omnidroids spawn in, so focus on the dome, otherwise you will spend all your time on enemies.

After the first dome is smashed, the timer resets and you get 1 minute and 30 seconds to go after the second dome. Follow the green arrow to your next objective. Watch out for turrets that fire at you along the way and try to slow you down. The Omnidroids defending the second dome are tougher. Use Mr. Incredible’s alternate attack that creates a line of destruction along the ground. If you line it up correctly, you can destroy enemies and damage the dome at the same time.

You also have 1 minute and 30 seconds to smash the third dome. This time you must pass by more turrets as well as spike pads to get to it. Don’t waste time trying to destroy them. Instead, rush past them and get to the dome. You can climb a Rope or use some Fans to get to the top of a ledge where the dome is located. Here you face lots of Omnidroids in all varieties and the dome is tougher to smash than the previous two. Try to keep moving so the dome is between you and the enemies as much as possible and keep attacking it. Using Power Discs can really help get the gold medal here.
Sulley’s Paintball Brawl
It’s time to show your rivals a victory of a different color. Put them in their place before time runs out.
- Gold: 35 enemies defeated
- Silver: 15 enemies defeated
- Bronze: 5 enemies defeated

You have 4 minutes to defeat as many enemies as possible in this Adventure. To accomplish this, you are armed with a Paintball Gun. At the same time, you have to avoid being beaten, so watch your health. Your Paintball Gun fires several rounds and then must reload. The key to staying in the game is to keep moving—especially while reloading—otherwise you are a sitting duck. Also, when you hit an opponent, he or she is momentarily stunned, so quickly follow up with more shots to defeat the opponent before he or she can return fire. This also applies to you, so if you get hit and stunned, try to move away and get to cover before your opponents follow up with more hits.

There are teleporters along the sides that can be used to quickly get from one side of the arena to the other. A couple of balconies that run the length of the sides of the arena can be accessed by ramps at either end. This gives you a height advantage. However, since the range of the Paintball Guns is not all that long, it is usually better to stay down in the arena.

Power Discs that increase your damage are useful for getting the gold medal since they can reduce the number of hits for defeating opponents and give you more time for going after others. Avoid getting surrounded by opponents or you can get into trouble. If one hits you, others can follow up with additional hits while you are momentarily stunned. That is why it is important to keep moving and use cover to avoid being ganged up on by your opponents.
Sparrow’s Flight
Captain Jack Sparrow is on the run—to collect as much shine as he can before that scurvy time runs out. This calls for all your packs and tools.
- Gold: Gather 25 collectibles
- Silver: Gather 15 collectibles
- Bronze: Gather 5 collectibles

Captain Jack Sparrow finds himself in a small seaside town where he needs to get as many collectibles as he can within 3 minutes. Once you gather the first 5 collectibles, then 5 more appear. Collect those and then another 5 appear. Watch out for several traps on the ground. They can either slow you down or take you out, causing you to wait while your character regenerates.

Many of the collectibles are up on top of buildings or on other elevated positions. Therefore, if you want to get gold, or even silver, having a pack with some type of boost or glide capability is helpful so you can quickly get to the tops of the buildings to grab the goodies.

For the bronze and silver medals, all of the collectibles are within the town or near it. There is no need to climb up the tall cliffs or platforms overlooking the town—that just wastes time. Instead, use the Fans to quickly get up on top of the buildings and jump from building to building to collect the yellow collectibles.
Mrs. Incredible’s Grab-It
Mrs. Incredible to the rescue! Use your elastic arms to take the townspeople to the safe zone and throw the criminals in prison where they belong.
- Gold: Earn 40 points
- Silver: Earn 20 points
- Bronze: Earn 5 points

Mrs. Incredible scores 1 point for getting townspeople to the park in the middle of town and 5 points for throwing criminals into the police station. Some of these people and criminals are on the ground, but many are up on top of buildings. Get as many as you can in 4 minutes and 30 seconds.
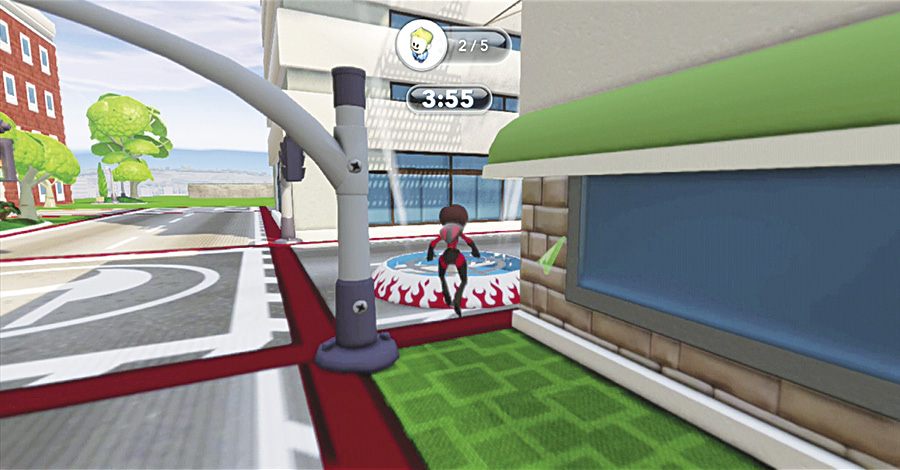
While you can climb up the sides of the buildings, it is much quicker to use the Fans and Elevators. There are also Super Cannons to help you get from one building to another. Use Glider packs to soar down to lower buildings or to the streets. The key to earning a lot of points is to throw the citizens off the tops of the buildings towards the park. Don’t worry, they have parachutes. Throw the criminals down to the street level as well, then once you have cleared the buildings, go down and throw them into the police station. If you hand deliver every person individually, you will not be able to get even a silver medal.

If you want to get gold, spend one attempt just exploring the area. Learn where the Super Cannons, Fans, and Elevators are located. Often getting part way up one building will lead to a Cannon that will shoot you up to the top of an another building. Then once you see how all the Cannons are connected, you can quickly move from building to building, throwing people and criminals down below. Make sure you leave enough time to get down to street level to put them all where they need to go.
Violet’s Stealth Mission
Avoid the Omnidroids and spotlights in Syndrome’s maze! Find as many collectibles as you can.
- Gold: Gather 25 collectibles
- Silver: Gather 15 collectibles
- Bronze: Gather 5 collectibles
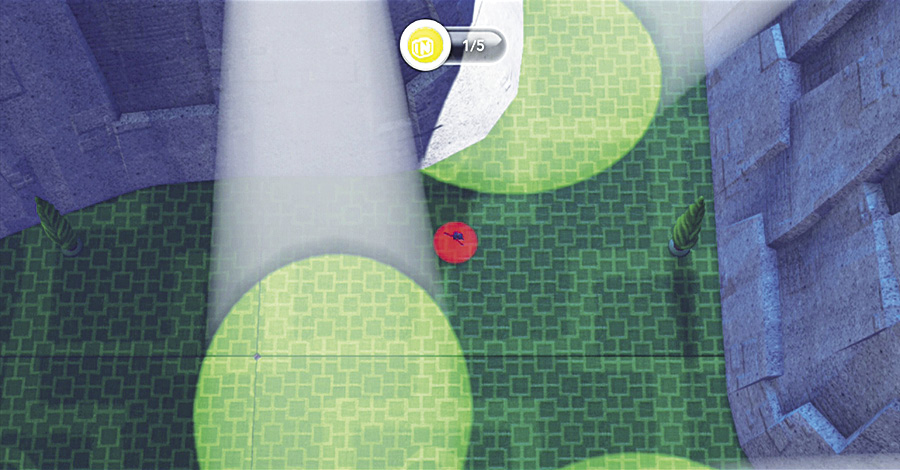
Violet has to avoid spotlights and Omnidroids with lights as she moves through a maze-like canyon while gathering collectibles. There is no time limit on this Adventure, so use caution. Instead, the Adventure ends when a light beam hits you. This Adventure is played from a top-down camera view.

Observe the direction of motion of the spotlights and the patrol patterns of the Omnidroids before rushing into an area. A good tactic is to follow an Omnidroid through an area—just be careful it does not turn around on you. Don’t try attacking them if you want to pull of a stealth mission. However you can destroy the Omnidriods before they turn around by holding the attack button while standing behind them.

Getting bronze is fairly easy, since you can easily get the first 5 collectibles. However, the next 10 are a bit tougher and those final 10 are downright difficult to get. The best way to earn silver and gold is to play it over and over so you learn the patterns and where the safe spots are.
Dash’s Data-Dart
Syndrome’s at it again! You’ve got to gather the collectibles while avoiding the blue and red balls.
- Gold: Gather 60 collectibles
- Silver: Gather 40 collectibles
- Bronze: Gather 10 collectibles
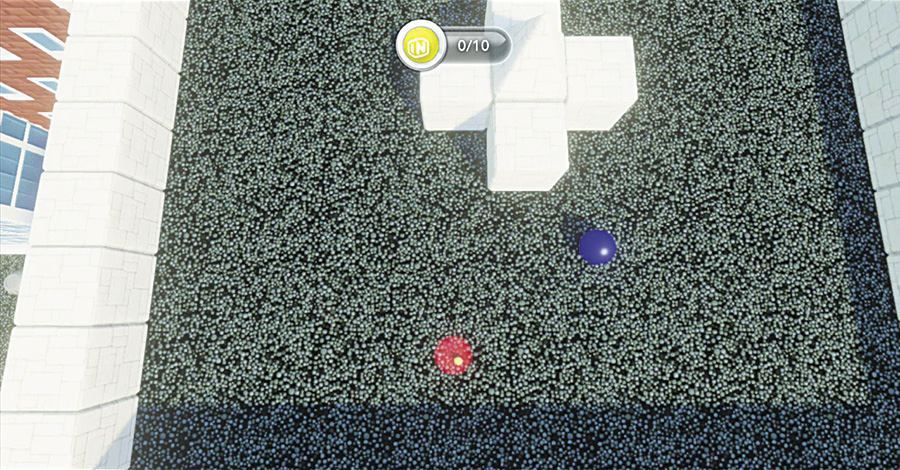
This is another top-down Adventure. While the concept is simple, mastering it is still challenging. You must move around a rooftop while avoiding blue and red balls. The blue balls drop yellow collectibles that you must collect. There is no time limit—the Adventure ends when you get hit by a ball.

As the Adventure progresses, it gets tougher. It begins with one blue ball and then adds a second and a third. The blue balls bounce around using physics like billiard balls, so you can predict where they will go after a bounce. However, red balls are larger and follow you around, so you have to keep moving.

If this were not tough enough, bumpers spawn and can give the balls some unpredictable bounces. Plus tar traps slow you down—as well as the balls. Try to avoid tar traps if possible, but you will need to walk onto them to get some collectibles. Also, the collectibles disappear after a few seconds, so you have to go after them before they are gone.
Syndrome’s Sorting Sprint
You’ve met your match with this crazy challenge. Fling townspeople to safety with your Zero Point Energy, stop oncoming attacks, and stay alive while being pushed to your doom. Do it all before time runs out.
- Gold: Earn 40 points
- Silver: Earn 25 points
- Bronze: Earn 5 points

This Adventure requires you to pick up townspeople on your roof and throw them onto adjacent rooftops for points. You have 5 minutes to score as many points as possible. You get 1 point for every townsperson thrown to another rooftop. Hit the targets and you score 2 points.
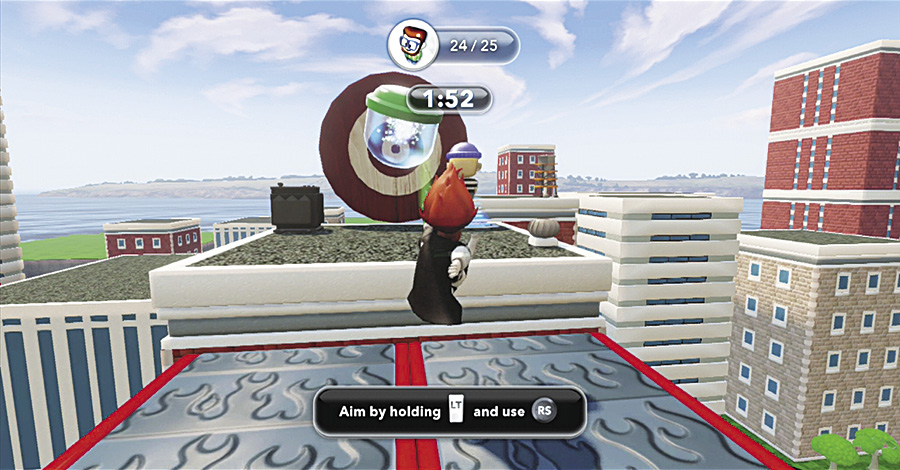
The rooftop on which you play has several conveyor belts, so you have to be careful you don’t fall off the roof. While you will be taken back up to the rooftop, it wastes time. It is important to aim when you throw the townspeople since you want them to at least land on a rooftop. If they miss a roof, no points for you. For long shots, drop kick the townspeople by jumping and then pressing the alternate combat button.

Use Syndrome’s Zero Point Energy to pick up and throw townspeople. This lets you grab them from a short distance and gives you a better chance of hitting the targets. As you progress, Omnidroids start appearing. Throw them off the roof with the Zero Point Energy to get them out of your way. If you want to get gold, you need to focus on hitting the targets. Take time to aim before each throw. While it may take a bit more time than just tossing them onto a rooftop, it still takes less time than picking up and throwing two different townspeople.
Mike’s Scare Pig Dash
It’s time for Mike to hog the spotlight. Race on Archie the Scare Pig around campus and collect as many points as you can!
- Gold: Earn 200 points
- Silver: Earn 120 points
- Bronze: Earn 30 points

You have 3 minutes to score as many points as possible by gathering collectibles. Yellow collectibles are worth 1 point each, orange collectibles are 2 points, and red collectibles are 5 points. Since you have a limited amount of time, be sure to make the Scare Pig run throughout this Adventure. If you are content to get bronze, just run around the ground and pick up all of the yellow collectibles.

For those who want a silver medal, you need to get up onto the floating platforms with the orange collectibles. Jump from one platform to another without falling and get those orange collectibles. The red collectibles, which you will need to get in addition to the other colors if you want gold, are very tough to reach. You need to run and double jump to get across to the platforms where they are located or drop down from a platform to get them on your way down.

On the ground level are several scare traps. Avoid them or they will hit you and the Scare Pig and waste your precious time. These are all located near the center of the area. As with several other Adventures, spend some time exploring so you know the lay of the land and look for ways to get those red collectibles.
Randy’s Scavenger Hunt
Race with Randy through the scream tunnels and collect as much as you can before your time drains away.
- Gold: Gather 20 collectibles
- Silver: Gather 14 collectibles
- Bronze: Gather 5 collectibles
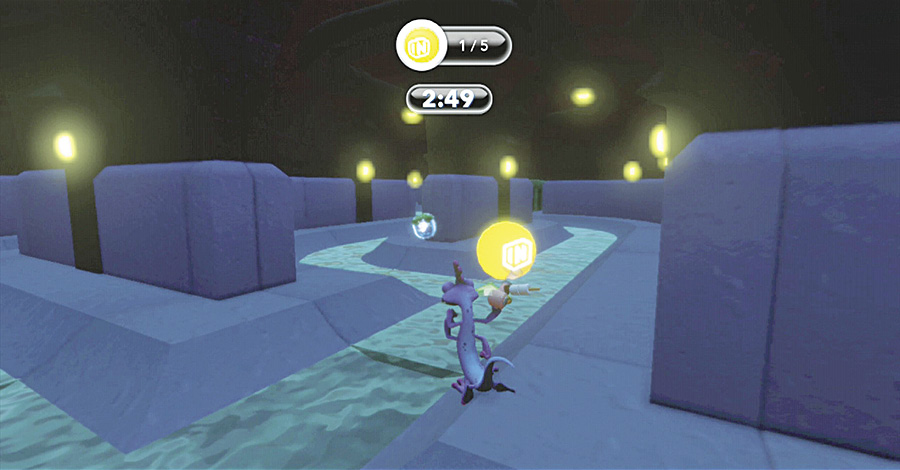
While the scream tunnels are not that large, they are patrolled by enemies. Try to avoid them and grab as many yellow collectibles as you can within 3 minutes.

There are two Fear Tech Students that throw things at you down in the tunnels. When they hit, they inflict damage and slow you down a bit by the impact. Luckily you are armed with a Toilet Paper Launcher. It takes two hits to destroy an enemy and your launcher is slow to reload, however. Also, the monsters regenerate after a bit.

Once you get the first 5 collectibles, 14 more spawn in the tunnels. Get those and the final collectible number 20 spawns. Be sure to use the green arrows to help you find the collectibles as quickly as possible so you don’t waste time going down tunnels where there is nothing for you to gather.
Barbossa’s Blockade
There be pirates here, and you’d be wanting to gather as many collectibles as possible and stop your enemies before the time be runnin’ out.
- Gold: Earn 35 points
- Silver: Earn 20 points
- Bronze: Earn 5 points

This combat Adventure gives you 6 minutes and 20 seconds to defeat as many enemies as possible and collect the collectibles they leave behind. Follow the red arrows to get to the next enemies. When playing as a pirate, such as Barbossa or one of the others (in Multiplayer, you can be someone other than Barbossa), use your Flintlock to fire at a distance, then move in if your enemies are not defeated by the gun to finish them off with the sword.
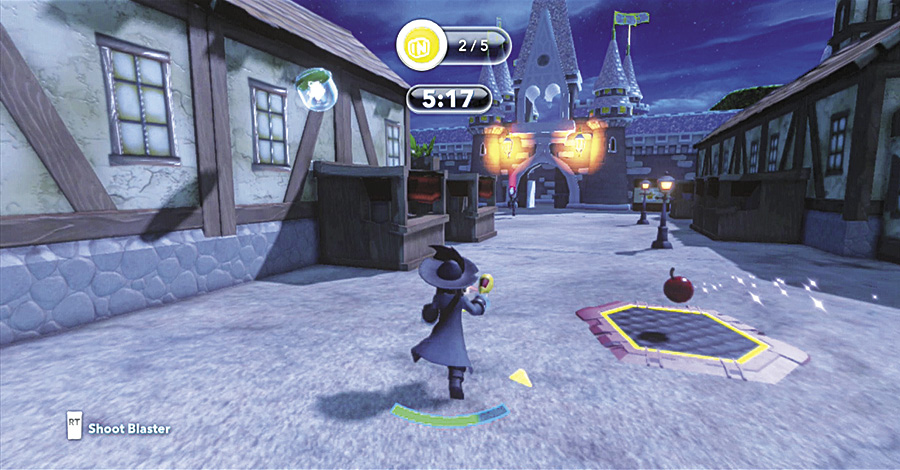
There are several items that you can pick up and use, such as Blasters and Cherry Bombs. Or wait for an enemy to get near one of the Explosive Blocks and then shoot the block to defeat the enemy with a blast.

While most enemies only give up a yellow collectible worth 1 point, more powerful enemies give up a red collectible that scores you 4 quick points. Use any special attacks your character may have. Also use Power Discs to increase your damage or help you avoid taking damage. The key to getting gold is to use your ranged weapons to damage enemies as you approach, then get in a series of attacks. Remember to block when you are under attack, then counterattack before the enemies can block.
Davy Jones Collects Souls
Ye’ll fear death with this challenge. Defeat yer enemies whilst collectin’ their souls so you can send them to the Locker before time runs out.
- Gold: Defeat 35 enemies
- Silver: Defeat 20 enemies
- Bronze: Defeat 5 enemies

This is another combat Adventure. This time you have 4 minutes to defeat as many enemies as possible. The only weapon you have for this Adventure is the Blunderbuss. Don’t expect to find anything.

The Turtle pirates like to throw bombs at you. Plus there are some up on the pirate ship, so keep moving or you risk getting hurt by the bombs they rain down on you.

Each enemy is a bit different, so it is important to know how best to beat them. The skinny Driftwood pirates can be defeated with a single shot of the Blunderbuss. The Clam pirates are a bit tougher and like to block your attacks. Let them come at you, block their attacks, and then counterattack. Turtle pirates are best engaged up close so they can’t throw bombs at you. However, their shell lets them take extra damage. If you want a chance at gold, be sure to use some Power Discs to give you an advantage.
Lightning’s Collector Course
It’s ka-chow countdown! How many collectibles can you gather while racing around the stunt arena before time runs out?
- Gold: Earn 120 points
- Silver: Earn 70 points
- Bronze: Earn 20 points

This car Adventure requires you to score points by running into as many collectibles as you can within 3 minutes. Yellow collectibles are worth 1 point, orange collectibles are 2 points, and red collectibles are 3 points. The red and orange are a bit tougher to collect. Right at the start, jump off the ramp and collect a row of red and orange collectibles.

In order to score points, you essentially have to perform stunts. Look for loops that are full of orange collectibles. You can score 30 points within a couple seconds. Make sure you have enough speed to get all the way around.

In order to get gold, you have to go after the red collectibles as well. Build up energy so you can use turbo, and then use ramps and tunnels to get up high enough to get those higher-point collectibles.
Mater’s Tow’n’Go
Time’s a tickin’! Can Tow Mater live up to his name and tow the tourist cars to their destination before time runs out?

There are several tourist cars stranded outside of Radiator Springs and Mater needs to tow them to the correct locations within 4 minutes. The green light beacons show you where the cars are located. Once you approach a car, press the tow button to pull it behind you. Then pull it to the beacon with the same color of light.

To save time, you can even throw the tourist cars towards their destination so you can start heading to the next car while the first is on its way. Just drive straight towards the beacon and then press the throw button. However, if you miss, you have to retrieve the car and tow it back again.

The key to getting gold on this adventure is to think ahead. Know where the locations for the three colors of cars are located. Then, as soon as you pick up a car, drive towards that location. As you are driving, look for other cars and go after those that are closest to their location or to you first. This saves time. Get good at throwing cars and you can save even more time so you can get 18 cars within the time limit.
Francesco’s Rush
Set on a course filled with challenges and shortcuts, even Francesco will appreciate this race.
- Gold: Finish in under 3:00
- Silver: Finish in under 4:00
- Bronze: Finish in under 6:00

Get ready to race for this Adventure. There are three different shortcuts that can help you get the gold medal. The first is when you are driving down a canyon—take a left around a stone pillar so you can then make a right turn into a cave. There are a couple of tight turns in the cave, but this can get you ahead of your opponents.

The second shortcut can’t be accessed if you took the first since the first shortcut puts you past the entrance to the second. After you get through the canyon and have to make a left turn, look for a ramp on the left side. It takes you on a paved course for a short bit and cuts off a bit of time.

The third shortcut is shortly after the exits to the other two shortcuts. When the road turns to the right, and you can see the castle directly ahead, drive straight ahead, through the barriers, and jump across a gap. Then avoid swinging pendulums as you drive into the castle and out into the lead. For the quickest time, it is best to take the first and third shortcuts—if you can handle the sharp turns in the cave. Even then, you need to race clean and avoid crashes in order to earn that elusive gold medal.
Holley’s C.H.R.O.M.E. Course
Have what it takes to be a C.H.R.O.M.E. Agent? Eliminate the enemy targets in this combat challenge to find out.
- Gold: 30 enemies defeated
- Silver: 22 enemies defeated
- Bronze: 10 enemies defeated

This is a combat course more than a race. While driving around an arena, you must defeat as many enemies as possible within 5 minutes. Pick up weapons from the surprise boxes to help you earn medals. The weapons only have a few shots, so you have to constantly drive over the surprise boxes to get more weapons.

The enemies spawn in the four corners of the arena. The green arrow will show you where they are in relation to your vehicle. Use weapons to eliminate them or keep up your speed and crash right into them to destroy most of the enemies.

Since you will be making lots of passes against the enemies who come in groups of three, use the 180-degree turn to quickly turn around and head back towards the enemy. Later in the adventure, the enemies that appear are tougher to defeat and just running into them once may not do the trick. Also, if you don’t like the weapon you have, quickly fire it off and pick up another.
Lone Ranger’s Justice Run
Pursue the Cavendish Gang through the canyons, deserts, and ghost towns of the Old West and defeat them before they escape. Enemies on horseback are worth more points than enemies on foot.
- Gold: Earn 100 points
- Silver: Earn 65 points
- Bronze: Earn 20 points

You have 4 minutes to ride along a course and defeat as many outlaws as possible. You get 2 points per outlaw and 10 points for an outlaw on a horse. The course makes a circuit with the same outlaws appearing during each time around.

Keep your horse riding as fast as possible as you move towards the next group of outlaws. Hit as many as you can by riding towards them until the reticle appears on them, then fire. Plus, you can also defeat an outlaw by running into them while your horse is running fast.

The key to getting gold is to go after the mounted outlaws. They spawn near the town, so it is important to try to get around the circuit as quickly as possible to go after those outlaws on horseback.
Tonto’s Flight
Race through the desert with the Crow Wing Pack, gathering collectibles before time runs out.
- Gold: Earn 35 points
- Silver: Earn 20 points
- Bronze: Earn 5 points

This is another collection Adventure. However, this time you have Tonto and his ability to turn into a Crow. There are colored collectibles spread throughout the area. Yellow collectibles are worth 1 point, orange collectibles are worth 2 points, and red collectibles are worth 3 points. Collect as many as you can within 5 minutes.

Unlike Gliders, you can press the flap button to flap your wings and rise up into the air as you fly. There are several high-value collectibles near where you begin, so grab them quickly.

Not all of the collectibles are out in the open—check out the cave as well. If you want to earn gold, you need to play wisely. Gather all the collectibles in your immediate area before moving on to the next area. Flying to the next collectible you can see can waste time since it may be farther away than one closer to you that you cannot readily see.
Jack’s Nightmare
Jack is in a fight with his Nightmare creations. How long can you last using all your Packs and Tools against the waves of unpleasant presents?
Gold: 3 Enemy Waves
Silver: 2 Enemy Waves
Bronze: 1 Enemy Wave
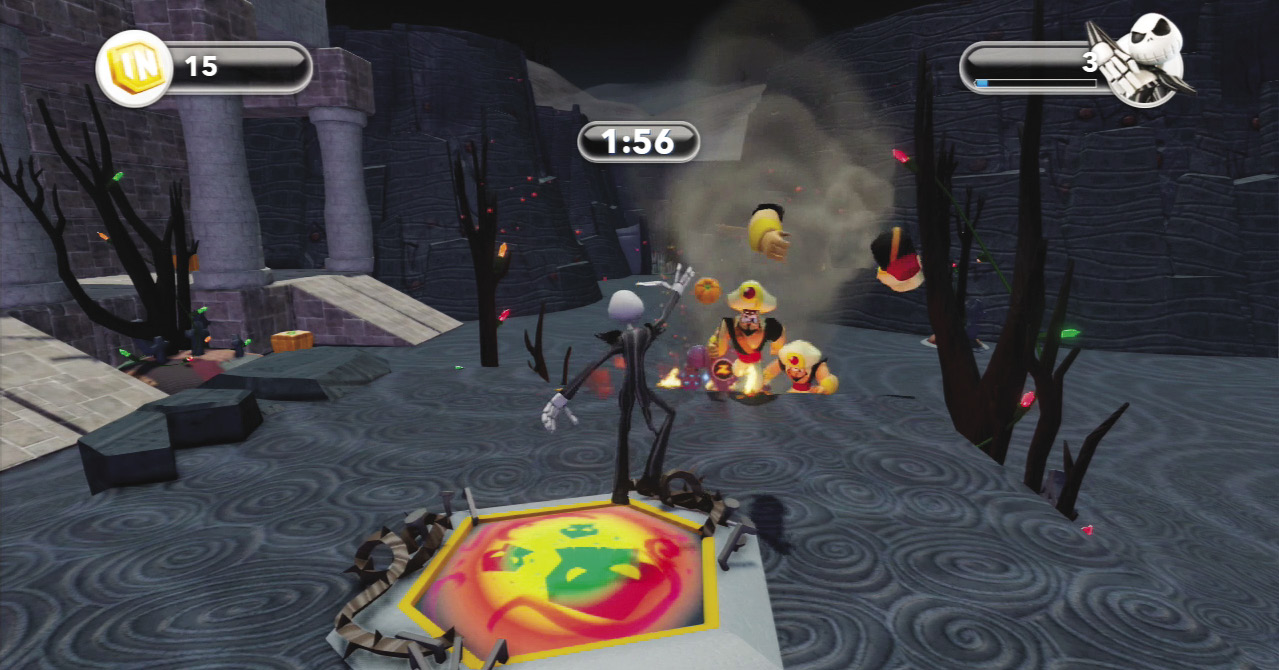
As you might guess, each round gets progressively more difficult with more enemies and more time you must survive. Round 1 is pretty easy with 3 minutes on the clock and basic melee enemies to deal with. The next round is similar, but a gate will open, allowing you access to another area, and projectile foes will appear. The extra room is great if you need to retreat, but the best approach for the first two rounds is to find a place where the enemies funnel in towards you. Jack is more than capable of holding his ground with his exploding jack-o-lanterns. One of the best spots to take on your foes is the raised section in the center of the first area. Enemies are forced to come to you using the ramp, and they can’t reach you due to the elevation of this section. If you do get overwhelmed, simply jump off the edge in the back and maneuver until your green health meter recharges.
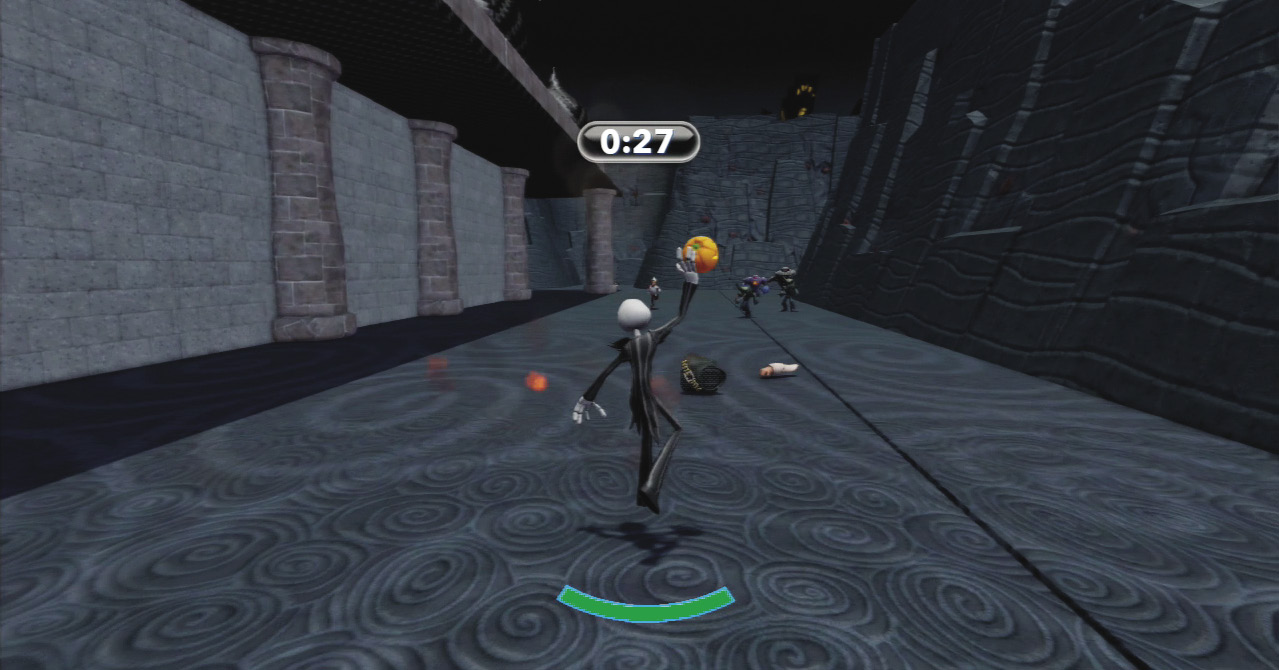
The third round is a real challenge because you must survive for 5 minutes. The new enemies that spawn are numerous and powerful. Many have projectile weapons, which means you can be outgunned as well as hit from multiple directions and various distances. Look for the Skull block that can be used to destroy all enemies, but overall the best tactic is to use the fully opened map to spread the enemies out and avoid open areas that leave your flank exposed. For example, use long walls around the castle to protect your sides while you do battle and when you need to run around a corner to recharge your health.
Buzz Lightyear, Save Me!
The townspeople are in trouble! They’re stranded on meteors out in space and only Buzz can help. Rescue them before time runs out!
Gold: 25 Points
Silver: 15 Points
Bronze: 4 Points
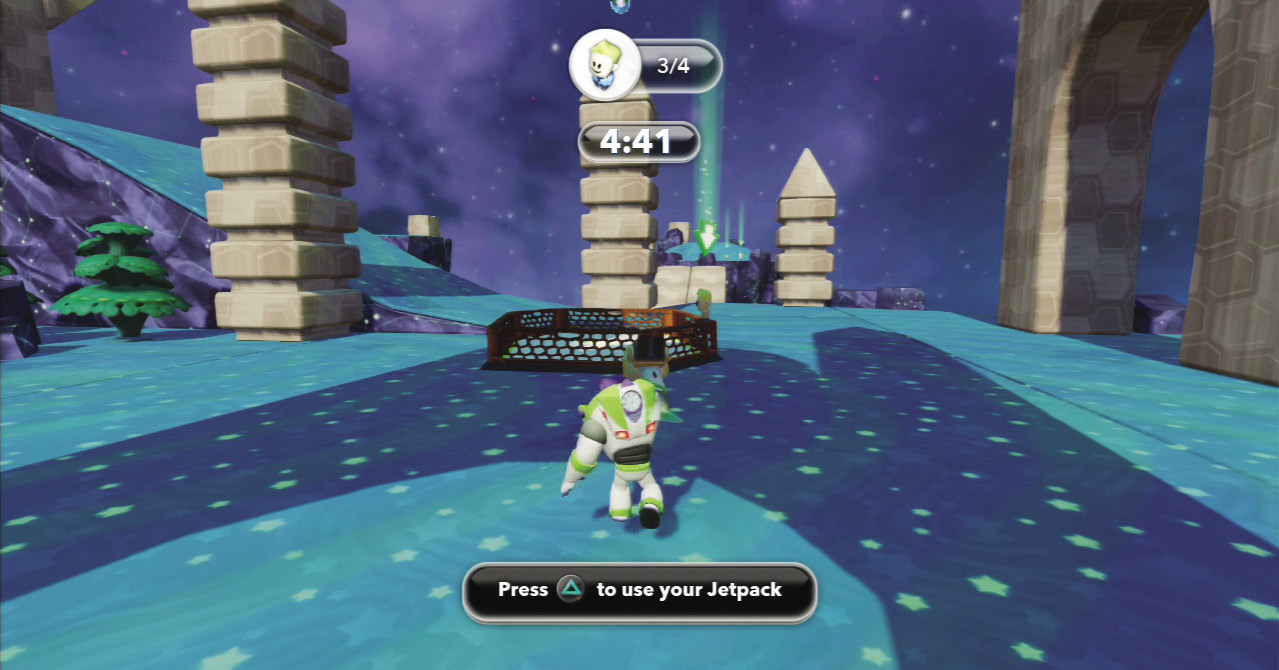
The first four people to collect are on the section with the IN gated pad. These will be easy to pick up and toss into the pen. However, the following set of townspeople are farther out on various meteors. You have 6 minutes to complete the challenge, and it seems like a long time until you realize how spread out some of the townspeople are. The goal is pretty straightforward, but you have to actually get them into the pen to rescue them. The first thing to master is your throwing distance and aim, as it is easy to overshoot the target or just plain miss it. Failing to get the townsfolk into the octagon means you will waste a lot of time. It is even possible to get these little folks stuck on the top of the gate. Whenever you are flying back to retrieve a person, try to land directly on the target pad to avoid having to stop, aim, and toss the person.
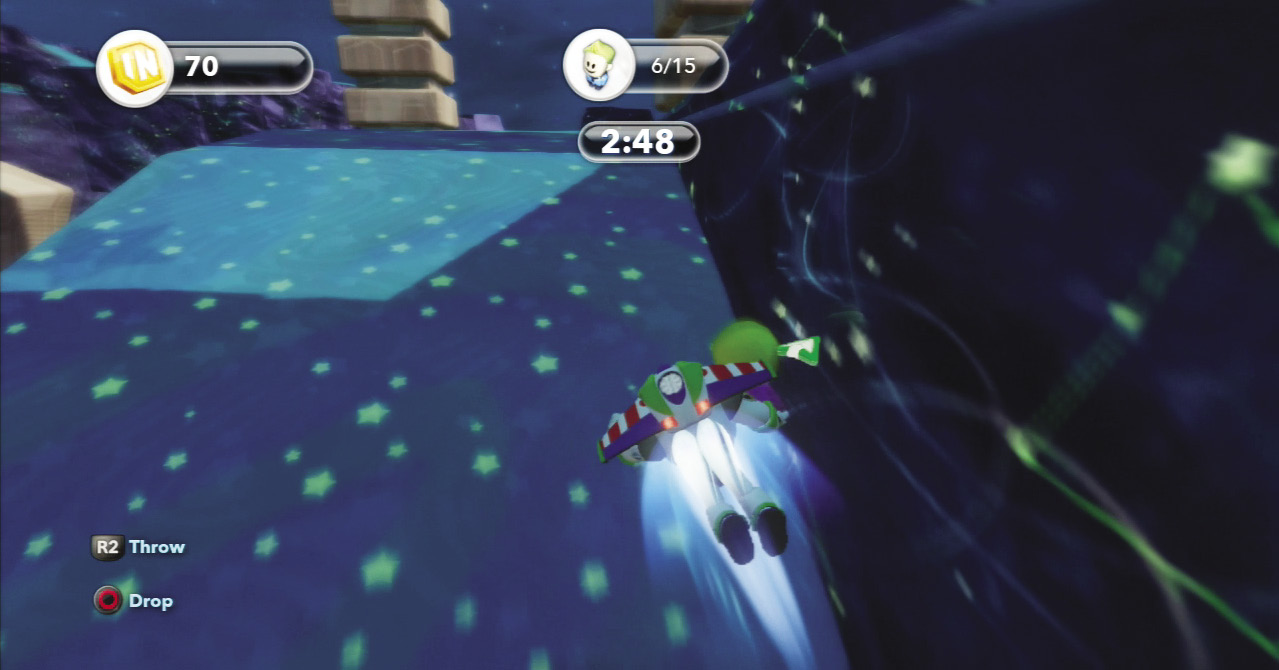
Although there is plenty of time on the clock, you need to fly (using the jetpack) as much as possible to avoid a time-consuming walking pace. The basic challenge is how to effectively return the townsfolk that are scattered on the meteors at various heights. If they are located at or above the height of the target pad you can fly directly back, but many are purposely placed too low. It goes without saying, but you should always seek higher ground when you try to return. However, many spots are just too low to make it back to the main hub directly. A good choice is to use the ramp to fly right up to the targeted area. The trick is looping around this ramp so you don’t slam into the wall rather than fly up the incline.
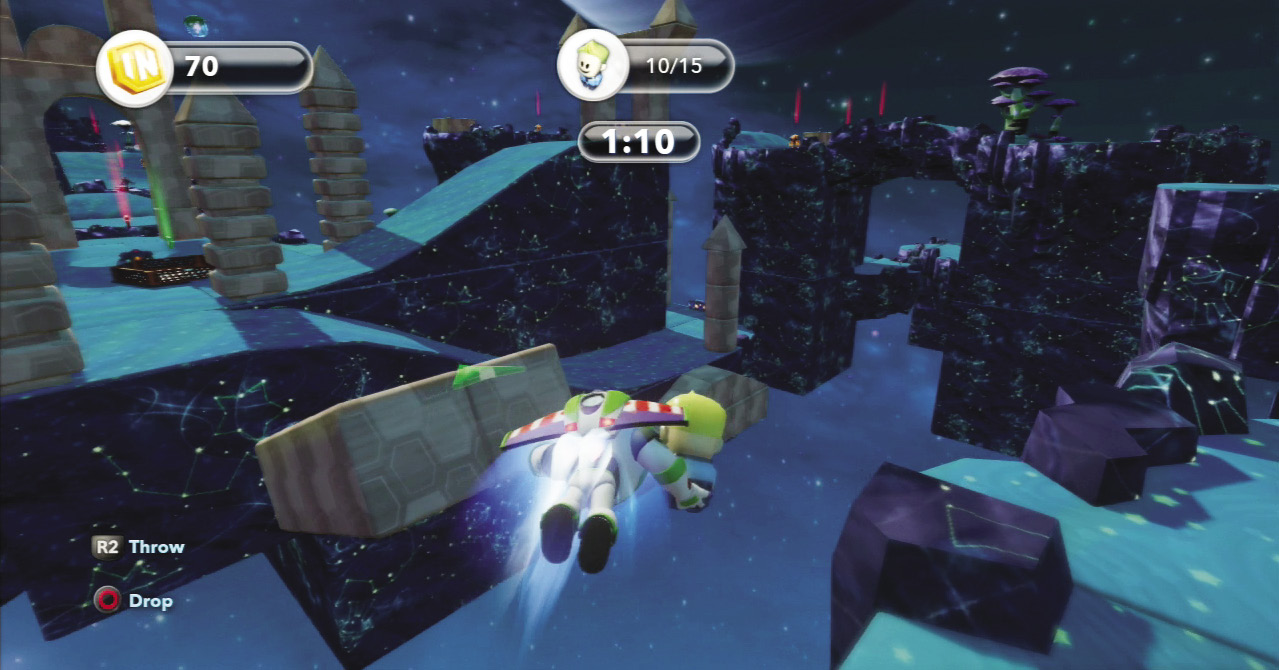
There are lots of enemies that will spawn on the meteors and you are equipped with the blaster if you need to use it. Still, keep your focus on the rescue mission and ignore all of the Zurgbots as they will only slow you down.
Woody’s Round Up
Race around the meteor track three times and show us how fast you are, Cowboy!
Gold: Under 3:00
Silver: Under 4:00
Bronze: Under 6:00
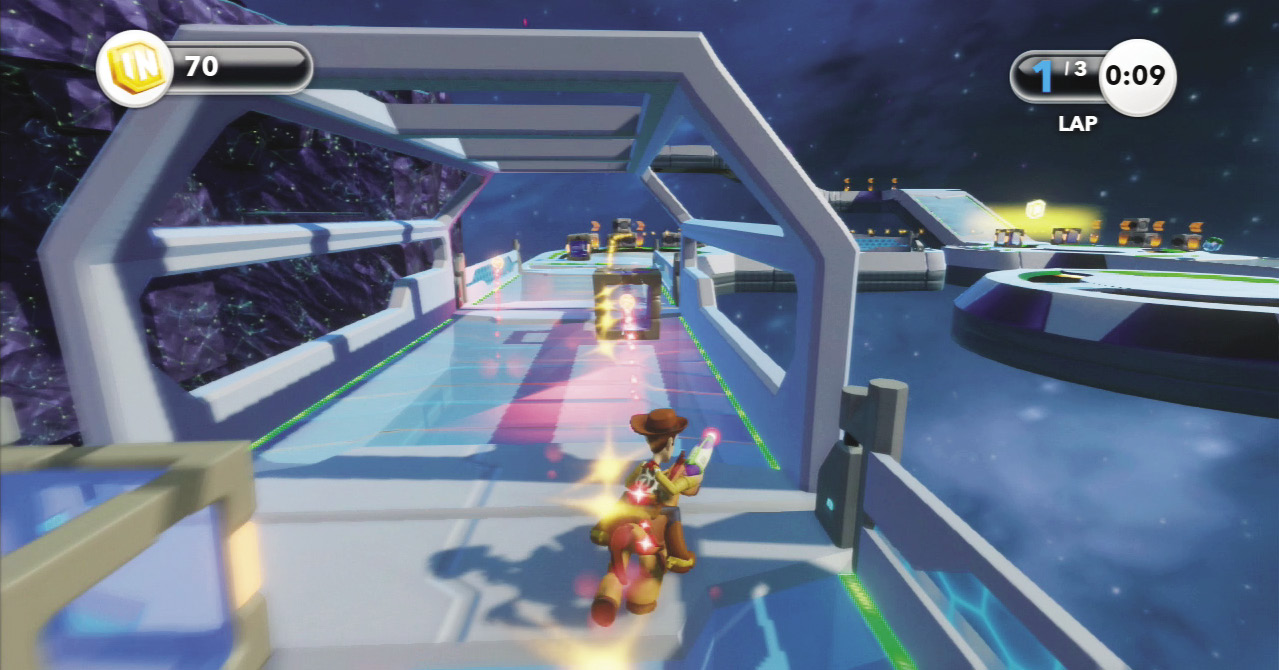
The three-lap race is pretty long, and if you want a chance at getting gold you need to sprint as much as possible. A lot of the turns will be tough to navigate at top speeds, however. Run as much of the time as you can and let up only when you are coming into a turn too fast. In this challenge you have a blaster at your disposal, but don’t waste time gunning for the Zurgbots. Instead, use the gun just to remove crates and obstacles from your path that might slow you down.
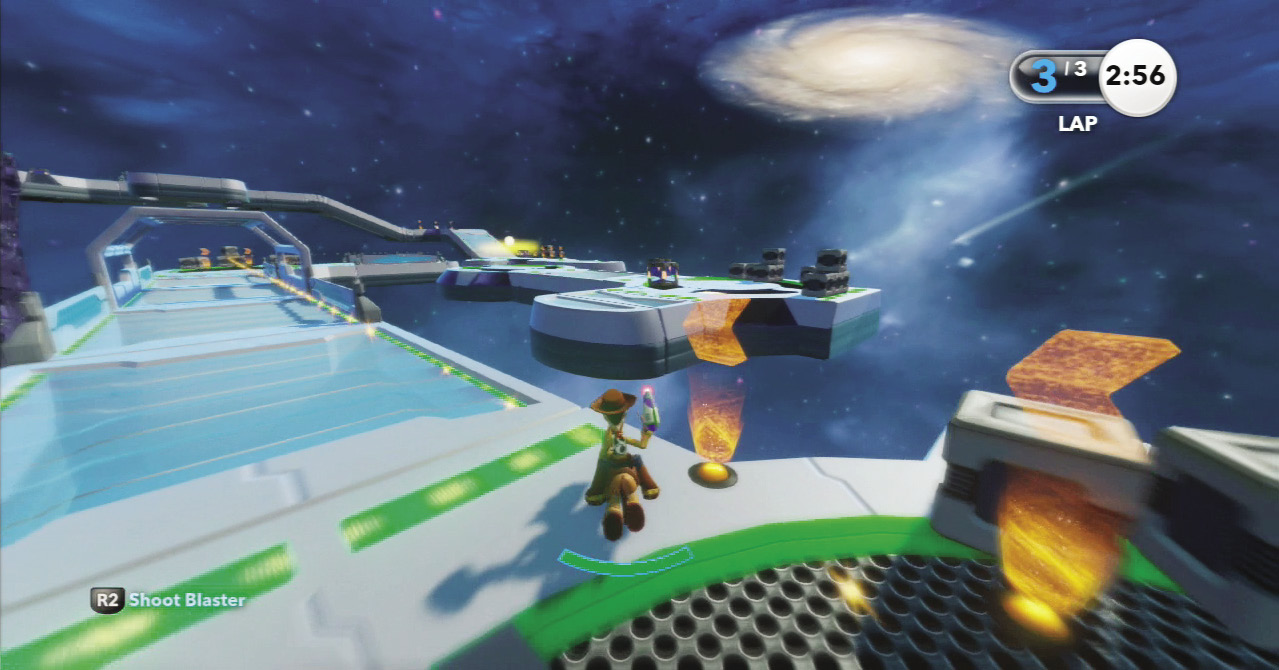
There are plenty of orange arrows to guide you along the way, but it is the yellow gates that you really need to pay attention to. You must pass through these checkpoints, but that doesn’t mean there is only one way to get to them. There are a few alternate paths that can give you an edge as well as let you collect some green capsules. One example is at the very start where you can jump across to a parallel path that is a long straightaway versus the obvious path that curves several times.
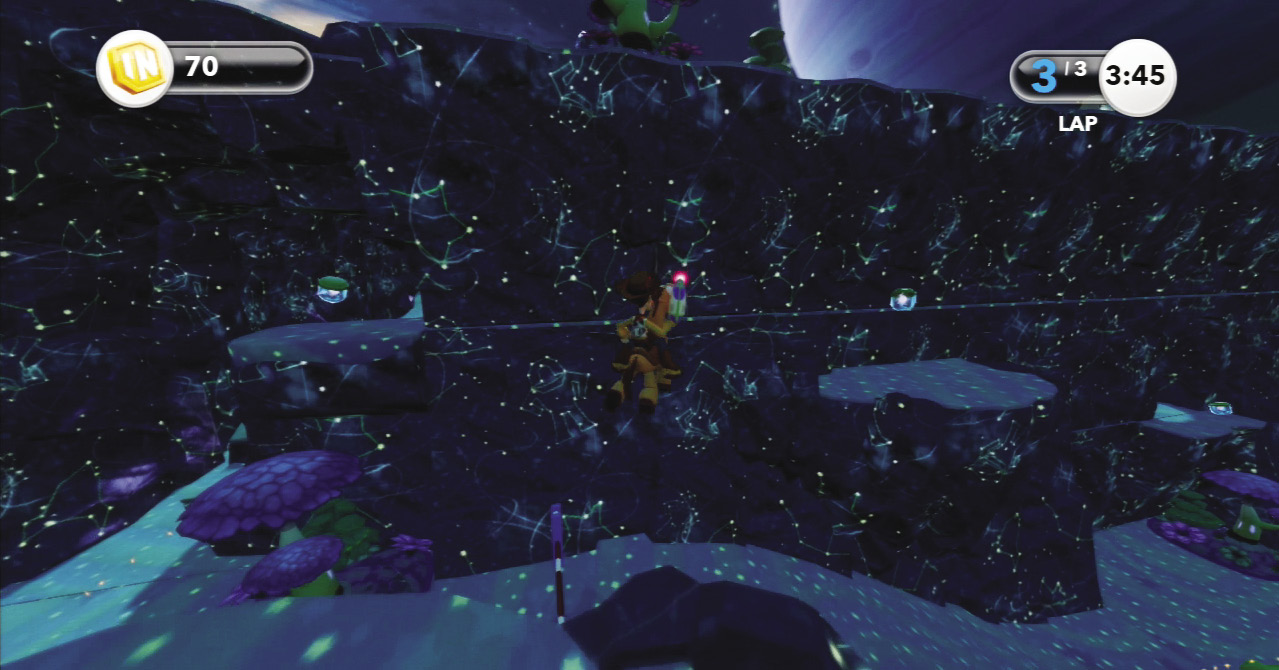
The other choice is to take the ramp and seek higher ground to collect some green capsules along the way.
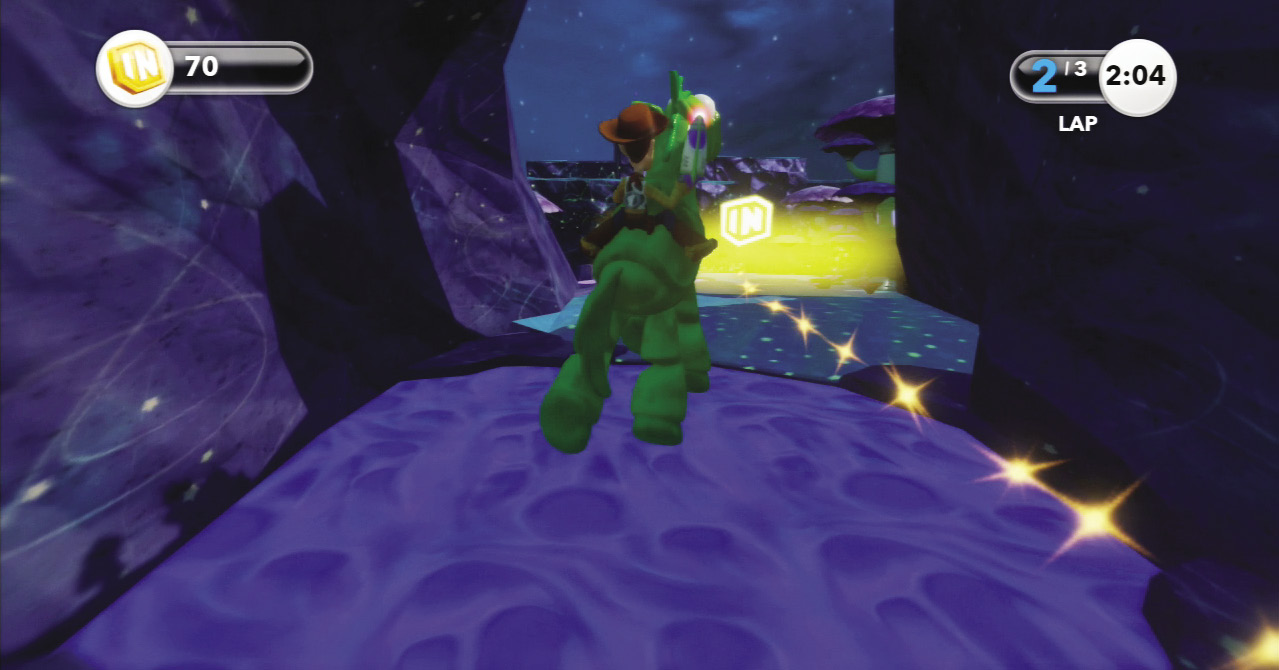
There are several obstacles to deal with, including the fences, but the Purple Goo can also be a problem. Purple pools will shrink you, thus making your ride smaller and slower. On the opposite end, the Green Goo will triple your size, and a giant-sized Bullseye can really ride like the wind.
Jessie’s Critter Corral
The poor lil’ critters have all escaped and gotta be corralled before they all get lost!
Gold: 24 Critters
Silver: 15 Critters
Bronze: 4 Critters
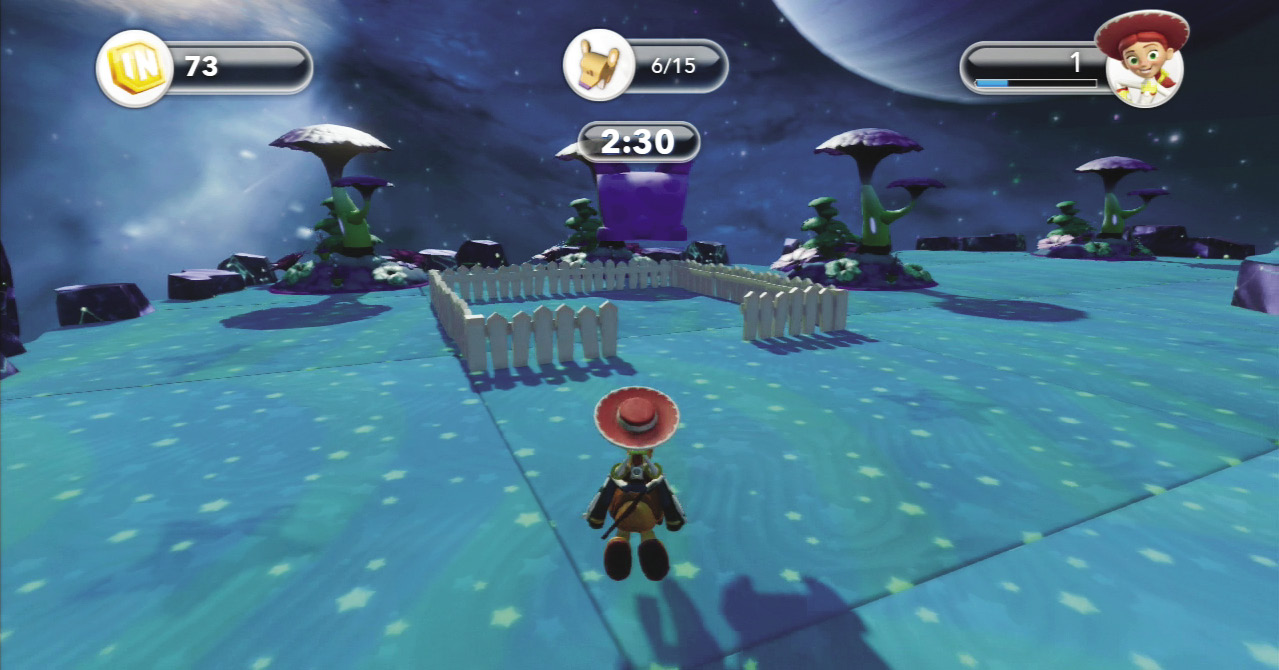
You have 4 minutes to round up as many critters as you can, but before you try to wrangle any of them, quickly hop on Bullseye to speed up the process. While toys like the jetpack and rocket booster can be very useful, your trusty steed is always available and is ideal for the job of corralling critters. There are plenty of critters around the pen to meet the minimum requirement, but to meet the gold standard you need to venture out farther and herd them back to the pen. Stick close to the pen as long as you can to get all the easy targets and make sure to toss them from a good distance to avoid having to ride all the way up to the corral.
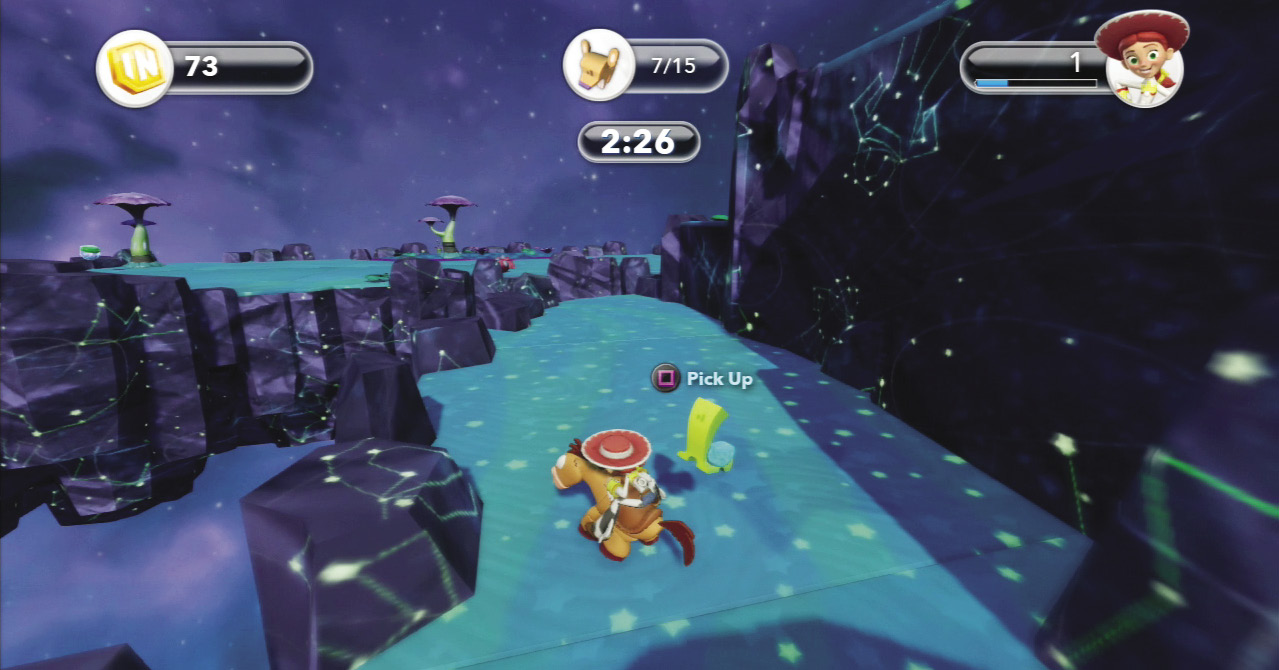
Keep in mind that the smaller critters are easy to carry and won’t slow down Bullseye, but the big ones are heavy enough to impact the horse’s speed. Always choose the smaller critters if you can, but if you must go for the larger ones consider using the Goo Shrinker to make them small enough that they become easy to carry.
Rapunzel’s Rail Ride
Race along the rails to collect all the lanterns before time runs out.
Gold: 70 Lanterns in 3:00
Silver: 50 Lanterns in 3:00
Bronze: 20 Lanterns in 3:00
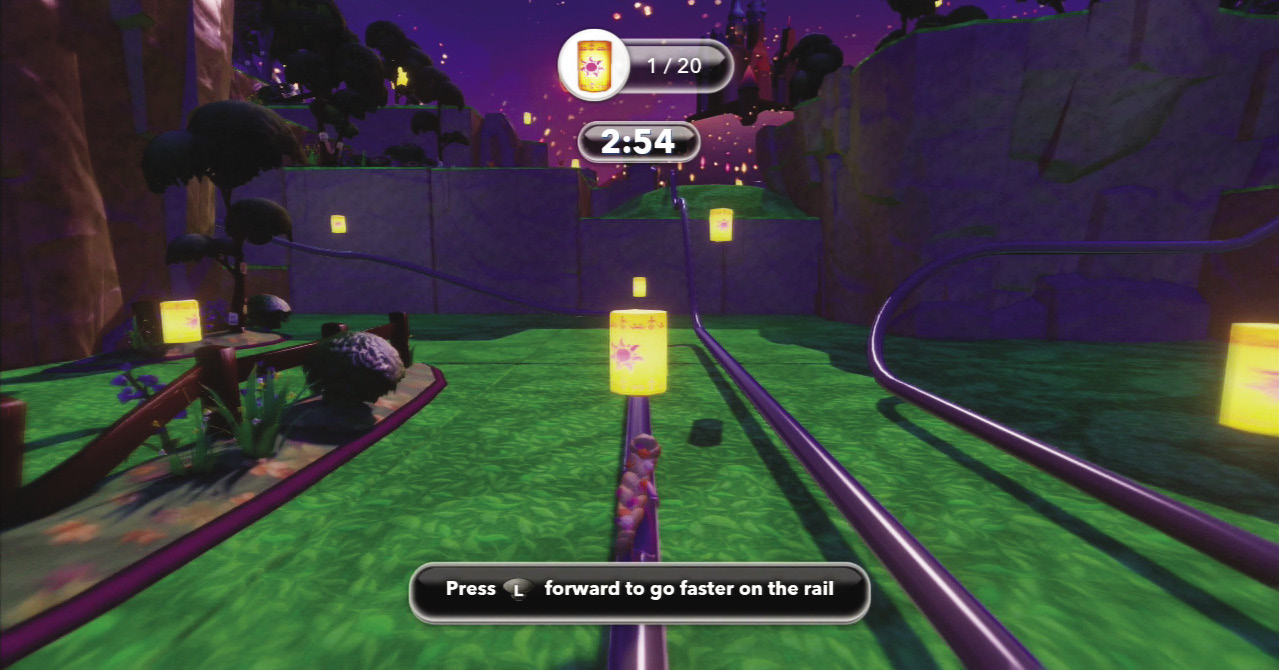
The first important tip is to keep pressing the directional stick forward to slide faster along the rails on the straight paths. Also, keep in mind that you can jump to another rail quickly as well as hop off and slide back in the opposite direction.
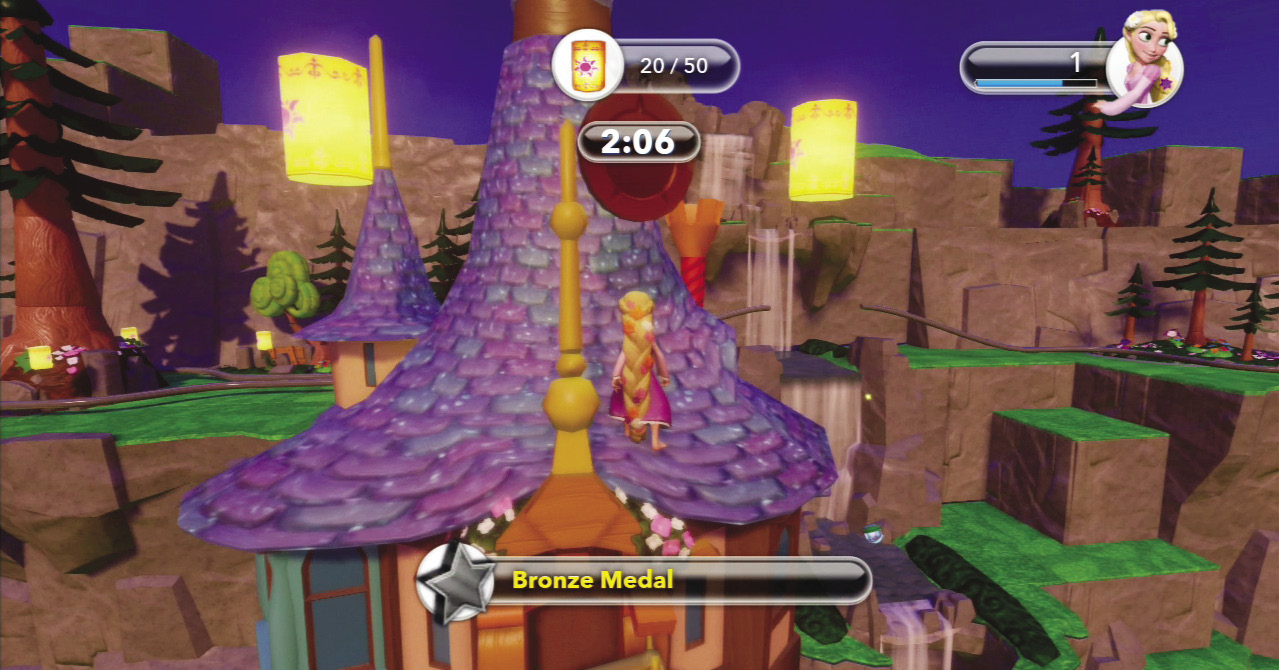
Many of the lanterns are above the track and will require you to jump while sliding in order to collect them. Try to avoid using the same rails and work on a flow from one to another to allow you to keep moving, but avoid going in a big circle where you already have tread. As you continue to slide and collect the lanterns, note that many of them require you to leap off the rail and jump or climb. Don’t take any long departures from the main rail that will burn your precious time, but it is worth grabbing some lanterns if you can quickly hop back on a rail.
Ralph’s Wreck’n Wrangle
Smash, wreck, fight, and jump your way through a mulit-storied building, and see how many of the collectibles you can gather before time is up.
Gold: 50 Collectibles
Silver: 30 Collectibles
Bronze: 8 Collectibles
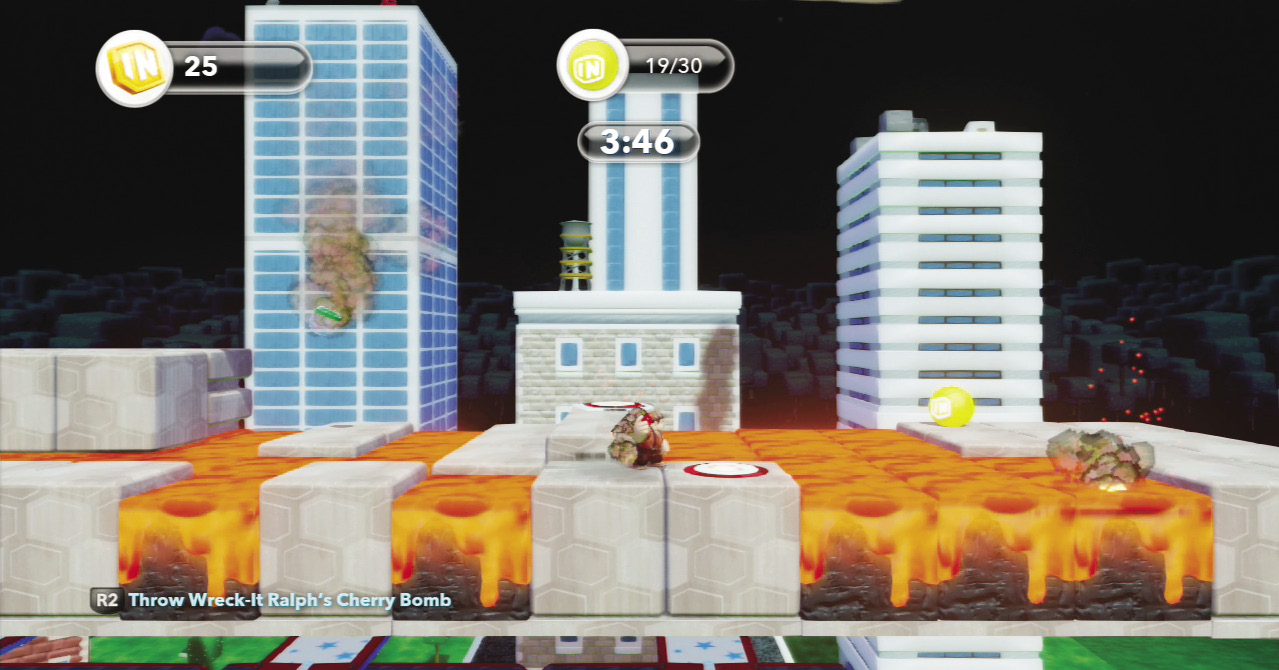
You have 6 minutes to scale this tall building and pick up as many collectibles as you can. There are lots of collectibles hidden in the stacks of blue squares, and the fastest way to find them is to toss Cherry Bombs like crazy. There is a lot of platforming to master on this level, such as avoiding swinging hammers and hot lava. As you race to the top, keep a look out for the round pads you need to step on to destroy walls in your way, make blocks appear over lava pitfalls, or shift large stone platforms.
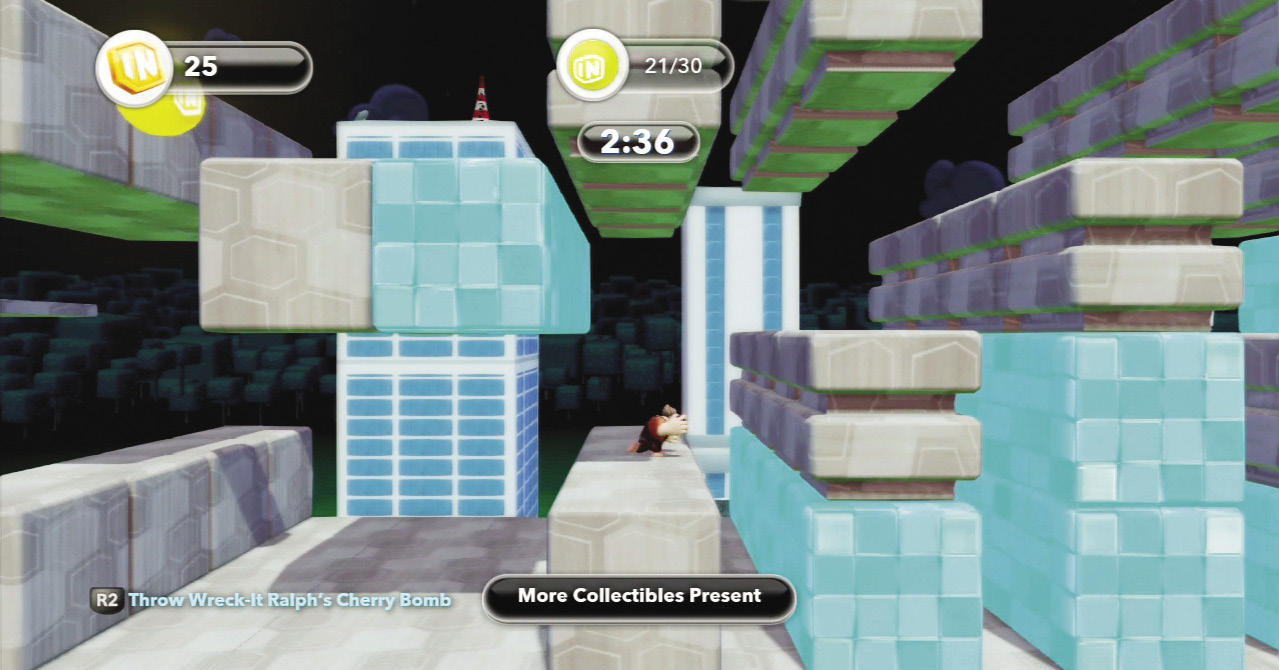
The toughest part is the area with long stone platforms that have two switches on each top tier. Triggering the first on the right will move some of the platforms, but the one on the left will create more blue blocks throughout the entire section. The key to getting through this fast is knowing which of these blue blocks has a collectible. On your first trip through, bust open all of the blue blocks and remember which ones hold a valuable collectible for your next attempt. It is easy to waste a lot of time searching this area, especially if you fall from the top level all the way to the bottom.
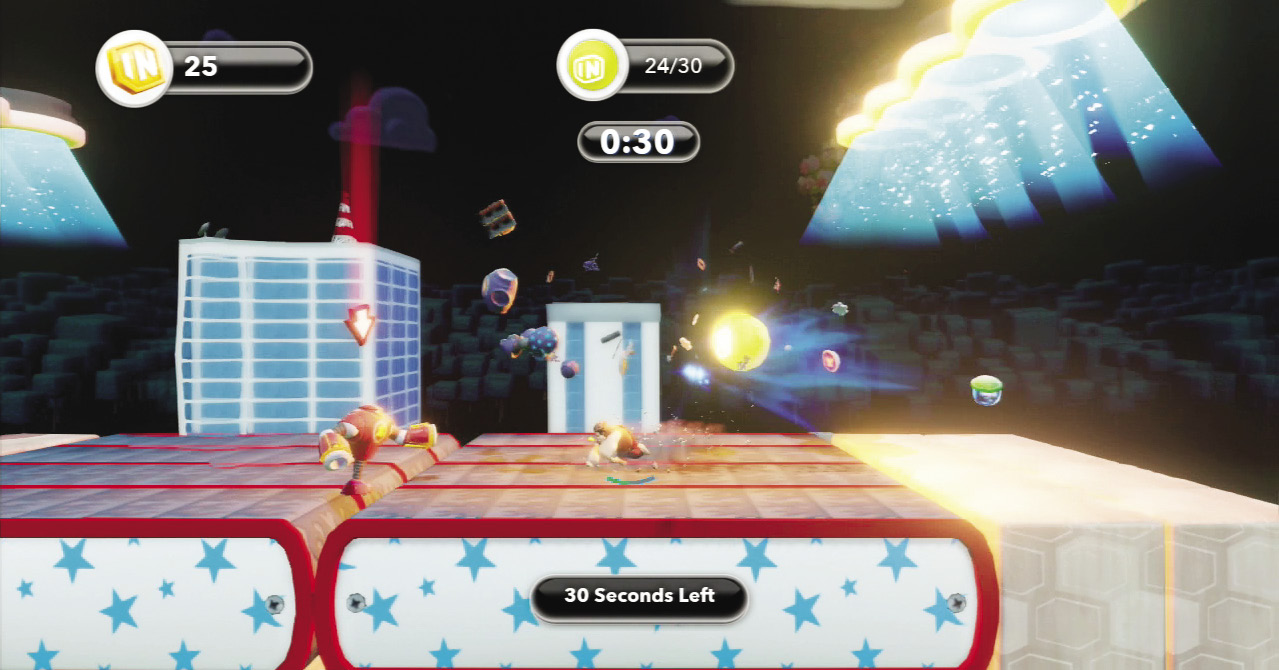
The rooftop is a rough area filled with a bunch of conveyor belts and lots of Zurgbots. Normally, you would avoid the enemies, but in this case they hold the collectibles you need. Stand on the stone part of the roof and toss Cherry Bombs to waste your foes. If any of your enemies gets too close, use your attack to quickly crush them. This spot is very chaotic as many of the enemies can shoot you from a distance and spawn from different areas. Try to destroy the robots as quickly as possible and use jumps to collect the yellow orbs and avoid the pull of the conveyors.
Vanellope’s Sweet Ride
Vanellope is made for racing and will prove it in this three-lap Race of Awesomeness.
Gold: Under 3:45
Silver: Under 4:45
Bronze: Under 7:00
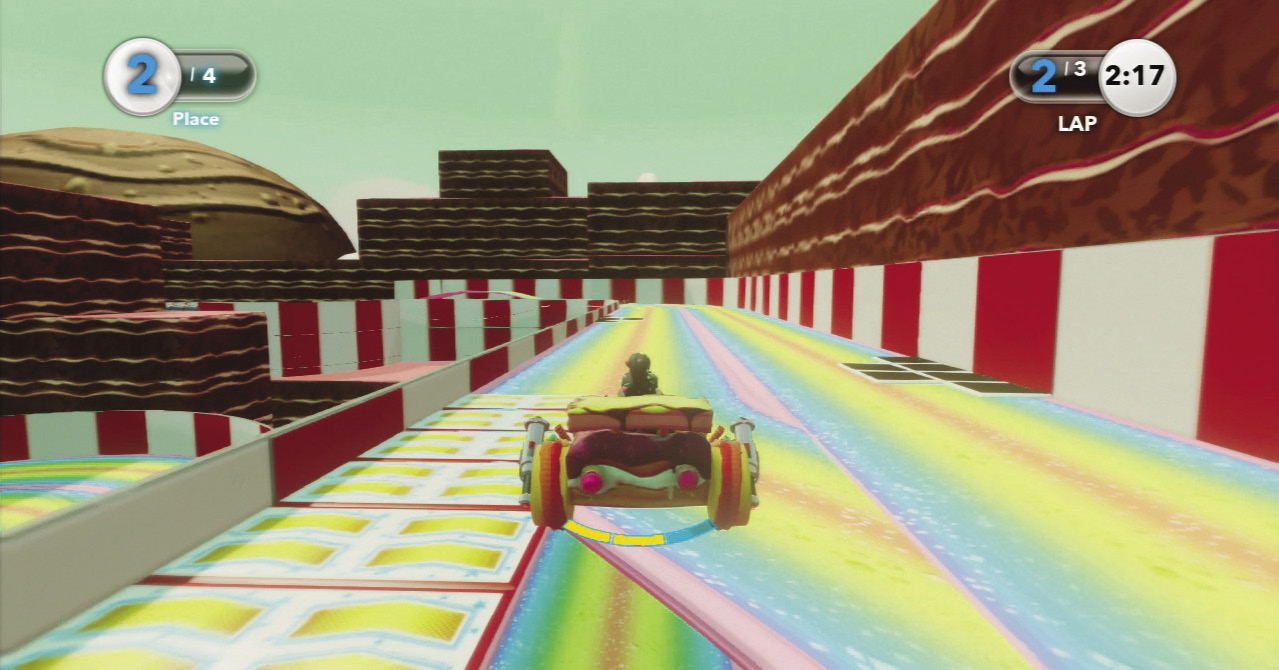
In any of the racing challenges, you must master the essential driving skill of drifting into the turns to increase your turbo meter, and use those boosts on the straightaway sections. There are a few alternate paths, but you can achieve great times by paying more attention to the actual terrain itself. Along the track there are yellow boost arrows, and you need to ride over them as much as possible while avoiding the brown sections that will slow you down. A good example of this is a section with several boost arrows on the left and brown tiles on the right. If you can hit all the arrows on the left and leap over the upcoming brown tiles, you can really drift into that upcoming turn to keep high speed and raise the turbo meter.
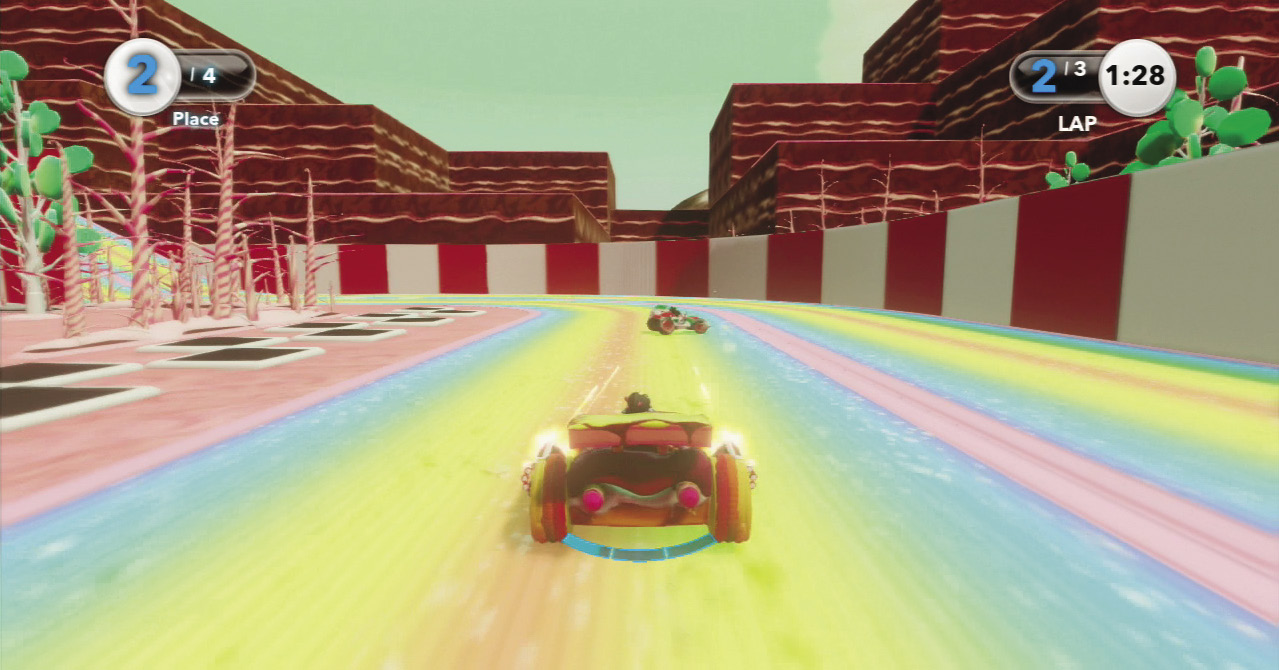
The other aspect you need to focus on in this race is the three competitors. This is a battle race, and that means that weapons will spawn from the question mark icons. It’s best to run through those icons as much as possible to stay stocked with artillery, but the best time to use it is when you have an opponent dead in your sights. You should be able to take first place for most of the race, but keep an eye out for the other racers trying to even the odds with weapons.
Anna’s Chilling Challenge
Prove your royal skills in this chilling challenge by collecting the most objects before time runs out.
Gold: 85 Points
Silver: 50 Points
Bronze: 10 Points
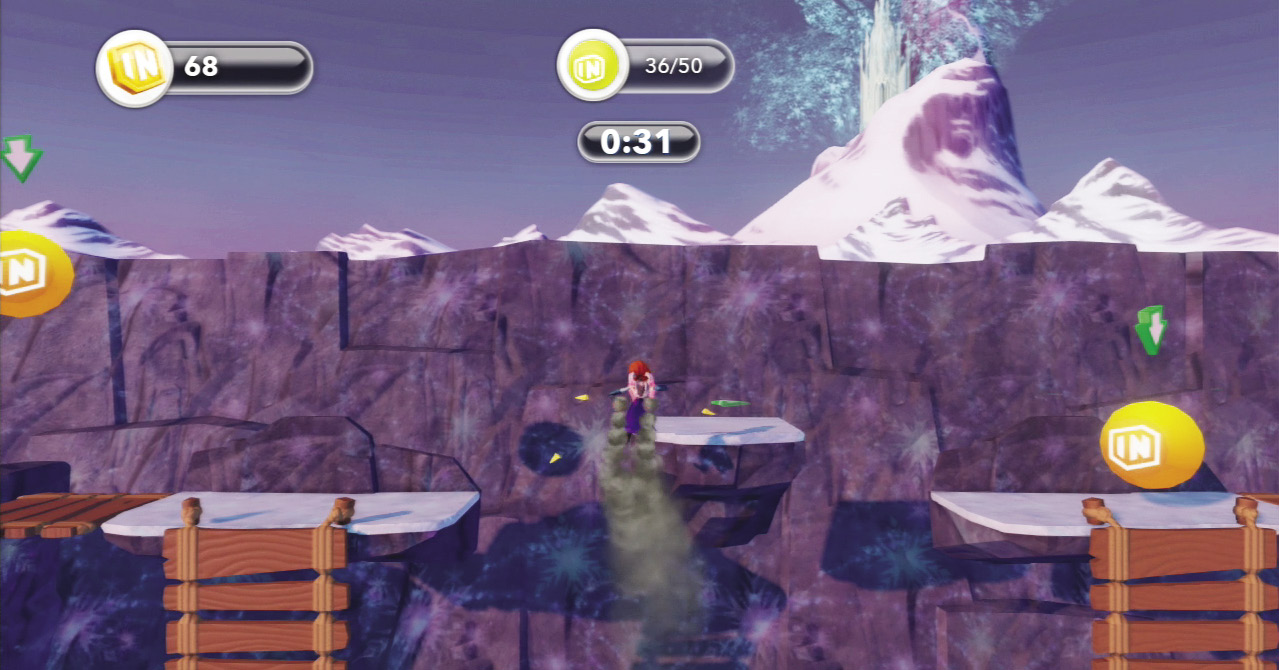
This is a pretty large area to work with including lots of ladders to climb and platforms to leap to. The key of course is trying to collect the high-value objects over the lower-point orbs. The point value for each target is as follows: yellow is worth 1 point, orange is worth 2, and red is worth 3. The high-value targets can be found on the top tier, and this is where you should spend most of your time. While it is okay to drop down to grab a few objects, don’t chase the compass arrow just to find a few yellow targets. The rocket booster is a great tool to bring you up to the top level quickly, but avoid overusing it, sending you so high in the air that the collectibles below will disappear.
Elsa’s Snowy Slingshot
Using a slingshot, hit the yellow targets for 1 point or the red ones for 3 points.
Gold: 60 Points
Silver: 35 Points
Bronze: 5 Points
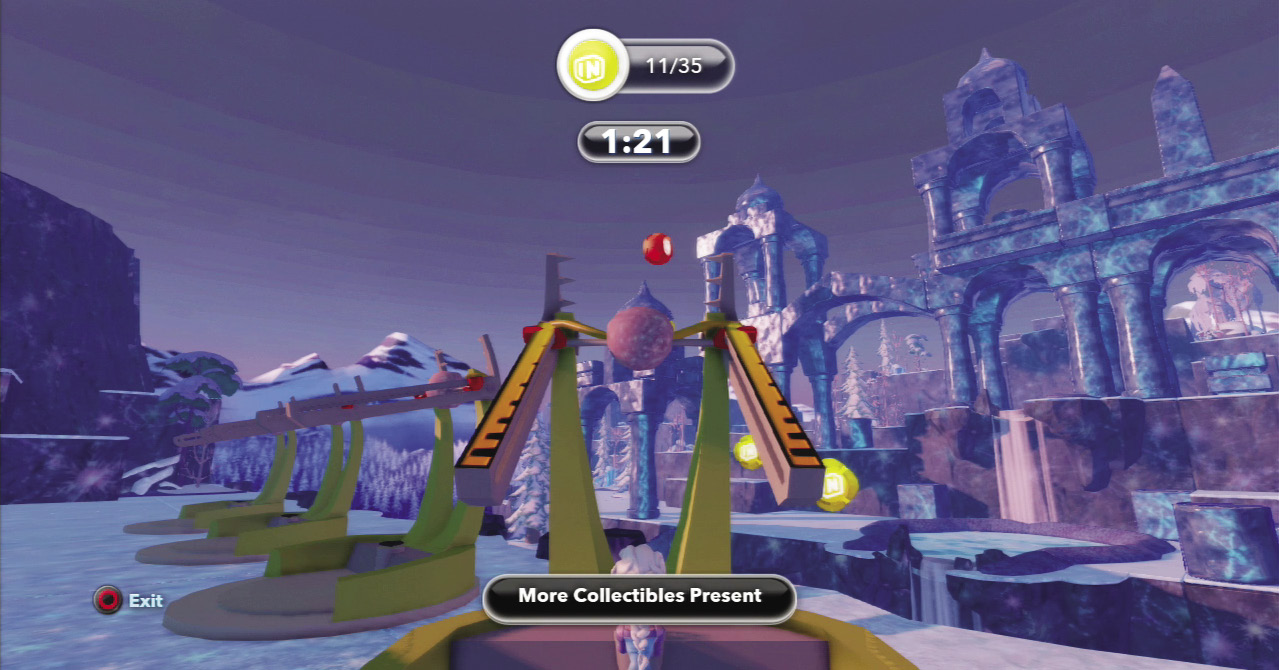
Spend a little time learning the range and arc of the slingshot. It is worth spending your first attempt just practicing your shooting, as it can be tough to judge how far to pull back on the slingshot to determine the trajectory of the actual shot. The best approach is to always try to pull back on the slingshot when you are moving from target to target to avoid wasting time. You can also pull back too far and overshoot many of these close targets. The red targets are worth triple the points and they represent an obvious incentive. These elusive red ones can move and will even disappear after a little while, flashing before they are gone for good. Keep your eyes peeled for the red ones and try to figure out if they are moving or stationary while picking off neighboring yellow ones. Hitting these red targets is the only way you will get the gold.
Mickey’s Magical Escape
Brooms have surrounded the castle and it’s up to Mickey to find a way out.
Gold: Under 3:00
Silver: Under 4:00
Bronze: Under 8:30
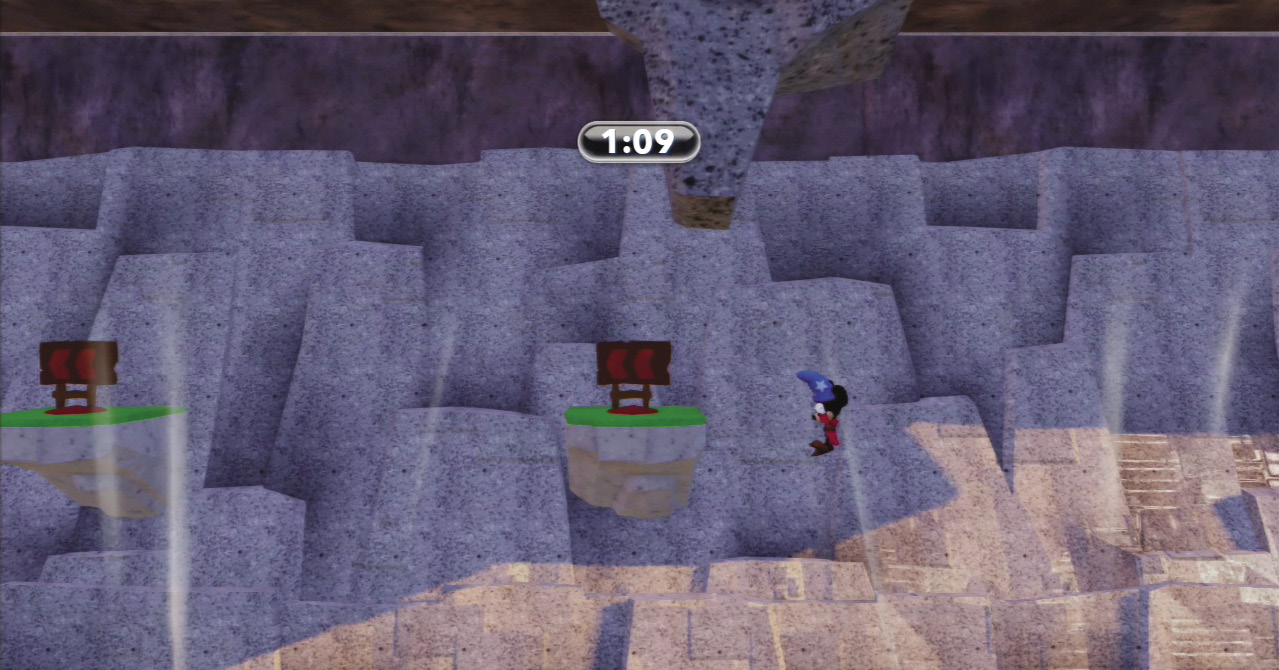
The challenge is easy to complete, but deceptively tricky to do in under 3 minutes. Basically you just follow the path laid out in front of you and shoot a few obstacles in your way. The tough part is there are things like swinging hammers, stomping barriers, and other pitfalls. Ultimately, you always want to take the high road, and if you fall by either missing a jump or getting knocked down, just restart. Because it is a timed event, you don’t want to wait too long to try to circumvent any one obstacle, so you need to be brave and jump in fairly quickly. Of course you don’t want to get smashed or fall, so it is not worth it to just rush in blindly. A few time-saving measures include pushing forward on the rail slide to get maximum speed and time your leap into the winds of the giants fans. You need to float across an updraft rather then run along the bottom because it takes too much time to climb back up.
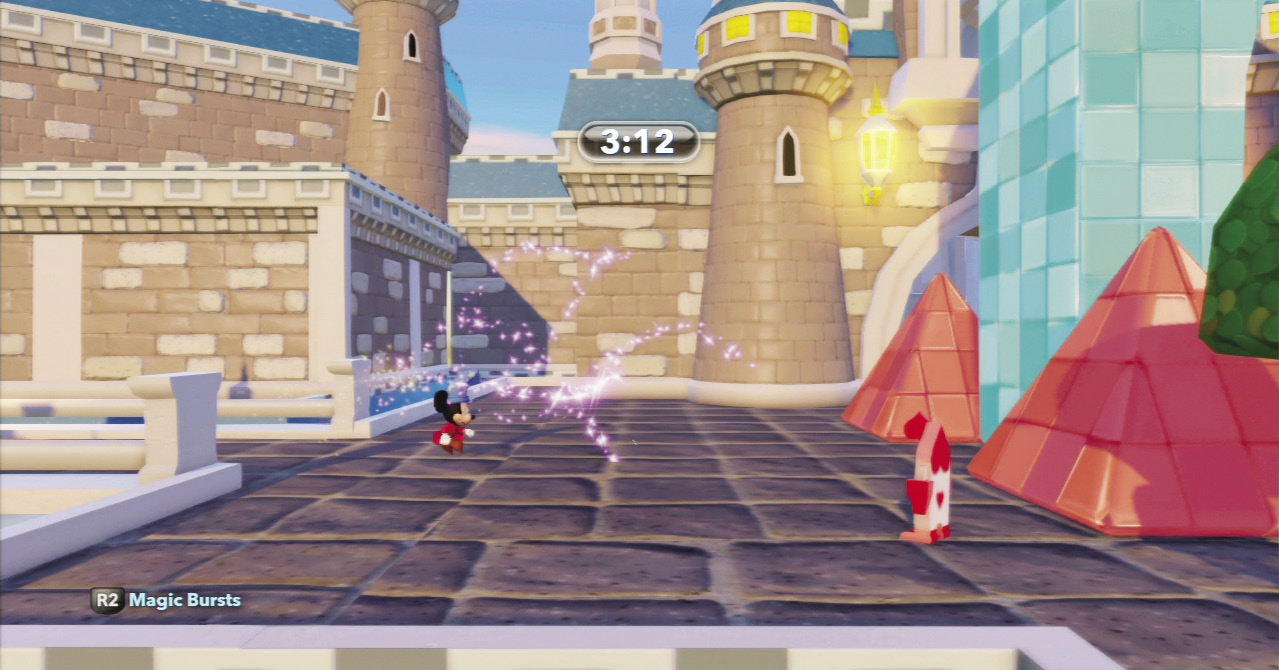
If your timing is off on the red plungers, they can crush you and waste a lot of time. Try jumping to the edge of the ledge and hang on if you are not sure of their timing, and then quickly pull yourself up and go. At the stone ramp, take the high road to hop across a few rotating platforms and grab the green capsule at the end of this section. Forget about the enemies and tanks—just sprint along the castle wall, avoiding anything that will slow you down and only stop to shoot the large red blocks that bar your way.
Agent P & the Infinity-inator
Dr. Doofenshmirtz has trapped Perry in the Infinity-inator! Survive the twisted games it creates and search for collectibles.
Gold: 25 Collectibles
Silver: 20 Collectibles
Bronze: 10 Collectibles
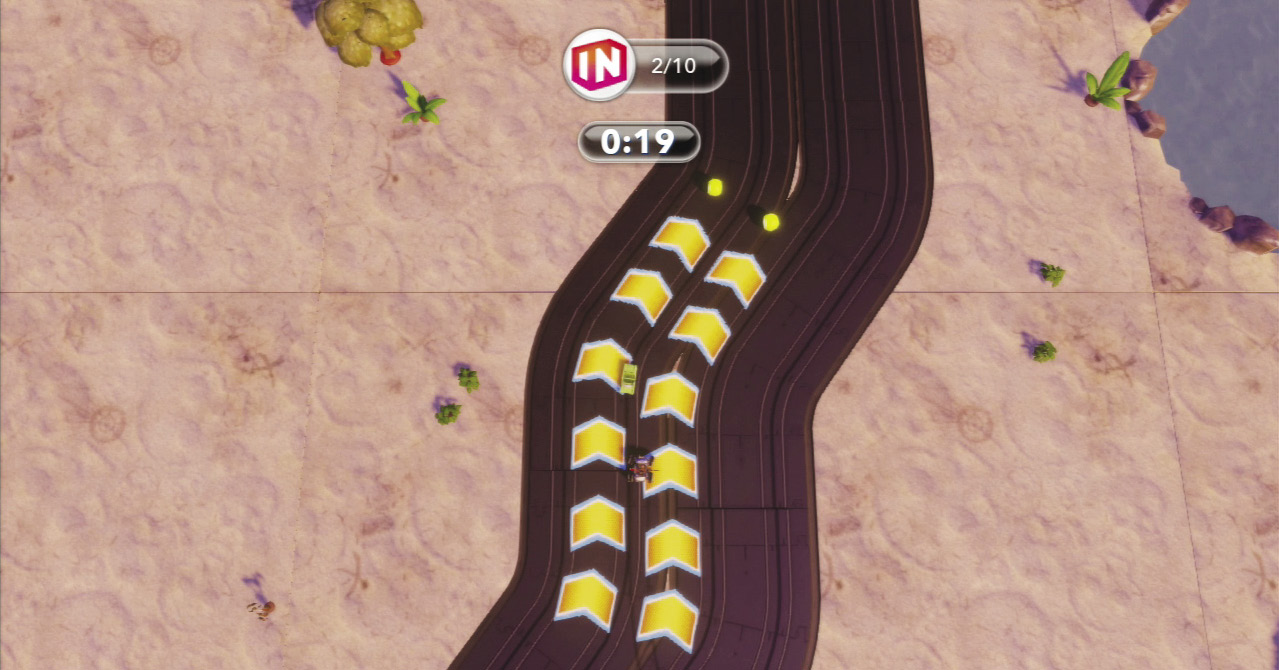
Agent P has an arch nemesis, Dr. Doofenshmirtz, who is an evil scientist bent on taking over the Tri-State Area. Dr. Doofenshmirtz is a hapless inventor who creates machines to fulfill his evil plans, and they all seem to have the suffix “inator”. In this challenge, Agent P must navigate several “games” and destroy the Infinity-inator while collecting yellow orbs.
Your first challenge is a driving game with 48 seconds on the clock. Even though this is a timed event, don’t be too concerned with your speed. Instead, take your time to line up along the yellow arrows on the track to pick up the collectibles. Use the accelerator between collectible sections to quickly get to the next pair, but don’t go so fast you drive recklessly. The track is relatively short and can be completed as long as you don’t crash and keep your speed up between collectibles.
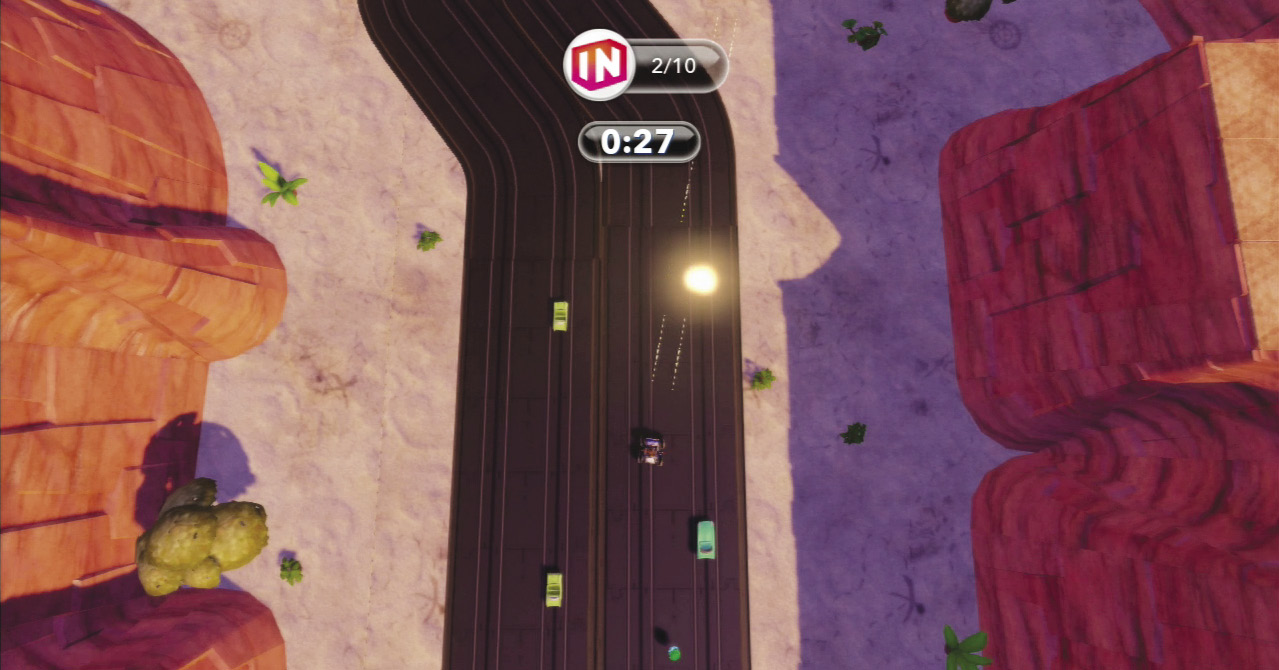
This wouldn’t be much of a challenge if the track was empty, so of course it is filled with traffic. Agent P’s vehicle is fitted with machines guns that can wipe out obstacles in his path, but the guns can’t be fired continuously. If the guns are reloading, you still have the ability to jump over cars if you need to avoid a head-on collision.
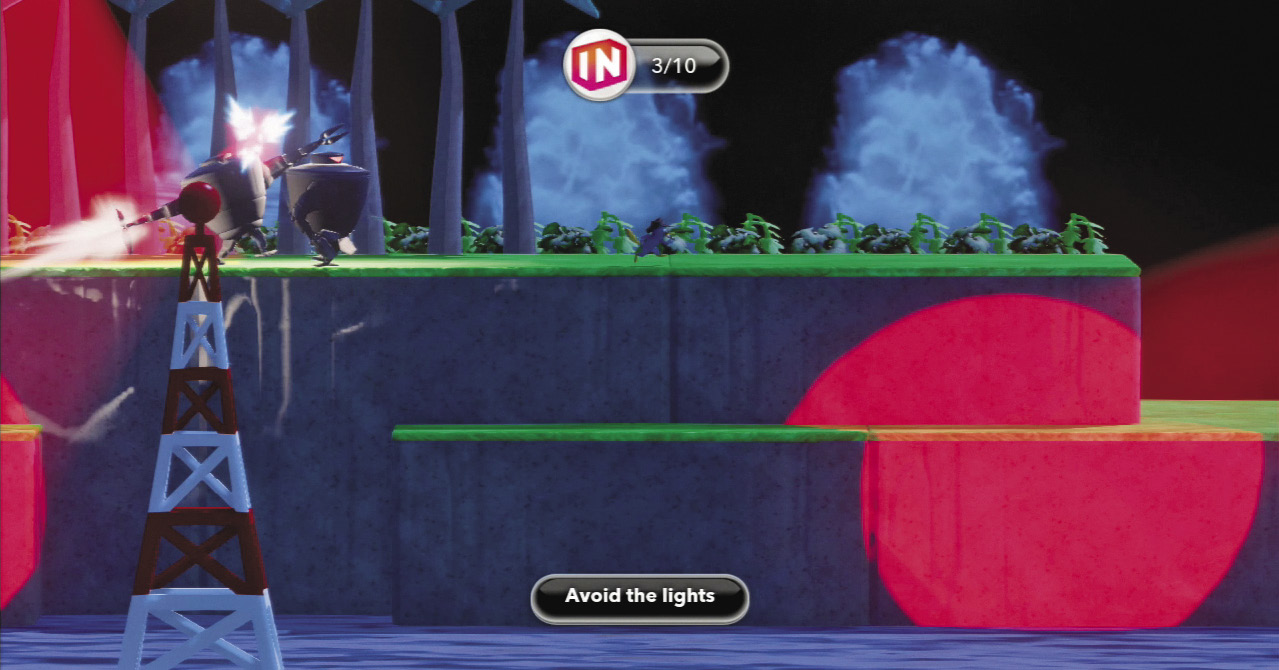
The next game is a sneaking mission where you must avoid the lights while picking up the collectibles. If you are spotted, Omnidroids will appear. They are not difficult to deal with, so the real challenge is that, over time, the collectibles will vanish. With no time limit on this section, the key is still to take it slow!
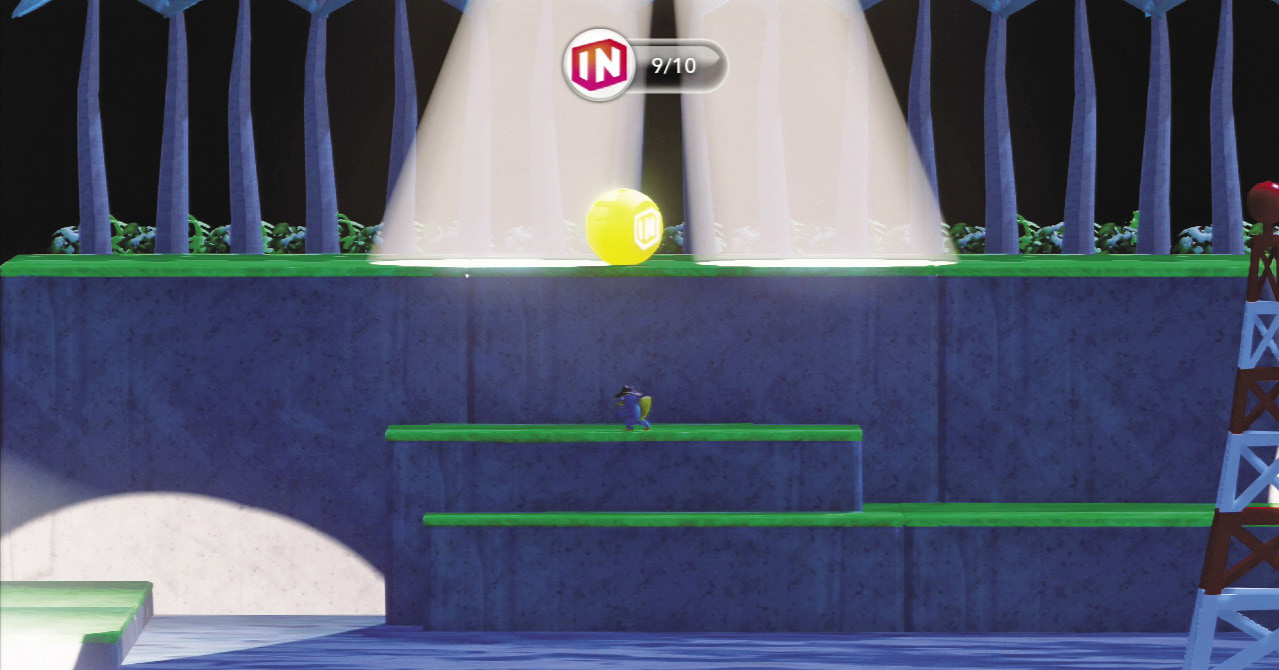
Watch the movement pattern of the spotlights before getting too close. All of the lights can easily be avoided utilizing two techniques. The first is the ability to jump up to or down from ledges to change levels quickly. By changing levels, you should be able to move quickly and avoid lights, allowing you to jump up to grab a collectible and hastily retreat below.
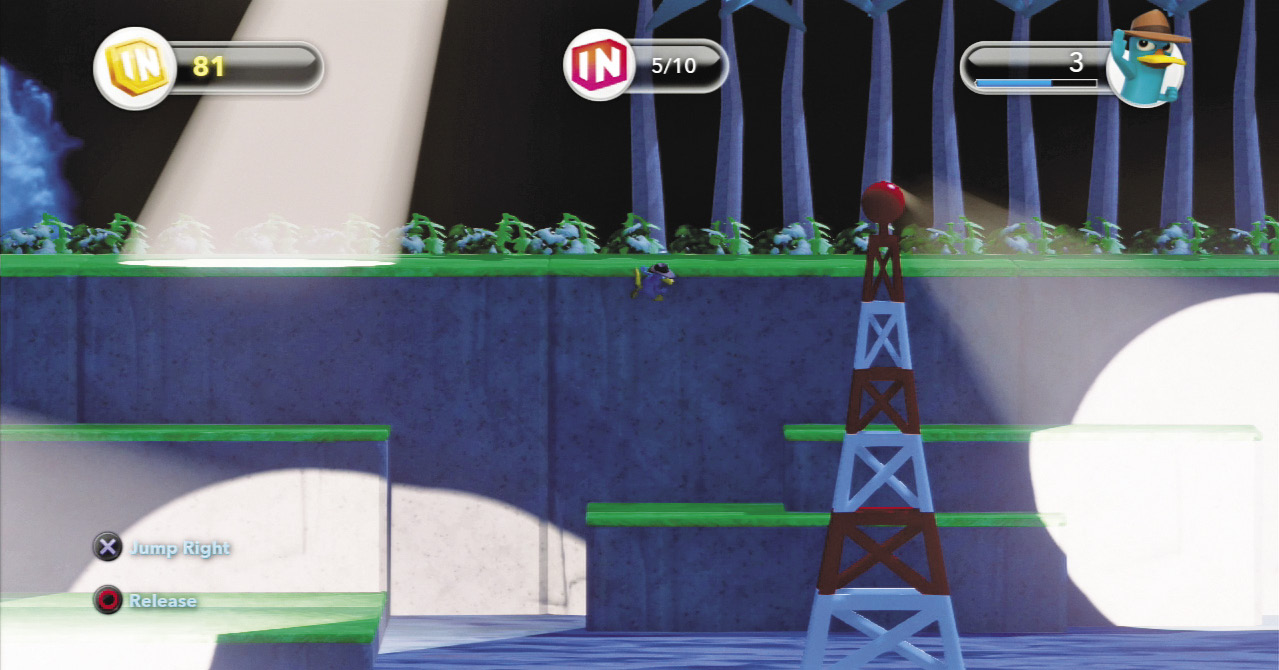
The other more subtle skill to master is running while holding on to a ledge. This tricky technique will allow you to run beneath the spotlights on the level above as well as barely go above the large circle of light below. This is an essential tool to avoid some of the toughest spots that may seem impossible to navigate.
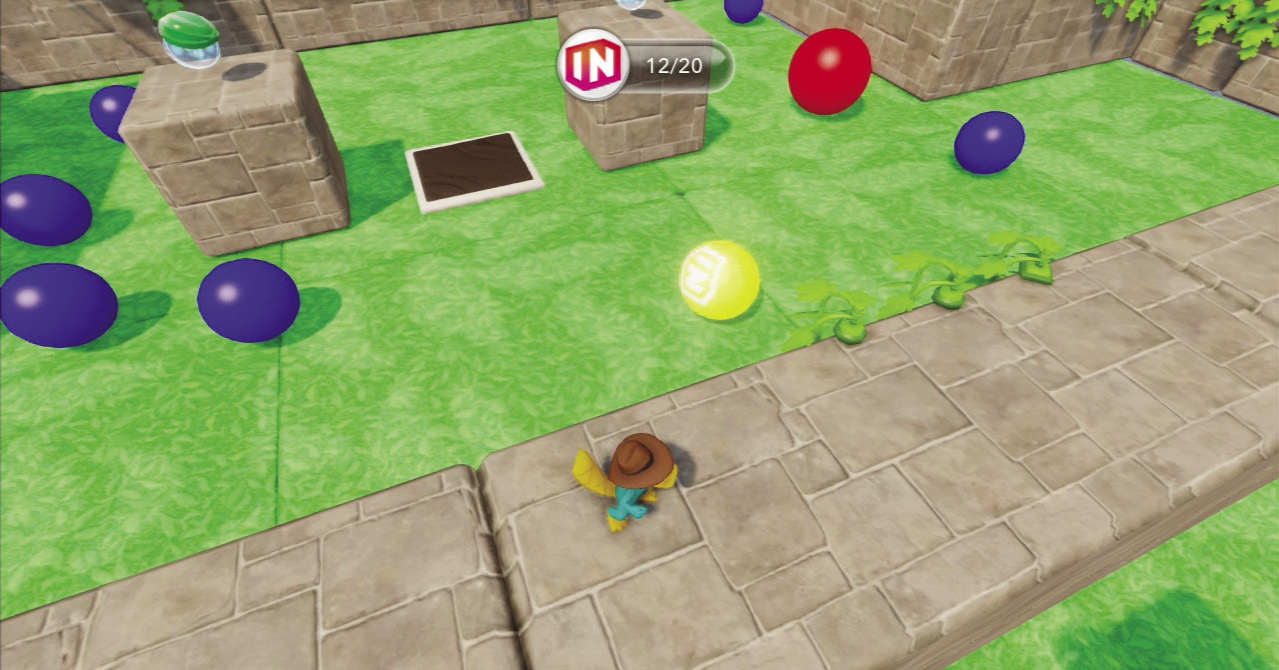
In the third game, you have to collect the yellow balls while avoiding the red and blue ones. There are three sections to this game, and each has two yellow balls you can collect. The best way to tackle this section is to avoid the temptation to run into the grassy area filled with balls. The better option is to follow the stone walls to a section where you can isolate the yellow balls and drop down to collect them.
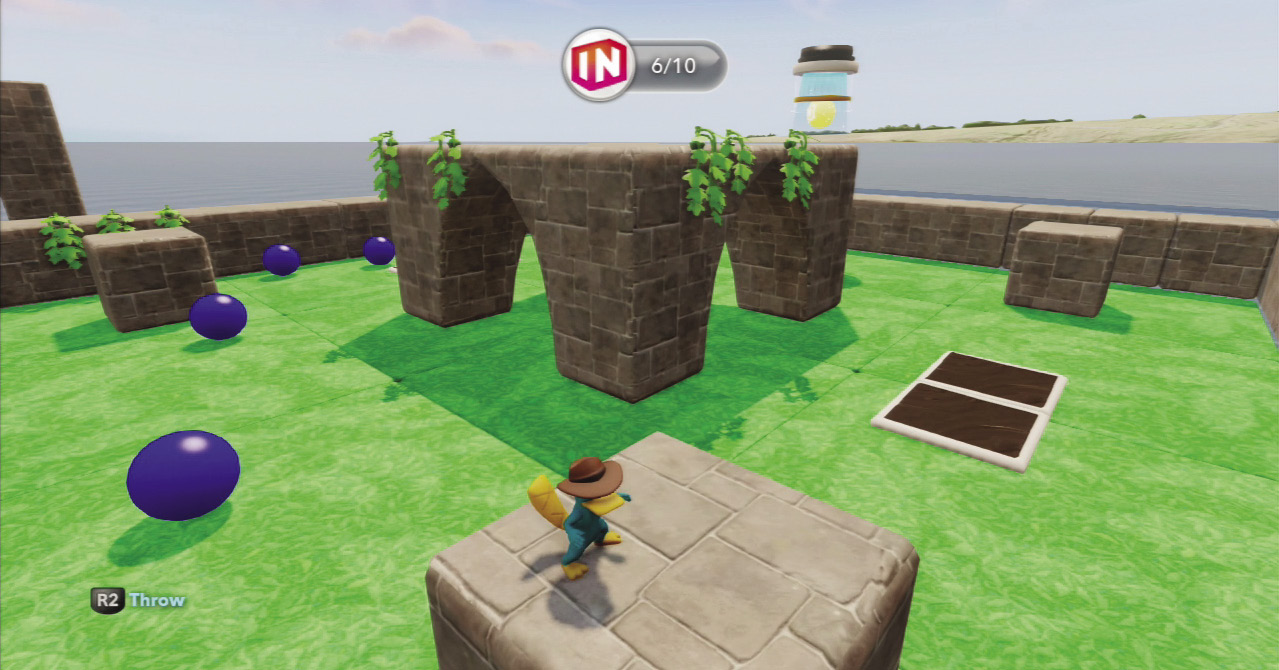
Once you enter an open area filled with balls, get the yellow one you were hunting and leap up to the square stone platform to plan your next move. Don’t try to chase the yellow collectibles in the open without scouting for them first. That said, you can’t wait all day on a stony perch for the perfect chance as you will run out of time. From your high vantage point, spot the yellow targets and get to them quickly.
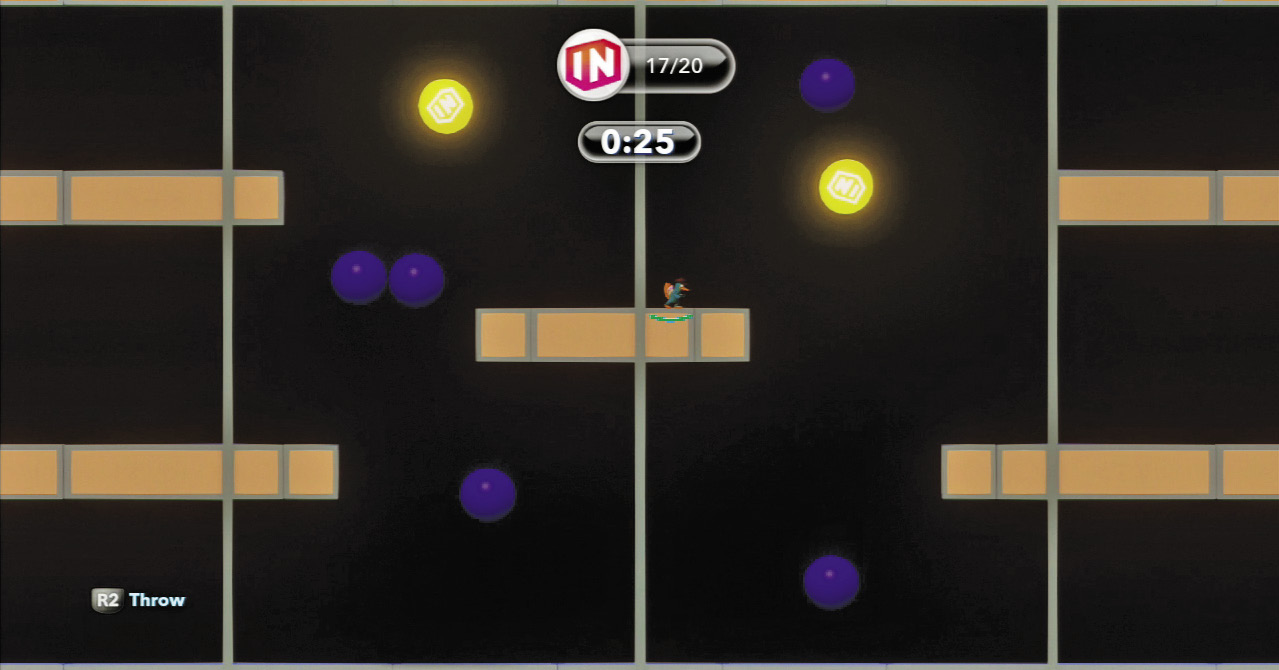
The fourth game is an old-school 2D platformer that is all about timing and dodging. Chase down the yellow dodge balls using the Boost ability when needed to change levels or to quickly grab a ball above. Continue to change levels boosting up or dropping down to avoid the balls as you search for the collectibles. The balls will bounce off the ledges and each other, but they always move at a constant speed, which should allow you to figure out their path. If you feel like you are getting trapped, remember that you can walk through the walls on each side of the screen to make a quick escape to the opposite side.
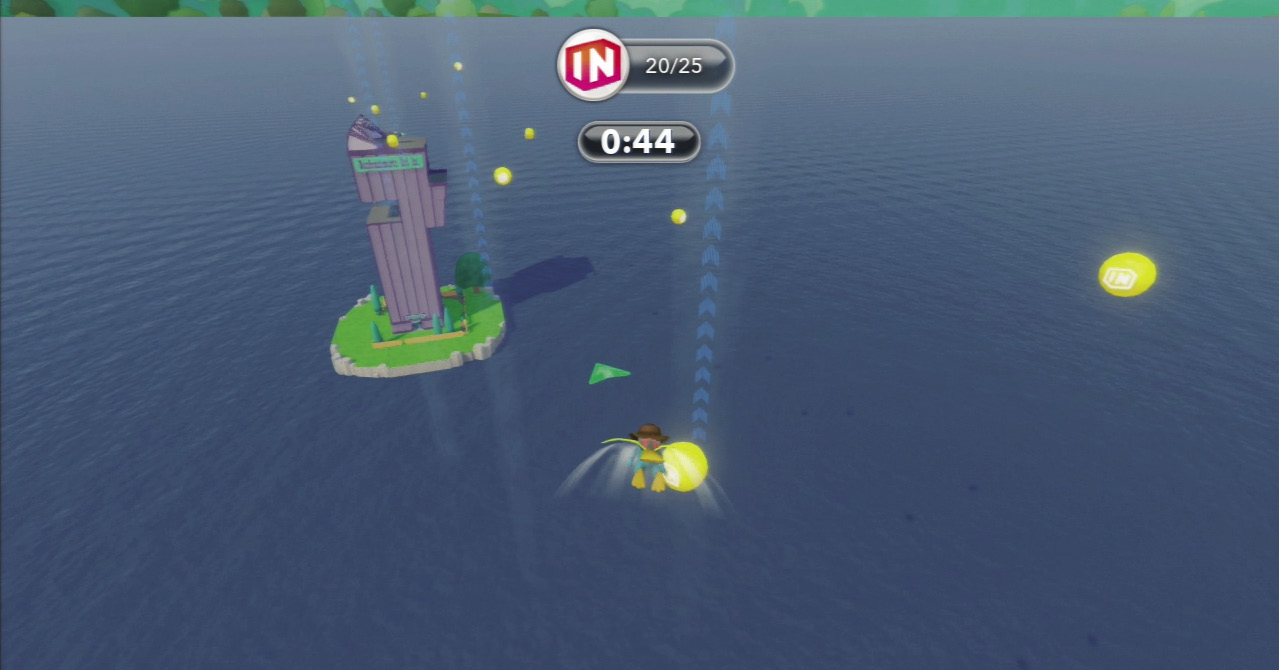
The final challenge is a gliding game. Soar through the air to get to the rooftop of the Doofenshmirtz Evil Incorporated building and destroy that Infinity-inator. There are lots of collectibles floating around and you have 55 seconds to grab them on the way to the rooftop. Don’t get too greedy trying to fly around grabbing the yellow orbs or you could risk falling in the water and have to do it all over with less time on the clock. Keep an eye out for the vertical line of blue arrows and pick up the collectibles on your way as you glide from one to another. Each line of up arrows will boost you up high and give you the essential height you need to keep gliding to the roof.
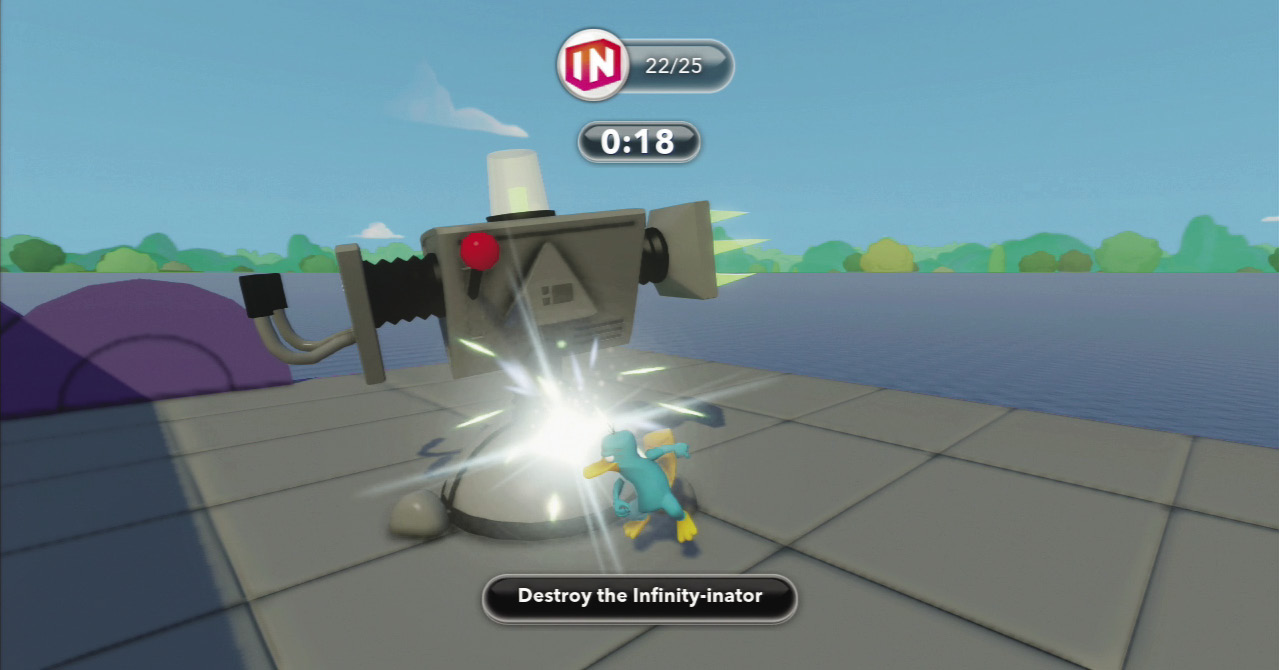
When you finally land on the roof, attack the Infinity-inator and make sure to destroy it to pick up three more yellow collectibles.
Phineas’ Pinball Mania
It’s a giant Pinball Table! Phineas has to keep the balls moving and enemies at bay with his Creativi-Toys.
Gold: Under 3:00
Silver: Under 2:15
Bronze: Under 1:00
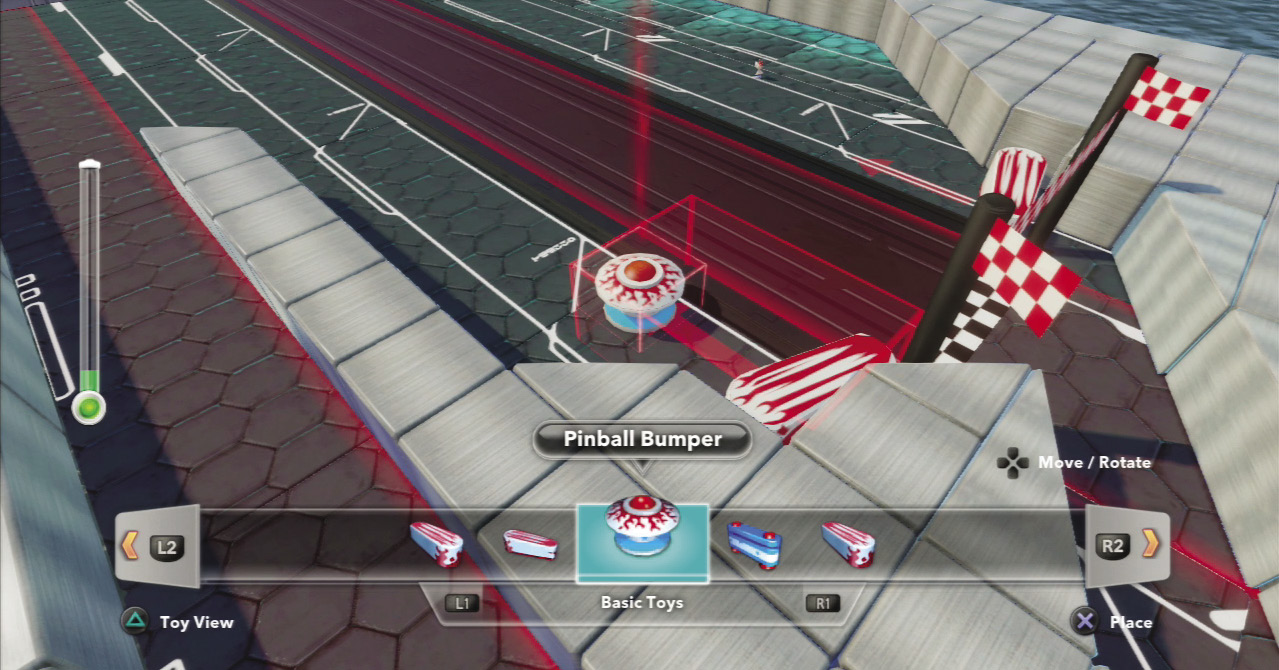
Using the boy genius, put your building skills to the test to construct a giant pinball game that keeps five spawning enemy Omnidroids from going past the final flippers at the bottom of the table. At your disposal are several pinball parts including bumpers, bouncers, and flippers. These can be placed and rotated in a variety of ways, but there are some restrictions. The first is that none of the parts can be placed on the center track, back curve, pinball launch chute, or too close to each other. The other limitation is that you are only allowed 10 pieces to create your game.
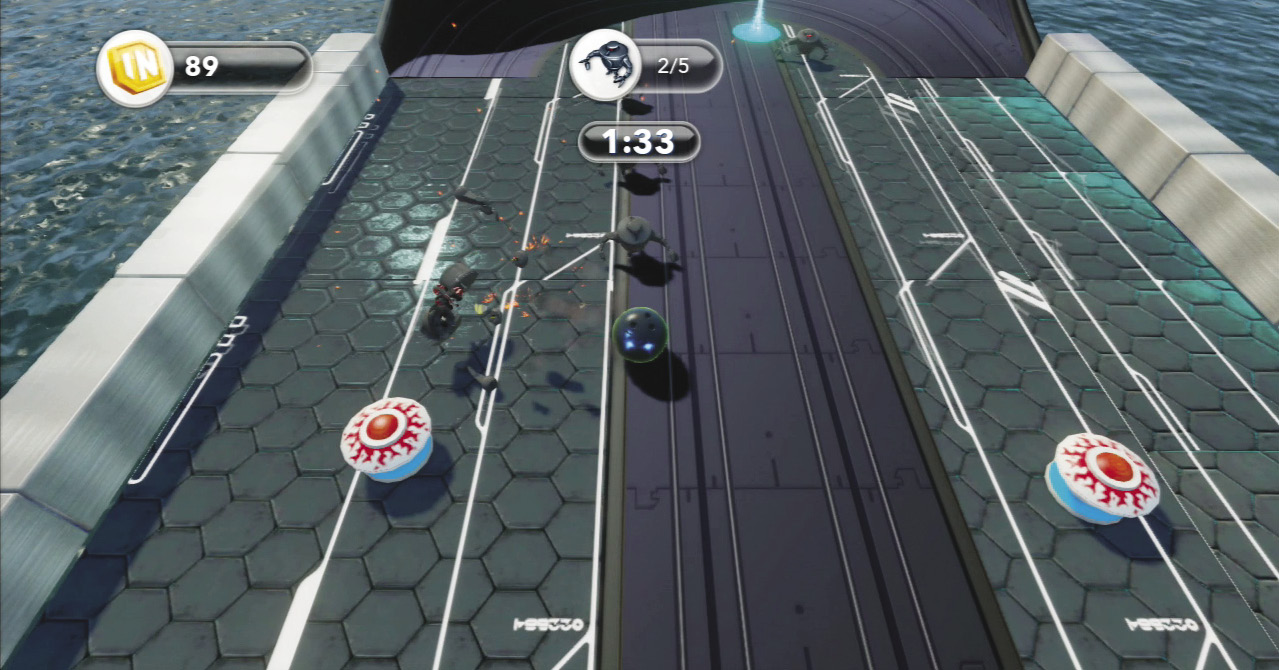
There are tons of options to actually craft the oversized retro game and it may take a few tries at placing the parts to see how they can work together. You have to decide when it is best to have the pinball bounce and ricochet versus using the flippers to move the ball in a straight line. There really is no single best building option, which leaves the you free to explore any arrangement you want. The best approach is to space out the pinball pieces to use them to move the ball up or down the table. Also avoid putting them too close together so the balls don’t get trapped. However, the real secret is not simply to build the best automated pinball table, but to take control of the pinball yourself. You do not have to worry about the game going Tilt, so you are free to help steer the largest ball around the table. Learning to control the ball is the key to victory as it allows you to smash into enemies directly and move the pinball up and down the table when needed. To do this simply move the control stick to guide the ball, but don’t expect it to be that responsive. The ball has it’s own momentum and can be sluggish to maneuver, but once you master controlling the pinball that gold medal is in the bag.
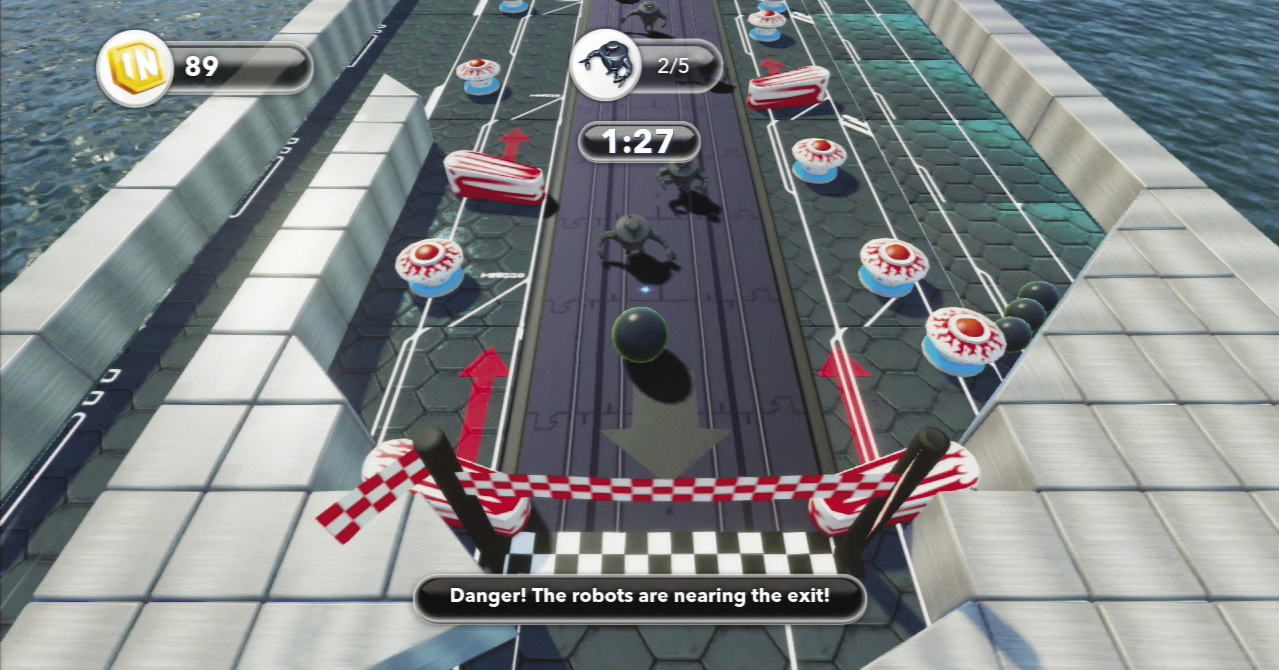
Controlling the pinball doesn’t mean you can zoom around the table smashing enemies at will. It still takes a clever table design to allow you to quickly move the ball where you need it. The slow speed and sluggish nature of moving a giant-sized ball will require you to use the bouncers, bumpers, and flippers to quickly get the ball where you want. This task is not as simple as putting all the pinball parts on the bottom of the table near the final flippers. While it might seem like a great idea to try to isolate the ball at the bottom to keep any of the robots from escaping, the real goal is to hit the ones near the bottom and quickly and move towards the top to wipe them out as they spawn. If you allow too many enemies to reach the bottom area of the table, it will not be possible to maneuver the ball fast enough to hit them all before they escape.
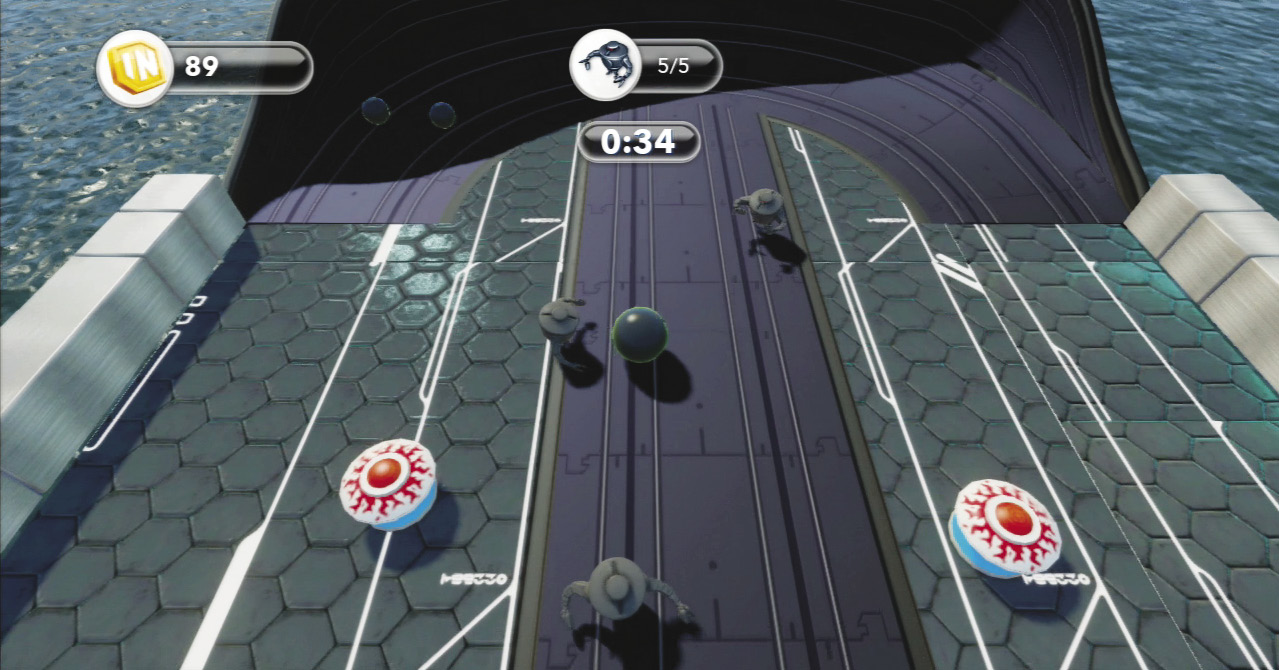
The goal is to keep five enemies from passing the final set of flippers, and as the time ticks away you should expect them to spawn faster and run down the center lane with haste. Keep an eye on the whole table and move the ball to the bottom whenever you see a robot nearing the bottom of the table. After dealing with their threat, move the ball up the center lane and wipe out any approaching Omnidroids. However, if there are none nearby it might be faster to move the ball past the final flippers into the pinball launcher on the left side to quickly spring the ball to the top of the table. It can be very effective to launch the ball to the top and simply roll straight down the center track smashing enemies when they spawn or rolling straight down toward the bottom. This is technique can be especially useful if you are having difficulty maneuvering the ball.
Hall of Heroes

The Hall of Heroes is a part of the game where you can see how your characters have progressed and keep track of all the Power Discs you have collected. At the Disney Infinity Hub, step on the purple button to travel to the Hall of Heroes. You can also access it from the Start menu when you first enter the game.

When you first begin playing Disney Infinity, the Hall of Heroes is very empty and consists of only a central area surrounded by pedestals. However, as you progress through the game, you not only fill in the open slots, you also build up the hall itself.

As you collect and use Power Discs, they will appear on the ground as tiles in the Hall of Heroes. The first wave consists of 20 Power Discs. However, another 35 Discs will be released in waves 2 and 3 combined for a total of 55 Power Discs. You can learn about the Power Discs you do not yet have by pressing the button indicated on the screen.

The Hall of Heroes grows as you earn stars in the Play Sets and the Toy Box—the architecture improves and you receive additional decorations. Here is a list of what you get at various levels of stars.
- 1 Star—Stage 1 adds some details to the flooring
- 4 Stars—Stage 2 adds some initial walls
- 9 Stars—Stage 3 gives you some interior planters
- 16 Stars—Stage 4 provides columns on the outside of the Hall
- 25 Stars—Stage 5 adds plants to the lower area inside the Hall
- 37 Stars—Stage 6 gives you inside columns and a ring around the top
- 52 Stars—Stage 7 puts a dome over the top of the Hall
- 70 Stars—Stage 8 adds plants outside of the Hall
- 92 Stars—Stage 9 provides statues on the upper ring
- 118 Stars—Stage 10 puts some plants on the dome
- 148 Stars—Stage 11 hangs banners on the lower levels
- 183 Stars—Stage 12 gives you an outside garden as well as a central tree and a pond
- 223 Stars—Stage 13 adds an outside garden with Townspeople statues
- 268 Stars—Stage 14 provides an upper ring as well as some outside plants
- 318 Stars—The final stage hangs banners on the upper level

Once a character reaches level 1, a bronze statue of that character appears on its pedestal. Get that character to level 5 to change the statue to silver. Continue leveling up your characters to level 10 to get a gold statue. It is fun to return to the Hall of Heroes periodically to see how it is growing and what you have added through your endeavors.
The Hall of Heroes also gets buttons for interactive events as you acquire character statues. When you have 3 statues, you get a fireworks button that sets off fireworks when you step on it. At 10 character statues, a music button appears. Get 18 statues and a button appears that allows you to change the sky. Finally, if you take ownership of all 29 characters and get a bronze statue, a special item will appear in the central fountain’s pillar of light, and it will unlock the Ultimate Pack that can be used by all non-car characters.