Disney Infinity 2014 Revised Edition Guide Playsets Toy Story in Space
Complete the Combat Simulations
Simulation 4: Unfathomable
Mission Giver: Zurg Hologram
Type: Combat
Rewards: 750 Crystals / 500 Sparks
Wii Rewards: 1,000 Crystals / 500 Sparks

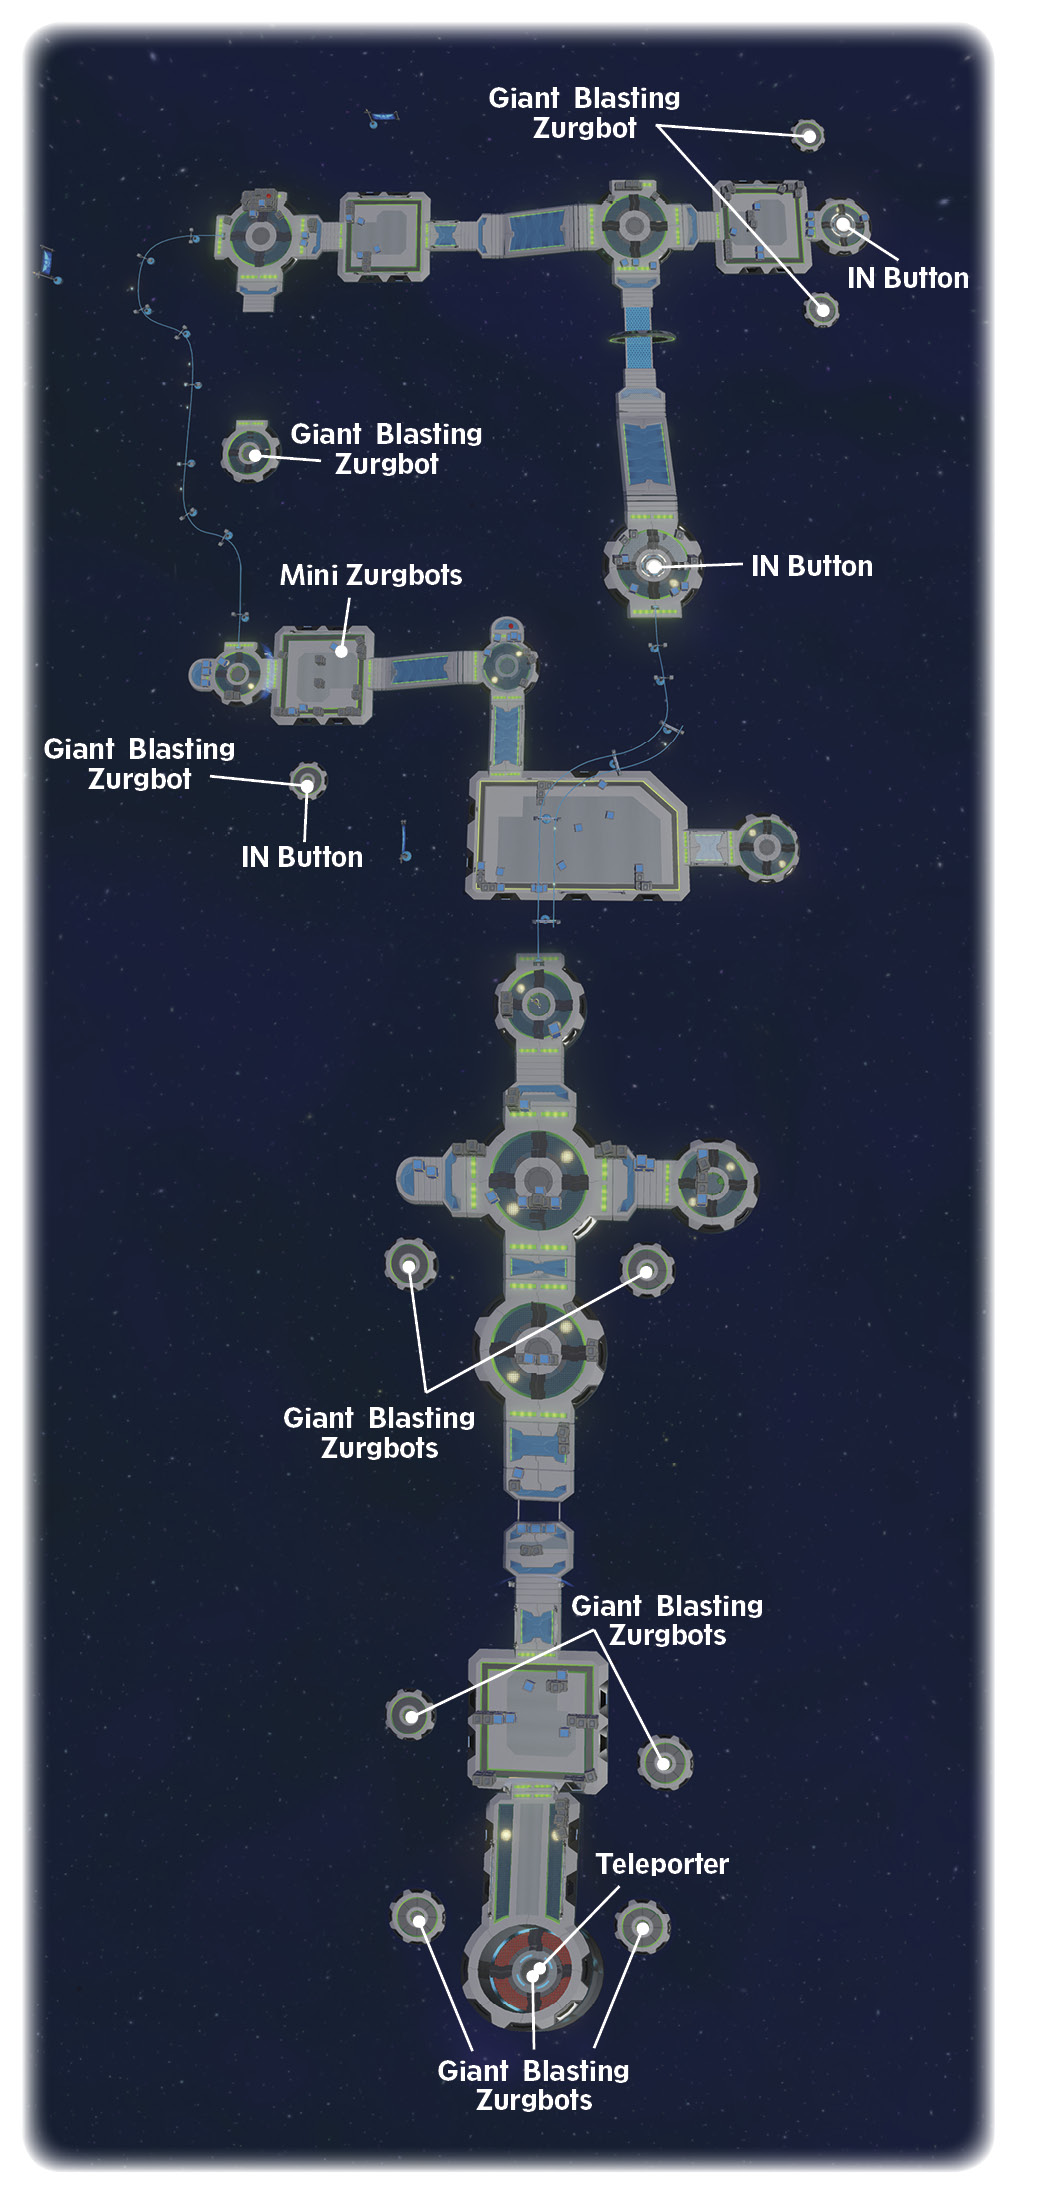
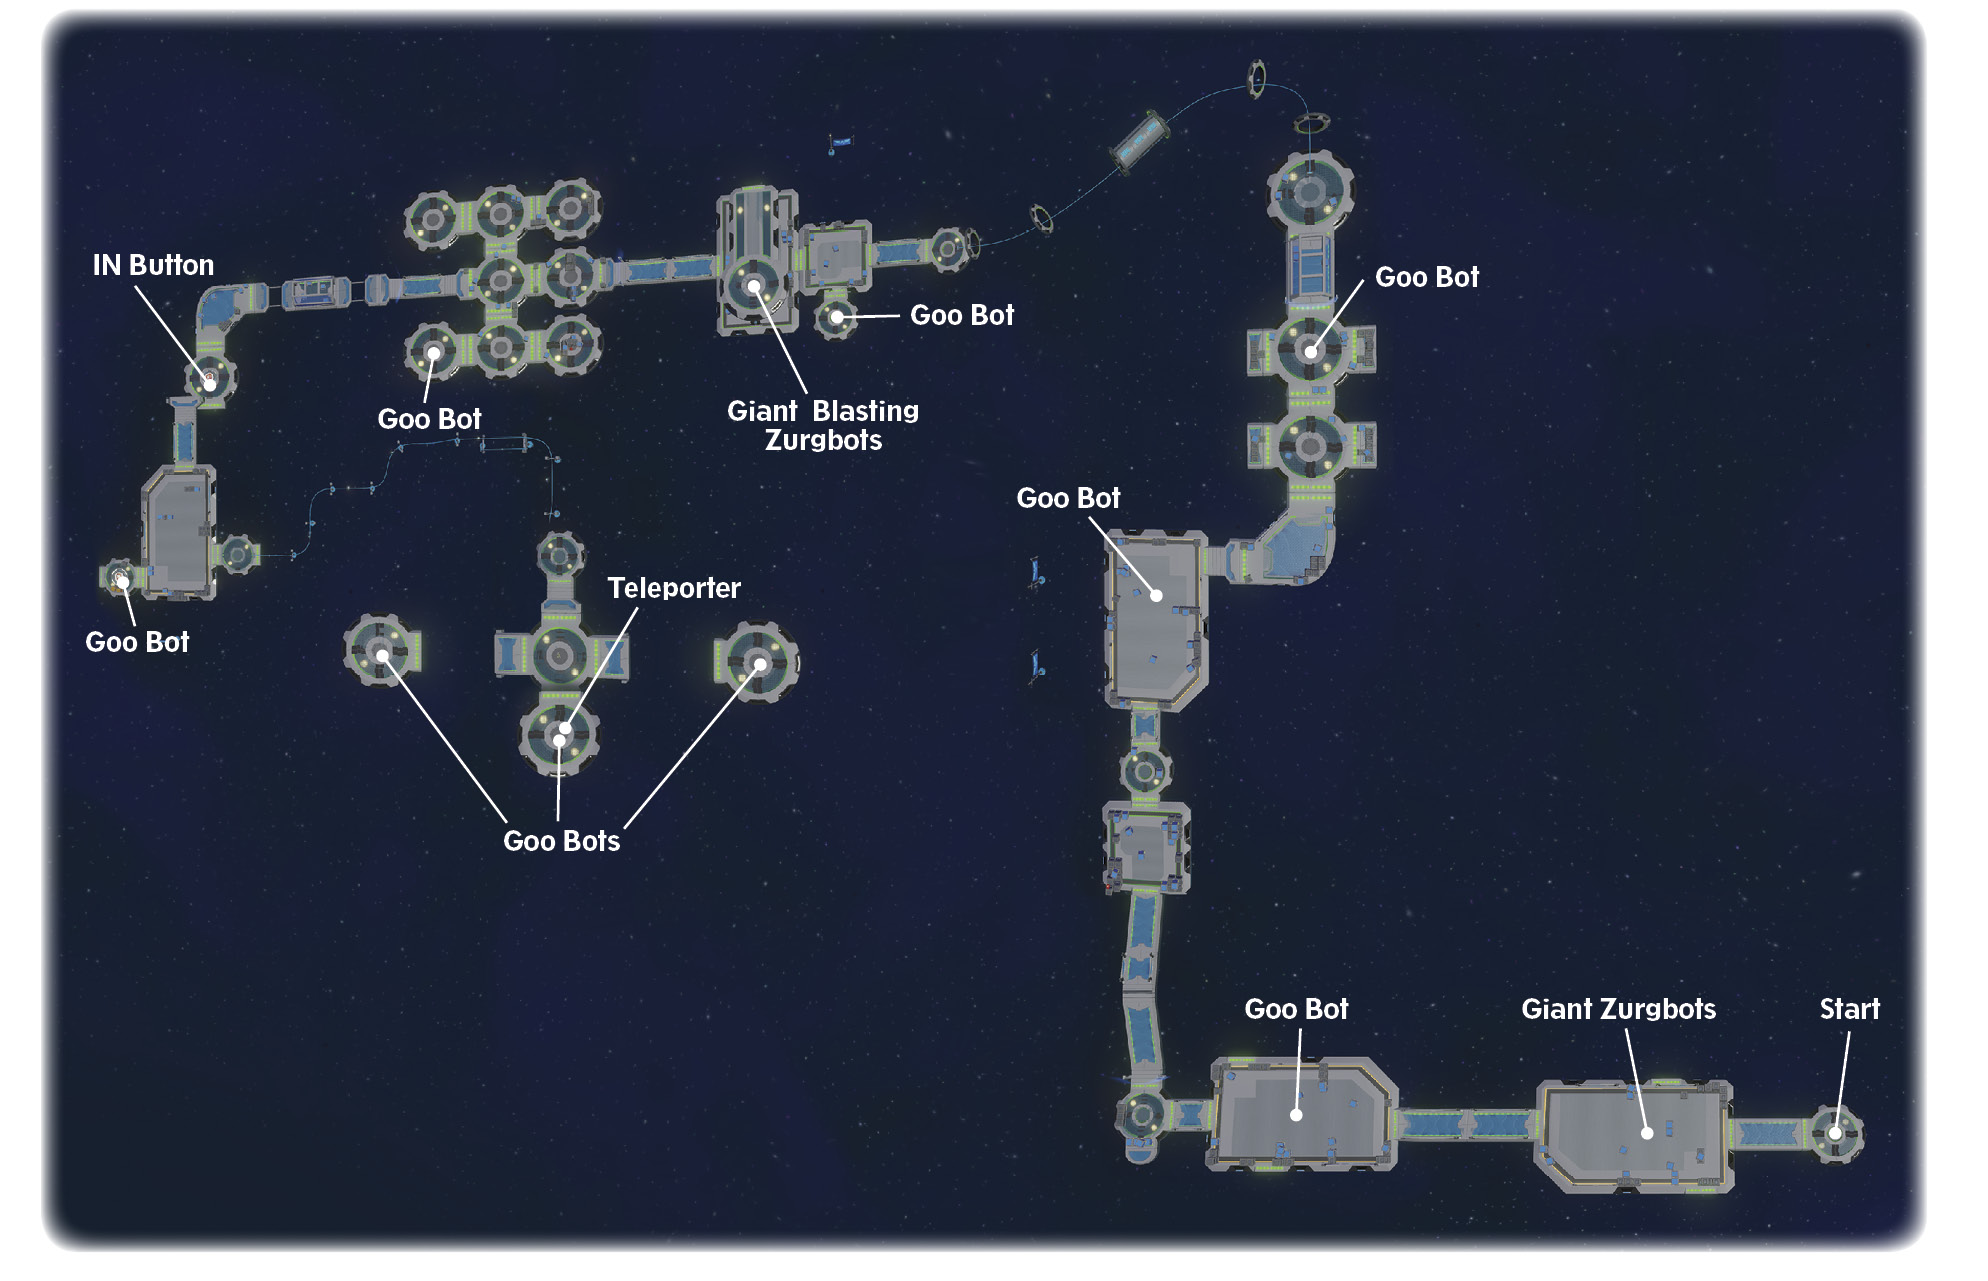
At the start of this simulation is a Giant Blasting Zurgbot accompanied by several blue ones. This huge red robot shoots a large energy sphere that might be slow, but it can go through objects to hit you. Luckily this big projectile is slow enough to easily to dodge. Shoot up the blue bots and outmaneuver the energy balls to wipe out this group.

Before you head down the ramp to the next batch of robots, look for a red capsule with the Zurg Wall behind some blue crates. Continue down the ramp to confront several Mini Zurgbots. The shoulder charge or ground pound attack can deal with them very well.

The real challenge here is the big red Zurgbot on the floating platform that shoots large projectiles. Keep in mind that your blaster fire’s a lot faster than the Giant Blasting Zurgbots and you can stand your ground in a one-on-one battle.

Before you jump on the rail for a curving ride, take out the Giant Blasting Zurgbot.

Go for a fun rail slide and in the next section look to the left crates to find the red capsule with the Ray Zapper. The section just up ahead has a pair of the Giant Blasting Zurgbots. Stay back to take them out from a distance and let your blaster’s superior firing rate do its job.

Continue past this spot to battle another pair of big reds to get to the large IN button.

Cross the extended blue bridge and step on the next IN button to go for a rail slide to the final area.

Take on a mixed group of big and little Blasting Zurgbots and make sure to look for the green capsule with Toy Story Decorations Toy Pack 1 behind gray crates.

To complete the final battle you must destroy ten robots of various types. The biggest threats are the Giant Blasting Zurgbots, because although they fire slowly, the large energy spheres can make it hard to battle their brethren. The last three enemies are a trio of big red Zurgbots. It can be easy to get overwhelmed if the screen is filled with huge projectiles, so take out one at a time. The robot in the middle is the easiest to take out and should be your first target. When it is gone, shoot and move to keep the Zurgbots guessing. Keep in mind that their elevated position will require you to jump up on the crates or leap into the air to hit them. If you are quick at zipping in and out of the zoomed-in mode you can target each one and overwhelm them with blaster fire.
 Simulation 5: Ultimate Downfall
Mission Giver: Zurg Hologram
Type: Combat
Rewards: 750 Crystals / 500 Sparks
Wii Rewards: 1,000 Crystals / 500 Sparks

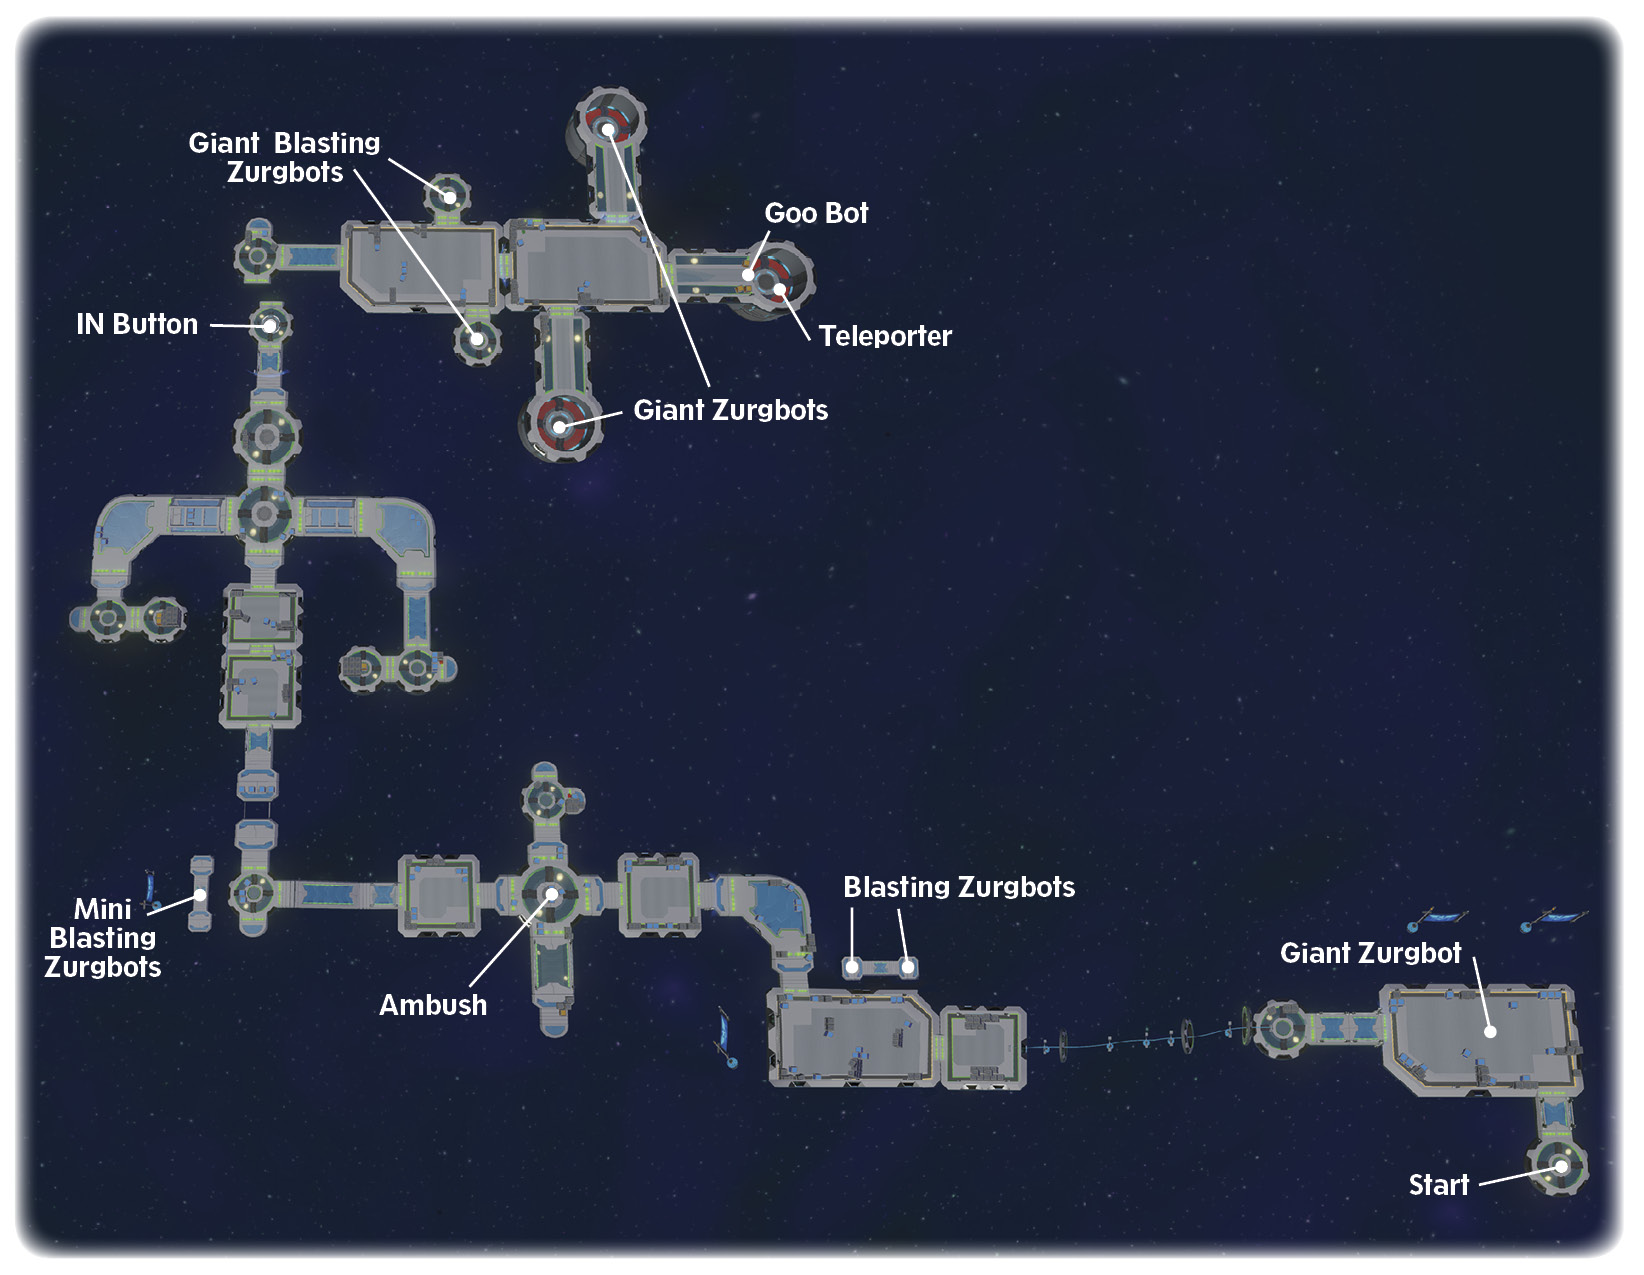
A super-sized blue Zurgbot makes its appearance. It is a tough robot to deal with up close due to its own form of the ground pound where it slams its huge mace-like fists into the floor. The good news is that like its other blue brothers, it has no long-range attack and can safely be dealt with if you can get some distance.

Rail slide to the next long area filled with red and blue bots. Beat up the blue bots and keep your distance to fire blaster shots at the Zurgbots that are trying to shoot you. Whenever you get into a battle of mixed Zurgbots like this, use a shoot and move tactic to avoid getting pinned down. When the reinforcements arrive it will include a Giant Zurgbot. Back up and fire away from a safe place to destroy this robot and avoid laser fire.

A small group of blue Mini Zurgbots have to be destroyed in the adjacent area to lower the barrier. You can unleash your blaster, but it is a lot more fun to get physical with the little blue bots.

The next area is an ambush! A blue Giant Zurgbot will appear in front and in back while Giant Blasting Zurgbots pop up on each side. Standing in the center of this four-way attack is not a great idea. Charge in any direction to remove the threat and get some space to wipe out the rest of the robots on your own terms. When the coast is clear, check the right side near some crates to find a red capsule with the Zurg Cap.

Go up the inclined ramp and wipe out the firing Zurgbots from a safe distance.

The next section has several big bots, and the real threat comes from the Blasting Zurgbots on the floating platforms. Don’t race into the mess of robots. Fire from a distance until you get a chance to focus on each red Zurgbot on the sides. Move up to the adjacent section to wipe out some blue bots and go down the side route to the right to find a red capsule with the Zurg Outfit.

Step on the nearby IN button to lower the next section of the level and stay back when you are about to go into the next battle. Take out as many robots as possible in this section and let them come to you.

When the blue barrier drops, step into the next section and look to the left for the green capsule with the Toy Story Space Track Set Toy Pack 5. Immediately backtrack a bit to get some space to deal with the giant blue bots at a safe distance.

The final section has a new and very deadly robot in the back: Goo Bot. Not only can this robot shoot Purple Goo to shrink you, it also uses a sort of chain lighting maneuver to create more Zurgbots! Needless to say, it is always a top priority target as it can continue to spawn an endless robot army.
 Simulation 6: No Survival
Mission Giver: Zurg Hologram
Type: Combat
Rewards: 1,000 Crystals
Wii Rewards: 1,000 Crystals / 500 Sparks

The final simulation is really going to test your combat skills. It starts out with a trio of giant robots. Keep your distance and fire away.

The next section features the Goo Bot that keeps spawning blue Zurgbots. It might seem like a good idea to just stand back and keep firing away as the blue bots come to you. However, it is more efficient to charge the Goo Bot and take it out to prevent it from continuing to create more targets.

The next combat section has a few Mini Zurgbots that can safely be dealt with from a distance. Wipe out the robots and grab the red capsule on top of the gray crates to the left to find the Zurg Minion Helmet.

In the next part there is a Goo Bot in the back and several red Zurgbots guarding it with gunfire. Shoot the Blasting Zurgbots at a distance while trying to dodge and charge in to directly tackle the Goo Bot.

Fight your way to the next section and battle another Goo Bot to lower the blue barrier. To deal with this Goo Bot just run in and unleash your blaster to destroy it as fast as you can.

Go for a rail slide through several rings to get to the next spot with lots of robots. There is a Goo Bot on the side, but the other big problem is the Giant Blasting Zurgbot on the upper section. There are two choices here: if you are quick, you can run in and waste the Goo Bot, or you can stay back and zoom in on the red Zurgbot to take it out first.

The next section has a barrier and you must destroy all the robots. Get close to the Goo Bot and fire away to stop it from producing a robot army, then clean up the rest of the bots. If you feel like you are getting pinned down, use the open circular-like paths to get to a safe distance. Make sure to check out the cluster of crates on the side that has a red capsule with the Zurg Accent.

Go to the large IN button to lower the track above and jump into another group of robots. Stand your ground in the center and blast the Goo Bot while trying to avoid the robot fire.

Jump on the next IN button to extend the rail on the opposite side of the area. Go for a rail ride to the final battle full of Goo Bots.

There are three round areas and each has a Goo Bot that will summon robots to challenge you. Run down each of these paths and charge the Goo Bot to stop its robot production.
 Defeat Zurg!
Mission Giver: Slinky Dog
Type: Combat
Rewards: 1,000 Crystals / 1,000 Sparks
Wii Rewards: 1,000 Crystals / 50 Sparks

After completing the final combat simulation, the City is under attack by an enormous Emperor Zurg. The only way to battle this giant is to turn the Shield Generator into a Goo Cannon.

You must take the batteries back from the Zurgbots and insert them into the Shield Generator at the tower’s base. The first battery is out in the Waterfall area, and that area is now filled with Zurgbots.

The Giant Zurgbots that surround the battery make it hard to acquire the power cell, but you must battle them up close. Clear out the first few and destroy any neighboring Zurgbots.

Once you pick up the battery the task is not over as you still need to return it to the tower. The battery is too large to fly or boost with, so your obvious option is to get to the teleporter below. However if you want to make it really easy, you could just shoot the battery with the Goo Shrinker to make it small enough to carry.

Toss the battery to the ledge below with the big Blasting bot and leap down to destroy the bot. Pick up the battery and step into the Green Goo to become large enough to boost and fly while holding the power cell, then make a long boosting leap to the teleporter pad.

Warp back to the City and place the first of two batteries at the base of the tower.

The second battery is in the Canyon, so fly or teleport out there and use the compass to locate it. You should expect that area to be filled with Zurgbots, so ready your blaster to wipe them all out.

Collect the battery near the back wall and shrink it down to size to make it easy to carry on your way back to the City.

Place the final battery in the base of the tower, take the elevator to the top, and press the IN button to fire the Goo Cannon.
Alien Easter Egg Hunt
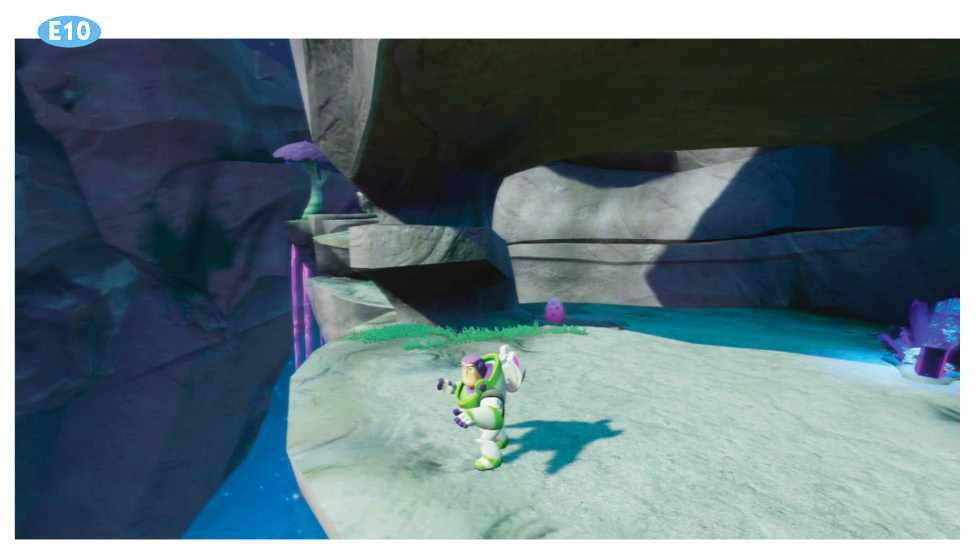
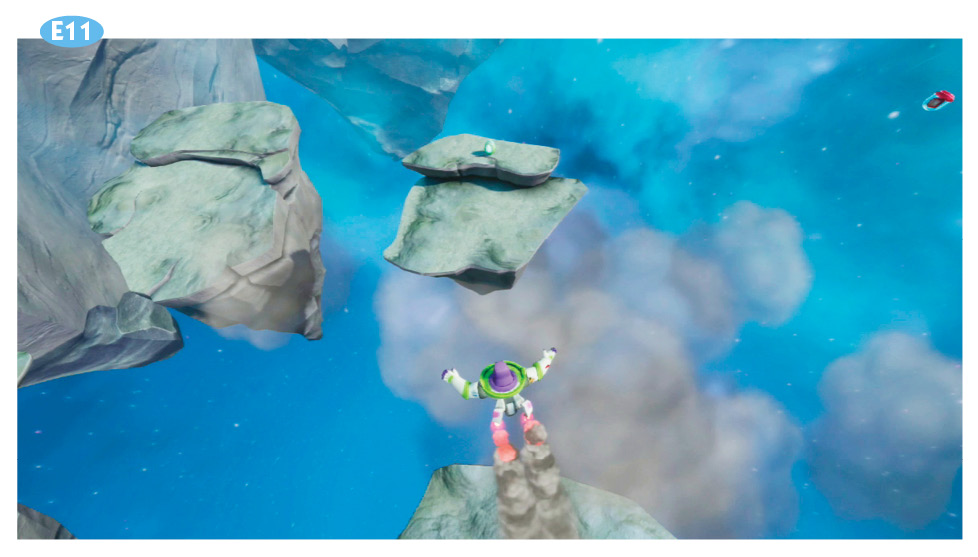
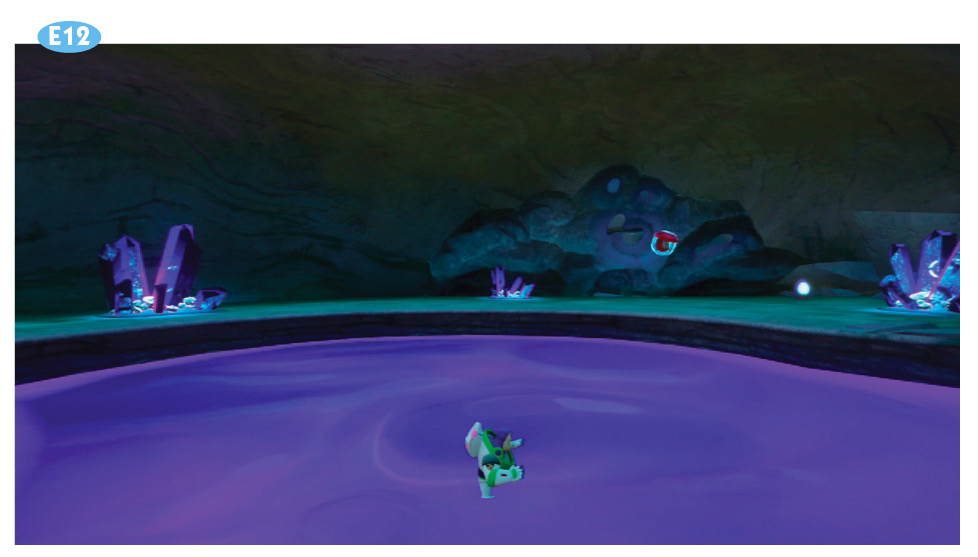
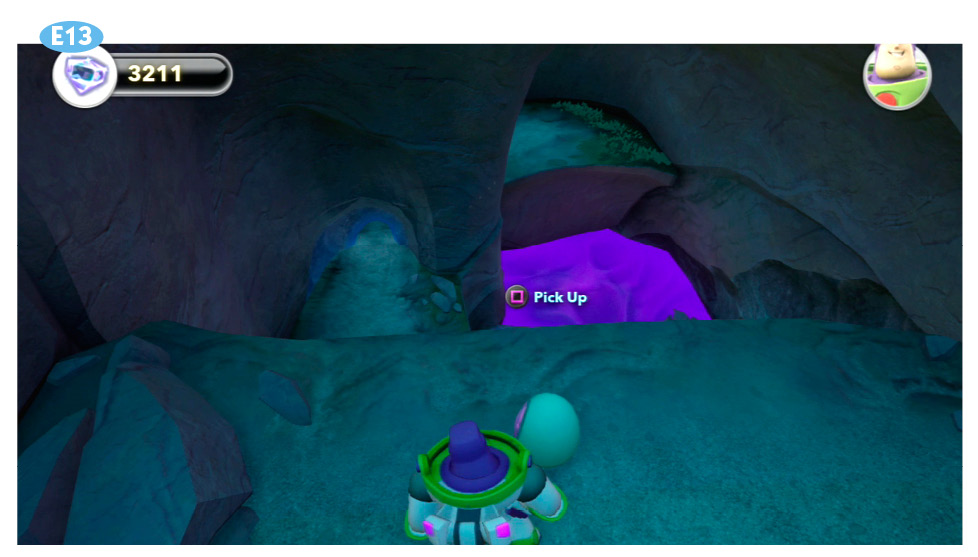
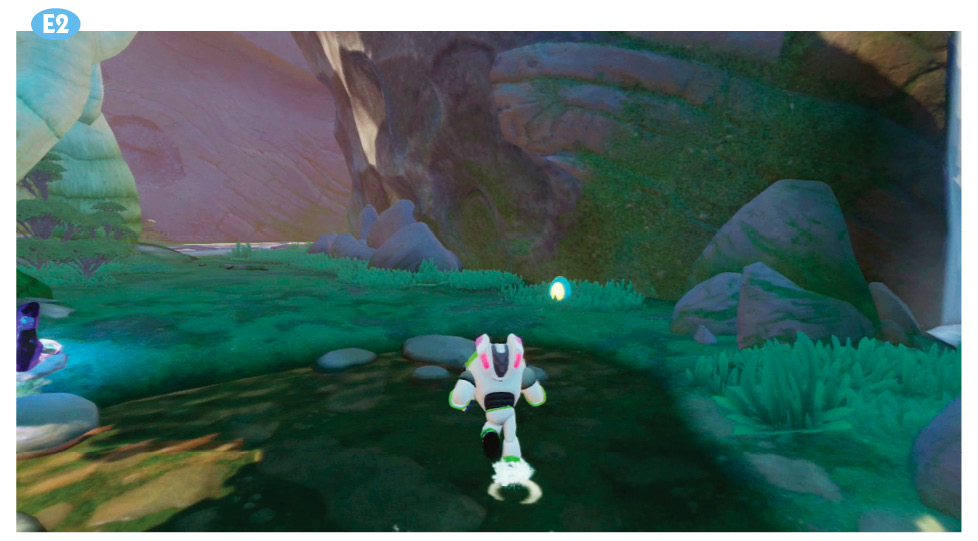
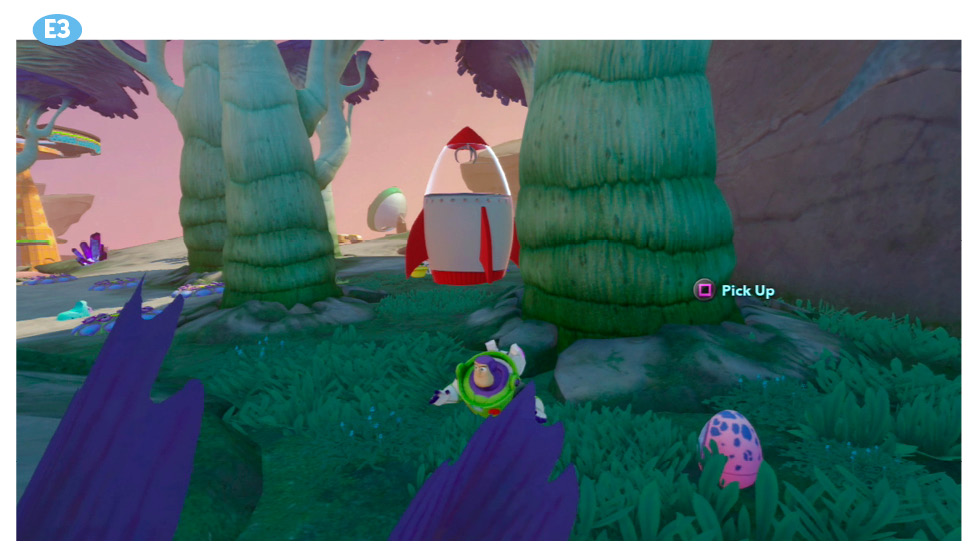
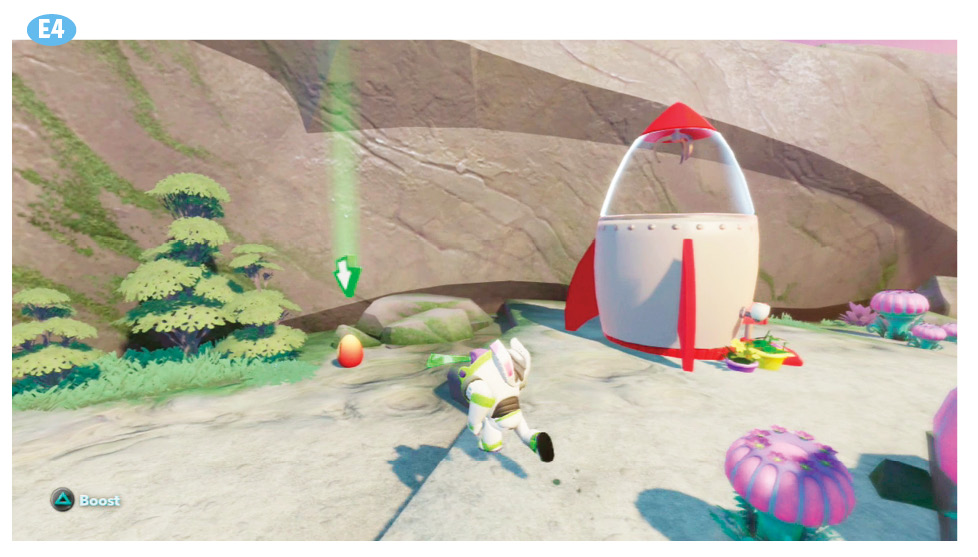
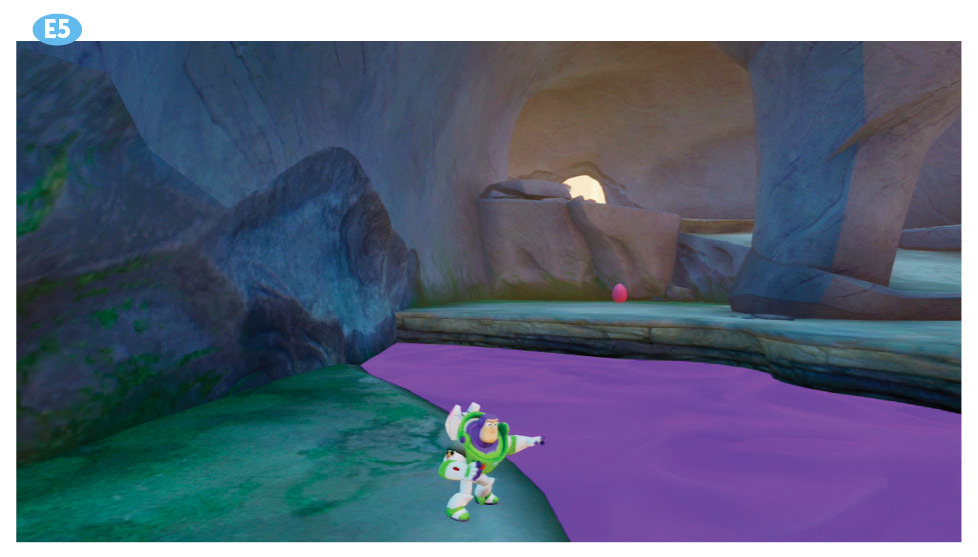
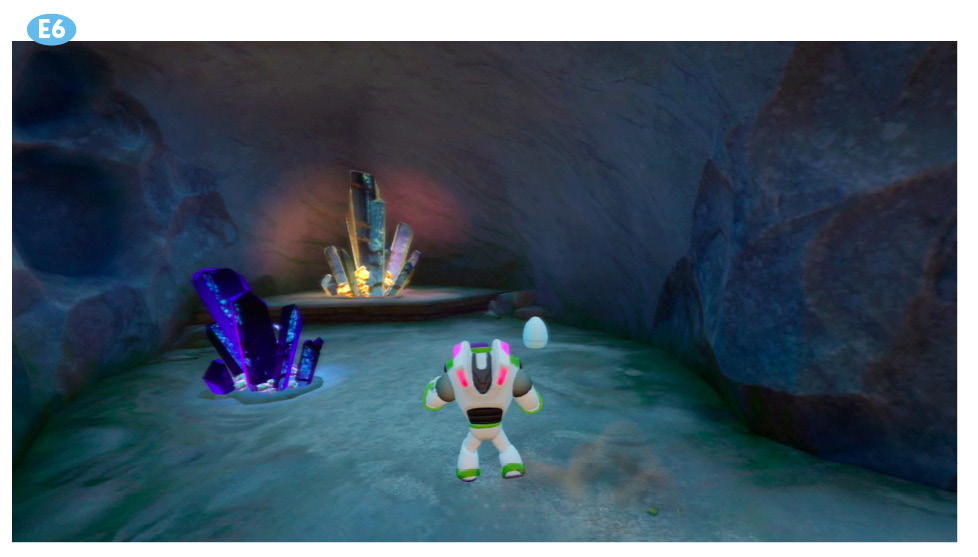
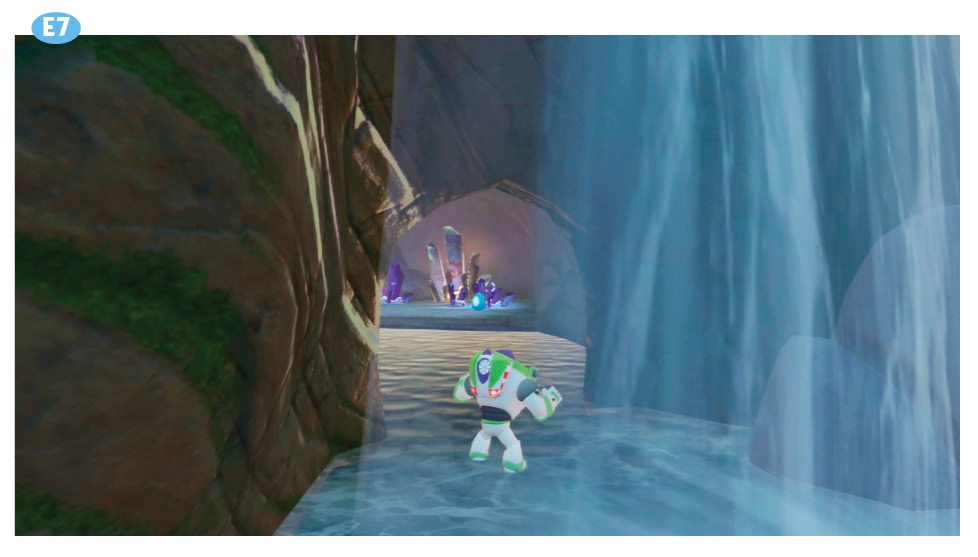
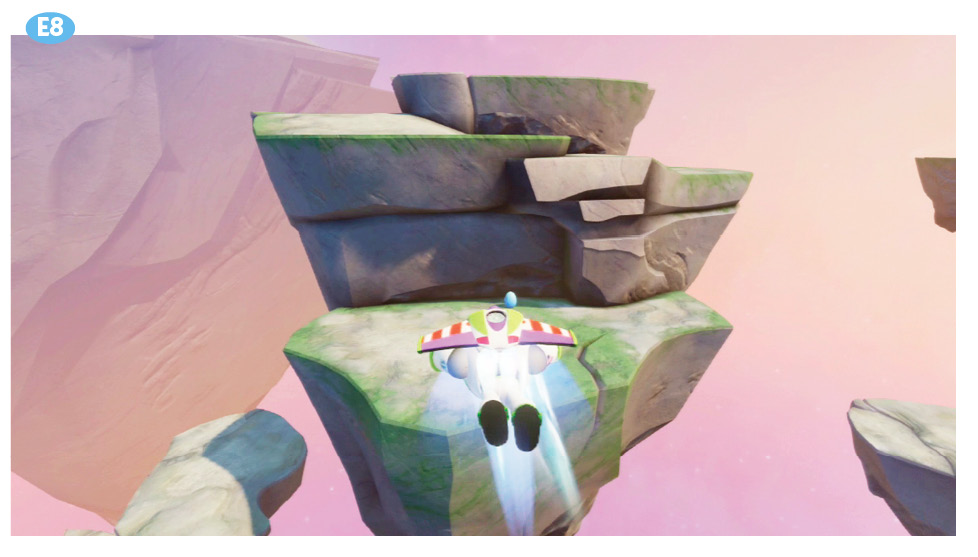
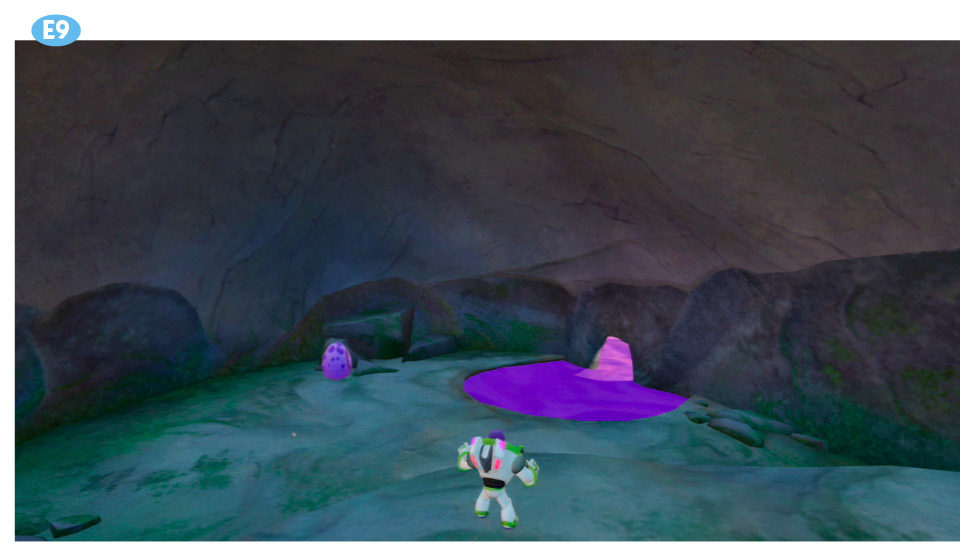
When you build the Hatchery, you are introduced to egg gathering by completing the mission Egg Spotted. The hatched egg will introduce a new species into the wild, and you can find the new critters in the Play Set as soon as they hatch. However, that mission was only the beginning of your inter-species introduction. There are actually thirteen colored eggs to find throughout the Main Town and Goo Valley. Below is the location of all the hidden eggs. Make sure to check out the collectibles map for each location.
Main Town
| Egg Appearance | Location | Creature Inside Egg | |
|---|---|---|---|
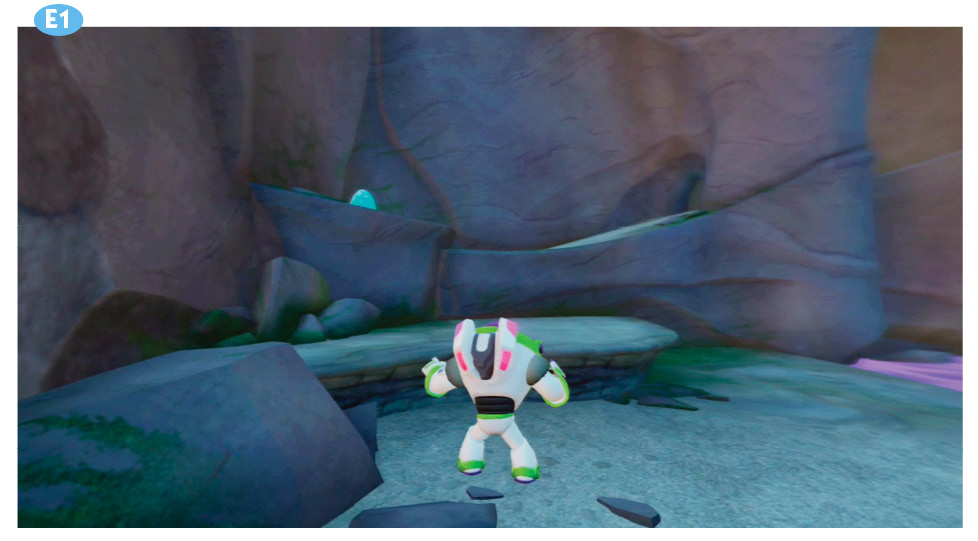
| E1 | Turquoise with purple spots and purple center | Under the breakable floor behind the Rocket Booster Blast challenge pad. | Nostrilloid |
| E2 | Blue with light blue rings and yellow center | Behind and to the left of the Blasters Away challenge pad. | Gummboid |
| E3 | Pink with blue spots and light blue center | At the far end of the forest with the Sarge Alien to the left of the tower. | Boomeroid |
| E4 | Red-orange with yellow center | On the cliffs by the house to the right, just above the Goo Valley entrance hole. | Snoutoid |
| E5 | Red with darker red streaks and light blue center | In the high cave to the left of the Goo Valley entrance. | Snailian |
| E6 | Light blue with light blue center | Down the hole at the top of the cliff to the right of the Canyon entrance. | Pinchoid |
| E7 | Blue with etchings and light blue center | Behind the waterfall cave at the very end of Jetpack Canyon. | Twitchoid |
| E8 | Light blue with a large white center | At the lowest level of the tallest giant floating space rock outside the Main Town. | Unicoid |
| E9 | Purple with blue spots and purple circle | Through the small cave hole on the cliff to the left above the Goo Valley entrance hole. | Rabbitoid |
Goo Valley
| Egg Appearance | Location | Creature Inside Egg | |
|---|---|---|---|
| E10 | Pink with purple spots and pink center | Follow the ledge hang at the bottom of the area to the immediate left of the third valley. | Octoid |
| E11 | Light green with blue stripes and blue circle | On the floating space rock at the far end of the second valley. | Leafoid |
| E12 | Dark purple with light blue center | Inside the small cave at the end of the purple puddle in the second valley area. | Quackoid |
| E13 | Light green with large purple circle | Underneath the breakable floor in the high town portion. | Wedgoid |