Star Ocean: Integrity and Faithlessness Guide Part V: Optional Tasks
Eastern Trei’kur—Bulletin Board 104-122
Q104—That Darn Ruddle
Reward
| EXP | FOL | SP |
| 9000 | 6000 | 300 |
| Items | ||
| CQC Program Delta, Resurrection Mist, Unlocks Ruddle’s Shop in Central Resulia | ||
Walkthrough
Prerequisites: Progress to at least Chapter 11, complete Runaround Ruddle
At this point in the game, finding Ruddle is made extra convenient thanks to the starship’s teleporter functionality. The quest starts at the guard next to the bulletin board where this quest is undertaken. Next, talk to the steward of The Yawning Kobold in Myiddok for another clue. In the center of Santeroule, talk to the elderly woman there for another hint. Then, teleport to the Resulian Plains, enter Central Resulia, and make your way to the bulletin board. Talk to the cheeky young girl standing in front of the bulletin board for the final hint. Head to Sthal, and in Fidel’s House, you’ll find Ruddle there waiting.
When the quest is turned in, you can find Ruddle selling valuable wares in Ye Grand Ole Castle of Comfort in Central Resulia.
Q105—Medical Emergency
Reward
| EXP | FOL | SP |
| 4100 | 2400 | 250 |
| Items | ||
| Arcane Amulet, Robust Vitalitea | ||
Walkthrough
Prerequisites: Progress to at least Chapter 7
The reward from Of Weapons and Womanizers (a Welch’s Laboratory quest) consists of three Healing Devices. You can craft the other two with the Engineering specialty leveled to at least Lv. 5. The recipe includes three Physical Stimulants and one Diffusion Device. Diffusion Devices are dropped off of Toy Soldiers (on the Kronos ship, the Cavaliero) and off of Avengers (in the Alcazar of the Golden Age).
Q106—Taste of Home
Reward
| EXP | FOL | SP |
| 5000 | 2500 | 280 |
| Items | ||
| Healing Band | ||
Walkthrough
Prerequisites: Progress to at least Chapter 9
Crab Rice Stew can be crafted with Lv. 5 Cooking. The recipe includes three Fresh Vegetables, three White Rice, three Shellfish Meat, and one Seaweed. These can all be purchased from The Upper Crust Gourmet Foods in Central Resulia.
Q107—Empty Shelves, Empty Coffers
Reward
| EXP | FOL | SP |
| 6300 | 3000 | 280 |
| Items | ||
| Mythril Mesh | ||
Walkthrough
Prerequisites: Progress to at least Chapter 10
Hunks of Damascus Steel are dropped from Damascus Forts in the Western Dakaav Tunnel or mined at excavation nodes there. Snakeskins are dropped from Lizard Warriors and Lizard Shamans in Eastern Trei’kur. However, these enemies are no longer found there in the latter portion of the main quest, so make sure to gather at least five of these skins while you can. The alternative to finding Snakeskin is post-end game, in the Maze of Tribulations (from Lizard Tyrants). Alternatively, you can find these lizardmen in the second iteration of the Cathedral of Oblivion.
Q108—Grannie Never Rests on Her Laurels
Reward
| EXP | FOL | SP |
| 3900 | 2500 | 250 |
| Items | ||
| Mentality Seeds x 2 | ||
Walkthrough
Prerequisites: Progress to at least Chapter 7
You can obtain Laurel Trees by defeating bipedal plant enemies like the Lamia Radix commonly encountered in the eastern region of the Resulian Plains.
Q109—Processing the Possibilities
Reward
| EXP | FOL | SP |
| 5100 | 2700 | 280 |
| Items | ||
| Cerulean Orb Signets, Vol. 3 | ||
Walkthrough
Prerequisites: Progress to at least Chapter 9
Kronos machinery enemies such as Toy Soldiers, Valiant Conscripts, and Avengers drop Quantum Processors. Toy Soldiers are encountered on the Cavaliero, while the other two enemies can be found in the Alcazar of the Golden Age.
Q110—Reaping Bloody Benefits
Reward
| EXP | FOL | SP |
| 6200 | 4000 | 280 |
| Items | ||
| Angelstone x 2 | ||
Walkthrough
Prerequisites: Progress to at least Chapter 10
There are two Bloodstained Cloths in chests in the Trei’kuran Dunes. Additionally, most ghost-like enemies (such as the Misfortuners encountered in the Trei’kuran Dunes) drop sheets of these.
Q111—Collective Parting of the Sands
Reward
| EXP | FOL | SP |
| 4200 | 2300 | 250 |
| Items | ||
| Gnomestone x 2 | ||
Walkthrough
Prerequisites: Progress to at least Chapter 8
At the earliest point this quest is undertaken, you can only obtain a Sandfish from fishing spots in the Trei’kuran Dunes. The chance to fish it up is rare, however. You can reset fishing nodes by sleeping at an inn or in the starship’s Private Quarters. Alternatively, you can get Sandfish from defeating Horned Turtles in the Northern Territory of Sohma between story chapters 9 and 10. When the turtles no longer appear in this area, you’ll have to resort to fishing Sandfish up in the Trei’kuran Dunes.
Q112—Mouth-Watering Collection
Reward
| EXP | FOL | SP |
| 5300 | 2900 | 280 |
| Items | ||
| Therapeutic Tincture x 3 | ||
Walkthrough
Prerequisites: Progress to at least Chapter 9
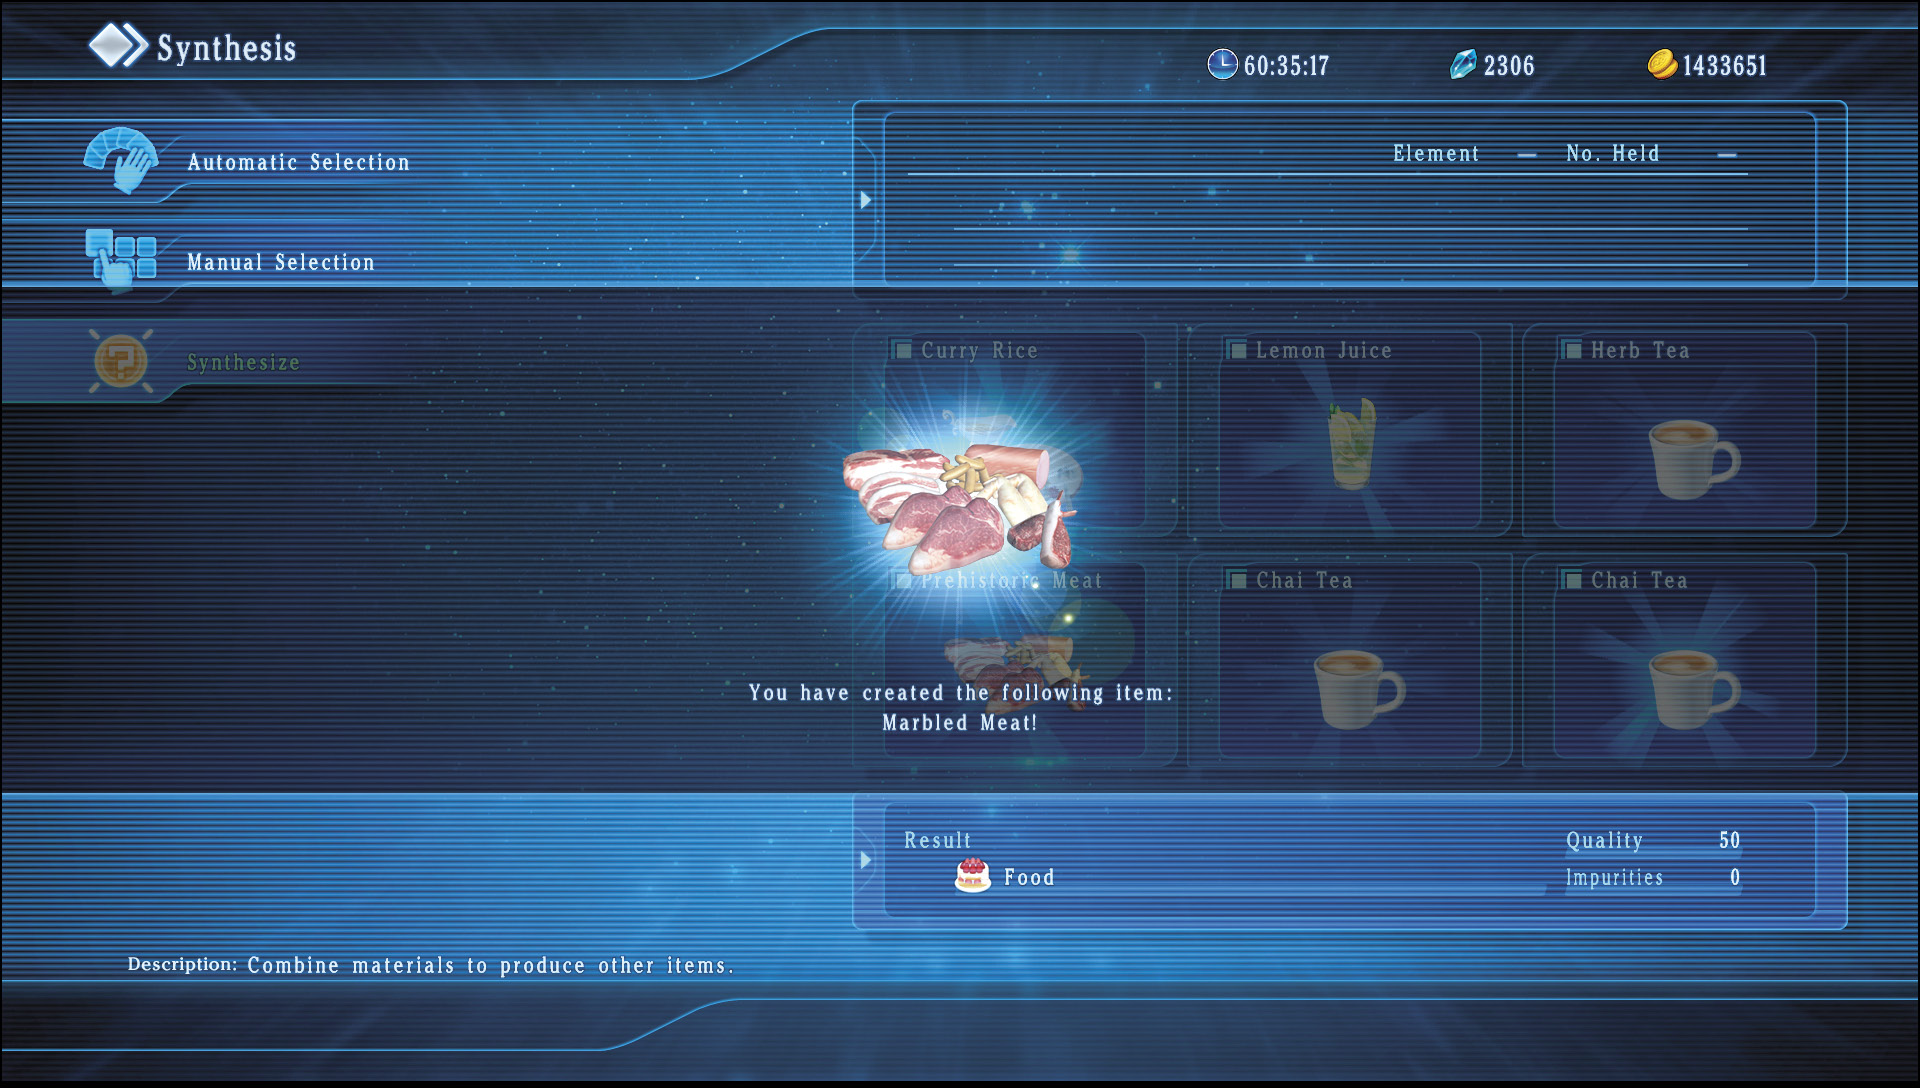
Marbled Meat can only be procured through Synthesis, with a resulting food quality of 50.
Q113—The Collective Gift of Giving
Reward
| EXP | FOL | SP |
| 6400 | 4500 | 280 |
| Items | ||
| Mind Amulet, Sukiyaki | ||
Walkthrough
Prerequisites: Progress to at least Chapter 10
You can craft Mythril with the Alchemy specialty skill if it’s leveled to at least Lv. 5. The recipe is six hunks of Platinum and two bottles of Alchemist’s Water. Otherwise, you can obtain pieces of Mythril by defeating Dark Materials in the Signesilica.
Q114—Subjugation Directive: Sandra
Reward
| EXP | FOL | SP |
| 4400 | 2400 | 250 |
| Items | ||
| Encyclopedia Corruptionem (unlocks Corruptology specialty), Resurrection Elixir | ||
Walkthrough
Prerequisites: Progress to at least Chapter 8
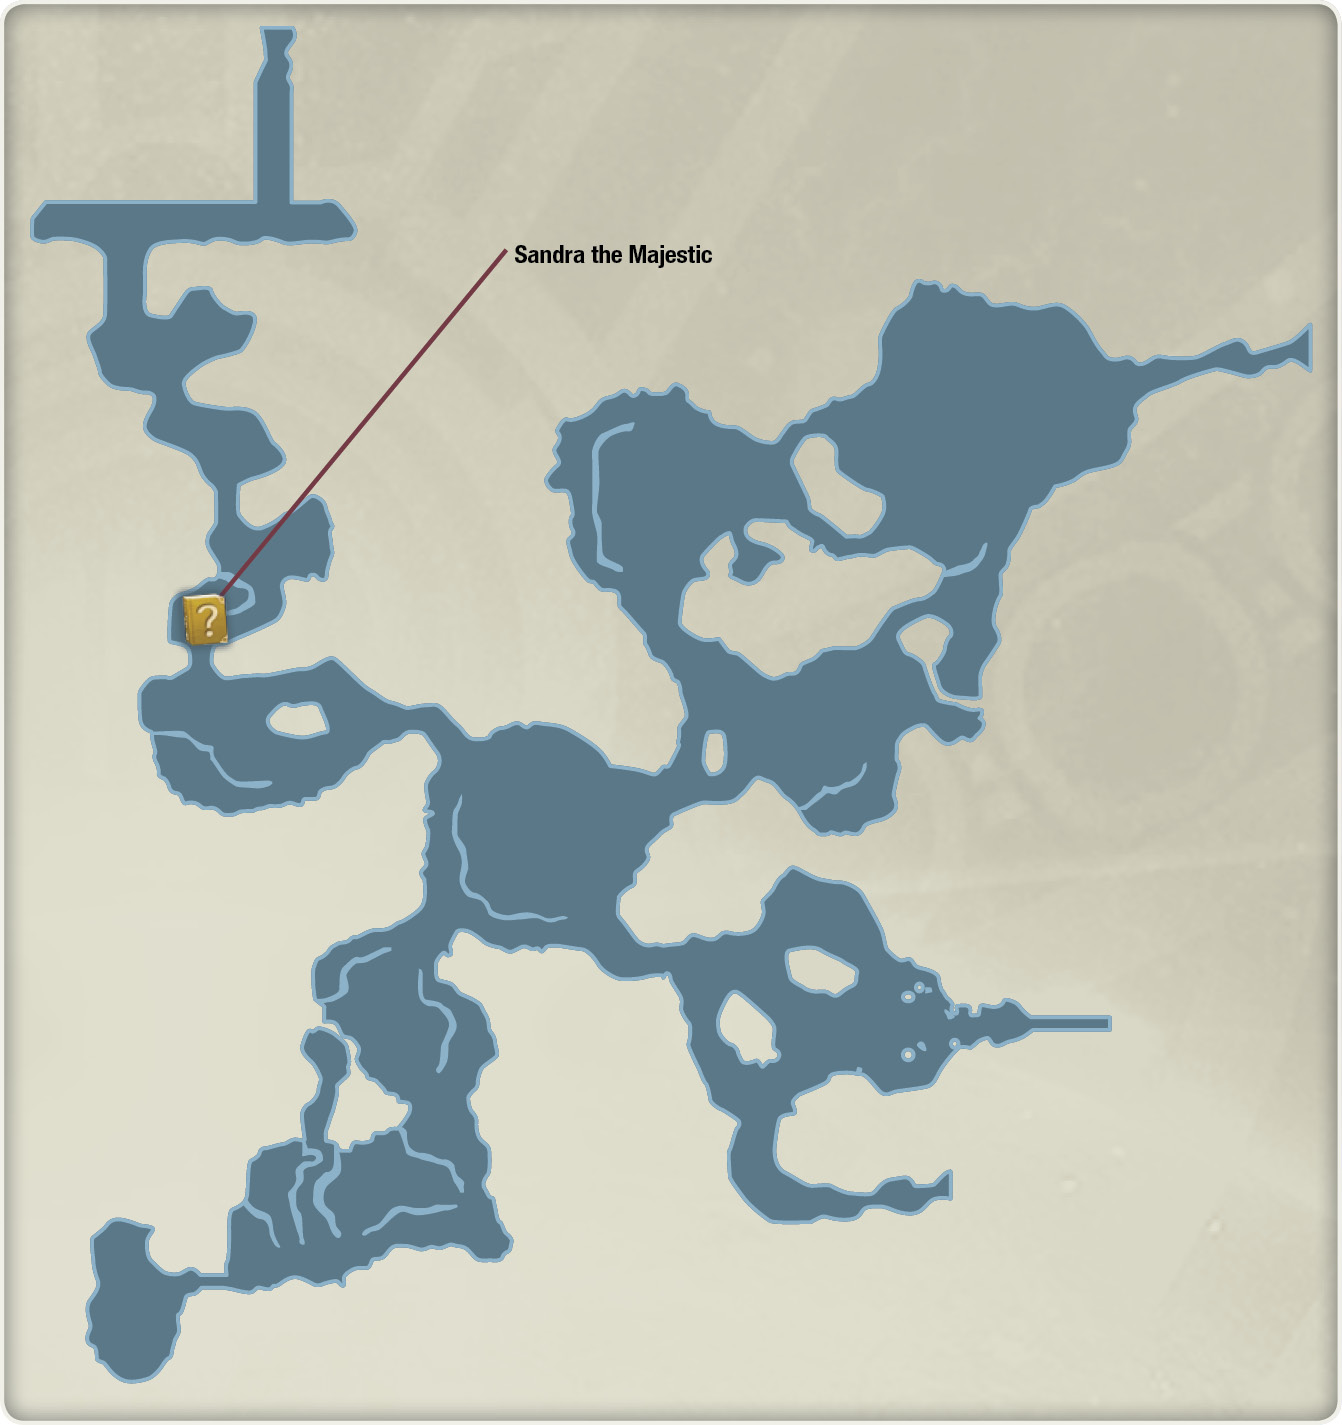
Sandra the Majestic is found on the way to the Trei’kur Slaughtery in the northwest region of the Trei’kuran Dunes.

Q115—Subjugation Directive: Zurtails
Reward
| EXP | FOL | SP |
| 4000 | 3000 | 250 |
| Items | ||
| Swordsman’s Manual III, Salmon Meuniere | ||
Walkthrough
Prerequisites: Progress to at least Chapter 8
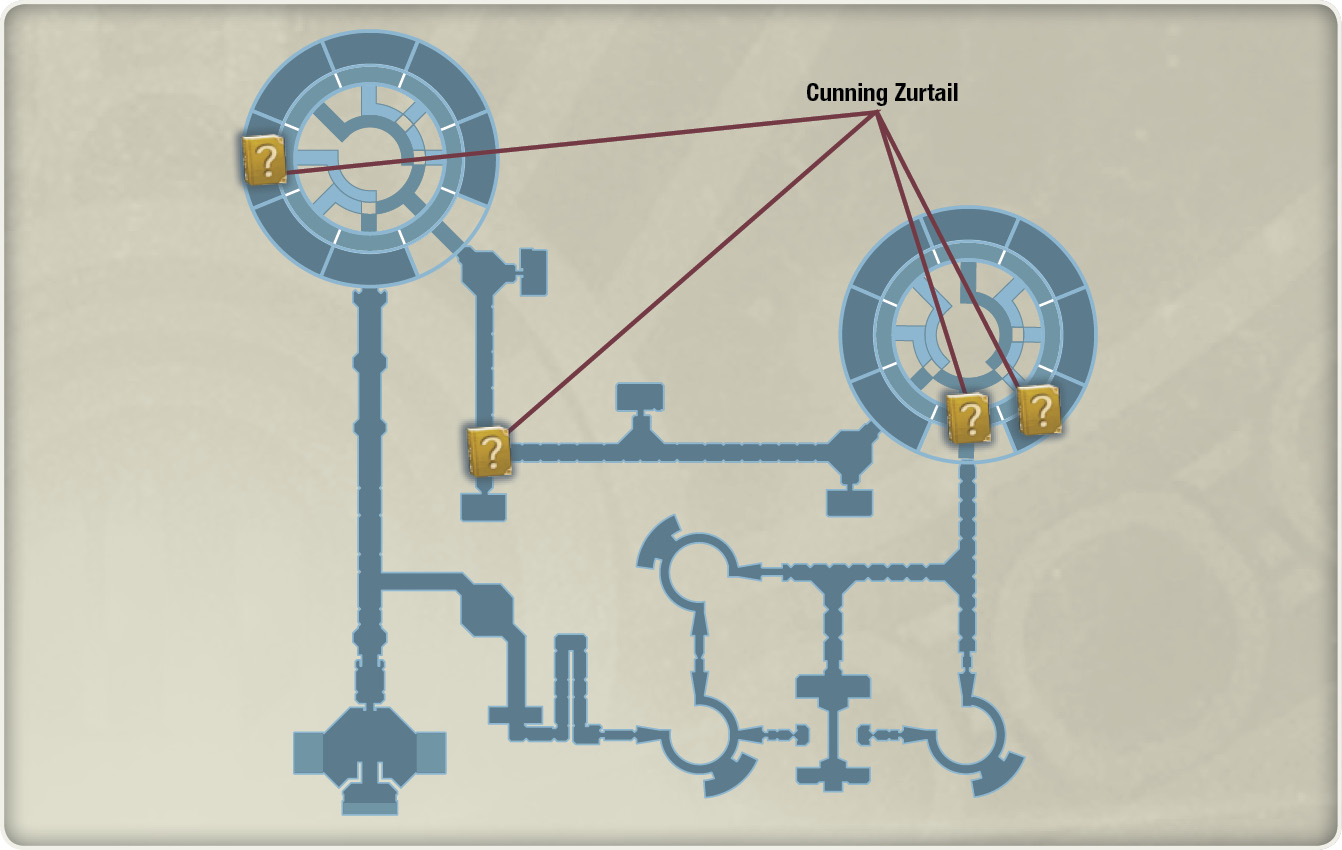
Cunning Zurtails are demon imps roaming the Trei’kur Slaughtery while this quest is active. You can find two groups in the northeast tower, with the other two in the northwest region of the slaughtery.
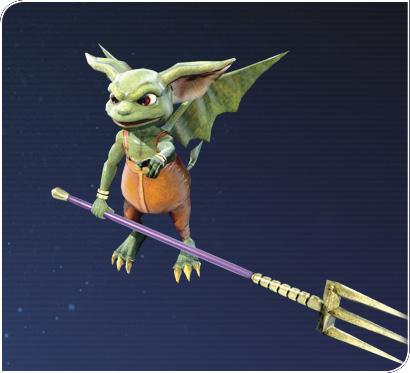
Q116—Subjugation Directive: Vlad
Reward
| EXP | FOL | SP |
| 5500 | 3500 | 280 |
| Items | ||
| Ifrit Mail | ||
Walkthrough
Prerequisites: Progress to at least Chapter 9
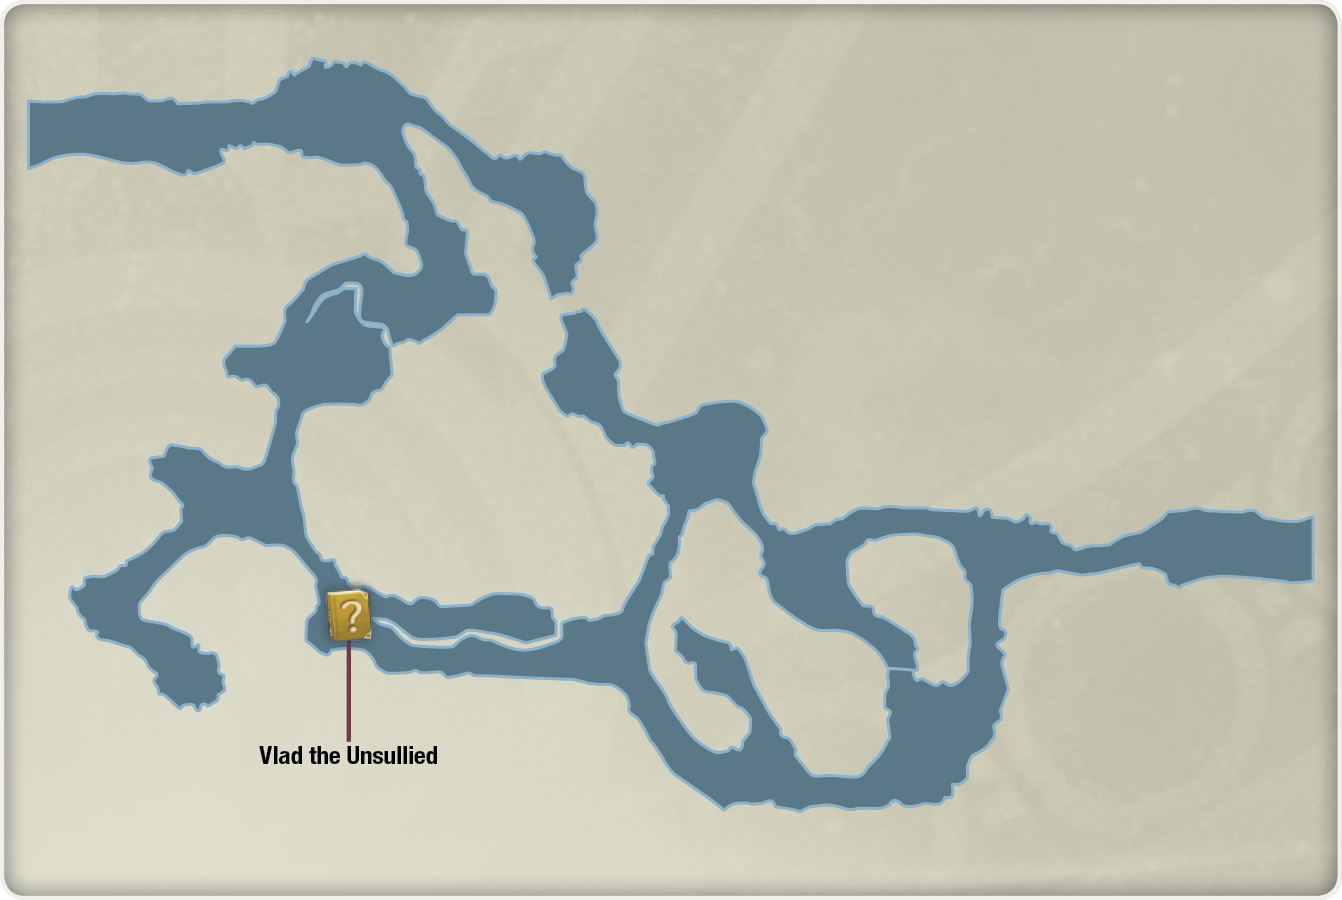
You can find Vlad the Unsullied haunting the Western Dakaav Tunnel. His exact location is in the southwest region of the area, near the locked chest.
Q117—Subjugation Directive: Dante and Mateo
Reward
| EXP | FOL | SP |
| 7200 | 5800 | 300 |
| Items | ||
| Superior Chain Mail | ||
Walkthrough
Prerequisites: Progress to at least Chapter 11
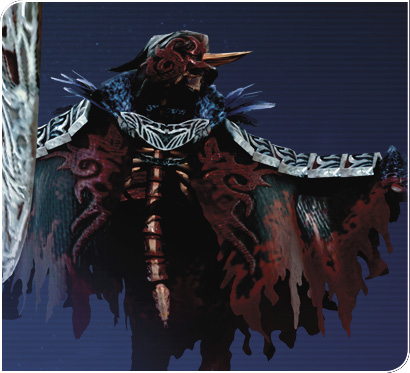
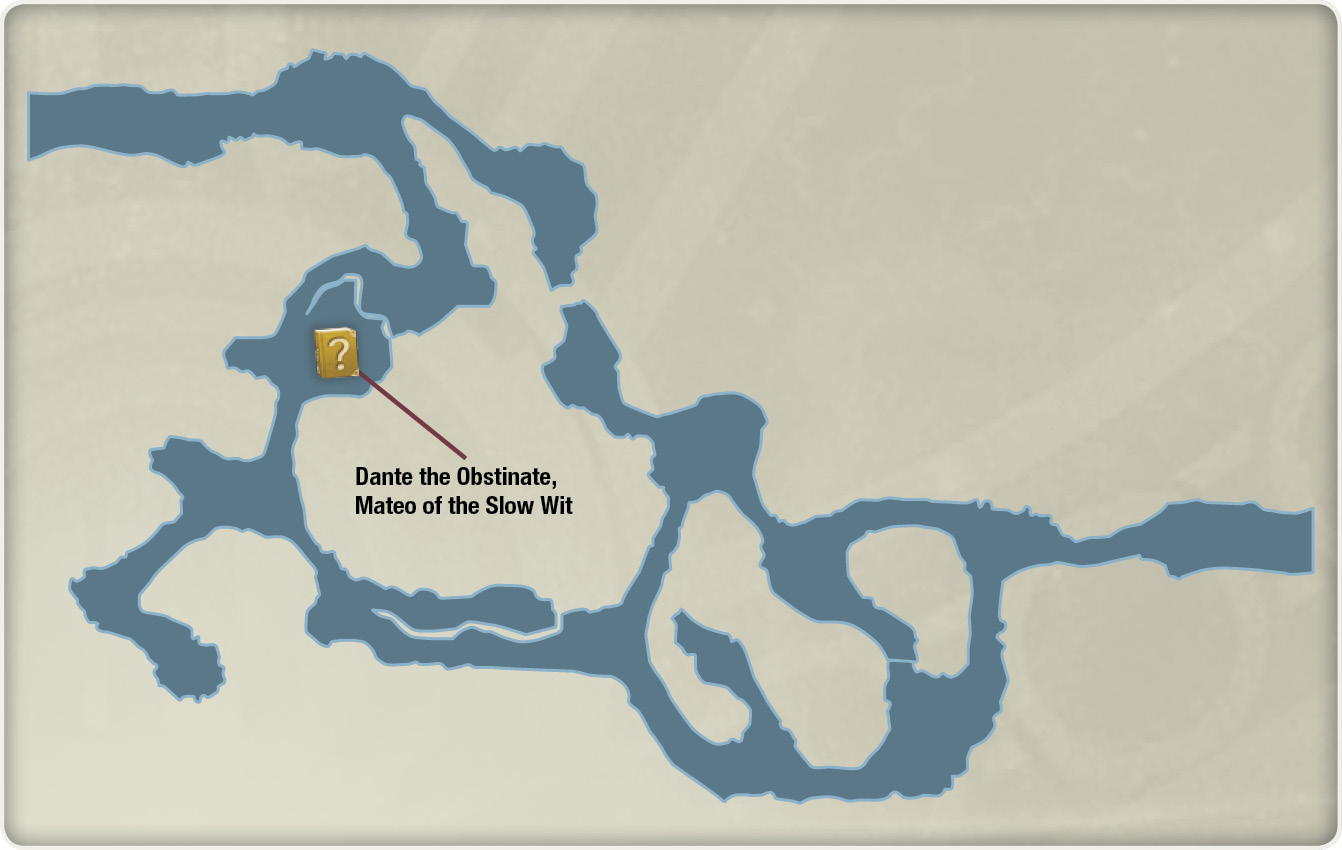
These two possessed suits of hulking armor are found near the save point in the Western Dakaav Tunnel. Like the encounter with Niflhel and Niflheim, watch out for their devastating area of effect attacks!


Q118—Subjugation Directive: Sythwas
Reward
| EXP | FOL | SP |
| 6500 | 4800 | 280 |
| Items | ||
| Light Scarf | ||
Walkthrough
Prerequisites: Progress to at least Chapter 10
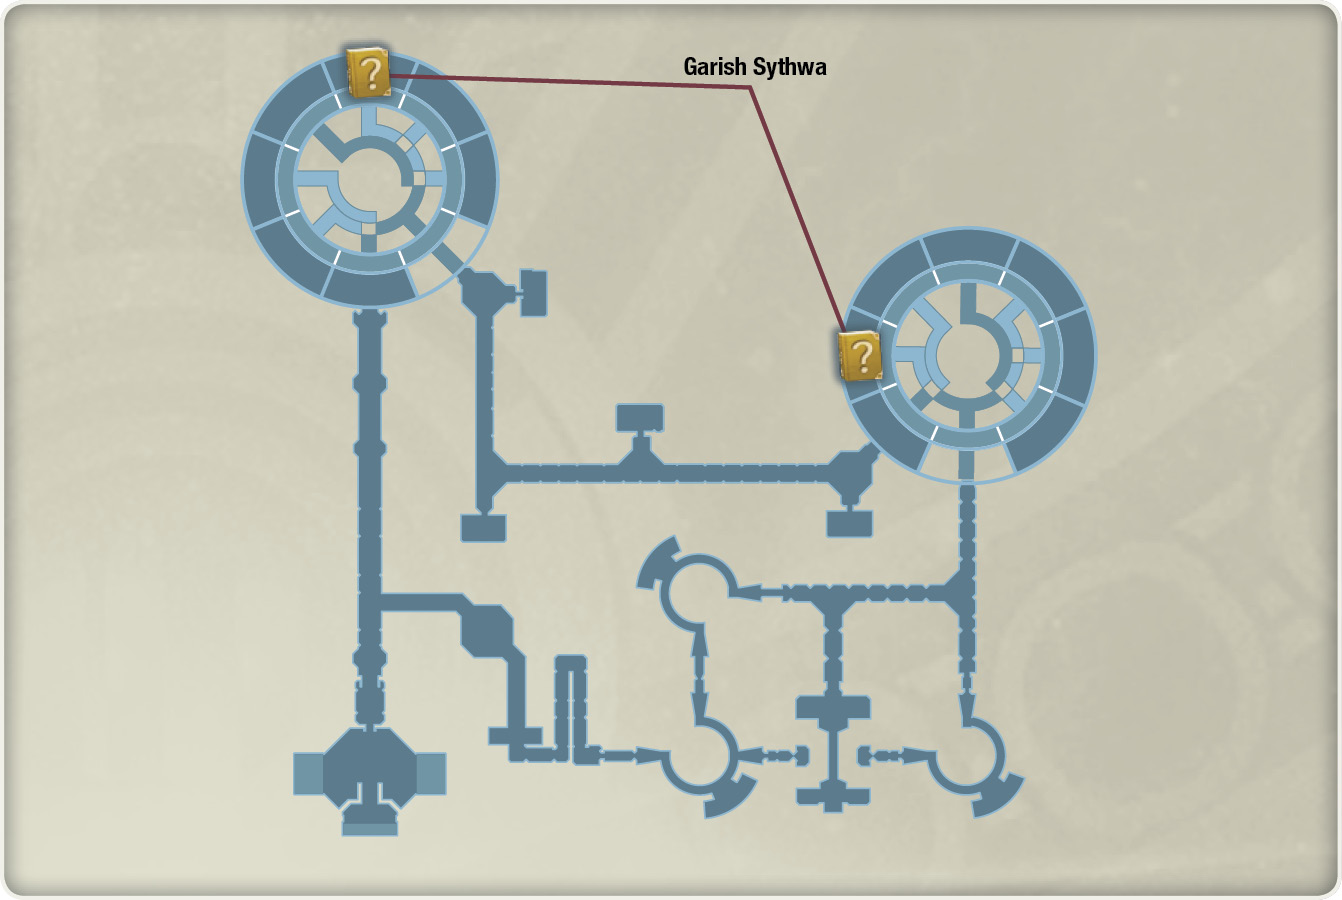
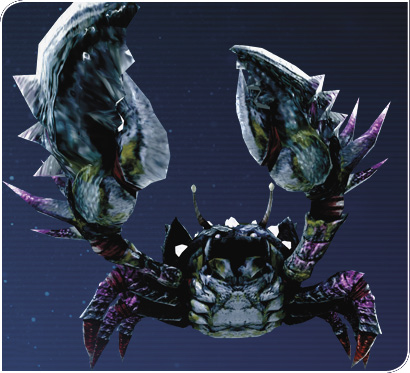
There are two groups of Garish Sythwas in the Trei’kur Slaughtery. One is in the northeast tower, while the other group is in the northwest tower.
Q119—Garrote the Guerillas
Reward
| EXP | FOL | SP |
| 6000 | 4500 | 280 |
| Items | ||
| Energy Amulet, Riot Potion x 2 | ||
Walkthrough
Prerequisites: Progress to at least Chapter 10
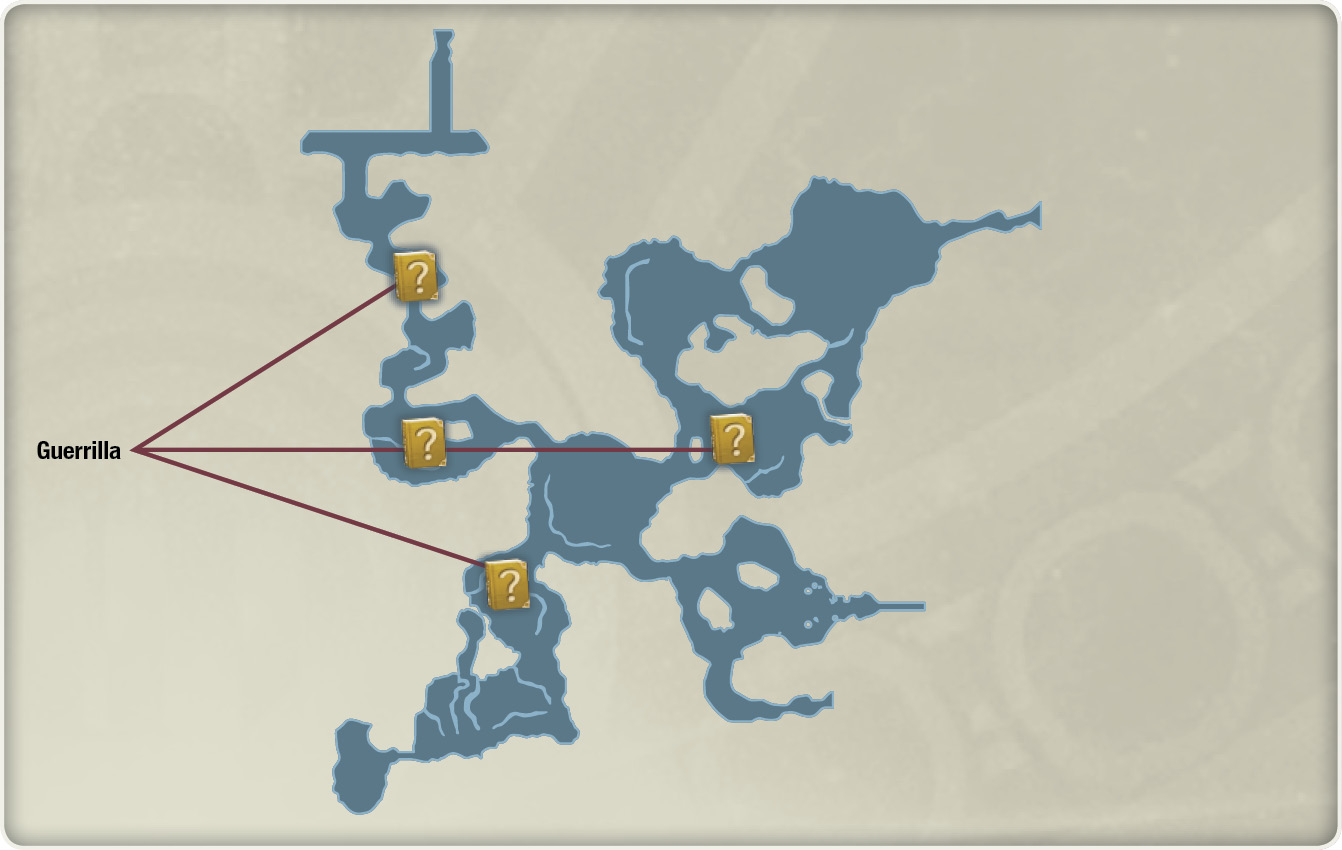
Trei’kuran survivors, simply named “Guerrillas,” are found littered across the Trei’kuran Dunes. Two groups dwell in the northwest region (near the Trei’kur Slaughtery), one group resides in the southwest, and one is found in the northeast portion of the area.

Q120—Wanted: Hannah
Reward
| EXP | FOL | SP |
| 5400 | 2500 | 280 |
| Items | ||
| Miraculous Device x 2 | ||
Walkthrough
Prerequisites: Progress to at least Chapter 9
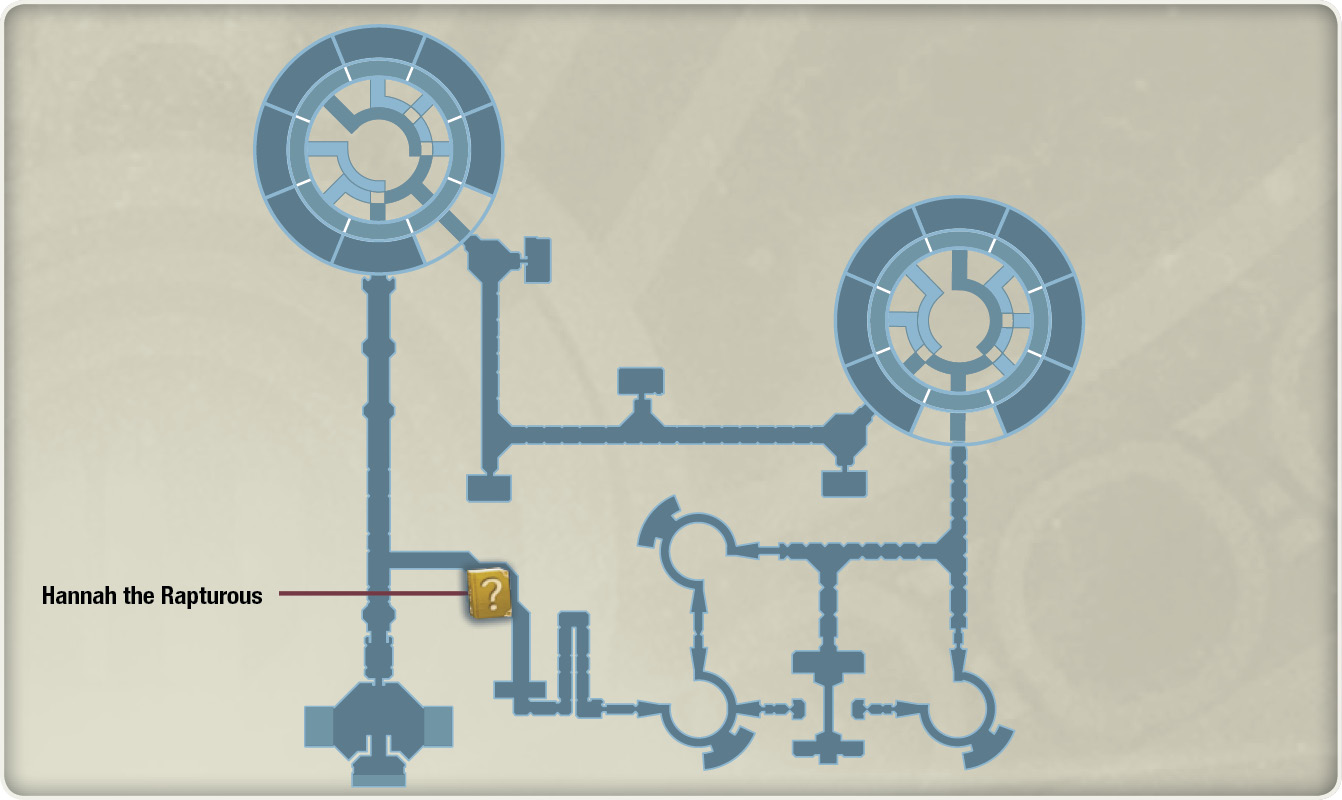
Hannah the Rapturous is a humanoid-type enemy found in the Trei’kur Slaughtery. The fastest way to reach her is through the shortcut door that unlocks after you complete the main mission involving the Trei’kur Slaughtery. From the entrance of the tower, go north until you reach a divergence, then head west, leading into the southwest portion of the area.

Q121—War and Peace
Reward
| EXP | FOL | SP |
| 6900 | 3000 | 300 |
| Items | ||
| CQC Program Eta, Holy Mist | ||
Walkthrough
Prerequisites: Progress to at least Chapter 11
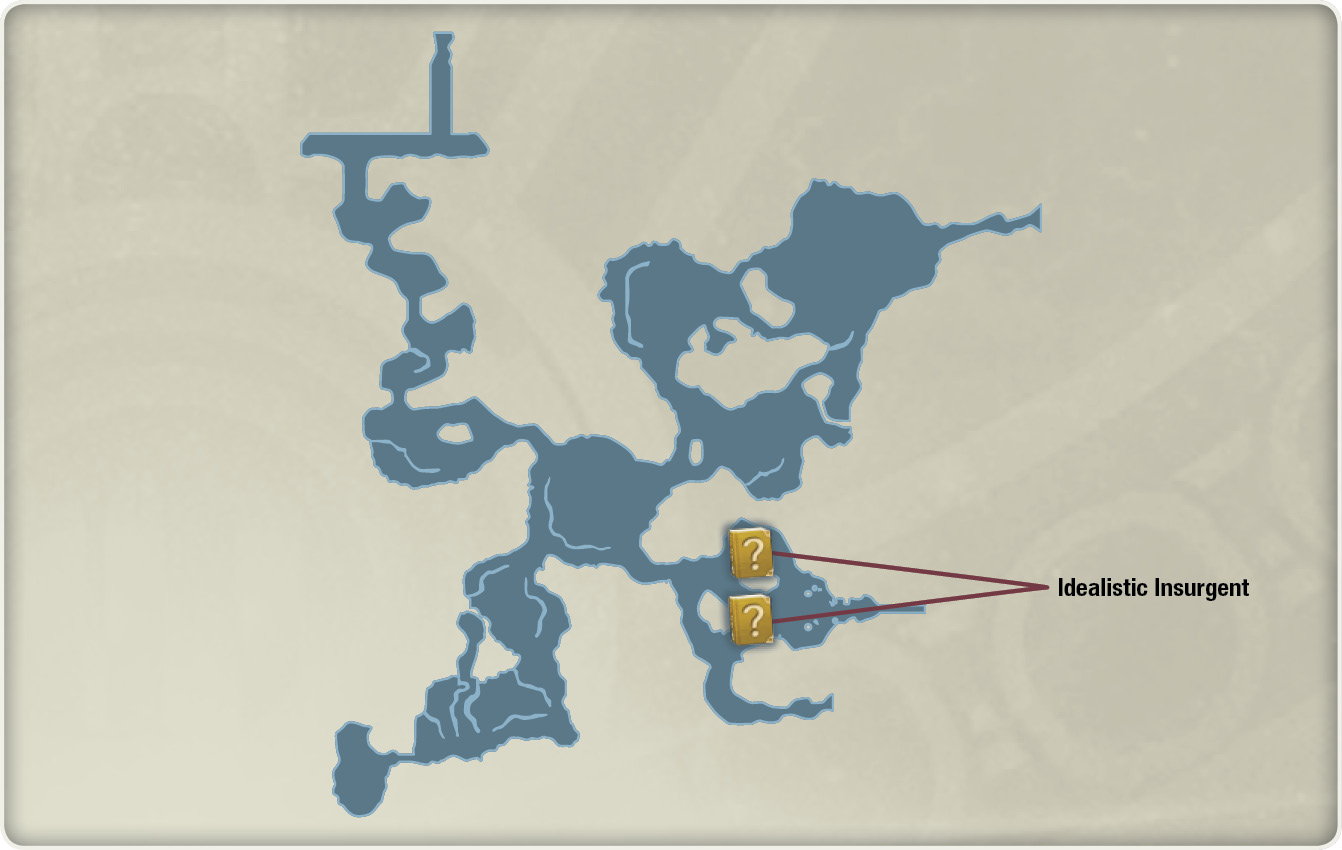
You can find Idealistic Insurgents in the Trei’kuran Dunes, just outside of Eastern Trei’kur. You’ll need to defeat at least 10 of them, so you may have to use the Ocarina specialty to respawn them (or simply re-enter the area).

Q122—A Peeping Golem!
Reward
| EXP | FOL | SP |
| 5500 | 3000 | 280 |
| Items | ||
| Nereidstone | ||
Walkthrough
Prerequisites: Progress to at least Chapter 9
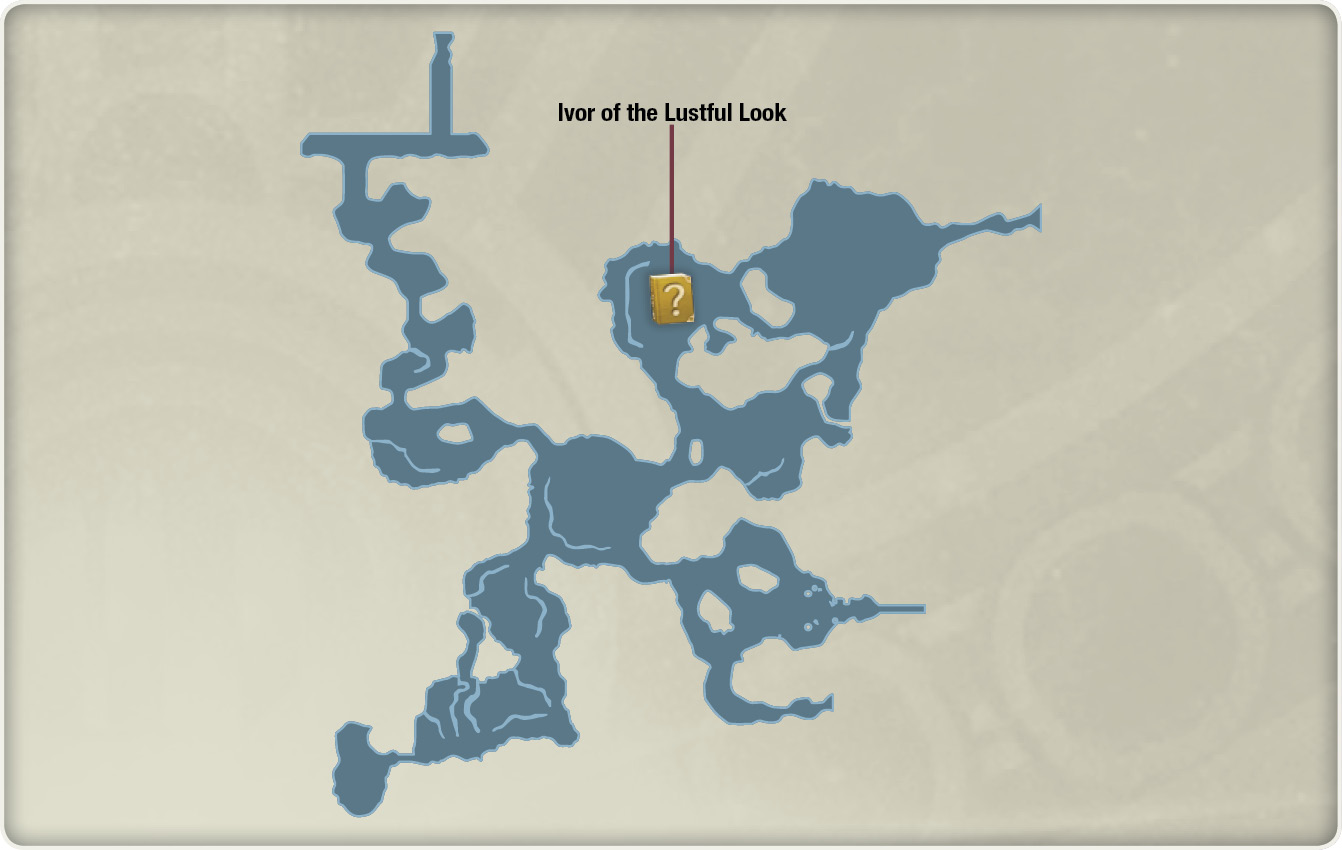
Ivor of the Lustful Look is a Corrupt enemy in the Trei’kuran Dunes. Like other Baskanias, its eye attacks deal a constant and significant amount of damage to anyone it’s focused on, so make sure to run away from its eye beams!