
Star Ocean: Integrity and Faithlessness Guide Part IV: The Maze of Tribulations
Indra’s Return
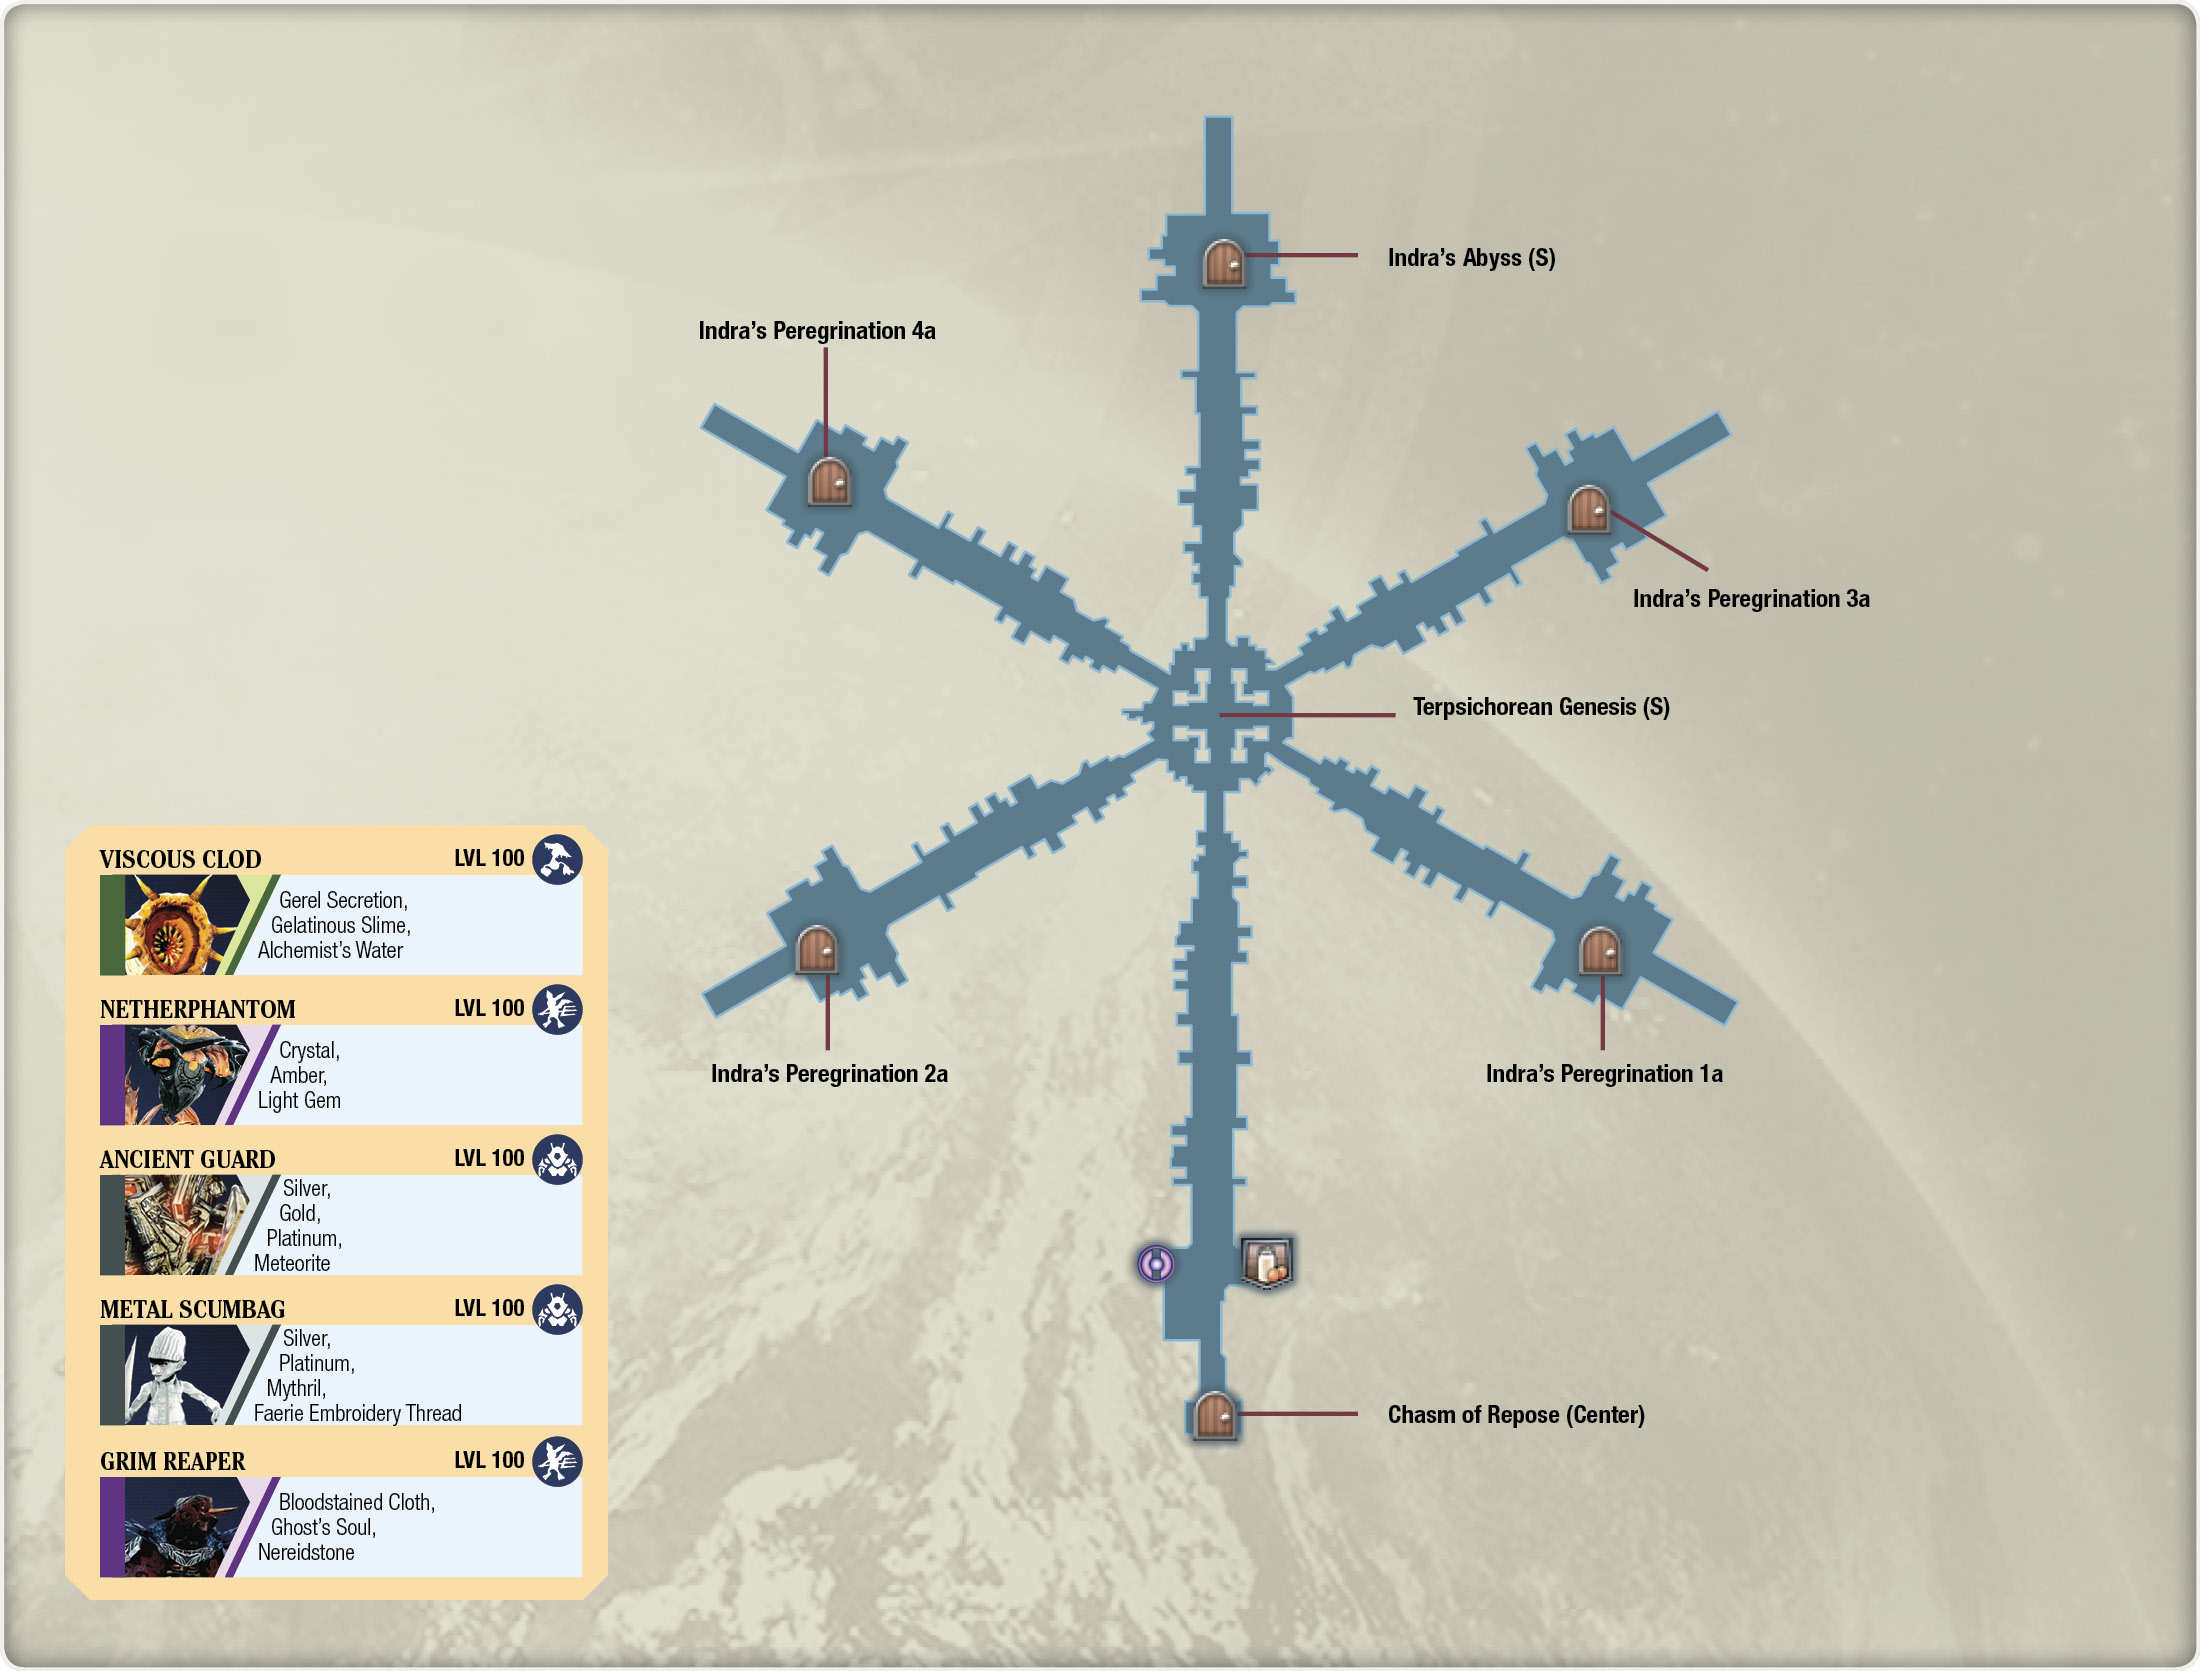
The layout of the lobby here is an exact replica of the previous floor. The primary differences are that monsters are more difficult and there are more levels per subarea. There’s also a notable spike in difficulty from the previous enemies, especially when it comes to the bosses. It’s highly recommended that you fight as many foes as you can with your EXP- and SP-boosting roles equipped to fill out the roles and specialty skills you need (but remember to equip better supportive ones before bosses). The average level of the foes here is around 100, so you should farm up enough EXP to match them.
Indra’s Peregrination I
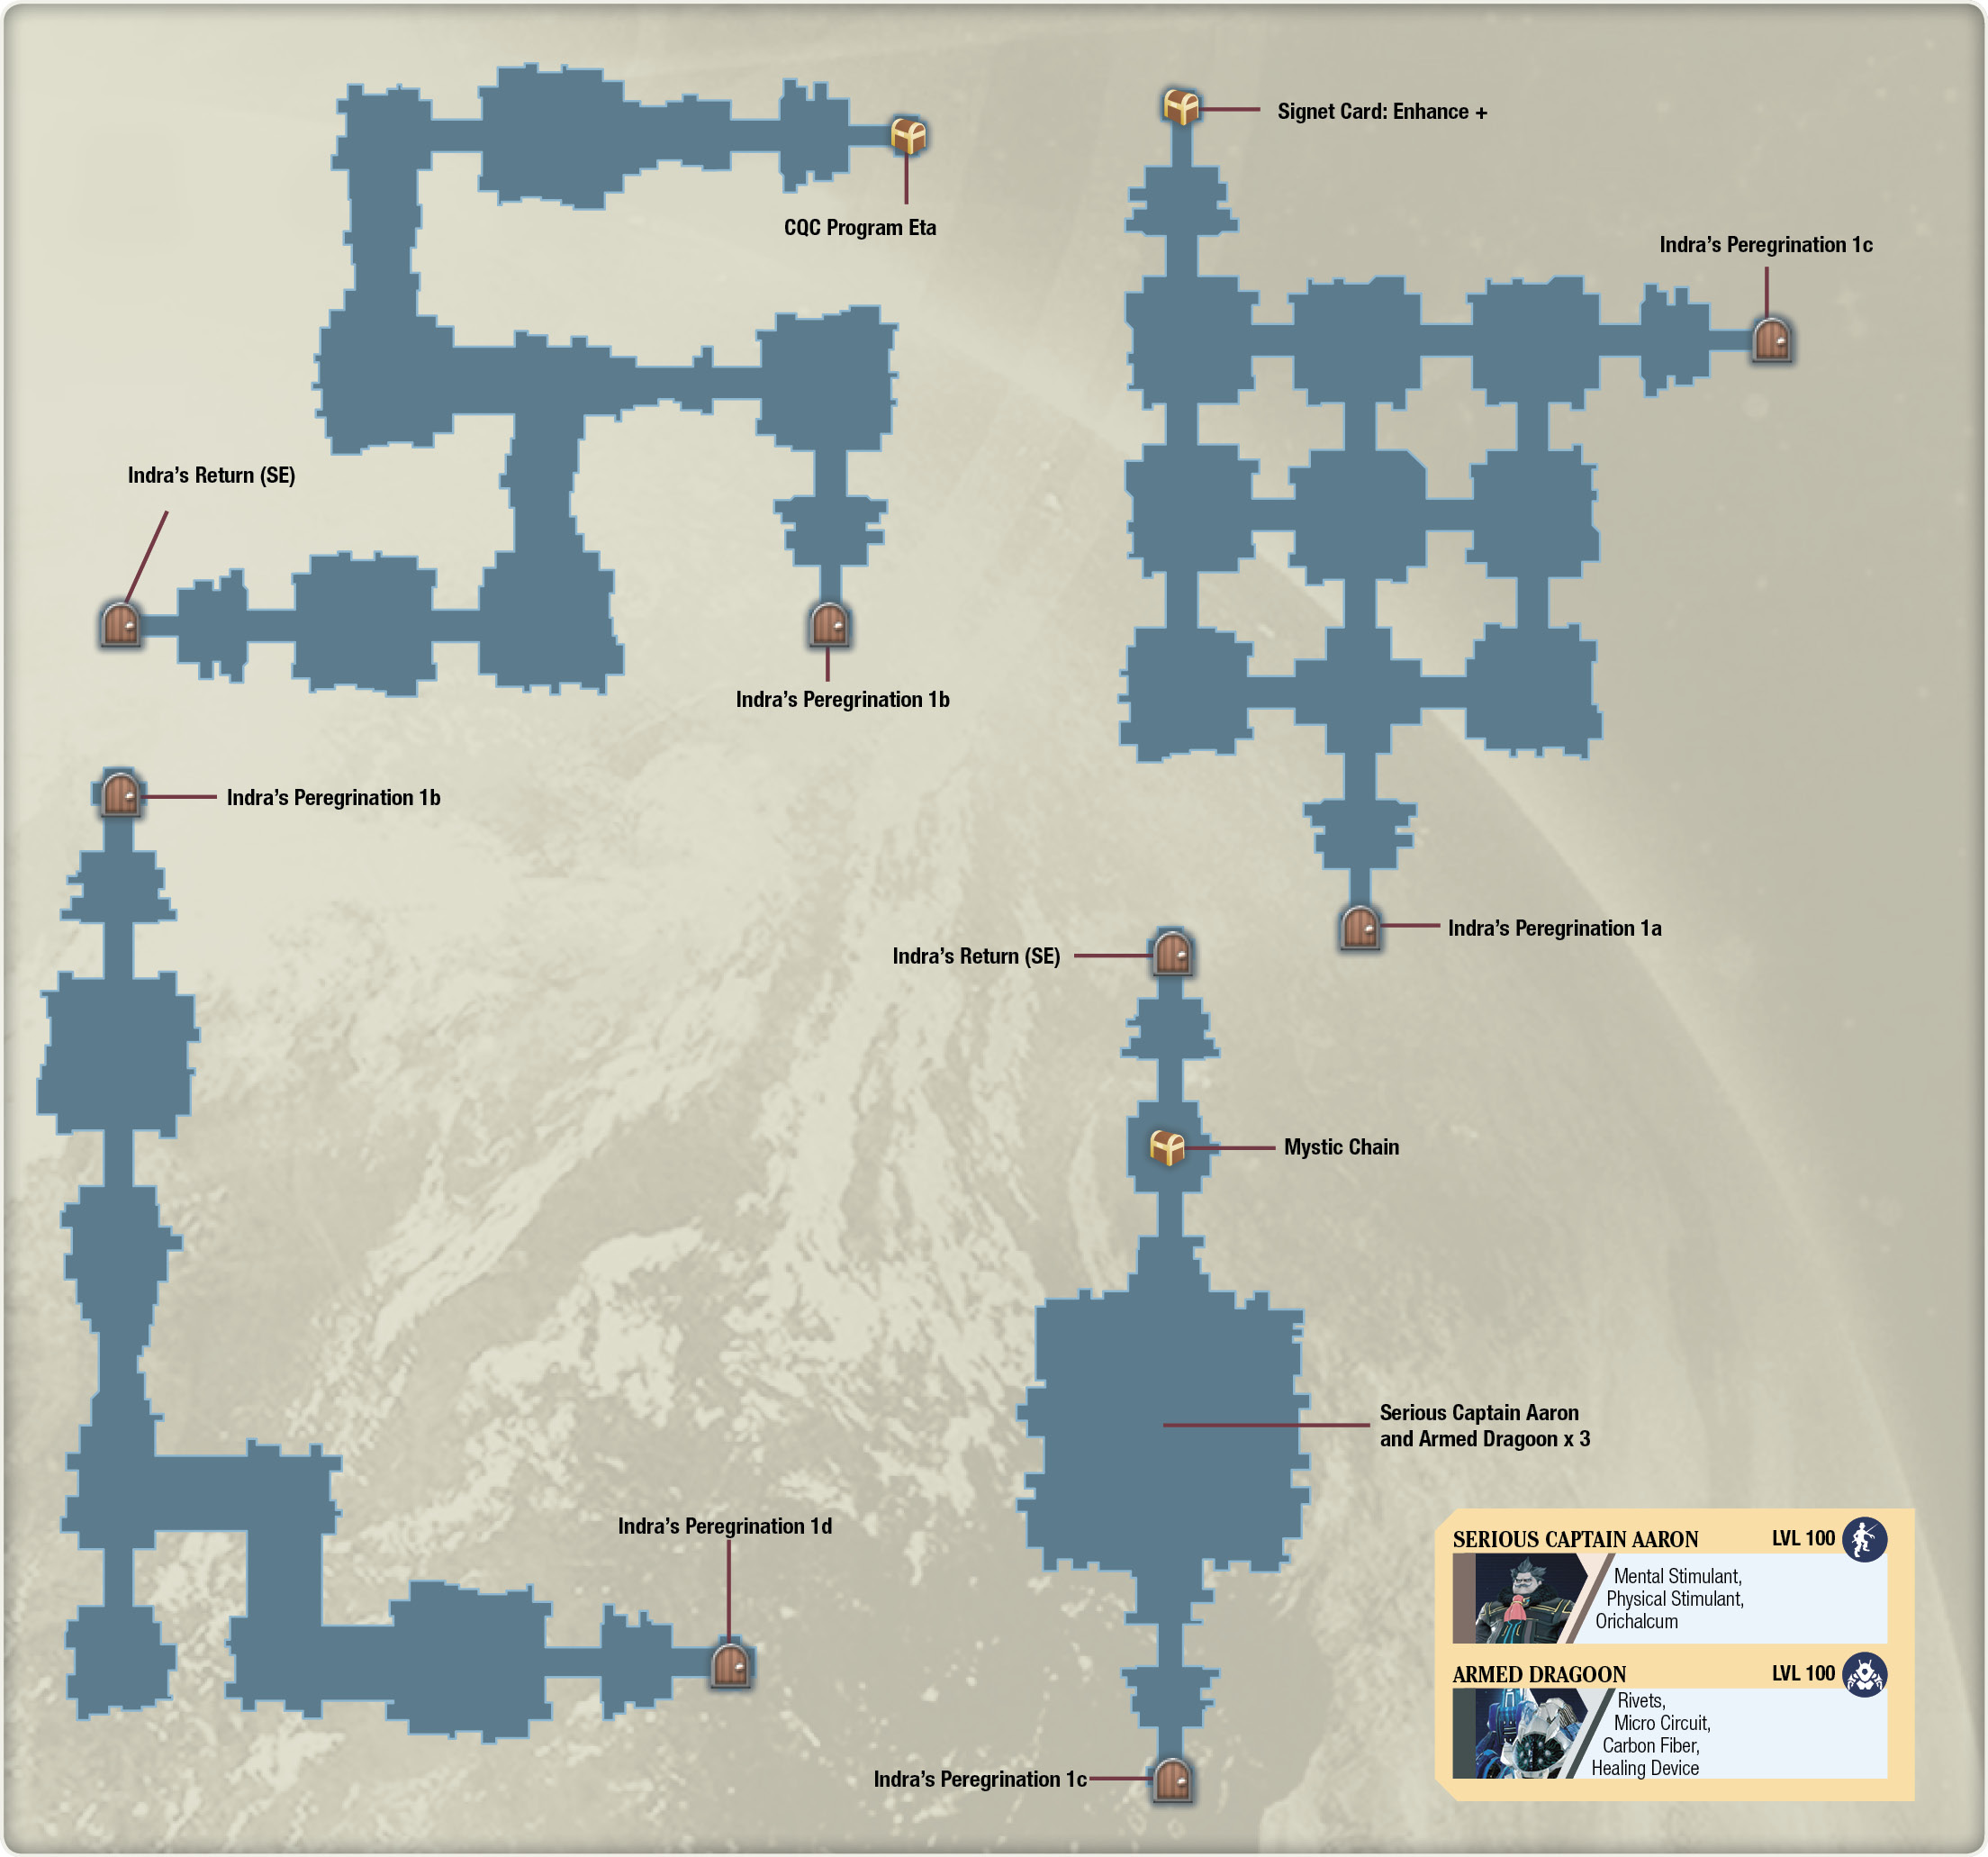
Start heading east to a path taking you north to a fork. Turning left here leads you to a chest containing a CQC Program Eta skill disk in the room located northeast. If your party is under Lv. 100, make sure to fight any enemies you encounter, especially if you see Metal Scumbags and you have access to the Scumbag Slayer. After you get the chest, you can backtrack to take the east path, which bends south, taking you to the transporter to the next level. The second level is a large 3x3 grid with a chest holding a Signet Card: Enhance + in a room in the far northwest corner. The transporter to the third level is located in the northeast corner of the grid, so head there after grabbing the signet card, and go on up. On this level, the first room you enter has three Metal Scumbags you can repeatedly slay using the Ocarina specialty. You can stay here and grind on this group of enemies to power yourself up for the upcoming bosses. It’s highly recommended that you at least fill out all of your slayer roles to unlock God Slayer. You’re going to need it soon.
When you’re done leveling up, you can backtrack to the save point in the lobby. Make your way back here, then run south and take the first left turn you see, going east. This path takes you to the first boss battle in Indra’s Return.
You’ll find Serious Captain Aaron here in the boss arena, and he’s brought some serious artillery along with him in the form of three Armed Dragoons. These mechanical combat suits have roughly 550,000 HP each and use cannon-type ranged attacks. Initially, the battle can be frantic because of so many enemies blasting away at your party. The first thing you’ll want to do is take control of Miki and maneuver her out of harm’s way. Captain Aaron’s goons can cause some headache with their ranged attacks and area-of-effect damage. Captain Aaron likes to cast signeturgical area of effect damage spells on your weaker members, so be careful.
Keep Miki alive as best as you can so she can cast Faerie Star to heal up any damaged party members. Once she’s safe, you’ll want to focus your fire to quickly reduce enemy troops. The best way to do this is to have one of your high ATK close-range attackers build up a 175% combo ratio with fast attack skills or normal attacks, and then finish off with a 200% Reserve Rush finisher. This should destroy at least one of the dragoons, especially if you get your other party members to focus fire on the same foe. For instance, have Anne use Hammer of Might => Hammer of Might => Hammer of Might => Lv. 1 Blazing Cannon, then immediately switch to Fidel and perform Air Raid => Air Raid => Air Raid => Lv. 1 Ethereal Blast on the same target.

Ideally, you’ll have one of the Reserve Rush users equipped with the Machine Slayer role for an extra 50% damage to the dragoons. Keep an eye on Miki while you perform the aforementioned combo, and make sure that Captain Aaron and his armored troops aren’t targeting her. A good way to keep Miki healthy is to equip her with the Skulker role, making it less likely for enemies to target her, especially if the role is leveled up completely.
When you’ve thinned out the horde of robots, you can send the Kronos captain packing by switching out the Machine Slayer role with the Warrior Slayer one. His spells should be manageable now that you’ve singled him out. On your way out through the north path, you’ll find a Mystic Chain in a chest. This chain mail synergizes well with characters using the Evasionist role for a combined boost of -50% Critical Hit Rate from foes.
Indra’s Peregrination II
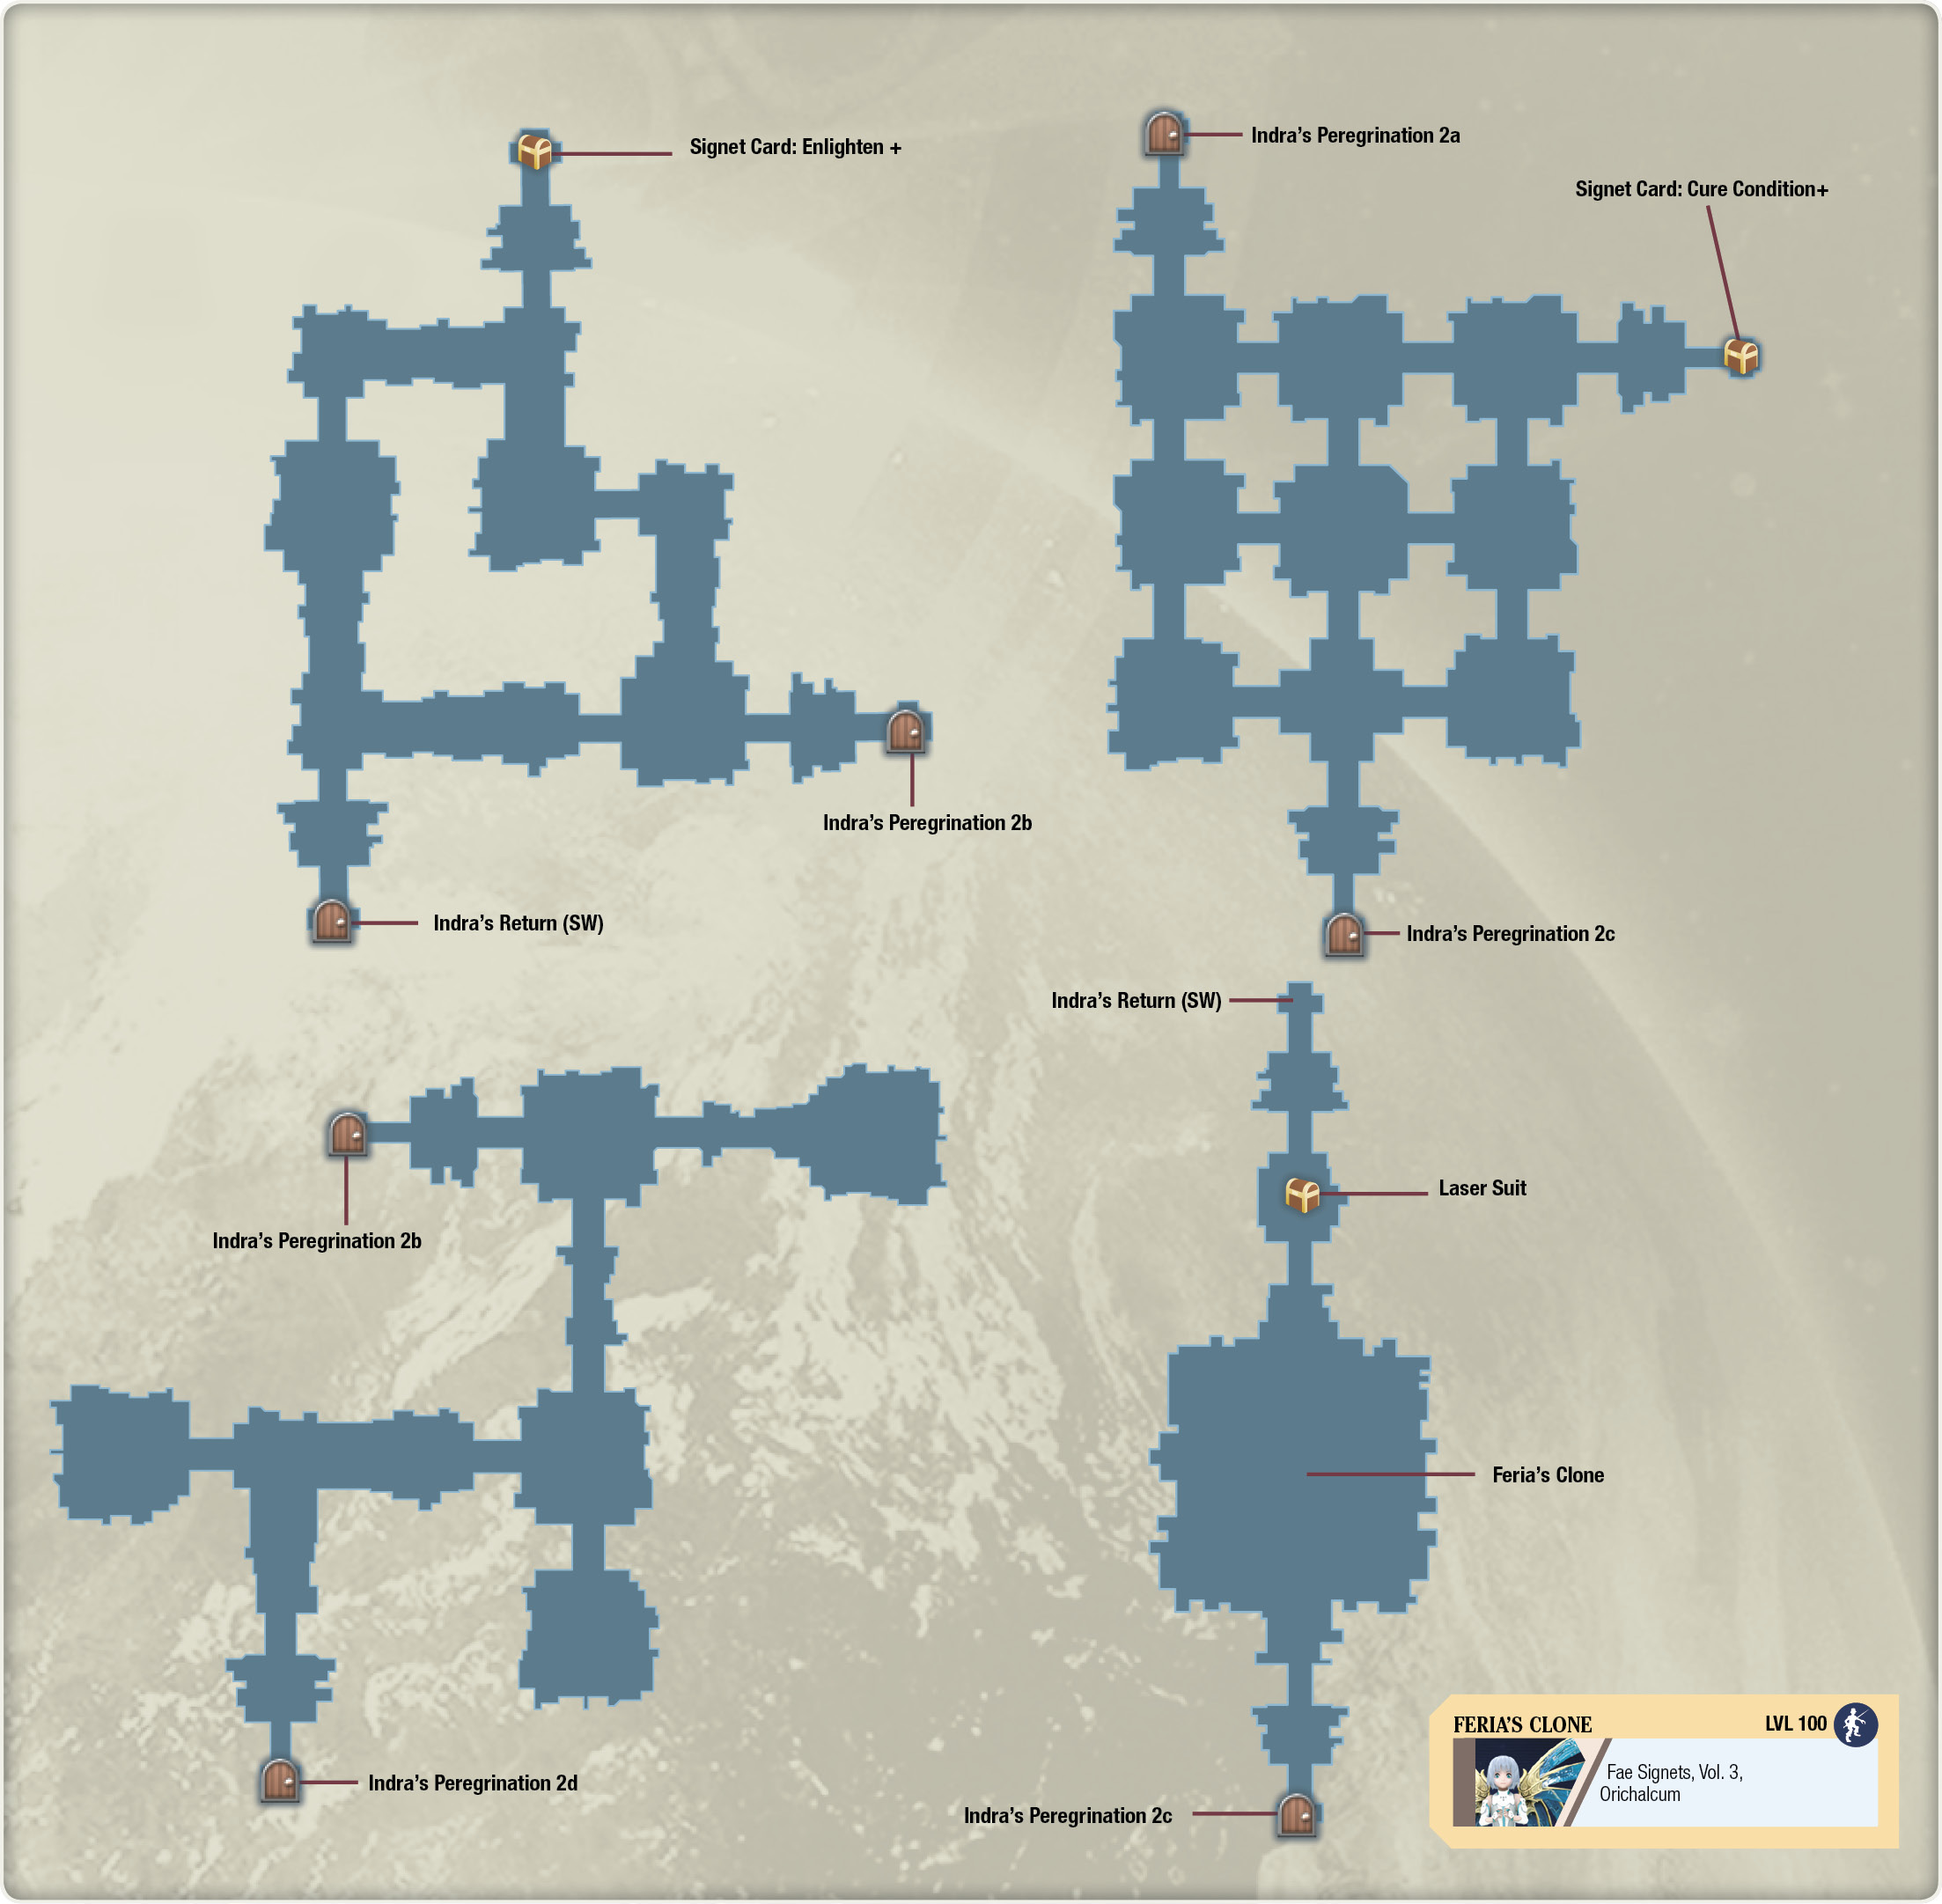
In the first level of this area, there’s a chest containing a Signet Card: Enlighten + in the northeast corner of the map. Get there by following the path all the way north, turning east, and then making a left into a room. After grabbing it, turn around and take the south path that eventually winds into a divergence. Make a left here, heading east to go up to the second level. There’s another 3x3 grid here with a chest in the northeast corner. Get to the chest by making an immediate left outside of your starting point and heading directly east. Pick up the Signet Card: Cure Condition +, and head back out into the grid, making a left turn to go south. Keep going until you’re forced to make a right turn west, and the transport pad to the third level will be on your left to the south. There’s no chest here on the third level, so make the first right you see and head south. Make the first right, and then left, going south, to the transport room in the south part of the map. Go up to the boss arena, and get ready for a boss encounter with one of Feria’s experimental clones!
Before you greet Feria’s clone, consider eating a Crab Rice Stew or Cheese Fondue to help your survivability against this spell-heavy boss. Be sure to equip Warrior Slayer on one of your damage-dealing melee members, too.
Don’t be fooled by her size; this weaponized child of war packs a mean punch with high-damage signeturgical spells like Extinction and Deep Freeze. She’ll also buff herself with Angel Feather, which increases all of her stats, most notably her INT. This makes her spells even more devastating, so dispel it immediately with Fiore’s Void spell. Her other skills are primarily projectile orbs that have a high chance to silence targets. Revolution is a single-hit projectile that deals a large amount of damage, roughly 30000-40000 hit points. If it doesn’t kill a party member, it might silence them. Oppressive Effulgence is an area-of-effect version that shoots out in all directions, but deals less damage per shot. The main mechanic in this fight is remedying silence as soon as you can, especially if Miki is afflicted. Otherwise, you’ll need to heal through her spell damage while raising anyone who’s annihilated from an Extinction or a Deep Freeze spell. As a spell caster, a particularly effective strategy is to keep her stunned, so equip Emmerson or one of your other aggressive members with the Stun Supporter and Interceptor roles and manually control them. Cycle between your weak and strong attacks to take advantage of quick combo-canceling so you can fire off a flurry of normal hits that each has a chance to stun. When you’ve defeated the Kronos experiment, head north to collect a Laser Suit from the chest, and then head back out to Indra’s Return.
Indra’s Peregrination III
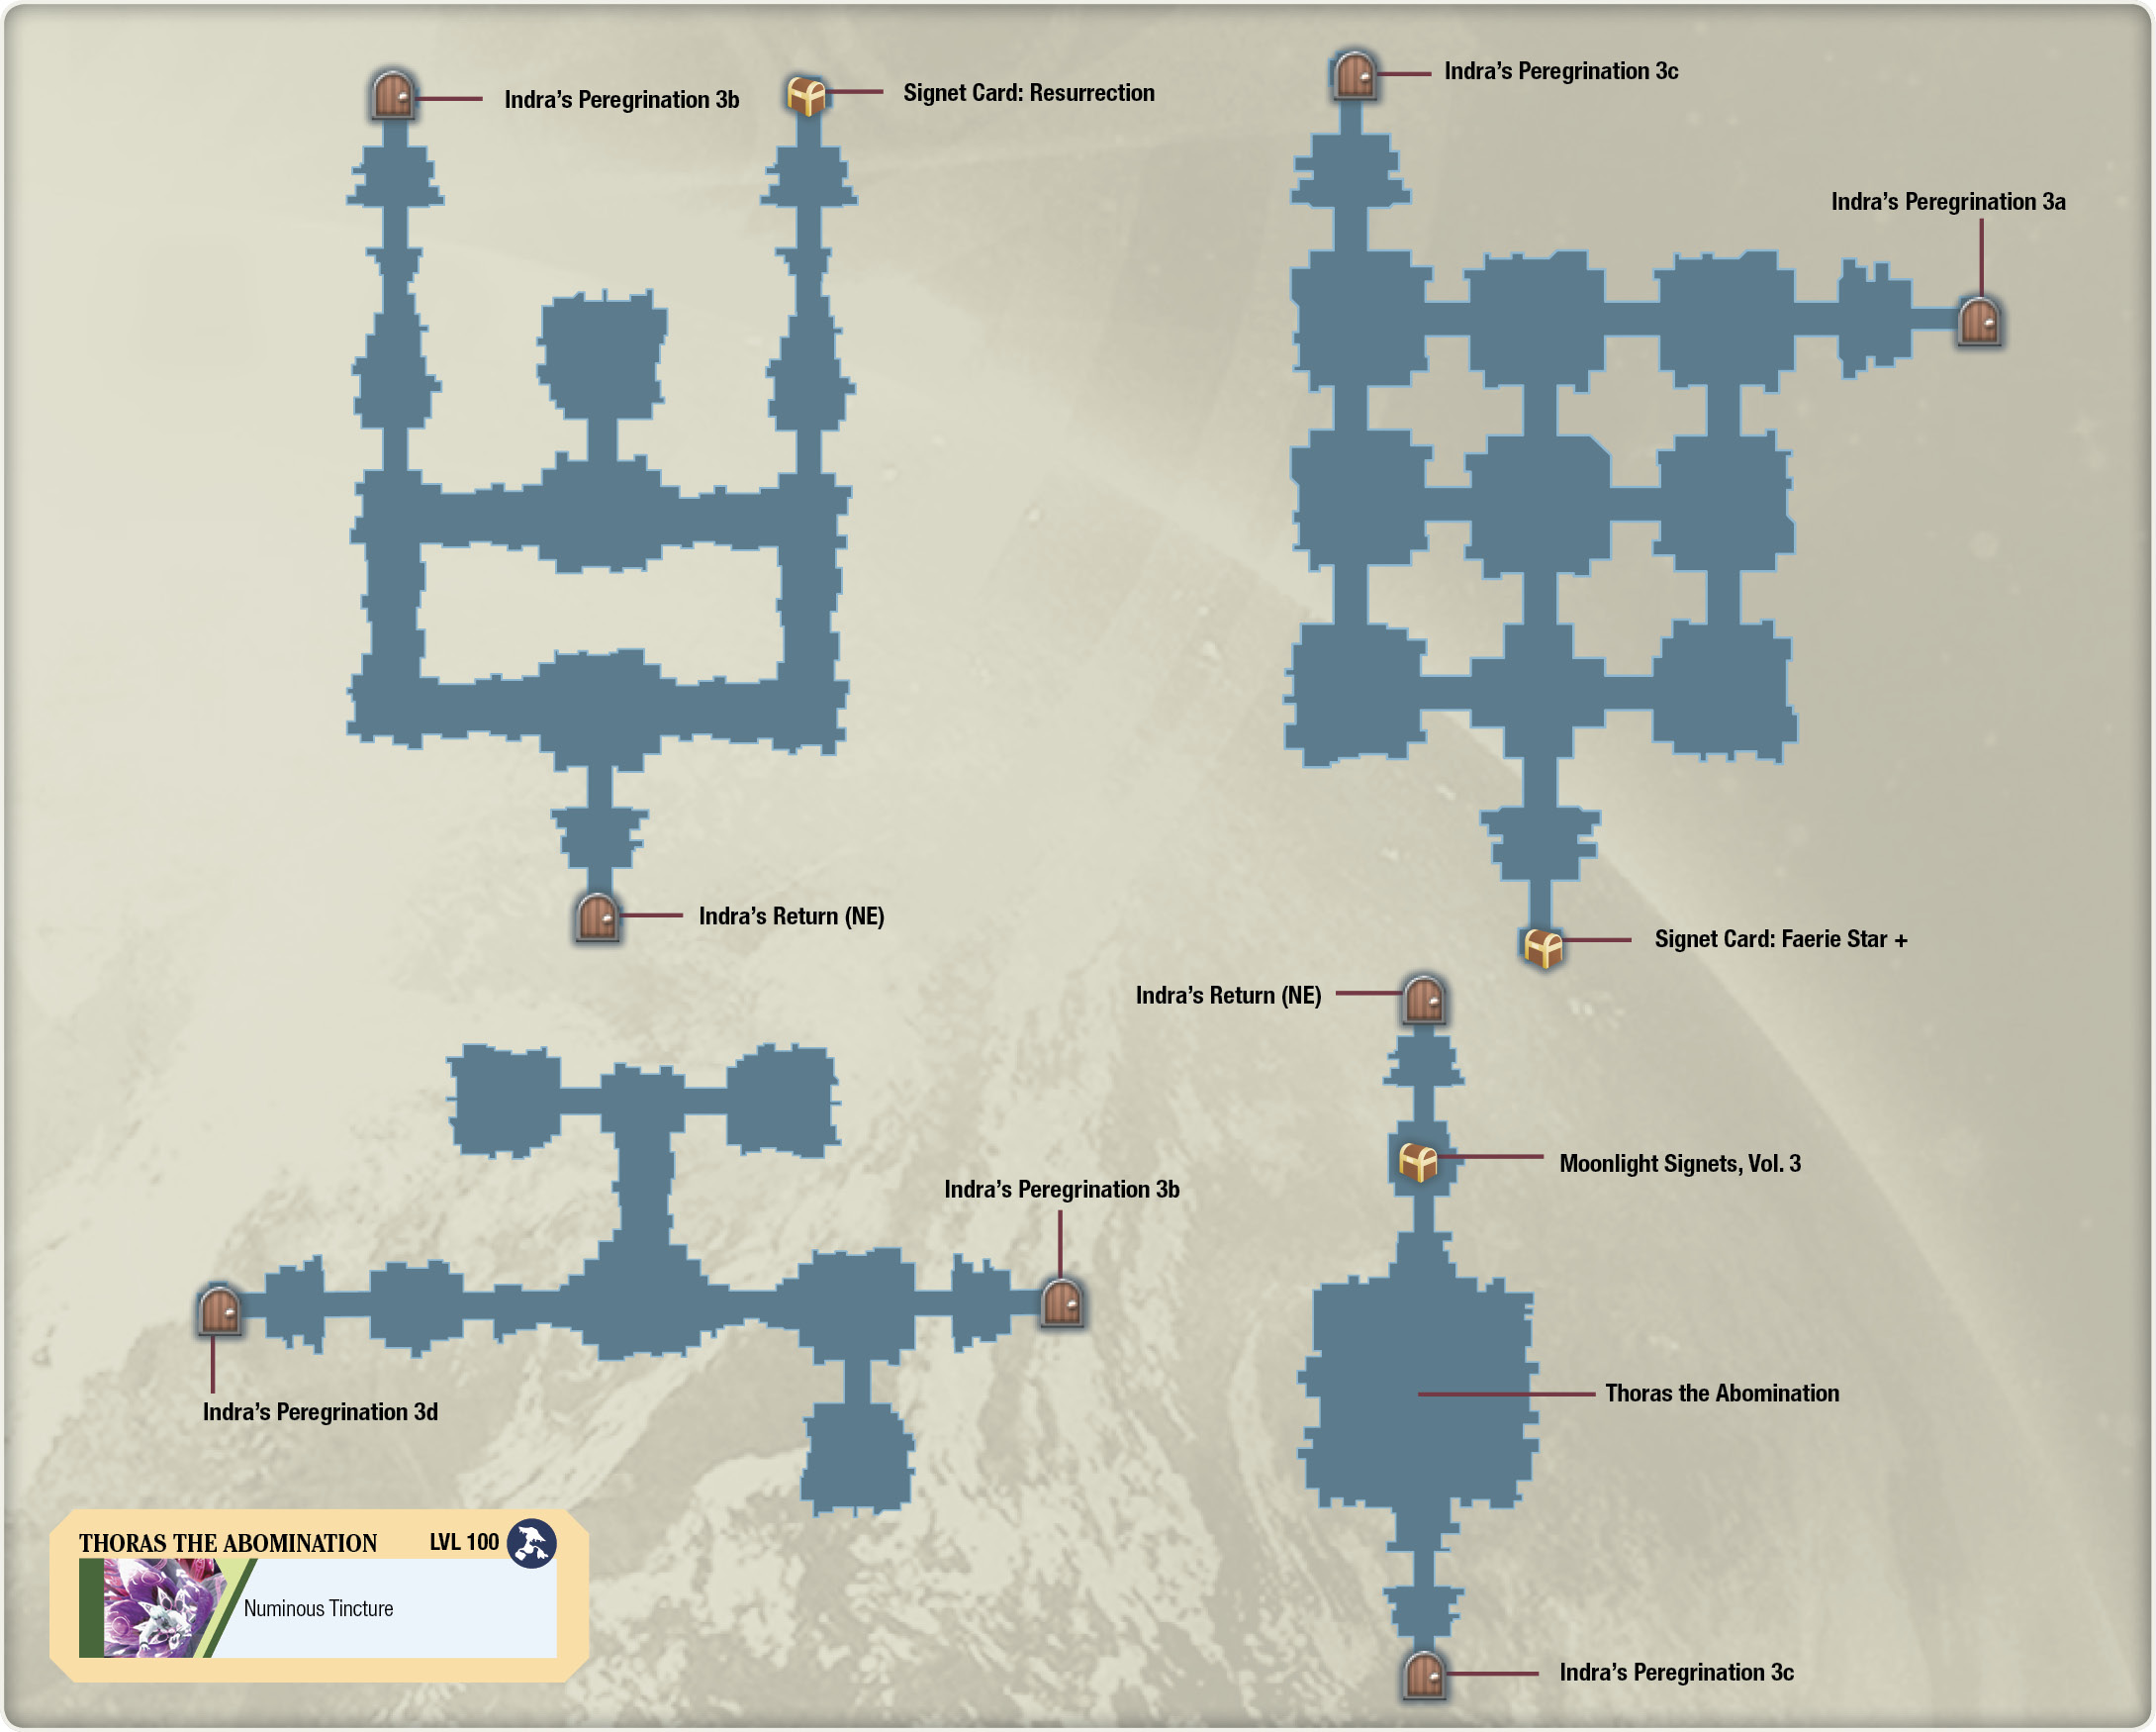
Go straight ahead, making a right turn in the first room you walk into, then head straight north until you find a chest in the far northeast corner of the map. You’ll score a Signet Card: Resurrection in the chest here. Head back out and make your first right, going west. When you get to the farthest west point of the map, turn right again, and you’ll be greeted by another transporter to the next level. Here is another 3x3 grid-based level. If you reach the center of the grid and head straight south at the intersection, you’ll find a room with a chest that holds a Signet Card: Faerie Star +. Pick it up, and then head back out, making a left going west, then turning right, northward. The transporter to the third level is in the room to the far northwest. It’s the last level before the boss arena; just run straight ahead west from your starting position to get to the transporter. After transporting up and opening the arena’s door, you’ll be greeted with a rematch against the corrupted plant-like creature aptly named Thoras the Abomination.
This corrupted mutant is capable of casting signeturgies like Sunflare and Dark Devourer, but he also has a few annoying physical tendril attacks. Eat some Grilled Steak to boost your offensive capabilities, or perhaps a serving of Cheese Fondue to help mitigate spell damage from the monstrosity.
His Sunflare can inflict an INT down debuff that you can’t cure with Miki’s Cure Condition, but it’s merely a nuisance at best. Flagellant Tendril Furor is a physical frontal area-of-entry attack that breaks guard and frequently knocks down your close-range fighters. Thoras is slow, but he’ll occasionally move toward your more delicate characters in an attempt to lash at them with his tendrils.
As long as you’re moving your back line members out of the way, your fragile characters will be safe from his knockdown effects. Thoras also has access to an ATK buff called Enhance, which can be dispelled using Fiore’s Void. When you see a ring of light-based shields surrounding him, he’s about to unleash Divine Wave. This is a guardable area-of-effect spell that deals a high amount of damage, so get ready to open the battle menu, and then guard with your healer. Ultimately, this is a battle of recognizing his movements and keeping your lower HP members away from his grotesque extremities. Having Plant Slayer on one of your damage dealers and Skulker on Miki makes this fight go smoother, as well. After you put Thoras out of his misery, you can secure a copy of the Moonlight Signets, Vol. 3 skill book in the room to the north on your way back out to the lobby.
Indra’s Peregrination IV
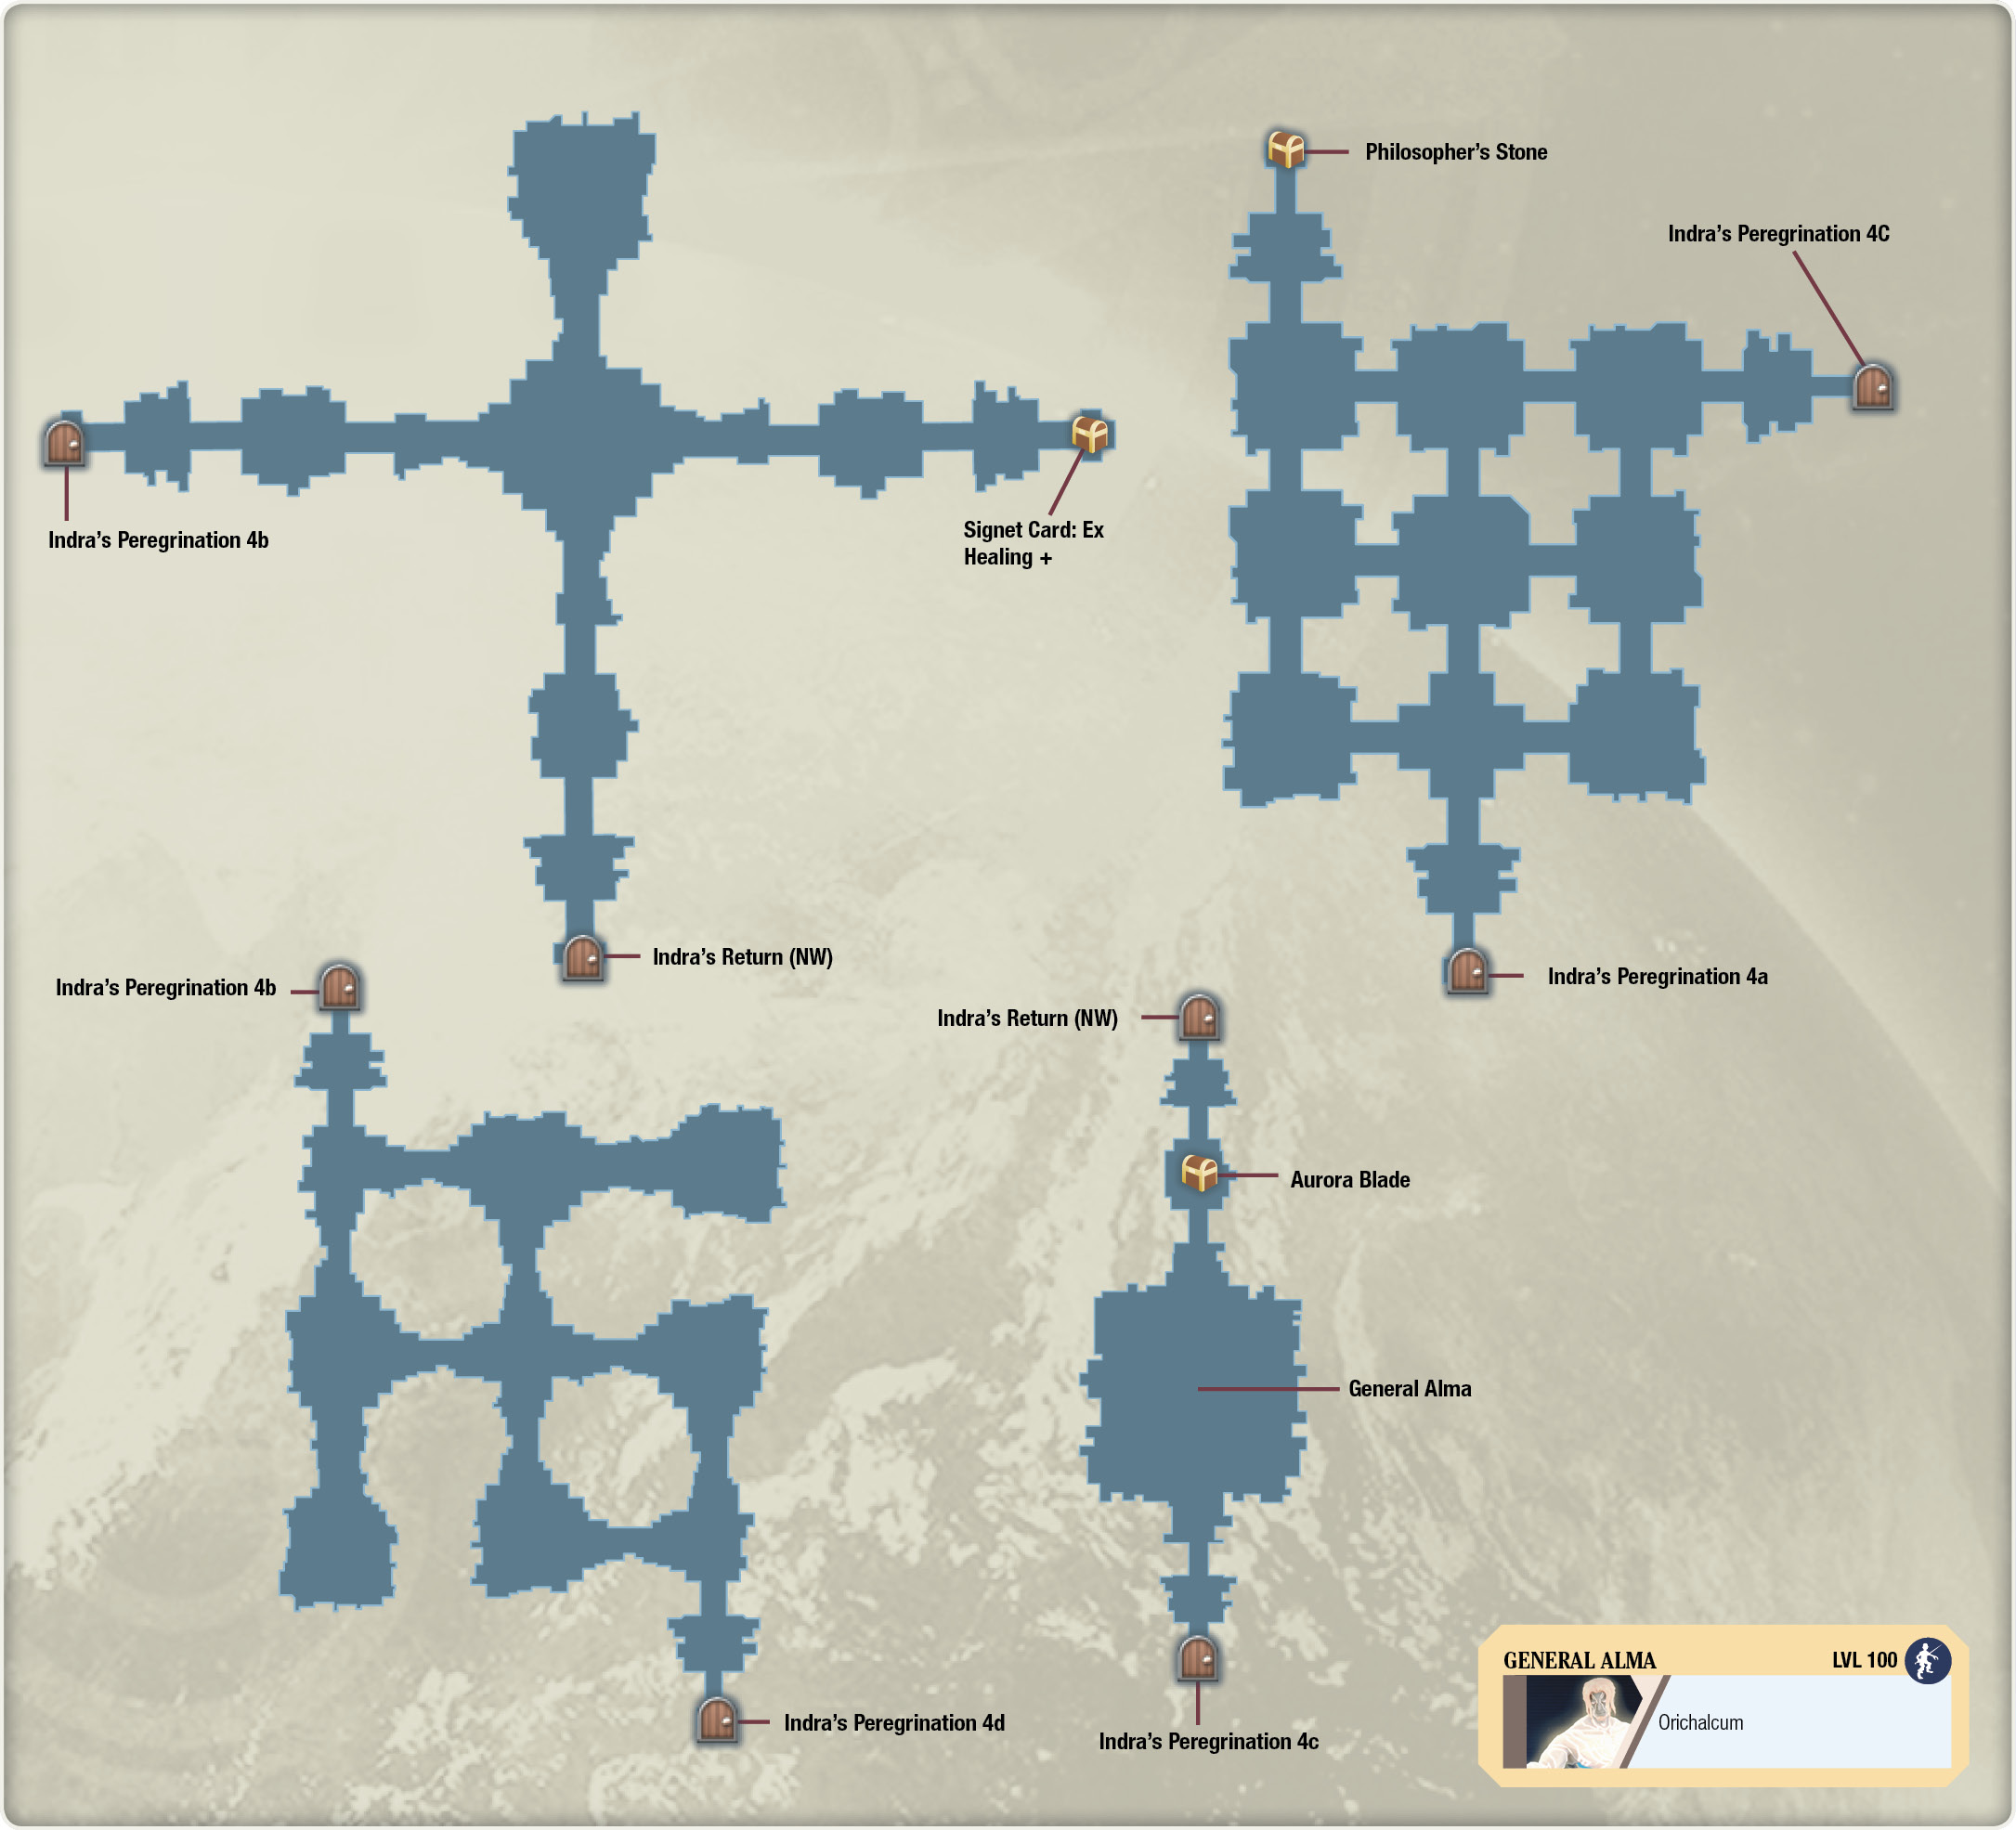
The first level here has the familiar cross layout, with a Signet Card: Ex Healing + located in the room farthest east. Run to the intersection and make a right, fighting through any foes you encounter. Pick up the signet card, then turn around and trek back to the intersection, where you can keep heading straight, going west, until you get to a transport pad to the next level. The second level is a set of rooms in a 3x3 layout, with a Philosopher’s Stone in a room in the northwest part of the map. Going north from your original position, make a left, then make a right, going straight ahead until you reach the chest room. Pick it up, and re-enter the grid, where you’ll make a left turn. Go all the way east until you reach the transporter to the third level. There’s no chest here, so if you’re itching to get to the boss, make the first left you come across, then take a right after, heading toward the farthest southeast point of the map. The transporter is in a room south from the eastern section of the area. Transport up to the boss arena, where you get to have a rematch against the Kronos rebel General Alma.
In his signeturgically fused state, General Alma is a maniacal brawler who frequently targets random allies with brutal punch attacks. His damage is primarily physical, so it’s recommended that you munch on some Pasta Bolognese before entering the battlefield. Alternatively, you can go with a savory Grilled Steak for a boost in ATK power.
One of the main mechanics behind the fight is to avoid using guardable attacks. When Alma guards, he will counter with Bosom Blow, an energy-powered reversal burst that knocks down nearby heroes. This is generally difficult to avoid if you have all of your party members set to automatic AI, but it’s manageable nonetheless. You can mitigate it by constantly barraging him with strong attacks (default  button), or with attack skills like Fidel’s Mirror Blade. Another powerful and potentially devastating attack is Hammergeddon, a jumping ground pound that deals a large amount of physical area-of-effect damage around him. Open the battle menu frequently, and move your nearby members out of the way accordingly. Alma also has a propensity for making a mad dash toward one of your fragile members, following it up with either Divine Bullet or Transitory Shock. Divine Bullet is a rather slow teleport chest punch, but it breaks guard and does a moderate amount of damage. You can sidestep it or move the character being targeted out of the way. Transitory Shock is a teleport into a guardable area-of-effect attack. Alma can buff himself with the Enhance signeturgy, so dispel it with Fiore’s Void to limit his damage.
Other physical attacks in Alma’s repertoire include Bloody Blight and Ground Wave. Bloody Blight is an unguardable uppercut, knocking down and stunning anyone in front of him, and Ground Wave is a guardable combination punch sequence.
An extremely effective strategy against the treacherous Kronos general is to equip Emmerson with the Stun Supporter and Interceptor roles. Like with other bosses, you can take control of Emmerson and execute quick normal attack combos to constantly incapacitate Alma.
As long as you’re vigilantly pausing to check on the general’s movements, you can avoid most of his damage while your AI-controlled members chip away at his health. After you banish your nemesis, pick up the Aurora Blade in the chest to the north. Aurora Blade is one of the strongest weapons in the game and is mostly like an upgrade for Fidel if it’s your first run through the Maze of Tribulations. Now, exit the arena and prepare yourself for an epic confrontation with a divine being!
Indra’s Abyss
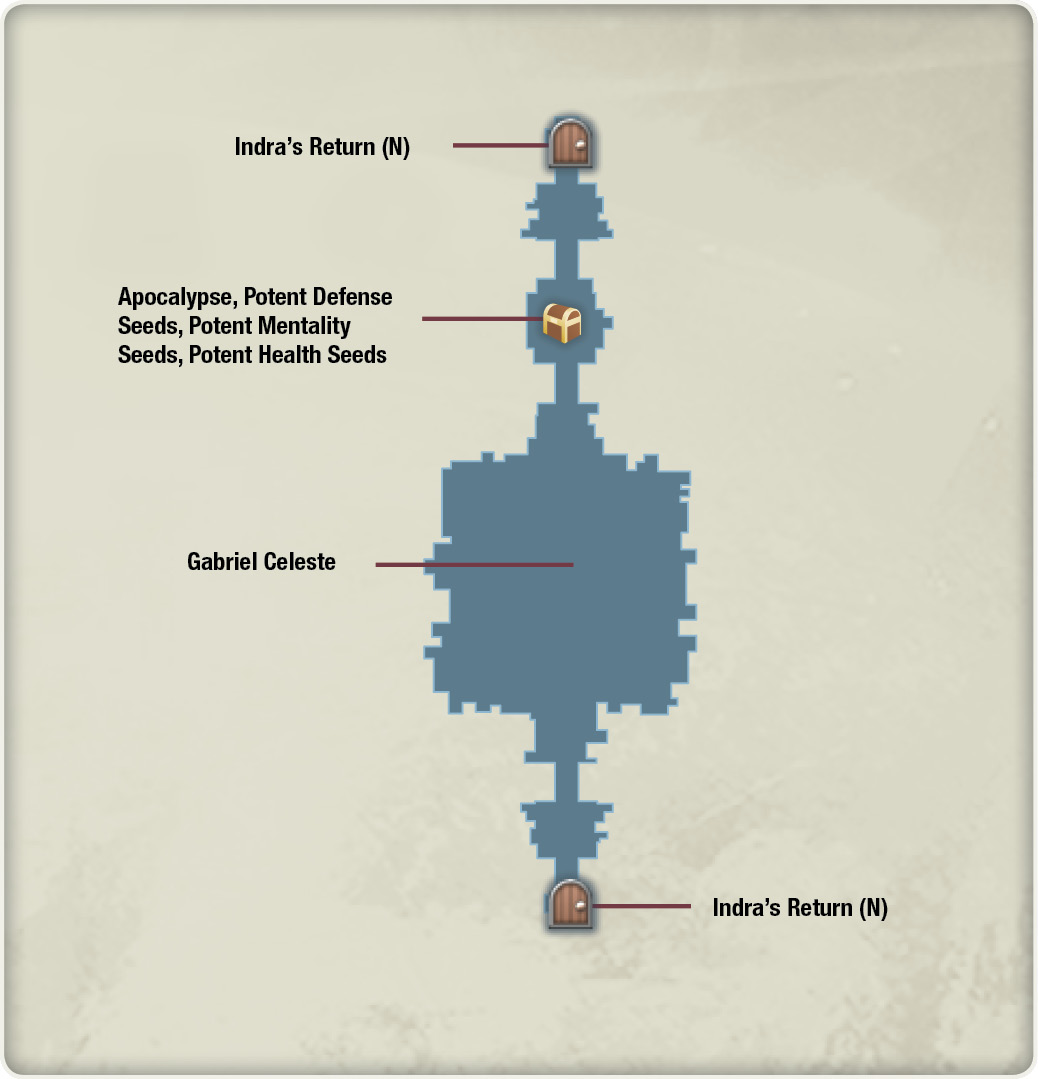
After you’ve beaten the four intercardinal areas’ bosses, you’ll gain access to the north path’s transporter, which will take you to a foe much more challenging than you’ve ever faced up to this point. Don’t forget to save your game!