
Splatoon 2 Guide Weapons & Gear Weapons
Sub Weapons
Every primary weapon is paired with a sub weapon. From spreading ink, to detecting enemies, to supplying your team with a forward jump point, sub weapons come in handy in a variety of situations. Each sub weapon consumes ink, so before deploying one, make sure you have enough ink in your Ink Tank, carried on your Inkling’s back. Some sub weapons can be thrown. Hold down the Sub Weapon button to reveal the weapon’s arc-like trajectory. This allows you to deploy each device with greater precision, particularly when lobbing it over great distances or bouncing it off walls and other surfaces.
Splat Bomb
Availability
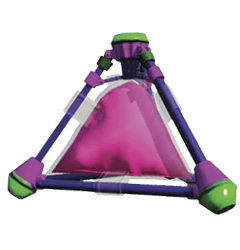
These ink-filled pyramid-shaped explosives operate on a time-delayed fuse. Once tossed, they bounce around for a few seconds before exploding and spreading ink over a wide area. Bounce them around corners, roll them down inclines, or skip them across platforms. While the delayed fuse allows for a variety of deployment techniques, it also gives opponents time to get away. For best results, toss Splat Bombs in areas where opponents are unlikely to see them until it’s too late, such as the bases of ramps. Splat Bombs only explode on the ground; they don’t detonate in midair. The Splat Bomb’s fuse begins counting down when it first touches an object—the fuse is paused whenever the Splat Bomb is falling, then resumes the countdown when it lands. When throwing a Splat Bomb downward at an opponent, bounce it off a ledge to begin the timer. Then when it lands, your opponent has less time to escape.
Burst Bomb
Availability
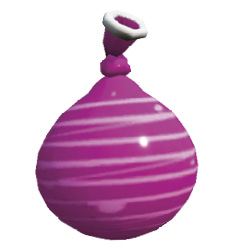
Think of these sub weapons as water balloons filled with ink. Although they lack the blast radius of Splat Bombs, Burst Bombs explode on contact. They inflict very little damage, even when scoring a direct hit, so they’re best suited for spreading ink and applying touch-ups in Turf War. Compared to Splat Bombs, Burst Bombs consume less ink, allowing you to deploy them with greater frequency. You can toss two to three Burst Bombs in quick succession without depleting your Ink Tank. This comes in handy when you need to make a quick escape. Toss a few Burst Bombs in the direction of your opponent before swimming to safety.
Suction Bomb
Availability
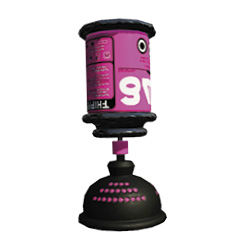
As the name implies, Suction Bombs stick to any vertical or horizontal surface they touch. They explode after a short delay, spreading ink over a wide area. These devices have a slightly longer fuse than Splat Bombs; the base of the Suction Bomb flashes repeatedly just before it explodes. The ink coverage of Suction Bombs is similar to that of Splat Bombs, but their ability to stick to surfaces allows you to plant them in spots your enemies might not suspect. Instead of tossing them on the ground, stick them to walls, just above an opponent’s eye level—opponents are less likely to expect explosives on walls.
Toxic Mist
Availability
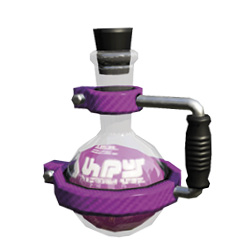
Toxic Mist is a hand-thrown device that emits a spherical cloud. Any opponents passing through this cloud are slowed and have their ink drained. This is a good way to cut off enemy movement through tight chokepoints. It’s also handy for losing pursuers. The toxic cloud remains in place for approximately seven seconds, giving you ample time to retreat. During Tower Control, toss Toxic Mist along the tower’s path, particularly when it’s stopped at a checkpoint. This is a good way to disperse tower riders.
Curling Bomb
Availability
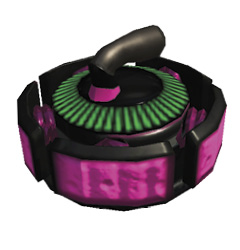
Similar to Seekers, Curling Bombs travel along the ground, trailing behind a narrow path of ink—these ink trails are great swimming paths. Unlike Seekers, Curling Bombs change direction when making contact with any objects, including Inklings. This allows you to bounce Curling Bombs around corners. After traveling a fair distance, the Curling Bomb finally explodes. You can determine at what range the Curling Bomb explodes by holding down the Sub Weapon button. The longer you hold down the button, the less distance the Curling Bomb will travel before exploding. Carefully gauge the distance to the target before letting one of these bombs loose. Plan it so the bomb explodes right at your target’s feet.
Autobomb
Availability
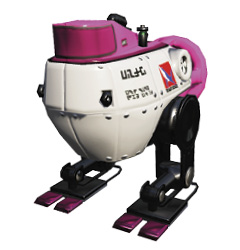
These unique robotic bombs are tossed just like Splat Bombs or Burst Bombs. However, upon landing, the Autobomb seeks out the nearest enemy within a wide radius. After it walks over to an enemy, there’s a slight delay before the Autobomb detonates and spreads ink over a large area. This delay gives opponents a chance to escape—the farther away they get, the less damage they take. For best results, toss these bombs toward preoccupied enemies. Autobombs also come in handy when you’re pinned behind cover. Simply toss one over a wall or piece of cover to send your attackers fleeing.
Point Sensor
Availability
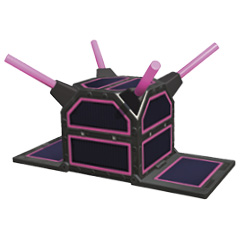
Upon detonation, the hand-tossed Point Sensor emits a sphere-shaped area of effect, tagging any opponent within for approximately 10 seconds. During this period, the tagged opponent is constantly circled by a squid icon that can be seen by you and your teammates. This squid animation appears on your team’s screens, even if the opponent is swimming or hidden behind a wall. This makes tracking down and eliminating opponents much easier.
Sprinkler
Availability
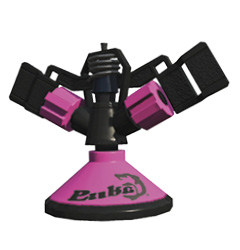
This device functions like a lawn sprinkler, spreading ink over a modest 360-degree radius. When first deployed, Sprinklers rotate quickly, spreading ink rapidly, then gradually slow down over time. The narrow steams of ink don’t inflict much damage, but Sprinklers offer a good way to maintain ink coverage in high-traffic areas during Turf War and Splat Zones. Instead of tossing one on the ground, where it’s likely to be spotted and destroyed, throw it high on a wall—Sprinklers stick to any surface, like Suction Bombs. However, you can only deploy one Sprinkler at a time. If you toss a second one out, the first one disappears. Destroy enemy Sprinklers by shooting them. If left untouched, a Sprinkler continues spreading ink as long as you’re alive.
Ink Mine
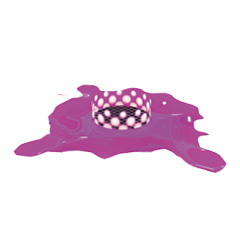
Availability
Ink Mines have undergone some changes—they now explode with less power, but tag nearby opponents with a Point Sensor effect, making them easier to trace. Ink Mines are triggered by enemy movement, so drop them in high-traffic chokepoints where enemy movement is guaranteed—paths leading out of the opposing team’s spawn point are good spots. They’re also effective when dropped at the tops of heavily traversed walls. To avoid getting surprised by enemy Ink Mines, stay within friendly ink. When coated with your team’s ink, an enemy Ink Mine becomes visible and explodes, spreading enemy ink over a wide area. Keep your distance from these mines, even when you’ve uncovered one. You can place up to two Ink Mines at a time.
Splash Wall
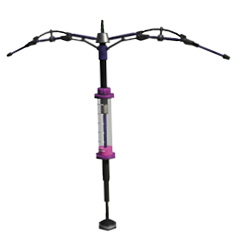
Availability
This defensive wall rains down ink, blocking enemy movement and incoming ink. The ability to shoot through your own team’s Splash Walls makes them an absolute game changer during duels, particularly in tight chokepoints. The Splash Wall is powered by its own integrated Ink Tank, visible along the center vertical pole. The ink level drops the longer the Splash Wall has been deployed—it takes approximately seven seconds for a Splash Wall to fully consume its ink. As enemy ink strikes the wall, the ink within the tank depletes at a faster rate.
Squid Beakon
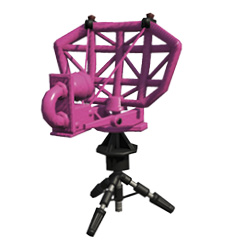
Availability
Drop this radar-like device to give your team a Super Jump point on the stage. Squid Beakons appear on the map as radar icons. Select one of these icons to initiate a Super Jump toward the chosen Beakon. Once a player lands on a Squid Beakon, it explodes. Don’t be stingy with these things; keep deploying Squid Beakons to give your team an advantage. For best results, place Squid Beakons in safe spots near the center of a stage to grant your team quick access to hotly contested areas like Splat Zones. The map also shows enemy Squid Beakons, so use this intel to hunt them down—destroy them by shooting them—or camp at an enemy Squid Beakon and ambush opponents as they jump into view. Each player can place up to three Squid Beakons on a stage at a time.