
Splatoon 2 Guide Multiplayer Maps Starfish Mainstage
Game Modes
Turf War
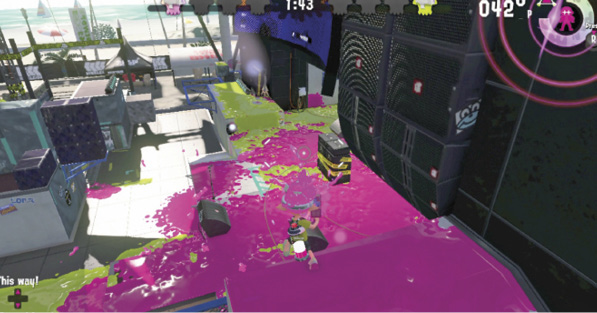
When operating near the mainstage, swim up to this elevated perch, just above the blue grate. This position, next to the large bank of speakers, is ideal for raining down ink and splatting opponents. Flank any enemies set up here. Don’t step onto the stage if opponents hold the high ground.
- Don’t forget to ink the sprawling, elevated safe zone branching out from your team’s spawn point to secure an easy 20% coverage. Spread ink here early during the match before pushing to the center. This area can’t be accessed by the opposing team, but you may need to apply touch-ups along the edges if opponents have lobbed ink over the walls. Check the map before the match ends to determine if touch-ups are necessary. Also, look for opportunities to lob ink into the opposing team’s safe zone, preferably right before the match ends.
- While you’re inking your team’s safe zone, don’t forget to cover the low-lying area just ahead of your team’s spawn point. Due to all the action in the center, this area is often overlooked. Ink this area from the elevated perimeter paths. Avoid dropping into this area, especially on the opposing team’s side of the map; you’ll be at a severe disadvantage as opponents rain down ink from the perimeter paths.
- Traversing the blue perimeter grates on the mainstage isn’t without danger, but these side paths are a great way to avoid the chaos in the center as you to push into the opposing team’s territory. Fire down through the grate as you cross to spread ink onto the surfaces below. These small strips of territory below the grates are often overlooked.
Splat Zones
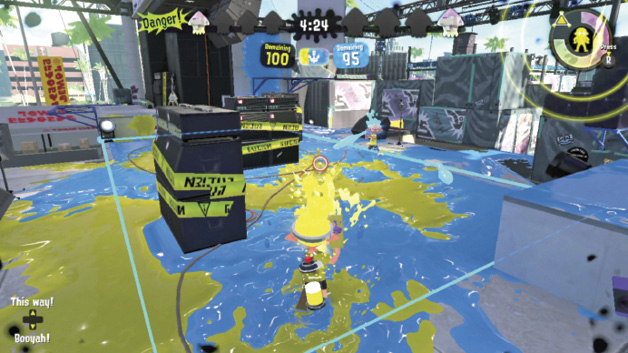
The Splat Zone is located in the center of the mainstage. When possible, ink this area from the elevated perimeter parches. If you must enter the Splat Zone, strafe around the speakers to prevent getting hit by incoming ink.
- The Splat Zone on the mainstage is best inked and defended from the elevated perches on the sides, above the blue grates. If your team can secure both perches, you’ll have an easy time capturing and controlling the Splat Zone for the duration of the match. However, these perches can be flanked easily. Consider using Ink Mines to cover your back.
- Once you’ve secured the Splat Zone, ink the area between the mainstage and the opposing team’s spawn point to slow down their advances. Delaying their access to the Splat Zone can give you a significant lead. Don’t ink too far into the opposing team’s territory; focus on the areas around the mainstage.
- While it’s important to defend the Splat Zone, there are too many approaches to adequately cover from one single location. Consider running patrols around the mainstage, striving to maintain an elevated position at all times.
Rainmaker
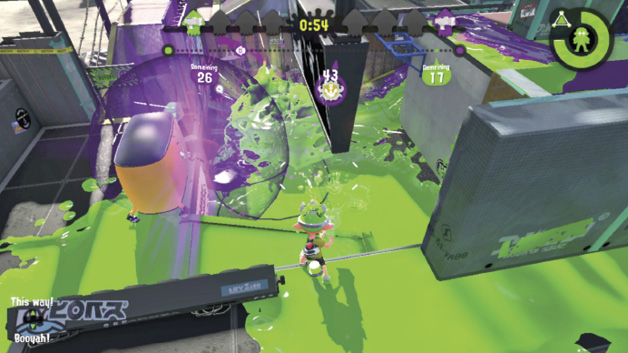
The majority of Rainmaker carriers move through this low-lying area during their advance to the capture point. If the opposing team acquires the Rainmaker, fall back to this position overlooking the low area and be prepared to ambush the Rainmaker carrier. Lob bombs and ink here to secure the Rainmaker for your team.
- At the beginning of the match, the Rainmaker sits at the center of the mainstage—rush in as quickly as possible to grab it. Make sure at least one teammate secures the perimeter perch overlooking the mainstage—the one above the blue grate. This elevated position is ideal for defense if the opposing team grabs the Rainmaker first—fire down on the carrier to halt their advance.
- New ramps are added during Rainmaker, facilitating travel to the capture point. One ramp leads up to the defensive perch, and another leads up and out of the low-lying area near the capture point. When defending, expect movement along these ramps and maneuver to intercept.
- While carrying the Rainmaker, avoid the new ramps and low-lying area to the right. Instead, cross through the center, grab the Rainmaker, and continue forward, veering to the left side of the map. Ink the tall gray wall straight ahead and swim up to quickly reach the capture point. This is the fastest and safest way to score the Rainmaker.
Tower Control
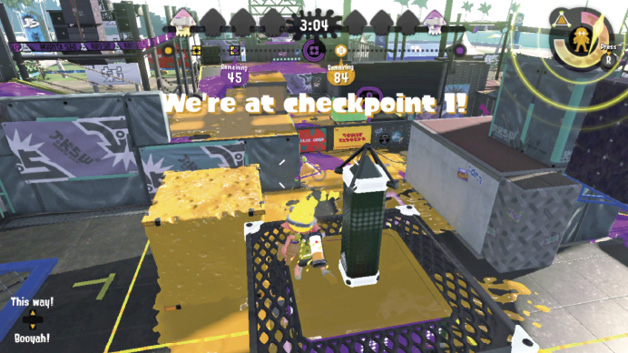
The tower starts on the mainstage and follows a winding path through three checkpoints on its way to the capture point. While riding the tower, ink the nearby sponge as it stops at the first checkpoint. This sponge allows your team to secure the high ground along the tower’s path, making the advance much easier.
- Tower Control adds two sponges to the map, one belonging to each team. Your team’s sponge is located on the opposing team’s side of the map and can only be expanded by your team’s ink. Ink the sponge and swim up its side to access the opposing team’s safe zone. From here you can harass defenders and assist teammates riding the tower. Or simply use the sponge as an elevated platform from which to target opponents. You can easily hop between the sponge and tower as it moves between the first and second checkpoints.
- The second and third checkpoints, along with the capture point, are all located next to the defensive perch. If the opposing team secures the tower, immediately fall back to this position and be ready to attack the tower riders as they advance toward the second checkpoint. The capture point is located a short distance beyond the third checkpoint, so endeavor to stop the advance while the tower is stopped at this final checkpoint.
- When defending, keep an eye on the opposing team’s sponge—if it expands, immediately ink it to make it shrink, especially when the tower approaches the second checkpoint. Keep the sponge small to prevent opponents from accessing your team’s safe zone.