
Splatoon 2 Guide Weapons & Gear Weapons
Specials
All specials in Splatoon 2 are new, each providing a unique tactical advantage. Unlike sub weapons, specials aren’t readily available at the start of a match. You must earn the special by inking territory. The more territory you ink, the faster the circular Special Gauge fills, located in the upper-right corner of the screen. Once the Special Gauge is full, you can activate your special. When and where you activate is important. Specials grant you a variety of offensive and defensive bonuses, but they only remain active for a few seconds. If you’re splatted while a special is ready, you lose the special and some progress on the Special Gauge when you respawn, so don’t wait too long. As soon as you activate, your Ink Tank is automatically replenished.
Ink Armor
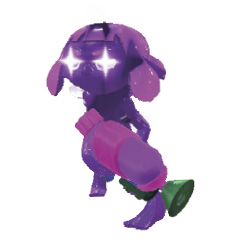
Availability
Don’t confuse Ink Armor with the Bubbler from the original Splatoon. Ink Armor mitigates damage but doesn’t eliminate it. It protects up to half your health or blocks one shot, including direct hits from the Rainmaker. Ink Armor is shared with any teammates alive at the time of activation, so make sure all teammates are on the field. Consider coordinating a push while you all benefit from Ink Armor. On the downside, you can’t hide in your ink while this special is active—Ink Armor causes your eyes to glow, even while you’re swimming in squid form.
Splashdown
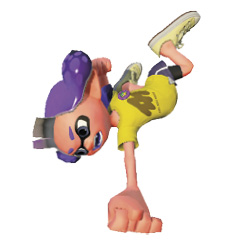
Availability
Looking to spread ink while splatting multiple opponents? Perhaps Splashdown is just the thing. Activate this special to deliver a powerful ground pound that spreads ink over a wide radius and splats any opponents within its generous range. This special must be activated at close range if you hope to splat opponents, but getting in close can be problematic, especially if you’ve been spotted. Either swim to close range or drop in from above; there’s nothing more satisfying than scoring a Splashdown splat from an elevated platform.
Sting Ray
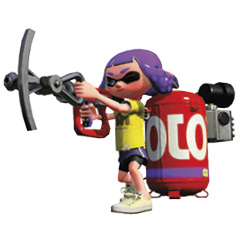
Availability
The Sting Ray fires a highly concentrated stream of ink, capable of cutting through the entire map and splatting any opponents in its path. Think of this as the new Killer Wail. Before activating, locate a distant target—the Sting Ray is most effective when focused on high-traffic areas. It’s difficult to aim as you fire, so sidestep to sweep the ink stream across the map. You can halt fire to readjust your aim before firing another stream, but the Special Gauge continually depletes whether you’re firing or not. The Sting Ray can pass directly through cover, so consider activating it after a teammate deploys a Point Sensor. This allows you to locate and engage opponents anywhere on the map.
Inkjet
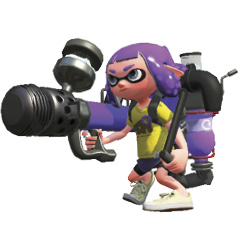
Availability
This jetpack-like device propels your Inkling high into the air, allowing you to rain down explosive projectiles. This is a popular special, particularly during Splat Zones. While flying, you’re always a preset distance above the ground, even when over grates. Press the Jump button for an added boost in altitude to clear objects in your way. You can enter squid form while the Inkjet is active, to swim through ink before popping up in a new location. Look for opportunities to fly directly over opponents—the ink propulsion shooting from the Inkjet can splat enemies.
Tenta Missiles
Availability
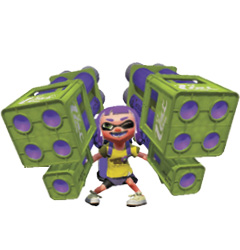
The Tenta Missiles special fires a volley of ink-filled homing missiles, ideal for splatting multiple opponents. Upon activation, you’re prompted to lock on to multiple targets. Squeeze as many targets into the reticle as possible for multiple locks; you can lock on to all opponents if they’re within view. Fire the missiles, launching them skyward in a steep trajectory—four missiles are fired per target. As the missiles climb, they continually track their targets. Missile impact points are determined once the missiles reach the apex in their flight paths. At that time, they come raining down on those points, regardless of where their targets move. If you’ve been targeted by Tenta Missiles, you’ll notice a colored circle around your Inkling’s feet. This is your cue to swim away. To avoid the missiles, move after they’ve determined their impact points. Tenta Missiles are effective when defending in Tower Control—the tower riders either have to move or get splatted.
Curling Bomb Launcher

Availability
The Curling Bomb Launcher is similar to Bomb Rush from the original Splatoon, allowing you to rapidly deploy a barrage of Curling Bombs. This is a great way to spread ink over a wide area, as each Curling Bomb dispenses its own ink trail across the map. By default, the Curling Bombs are set to detonate at close range, traveling a short distance before exploding. If you want the bombs to travel greater distances, hold down R longer. This means you dispense fewer bombs before the Special Gauge is depleted, but the Curling Bombs travel farther, likely spreading ink over a larger area.
Ink Storm
Availability
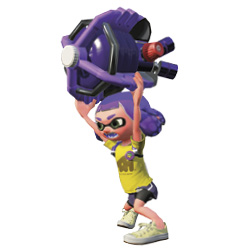
When activating Ink Storm, your Inkling holds a bomb-like device. Toss this in the direction you wish the storm to travel. Soon, a cloud appears overhead, raining down your team’s ink. The Ink Storm drizzles small ink droplets across the map in the direction you’ve indicated. While these droplets are great for spreading ink, they don’t inflict much damage on opponents caught in the downpour. However, the ink droplets can make movement difficult, requiring opponents to re-ink territory to facilitate swimming and easier travel. Watch for opponents trapped in your ink, and snipe them with chargers like the E-liter 4K. In a tight match of Turf War, a late-round Ink Storm can help secure enough territory for a win.
Baller
Availability
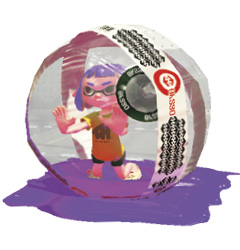
The Baller special resembles a large hamster ball with your Inkling in the center. While traveling in the Baller, your Inkling can roll across the map at high speed while spreading ink, similar to a roller. You can even roll the Baller straight up vertical surfaces, no matter what color they’re inked in—it’s just like swimming up a wall as a squid. The Baller consists of two protective layers that can be destroyed by opponents, so avoid direct confrontations; otherwise your ride will be cut short. When the Special Gauge becomes depleted, the Baller detonates, spreading ink over a wide blast radius. Alternatively, you can choose when you want the Baller to explode by holding down ZR.
Splat Bomb Launcher
Availability
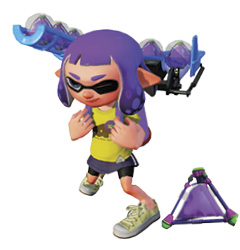
Similar to the Curling Bomb Launcher, this special allows you to fire a volley of Splat Bombs. Tap R as quickly as you can to unleash a torrent of Splat Bombs. Opponents are apt to swim away before getting splatted, making this special great for securing objectives and other points of contention. For best results, swim to the top of an elevated platform or tower before raining bombs down on an area. Though you’re unlikely to come under attack while launching Splat Bombs, your back is vulnerable—take this into account before activating the special.
Suction Bomb Launcher
Availability
The Suction Bomb Launcher operates identically to the Splat Bomb Launcher, dispensing these adhesive explosives at a rapid pace. Keep tapping R while the special is active to launch a volley of Suction Bombs. Unlike Splat Bombs, Suction Bombs stick to any surface, so don’t forget to launch them toward walls and other vertical planes. During Tower Control matches, get above an approaching tower before activating this special. Sticking multiple Suction Bombs to the tower is a surefire way to make riders scramble, allowing your team to move in for the capture.