
Splatoon 2 Guide Multiplayer Maps Port Mackerel
Game Modes
Turf War
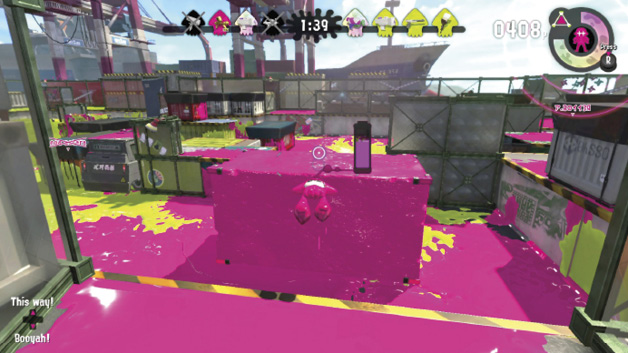
Ink this large sponge nearest your spawn point, and use it to transition between the left elevated path and the shipping containers in the center. This sponge can only be expanded by your team, preventing opponents from accessing these elevated areas. Likewise, you can’t expand the sponges on the opposing team’s side of the map.
- Technically, there are no safe zones on this map, as the opposing team can ink right up to your team’s spawn point. However, opponents are unlikely to access the elevated paths to the left and right of your spawn point. Thoroughly ink both of these paths. Together, these paths and the area around your team’s spawn point account for approximately 19% of the map. That’s a huge chunk of territory that should never be overlooked.
- Consider equipping weapons capable of inkling the long alley areas. Charge-based weapons, like the Splat Charger, are great for inking these narrow pathways with a single charged shot. Curling Bombs are also effective.
- While this map contains no true sniper perches, charge-based weapons can still make an impact when you’re vying for control of the center. Use the center’s forklifts or sponges to climb atop the containers, then fire down on opponents moving through the narrow alleys below. When you’re not splatting opponents, use the weapon’s range to spread ink down the narrow lanes.
Splat Zones
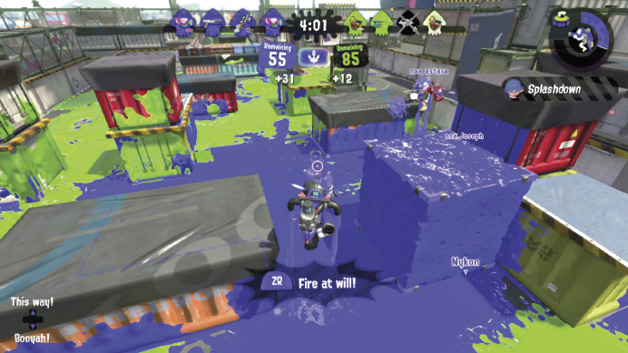
The Splat Zone is nestled between the shipping containers in the center of the map. Expect plenty of chaotic close-quarter fighting in this area. Look for opportunities to gain a height advantage by inking and expanding the nearby sponges. Or use Inkjet specials to attack from the air.
- Get on top of the sponges in the Splat Zone, and use the Slosher to rain down ink on opponents attempting to neutralize the objective. Swinging a roller or the Octobrush is another effective way to smack opponents with large globs of ink.
- This is a linear map, with few flanking opportunities leading to the central Splat Zone. Once your team captures the zone, consider cutting off opponents by pushing toward their spawn point. Don’t advance beyond the elevated paths coming out of their base. By covering the center and two elevated paths, you can effectively block them from reaching the Splat Zone. To avoid getting trapped in your base, consider deploying forward Squid Beakons early in the match.
- There are no forklifts in this mode, but you can still ink and expand the nearby sponges to reach the tops of the surrounding shipping containers. While the sponges and containers aren’t very high, they provide an excellent view of the Splat Zone.
Rainmaker
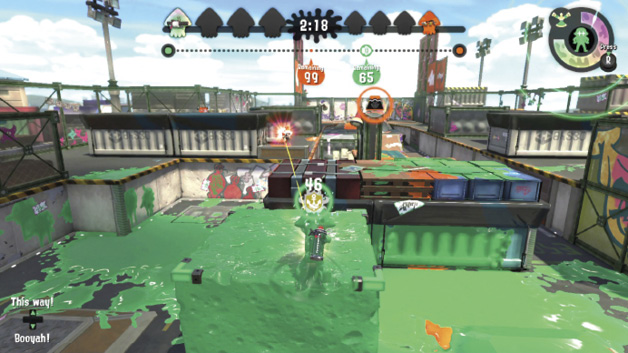
When carrying the Rainmaker, swim up this sponge and squid-jump to the tops of the nearby crates, then to the elevated walkway on the left—this is the fastest route to the capture point. Defenders are likely expecting this approach, so don’t be surprised if you come under attack as soon as you reach the top of the sponge.
- The Rainmaker starts in the center of the stage, between the shipping containers. Instead of rushing the Rainmaker at the start of the round, look for opportunities to flank the opposing team. Use the shipping containers to conceal your sneaky maneuvers, then pop around corners to splat your unsuspecting opponents. Once you’ve thinned the ranks, make a move for the Rainmaker.
- The sponges are in different locations in this game mode. Those in the center allow you to access the tops of the containers, overlooking the Rainmaker. There’s also a sponge near each capture point—these can only be expanded by the attacking team, providing them with an elevated route to the capture point. Rainmaker carriers taking the low path are vulnerable to opponents shooting down from all sides.
- Keep in mind that the Rainmaker carrier is always highlighted. Consider using a Splat Charger or scoped long-range weapon to line up your shots as the Rainmaker carrier climbs a sponge or moves atop the containers.
Tower Control
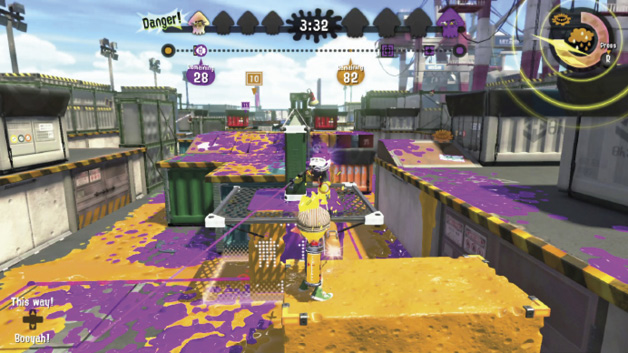
The sponge near the second checkpoint allows defenders to challenge tower riders at close range—splat opponents riding the tower, then jump on. The sponge can also be used to access the elevated path on the right, another excellent defensive position.
- As with the Rainmaker, the tower starts in the center of the map, surrounded by shipping containers. Use the sponges in the center to climb atop the containers. From these elevated positons, you have a better chance of challenging the tower riders. Otherwise, opponents on the tower have the height advantage.
- To quickly get back into the action after respawning, ink a path from your team’s spawn point to the tower. Swimming to the center is vital when there are no opponents to Super Jump to. Placing Squid Beakons along the tower’s path is another wise option for keeping your team in the fight.
- The right elevated path leading out of your team’s spawn point is great for defense. From here you can engage the approaching tower as it travels between the first and second checkpoints. Riders are extremely vulnerable when stopped at these spots, so make sure you’re in a position to take advantage.