
Splatoon 2 Guide Multiplayer Maps Humpback Pump Track
Game Modes
Turf War
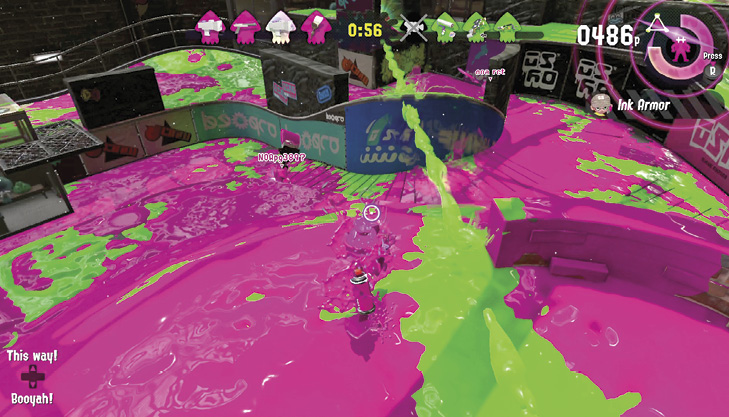
When occupying the hill, watch out for sharpshooters on the periphery. Be ready to swim behind the walls atop the hill to avoid getting splatted.
- Ink the safe zone near your team’s spawn point, as it accounts for approximately 15% of the map. Opponents can’t reach this area, so once it’s inked, it’s relatively safe. Don’t forget to ink the foam pit to the left of your spawn point—this offers a good view of the map.
- There’s a lot of real-estate to ink in the center. Take control of the hill in the middle and ink the approaches. The wooden walls on the humpback hill portion are inkable, so watch for opponents swimming up these walls.
- Use a roller to paint the perimeter paths and the safe zone while teammates push forward to engage the center of the hill. Avoid the inner track around the hill unless you’re going for a flanking, stealth splat.
Splat Zones
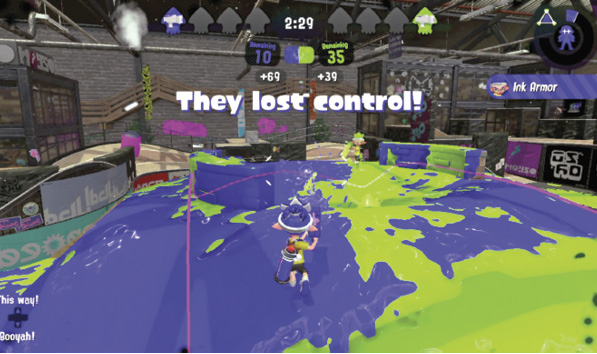
The Splat Zone is situated atop the central hill. Rush to the center as quickly as possible to claim the zone before the opposing team. Once one team controls the zone, it can be difficult for the other team to capture—the hill is a highly defensible position.
- Long-range weapons can provide cover from the side perches, but this is ultimately an in-your-face close-quarters battle.
- Prepare to rush the middle. Ink the interior walls leading to the Splat Zone and swim up the vertical surfaces instead of running up the ramps from the sides. This allows you to swim up into the zone, while taking cover behind the low walls atop the hill.
- Short-range weapons like the Splat Dualies and Octobrush can be really helpful here. The Splat Dualies in particular, because of their dodge roll ability.
- Use the small jump platforms to move in and out of the Splat Zone. You can also ink the tops of the curved walls in the zone, allowing you to hide in your ink—opponents probably won’t notice you here. Keep in mind that the entire Splat Zone is extremely vulnerable to incoming bombs, so be ready to move.
Rainmaker
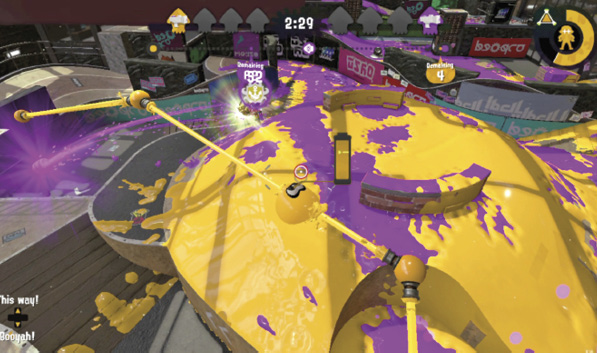
Rainmaker adds two Ink Rails, one on each side of the map. This provides a quick way to reach the map’s center, where the Rainmaker resides, atop the hill. This is also a good way to sneak up on the Rainmaker carrier. Remember, you can be shot while riding an Ink Rail, so don’t linger up here too long.
- Use the Ink Rails to quickly reach the center platform, to the left of the Rainmaker. From here you can grab the weapon and continue across the map to the right and up the perimeter path. Or double back to the left and swim up the large vertical wall to the left of the capture point.
- When carrying the Rainmaker, it’s better to continue across to the right, as there are fewer turns and longer sight lines. Fire the Rainmaker all the way to the corner and swim after it; then turn left, fire at the capture point, and swim up. The left-hand route, up the inkable wall, is shorter but requires more turns—this path is best utilized when you’re accompanied by an escort who can ink a path for you.
- Remember that you can jump off the Ink Rails at any point. Leap straight ahead for the Rainmaker at the first node.
- Watch where the Rainmaker carrier is firing—wait for the burst from the Rainmaker to explode, then toss a bomb at the impact point. If your timing is right, the Rainmaker carrier may swim directly into your bomb’s blast radius.
Tower Control
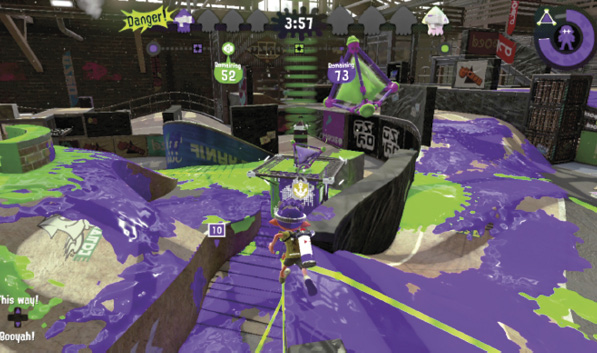
The tower is extremely vulnerable as it approaches the second checkpoint. If you’re on defense, this is your opportunity to take back the tower—fire down on the tower riders, raining down ink and bombs. If the tower advances beyond this checkpoint, it’s difficult to secure a victory.
- While it may seem like an excellent defensive position, the foam pit on the left, near the final capture point, is too far away to be of much use. You’re better off moving forward and attacking the tower as it stops at the preceding checkpoints.
- The last checkpoint is low and can be walked onto by the defending team—this is a great spot for a Splash Wall. Maintain the high ground and fire down onto the tower riders. Keep in mind that once this checkpoint is cleared, the finish is just a second or two farther. Defend the last checkpoint with all your might!
- This map is a tug-of-war atop the hill in the center without a lot of reason for finesse. Send scouts to ink the areas around the checkpoints ahead to slow down the enemy approach.