
Splatoon 2 Guide Multiplayer Maps Sturgeon Shipyard
Game Modes
Turf War
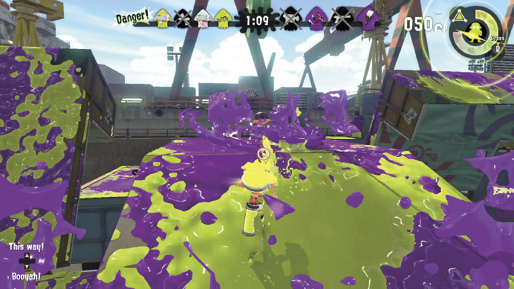
While the bridge in the center of the map offers a slightly elevated view of the surrounding area, any gains here are temporary. As a high-traffic area, this bridge will undergo multiple coats of ink throughout the match. You’re better off focusing on the perimeter paths and returning to the bridge to apply one last coat just before the match ends.
- There are no safe zones on this map—you can ink nearly every horizontal surface, right up to the opposing team’s spawn point. Opponents can make similar advances on your base. Take this into account as the match winds down: check the map and consider re-inking areas opponents have claimed, or look for opportunities to push into enemy territory.
- Don’t forget to ink the decks of the four drawbridges. It may not seem like much, but each drawbridge is worth 1% toward your total ink coverage. If you can ink all four drawbridges, that’s 4% total. In a close match, every little bit counts.
- As you advance out of your spawn point, ink the narrow, elevated path to the right. Even if opponents push into your base, they’re unlikely to ink this often overlooked area. Once inked, chances are this path will remain inked for the duration of the match, securing you some of the easiest territory.
- Don’t get bogged down by fighting around the central bridge. Territory constantly changes hands here. Your efforts are better spent inking the perimeter paths and wide walkways around each team’s spawn point. If opponents are constantly Super Jumping to the center, sneak into their base and claim some territory in the final moments of the match.
Splat Zones
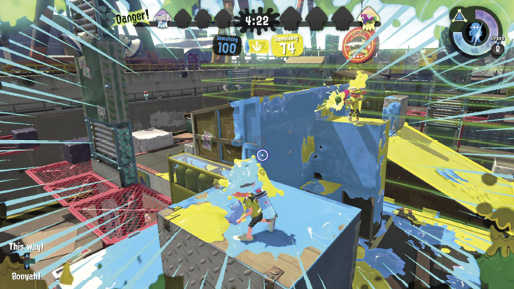
When pushing toward the Splat Zone, watch out for opponents posted on the central drawbridges. When raised, these drawbridges function like defensive towers, making it extremely difficult to get near the Splat Zone. Eliminate defenders on the drawbridges before attempting to contest the zone.
- In this mode, almost all activity occurs around the central bridge, where the Splat Zone is situated. When possible, Super Jump to the center to assist your teammates. Keep an ingress route inked to facilitate swimming from the spawn point. Squid Beakons are always a good option for maintaining a presence in the center.
- After capturing the Splat Zone atop the bridge, take up positions along the flanking drawbridges. Once raised, the drawbridges offer an excellent defensive position, making it easy to spread ink across the zone while picking off opponents. If the opposing team holds the zone and the two drawbridges, take out the defenders before attempting to contest the zone. Long-range weapons are best suited for taking out defenders on these raised perches.
- If the opposing team has the Splat Zone locked down, use the perimeter perches on both sides of the map to challenge defenders in the center—these towers are a great way to counter defenders posted on the central drawbridges. Coordinate a simultaneous attack from both sides to divide the defending team’s attention. Once the team has been splatted or chased away, move in and secure the Splat Zone.
Rainmaker
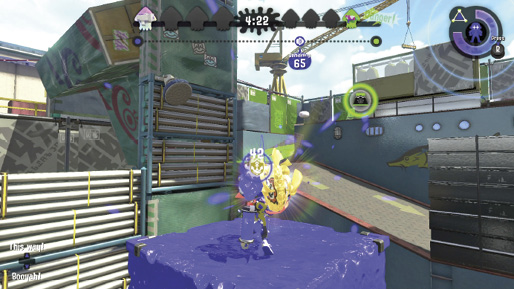
The sponge is critical in this game mode. After capturing the Rainmaker, make a beeline for the sponge and expand it. Quickly swim across the sponge and squid-jump to the adjacent ramp—this puts you within striking distance of the capture point. Don’t let opponents shrink the sponge, or you won’t make the jump.
- In Rainmaker, the sponges are reversed. Your team’s sponge is located near the capture point on the other side of the map; the opposing team’s sponge is situated near your spawn point. When defending, focus on keeping the nearby sponge small. This makes it tougher for the opposing team to reach the capture point.
- When making an early push, rush along the right side of the map, then cross the bridge to grab the Rainmaker. Advance toward the sponge in the low-lying area and ink it. Swim up the side of the sponge, then leap to the adjacent ramp to continue your path toward the capture point. While this is the quickest route, you need teammates to clear a path for you and ink the sponge. The sponge route is far preferable to traversing the ramps, which can’t be inked.
- The orange grate near the center offers an excellent view of the Rainmaker, as well as the surrounding routes leading to the adjacent capture point. Consider using this as a defensive positon. Remember, you can fire through the grate as opponents move through the low-lying area beneath.
Tower Control
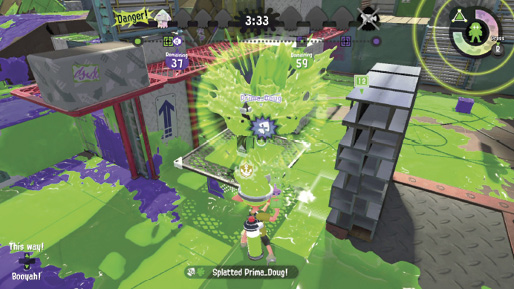
The tower starts on the central bridge and must pass two checkpoints before reaching the capture point. The tower is most vulnerable while stopped at the second checkpoint, in the low-lying area. You need the support of teammates to advance the tower beyond this critical checkpoint. Mid-range, fast-firing weapons are well-suited for this mode.
- In Tower Control the sponges are in the same configuration as in Rainmaker, with your team’s sponge nearest the capture point. Send teammates forward to take the sponge and use it to access the high ground around the opposing team’s spawn point. Harassing the defenders here diverts their attention from the tower.
- If the opposing team is in control of the tower when you spawn, swim to the left out of your base. If your team is in control, swim to the right. These corresponding paths put you in a good position to either defend or support your teammates.
- Passing the second checkpoint is difficult. While stopped here, the tower is surrounded by high terrain. It’s imperative to have your team push forward and harass defenders on the high ground. If necessary, step off the tower and use a special, like Splashdown, to help thin out defenders.