
Splatoon 2 Guide Multiplayer Maps Musselforge Fitness
Game Modes
Turf War
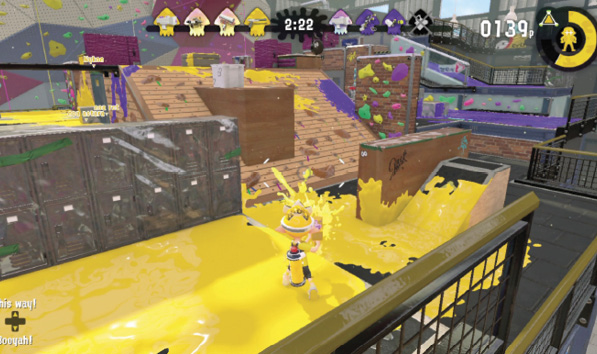
Although most fighting takes place around and atop the central hill, focus on inking the less-traveled areas, such as the perimeter paths. If you’re feeling confident, make a push toward the opposing team’s spawn point, inking the low area below their exit ramp.
- The L-shaped ramp leading out of your team’s spawn point accounts for nearly 7% of the map. While this may seem small, inking this area can make a huge difference in a close match. Before pushing to the middle, make sure this ramp is thoroughly inked. The opposing team can’t access this area, so once it’s inked, it should be safe for the duration of the match.
- All wooden surfaces are inkable, but the lockers, weight cabinets, and vertical brick walls are not. The walls with multicolored climbing holds can’t be inked either.
- The two low areas on the central hill’s flanks are often overlooked. Don’t forget to spread ink in both of these areas to give your team a slight edge in coverage. Maintain a low profile while operating here, as you’re vulnerable to incoming fire from the surrounding elevated platforms.
Splat Zones
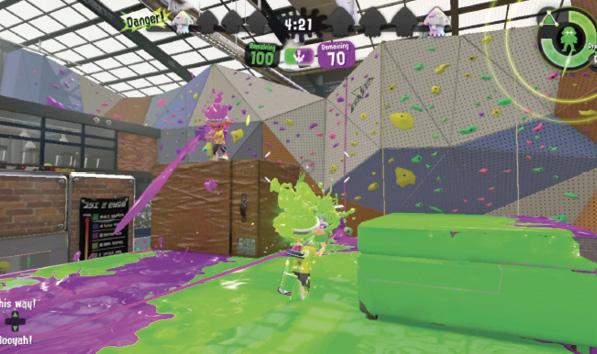
The Splat Zone is located atop the central hill, often leading to tug-of-war-style matches as both teams vie for control of this position. It’s best to attack and defend the zone from the perimeter, firing down from the barriers or adjacent perches. Only walk into the zone when you need to chase out opponents.
- While Super Jumps are the preferred method of getting back in the action, create an ink trail from your team’s spawn point to the Splat Zone. This facilitates faster travel when no teammates are available to jump to. Consider placing Squid Beakons on the hill’s perimeter to maintain a presence in the center.
- The two hill overwatch perches are really valuable here, both offensively and defensively. Lob bombs from these elevated positions to neutralize the zone, preventing the opposing team from scoring. Or simply camp here and splat any opponents who attempt to rush the Splat Zone.
- Once you’re in control, coordinate with you team to surround the Splat Zone. Assume positions on the hill overwatch perches and behind the L-shaped barricades. These are good spots for taking cover, provided you know which direction the enemy team is approaching from.
Rainmaker
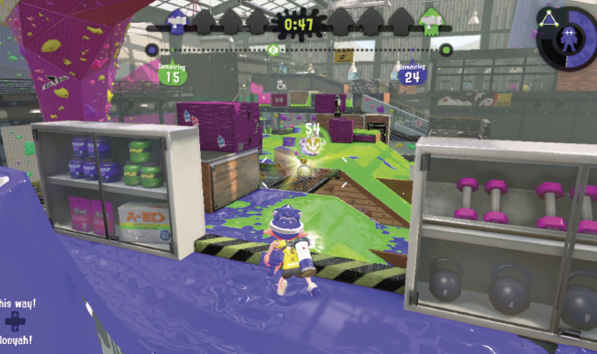
The catwalks attached to the central hill are critical chokepoints during Rainmaker matches. Rainmaker carriers almost always cross these narrow grates while advancing toward the capture point, so be ready to counter by tossing bombs and flinging ink. If the carriers fall through the grate, they’ll survive but suffer a serious setback.
- Rainmaker introduces two Ink Rails, each leading from the central grated catwalks toward the separate capture points. Once you’ve secured the Rainmaker, the Ink Rail route is the most direct, but it’s also probably defended. Still, it’s usually worth the risk. At the very worst, you’ll get splatted a few feet from the capture point, likely giving your team the lead.
- Scoring the Rainmaker is tricky on this map, as there are only two predictable routes. When the opposing team acquires the Rainmaker, have at least two teammates fall back and defend. Be sure to cover the Ink Rail route on the right, as well as the path leading across the grate on the left.
- Given the difficulty of advancing the Rainmaker, coordinate with teammates to serve as escorts. Have one or two teammates sweep ahead, clearing a path to the capture point.
Tower Control
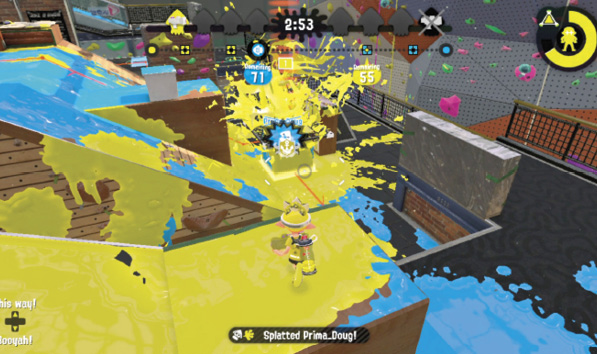
This raised platform overlooking the second checkpoint is an excellent defensive position during Tower Control matches. Instead of attacking the riders while the tower crosses the central hill, wait until the tower descends into the narrow alley between the first and second checkpoints—this is your cue to rain down ink and bombs.
- The tower starts off on the central hill. Reach this position as early as possible and ascend the tower to initiate an early push. At this point, the tower is at its highest position, allowing riders to fire down on opponents.
- To retake the tower, use the elevated perches between the first and second checkpoints and drop onto it. The tower is particularly vulnerable when stopped at the second checkpoint, positioned directly beneath the central catwalk. Defenders can fire straight down at the tower through the grate.
- Bombs are extremely useful for dislodging opponents on the tower. Throw them from the map’s numerous elevated positions for greater precision. Suction Bombs are particularly effective. Sticking one of these bombs to the tower usually causes the riders to flee.