
Red Faction: Armageddon Guide Essentials Armory
Upgrades
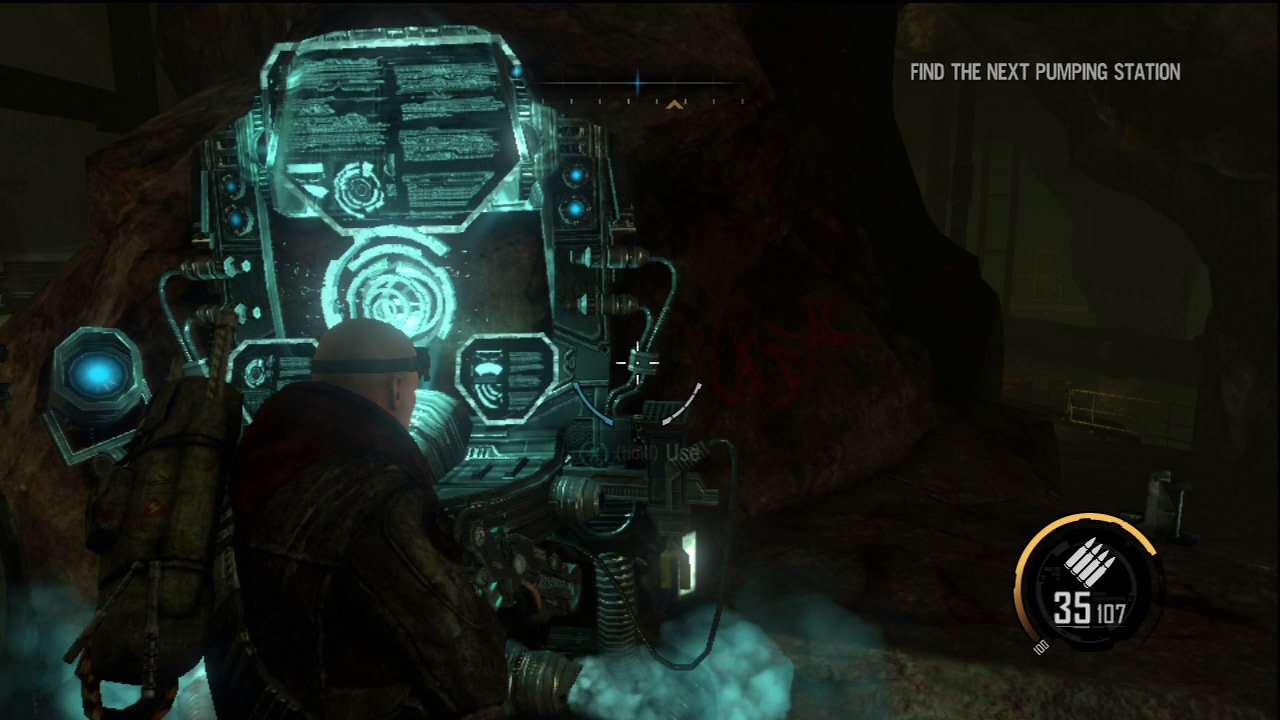
Use the salvage you've been gathering to purchase upgrades at upgrade stations.
Weapon Classification
Some upgrades enhance different weapons in varying ways. The weapons are broken up into three categories: Small Arms, Heavy Weapons, and Explosive Weapons. Study the lists below to identify which weapons belong to each category. In some instances, a weapon may appear in two lists.
Small Arms
LEO Machine Gun
Nano Rifle
Arc Welder
Plasma Beam
Assault Rifle
Enforcer
Shotgun
Plasma Thrower
Rail Driver
Pistols
Banshees
Laser Pistols
Heavy Weapons
LEO Rocket Launcher
Singularity Cannon
XNG-5000
Pulse Grenade
Charge Launcher
Plasma Cannon
Rocket Launcher
Explosive Weapons
Singularity Cannon
Charge Launcher
XNG-5000 Pulse Grenade
The game's upgrade system allows you to customize your character with a variety of enhancements and abilities. Salvage is the currency that allows you to purchase these upgrades, so go out of your way to find all the salvage you can.
In the single-player campaign, upgrades can be purchased from the blue upgrade stations. Upgrades can also be purchased during Infestation by accessing the Upgrades menu. Any upgrades purchased in the single-player campaign are applied when playing Infestation, and vice versa.
There are four different upgrade tiers, each containing a wide mix of upgrades. Initially, you can only access the first tier, but as you progress through the single-player campaign, the other tiers are unlocked.
Upgrades in an unlocked tier can be purchased as long as you have enough salvage and meet any prerequisites—this may require you to earn another upgrade before making the purchase. In this section, we take a close look at every upgrade, helping you determine which ones are must-haves.
Tier 1 Upgrades
Enemy Health Indicators
Cost: 1,000 Salvage
Prerequisite: None
Description: S.A.M. provides a visual indicator of enemy vital signs.
Purchase this upgrade to view an enemy's health. This appears in a small meter directly above the aiming reticle on the HUD whenever you aim at an enemy. Knowing how much health an enemy has left makes it easier to plan your attack and conserve ammo. After all, there's no need to hit an enemy with a Plasma Cannon when a few shots from the Assault Rifle will do.
Evasive
Cost: 1,000 Salvage
Prerequisite: None
Description: Reduces enemy accuracy while you are dodging. Additionally, reduces damage taken while dodging.
• NPCs have 50% less accuracy against the player during a dodge.
• NPCs deal 30% less damage against the player during a dodge.
If you come under heavy fire, always make an effort to dodge out of the way. Hitting a moving target is hard enough, but this upgrade deceases the accuracy of your foes. And even if they hit you while you're dodging, the damage dealt is reduced. This is a great upgrade to own if playing the game on Hard or Insane difficulty, otherwise, you can live without it.
Fast Hands
Cost: 1,000 Salvage
Prerequisite: None
Description: Reduces reload times as well as reducing the time it takes to switch between carried weapons.
• Weapon reload speed is increased by 25%.
• Weapon equip speed is increased by 33%.
It may not sound like much, but this upgrade pays off once you access heavier weapons with long reload times. This makes a big difference when reloading weapons like the Shotgun or Plasma Cannon. In addition to decreasing reload times, this upgrade also makes it faster to swap between weapons in your inventory.
Health Increase I
Cost: 1,000 Salvage
Prerequisite: None
Description: Increases your total health.
• Maximum health is increased by 100 (base character health is 1000).
This is the first of three Health Increase upgrades. You must own this one to purchase the subsequent upgrades in tiers 3 and 4. This upgrade slightly increases the length of your health bar, effectively increasing the amount of damage you can take before you die. If you find yourself dying frequently, strongly consider purchasing this upgrade.
Recoil Reduction
Cost: 1,000 Salvage
Prerequisite: None
Description: Reduces the negative effects on accuracy that occur from repeated weapon fire.
• Weapon recoil (camera kick) is reduced by 25%.
• Weapon spread increase (reticule bloom) is reduced by 25%.
• Weapon spread recovery is increased by 25%.
This is a relatively steep price to pay for a slight reduction in recoil. This upgrade makes the most noticeable difference when firing the Assault Rifle, however, you can minimize the effects of recoil yourself by simply firing in short, controlled bursts. Unless accuracy is a problem, your salvage is better spent on other upgrades.
Shockwave
Cost: 1,000 Salvage
Prerequisite: None
Description: The Nano Forge releases a burst of energy that stuns nearby enemies and holds them immobile.
Purchase this upgrade early and take advantage of its ability to suspend and stun multiple enemies. Shockwave can be a life saver when swarmed by large groups of creepers or ravagers. Stunned enemies are surrounded by a blue glow as they slowly drift to the ground. Make an effort to kill all the stunned enemies before they reach the ground and recover. Later Shockwave can be upgraded to increase its effectiveness.
Shockwave Achievements and Trophies
| Name | Description | Gamerscore | Trophy |
|---|---|---|---|
| Zero G War |
Kill 50 Shockwaved enemies
before they hit the ground |
20 | Bronze |
| Hold Still | Kill 6 enemies in one use of Shockwave | 10 | Bronze |
Tier 2 Upgrades
Autopsy
Cost: 1,000 Salvage
Prerequisite: None
Description: Salvage is created from dead enemies.
| Enemy | Salvage |
|---|---|
| Cultist | 1 |
| Cultist Officer | 1 |
| Creeper | 1 |
| Alpha Creeper | 2 |
| Ravager | 2 |
| Pod | 3 |
| Wraith | 3 |
| Monolith (Small) | 5 |
| Beserker | 5 |
| Tentacle | 5 |
| SHIVA | 5 |
| Monolith (Medium) | 8 |
| Behemoth | 10 |
| Monolith (Large) | 10 |
On the surface, this may seem like a rather boring upgrade. But it's actually one of the most powerful upgrades available, allowing you to automatically accrue salvage for each kill you perform. You don't even have to gather the salvage—it's automatically added to your stash. The amount gained from each kill varies based on the enemy, usually ranging from two to four extra salvage per kill. This adds up quickly over time, allowing you to purchase more upgrades. It also greatly helps in earning the Nanergy! achievement/trophy, which requires you to acquire 25,000 salvage. For best results, buy Autopsy as early as possible—it'll easily pay for itself and more.
Berserk
Cost: 1,000 Salvage
Prerequisite: None
Description: The Nano Forge infuses you with energy, temporarily increasing your attack speed and damage.
Berserk is one of two Nano Forge upgrades available in tier 2—the other is Shell. When Berserk is activated, you're shrouded with a blue surge of energy, temporarily boosting your attack speed and damage output. Berserk can come in handy in a variety of situations, such as when facing durable enemies like monoliths, berserkers, or behemoths. Berserk doesn't really begin to shine until you apply the tier 3 and 4 upgrades, but you must own this base upgrade before you can acquire those.
Dead Eye
Cost: 1,000 Salvage
Prerequisite: None
Description: Makes you more accurate, as well as reduces camera shaking while you are zoomed in.
• When Snapping to Target, camera shake is reduced by 25%.
• When Snapping to Target, weapon spread is reduced by 25%
This upgrade reduces any shot deviation when firing, helping your shots find their targets with greater precision. The camera also drifts less when holding down the aim button, making it easier to score hits. With most weapons, the benefits of this upgrade aren't very noticeable. It can make a difference when using a precision weapon like the Rail Driver—you'll find it's slightly easier to score lethal headshots.
Deep Pockets
Cost: 1,000 Salvage
Prerequisite: None
Description: Increases the maximum amount of ammo carried for each weapon.
• Maximum ammo increased by 25%.
If you search each level carefully, ammo pick-ups are readily available. But if you're still running short on ammo, consider purchasing this upgrade to increase the amount of ammo you can carry for each weapon. Initially, some of the heavier weapons, like the Plasma Cannon, only allow you to carry around a handful of shots. If you use these weapons frequently, this upgrade can be a very worthwhile purchase—especially if you don't like searching tirelessly for ammo pick-ups.
Impact Boost
Cost: 1,000 Salvage
Prerequisite: Impact
Description: Increases the power of Impact, giving it a faster recharge rate, increased damage, and a longer range.
• Nano Forge recharges 20% faster after using Impact.
• Impact goes 40% farther.
Impact is the default ability of the Nano Forge and never has to be purchased. However, you can increase its effectiveness with the Impact Boost upgrade. Instead of just knocking holes in walls, this upgrade makes Impact a formidable offensive option, particularly when confronting large swarms of creepers.
Impact Achievements and Trophies
| Image | Name | Description | Gamerscore | Trophy |
|---|---|---|---|---|
|
It's All in the Wrist | Send an enemy at least 30 meters with Impact | 15 | Bronze |

|
Haymaker | Kill 5 enemies in one shot with Impact | 10 | Bronze |
Improved Explosives
Cost: 1,000 Salvage
Prerequisite: None
Description: Increases the damage done by explosive weaponry.
• Heavy weapons damage increased by 15%.
Enjoy using weapons like the Charge Launcher, Pulse Grenade, and Rocket Launcher? Then strongly consider purchasing this upgrade to increase the damage output of all heavy weapons. While the damage increase isn't particularly noticeable, over time you will notice a decrease in ammo use and reloads with these weapons as it takes fewer shots to kill each enemy.
Improved Small Arms I
Cost: 1,000 Salvage
Prerequisite: None
Description: Increases damage inflicted with non-explosive weaponry.
• Small arms damage increased by 20%.
This is the first of two upgrades that increases the damage output of your non-explosive weaponry. Before buying it, take into consideration your style of play. If you find yourself using explosive weapons frequently, this upgrade may not be worth it. But for those using weapons like the Pistols, Assault Rifle, Shotgun, Banshees, and Nano Rifle, this upgrade is worth your consideration, particularly when combined with the Stopping Power upgrade.
Last Gasp
Cost: 1,000 Salvage
Prerequisite: None
Description: When you are at very low health, you take reduced damage.
• At 30% health or lower, the player takes 40% less damage.
This is a passive upgrade applied only when your health is at critical stages—when the screen turns red. Subsequent damage dealt during this period is reduced, increasing your chances of survival. Unless playing the game on Hard or Insane difficulty, this isn't an essential upgrade. You're better off dodging attacks while retreating or deploying a Shell to recover. However, this upgrade can be a life saver during chaotic Infestation matches.
Melee Training
Cost: 1,000 Salvage
Prerequisite: None
Description: Increases the damage and effectiveness of your melee attacks.
• Maul damage increased by 100%.
• Maul applies twice as much force.
• Other melee damage increased by 60% to humans, 100% to everything else.
• Other melee attacks apply twice as much force.
Once you've acquired your most sought-after tier 2 upgrades, give this one some serious consideration. At close range, melee attacks are the quickest way to eliminate most threats—it's faster than aiming and firing a weapon at a fast-moving enemy like a creeper, ravager, or wraith. This upgrade ensures that you kill most enemies with only one or two strikes.
Repair Grenade
Cost: N/A
Prerequisite: None
Description: Repairs objects over great distances.
The Repair Grenade ability cannot be purchased from upgrade stations. Instead, it's automatically added to your abilities during the course of the single-player campaign, free of charge. The Repair Grenade ability functions similar to the Nano Forge's Repair ability, but it allows you to repair objects at greater distances by firing a pulse of nanites. Even at close range, this is a faster alternative to the standard Repair ability, allowing you to turn your attention to other matters while the nanites work their magic.
Shell
Cost: 1,000 Salvage
Prerequisite: None
Description: The Nano Forge creates a sphere of protective energy that stops incoming weapon fire. Enemies within the Shell are attacked by nanites.
As soon as the tier 2 upgrades are available, Shell should be one of your very first purchases. When activated, you're surrounded by a dome-shaped force field capable of blocking all enemy projectile attacks. This is great when facing off against large groups of ravagers or wraiths, but it can also save your life if deployed when you're low on health. Although the Shell only lasts for a few seconds, it provides protection long enough for your health to fully recover. Two more Shell upgrades can be purchased at tiers 3 and 4, but you must own this one first.
Shockwave Boost
Cost: 1,000 Salvage
Prerequisite: Shockwave
Description: Increases the radius and power of Shockwave, as well as reducing the cool down between uses.
• Shockwave range is increased by 25%.
• Shockwave can affect three additional aliens.
• Shockwave lasts 20% longer.
• Shockwave launches aliens in the air more forcefully and makes them float higher.
• Nano Forge recharges 40% faster after using Shockwave.
• Shockwave does 50% more damage.
If you like using Shockwave, then this is an upgrade worth forking over some salvage to obtain. By increasing the radius of Shockwave, you can effectively suspend and stun more enemies with this upgrade. This makes it much easier to earn the Shockwave-based achievements/trophies. Even better, Shockwave Boost also decreases the cool down period, allowing you to use Shockwave and other Nano Forge-based abilities with greater frequency.
Stopping Power
Cost: 1,000 Salvage
Prerequisite: None
Description: Your weapons have more stopping power, and hit with greater force.
• Bullets apply twice as much force.
• Aliens are more likely to heavy flinch faster.
Who doesn't want more power out of their weapons? Just don't expect amazing results from this upgrade. It certainly increases the damage output of each weapon, but the end results aren't particularly noticeable. However, over time this upgrade has its benefits, requiring fewer shots to bring down enemies. This means less ammo expended and fewer reloads required.
Tier 3 Upgrades
Berserk Boost
Cost: 1,000 Salvage
Prerequisite: Berserk
Description: Increases weapon accuracy, fire rate, and reload speed. Additionally, reduces cool down between uses.
• Nano Forge recharges 33% faster after using Berserk.
• Weapon spread is reduced by 50%.
• Aim assist is 3x more effective.
• Weapon refire rate is increased by 10%.
This Berserk upgrade greatly enhances weapon performance. The rate of fire increase is the most noticeable benefit, especially when shooting a rapid-firing weapon like the Assault Rifle. It also rapidly unleashes a flurry of destruction with heavier weapons like the Rocket Launcher or Plasma Cannon. Regardless of your weapon choice, Berserk is best reserved when you need an offensive boost. But remember, while Berserk is active, you cannot use any other Nano Forge abilities like Impact, Shell, or Shockwave.
Extended Clips
Cost: 1,000 Salvage
Prerequisite: None
Description: The clip size for all weapons is increased.
• Clip sizes increased by 25%.
• Weapon overheat reduced by 25%.
Consider making this one of your early tier 3 purchases to increase the magazine capacity of every weapon in your arsenal. It may not seem like much, but larger clip sizes reduce the amount of times you must reload. This can make a huge difference in chaotic fire fights, particularly when firing weapons with small magazine capacities, like the Shotgun or Nano Rifle.
Faster Replenishment
Cost: 1,000 Salvage
Prerequisite: None
Description: Your Nano Forge energy replaces itself faster.
• Nano Forge fuel regeneration increased by 25%.
After each use of Impact, Shockwave, Shell, or Berserk, the Nano Forge must recharge for a few seconds, as indicated by the meter to the left of the reticle on the HUD. This upgrade significantly reduces the time it takes for the Nano Forge to recharge itself, allowing you to use these abilities with greater frequency.
Of course, the effectiveness of this upgrade all depends on how often you're using these abilities, so take your style of play into consideration before settling on this one.
Health Increase II
Cost: 1,000 Salvage
Prerequisite: Health Increase I
Description: Further increases your total health.
• Maximum health is increased by 200 (base character health is 1000, stacks with Health Increase I).
Like Health Increase I, this upgrade extends your health meter, allowing you to absorb more damage before you die. You can never go wrong with these Health Increase upgrades, particularly if playing the game at more challenging difficulty levels. A boost in health also never hurts when fending off waves of aliens in Infestation.
Hollow-Tipped Rounds
Cost: 1,000 Salvage
Prerequisite: None
Description: Greatly increases the effectiveness of headshots.
• Headshot damage increased by 100%.
• Killing headshots always cause the head to explode.
The effectiveness of this upgrade varies based on weapon preference and your style of play. If you're a sharpshooter who prefers to drop targets quickly with headshots, then this upgrade is for you. But if you care less about pinpoint accuracy and get your kills through other methods, then this is a waste of your hard-earned salvage.
Killing Spree
Cost: 1,000 Salvage
Prerequisite: None
Description: After killing an enemy, your damage is boosted for a short while.
• After every kill, the player's damage is increased by 25% for three seconds.
There are no visual cues to identify when the damage-boosting benefits of this upgrade are in effect, but the damage bonus is welcome nonetheless as you chain together a string of kills. This upgrade isn't tied to any specific weapon, allowing every item in the armory to benefit from this upgrade.
Rapid Blast
Cost: 1,000 Salvage
Prerequisite: None
Description: Increases the rate of fire for all explosive weaponry.
• Explosive weapon fire rate increased by 20%.
If you enjoy using explosive-based weapons like the Charge Launcher, Pulse Grenade, and Rocket Launcher, this may be a worthwhile upgrade. Increasing the rate of fire of these devastating weapons can make a huge difference in tough fights, particularly when attempting to down hardy enemies like monoliths, tentacles, and behemoths.
The Rocket Launcher in particular benefits from this upgrade, allowing you to lock on and fire at multiple targets in quick succession. Unfortunately, the upgrade does nothing to speed up weapon reload times—you'll need the Fast Hands upgrade for that.
Resourcefulness
Cost: 1,000 Salvage
Prerequisite: None
Description: Increases the amount of ammo received when picking up ammo packs.
• Ammo gained from pick-ups increased by 25%.
Given the wide dispersal of ammo throughout each level, this isn't the most critical of upgrades. However, if find yourself running out of ammo frequently, this can be a worthwhile purchase. Combine this upgrade with Deep Pockets to put an end to your ammo shortage problems.
Shell Boost
Cost: 1,000 Salvage
Prerequisite: Shell
Description: Increases the size and duration of Shell, as well as the damage dealt to enemies within the Shell.
• Nano Forge recharges 33% faster after using Shell.
• Shell lasts 50% longer.
• Shell radius increased by 1.5 meters.
During Infestation matches, increasing the size of the Shell pays off considerably, allowing your teammates to gather within the protective force field. But most welcome is a modest increase in the duration the Shell is active, giving you a few more seconds of protection. If any enemies are trapped in the Shell, the upgrade also increases the rate at which they take damage. If you enjoy using Shell, this is one upgrade you can't pass up.
Wide Impact
Cost: 1,000 Salvage
Prerequisite: Impact Boost
Description: Greatly widens the destructive area of Impact.
• Impact is twice as wide.
By default, Impact has a rather narrow arc, allowing enemies on your flanks to avoid its violent blast. This upgrade fixes that, essentially allowing you to knock back all nearby hostiles within your field of view. When combined with the benefits of Impact Boost, this upgrade makes Impact an extremely useful weapon.
It is best deployed against large groups of creepers and ravagers—if you manage to kill five enemies with one blast you earn the Haymaker achievement/trophy. In addition to targeting enemies, Impact is also a fast way to damage structures. Pieces of debris flying off structures become projectiles capable of injuring or outright killing enemies.
Tier 4 Upgrades
Berserk Pulse
Cost: 1,500 Salvage
Prerequisite: Berserk Boost
Description: Berserk energy is increased so much that pulses of energy are emitted from you. When Berserk is active, you have unlimited ammo in your weapon.
• Berserk generates an explosion at the player's feet every three seconds.
This is the final upgrade for Berserk, stacking new features onto those offered by the previous two upgrades. With this upgrade, as long as Berserk is active, your selected weapon has unlimited ammo. Even better, you don't have to reload.
However, your weapon must have at least one shot remaining when Berserk is activated—you cannot fire a weapon that has no ammo at all. Once you have this upgrade, activate Berserk, and cut loose with the Rocket Launcher or Nano Rifle. This comes in handy when taking on berserkers or behemoths.
Energy Transfer
Cost: 1,500 Salvage
Prerequisite: None
Description: When you kill enemies, the Nano Forge gains its energy back quicker.
• Every kill reduces the Nano Forge fuel regeneration time by 0.75 seconds.
If you like using Berserk, Impact, Shockwave, or Shell, then this upgrade is worth looking into. After the deployment of any of these abilities, the Nano Forge must recharge, usually taking several seconds. With this upgrade, you can decrease the time it takes to recharge by killing enemies. If you use the Nano Forge abilities frequently, this is a very attractive upgrade.
Health Increase III
Cost: 1,500 Salvage
Prerequisite: Health Increase II
Description: Gives you even more total health.
• Maximum health is increased by 200 (base character health is 1000, stacks with Health Increase I and II).
As the final Health Increase upgrade, this maximizes the health bar to its fullest, allowing you to absorb more damage before dying. If you're still suffering from frequent deaths, this upgrade is well worth the asking price. The boost in health can make a big difference when playing Infestation, particularly as you advance through the latter waves.
Improved Small Arms II
Cost: 1,500 Salvage
Prerequisite: Improved Small Arms I
Description: Further increases damage inflicted with non-explosive weaponry.
• Small arms damage increased by 25% (stacks with Improved Small Arms I).
This may seem like a steep price to pay for yet another increase in damage. However, when combined with the benefits from Improved Small Arms I and the Stopping Power upgrade, your non-explosive weapons will exhibit a noticeable uptick in damage output. The decision whether or not to buy this upgrade largely depends on which weapons you prefer. If you find yourself primarily using explosive weapons, this upgrade may not be worth it.
Reflective Shell
Cost: 1,500 Salvage
Prerequisite: Shell Boost
Description: Shell now reflects incoming weapon fire back at the attacker.
This is the Shell ability's final upgrade, and it's definitely worth the price. The upgrade causes the Shell to reflect all projectile attacks, sending them back at the shooter. So not only does it block the incoming shots, but it has the potential to damage your attackers. This works particularly well against ravagers, wraiths, and berserkers.
Shockwave Drain
Cost: 1,500 Salvage
Prerequisite: Shockwave Boost
Description: Shockwave now drains health from the immobilized targets, transferring it to you.
This is the final Shockwave upgrade, allowing you to drain health from immobilized enemies. Not only is this a great way to gain health, but it's also a good way to quickly kill all the suspended enemies before they drop to the ground.
If you kill six enemies in one deployment of Shockwave, you unlock the Hold Still achievement/trophy. If you're low on health, don't expect this upgrade to save you, as you can still be hit by enemies who aren't immobilized. You may be better off deploying a Shell, giving you a safe haven in which to recover.