
Halo Wars 2 Guide Campaign Walkthrough Act II
Mission: Lights Out
In the Cartographer’s map room, Professor Anders learns that Atriox has hacked into the Ark’s expansive network of portals and is using them to zap his troops almost instantaneously around the massive Forerunner installation. A nearby Control Node serves as the router networking all the Banished hacking devices on this arm of the Ark. The next UNSC move is clear: wrest control of local portals from the Banished, and use them to find and destroy the Banished Control Node. If that effort succeeds, many of Atriox’s units will end up stranded. You can be sure Decimus will not be pleased…
Mission Walkthrough
Mission SummaryCripple the Banished’s portal network. Scouting ReportPortals can be used to travel across the battlefield when no longer under Banished control. ObjectivesPrimary
Optional
Bonus
Par Time
ExtrasSkulls Available: 1 Phoenix Logs: 2 Map Legend
|
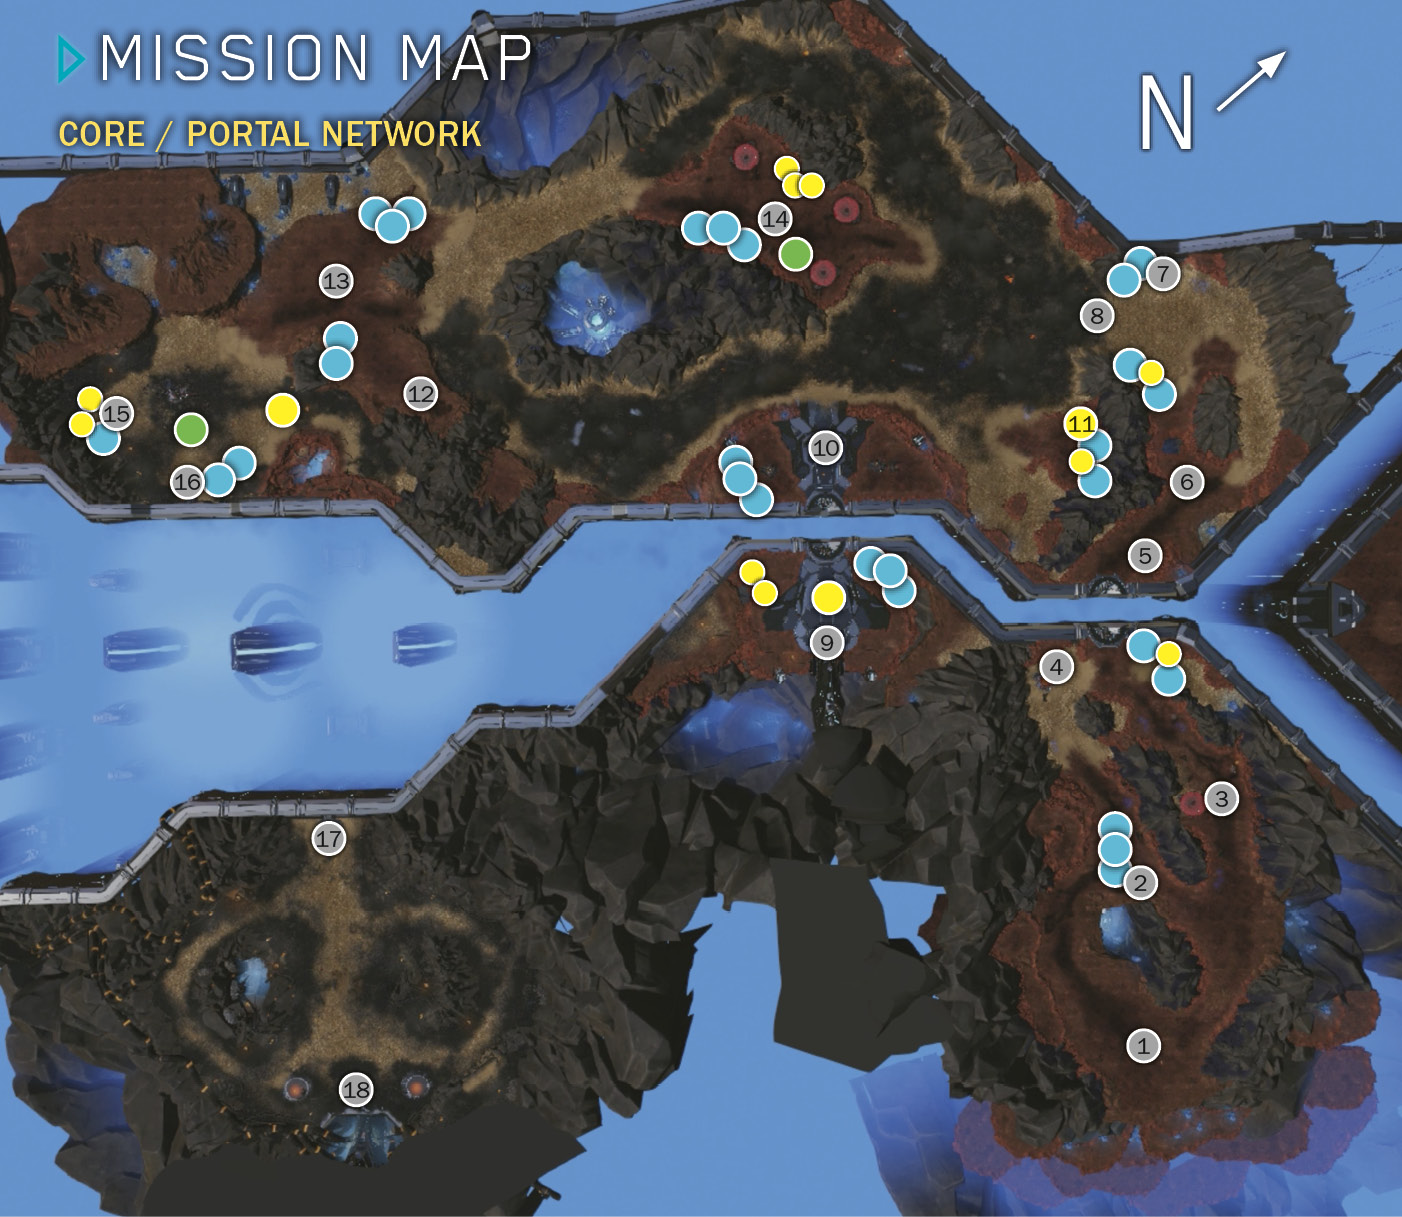
 Start
Start Wraith (Douglas returns)
 Prison dome
 Portal to
 Portal to
 Reaver ambush!
 Portal to
  / Base site
 Begin bombardment zone
 Portal to
 Portal to
  /
/  Power Node
 Portal to
 Base site
 Prison compound
 Portal hacking device
 Portal to
 Portal to
 Banished Control Node / Decimus
 Phoenix log
 Supply silo
 Power Node
 Power silo
Primary Objective: Locate and Destroy the Four Banished Teleporter Hacking Devices
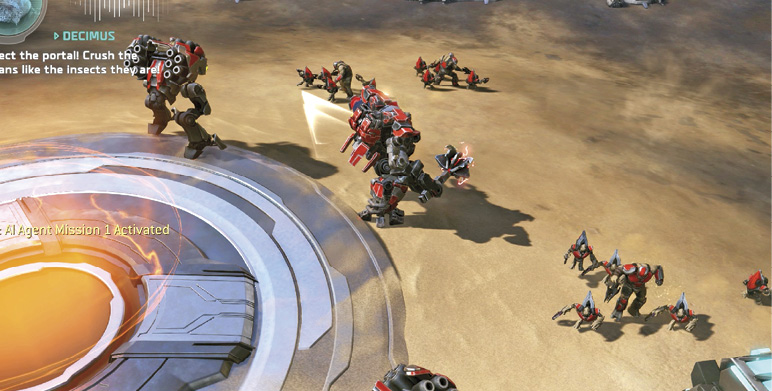
You start with your Spartan leader, Jerome-092, and a mixed infantry squad on artificial amber terrain in a strange, alien landscape. Follow the path until you encounter a Banished squad with a Wraith tank
 . Suddenly, Douglas makes a dramatic return to Spartan Red Team with a leaping hijack of the Wraith. Your squad just got a lot tougher. Smash three Banished Supply silos and scoop up the fallout.
Optional Objective: Rescue All 10 Squads of UNSC Prisoners
Deactivate the First Prison Dome
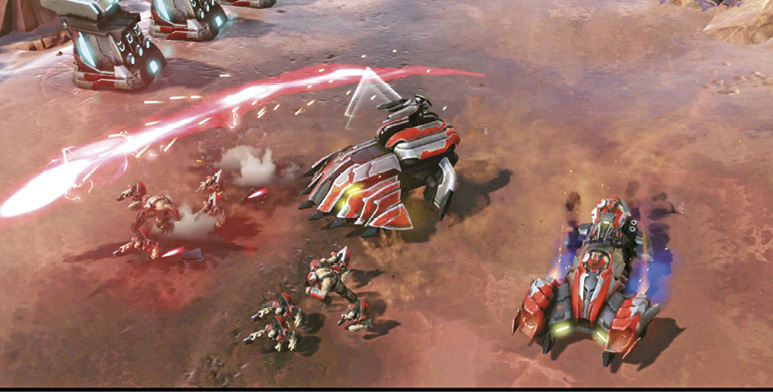
Here you have two directions from which to choose. We suggest you head uphill to the right, even though Isabel warns that this way is heavily guarded. But you’ve got two Spartans now, so blast your way past the Turret and a pair of Ghosts to the red prison dome . Destroy the Prison Generator to liberate the first four squads of prisoners—two Hellbringers and two Cyclops units.
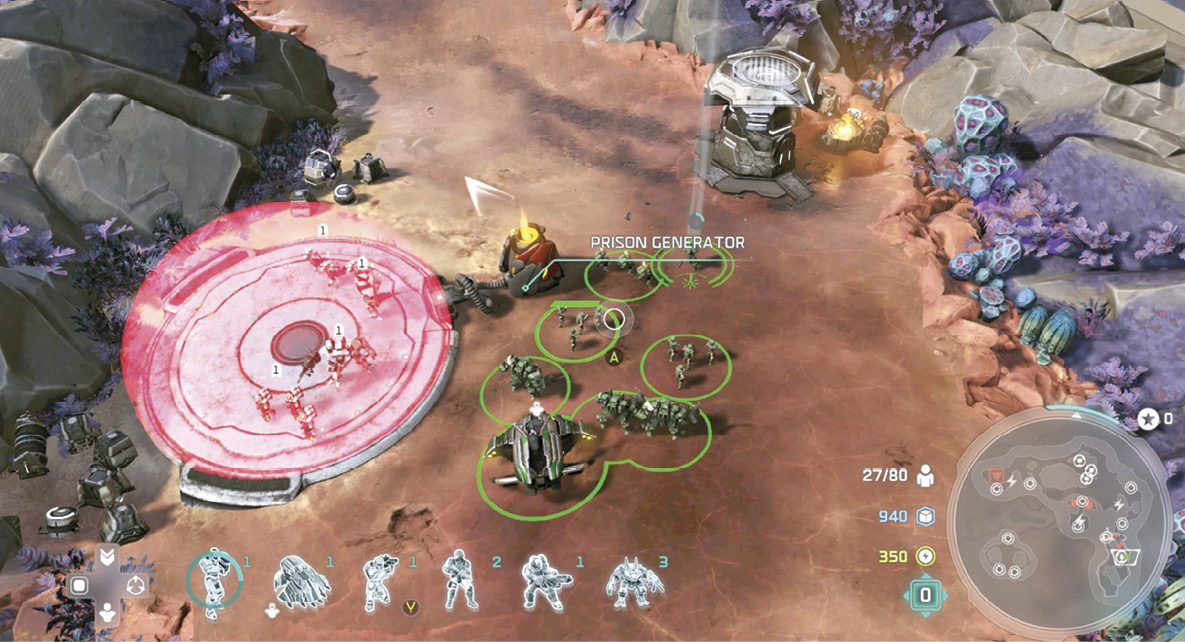
Optional Objective: Destroy All Four Banished Devices Before Reinforcements Arrive
Destroy the First Portal Hacking Device
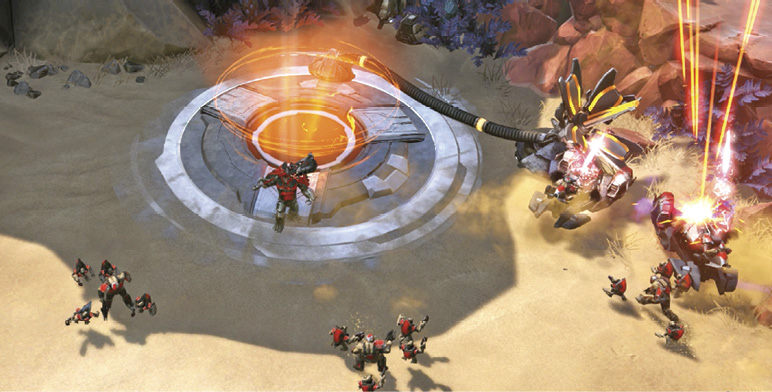
After the prisoners are free, proceed down the slope until you spot the Banished hacking device next to the glowing portal. Two Ghosts guard the portal, but ignore them and concentrate all your firepower on the hacking device so you destroy it quickly, before Banished reinforcements pop out of the portal. When the device explodes, wipe out the Ghosts. If you can repeat this feat at the other three hacking devices you encounter up ahead, you complete an optional objective.
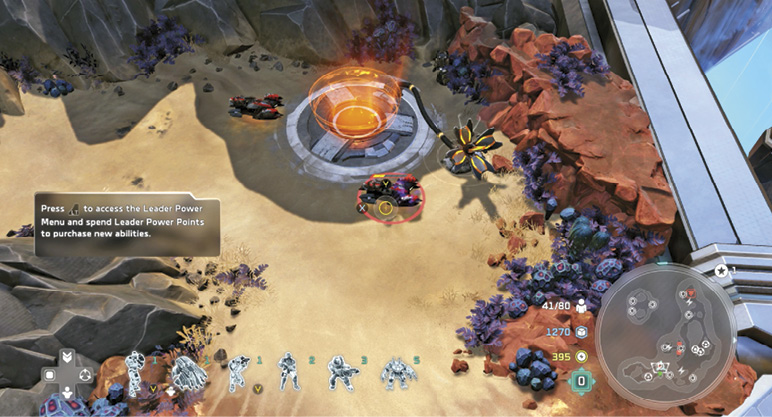
Primary Objective: Cross the Chasm
Plates of the amber terrain have separated, creating a large chasm ahead. But the portal is now blue and friendly, so you can use it to zap to another section. Before you go, loot the nearby silos for pickups if you haven’t already done so, then group-select your full strike force and click on the portal to send everyone through to the next portal . You end up across the chasm.
Optional Objective: Take Out the Reavers without Suffering Hornet Casualties
Push your force forward with Spartans in the lead until you trigger a quick cutscene: two Banished anti-air units called Reavers suddenly leap across a smaller chasm to ambush your force . It’s a foolish ambush, because you have no air units yet and your Cyclops units can rip them apart easily. Once the Reavers go down, Cutter is confident enough to send down a Hornet squadron. Be wary of Reavers ahead, because if you keep your Hornets intact, you pick up more mission points in this optional objective.
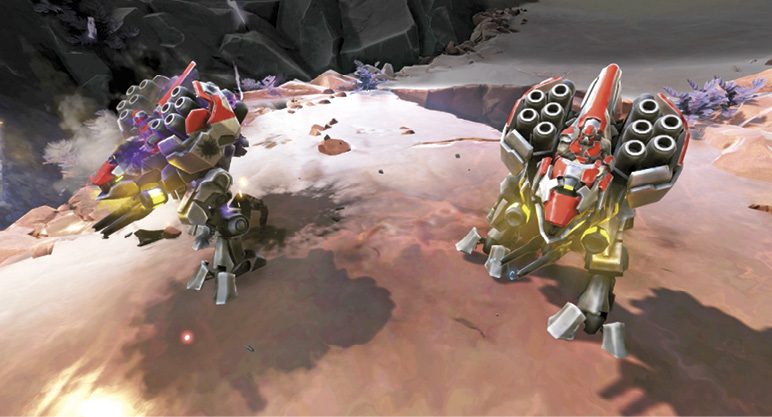
Destroy the Second Portal Hacking Device
Follow the path until you spot Decimus at the next hacked portal . After the boss teleports out, two more Reavers arrive to help defend the portal. Hold your Hornets and ex-prisoners back if you want to keep your secondary objectives intact; select your Spartans and other units and ignore the defenders to concentrate full fire on the hacking device next to the portal. Again, you want to destroy the device before reinforcements come through. Once the device is eliminated, hit the Reavers next so you can bring in your Hornets to help.
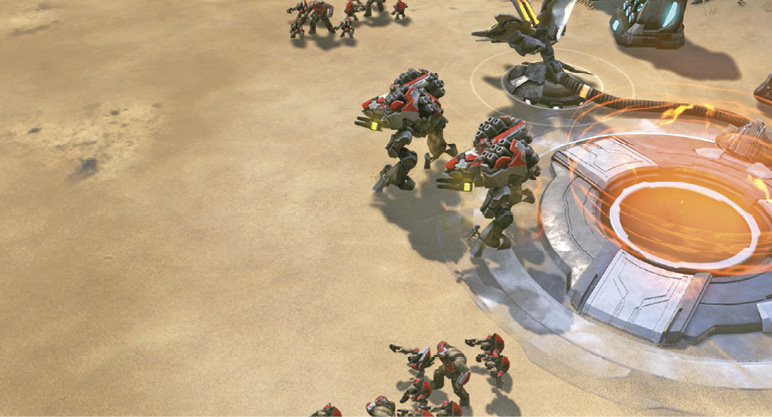
Optional Objective: Claim All Four Base Expansions
Build a Strong Base (1 of 4)
After the fight, drop a Firebase onto the base site and spend a few moments building it up. As the HQ is coming online, knock down all five silos around the site to kick-start your resource inflow. Start construction by putting up two Turrets on the side facing away from the portal. Upgrade both to Anti-Air Turrets as soon as you can. The reason: Banshee raiders hit your base from that direction shortly, and continue at regular intervals for most of the mission.
Put in two Supply Pads and two Generators to get your resource inflow going. Then add an Airpad for Hornets, a Garage for anti-air Wolverines, and a Barracks for the armor-busting Cyclops. Finally, add two more Turrets on the other end of the base.
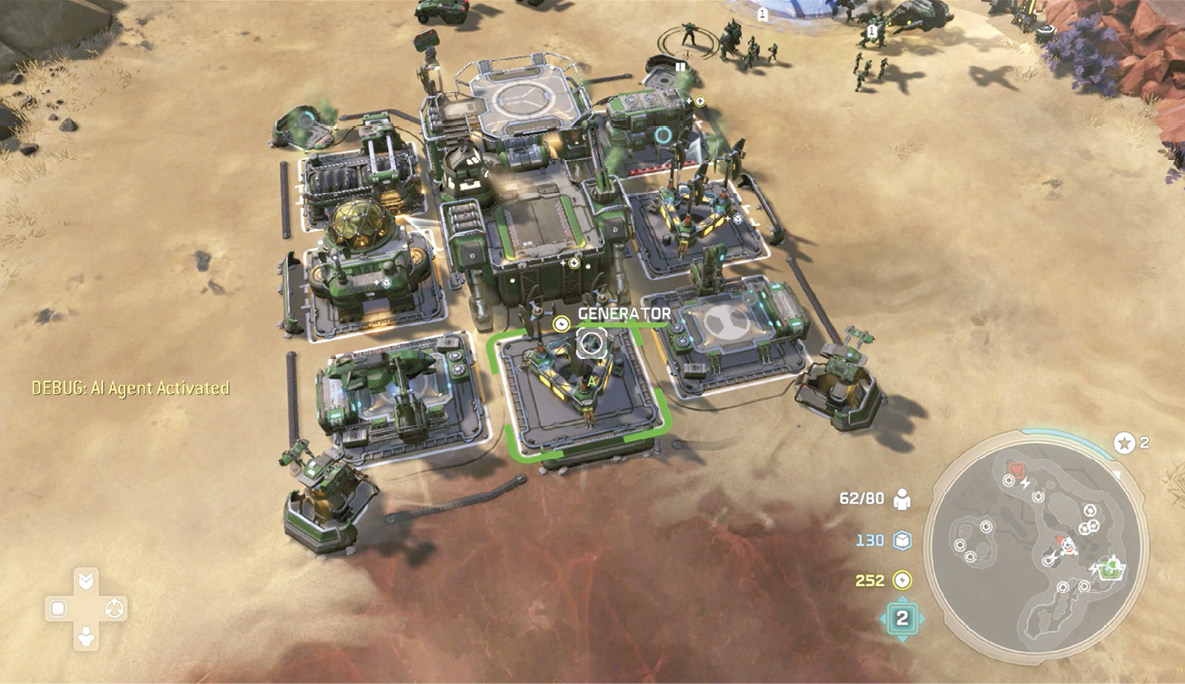
Now you can focus on unit production. A good Spartan-led strike force would be a mix of two to three Cyclops, five to six Hornets, a pair of Wolverines, and a handful of anti-infantry Hellbringers. Remember to put all your Hornets on a separate hotkey so you can quickly select and pull them back if Banished Reavers suddenly jump into the fray.
Teleport to the Platform
Send your Spartan-led strike force through the portal to arrive on a metallic platform , where you can capture a Power Node and loot some silos. But be ready—when you start the Node capture, teams of Jump Pack Brutes suddenly attack, joined by a pair of Banshees. Then Spirit dropships deliver Banished infantry too, including Grunts and Hunters! Clear out the platform. Afterward, seize the resources, heal your troops with Restoration Drones, and produce fresh units back at your base to replace any fallen units. Then send an infantry squad to activate the lightbridge at the nearby control panel.
Destroy the Third Portal Hacking Device
March everyone except your Hornets over the lightbridge; Decimus greets you , then skedaddles into the portal. Suddenly two Reavers drop into your midst (which is why you left your Hornets across the bridge). Before you target them, however, turn all guns with concentrated fury on the portal hacking device. Remember, you want to destroy each device before reinforcements can warp through it. Once the device explodes, take out the Reavers, then quickly bring your Hornets across the bridge to help mop up. Wipe out the Banished infantry scattered across the platform and knock out the Engineer floating over the hacking device.
Build Two Minibases (3 of 4)
Destroy the two Banished minibases near the portal and replace them with two One-Slot Minibases of your own. (That gives you three out of four base expansions.) Put an Armory in one of them so you can buy its upgrades—in particular, you want the Reinforcements upgrade to boost your Population cap from 80 to 100. Destroy the two Shield Generators so the red energy barrier dissipates at the front of the platform. Of course, you don’t want to send troops out wandering into the blackened bombardment zone where they’ll be obliterated. But you might want to tap another Power Node nearby.
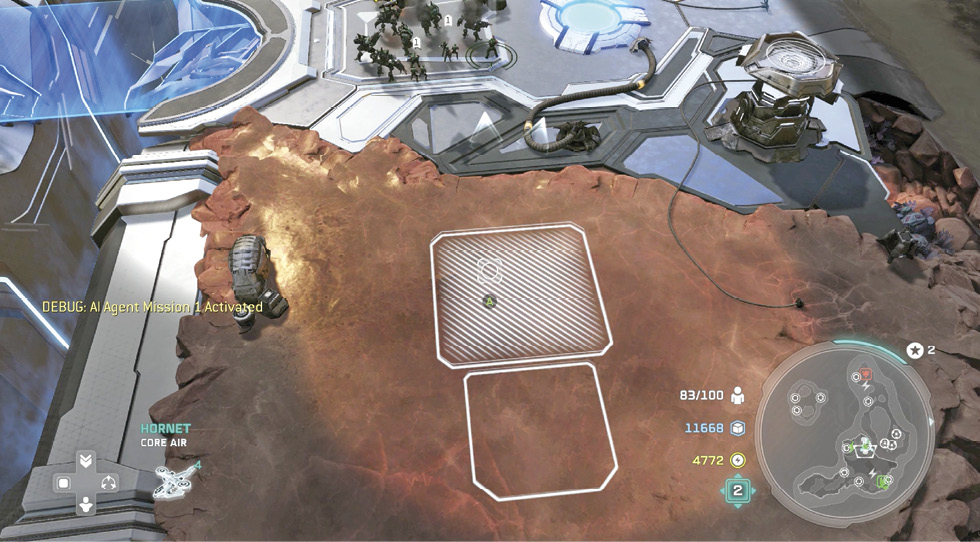
Send Hornets and Spartans for Resources (Optional)
The Power Node and some resource-filled silos sit on a small plateau just around the rock formation from your first base, guarded by a tough handful of Banished troops, including Ghosts and Elite Ranger marksmen. To get there on foot, you must exit the old base area
 and move a short distance through the blackened bombardment zone along the rock formation.
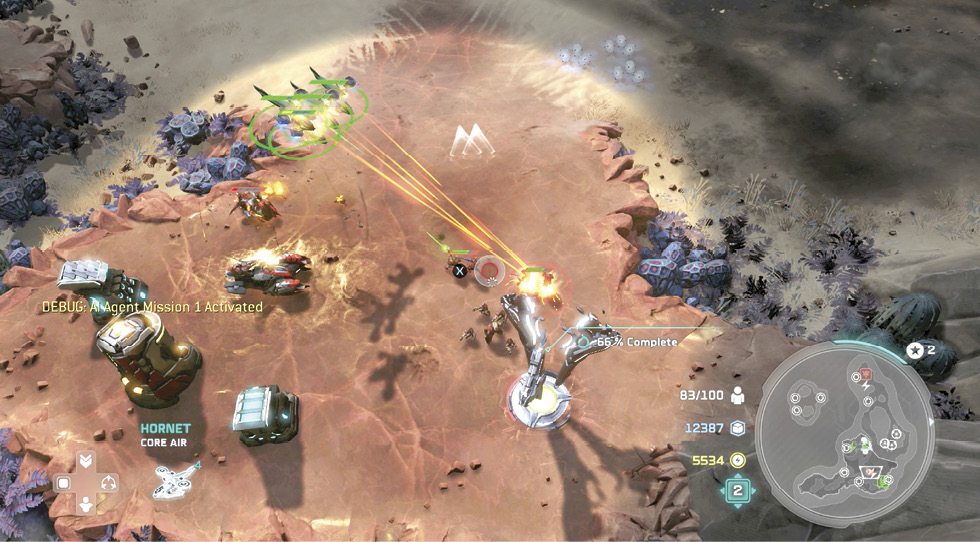
However, a strong flight of six or seven Hornets can avoid bombardment by flying directly to the location from your newly conquered minibases area to wipe out the defenders. Of course, Hornets can’t capture the Node or nab pickups, so send a Spartan through the portal at
 back to
 , and then walk him to the edge of the blackened zone
 . (Spartans are tough and shielded; they can survive if they get caught in an orbital strike zone along the way.) Wait until the first plasma strikes stop burning, then rush the Spartan along the rock formation to the plateau to capture the Power Node. Retrace back over the same route to return him to your main strike force.
Build a Firebase (4 of 4)
Send your Spartan-led army into the portal to teleport to an open plateau
 . March up the reddish slope to find another base site
 and call down a three-socket Firebase onto it. Take some time to develop the base; put in all three of the unit-production facilities (Garage, Airpad, Barracks) so you can train replacement troops and rally them closer to where you need them for the big upcoming endgame battle. (If you’re not in a hurry, you can upgrade the base to a Combat Station and add Turrets for protection.)
Optional Objective: Rescue All 10 Squads of UNSC Prisoners (Continued). Completion Earns a Skull!
Deactivate the Remaining Three Prison Domes
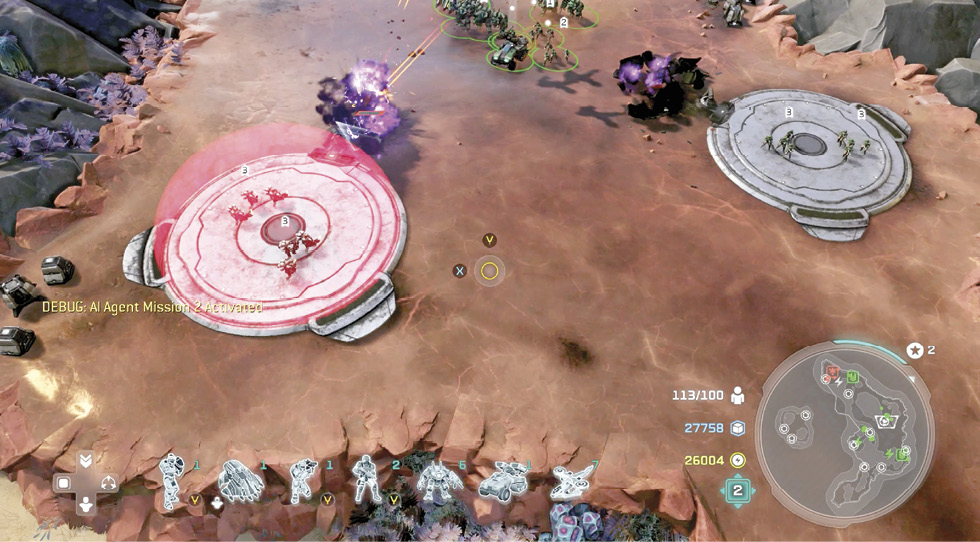
While you build up the new Firebase, send a Spartan-led strike force down the short ramp directly behind the base. March along the light-sand valley that leads to a Banished prison compound . As you attack the prison guard units, keep your Hornets in the rear; the enemy detail includes anti-air Reavers. After you eliminate the Banished units and Turrets, destroy the three Prison Generators to liberate all remaining squads of prisoners. While you’re at it, look for the Phoenix log near one of the prison domes.
Destroy the Fourth Portal Hacking Device
Return to your new Firebase and train new troops to replace any you lost during your prison-breakout operation. Then send your full strike force downhill into the big Banished base. The hacked portal
 is to the left of the base, but the hacking device
 is actually behind the base.
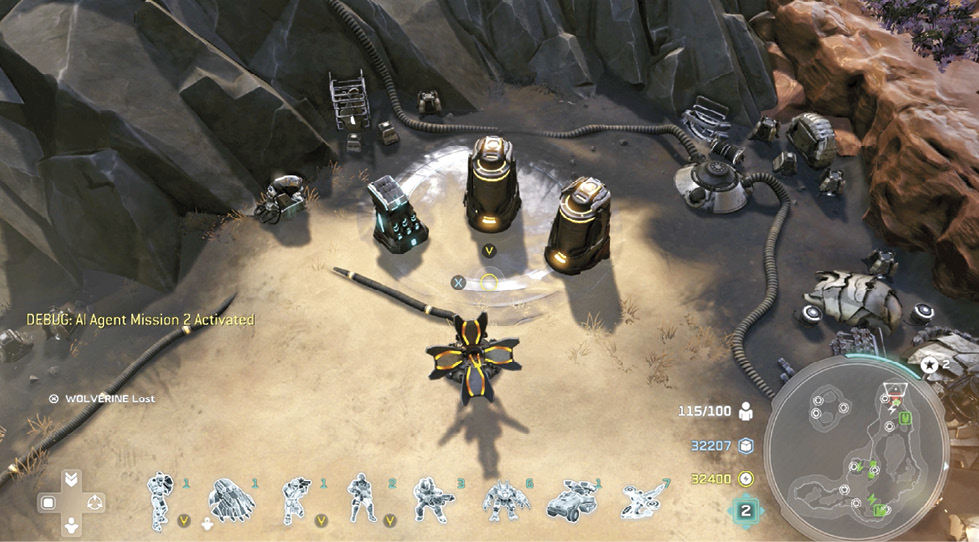
Hustle around the base’s right side, ignoring the Turret and other hostile units to concentrate fire on the device; you want to destroy it before the Banished can react and send reinforcements through the portal. Once the hacking device is toasted, work around the big base, wiping out resistance, and then destroy the base itself. Be sure to snag the Phoenix log that spawns in the rubble as the base collapses.
Primary Objective: Destroy the Banished Control Node
Heal up your team, replace any lost troops, and get ready for the last push. Move your full army into the portal to teleport over to a smaller, self-contained arena
 . The Control Node
 sits on the arena’s opposite side, controlling access to two more portals, one on either side of it. Once you begin your attack, Banished unit pairs emerge from both portals roughly every 10 seconds—Reavers from the left portal, Elite Rangers from the right—so you want to destroy that Control Node as soon as possible.
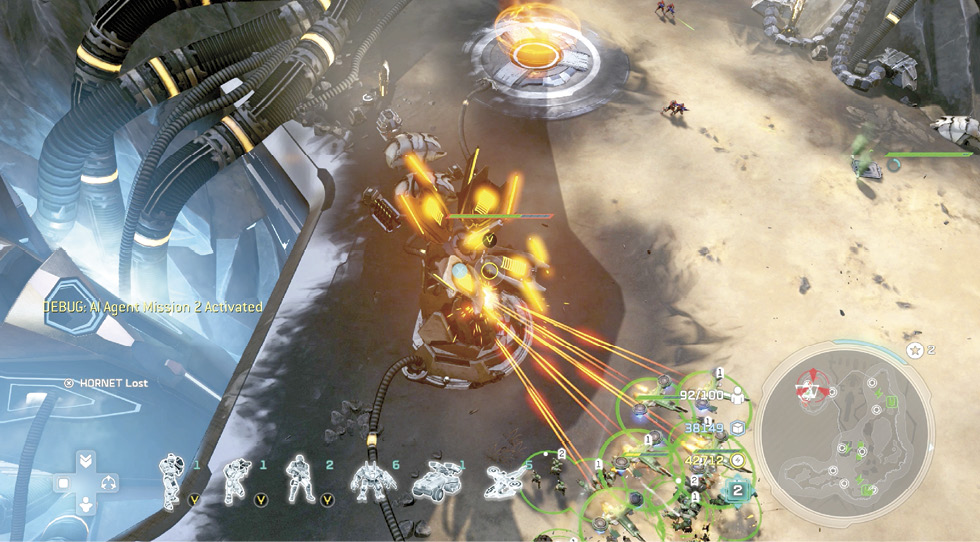
Smash directly up the middle of the area, taking out Turrets and infantry as you go. (Once you kill a Banished Turret, drop in one of your own in the now-empty slot!) Watch for Jump Pack Brutes and Reavers hopping in from cliffs overlooking the arena; keep your Hornets and Wolverines in the rear of your column if possible. Fight straight to the Control Node, then focus all unit fire on it until the big apparatus finally explodes.
Primary Objective: Defeat Decimus
Decimus: Round 1
It’s not over yet. Decimus drops onto the field, bringing a pair of Banshees with him. Within seconds Decimus summons one of his massive orbital plasma strikes. The moment the red targeting circle appears around him, immediately rush all units outside the circle. Wait until the plasma beams converge and detonate a final explosion, then rush back in to attack. Concentrate fire on Decimus as much as possible, but shift your full focus to any supporting units that approach to eliminate them quickly.
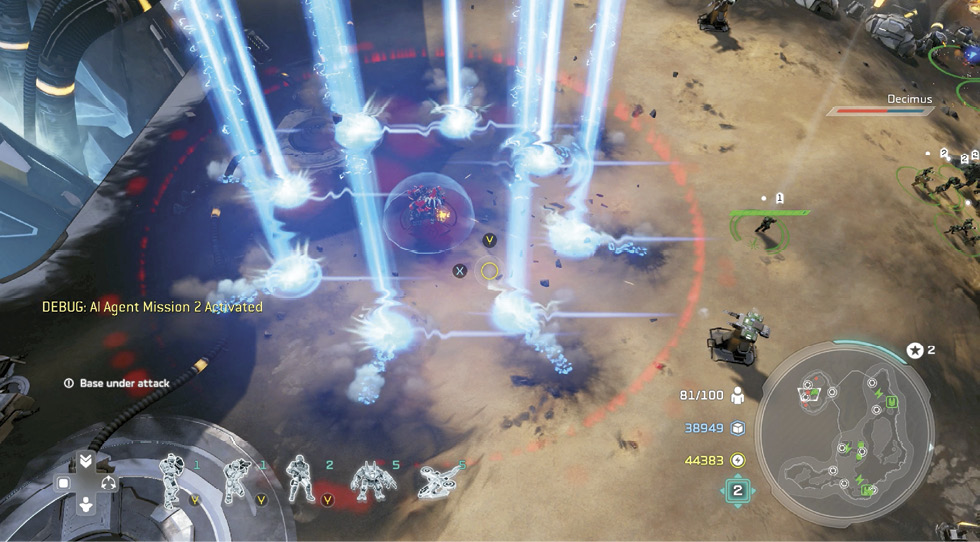
Decimus continues to summon orbital strikes on his position. Keep dodging and returning until you knock his health bar down to about one-third. At that point, Decimus suddenly leaps out of the arena and starts calling in individual plasma beam strikes. Run your troops away from the white reticles that start appearing on the ground.
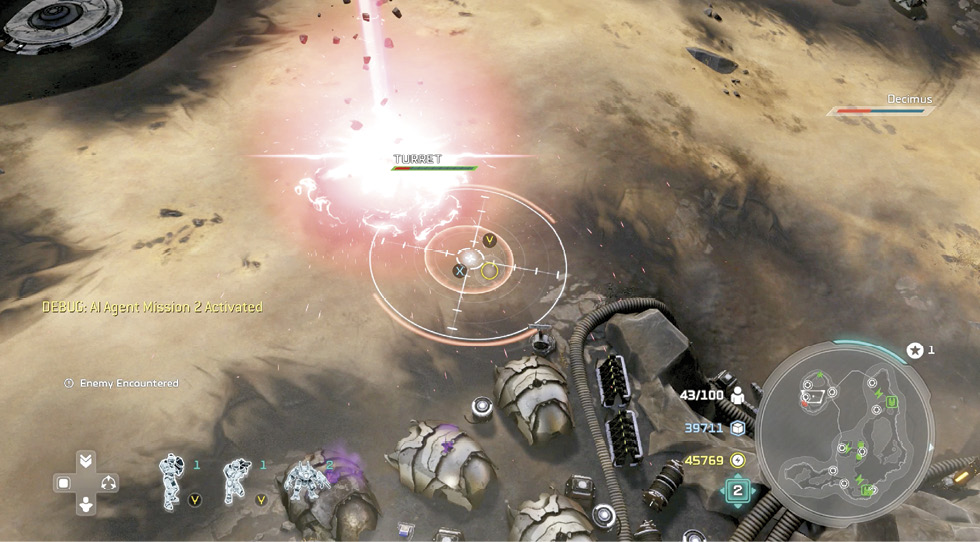
Decimus: Round 2
If your strike force is severely depleted, run your troops all the way back to the portal and teleport back across the chasm to
 for a respite. Immediately switch to your newest base
 and crank out replacement troops, rallying them next to the portal. Once you’ve got a full army again, dive back in! Decimus returns to the field, fully healed and accompanied by two Engineers that train their reconstitution beams on the boss and drop a bluish Overshield bubble around him. Ignore Decimus briefly while you concentrate fire on the Engineers, then lay into him with all guns again.
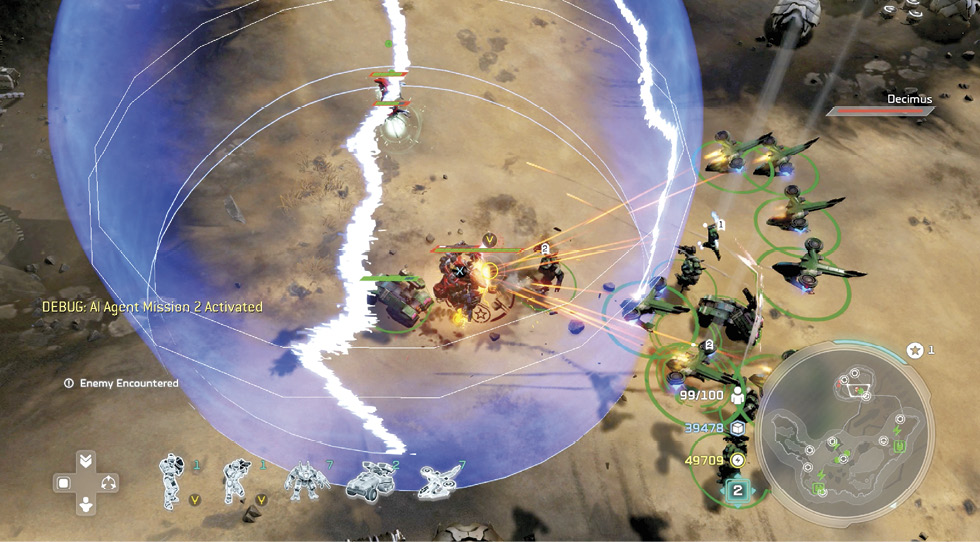
Run away when the red targeting circle reappears around Decimus, then rush in after the orbital blast to take him out for good. The victory is short-lived, however. Upstairs, the Spirit of Fire suddenly comes under brutal assault from the Banished capital ship, the Enduring Conviction.
 “Lights Out”Sculpting the Big Story Beats This mission gives the UNSC the first chance to deal some real damage to the Banished and finally remove an old adversary, Decimus. You get the opportunity to cripple Banished mobility by deactivating the entire portal network. Decisions about When to Introduce New Gameplay Twists It was important that players get the chance to have revenge on Decimus and finish the job they started in “A New Enemy.” Ideas Behind the Map The map was meant to promote the Reaver anti-air unit. It also sought to introduce players to teleportation for Multiplayer. At this point the Banished are using quite a few Leader Powers to protect themselves, and this reinforces the power of the Enduring Conviction looming overhead like the queen on a chessboard; Cutter must remove it. Role the Mission Fulfills in the Story’s Escalation This mission gives you a good start to limiting the Banished movement on the Ark. The next step is to attempt a savage blow to the Banished carrier. How the Mission Evolved Over the Course of Development Originally, the mission design focused on using the Pelican Transport to get around. But the mechanics weren’t very easy to use, so we moved toward using portals, which were point-and-click and more user-friendly and accessible for new players. |