
Prima Games eGuides
primagames.com Browse Redeem a code Help
Halo Wars 2 eGuide
Sign in My Guides

Sign in or create an account

We'll email you a link. No password needed, and if you don't have an account yet, the link makes one.

By creating an account or signing in, you agree to our Terms of Service and Privacy Policy.

Have a password?

Had an account on the old eGuides site, or a code from a printed guide? Help and troubleshooting

Sign in with a password

By signing in, you agree to our Terms of Service and Privacy Policy.

Check your email

A sign-in link is on its way. It works once and expires in 15 minutes. Open it and you're in, with an account if you didn't already have one.

Contents

  • Foreword
    • Making Halo Wars 2
  • Getting Started
    • How to Use This Guide
    • Controls
    • An RTS Primer
    • Deploying Your Army
    • Notes on Damage and Healing
    • Game Phases
    • Other Tips and Tactics
  • Campaign Walkthrough
    • Overview
    • Difficulty Levels
    • Act I
      • Mission: The Signal
      • Mission: A New Enemy
      • Mission: Ascension
      • Mission: One Three Zero
      • Mission: The Cartographer
    • Act II
      • Mission: Lights Out
      • Mission: From the Deep
      • Mission: Hold the Line
      • Mission: Under the Dark
    • Act III
      • Mission: The Foundry
      • Mission: The Halo
      • Mission: Last Stand
  • Multiplayer
    • The HUD
    • Game Modes
    • The Factions
    • Choosing a Leader
    • Combat
    • Choosing Your Strategy
    • Multiplayer Atlas
      • Map Features
      • Badlands
      • Sentry
      • Bedrock
      • Ashes
      • Highway
      • Rift
      • Vault
      • Frontier
  • Interactive MP Maps
    • Badlands
      • Domination: 1v1
      • Domination: 2v2
      • Deathmatch: 1v1
      • Deathmatch: 2v2
      • Strongholds: 1v1
      • Strongholds: 2v2
    • Sentry
      • Domination: 1v1
      • Domination: 2v2
      • Deathmatch: 1v1
      • Deathmatch: 2v2
      • Strongholds: 1v1
      • Strongholds: 2v2
    • Bedrock
      • Domination: 1v1
      • Domination: 2v2
      • Domination: 3v3
      • Deathmatch: 1v1
      • Deathmatch: 2v2
      • Deathmatch: 3v3
      • Strongholds: 1v1
      • Strongholds: 2v2
      • Strongholds: 3v3
    • Ashes
      • Domination: 1v1
      • Domination: 2v2
      • Domination: 3v3
      • Deathmatch: 1v1
      • Deathmatch: 2v2
      • Deathmatch: 3v3
      • Strongholds: 1v1
      • Strongholds: 2v2
      • Strongholds: 3v3
    • Highway
      • Domination: 1v1
      • Domination: 2v2
      • Domination: 3v3
      • Deathmatch: 1v1
      • Deathmatch: 2v2
      • Deathmatch: 3v3
      • Strongholds: 1v1
      • Strongholds: 2v2
      • Strongholds: 3v3
    • Rift
      • Domination: 1v1
      • Domination: 2v2
      • Domination: 3v3
      • Deathmatch: 1v1
      • Deathmatch: 2v2
      • Deathmatch: 3v3
      • Strongholds: 1v1
      • Strongholds: 2v2
      • Strongholds: 3v3
    • Vault
      • Domination: 1v1
      • Domination: 2v2
      • Domination: 3v3
      • Deathmatch: 1v1
      • Deathmatch: 2v2
      • Deathmatch: 3v3
      • Strongholds: 1v1
      • Strongholds: 2v2
      • Strongholds: 3v3
    • Frontier
      • Domination: 1v1
      • Domination: 2v2
      • Domination: 3v3
      • Deathmatch: 1v1
      • Deathmatch: 2v2
      • Deathmatch: 3v3
      • Strongholds: 1v1
      • Strongholds: 2v2
      • Strongholds: 3v3
  • Blitz
    • Core Concepts
    • The Proving Grounds
    • Blitz Basics
    • Firefight Basics
    • Card Basics
    • Deck Basics
    • Recommended Decks
    • UNSC Card Tables
    • Banished Card Tables
    • Blitz Card Gallery
      • Blitz Cards: A-D
      • Blitz Cards: E-K
      • Blitz Cards: L-S
      • Blitz Cards: T-Z
  • Leaders
    • Overview
    • UNSC Leaders
    • Banished Leaders
  • Structures
    • Overview
    • Bases
      • About Bases
      • UNSC Bases
      • Banished Bases
    • Minibases
      • About Minibases
      • UNSC Minibases
      • Banished Minibases
    • Economy Structures
      • About Economy Structures
      • UNSC Economy Structures
      • Banished Economy Structures
    • Advanced Unit Structures
      • About Advanced Unit Structures
      • UNSC Advanced Unit Structures
      • Banished Advanced Unit Structures
    • Defensive Structures
      • About Defensive Structures
      • UNSC Defensive Structures
      • Banished Defensive Structures
  • Units
    • Overview
    • Infantry Units
      • About Infantry Units
      • UNSC Infantry Units
      • Banished Infantry Units
    • Vehicles
      • About Vehicles
      • UNSC Vehicles
      • Banished Vehicles
    • Air Units
      • About Air Units
      • UNSC Air Units
      • Banished Air Units
    • Hero Units
      • About Hero Units
      • UNSC Hero Units
      • Banished Hero Units
    • Super Units
      • About Super Units
      • UNSC Super Unit
      • Banished Super Unit
    • Ultimate Units
      • About Ultimate Units
      • UNSC Ultimate Unit
      • Banished Ultimate Unit
  • Extras
    • Achievements
    • Skulls
    • Phoenix Logs
  • Concept Art Gallery
    • Atriox
    • Grav Mace
    • Spirit of Fire
    • Jerome Helmet
    • Environments

Halo Wars 2 Guide › Blitz

Core Concepts

Blitz does away with the base-building, research, and unit-training found in other game modes. Instead, this card-based game mode features simplified resource management and accelerated army growth. The result is a fast-paced and competitive test of skill and strategy.

Halo Wars 2’s Blitz menu also offers Firefight—a sub-mode that brings the same mechanics to a prolonged battle against wave after wave of AI-controlled enemy units.

Playing Blitz Cards

Your card hand consists of four Blitz cards drawn from a 12-card deck. Each card in your hand carries a specific Energy cost. Playing a card automatically deducts the required Energy from your reserves, after which the card summons the corresponding unit or activates the indicated Power. The played card is then placed on the bottom of your deck, and a new card is added to your hand.
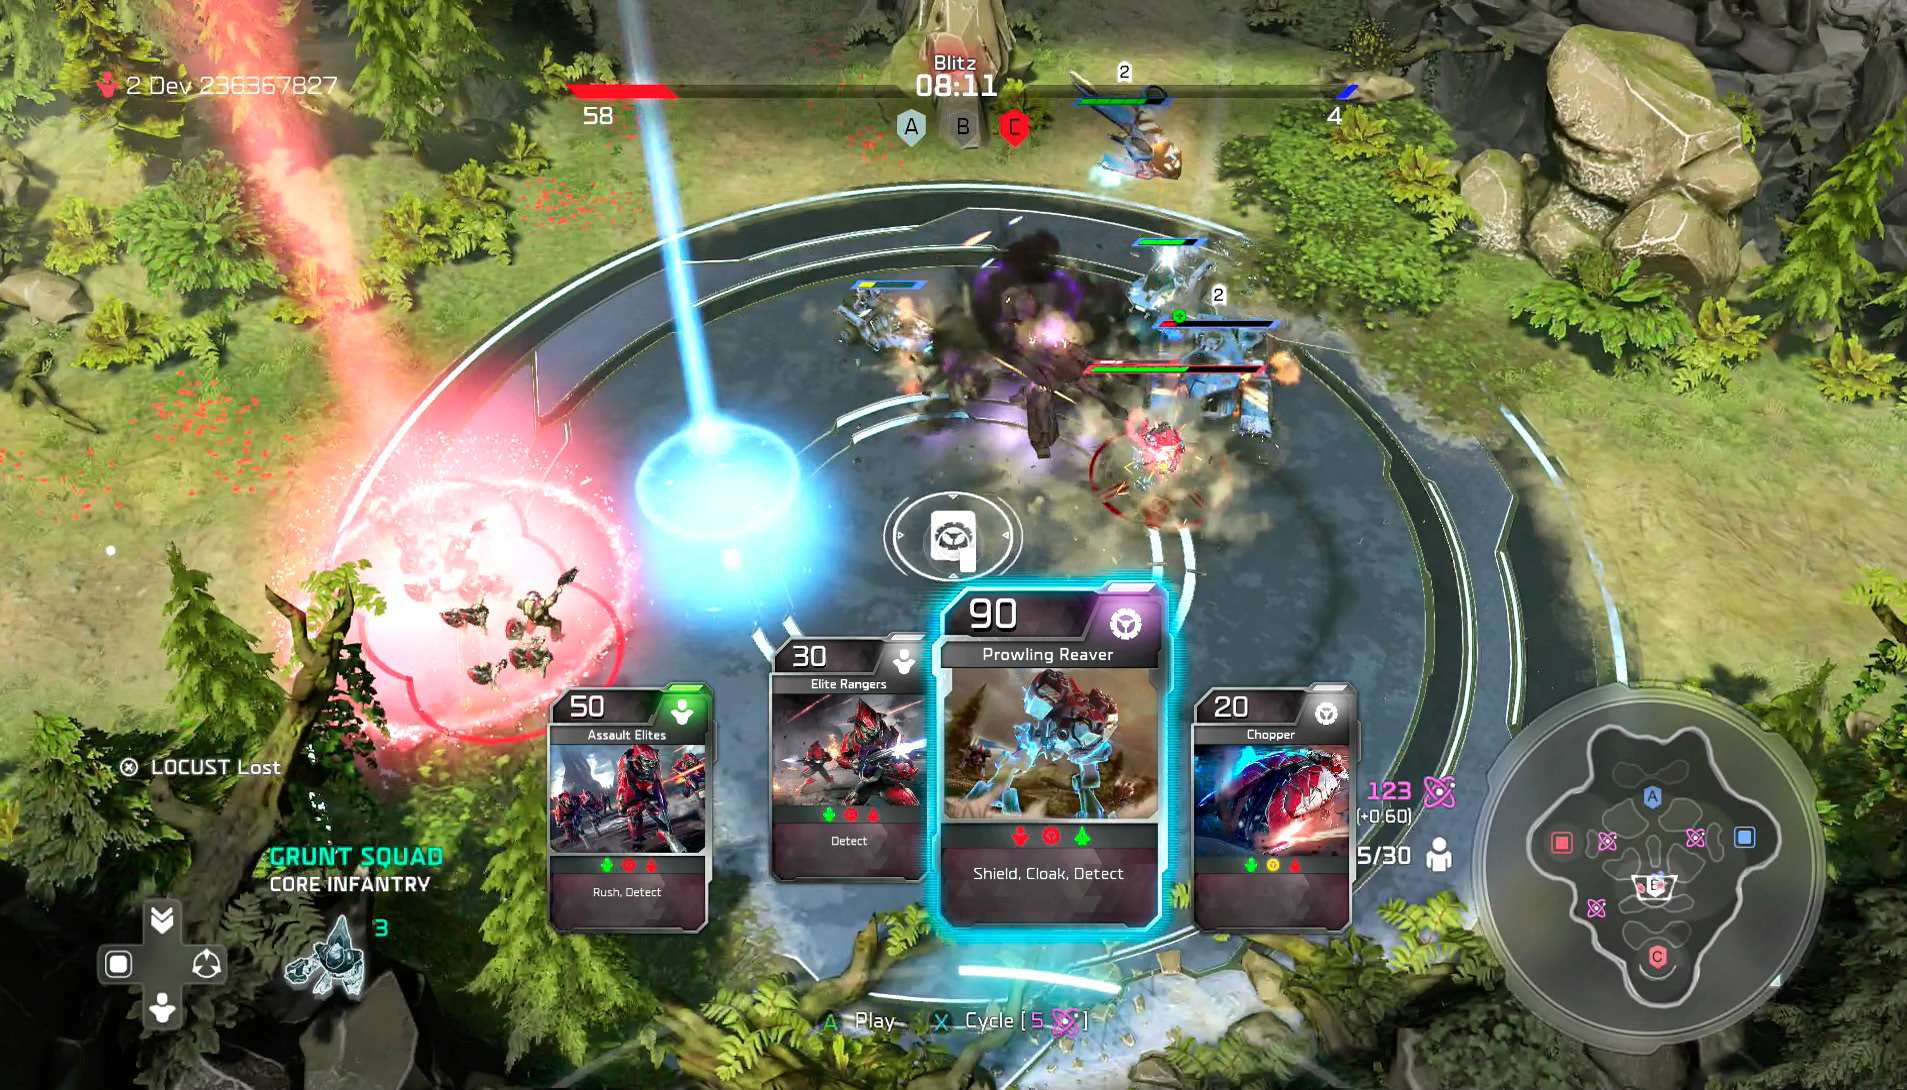
You also have the option to “cycle” cards. This process allows you to move a target card back into your deck, permitting a new card to take its place in your hand. Cycling carries a flat fee of five Energy per use, regardless of a card’s cost or rarity.

When you play a unit card, the corresponding unit instantly appears at your current location. In most cases, summoning a unit directly to the battlefield results in Deployment Fatigue. Units afflicted by Deployment Fatigue suffer a 50 percent penalty to health and damage for eight seconds. If the fatigued unit avoids taking damage during this time, it recovers all its health. If not, the unit’s health remains compromised even after the effects of Deployment Fatigue fade.

Although some units are immune to the effects of Deployment Fatigue, summoning units to your home base is the best way to ensure your reinforcements arrive at full strength.

Managing Energy

Blitz contains no Supply or Power—the only available resource comes in the form of Energy. Energy is consumed each time you play (or cycle) a card, so the more Energy you gather, the better.

Blitz and Firefight both feature Energy Crates that contain clusters of Energy Cells. In Blitz, collecting these Cells increases the rate of your Energy income. In Firefight, collecting a Cell instantly adds a set amount of Energy to your reserves.
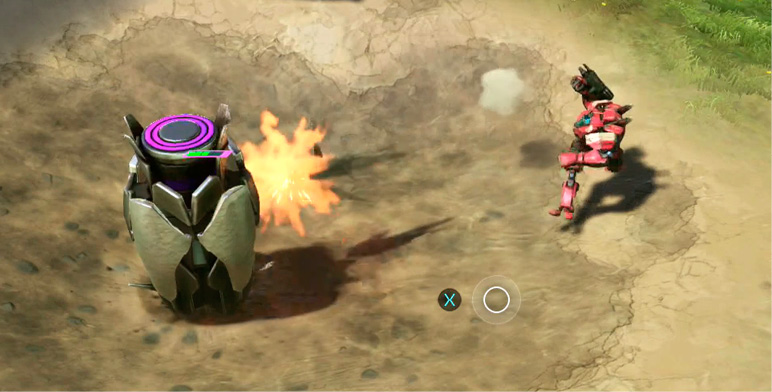
Claiming a dropped Energy Crate is a two-part process. First you must destroy the Crate; then you must collect the revealed Energy Cells. While any unit capable of attacking can destroy an Energy Crate, only ground units can collect loose Energy Cells.

Each time you lose a unit, you receive a 50 percent refund for that unit’s Energy cost. This Energy value is distributed evenly across squad-based units, granting a smaller refund each time a squad loses one of its members.

Holding Control Zones
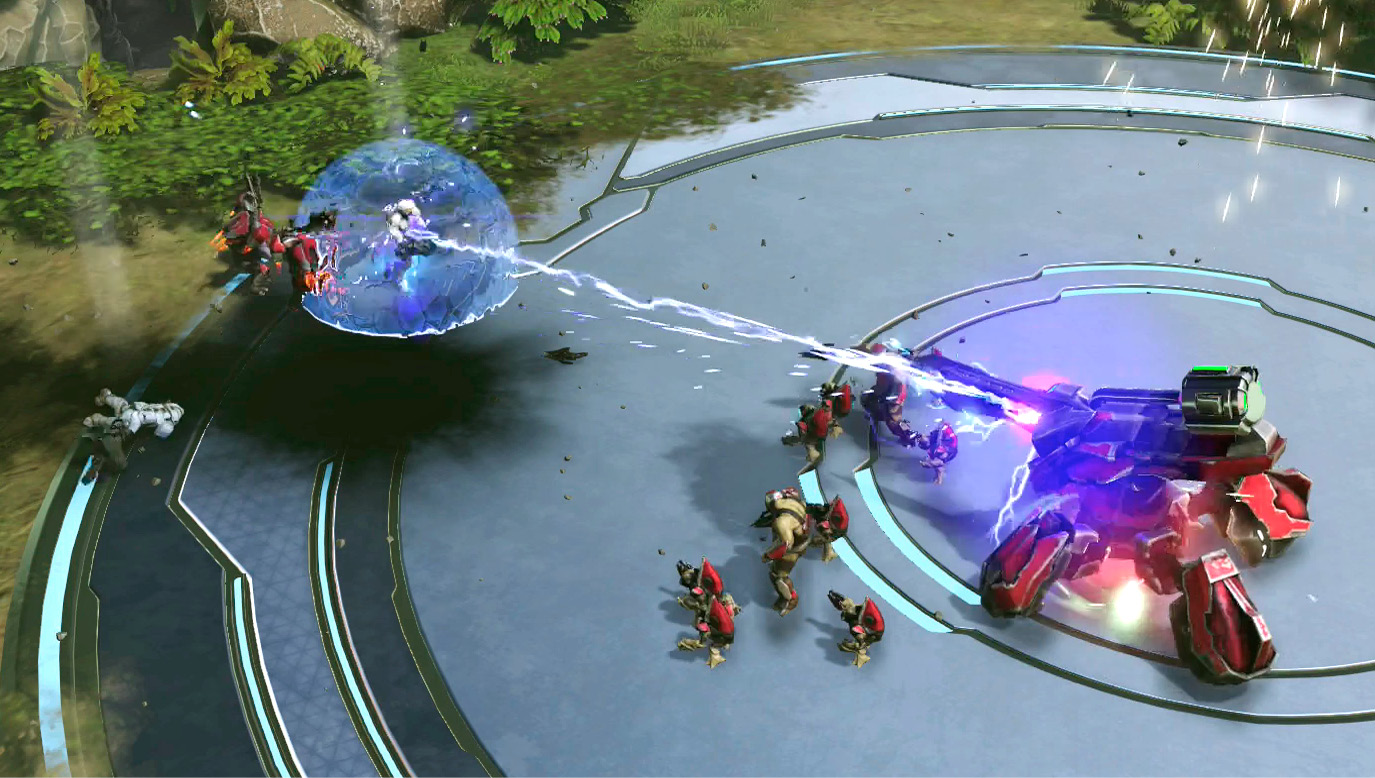
Specific objectives vary between Blitz and Firefight, but claiming and holding Control Zones should always be your priority. The units you summon, the Powers you utilize, and the strategies you employ throughout a match should all support your goal of holding more Control Zones than the opposing team.

Managing Units

Each player has a Population limit of 30 active units. In contrast to other game modes (in which different units carry different Population costs), Blitz counts each active unit as a single member of your Population.
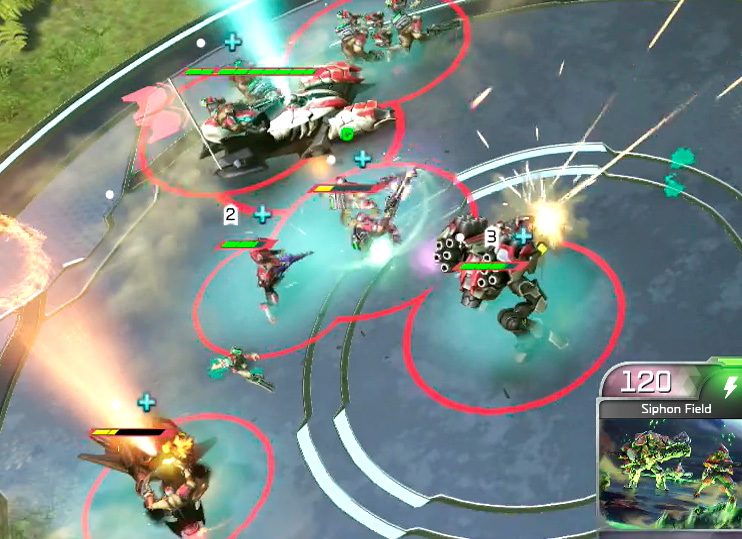
Controlling units in Blitz works just like controlling units in any other game mode—the mechanics behind selecting units, assigning control groups, and issuing basic move/attack/ability commands all remain unchanged. That being said, effectively managing your units is an essential component of succeeding in Blitz. It’s typically much more difficult to stockpile Energy in Blitz than it is to generate resources in other game modes, and a played card can take quite a while to return to your hand. In Blitz, every member of your army represents a significant investment.

Special Units

Unlike the units in other game modes, Blitz units don’t earn veterancy. However, many cards summon veteran units with the corresponding bonuses already in place. You also find cards that include Keywords—these indicate passive abilities, many of which aren’t available to units in other game modes.

Keep reading with a free account

The first 3 sections of Halo Wars 2 are open to everyone. An account opens the rest of it, and every other guide in the archive. It's free, and there's nothing to buy.

Bought guides on the old Prima Games site? Your account and every guide you own moved here, so there's nothing to buy again. Sign in.

Create a free account Or browse our free guides

PreviousStrongholds: 3v3 NextThe Proving Grounds