
Destiny Signature Series Strategy Guide Codex
The Hive
The Hive are an ancient, festering evil. Their antipathy to the Light transcends hatred. To the Hive, the eternal struggle between light and dark is not only a war, it is a crusade—all Light must be devoured so Darkness can reclaim the universe.
Hive Sects: Blood of Oryx, The Scarlet Brood, Spawn of Crota, The Hidden Swarm, Venom of Oryx.
Conflict is not always cleanly black and white; there are complexities, shades, and arguments for either side.
But there are no arguments for the Hive. They are pure evil, and they seek to destroy humanity.
A foul blight on the faded grandeur of the solar system, the Hive must be destroyed.
Hive Weapons
Hive weapons deal a variety of damage types.
The Shredder, Ogre’s Eye Blast,Tomb Ship's turrets, and the Shrieker’s attacks all deal Void damage.
The Boomer, Thrall’s claws, Cursed Thrall’s detonation, and Wizard’s energy bolts all cause Arc damage.
Finally, the Wizard’s poisonous cloud of darkness, the Knight’s Cleaver, and the Ogre’s ground smash all inflict pure Kinetic damage.Weak Points
For all Fallen, their heads are their weak point.
For Ogres, the weak point is still their heads, though it’s more precisely their “eyes.”
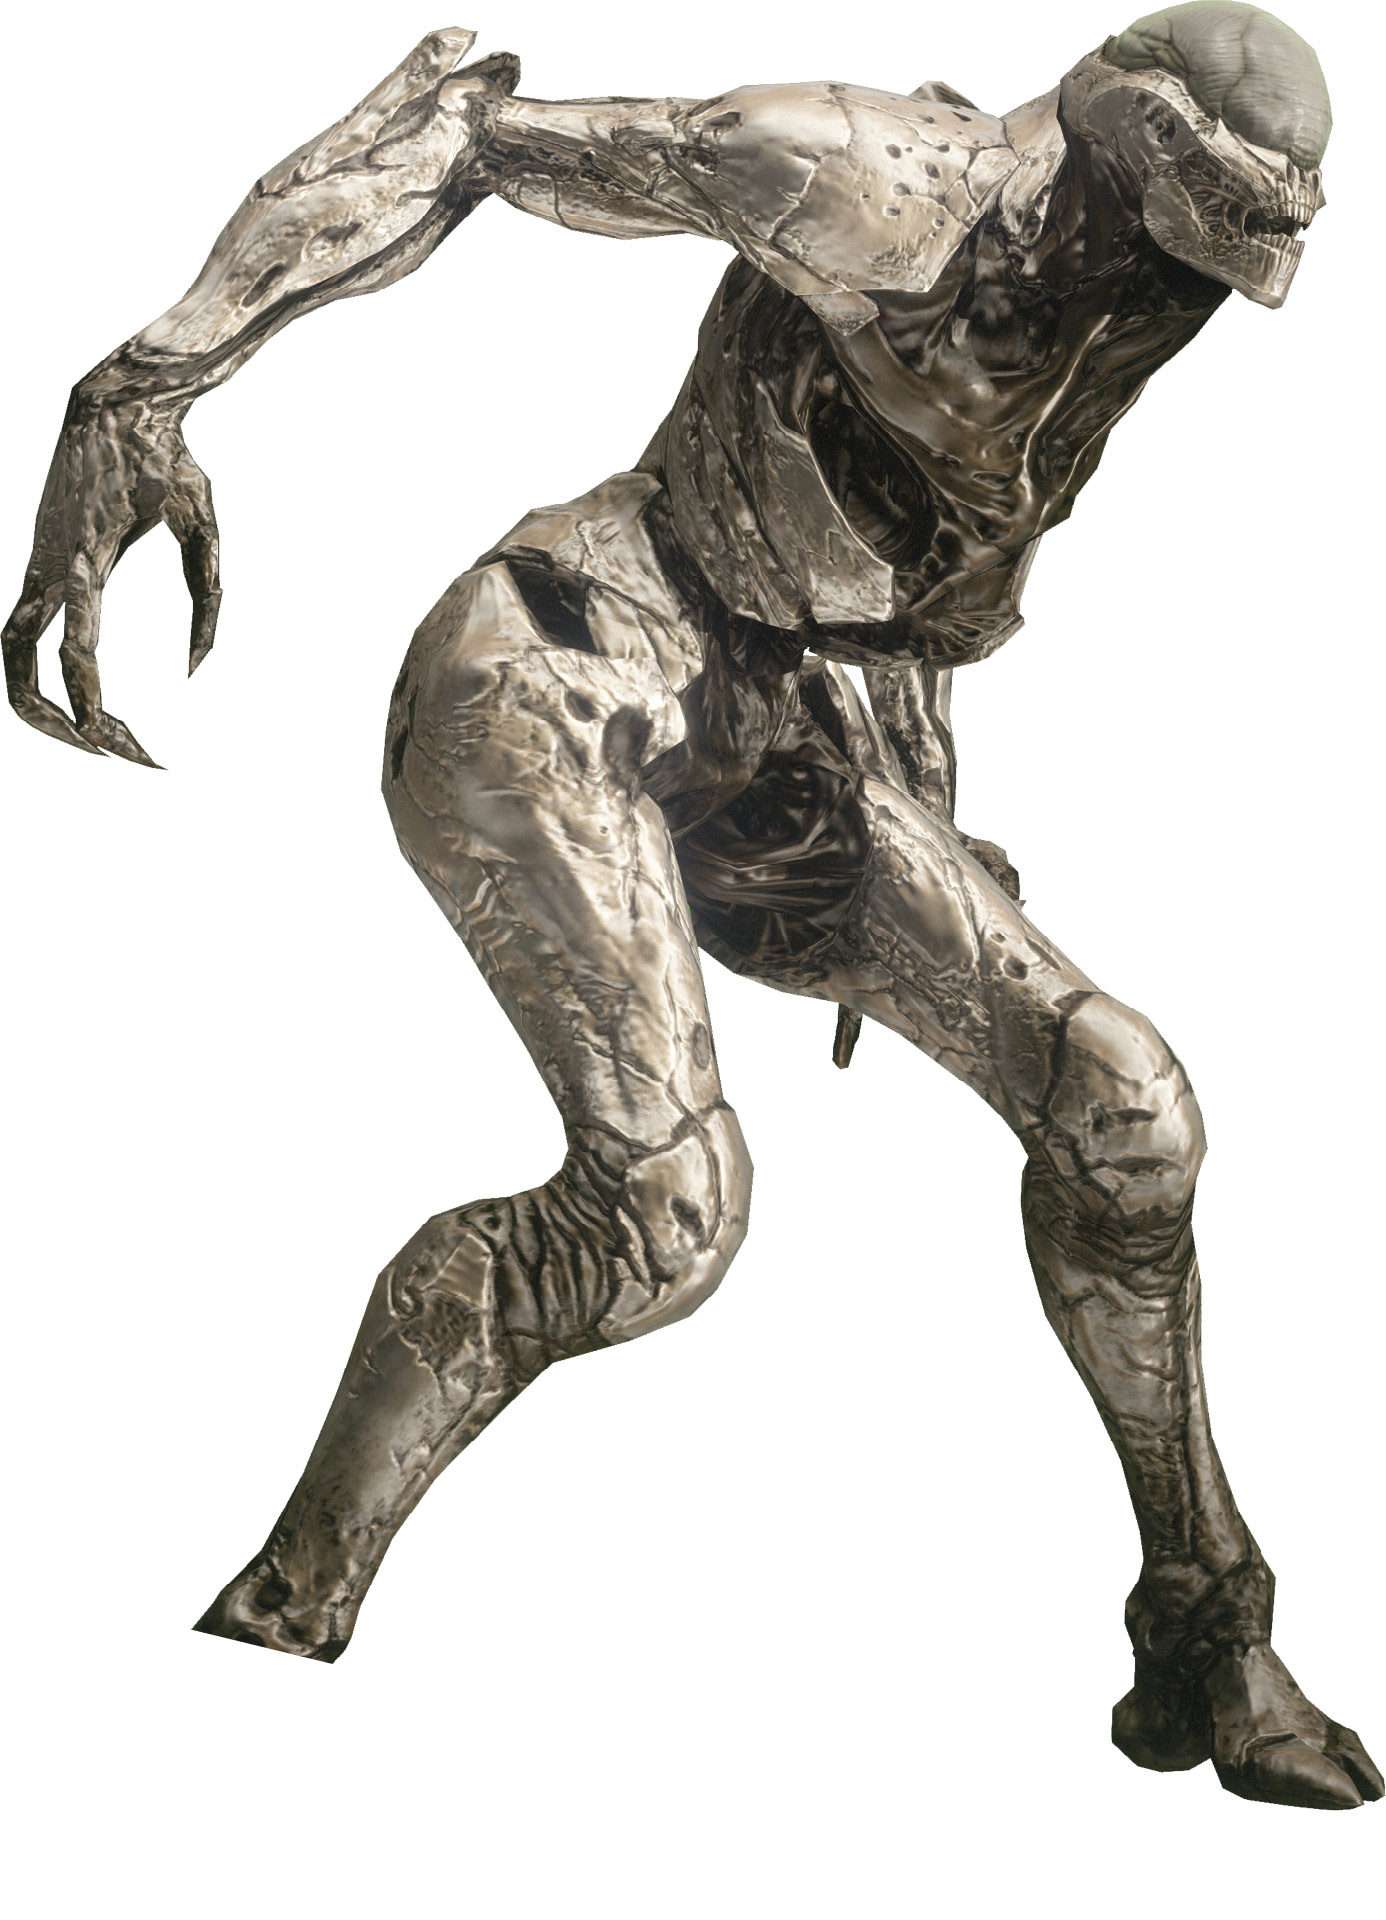
Thrall
Degenerate avatars of rage, Thrall rush blindly into combat to rend and tear with their claws.
Loadout: Claws
Variants: None
Behavior
Thrall are nearly mindless berserker units, charging headlong into melee combat range.
Thrall typically come in large packs, and when they arrive, they quickly swarm the nearest target they can find and attempt to tear it apart.
Tactics
Thrall lack any subtlety whatsoever, which you can exploit in several ways. For example, simply using your movement abilities to float over their heads renders their melee attacks completely ineffective.
However, avoid exposing yourself to other hostile Hive units in the area while doing so, as Thrall can easily force you out of cover.
Because Thrall are melee only, a strong shotgun is highly advisable if you expect to be forced into close-range engagements in tight spaces with packs of Thrall.
Rapid-fire weaponry and persistent area-of-effect grenades can also serve you well against packs of Thrall.
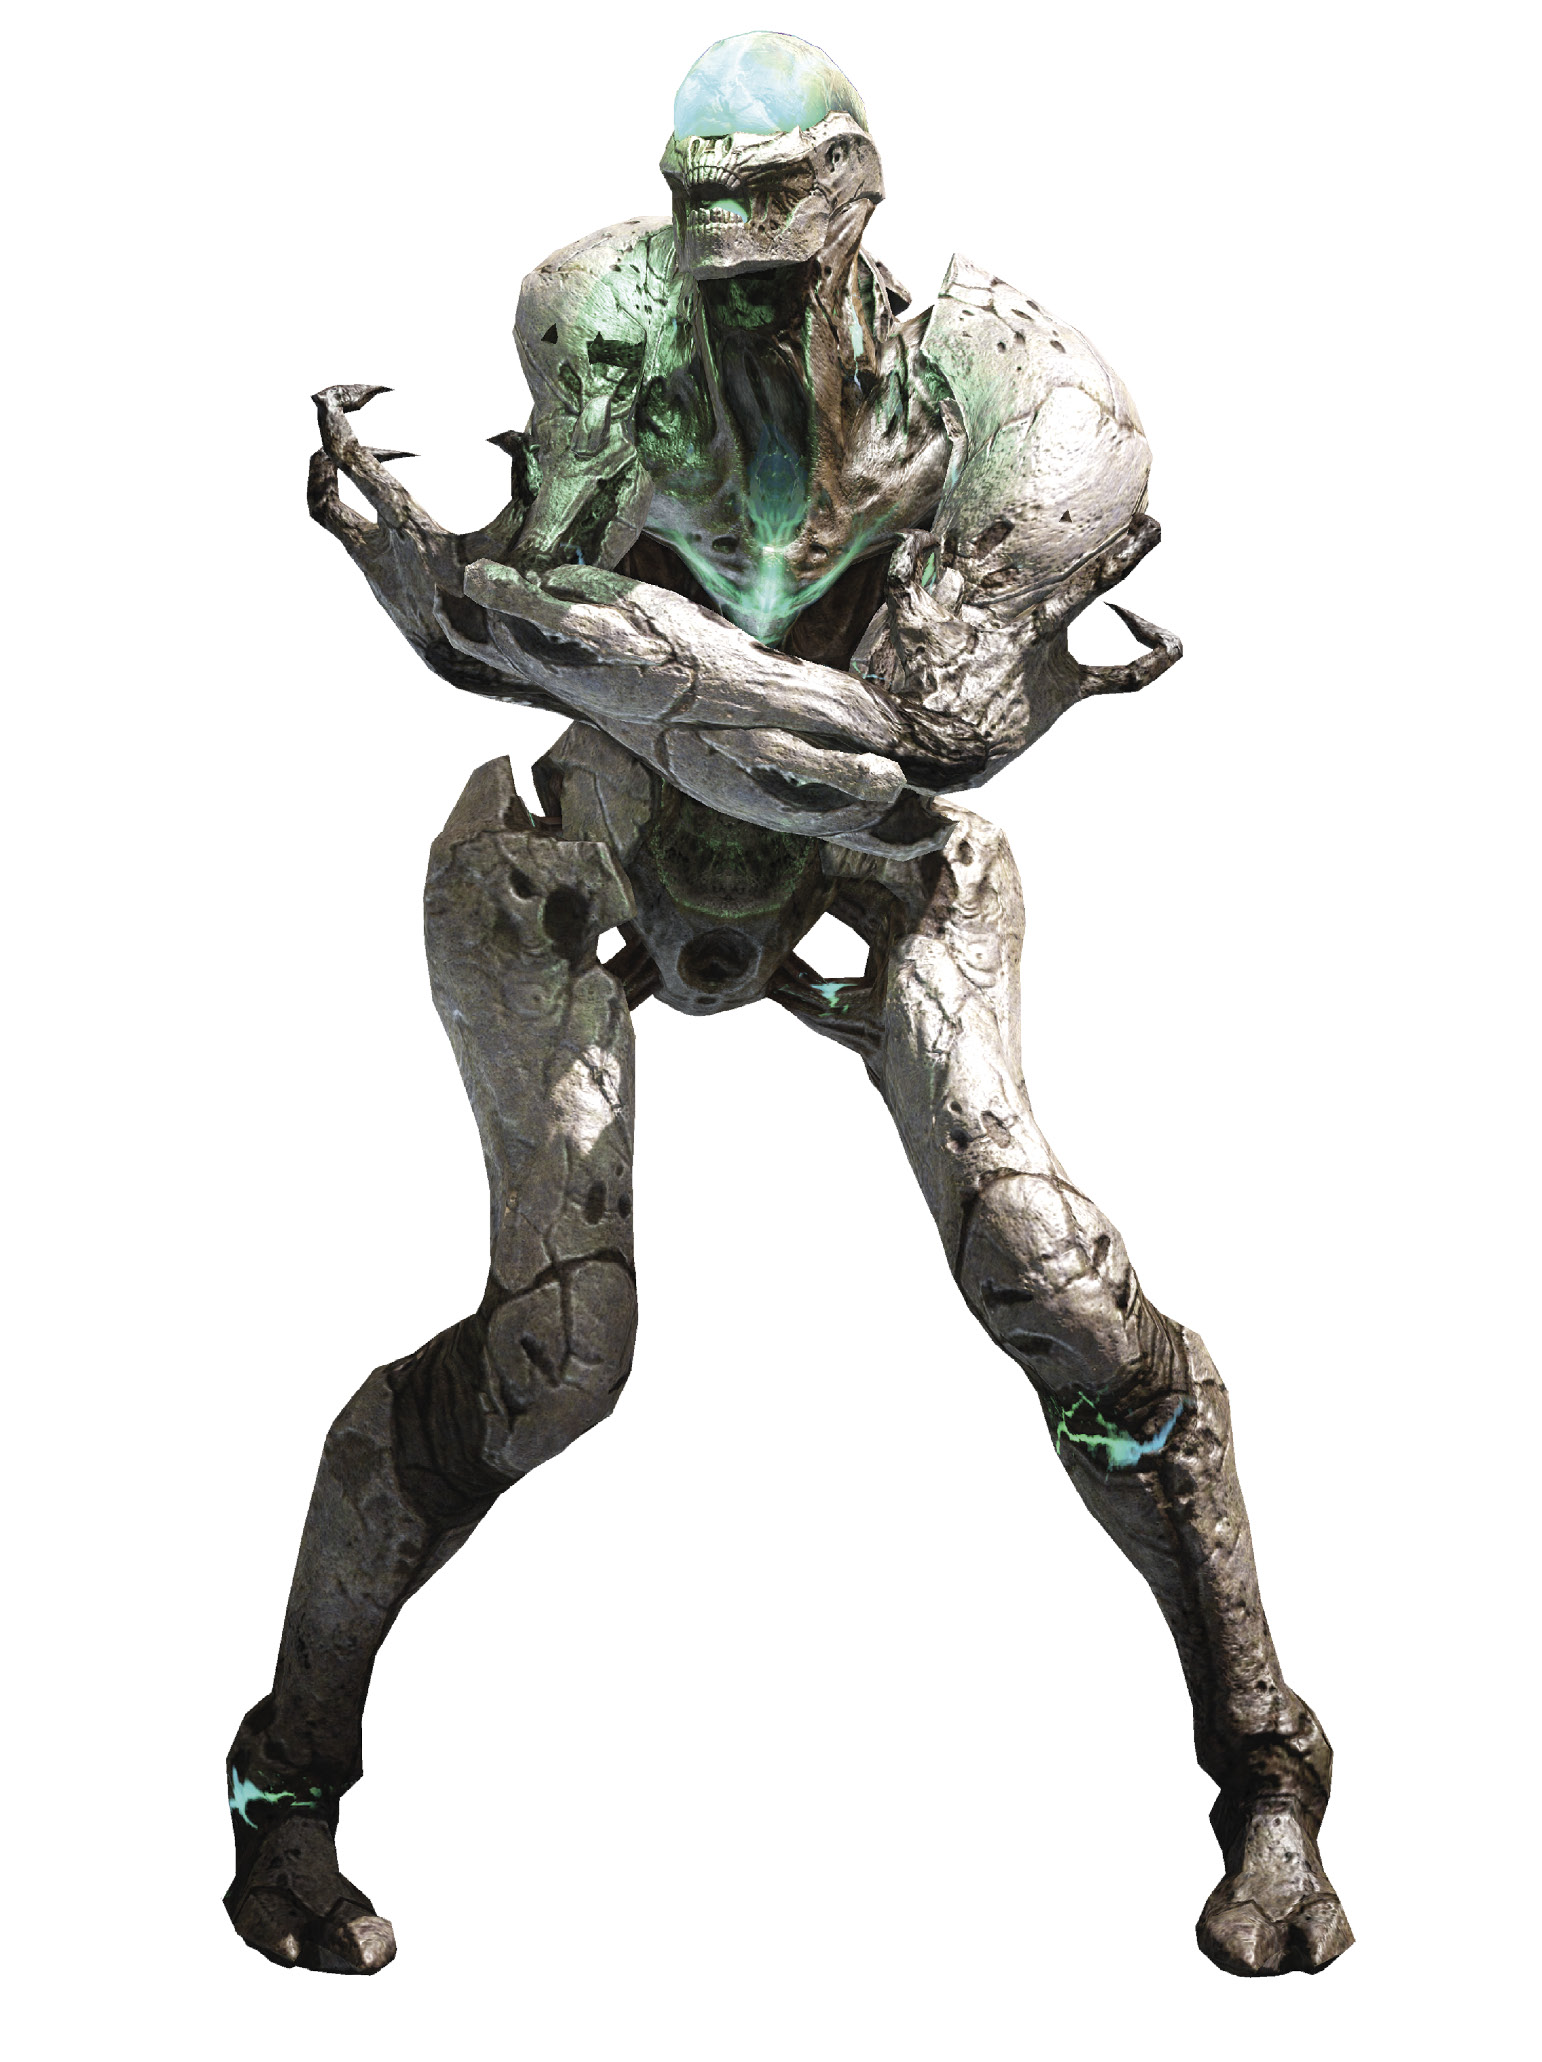
Cursed Thrall
These corrupted Thrall are capable of detonating explosively at short ranges.
Loadout: Detonation
Variants: None
Behavior
As explosive variants of normal Thrall, Cursed Thrall move more slowly. However, when they get into melee range, they explode, dealing damage in a blast of foul energies.
Cursed Thrall will detonate when you destroy them, so be careful about killing them near your teammates! A Cursed Thrall will also harm combatants, so a well placed Cursed Thrall death can take out an entire pack of Thrall.
Cursed Thrall are often interspersed with packs of regular Thrall, and they are a serious threat that you must deal with swiftly. While regular Thrall flush you out of cover, Cursed Thrall detonating nearby while you are taking fire can be fatal, especially on higher difficulty missions.
Tactics
When you spot them on the battlefield, you should make Cursed Thrall priority targets. They are too dangerous to be allowed into melee range, but their detonation can be used as a weapon against other nearby Hive.
Cursed Thrall are a bit slower than normal Thrall, but they tend to be mixed into waves of Thrall. When other Hive are present and bombarding your position, picking them off can be difficult.
Unlike with regular Thrall, avoid using short-range weapons or melee strikes against Cursed Thrall. Simply pick them off from a distance before they can become a threat.
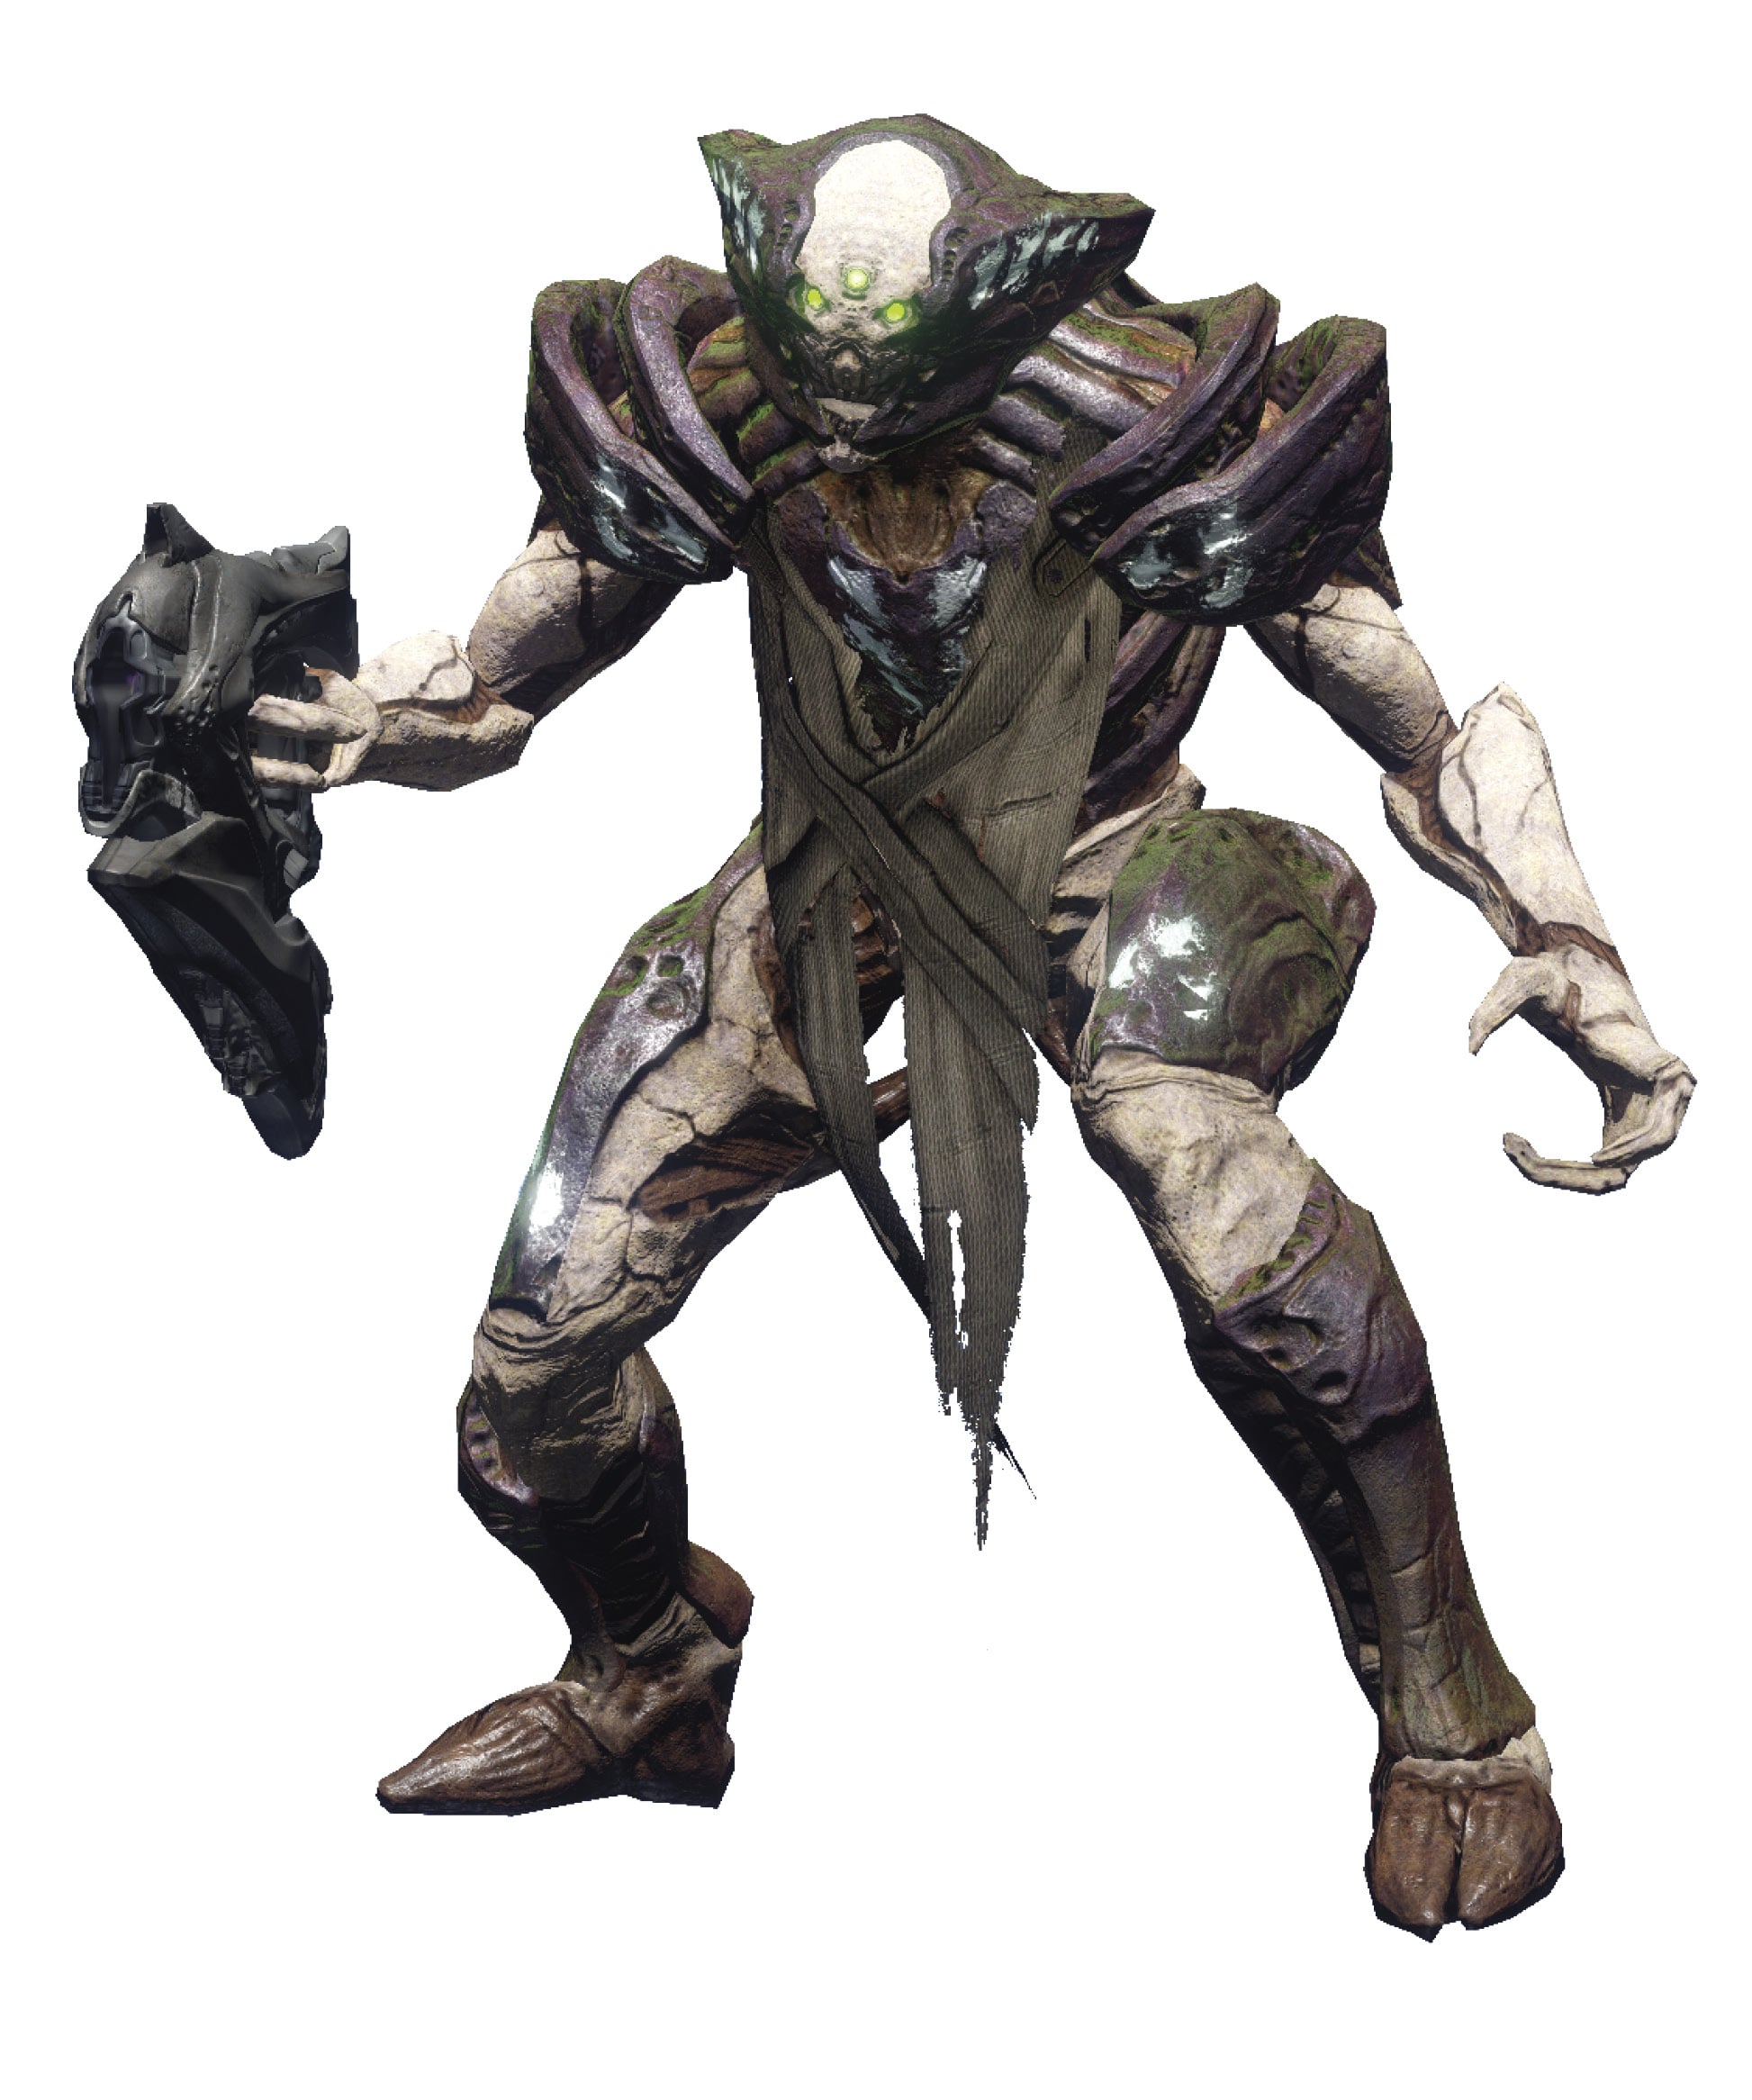
Acolyte
Foul enforcers of the Hive’s black army, Acolytes engage at a distance behind a wall of howling Thrall.
Loadout: Shredder
Variants: Boomer
Behavior
Acolytes are the most common frontline combatants of the Hive forces. More cunning than the ravening Thrall, they behave more closely to the Fallen Dregs, lurking at a distance and taking shots with their Shredders.
Acolytes typically seek out nearby cover and open fire from a distance. Be wary of entrenched Acolytes: just like Dregs, their accuracy and rate of fire increase when they have taken cover.
More infrequently, you may encounter Acolytes armed with Boomers, the Hive’s dangerous explosive weapon. These Acolytes are no more sturdy than their Shredder brethren, but they are considerably more dangerous—make them high-priority targets.
Tactics
Acolytes are fairly weak targets. Use primary weapons, grenades, or melee strikes to take them down quickly.
They are primarily a danger when larger numbers of them engage you in an encounter alongside masses of Thrall and other heavier-hitting Hive forces.
Aim for the head and pick them off quickly. You can often quickly eliminate the Acolytes in a battle before turning your attention to any remaining Hive.
If you’re forced to shift your attention to other targets, you can frequently leave Shredder Acolytes standing as long as you have decent cover. But don’t ignore any Acolytes armed with Boomers, as they can easily flush you out of cover.
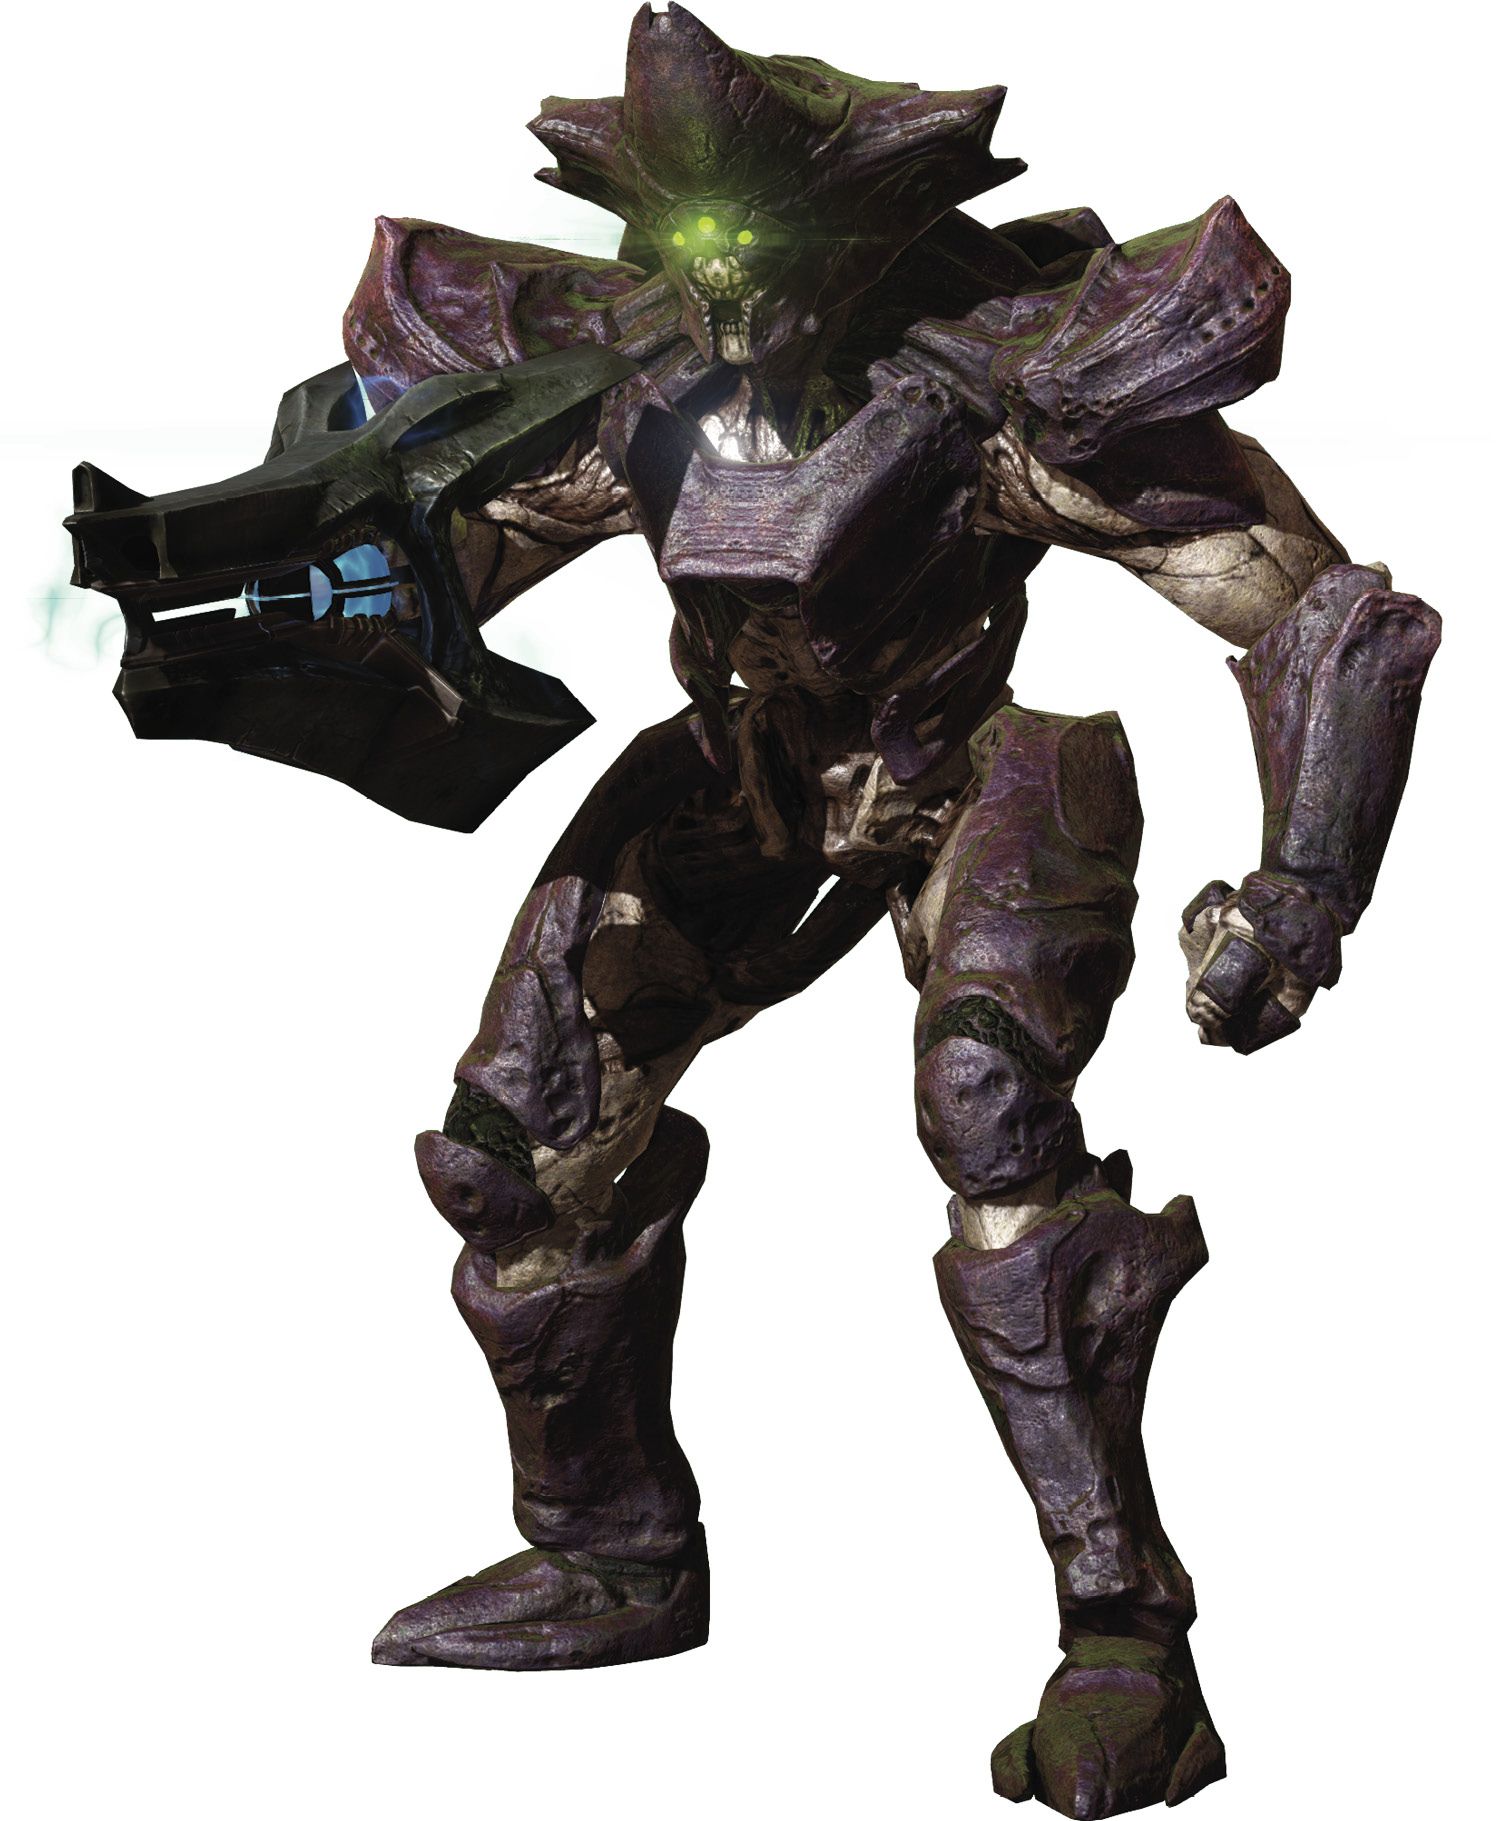
Knight
Powerful frontline warriors of the Hive, Knights stride into battle with thick armor and dark magic.
Loadout: Boomer
Variants: Shredder, Cleaver
Mythic Difficulty: Gain Arc shield
Behavior
Knights are heavily armored frontline enemies. Tougher than Acolytes, their only noticeable weakness is their plodding pace on the battlefield.
Knights are usually armed with a Boomer, a powerful explosive weapon that has a large blast radius. Boomers also make Knights very dangerous because they can flush you out of cover from long range.
They may also appear armed with either a Shredder or the Cleaver. If they do use a Shredder, be wary: while it is usually less dangerous than a Boomer, Knights are more accurate than Acolytes.
Cleaver Knights are a different matter entirely. Armed with a viciously powerful sword, these powerful melee combatants stride into close quarters and attempt to eviscerate you with a single swing.
On top of their inherent durability, Knights can summon a wall of darkness, blocking all incoming damage and restoring their health.
Knights can also go into a berserk rage when their health gets critically low. After this point, each time you damage them, they have a chance of entering a berserk stage. This causes them to regain some health and charge toward you to engage in melee combat, heedless of cover or positioning.
Luckily, the berserk state does wear off after a time. Though it is possible for a Knight to heal up between the wall of darkness and berserking and then berserk a second time later, this is usually rare. It requires an unusual engagement for a Knight to stay alive that long!
Tactics
Dispatch Boomer Knights as quickly as possible. Hit them a few times to trigger their shields, then lay into them when their shields drop.
Do not let Cleaver Knights anywhere near you. If you see them, consider them a priority target on par with Cursed Thrall, even more dangerous than Boomer Knights.
It’s well worth it to burn an offensive super move or use Heavy Weapon ammo on groups of Knights. They are simply too dangerous to leave active for lengthy periods of time during an open firefight against other Hive forces.
You can break a Hive Knight’s wall of darkness with a super move or a rocket, but you’re often better served by waiting out the wall, turning to other targets while it is active, and then finishing the Knight when the shield drops.
Berserking can make a Knight an easy target, but it can also get you into trouble if a Knight berserks at close range and charges you instantly. Once a Knight is weakened, finish it off swiftly; don’t let it linger at low health.
Berserking Cleaver Knights are a panic super-level threat—they can and will kill you and your teammates incredibly quickly. Don’t let them get into range!
On Mythic difficulty, Knights gain yet more durability with Arc Shields. Be absolutely sure to bring a ready source of Arc damage if you anticipate many encounters with Knights during a mission. Knights are already sturdy and dangerous enemies, and the Arc Shield gives them more time to hammer you with long-range bombardment or get into range with their vicious Cleavers.
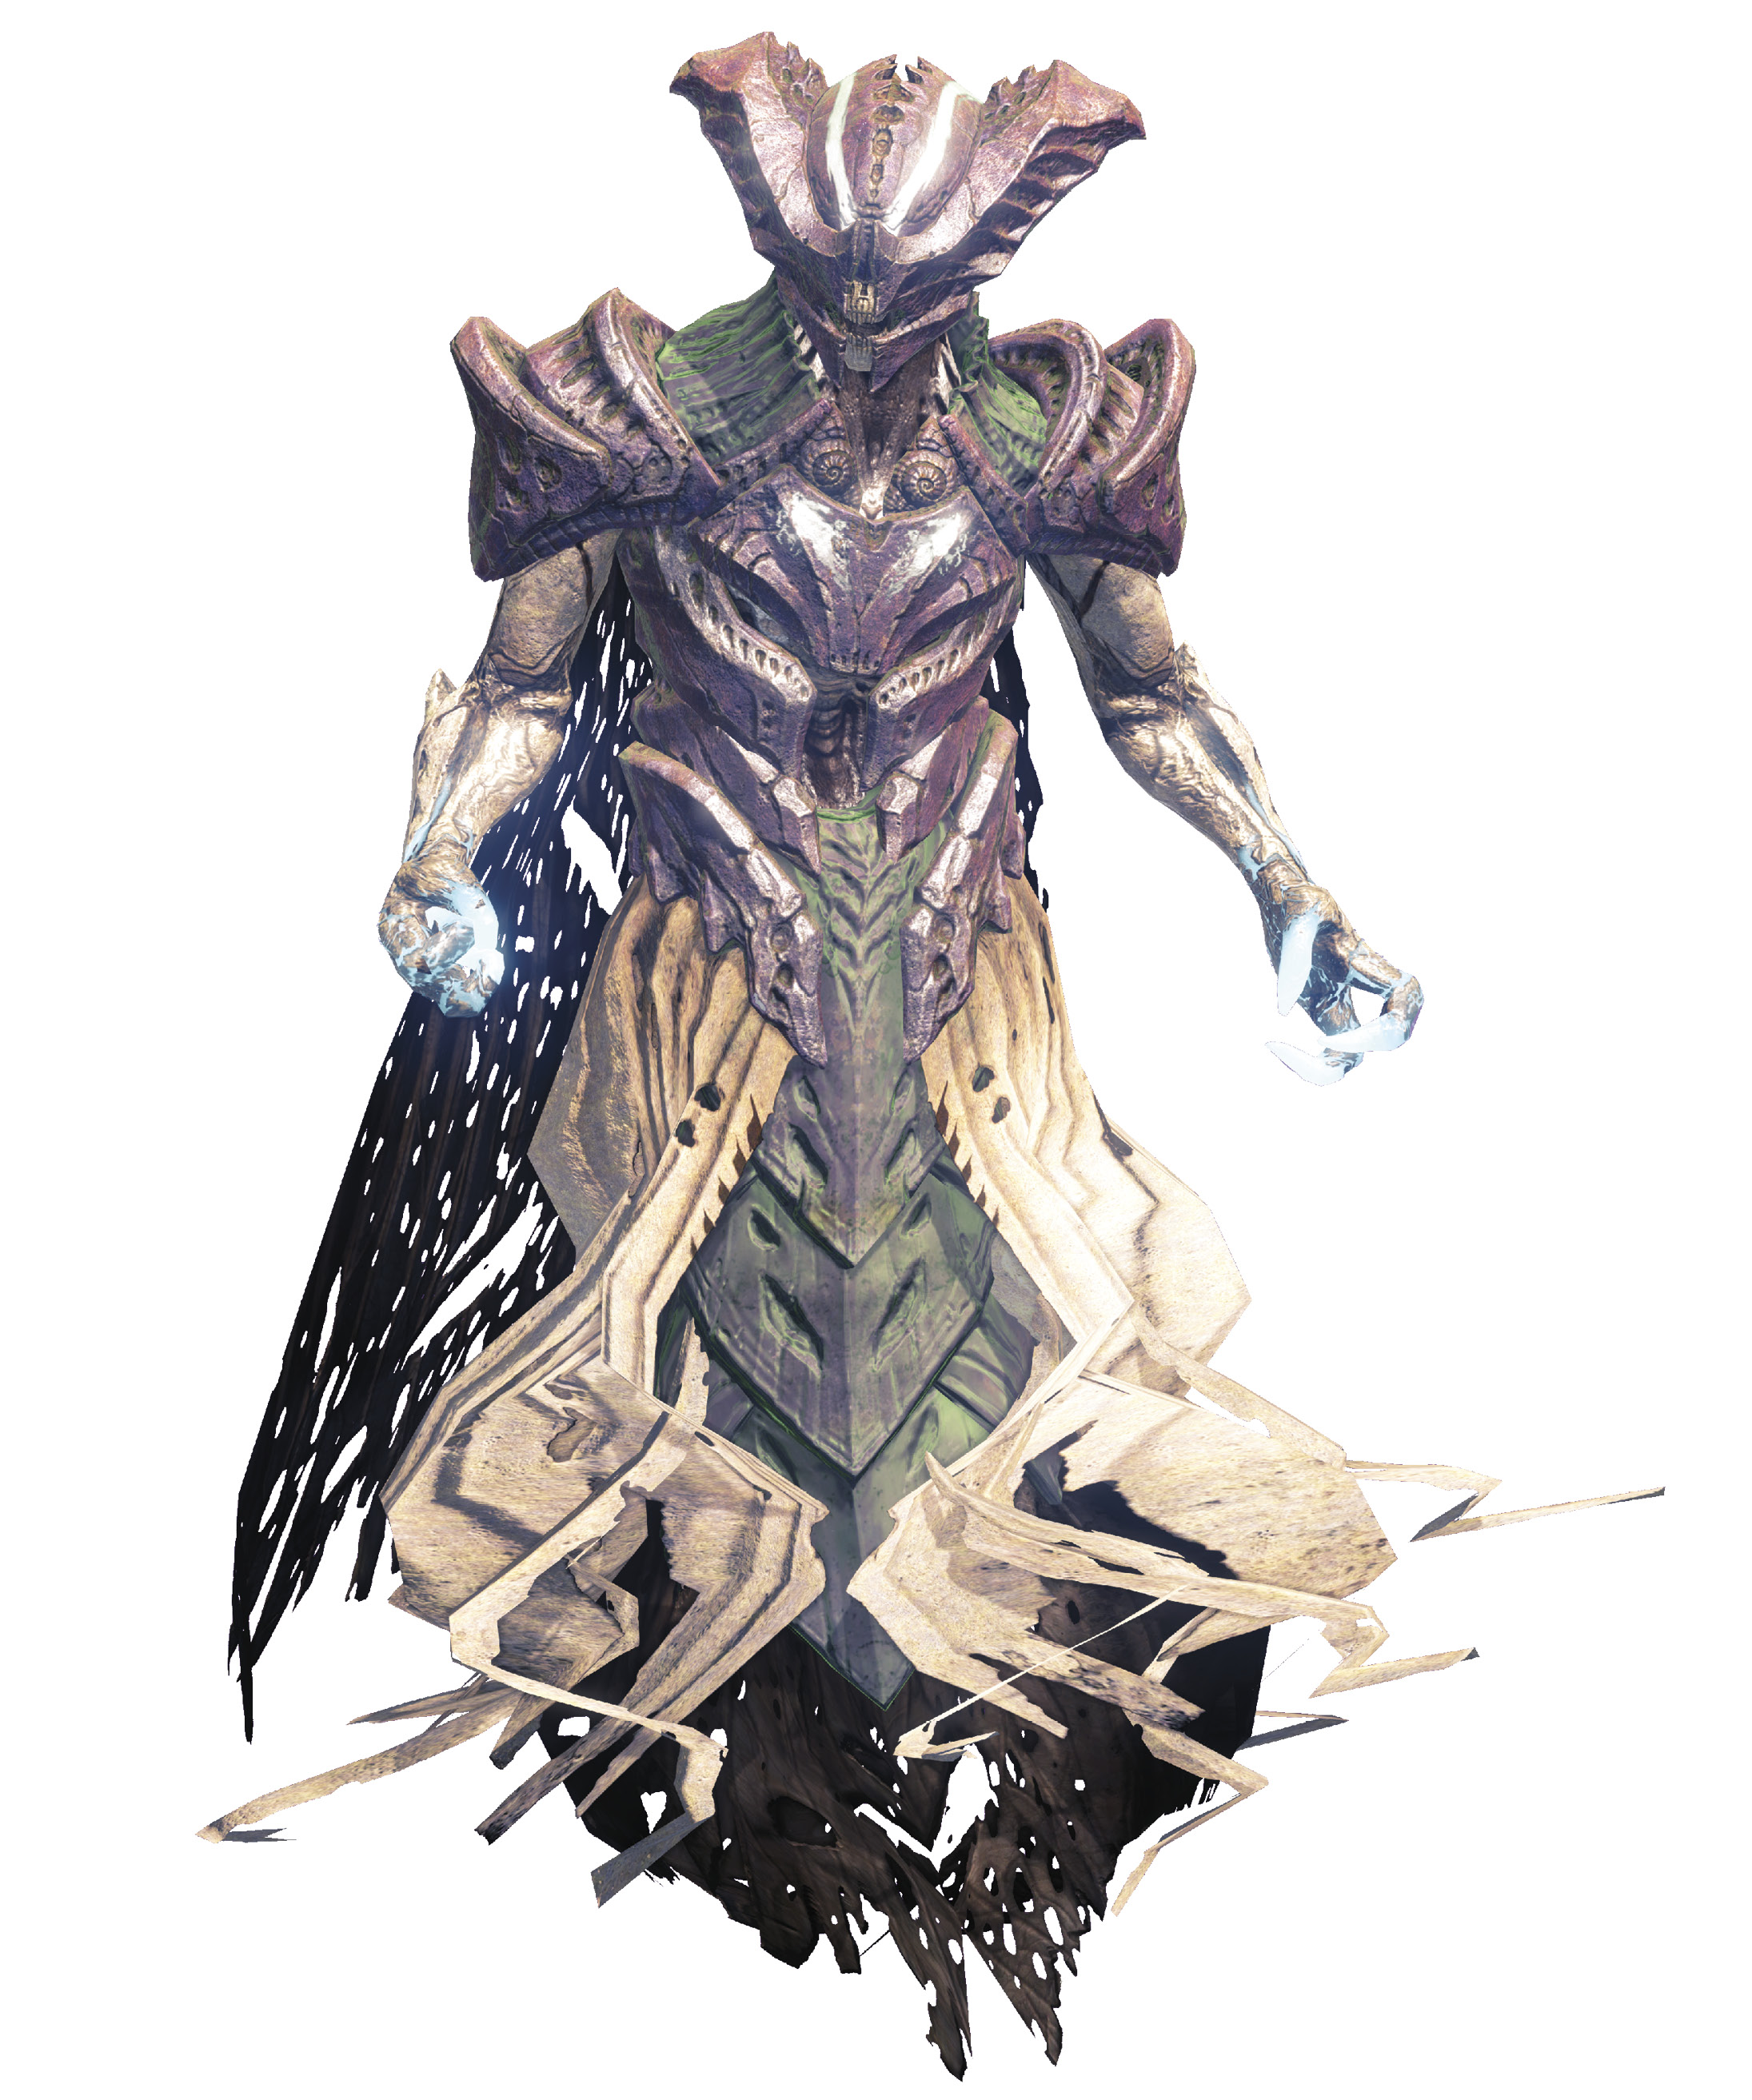
Wizard
Floating above the battlefield, Wizards support Hive forces with what can only be described as dark magic.
Loadout: Darkness Blast, Clouds of Darkness, Solar shield
Variants: None
Behavior
Wizards hover above their Hive minions and bombard Guardians with bolts of raw darkness. These well aimed projectiles are difficult to avoid in the open, but they are slow moving and fairly easy to dodge if you keep them in sight.
In addition to their ranged attack, Wizards can also summon a dark sphere of foul energy. Hive that stand within it are healed, whereas it damages any Guardians caught inside. If you are standing inside when the sphere appears, get out quickly: it damages and dulls your perception.
Wizards come armored with a Solar shield. Although you can take them down fairly quickly once you destroy the shield, they are nimble targets in the air. This makes them poor targets for grenades or rockets.
On higher difficulty tiers, Wizards’ basic Darkness Blast attack becomes noticeably faster and more deadly, increasing their lethality.
Tactics
Wizards are dangerous opponents, and although they rank slightly below Boomer or Cleaver Knights in terms of immediate threat, you should dispatch them as swiftly as possible.
Wizards hovering around the battle while you are fighting, healing Hive and pelting you with seeking bolts increase the difficulty of any encounter.
To take them down quickly, heavy machinegun fire or sniper shots work quite well. A blast from a fusion rifle can hit them from a decent distance, as well.
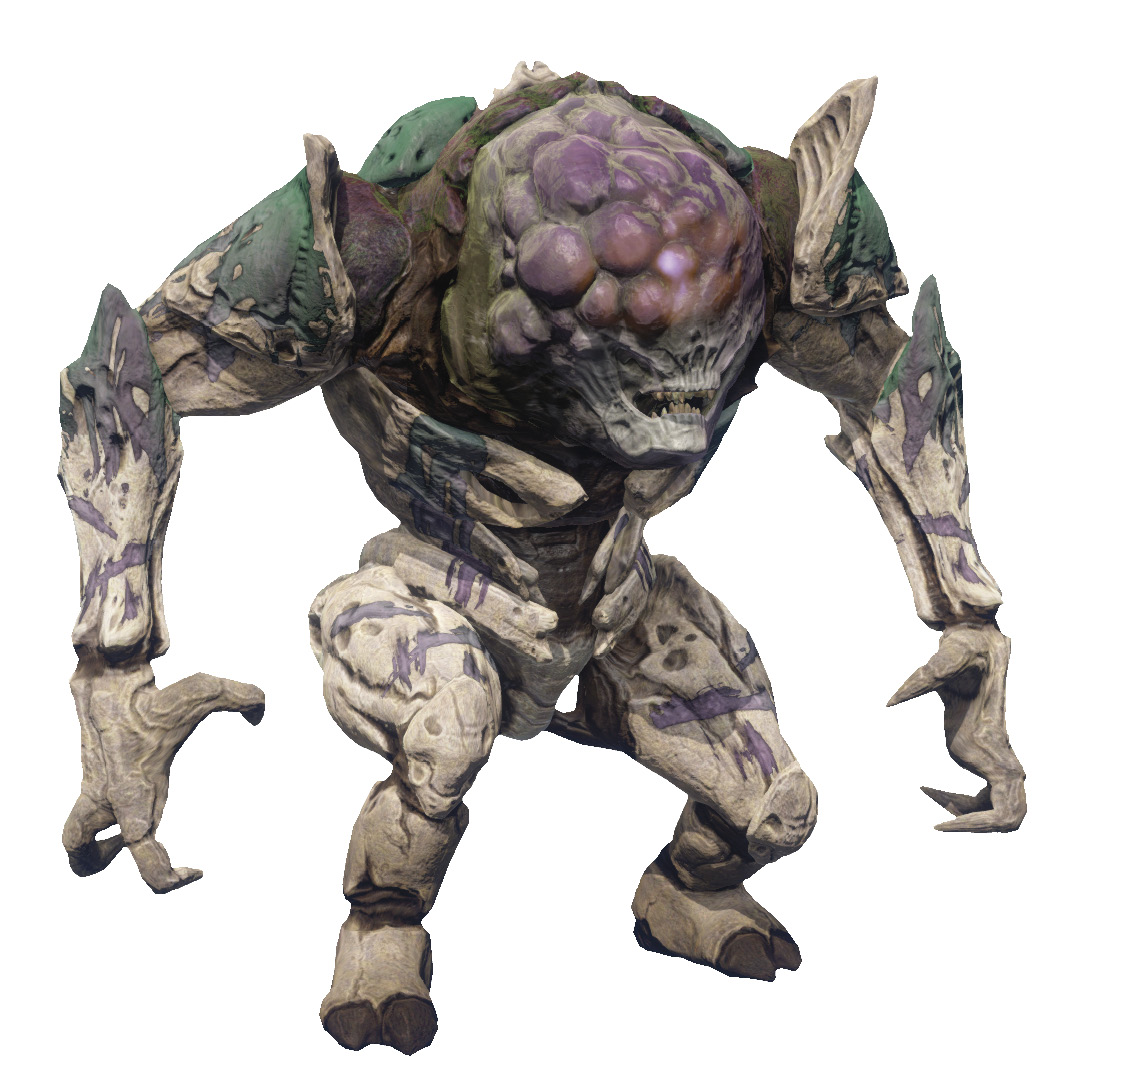
Ogre
Mutated masses of muscle and fury, Ogres are living Hive battering rams.
Loadout: Eye Blast, Ground Slam
Variants: None
Behavior
Ogres are as brutally direct as the Thrall, with two major differences: they are far stronger and tougher, and they have a very dangerous projectile weapon in the form of their Eye Blast.
When an Ogre spots a Guardian at a distance, it unleashes a continuous beam of dark Void energy from its eye. This attack is very dangerous and damaging, so avoid getting caught inside the beam for any length of time.
Additionally, the Ogre prefers to rush into melee range, where it can unleash a devastating ground smash that causes damage in a wide area around itself.
Like Knights, Ogres can enter a berserk state when they get low on health. But unlike Knights, Ogres always berserk when they get low! Don’t leave heavily damaged Ogres roaming the battlefield; take them down quickly.
Tactics
The Ogre is another high-threat Hive target that you must dispatch immediately, or else you risk it taking you down alone.
Super attacks and Heavy Weapon ammo are well worth expending when you spot an Ogre. Thankfully, they are among the rarest of Hive forces, but respect the threat they represent in battle when they do appear.
It is possible to evade an Ogre at close range by jumping, but unlike the Thrall or Cleaver Knights, the Ogre has a dangerous ranged attack that it can follow up with. That said, if given the choice between definitely eating a ground pound and possibly getting hit by an eye beam, jump!
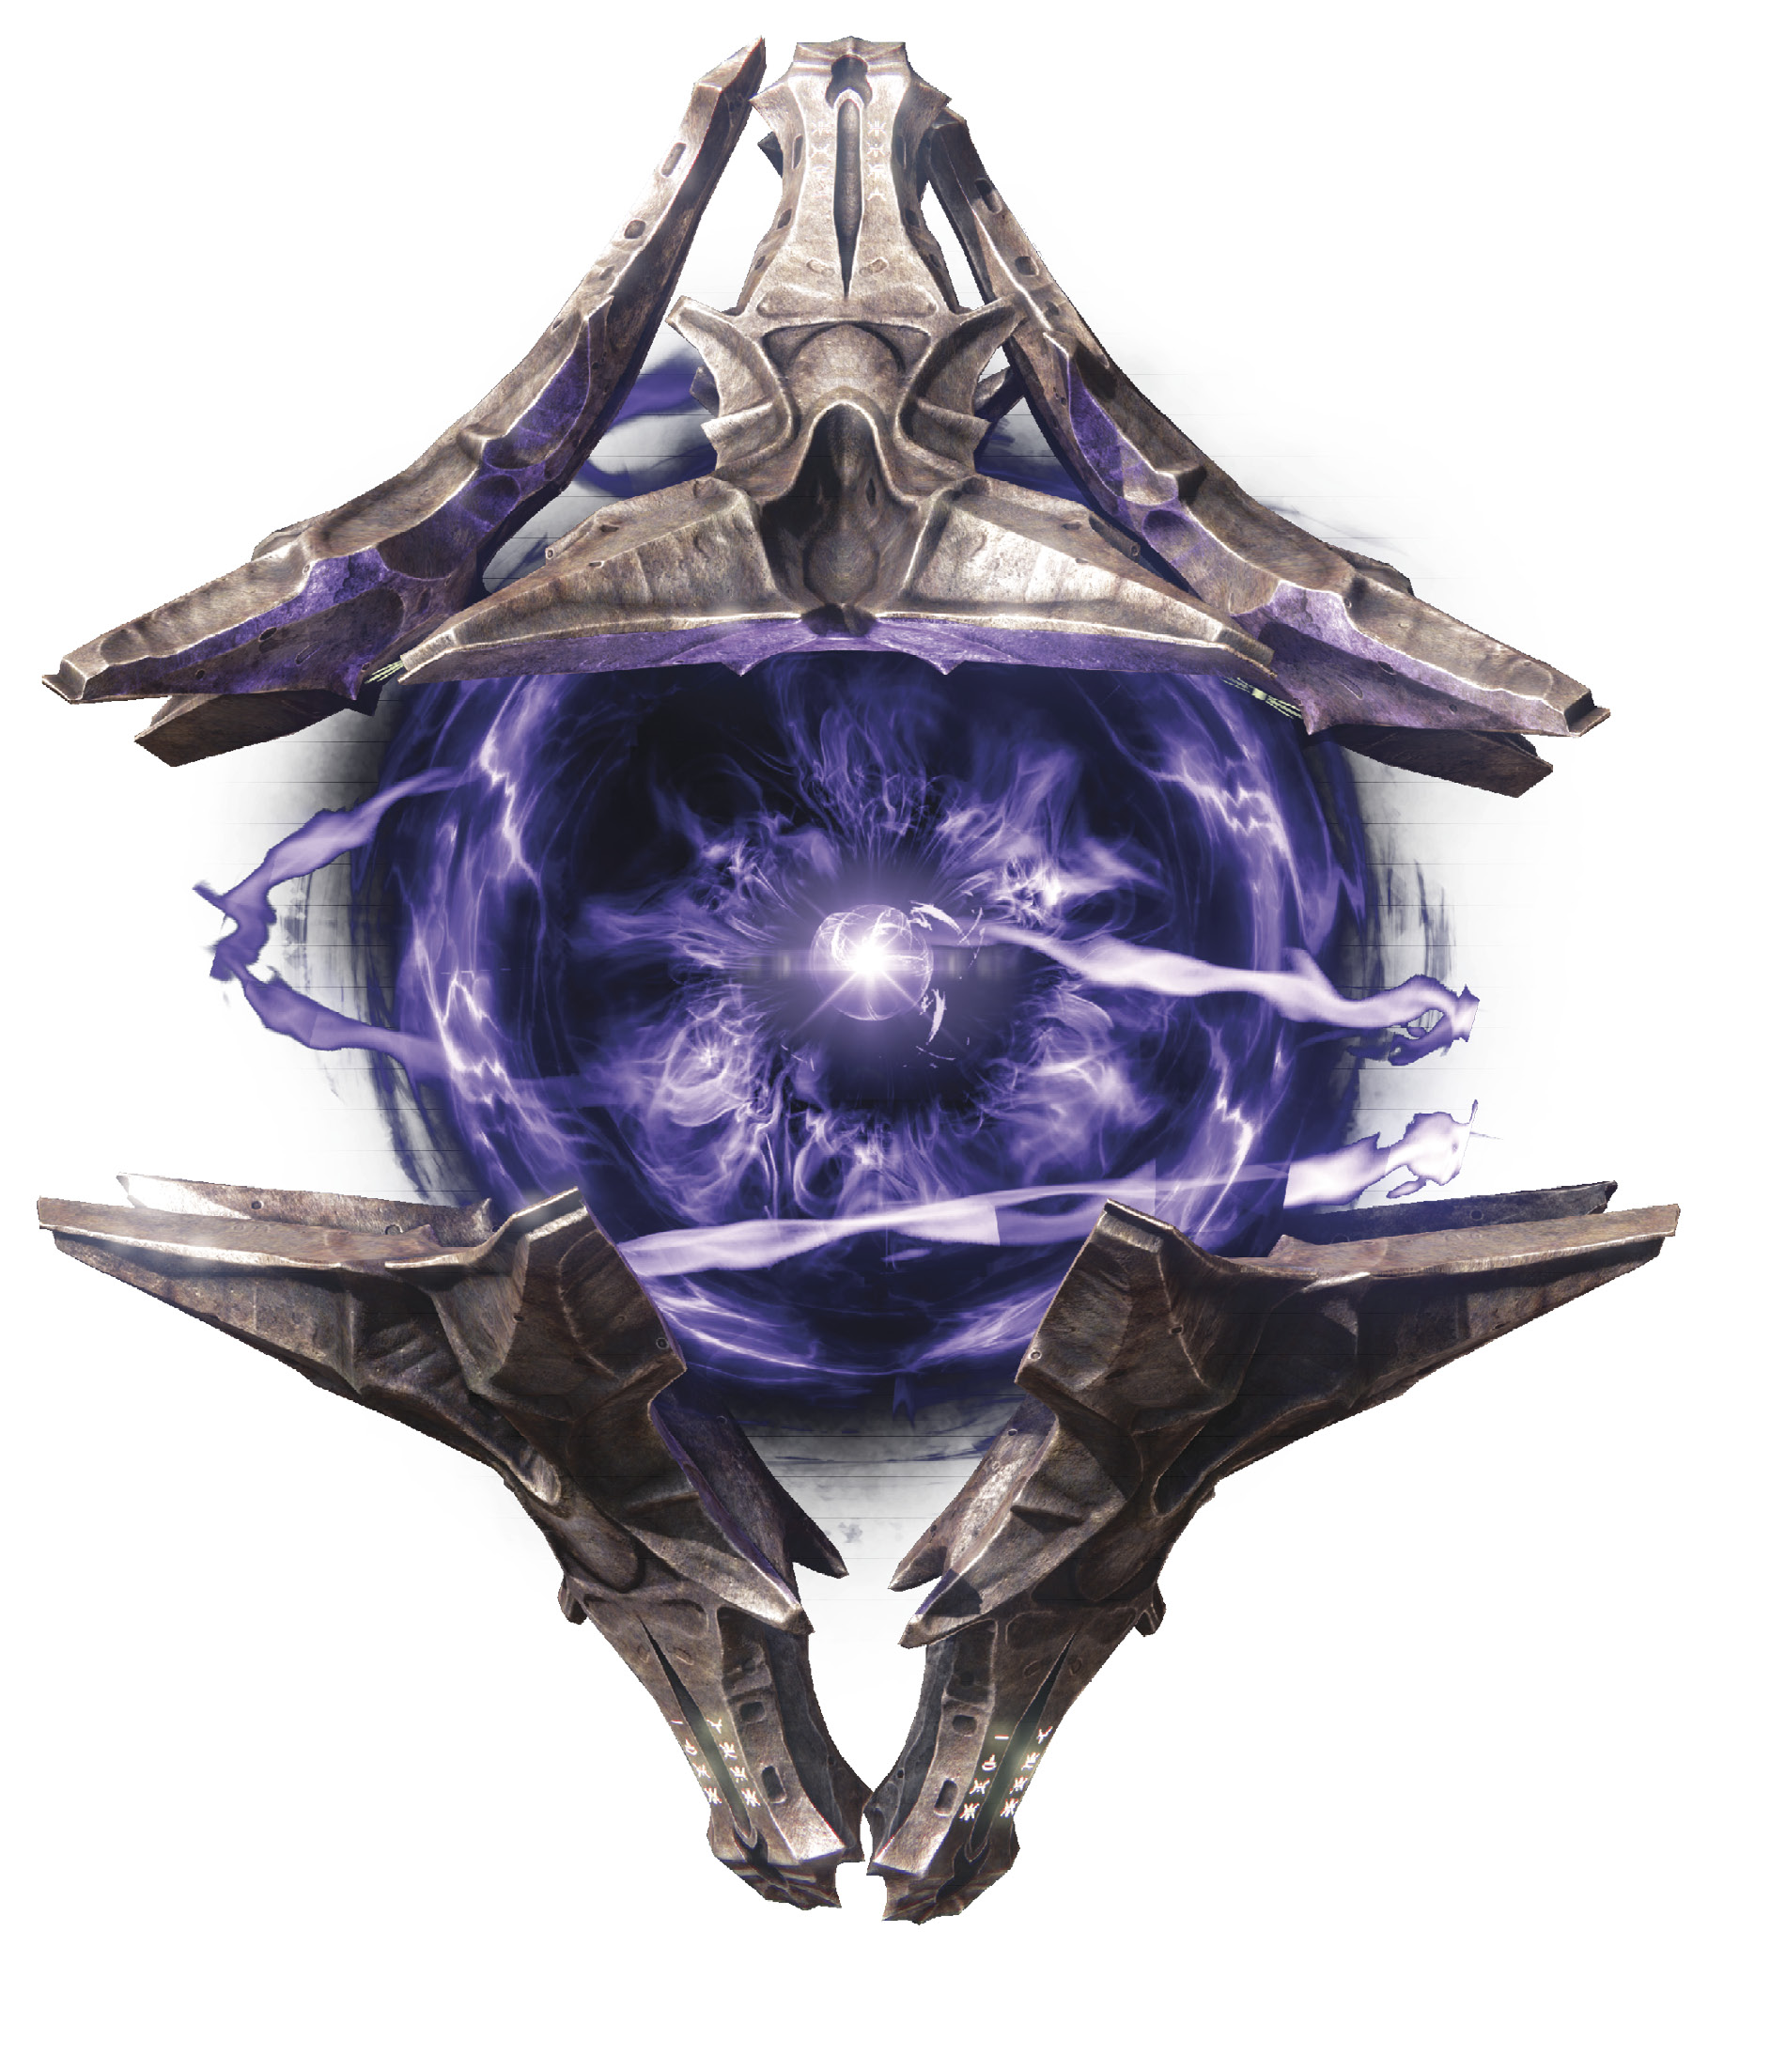
Shrieker
Void-infused sentinels, Shriekers serve as immobile but animate sentries of the Hive’s dark holds.
Loadout: Void Blast
Variants: None
Behavior
Shriekers are rarely encountered Hive “turrets” of a sort. They are immobile and instantly attack any Guardian in range with bolts of Void energy.
Shriekers can phase into existence during a battle. Be particularly alert for their presence during major Strike battles, as they are often located in what would otherwise be nicely defensible terrain.
Tactics
You can easily dispatch Shriekers safely from a distance, because they are immobile targets. The primary danger comes from a Shrieker you don’t spot, or one phasing in near you while you already engaged in battle.
When you do spot a Shrieker, seek out nearby cover and take it down from range. A Shrieker releases a blast of Void energy when it dies, so you don’t want to be near them when they are destroyed.
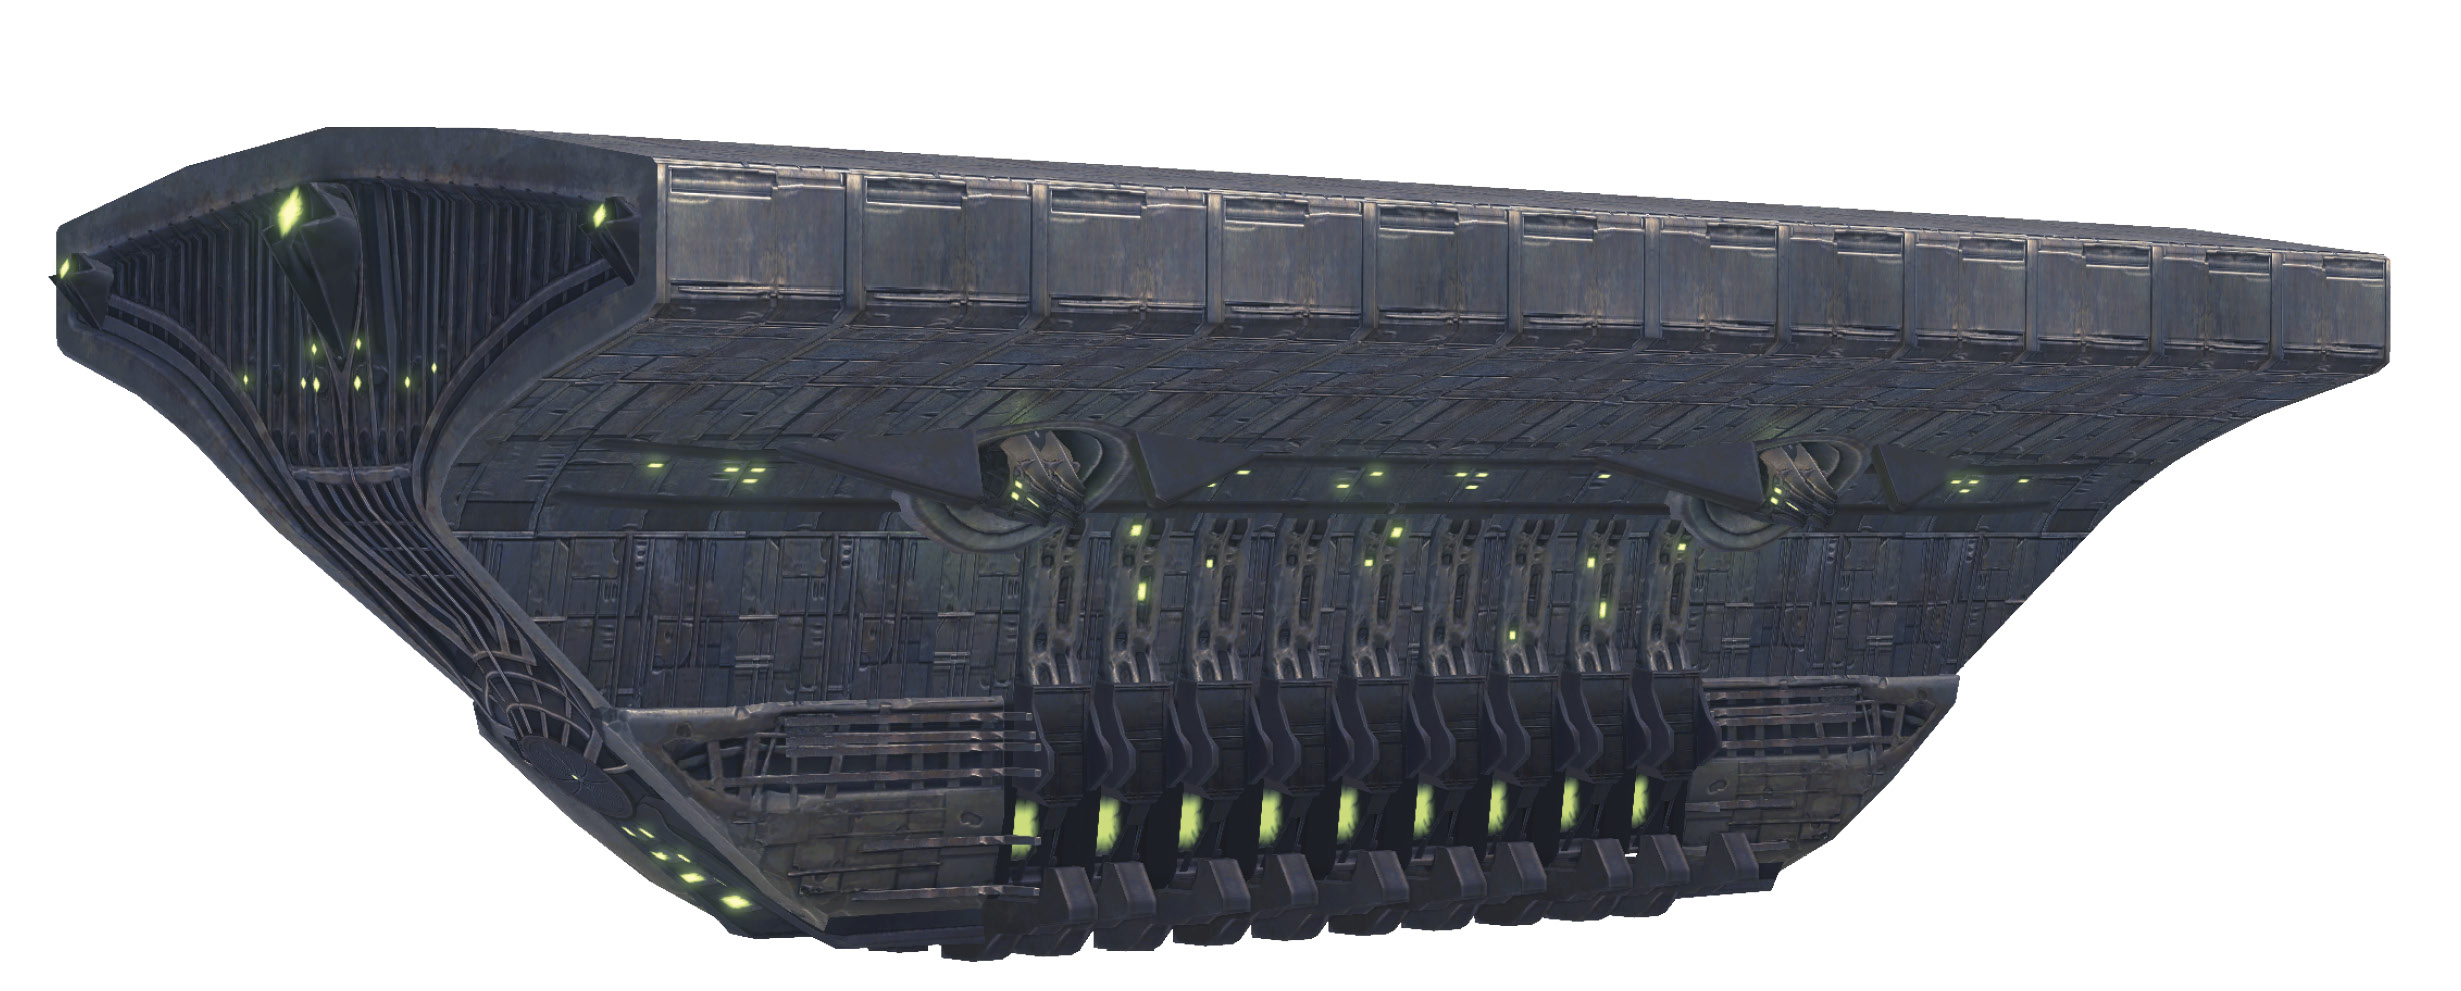
Tomb Ship
A strange and otherworldly transport “ship,” the Tomb Ship rips holes in reality and deposits its foul cargo on the battlefield in a cloud of darkness.
Loadout: Void Turrets
Variants: None
Behavior
Tomb Ships phase in and out of existence, warping onto the battlefield, dropping Hive forces, and then vanishing.
Don’t be surprised to see a Tomb Ship “flying” beneath the surface of the Moon! These transports can appear anywhere there is enough space, allowing the Hive to drop reinforcements almost anywhere you encounter them.
Much like Wizards, Tomb Ships are armed with Void energy turrets that fire tracking projectiles. Consequently, it is best to seek cover when they arrive, since they are difficult to evade in the open.
Tactics
When a Tomb Ship prepares to unleash its Hive forces onto the battlefield, clouds of darkness form beneath it before the Hive troops appear.
If you are quick enough, you can get a lingering area-of-effect grenade onto the ground that detonates just as the Hive appear, inflicting significant damage before they have a chance to disperse.
Similarly, a well-aimed rocket can annihilate an entire Tomb Ship’s payload if you time the shot correctly.
You can also shoot off the turrets on a Tomb Ship. If one is hovering too long for your liking, destroy the nearest turrets, and then return your attention to the Hive forces in the area.