Prima Games eGuides
primagames.com Browse Redeem a code Help
Hunted: The Demon's Forge eGuide
Sign in My Guides

Sign in or create an account

We'll email you a link. No password needed, and if you don't have an account yet, the link makes one.

By creating an account or signing in, you agree to our Terms of Service and Privacy Policy.

Have a password?

Had an account on the old eGuides site, or a code from a printed guide? Help and troubleshooting

Sign in with a password

By signing in, you agree to our Terms of Service and Privacy Policy.

Check your email

A sign-in link is on its way. It works once and expires in 15 minutes. Open it and you're in, with an account if you didn't already have one.

Contents

  • Essentials
    • Adventurer's Guide
      • Screen Layout
      • Main Characters
      • Journey into the Unknown
      • Collectibles
      • Combat
      • Talents
      • Magic
      • Achievements & Adventure + Mode
      • Endgame
    • Gear Catalog
      • Introduction
      • Caddoc's Gear
      • E'lara's Gear
      • Preorder Sets
    • Bestiary
      • Introduction
      • Enemy Resistances and Vulnerabilities
    • Crucible
      • Introduction
      • The Loadouts
      • The inXile Maps
    • Secrets
      • Achievements and Secrets
  • Walkthrough
    • Prologue
      • Caddoc's Dream
      • The Fountain of Elisha
      • The Swamps of Despair
    • Chapter 1
      • Town of Dyfed
      • Town Entrance
      • Smithy
      • Dyfed Inn
      • Town Center
      • City Exit
      • Keep Entrance
      • Boss Battle: Infected Wargar
    • Chapter 2
      • Dungeon of Dyfed
      • Well of Sorrows
      • Crypt of Eternity
      • Prison
      • Crane Room
      • Descent
      • Ballista City
      • The Catacombs
      • Spider Lair
      • Boss Battle: Queen of Darkness
    • Chapter 3
      • The Wilds of Govad
      • Bridges
      • Descent
      • Lost Temple
      • Encampment
      • Temple Puzzle
      • Temple Slope 2
      • Watery Depths
      • Docks
      • Boss Battle: Harridan
    • Chapter 4
      • The City of Llyr
      • The Landing
      • Black Hearts and Red Blood
      • Arches of Fire
      • The Scarlet Maid Tavern
      • The King's Tale
      • The Library
      • Boss Battle: Archghoul
    • Chapter 5
      • The Walls of Kala Moor
      • Forest
      • Quarry
      • Sewer
      • Bridges
      • Gate Entrance
      • Wall
      • Sewers
      • Boss Battle: Blind Dragon
    • Chapter 6
      • The Depths of Kala Moor
      • Kala Moor Entrance
      • Lower Holding Pens
      • Three Brothers' Treasure Vault
      • Elevator Pens
      • Depths
      • Dungeons
      • The Forge
      • Boss Battle: Anuvin

Hunted: The Demon's Forge Guide › Walkthrough › Chapter 2

Spider Lair

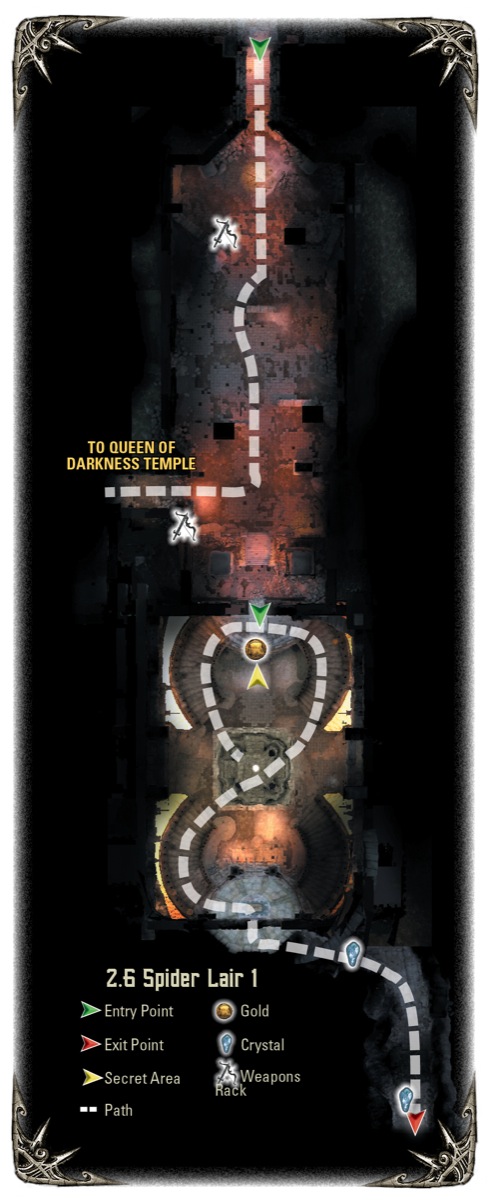
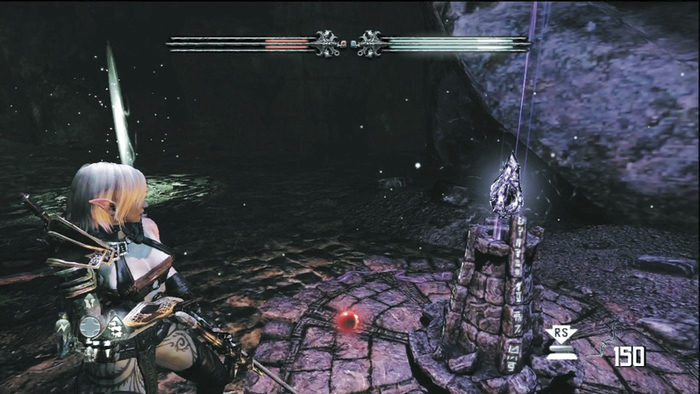
Take the door out to a broken ledge. Jump off the ledge to land next to a new obelisk and magic portal. Explore side alcoves next to the obelisk for another Deathstone corpse and a sack of gold. Follow the passage around until it leads to a door.

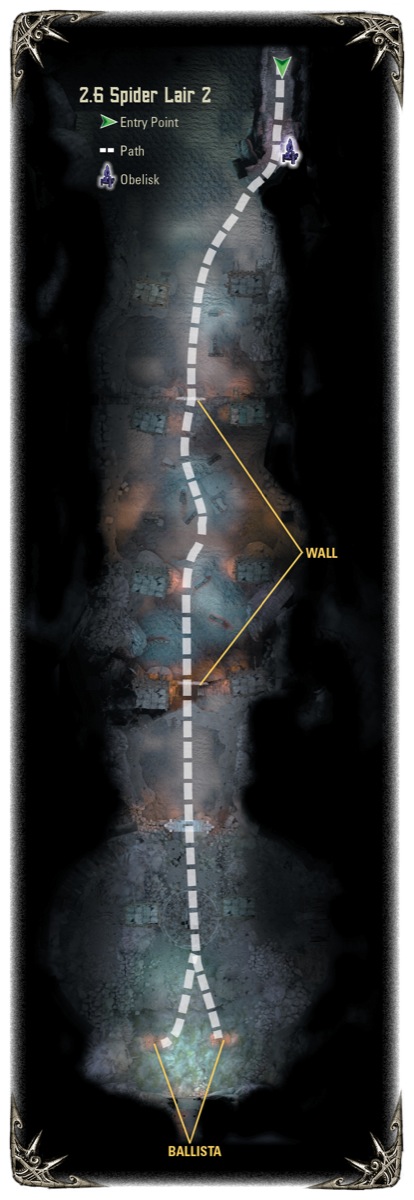
The next room is a long rectangle. On the near side, a vat of the silvery liquid called "Sleg" tempts anyone to taste its wanton power. Be forewarned, though: A single sip will forever change your fate and put you on a dark path that will destroy Caddoc's and E'lara's friendship. If you do drink the Sleg, you become nearly invulnerable and your damage increases to fearsome levels. As you enter the room, Wargar of all kinds flood the far side. You'll have to deal with Wargar Guardians, Warriors, Archers, Scorchers, and Zealots.
Sleg

You've finally discovered some of the silvery magic liquid that transforms normal Wargar into Infected Wargars and invigorates Wargar Zealots into highly resistant, highly vicious monsters.

One sip of the addictive liquid they call "Sleg" is all it takes for its corrupting and powerful magic to energize its victim. Drinking Sleg will make your nearly invulnerable in combat; however, it also perverts your soul.

Sleg will give you a huge advantage in combat, but it will also change the outcome of the story's ending and put the imbiber on the path of the wicked and the damned. Drink only if you don't care about the evil it will bring to either Caddoc or E'lara, or both.

Move at all times. You can't seek cover for long; reinforcements pour in behind you, too, so cover doesn't protect you well. If you dance around the room, constantly firing at targets or slicing them as you glide by, Wargar by Wargar you will thin the horde. As tempting as the Sleg may be, it's possible to destroy all the foes with some patience, skill, and lots of arrows. When the very last Wargar falls, the portcullis at the room's far end rises and you can exit down the new corridor.

The corridor leads to the temple of the Queen of Darkness. Below you, the Wargar feed the Queen of Darkness a large vat of Sleg. Before the Wargar can think about feeding the prisoners to their Queen, too, it's time to jump into action.

Keep reading with a free account

The first 3 sections of Hunted: The Demon's Forge are open to everyone. An account opens the rest of it, and every other guide in the archive. It's free, and there's nothing to buy.

Bought guides on the old Prima Games site? Your account and every guide you own moved here, so there's nothing to buy again. Sign in.

Create a free account Or browse our free guides

PreviousThe Catacombs NextBoss Battle: Queen of Darkness