
Hunted: The Demon's Forge Guide Essentials Bestiary
Enemy Resistances and Vulnerabilities
Enemy Resistances and Vulnerabilities
| Arctic Arrow | Pyre Blast | Arcane Burst | Primal Rage | Wind of Wrath | Dash | Dragon's Breath | Brimstone | Sigil of Pain | ||||||||||
|---|---|---|---|---|---|---|---|---|---|---|---|---|---|---|---|---|---|---|
| Name | Resistance/ Vulnerability | Special | Resistance/ Vulnerability | Special | Resistance/ Vulnerability | Special | Resistance/ Vulnerability | Special | Resistance/ Vulnerability | Special | Resistance/ Vulnerability | Special | Resistance/ Vulnerability | Special | Resistance/ Vulnerability | Special | Resistance/ Vulnerability | Special |
| Annuvin | None | None | None | None | Resistant | None | None | None | None | None | None | None | None | None | None | None | Resistant | None |
| Arackling Crawler | None | None | None | None | None | None | None | None | None | None | None | None | Vulnerable | Lightning can arc to and from this enemy | None | None | None | None |
| Archghoul | Immune | None | Immune | None | Vulnerable | Triggers a stagger reaction | None | None | Resistant | Immune to tier 1 Wind of Wrath | None |
Immune to the stun
component of this attack |
Extra
damage |
Lightning doesn't arc to or from this enemy | Immune | None | None | None |
| Blind Dragon | None | None | None | None | None | None | None | None | None | None | None | None | None | None | None | None | None | None |
| Dread | None | None | Extra damage | None | Highly resistant | None | Immune to taunt | None | None | None |
Extra
damage |
Immune to the stun
component of this attack |
Vulnerable | Lightning can arc to and from this enemy | Extra damage | None | Highly resistant | None |
| Eye of Annuvin | Vulnerable | Freezing the eye causes it to drop and shatter | Resistant | None | None | None | None | None | Immune | None | None |
Immune to the stun
component of this attack |
Extra
damage |
Lightning doesn't arc to or from this enemy | None | None | Immune | None |
| Harridan | Immune | None | Extra damage | None | Resistant | None | None | None | None | None |
Extra
damage |
Immune to the stun
component of this attack |
Vulnerable | Lightning can arc to and from this enemy | Extra damage | None | Resistant | None |
| Infected Wargar | Resistant | Frozen helms break more easily | Resistant | None | Resistant | None | None | None | None | None | None |
Immune to the stun
component of this attack |
Vulnerable | Lightning can arc to and from this enemy | Resistant | None | Resistant | None |
| Juggernaut Elite | Immune | None | None | None | Vulnerable | Triggers a stagger reaction | None | None | Resistant | Immune to tier 1 Wind of Wrath | None |
Immune to the stun
component of this attack |
Vulnerable | Lightning can arc to and from this enemy | None | None | None | None |
|
Minotaur
Juggernaut |
Immune | None | None | None | Vulnerable | Triggers a stagger reaction | None | None | Resistant | Immune to tier 1 Wind of Wrath | None |
Immune to the stun
component of this attack |
Vulnerable | Lightning can arc to and from this enemy | None | None | None | None |
| Shadow Crawler | None | None | None | None | None | None | None | None | None | None | None | None |
Extra
damage |
Lightning doesn't arc to or from this enemy | None | None | None | None |
| Skeleton | None | None | None | None | Highly resistant | None | Immune to taunt | None | None | None |
Extra
damage |
Immune to the stun
component of this attack |
Vulnerable | Lightning can arc to and from this enemy | None | None | Highly resistant | None |
|
Queen of
Darkness |
None | None | None | None | None | None | None | None | None | None | None | None | None | None | None | None | None | None |
| Wargar Archer | None | None | Extra damage | None | None | None | None | None | None | None | None | None | None | Lightning doesn't arc to or from this enemy | Extra damage | None | None | None |
|
Wargar
Blastcaster |
None | None | None | None | None | None | None | None | None | None | None | None |
Extra
damage |
Lightning doesn't arc to or from this enemy | None | None | None | None |
| Wargar Guardian | Resistant | Frozen shields and helms break more easily | Resistant | Shield blocks damage | Vulnerable | Extra damage to shields with a chance to destroy | None | None | Vulnerable | Pose when levitating causes shield arm to drop | Vulnerable | If hit when blocking, the victim's shield takes extra damage | Vulnerable | Lightning can arc to and from this enemy | None | None | None | None |
| Wargar Scorcher | None | None | None | None | None | None | None | None | None | None | None | None |
Extra
damage |
Lightning doesn't arc to or from this enemy | None | None | None | None |
| Wargar Soldier | None | None | None | None | None | None | None | None | None | None | None | None |
Extra
damage |
None | None | None | None | None |
|
Wargar
Warrior |
Resistant | Frozen shields break more easily | Resistant | Shield blocks damage | Vulnerable | Extra damage to shields with a chance to destroy | None | None | Vulnerable | Pose when levitating causes shield arm to drop | Vulnerable | If hit when blocking, the victim's shield takes extra damage | Vulnerable | Lightning can arc to and from this enemy | None | None | None | None |
| Wargar Zealot | None | Frozen helms break more easily | Resistant | None | None | None | Immune to taunt | None | None | None |
Extra
damage |
Immune to the stun
component of this attack |
Vulnerable | Lightning can arc to and from this enemy | Resistant | None | None | None |
Annuvin
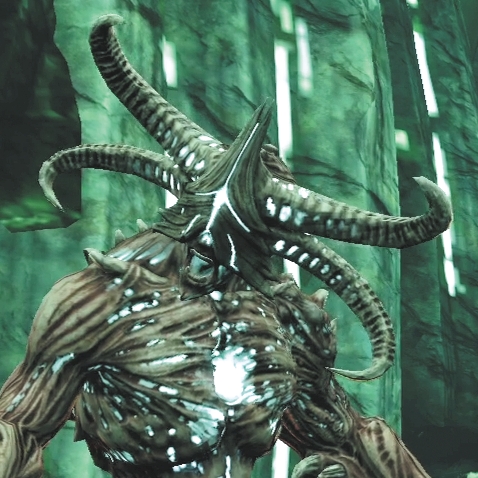
First encountered: Chapter 6
Abilities: Minions, Energy Strikes, Regeneration
Description: In the depths of Kala Moor, the ultimate challenge awaits. Corrupted by the power of Sleg, Annuvin has become a warped version of his former dragon hunter self. Sleg has transformed Annuvin into a giant, raging monster that calls upon magic and minions to defeat you.
Combat tips: Annuvin regenerates quickly, as he draws power from the very magical foundation around him. You must drop the pillars around Annuvin one by one to inflict continuous damage; otherwise, he simply regains health faster than you can supply damage. See the walkthrough for Chapter 6, "Kala Moor," for complete details on the battle against Annuvin.
Resistances: Arcane Burst (-15%), Sigil of Pain (-15%)
Vulnerability: None
Arackling Crawler
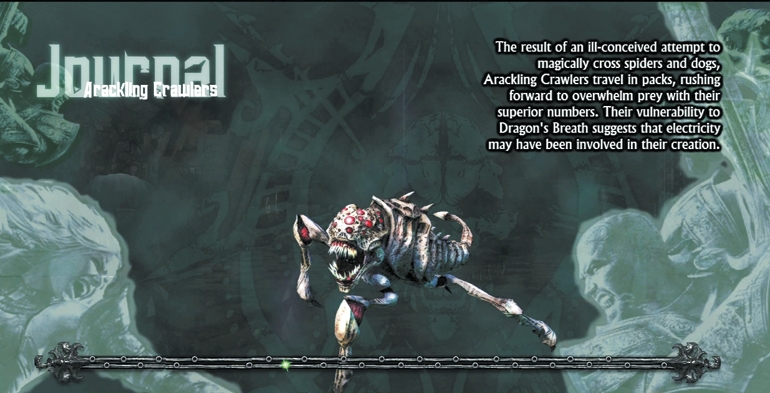
Threat level: Low
First encountered: Prologue
Abilities: Leap, Quickness
Description: The result of an ill-conceived attempt to magically cross spiders and dogs, Arackling Crawlers travel in packs, rushing forward to overwhelm prey with superior numbers. Their vulnerability to Dragon's Breath suggests that electricity may have been involved in their creation.
Combat tips: Unless you are a superior sharpshooter, it's difficult to line up ranged attacks on the scurrying Aracklings. Better to whack them with melee blows in tight, and always remember to block a leaping Arackling with your shield.
Resistance: None
Vulnerability: Dragon's Breath
Archghoul
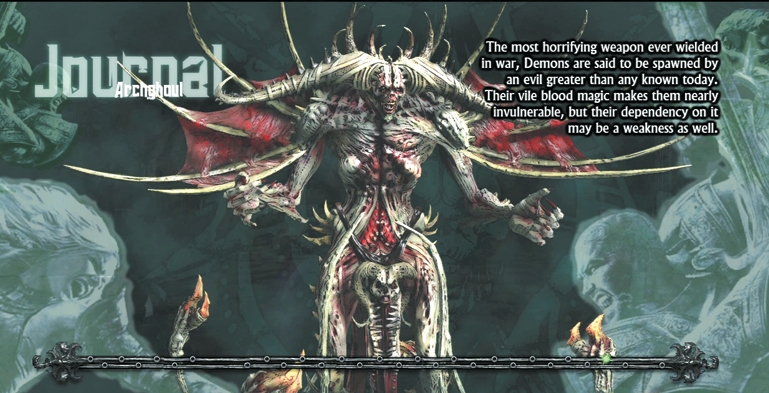
Threat level: High
First encountered: Chapter 4
Abilities: Blood Magic Shield, Firebolt
Description: The most horrifying weapon ever wielded in war, these demons are said to be spawned by an evil greater than any known today. Their vile blood magic makes them nearly invulnerable, but their dependency on it may be a weakness as well.
Combat tips: You cannot harm an Archghoul when it has its defensive Blood Magic Shield up. Instead, aim for the dangling human bodies surrounding the shield from which the demon draws its power. Each body explodes with a single hit; slay them all and the Blood Magic Shield drops temporarily and you can inflict damage on the Archghoul. See the walkthrough for Chapter 4, "The City of Llyr," for complete details on the battle against the Archghoul.
Resistance: Arctic Arrow (immune), Ice Weapons (immune), Pyre Blast (immune), Brimstone (immune), Wind of Wrath (immune to tier 1)
Vulnerability: Dragon's Breath (+20%)
Blind Dragon
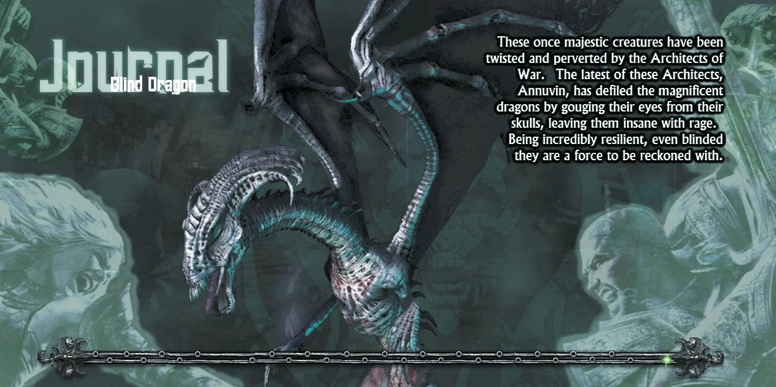
Threat level: High
First encountered: Chapter 5
Abilities: Dragon's Breath
Description: These once-majestic creatures have been twisted and perverted by the Architects of War. The latest of these Architects, Annuvin, has defiled the magnificent dragons by gouging their eyes from their skulls, leaving them insane with rage. Being incredibly resilient, even blinded they are a force to be reckoned with.
Combat tips: The only sensible way to take on a dragon is with a big, big weapon. Fortunately, you have two ballistae near the dragon that can deal 400 percent more damage per blow than a standard heavy attack. Alternate between each ballista; when the dragon focuses its attention on you, disengage from the current ballista and race over to the other one to launch an attack or two, before repeating the process. See the walkthrough for Chapter 5, "The Walls of Kala Moor," for complete details on the battle against the Blind Dragon.
Resistance: None
Vulnerability: Ballista (see Combat Tips)
Dread
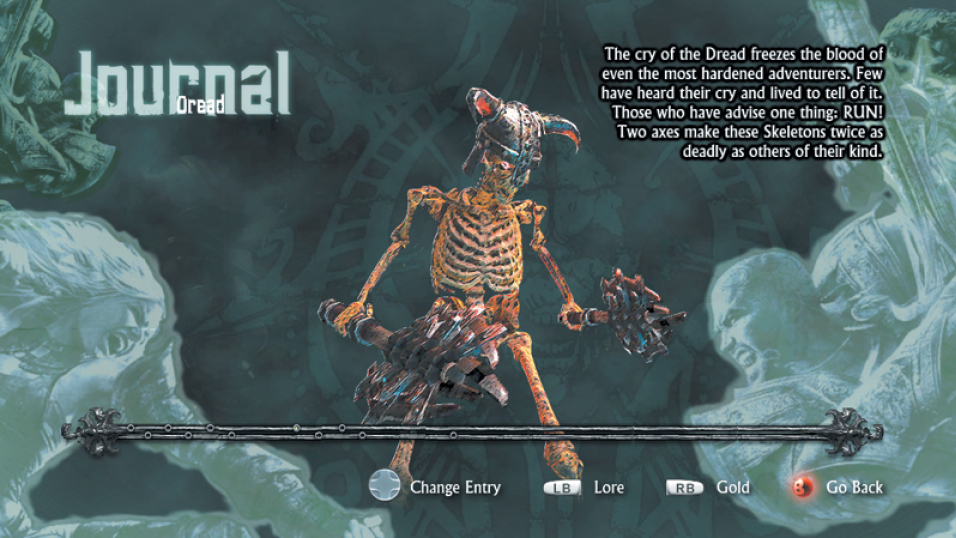
Threat level: Moderate
First encountered: Chapter 1
Abilities: Dual Wielding
Description: The cry of the Dread freezes the blood of even the most hardened adventurers. Few who have heard the cry have lived to tell of it, and the advice of survivors is to run. Two axes make these skeletons twice as deadly as others of their kind. Burn it with Brimstone or Pyre Blast, and avoid arcane magic.
Combat tips: If you don't have fire, trade off attacks between Caddoc and E'lara to prevent the Dread from ganging up on one and eliminating the hero quickly.
Resistance: Arcane Burst, Sigil of Pain
Vulnerability: Brimstone, Dash, Pyre Blast
Eye of Annuvin
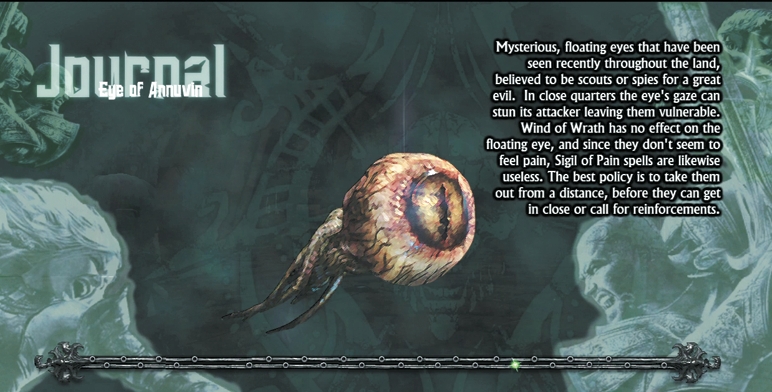
Threat level: Moderate
First encountered: Chapter 5
Abilities: Whiteout Stun
Description: Mysterious, floating eyes that have been seen recently throughout the land, believed to be scouts or spies for a great evil. In close quarters, the eye's gaze can stun its attacker, leaving them vulnerable. Generally, an Eye of Annuvin should be top priority if you have to cross an area that it's guarding.
Combat tips: Wind of Wrath has no effect on the floating eye, and since they don't seem to feel pain, Sigil of Pain spells are likewise useless. The best policy is to take them out from a distance, before they can get in close or call for reinforcements.
Resistance: Pyre Blast, Wind of Wrath (immune), Dash, Sigil of Pain (immune)
Vulnerability: Arctic Arrow, Dragon's Breath
Harridan
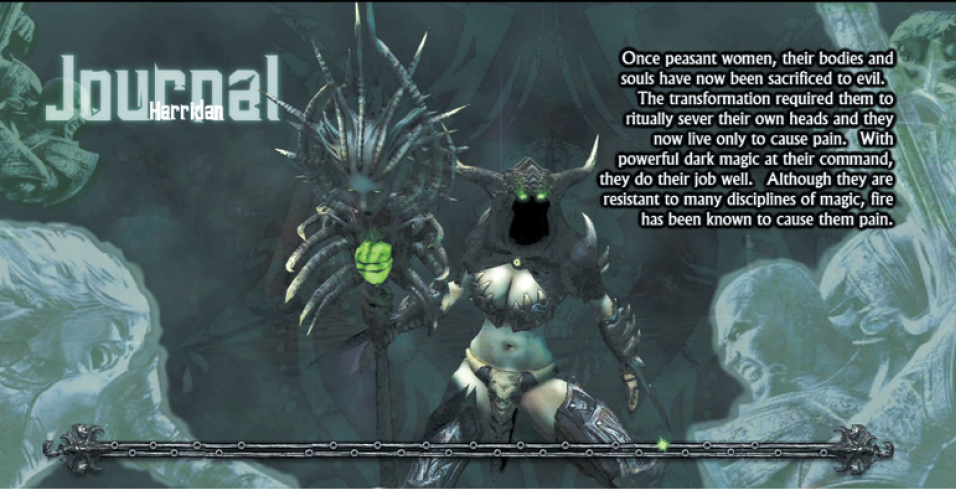
Threat level: High
First encountered: Chapter 3
Abilities: Deadly Totems, Teleportation
Description: Once peasant women, their bodies and souls have now been sacrificed to evil. The transformation required them to ritually sever their own heads, and they now live only to cause pain. With powerful dark magic at their command, they do their job well.
Combat tips: Although they are resistant to many disciplines of magic, fire does cause them pain. Rely on Brimstone and Pyre Blast whenever possible as you dance around to avoid the quickly moving and teleporting Harridan. The witches' totems bombard you if left unchecked; while in motion, whenever a totem comes into your sights, shatter it with a few well-targeted arrows or a hefty swing as you run by. See the walkthrough for Chapter 3, "The Wilds of Govad," for complete details on the battle against Harridan.
Resistance: Arctic Arrow (immune), Ice Weapons (immune), Sigil of Pain (-50%), Arcane Weapons (-50%), Arcane Burst (-35%)
Vulnerability: Dash (+150%), Brimstone (+40%), Pyre Blast (+20%)
Infected Wargar
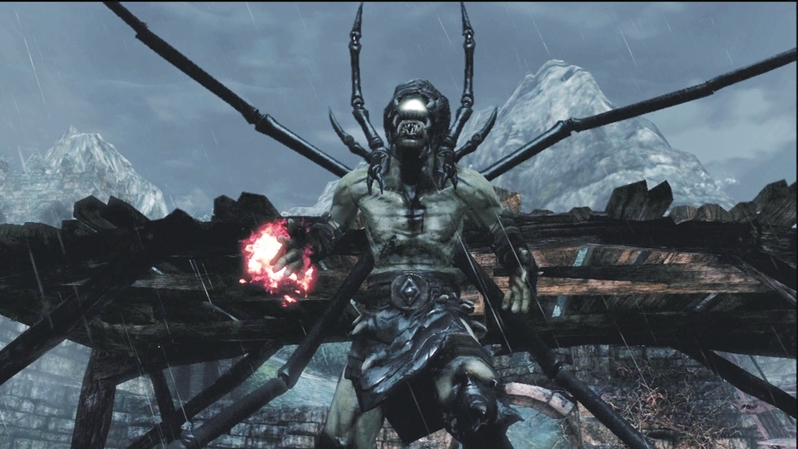
Threat level: Moderate
First encountered: Chapter 1
Abilities: Firebolts, Teleportation
Description: Infected Wargar have been twisted by dark magics into creatures far more hideous and powerful than their normal brethren. Dangerous and tough, they are difficult to stun even with a direct Dash attack. With their ability to teleport, the best course of action is to attack from a distance.
Combat tips: As soon as the Infected Wargar disappears in a puff of red smoke, scan the area for its reappearance. You don't want this thing shooting at your back, and as it reappears, you may get off a shot or two before it turns its attention on you. See the walkthrough for Chapter 1, "Town of Dyfed," for complete details on the battle against the Infected Wargar.
Resistance: Arctic Arrow (-90%), Arcane Burst (-30%), Brimstone (-30%), Pyre Blast (-30%), Sigil of Pain (-30%), Dash (immune to stun effect)
Vulnerability: Dragon's Breath
Juggernaut Elite
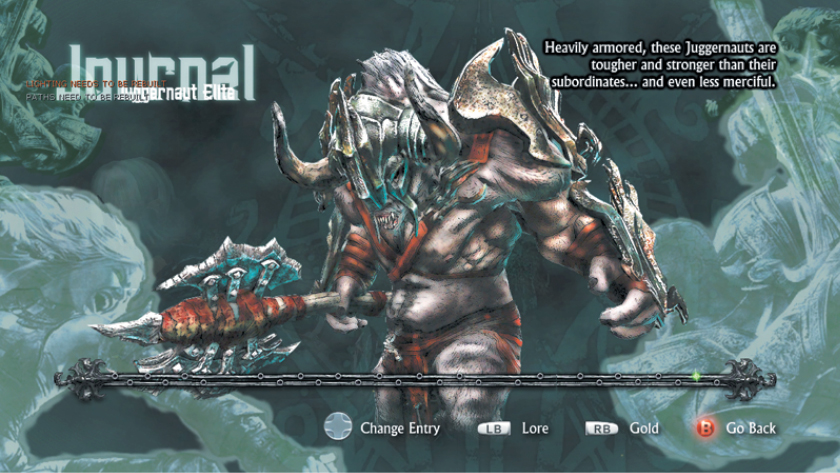
Threat level: Moderate
First encountered: Chapter 4
Abilities: Charge, Heavy Armor
Description: Heavily armored, these Juggernauts are tougher and stronger than their subordinates..and even less merciful. You don't want to get into melee with them unless you're in a confined area and have no choice.
Combat tips: Switch to Arcane Burst and stagger a Juggernaut Elite with each arrow hit. This helps slow down the beast and get off more shots, especially with a fast bow. With enough mana, you can down a Juggernaut Elite with Arcane Burst arrows, but if you can't beat it at range, keep on the move while Caddoc and E'lara trade blows against the armored hide. If you can split its focus, it should open up enough time for the partners to deal lethal damage.
Resistance: Arctic Arrow (immune), Dash (immune to stun), Wind of Wrath (immune to tier 1)
Vulnerability: Arcane Burst, Dragon's Breath
Minotaur Juggernaut
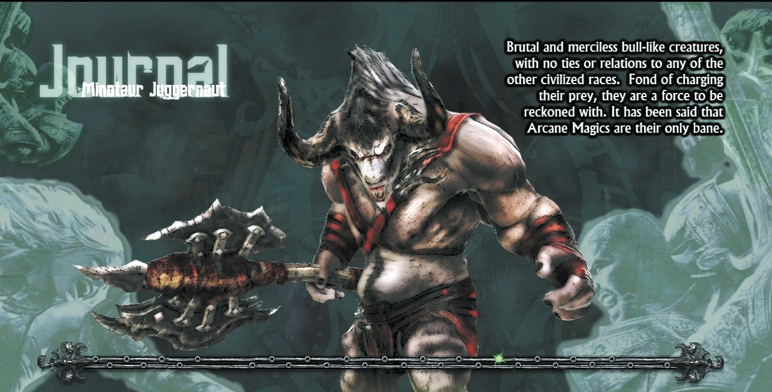
Threat level: Moderate
First encountered: Chapter 3
Abilities: Charge
Description: The Minotaur Juggernauts are brutal and merciless bull-like creatures, with no ties or relations to any of the other civilized races. Fond of charging their prey, they are dominant on the battlefield against all but the most skilled combatants. It has been said that arcane magic is their only bane.
Combat tips: Avoid trading blows in melee with this beast. Better to switch to Arcane Burst at range and drop it with four or five shots. And when we say ranged, we mean very far back, so you can avoid the Minotaur's devastating charge. Arcane Burst produces a stagger effect, which helps keep the Minotaur at bay, and Dragon's Breath can arc from it to multiple targets, thus inflicting greater damage in a mass battle.
Resistance: Arctic Arrow (immune), Dash (immune to stun), Wind of Wrath (immune to tier 1)
Vulnerability: Arcane Burst, Dragon's Breath
Shadow Crawler
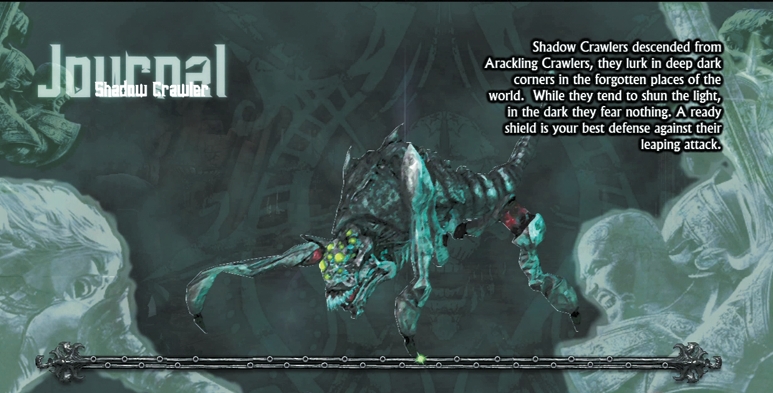
Threat level: Low
First encountered: Chapter 2
Abilities: Leap, Quickness
Description: Shadow Crawlers descended from Arackling Crawlers, and they lurk in the deep, dark corners of the forgotten places of the world. While they tend to shun the light, in the dark they fear nothing. A ready shield is your best defense against their leaping attack.
Combat tips: Keep that shield at the ready to deflecting a leaping Shadow Crawler. As with the Aracklings, these beasties move very quickly and are hard to pin down with a bow. Switch to melee to swat them aside, and get ready to pop a Health Vial when they start to swarm.
Resistance: None
Vulnerability: Dragon's Breath
Skeleton
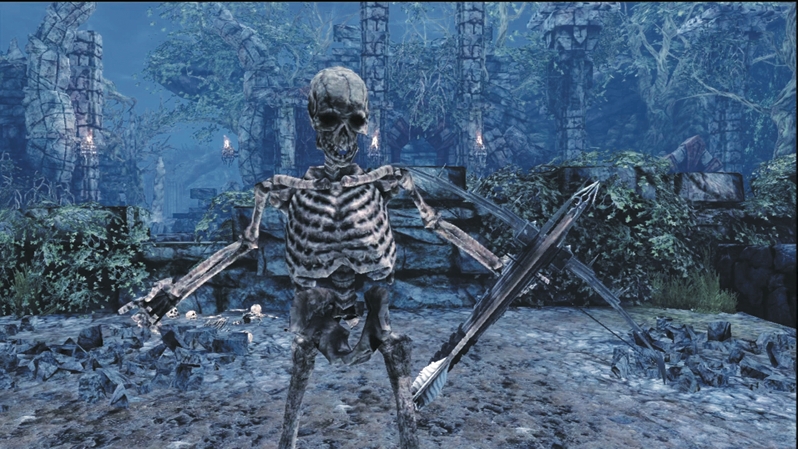
Threat level: Low
First encountered: Prologue
Abilities: Ranged Crossbow
Description: Most Skeletons are melee fighters, though some use crossbows to pelt you with ranged bolts, and all can rise up from the ground and surprise you if you aren't on your guard. They are generally found near battlefields and in dungeon depths.
Combat tips: Avoid arcane magic, such as Arcane Burst and Sigil of Pain; Skeletons are highly resistant to that damage type. Instead, rely on Dash and Dragon's Breath, which tend to shatter bones quicker than standard attacks.
Resistance: Arcane Burst, Primal Rage (immune to taunt), Sigil of Pain
Vulnerability: Dash, Dragon's Breath
Queen of Darkness
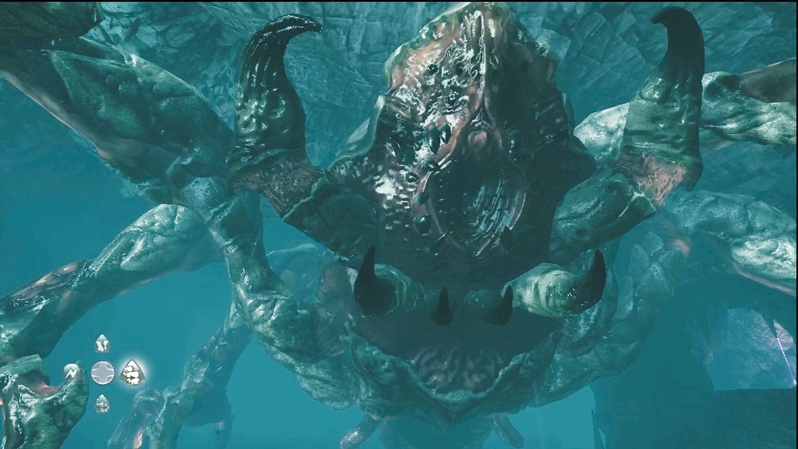
Threat level: High
First encountered: Chapter 2
Abilities: Overwhelm
Description: Who isn't afraid of bugs, especially the uberimmense kind? Caddoc's worst nightmare comes true when the pair find themselves in the lair of the Queen of Darkness, a really giant spider. Bows and swords aren't going to be very useful.
Combat tips: Run! The only possibility for survival is to sprint out of the catacombs as they collapse around you. If you can reach the ballista, and if you have very good aim, you might live to hate spiders worse than before. See the walkthrough for Chapter 2, "Dungeon of Dyfed," for complete details on the battle against the Queen of Darkness.
Resistance: None
Vulnerability: None
Wargar Archer
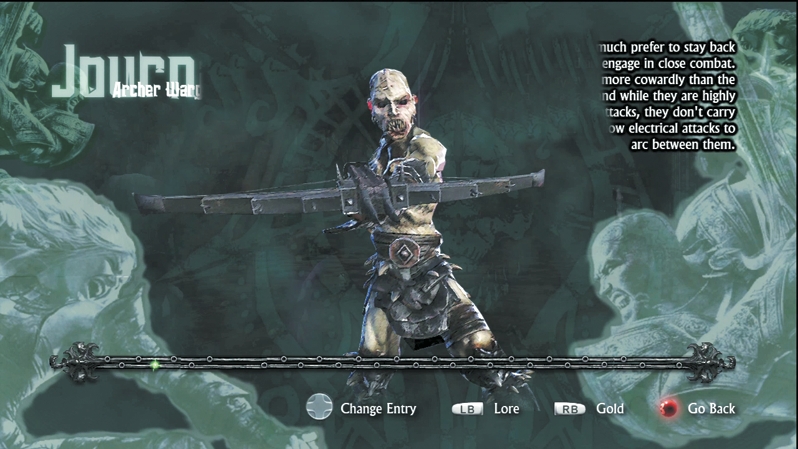
Threat level: Low
First encountered: Chapter 1
Ability: Ranged Attack
Description: Archers would much prefer to stay back rather than engage in close combat. They're even more cowardly than the average Wargar, and while they are highly susceptible to fire attacks, they don't carry enough metal to allow electrical attacks to arc between them.
Combat tips: E'lara can outduel these ranged attackers in a battle of arrows, especially if she adds a little fire to her arrow tips. Seek cover when barraged by arrows until you can pinpoint and pick off each Wargar Archer one by one.
Resistance: Dragon's Breath
Vulnerability: Brimstone, Pyre Blast
Wargar Blastcaster
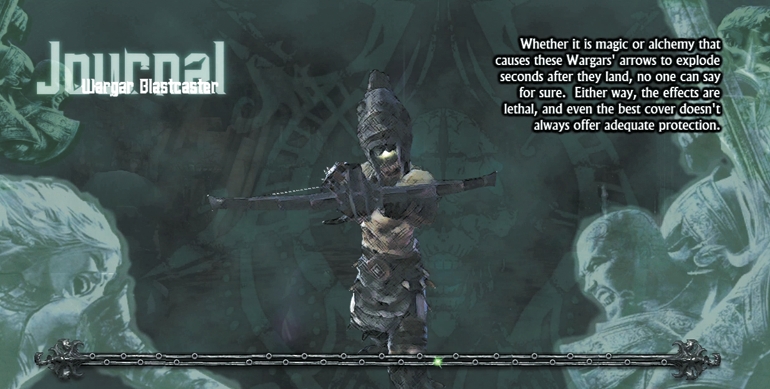
Threat level: Low
First encountered: Chapter 2
Abilities: Explosive Arrows
Description: Whether it's magic or alchemy that causes these Wargar's arrows to explode seconds after they land, no one can say for sure. Either way, the effects are lethal, and even the best cover doesn't always offer adequate protection.
Combat tips: You can't rely on cover to beat a Wargar Blastcaster; you have to out-damage them. Don't waste precious seconds at the start of a battle seeking for the perfect spot. Take aim on the Blastcasters with arrows or magic and hit them fast and hard to keep them off balance.
Resistance: None
Vulnerability: Dragon's Breath
Wargar Guardian
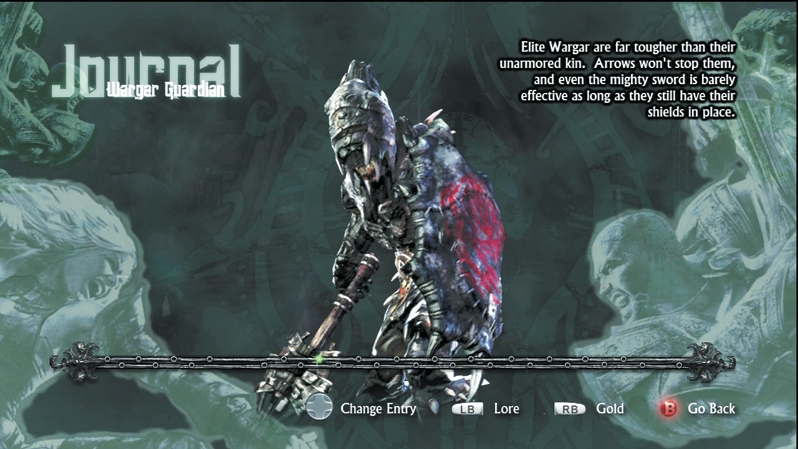
Threat level: Low
First encountered: Chapter 1
Abilities: Heavy Armor, Shield
Description: Wargar Guardians are far tougher than their unarmored kin. Arrows won't stop them, and even the mighty sword is barely effective as long as they still have their shields in place.
Combat tips: Use Arctic Arrow, Arcane Burst, and Dash to destroy their shields, or Caddoc can levitate them with Wind of Wrath and E'lara can land heavy damage when the Guardians' shield arms drop.
Resistance: Arctic Arrow, Pyre Blast
Vulnerability: Arcane Burst, Dash, Wind of Wrath
Wargar Scorcher
Threat level: Moderate
First encountered: Chapter 1
Abilities: Lethal Arrows
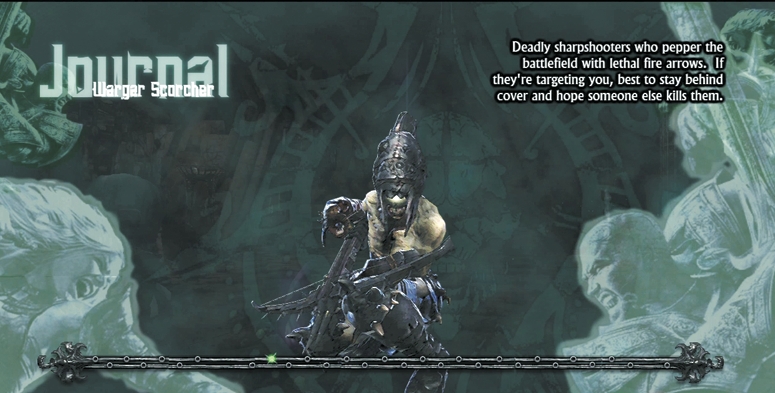
Description: These deadly sharpshooters pepper the battlefield with lethal fire arrows. If they're targeting you, stay behind cover and hope your partner kills them.
Combat tips: If you have to take out the Scorcher yourself, rely on Dragon's Breath or a well-placed Arctic Arrow to slow it down.
Resistance: None
Vulnerability: Dragon's Breath
Wargar Soldier
Threat level: Low
First encountered: Chapter 1
Abilities: Melee
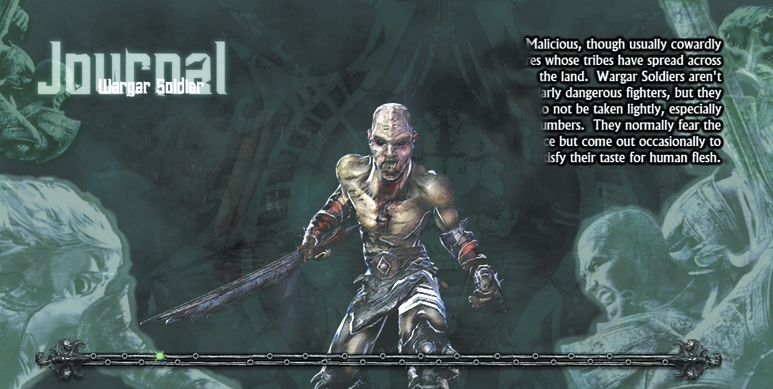
Description: Wargar Soldiers are the weakest form of the Wargar and can frequently be confused with their Warrior brethren. They generally fall to a single hit or two, and if they don't have backup, feel free to charge in and do some damage.
Combat tips: Soldiers take extra damage from Dragon's Breath, but why waste magic when a good blade or arrow will do? They aren't resistant to anything, so it's your choice for how to eliminate mass droves of these enemies.
Resistance: None
Vulnerability: Dragon's Breath
Wargar Warrior
Threat level: Low
First encountered: Chapter 1
Abilities: Melee or Ranged Weapons
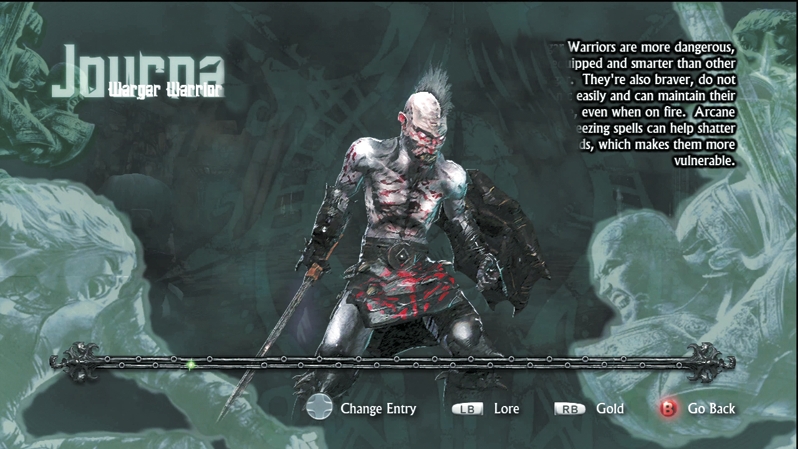
Description: Wargar Warriors are more dangerous, better equipped, and smarter than other Wargar. They're also braver, do not panic easily, and can maintain their composure, even when on fire. Arcane Burst and freezing spells can help shatter their shields, which makes them more vulnerable.
Combat tips: You don't want to break out the Arctic Arrow unless you aim for a Warrior's shield, though a healthy dose of Dragon's Breath will arc between Wargar Warriors and damage multiple foes with a single blast.
Resistance: Arctic Arrow, Pyre Blast
Vulnerability: Arcane Burst, Dash, Dragon's Breath, Wind of Wrath
Wargar Zealot
Threat level: Low
First encountered: Chapter 2
Abilities: Dual Wield
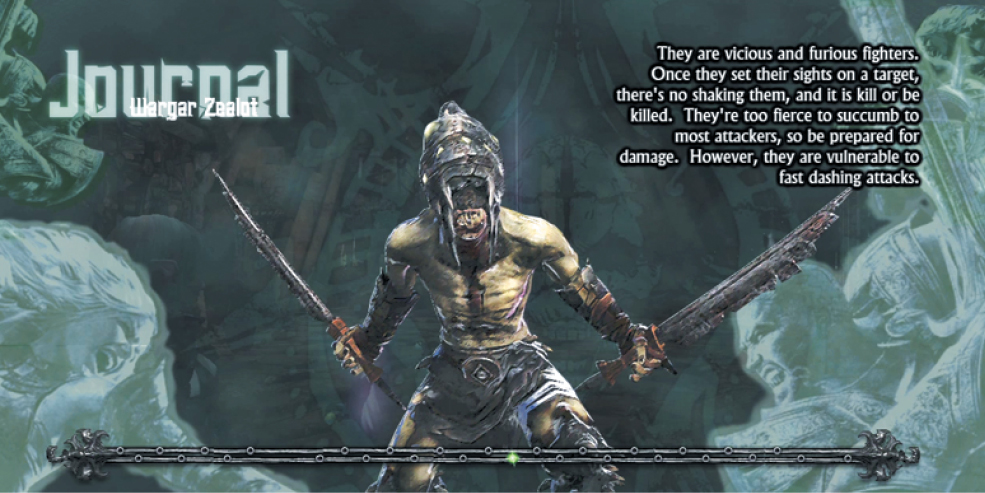
Description: They are vicious and furious fighters. Once they set their sights on a target, there's no shaking them, and it is kill or be killed. They're too fierce to succumb to most attacks, so be prepared to take damage. However, they are vulnerable to fast dashing attacks.
Combat tips: Caddoc can hammer Zealots with his Dash attack, as long as he doesn't get caught in the middle of a group of Zealots hell-bent on slicing him to pieces. E'lara should stay back and seek cover; better to use her arrows and switch to Dragon's Breath if they get in close.
Resistance: Pyre Blast, Primal Rage (immune to taunt), Brimstone
Vulnerability: Dash, Dragon's Breath