
Assassin's Creed Rogue Guide Side Activities and Challenges
Land Activities
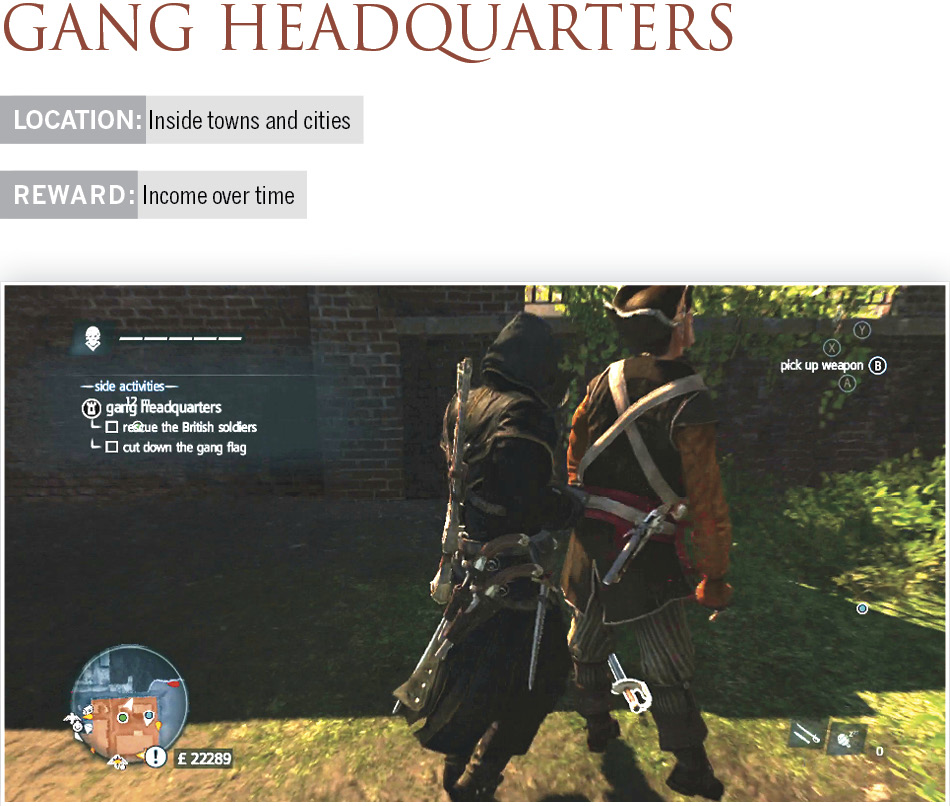
Take out the gang captains and their flags to stop criminal activity in larger areas. You have to beat fairly hard fights to make that happen, and the leaders are tough cookies. Many of them have to be hunted, like stalkers, so listen for the whispers and use Eagle Vision to find your target.
Gang HQs become Fast Travel locations when you beat them, and they’ll have Bank Access, Fleet Mission maps, and collectibles there as well. You also improve your income by getting these important economic areas under your control. These missions are well worth your time.
To aid in beating them, bring a large supply of grenades. Berserk Grenades turn the defenders against each other. Though their leaders are immune to this poison, it makes your life easier to remove reinforcements. This is doubly helpful if the affected guards attack their own leader, making it easy for you to sneak up and launch an air assassination against them!
New York
Lower Manhattan—West Port Gang Headquarters
|
Region |
|
| Location | Lower Manhattan |
| HQ Coordinates | 378, -546 |
| Difficulty | Medium |
| Reward | Increased Income |
Objectives:
- Kill the British traitor.
- Locate and kill the gang leader.
- Cut down the gang flag.
Bonus Objective:
- Stay out of open combat.
The headquarters in the west port has a more concentrated population of gang members than any of the other gang headquarters, requiring precision strikes when you’re on the move. However, if you are approaching the HQ from the inland, you will at least be able to use the taller buildings to your advantage.
Start by using one of the connecting lines that leads you straight to a haystack on top of the north building. If you time it right, you’ll be able to slip into the haystack undetected and get an easy kill on one of the rooftop soldiers. If you look across to the other building you will see a rifleman patrolling the tallest of the buildings within this gang headquarters. Before you go after this rifleman, listen to your surroundings. A nearby assassin may be ready to strike you down. Use Eagle Vision to find the assassin, then move fast to take out both enemies with one fell swoop.
If you’ve taken out these three major enemies, you now have complete control of the upper level. This gang headquarters has a special variant on the usual “optional objective”: there is an added objective to kill the British traitor hiding out in the enemy HQ. He shows up on your HUD almost immediately, but before you go after him it is a good idea to locate the gang leader. This way, you know where he is and it will be a little easier to get to him if you happen to alert the gang while you’re going to kill the British traitor.
From the rooftop, you might locate the gang leader below you in one of the alleys. If you can air assassinate him, that’s your best bet. The gang flag will be close by, near the center of the headquarters. Cut it down and head around the back side of the ship that is docked in the port. If you climb on the side of the ship, you should be able to see the British traitor walking in a small pattern on the ship’s deck. He is accompanied by two soldiers, however they do not follow him, so you can charge him from his blind side as he walks away and then disappear before anyone sees a thing. Be sure to climb up to the top of the ship to pick up a Prosperity Fragment located in this area. Enjoy your income increase and new, fast travel location as you continue your adventure.
King’s Farm—West Countryside Gang Headquarters
|
Region |
|
| Location | King’s Farm |
| HQ Coordinates | 376, -315 |
| Difficulty | Medium |
| Reward | Increased Income |
Objectives:
- Locate and kill the gang leader.
- Cut down the gang flag.
- Locate and kill the gang scouts (3).
Bonus Objective:
- Stay out of open combat.
King’s farm is quite literally a farm, so there aren’t many buildings to travel to or be concealed by. The good thing about the West Countryside Gang Headquarters is that the restricted area is within the walls of the compound. This is one activity you should take your time on because staying undetected will come with major benefits. Because walls surround this compound, you have an almost unlimited number of ways to enter the gang headquarters. Try not to enter through one of the entrances; instead, use your climbing skills to get the jump on one of your main objectives.
You must assassinate four people to claim this headquarters for your allies: three of them are apparent as soon as you enter the premises. Use bushes and walls to conceal your approach to each objective. There are plenty of hiding spots all around the inside of this gang HQ, but also there are many enemies and hidden assassins. Use Eagle Vision to pinpoint as many enemies as you can; it will be easier to keep track of them visually. And be sure to listen for whispers as you approach a hidden assassin who’s ready to take you down. You may choose to use one of the farmhouses as a vantage point, but there won’t be much you can do from there. Unfortunately, the three scouts are spread out around the area, but they roam about and will, at some point, wander into a corner that leaves them unprotected. Two are on the ground level and one is patrolling around the elevated flag—leave him for last. The first two can be taken out by sneaking around the edges of the gang headquarters. You might want to take out a few soldiers that are in your way, but these scouts are your main focus because they can call out your position before anyone else.
Be on the lookout for the gang leader; he can show up anywhere within this area, but most likely he is near the ground-level scouts. If you haven’t run across the gang leader after killing the first two scouts, try looking for him now because it’s not a good idea to charge the third scout while the gang leader is still looking for you. Once you’ve found the leader and killed him, you have several options for how to approach the final target. If you are comfortable with your air rifle, try putting him to sleep so that you can sneak up on him for an easy assassination. If you think you have his patrol pattern down, see if you can keep in his blind spot and back-stab him after you’ve climbed to his position. Finally, if you’re feeling a little chaotic, a couple of pistol shots on the enemy or a shrapnel grenade can put him down for good while you cut down the enemy flag and claiming this gang headquarters for yourself and your allies.
Enjoy your new farm and collect on some higher income, you’ve just captured the West Countryside Gang Headquarters.
Stuyvesant’s Farm—Brewery Gang Headquarters
|
Region |
|
| Location | Stuyvesant’s Farm |
| HQ Coordinates | 620, -455 |
| Difficulty | Hard |
| Reward | Increased Income |
Objectives:
- Rescue the British soldiers.
- Locate and kill the gang leader.
- Cut down the gang flag.
Bonus Objective:
- Stay out of open combat.
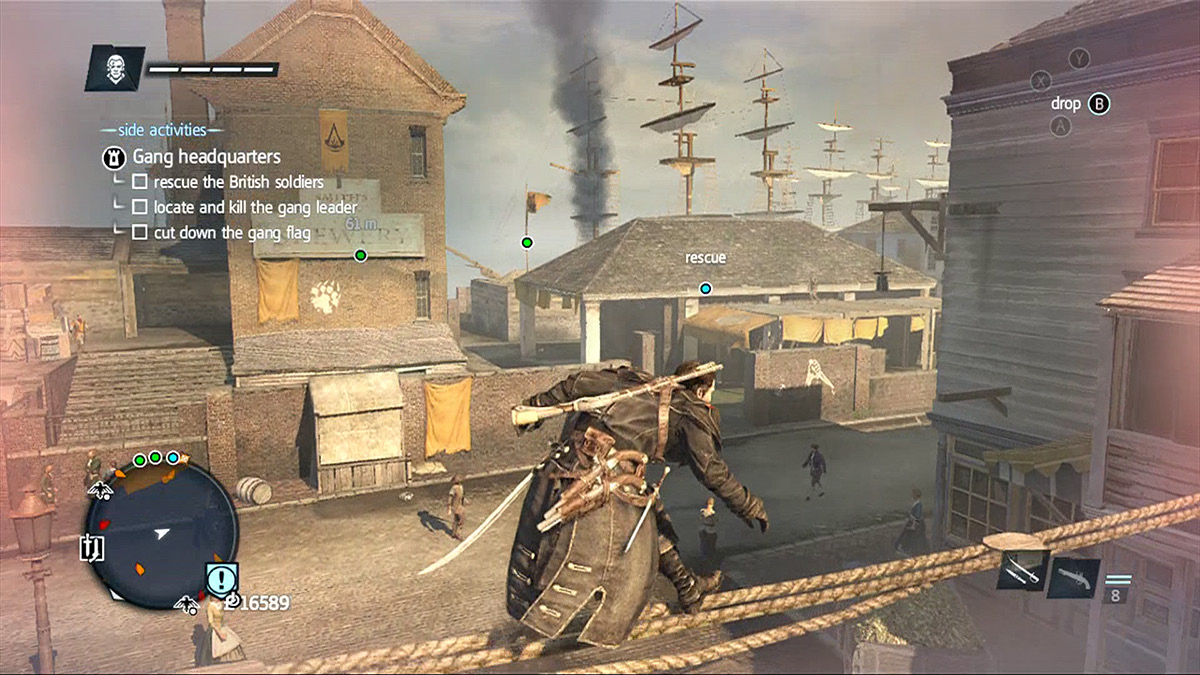
Stuyvesant’s Farm can be a little tricky if you are going for the bonus objective: there are many open corners, guards covering every pathway, and the gang leader likes to hang out right in the HQ center. There is only a small area in which you can stay hidden from him. Try starting this headquarters takedown seaside and hit the enemy from their blind side.
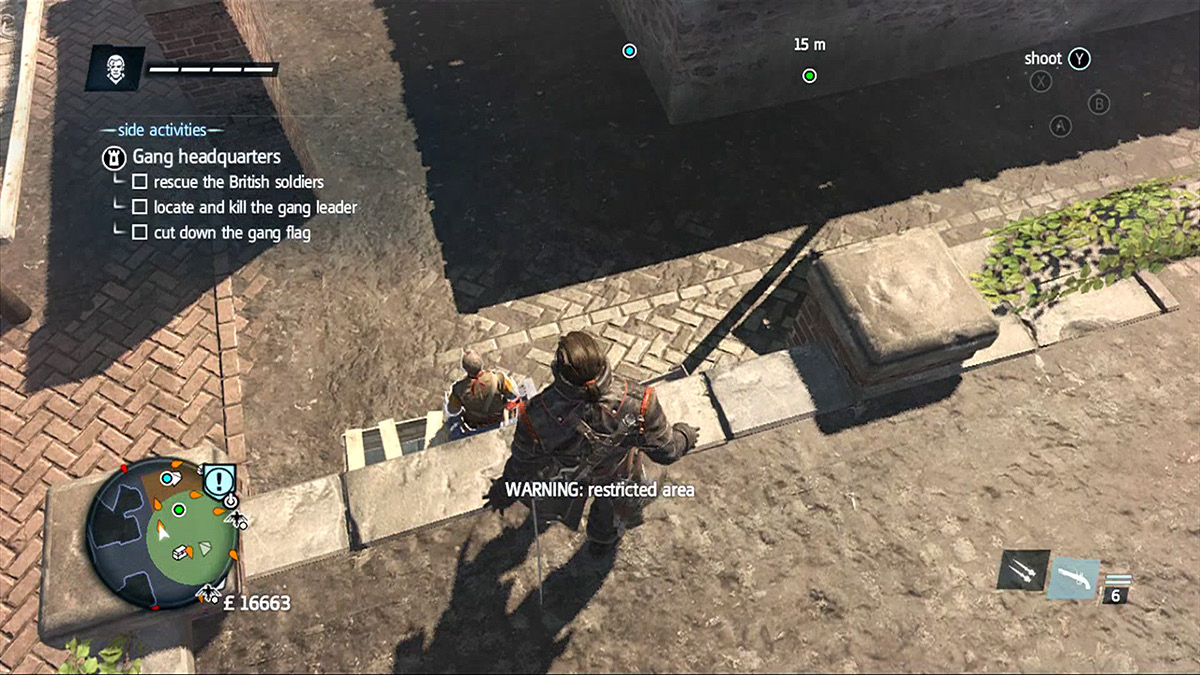
One of the main objectives for this gang headquarters is rescuing the British soldiers. They are in the stables under the watch of a single guard. First you have to get there while keeping out of sight. Try entering these headquarters by climbing on the wall near the eastern entrance. A guard is at this entrance, but he happens to be a lazy guard who’s taking a break and sitting on top of some boxes. From the wall, you can assassinate the guard from the air, but before you kill him, take a look around and try to spot the two guards that patrol directly in front of this guard and ninety degrees west. These two patrolling guards will see you kill the one by the entrance if they are walking toward you, however they do have a long walk back the other way, so wait until they begin this walk and kill the guard. Quickly now; rush the guard directly in front walking away because as soon as he turns around, you will be trapped.
At this point, a patrol may or may not notice the body you dropped just moments ago. If the body is noticed, don’t worry. This is a good thing because they will run to the body to check it out, leaving the stable wide open for you to run in and rescue the prisoners. Also, don’t worry about them; they can take care of themselves from here. The fallen guard won’t distract the others for very long, so once you’re done in the stable, be ready to turn around and hide because another guard may come looking for you. As long as you’re hidden behind the wall, you can kill him and hide his body.
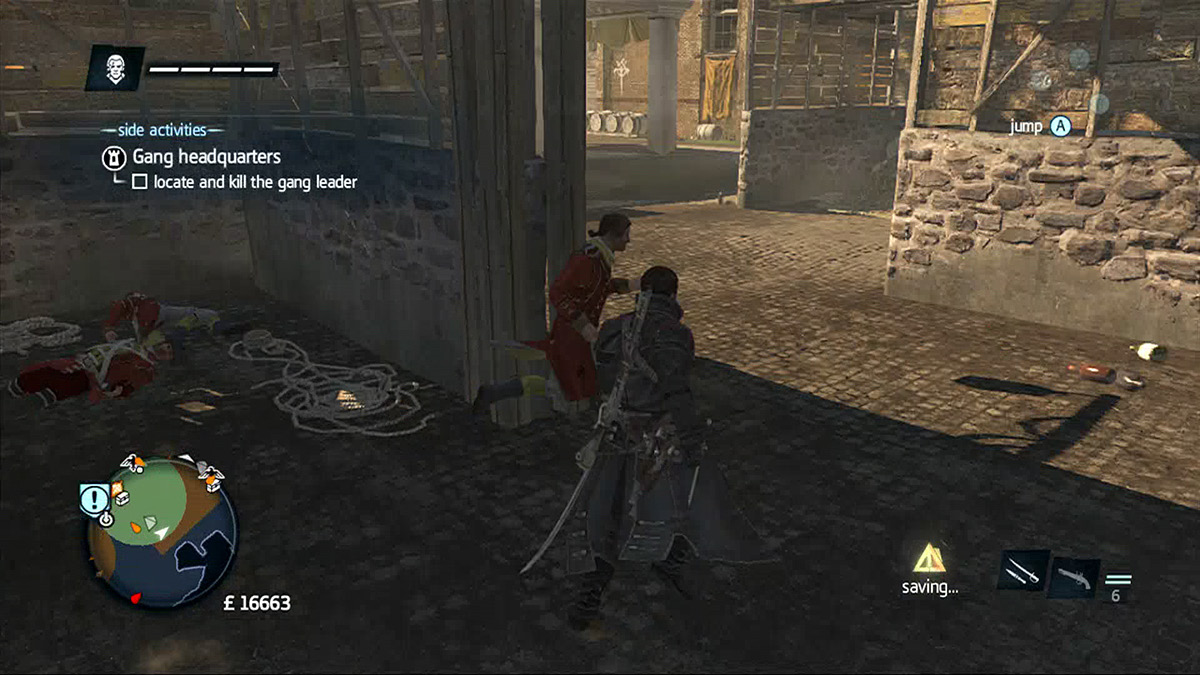
Now, you must locate and kill the gang leader. As mentioned before, he will be patrolling the center of this headquarters, so peering from the stable may give you a direct line to him as he walks by you, don’t forget to use Eagle Vision to locate and tag him because he may spot you, and like most gang leaders, he is a coward and will attack you and run. It’s best to try to lure him and assassinate him, leaving no fuss to foil your plan. Once he’s down, make sure there aren’t any guards around, then climb up and cut that flag down. The headquarters is now under the control of the Templars, and you benefit from this by getting a new fast travel location and an instant raise in your income.
Waterfront—East Port Gang Headquarters
|
Region |
|
| Location | Waterfront |
| HQ Coordinates | 563, -651 |
| Difficulty | Hard |
| Reward | Increased Income |
Objectives:
- Sabotage the gang’s poison reserves.
- Locate and kill the gang leader.
- Cut down the gang flag.
Bonus Objective:
- Stay out of open combat.
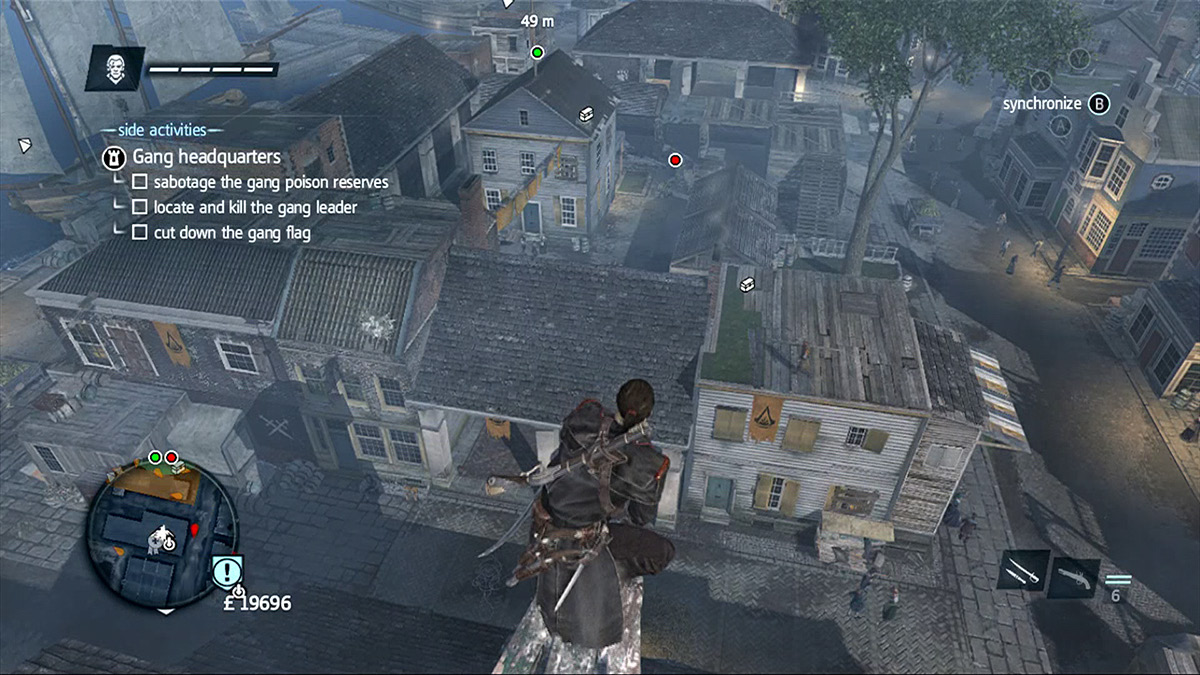
Waterfront is a large and complicated gang headquarters to take. There are several scouts on the rooftops and plenty of patrolling guards that will spot you if you are not careful. The safest way to take this headquarters will take the longest, but if you want the bonus objective of staying out of combat, it will be well worth it. The East Port Gang Headquarters is almost completely surrounded by tall buildings. Of course there are entry ways, but they are bottlenecks that you don’t want to get caught in. It is advantageous for you to climb one of these taller buildings, and if you choose one that is close to a scout, you can take him out provided you time it correctly. Use sleep darts to cover your approach as you run all the way around the headquarters, taking out as many scouts as you see. This makes the ground work much easier.
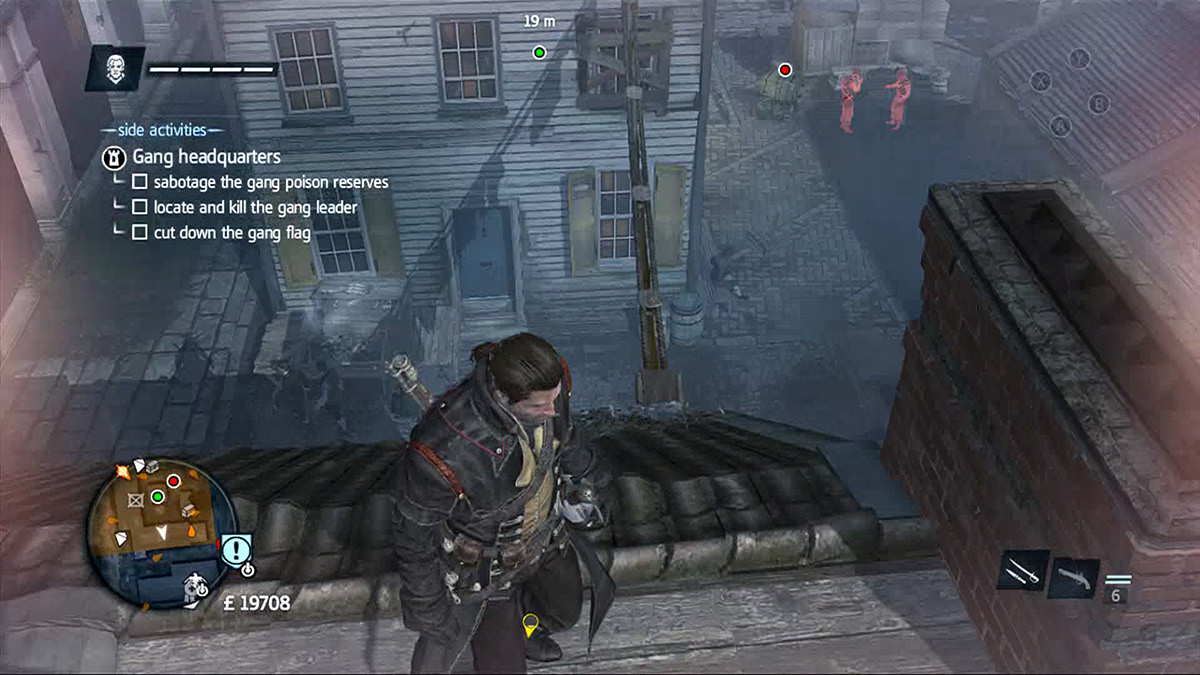
One of the main objectives is to sabotage the gang’s poison reserve. It may be enticing to tackle this right away, but two stationary guards are watching the reserve, and unless you lure them away, it will be difficult to stay hidden. The next thing you should do before jumping down to the ground level is search for and locate the gang leader; knowing that he’s not searching for you anymore will make sabotaging the poison reserves much less stressful. The gang leader patrols all over the inside of the headquarters, so taking out the rifleman scouts will prove useful. You can use the rooftops to run around the complex in search of him, using Eagle Vision. Find him and kill him.
You should now be on the ground floor. There are a number of hay wagons and corners you can use to hide in or behind. Use as many as you can, but move quick and keep your head on a swivel because an enemy will more than likely be waiting for you around every turn. A number of assassins are in the area, so constantly switching in and out of Eagle Vision will keep you safe and out of combat. Once you make it close enough to the gangs poison reserve, you have to lure the guards away from it. There are two guards; do what you can to lure one at a time because if they both come looking for you, it may provoke combat if you take one out while the other is present. After you’ve taken out both guards, or at least lured them with a bait and switch, you can sabotage the reserves. Do this and climb up the flag building to cut down and claim the Waterfront for the Templars.
East Village—East Countryside Gang Headquarters
|
Region |
|
| Location | East Village |
| HQ Coordinates | 559, -293 |
| Difficulty | Hard |
| Reward | Increased Income |
Objectives:
- Sabotage the gang’s poison reserves x2.
- Locate and kill the gang leader.
- Cut down the gang flag.
Bonus Objective:
- Stay out of open combat.
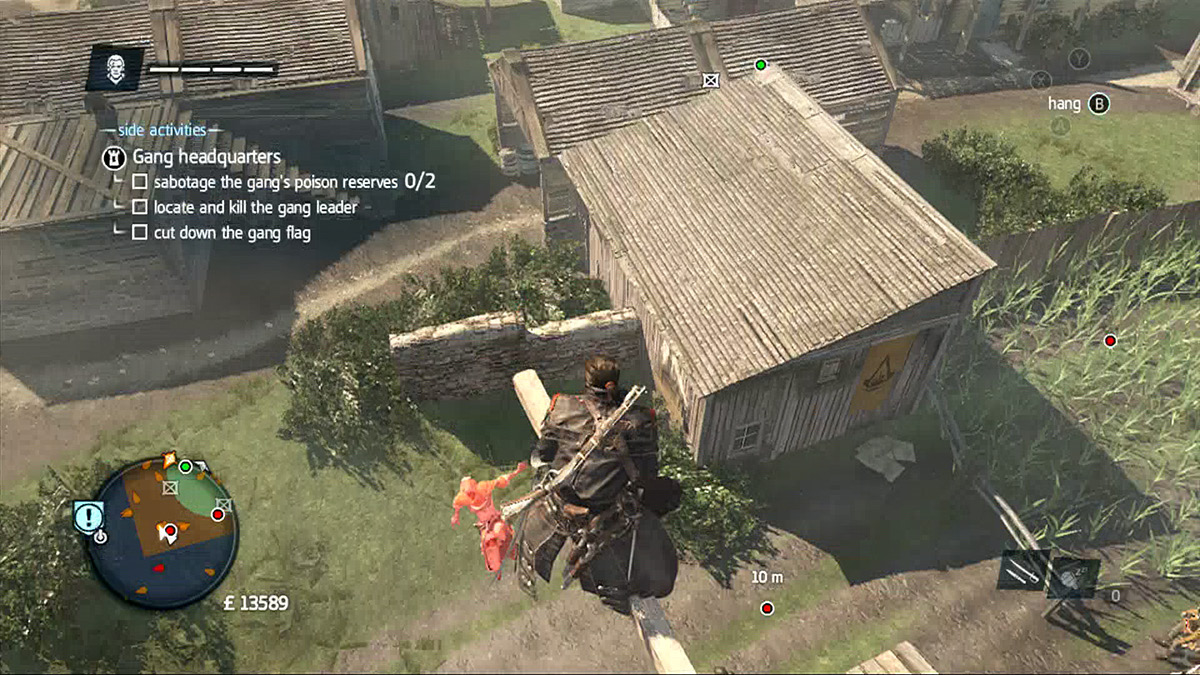
East Village may be one of the most difficult gang headquarters to take simply because it happens to be a small location highly populated with the enemy gang. There are plenty of brush tufts and fields for you to hide in, so be prepared to use them if you need to get out of sight quickly, especially after sabotaging one of the enemy’s poison reserves. Since East Village is so small, it is a good idea to enter the headquarters by climbing one of the taller buildings. This allows you to get a good view of the entire area and plan your attack accordingly.
There are two objectives, much like the Waterfront, that have to be met on top of killing the leader and cutting down their flag. It will serve you best to do these first because it will also decrease the enemy population a little. Climb on top of the tallest building above one of the poison reserves; you may notice an assassin awaiting your arrival. She won’t see you if you climb the back side because she is watching the inner section of the headquarters, so sneak up behind her and kill her before she gets you. From here, you can take her position hovering above several enemy soldiers and if you time it right, you may be able to assassinate two of the soldiers that patrol the side near the field. Quickly recover and, if the coast is clear, sabotage the poison reserve and get clear of the area.
If you made it away from the reserve without being seen, sabotaging the second reserve shouldn’t be a problem. By killing the guards that traveled a little farther than they should have, you can clear this area as well. Sabotage the second poison reserve and keep out of side within the field.
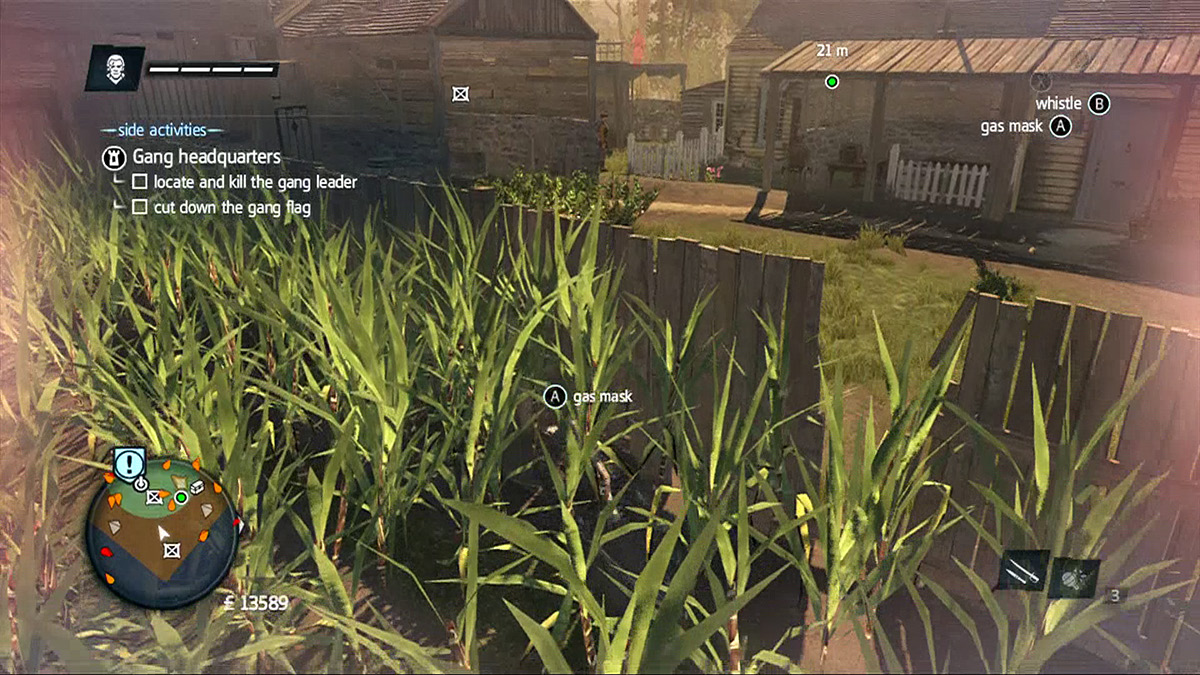
This field is adjacent to a small courtyard. This is where the gang leader likes to hang out. Make your way to the center building and use Eagle Vision to search for the leader. From here you should be able to get the drop on him, but be diligent and don’t stay up there too long because a rifleman guard is perched on top of the opposite roof. Get up, locate the gang leader, and kill him. Lingering too long will get you caught, so if you cannot find him right away, you might want to sneak around the backs of the buildings to get rid of the guard, then take your time and search for the leader again.
Once you have killed the leader, you will be safe to climb up and cut down the enemy’s gang flag. Do this and claim the headquarters for yourself, creating a new fast travel location and a growth in your income.
North Atlantic
Halifax—Halifax Gang Headquarters
|
Region |
|
| Location | Halifax |
| HQ Coordinates | 319, -832 |
| Difficulty | Easy |
| Reward | Increased Income |
Objectives:
- Sabotage the poison supplies x2.
- Locate and kill the gang leader.
- Cut down the gang flag.
Bonus Objective:
- Stay out of open combat.
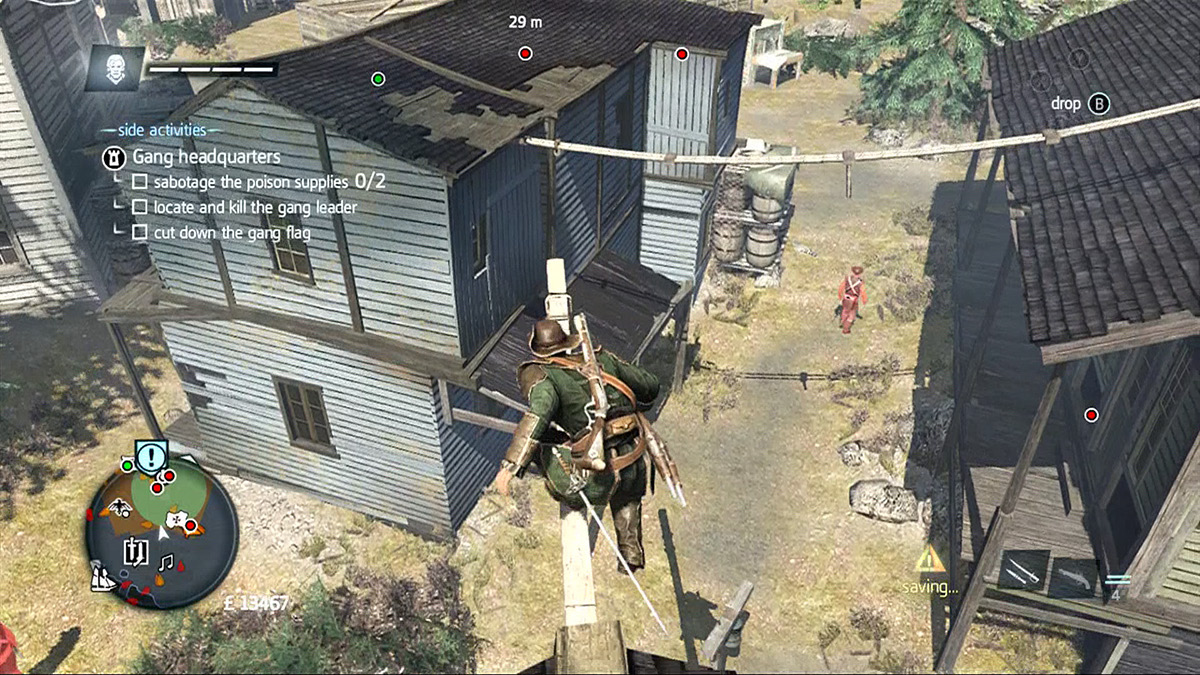
Taking the Halifax Gang Headquarters should be quick and painless, especially if you have done some of the others first. This HQ is full of tall buildings, leaving you lots of room to run around and scope out all of your targets before taking action. There are a couple of poison supplies you will have to sabotage and, of course, you must locate and kill the gang leader. Fortunately, your objectives are all located relatively close together.
Start by climbing on top of the tall building near the weapons shop. This building allows you to do some reconnaissance without even entering the restricted area. Use Eagle Vision to tag as many enemies as you can. If you look toward the center near the two poison supplies you might be able to spot the gang leader. If you can’t spot him, don’t worry: He will show up sooner or later. From the tall building you can enter the restricted zone with a short building-to-building jump. Listen for the whispers because even though this may be one of the easier HQs to take, it is important not to take it too lightly. An assassin can do enough damage to make you fail very quickly.
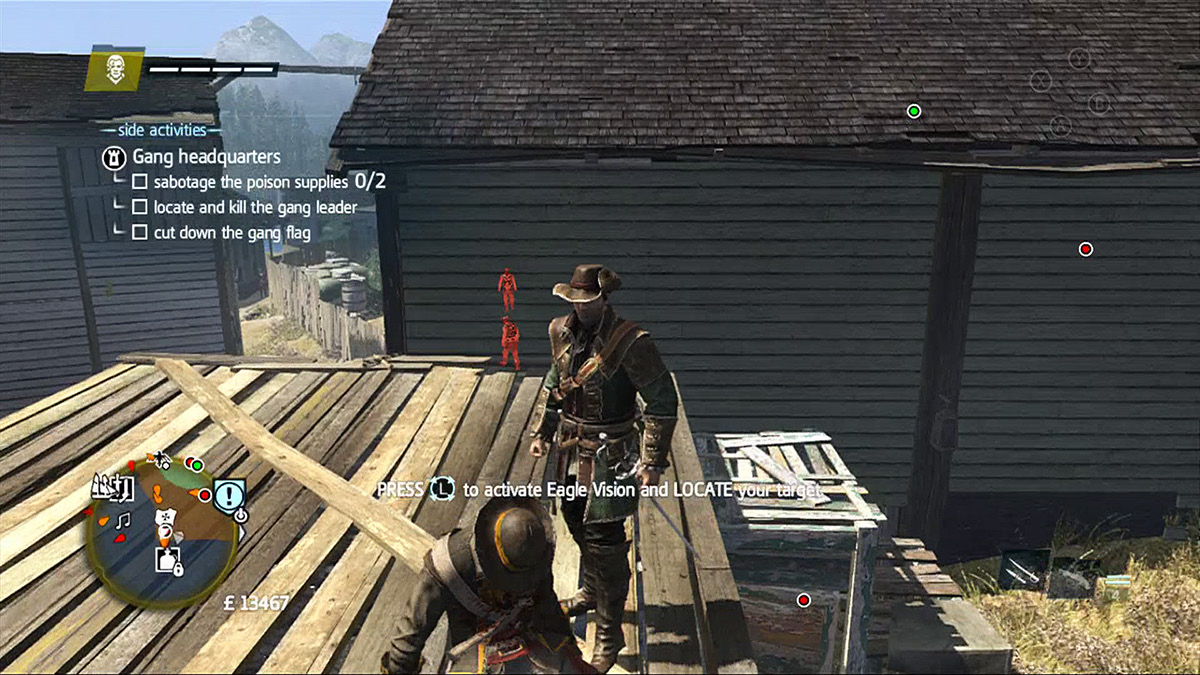
From the building you just jumped onto, you can see a scout to your right who’s looking the opposite way. Take care of him and assassinate the guards below. With one swift action you can kill all the targets quickly and cleanly. This also leads you to your first poison supply. Sabotage the supply and head right back up the building you came from. Now is the time to make your move on the gang leader because he will spot you if you go for the second supply first. Locate and kill him, then stay hidden in the brush along the back side of the headquarters.
Keeping to the brush, sneak around to the other side of the poison supply and ambush any guards protecting the supply. Kill them and sabotage the final supply. Now sneak up to the gang flag and cut it down to earn your rewards and own the gang HQs of the North Atlantic.
River Valley
|
Region |
|
| Location | Albany |
| HQ Coordinates | 888, -789 |
| Difficulty | Easy |
| Reward | Increased Income |
Albany—Albany Gang Headquarters
Objectives:
- Rescue the British officer.
- Locate and kill the gang leader.
- Cut down the gang flag.
Bonus Objective:
- Stay out of open combat.
The Albany Gang Headquarters is a little different than the ones you captured in New York and the North Atlantic. This headquarters is on a cliff in Albany, and that gives you the opportunity to use a few very different infiltration techniques. If you choose to, you can dock at the town’s harbor and use the urban area to conceal your approach. However, you may want to take your ship to the cliff that is directly adjacent to the gang’s headquarters because it is a little more direct, yet offers a greater tactical advantage.
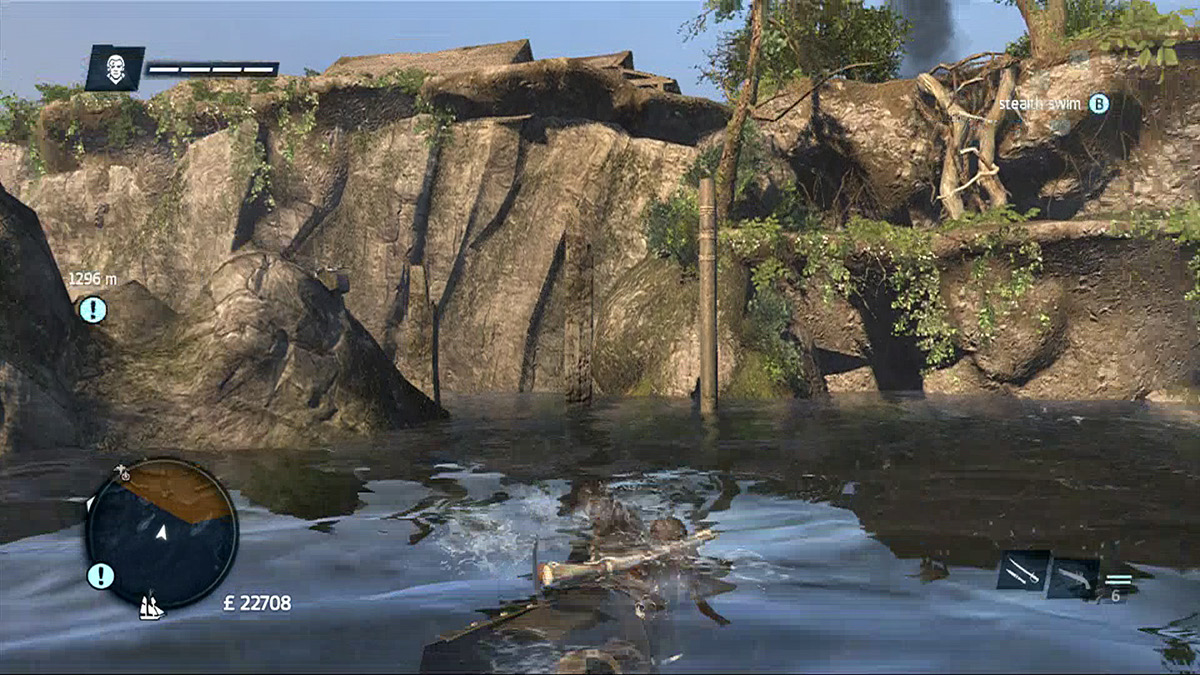
The mostly sunken ship that appears to have hit shallow water conveniently creates just the right platform to get you to the side of the cliff. Use the ship and climb up the side; you should be at the immediate edge of the restricted area. Right away, you notice the captured British officer (one of your objectives) being watched by a lone guard: This is a trap. Use Eagle Vision and listen to the whispers because there is an assassin nearby and you must take him out before he catches you by surprise. After you’ve taken care of the assassin, use the tree and the bushes around the officer to kill the guard and rescue your ally.
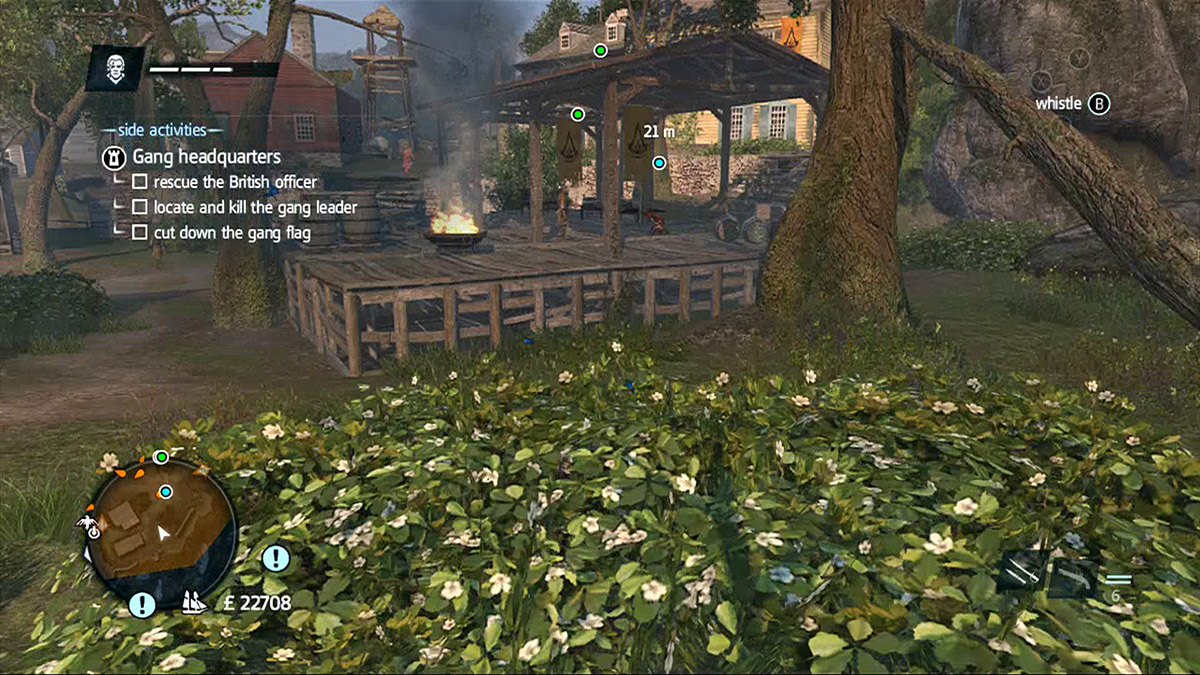
As soon as you rescue the captive, find a hiding place because up the staircase behind him is a watchtower with a rifleman who will easily spot you if you aren’t careful. Either find another way around or wait until he is facing the other way to climb the tower and deal with him. Your next objective is to find the gang leader. Fortunately, his area of patrol is on the other side of the HQ. The guard tower is attached to a building that will lead you to the gang’s flag; however, on the other side of it is another guard tower and another rifleman. Time his patrol path and rush him, taking the rifleman out of the picture. In the Albany Gang Headquarters, the gang flag doesn’t serve as the gang leader’s bait, so once the coast is clear, go ahead and cut it down.
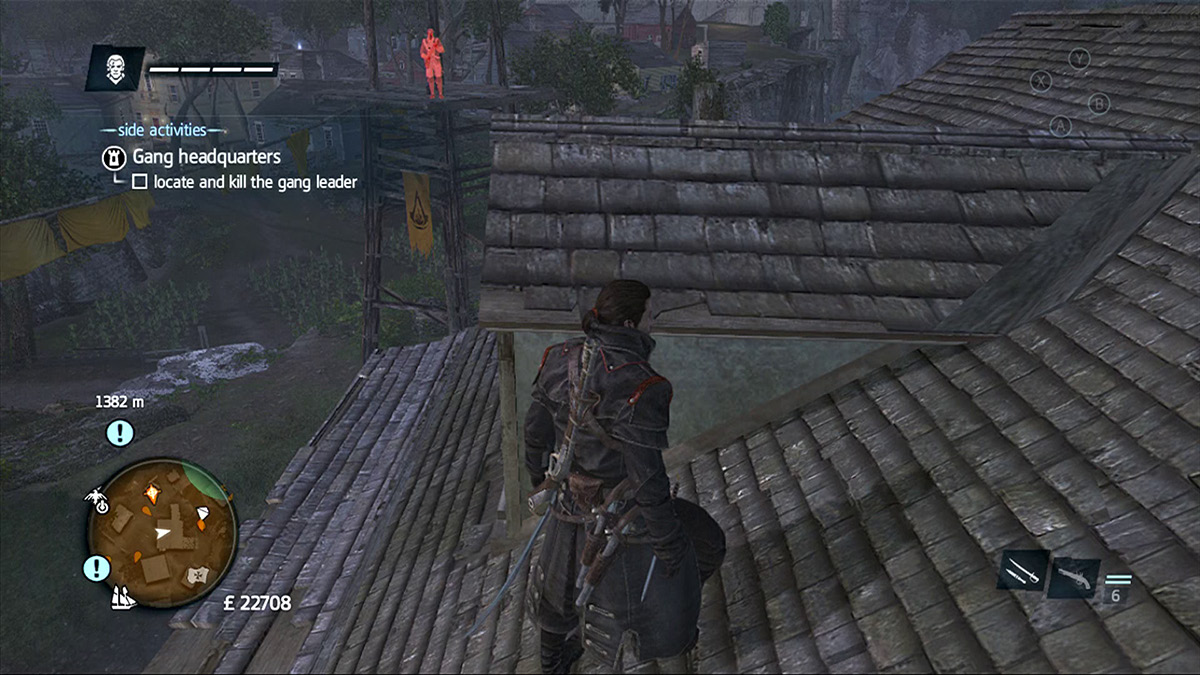
You should be able to see the gang leader’s patrol area via the vantage point on top of the building. Use Eagle Vision; there is a good chance he will cross your line of sight. To get to his location, there are two available paths: You can take the back path, or you can simply cross the bridge. If you killed the guard in the watch tower, the bridge path may be the safest route. Get to the other side and hide in the bushes as soon as you can. Hopefully, you know the location of the gang leader and can create a plan of attack to kill him quickly. If not, he will likely cross your path soon, so stay hidden in the bushes and wait for your moment. Assassinate the gang leader and his minions will surrender.
Two Bends—Central Gang Headquarters
|
Region |
|
| Location | Two Bends |
| HQ Coordinates | 408, -793 |
| Difficulty | Medium |
| Reward | Increased Income |
Objectives:
- Kill the Slaver.
- Locate and kill the gang leader.
- Cut down the gang flag.
Bonus Objective:
- Stay out of open combat.
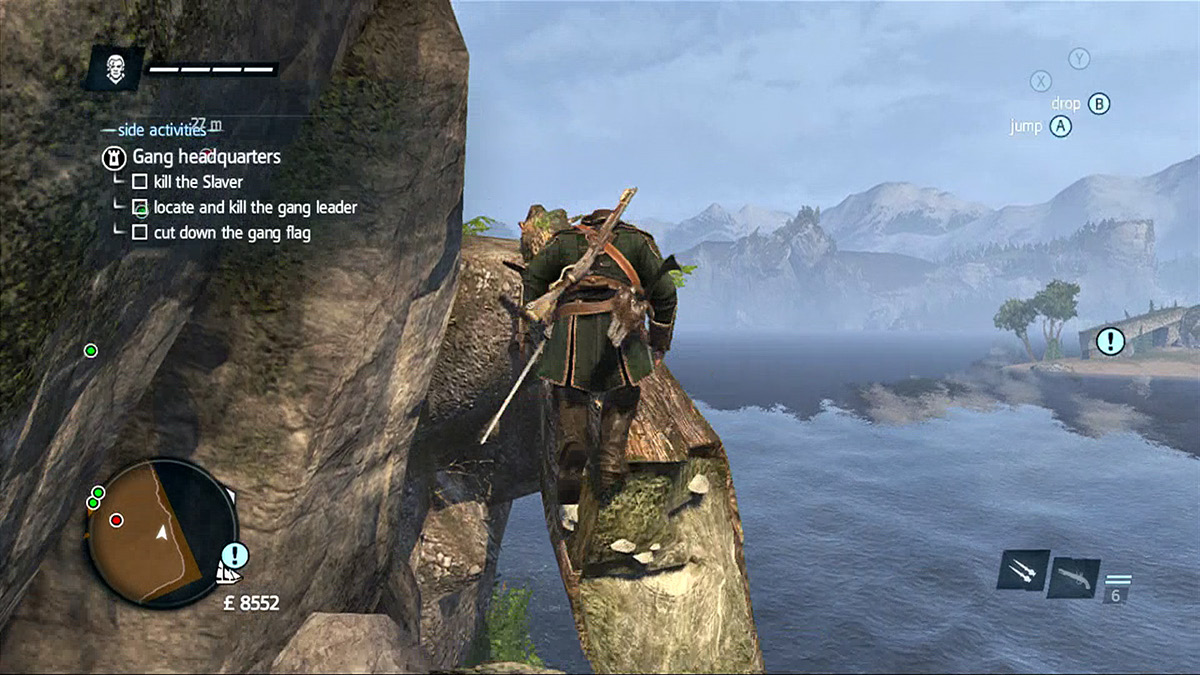
Like the Albany Gang Headquarters, the Central Gang Headquarters is on a cliff near the sea, so again you have two choices in claiming this HQ: Take the headquarters head-on and use the town as cover, or use the cliff side to climb up the stone and flank the enemy, preserving the element of surprise. If you choose to enter through the front entrance, use the buildings to cover your approach and bushes to eliminate enemies, but beware of the guard towers that watch this area. However, if you choose to take the flanking route, climb the stone cliff and use the bushes that grow near the water to hide and scope out your plan of attack.
Using the bushes near the cliff, you find that you started this headquarters takeover right next to the field that the Slaver is patrolling. From the bushes, you can use the field to crawl through and lure the Slaver right into your blade. Time his path carefully because about three other soldiers also patrol this area and move across walkways. It is possible to reveal your location if you are not paying attention. Killing the Slaver completes your first objective.
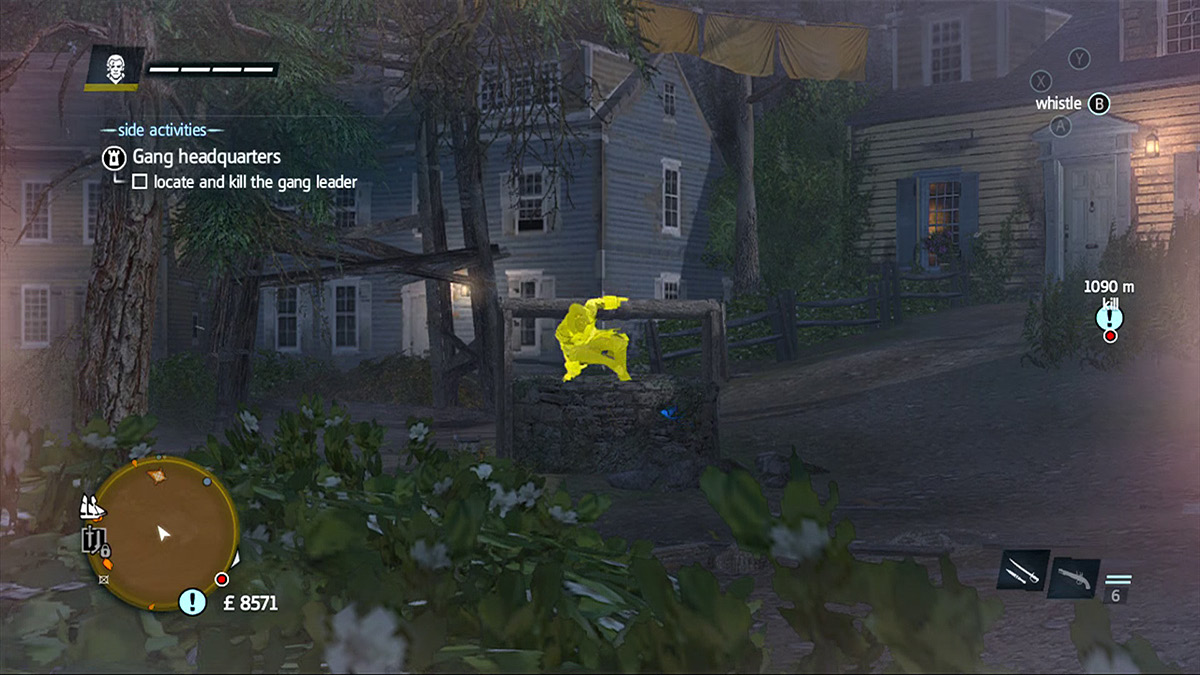
While approaching the gang leader’s location, you might want to kill a couple of guards standing in your way (you know, if you’re into the whole possibly unnecessary killing thing) because there are only a couple of paths to the inner headquarters and both are heavily guarded. You may choose to climb on top of the red field house, but you risk being spotted by the tower guards. If you haven’t killed the riflemen, take one of these paths and find a bush to hide in. Here you start to hear the whispers of an assassin close by; stay hidden and locate him before he jumps you.
Next, it’s relatively safe to climb up to the gang flag and cut it down. You can use this flag area to locate the gang leader because you are too high up for any of the enemies to spot you. On the side of the building where the gang leader patrols, indicated on your minimap, there is a leap of faith. Once you’ve spotted the gang leader from this location, the leap of faith serves as a great way to get to the ground floor without being seen. Dive into the hay wagon and lure the leader to your location or track him down silently. This is your final task: Complete it by killing him and you have taken this gang headquarters for yourself.
Lac Eternel—Lac Eternel Gang Headquarters
|
Region |
|
| Location | Lac Eternel |
| HQ Coordinates | 423, -373 |
| Difficulty | Hard |
| Reward | Increased Income |
Objectives:
- Sabotage the gang’s poison reserves x3.
- Locate and kill the gang leader.
- Cut down the gang flag.
Bonus Objective:
- Stay out of open combat.
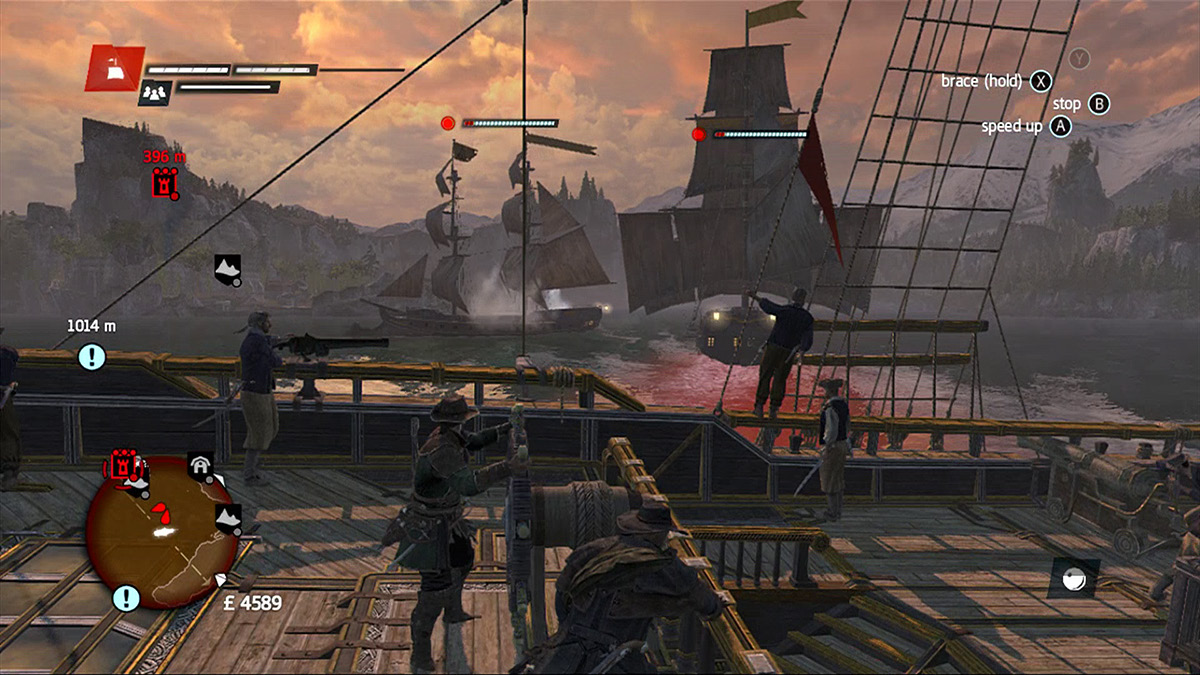
Depending on where you are in the story, the Lac Eternel Gang Headquarters may be very different from any other gang headquarters you run across. Before you get to the headquarters, you must first get through the blockade of enemy ships that protect the harbor. Lac Eternel is in a “hard” area, so this can be a challenge if you and your crew are not prepared. The area in which the headquarters is located is very large, making your approach a little more difficult to plan. If you dock the Morrigan at the harbour, you can take the path to the right of the dock and use the brush and trees to conceal your approach, or you can use the shipwreck to the left to get over the fortress wall.
Since Lac Eternel is so large, you must sabotage three different poison reserves to take this gang headquarters. The reserves are spread out, making it impossible to take out two with one move. It may be easier to get to the farthest poison reserve because you can use the outside of the headquarters and hug the mountain to avoid being noticed by anyone patrolling the center. Fortunately, the guards in this headquarters like to keep relatively close to one another and move in groups. This makes moving around them easier because they normally all face the same direction. Note that even though they usually move in groups, they may split up from time to time, and if you can’t quite move around them, this is your chance to pick them off one by one.
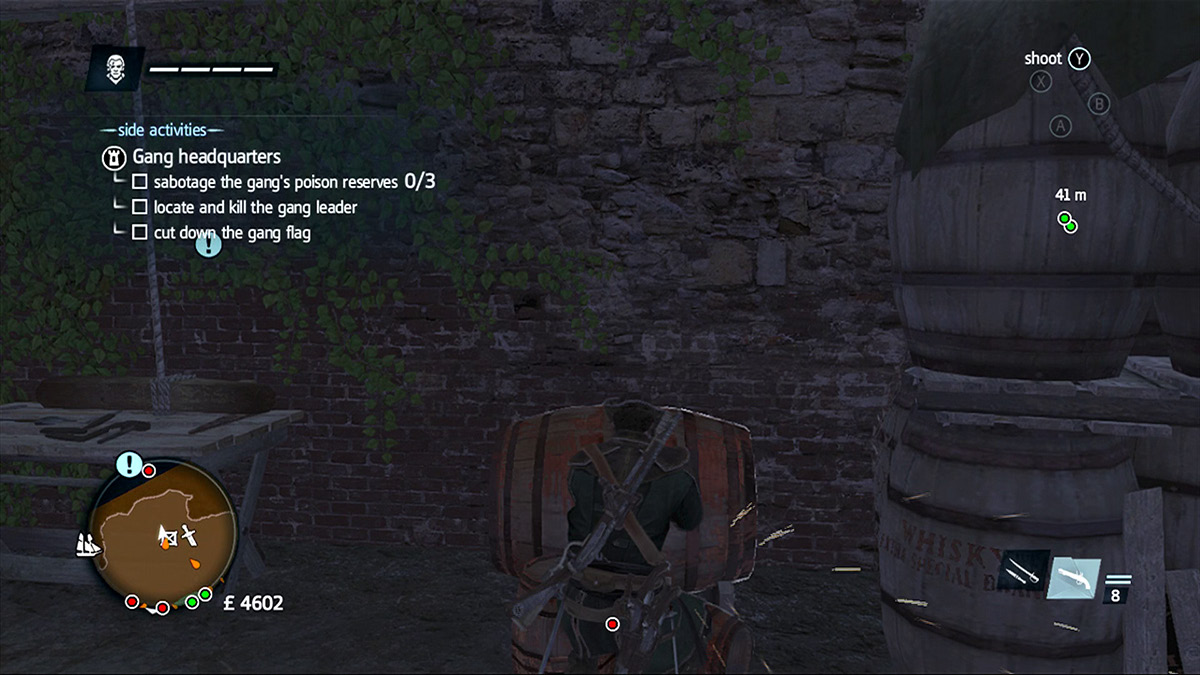
When you’ve made it to the back poison reserve, lure the two guards in front of it away by hitting the rifleman in the scout tower with a berserk dart. This grabs the guards’ attention and, if you’re lucky, gets rid of that pesky rifleman overlooking the area. Sabotage the poison reserve, then use the stables behind you to climb on top and escape toward the next objective. You can take the rooftop route straight to the next reserve. From there, you can see another two guards. Dive down into the hay wagon, then lure the guards toward you: It’s a double assassination opportunity. If the coast is clear, get in to sabotage the objective and get out by slipping up the fortress wall directly behind the poison reserve.
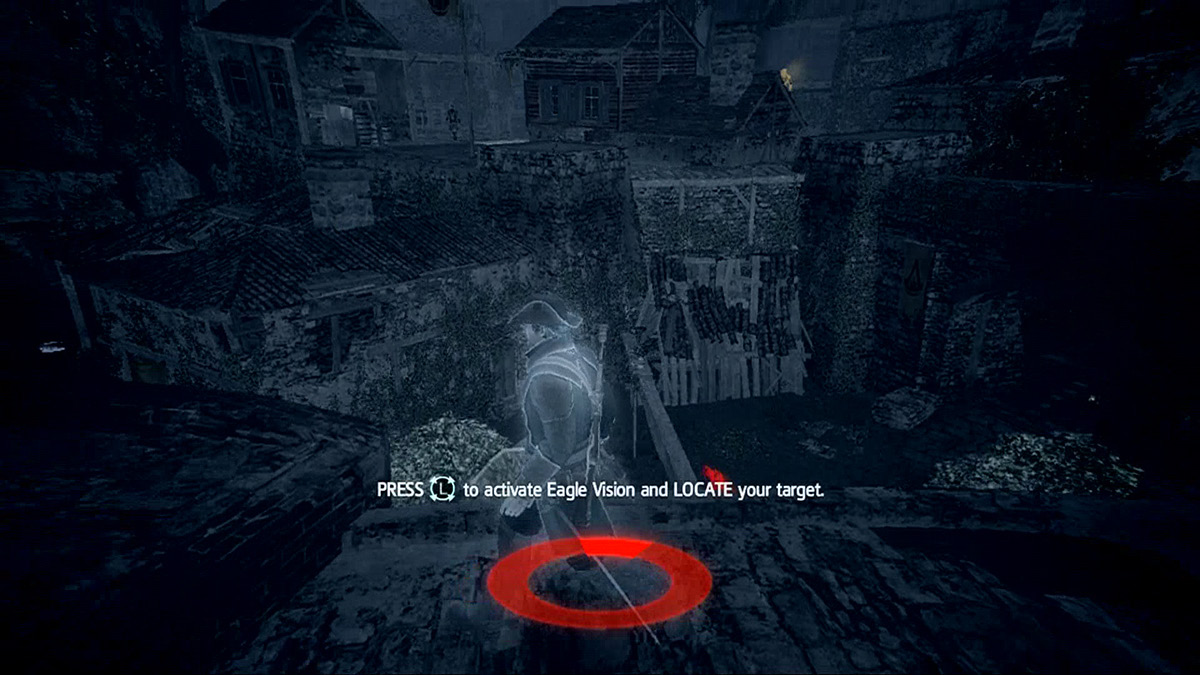
With no time to waste, use Eagle Vision to locate the gang leader. He is hiding somewhere in the second level, directly across from the fortress wall. Locate him and run to the other end of the wall because this provides a great transition to the final poison reserve. Here, you see two British soldiers being toyed with by the enemy gang. If you can kill their tormentors quickly, do so. If not, you may want to hide in the wagon below and lure the enemies over one by one. Sabotage the final reserve and find the gang leader. Be careful; there are still a great number of enemies roaming around the paths, but if you can get to him before anyone sees you, then the rest of this takeover is easy. Kill the gang leader and cut down the flag to receive another income boost, a new fast travel location, and the achievement/trophy “Capture all Gang HQs.”
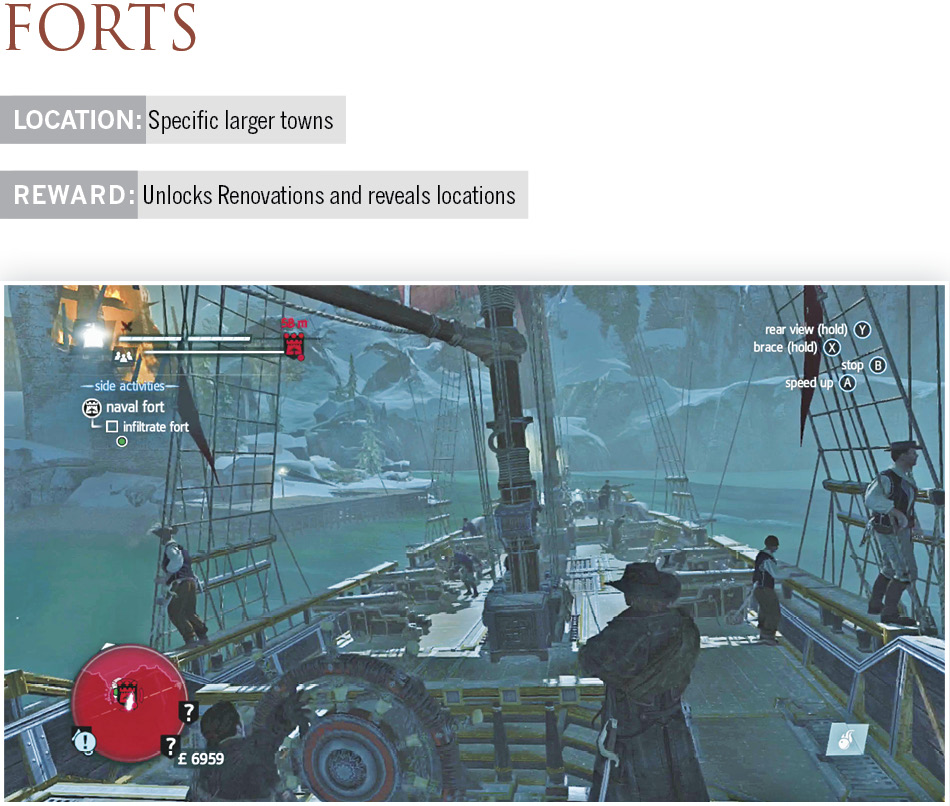
Military forts have several defensive towers near their docks. They’ll fire on ships that get too close; be careful of their damage output. Mortar damage is always nasty, and forts have a good supply of them and infinite ammo to shovel at you. Even fast, maneuverable sailing won’t avoid all of the damage. Also, these ports have ships to assist in their defense, so it’s a battle on several fronts.
Having plenty of your own mortar ammunition is a good start for these fights. Mortars deal enough damage to nail those towers, and the extended range lets you start taking things out well before any local ships join the battle.
Use all of the mortar ammunition that you have, and be just as free with your heavy shot and flaming oil. Forts always have harbormasters, so you can stock back up on everything after you finish your task. Don’t hold anything back!
Another good trick is to board and take ships in the area during the fighting so that the Morrigan can be repaired on the fly.
Once you’ve taken the outer defenses, send Shay into the fort. There are usually several additional tasks to complete before you can claim the fort. Defeat any snipers while eliminating stashes of ammunition or whatever else is marked. Once you do this, the leader of the facility comes out to see why their entire base is going up in flames. Target them and kill the leader along with their bodyguards to finish the Fort activity.
Remember to bring plenty of personal weapon supplies before making these runs. Grenades and Smoke Bombs are both highly useful because of the prevalence for group fighting that you encounter inside the forts.
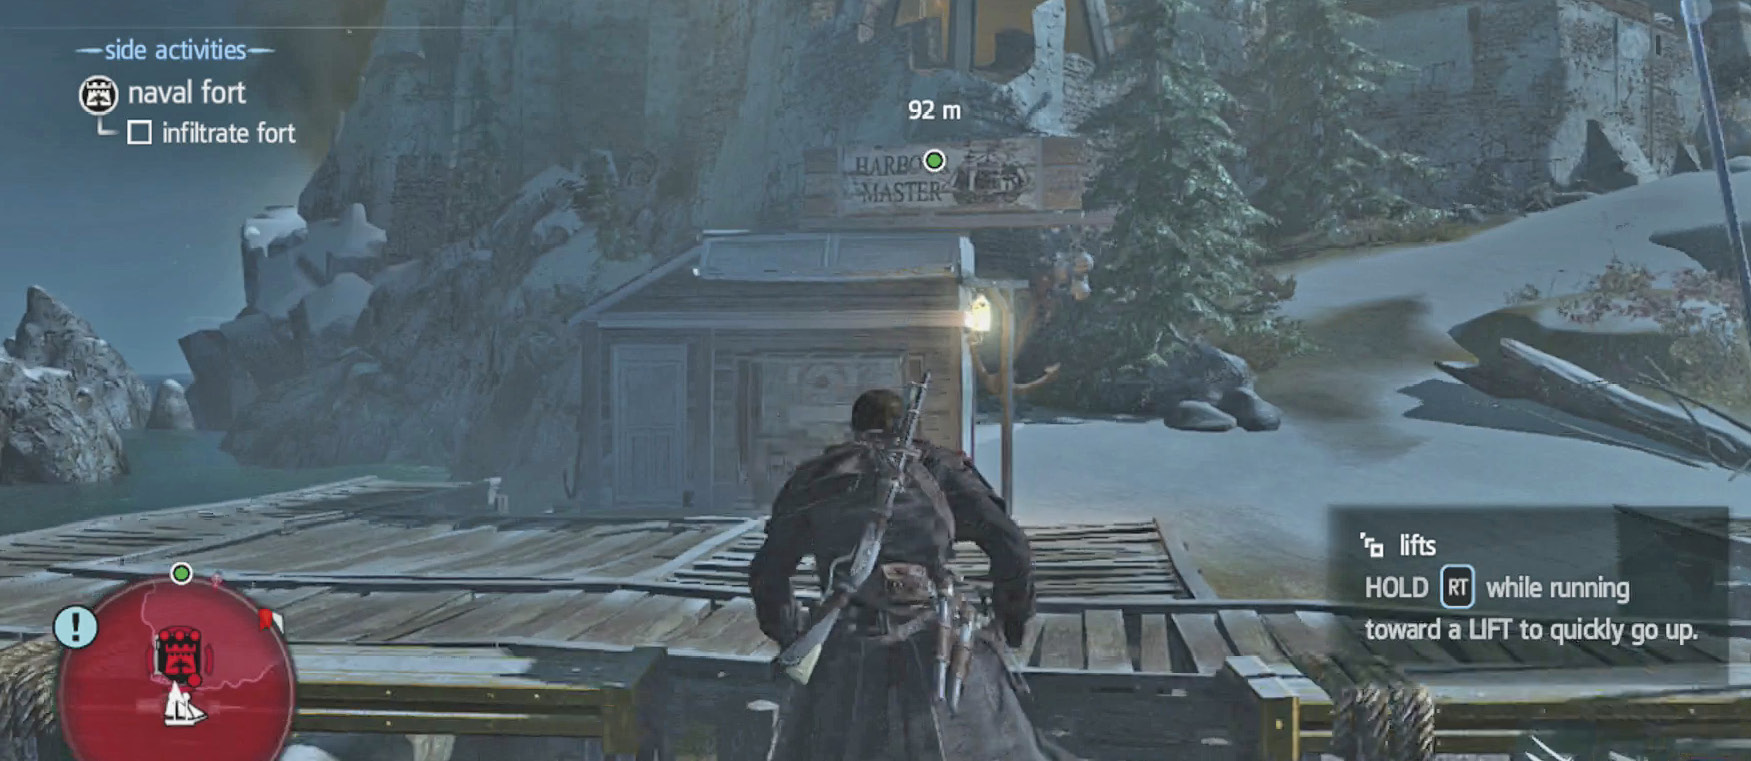
Port La Joye
Naval Objectives:
- Destroy fort defenses (4)
Land Objectives:
- Destroy powder reserves (2).
- Kill the fort captain.
- Kill snipers (2).
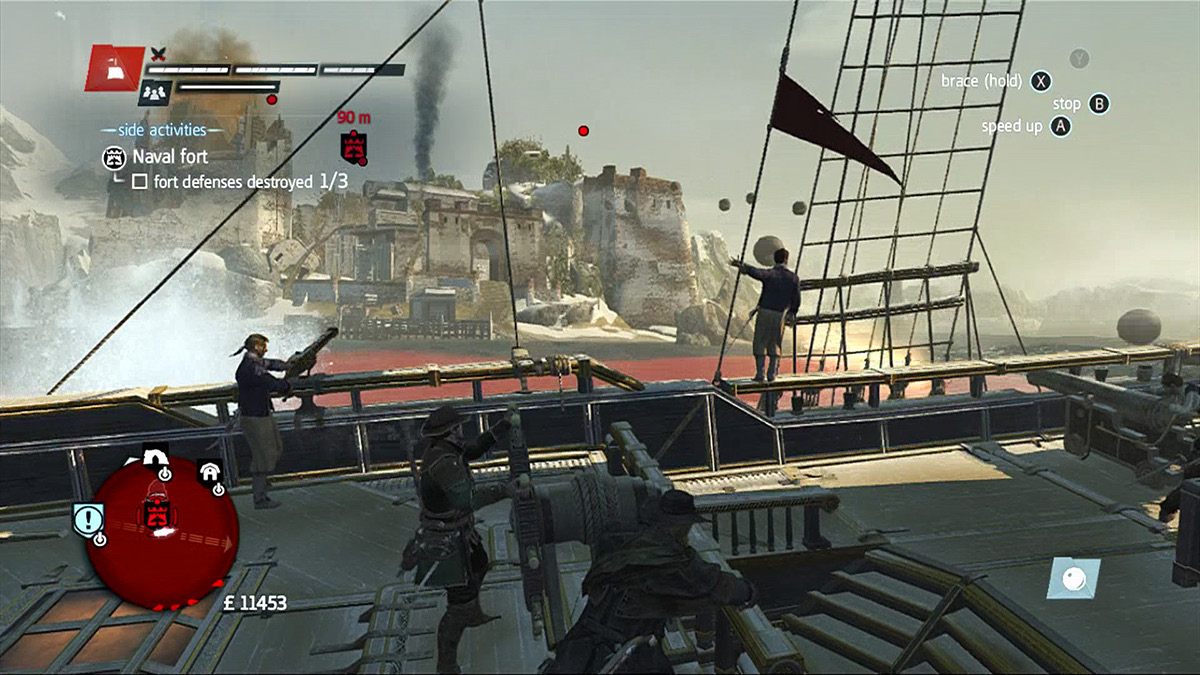
Port La Joye is one of the more challenging of the Naval Forts in Assassin’s Creed Rogue simply because it is protected by four guard towers. If you don’t have your ship upgraded to be able to both take a few hits from the guard towers’ volleys and have enough fire power to take them down, this fort will be exceedingly more challenging. Use the Morrigan’s speed to travel horizontally and attack the towers with your broadside cannons. It may be easier to avoid enemy fire if you take each tower head-on, however, your forward cannons won’t do enough damage, which makes this first phase of the fort more difficult than it has to be.
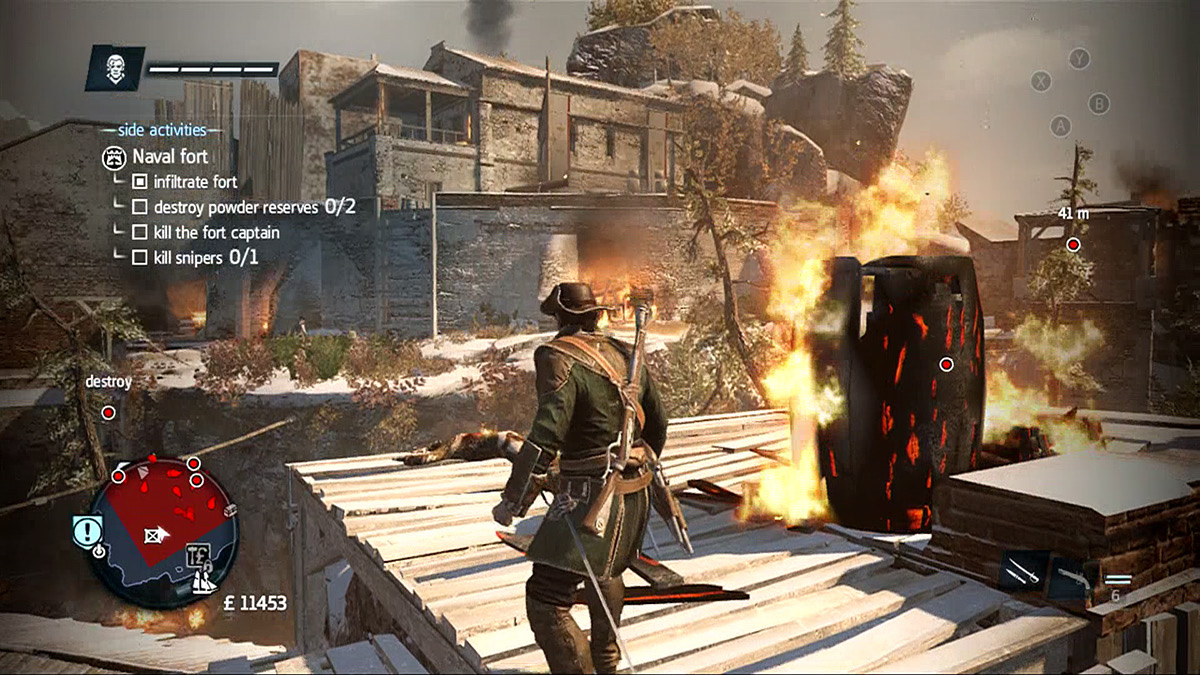
Once the towers are down, you will be able to dock at the front of the fort and prepare to infiltrate. As with all forts in Assassin’s Creed Rogue, you have a few different options in how you approach your objective. As you will notice, directly after you dock your ship you, there will be a breach in the enemy’s wall, which allows you to sneak in on the ground level. Crawl under the wall and you will find yourself hidden in the brush; stay hidden and wait to scope out your surroundings before moving forward. Several guards surround the area that you have just entered; fortunately for you, they are a little preoccupied by the damage that you have just done to their fort. To your immediate left you see one of the powder reserves that you are required to destroy to complete this activity. Take it out and anyone you think might give away your position, then get out of there.
Unlike the Gang Headquarters, taking a Naval Fort is much more chaotic and does not have a bonus objective tied to it. However, it is still a good idea to stay hidden as long as possible because even though you will have your crew there to help you take down the enemy fort, there is a good chance they will be busy taking the front door down and killing all that stand in their way while you are in the back ranks making sure they aren’t being gunned down. With that said, use the chaos to keep the enemy busy while you take care of the main objectives.
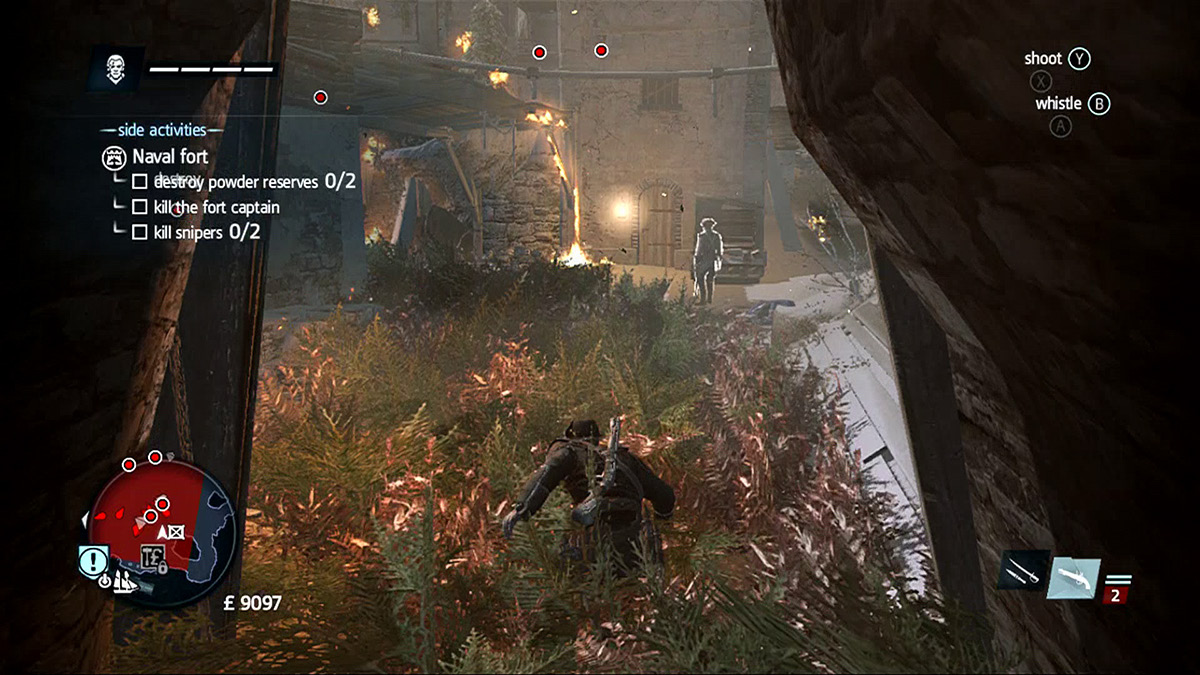
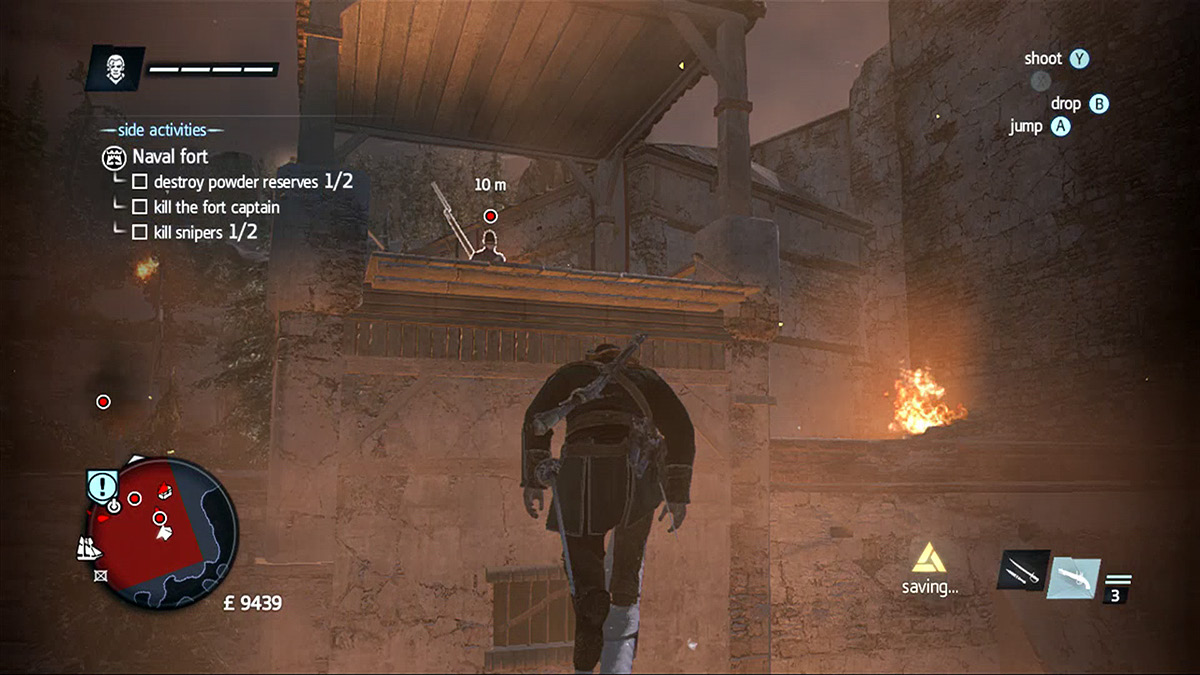
Destroying powder reserves will definitely attract attention to that area, so be careful and don’t give away your position just yet. Giving away your position and engaging in combat will not only draw the attention of more soldiers, but it will also catch the eye of the sniper located in the building adjacent to the powder reserve’s location. Assassinate any guards that you need to in order to stay hidden, but as soon as you get a chance, climb the sniper tower and take out the sniper before you’re spotted.
From the first sniper tower, run across to the buildings on the other side; they lead you straight to the second and final sniper. Note that there is an Animus Fragment just off to the side of the second guard tower. Use your air rifle to make sure he doesn’t get a bead on you before you have a chance to defend yourself. Take out the sniper and then scope out your next objective, which happens to be fairly close to this tower. It should be clear for you to head directly to the powder reserve, but because it is right in front of the fort captain’s headquarters. You have two choices once you’ve ignited the powder: hide in the bushes and wait for the guards to come to you or climb on top of the overhang and perform an aerial assassination on the guards that are protecting the captain.
The fort captain is a bit sloppy and anxious; take advantage of this and lure him right into your blade. Killing the fort captain grants you completion of this side activity, leaving you with a new fast travel location and new renovation options.
Fort Baie Rouge
Naval Objectives:
- Destroy fort defenses (5).
Land Objectives:
- Destroy powder reserves (3).
- Kill the fort captain.
- Kill snipers (2).
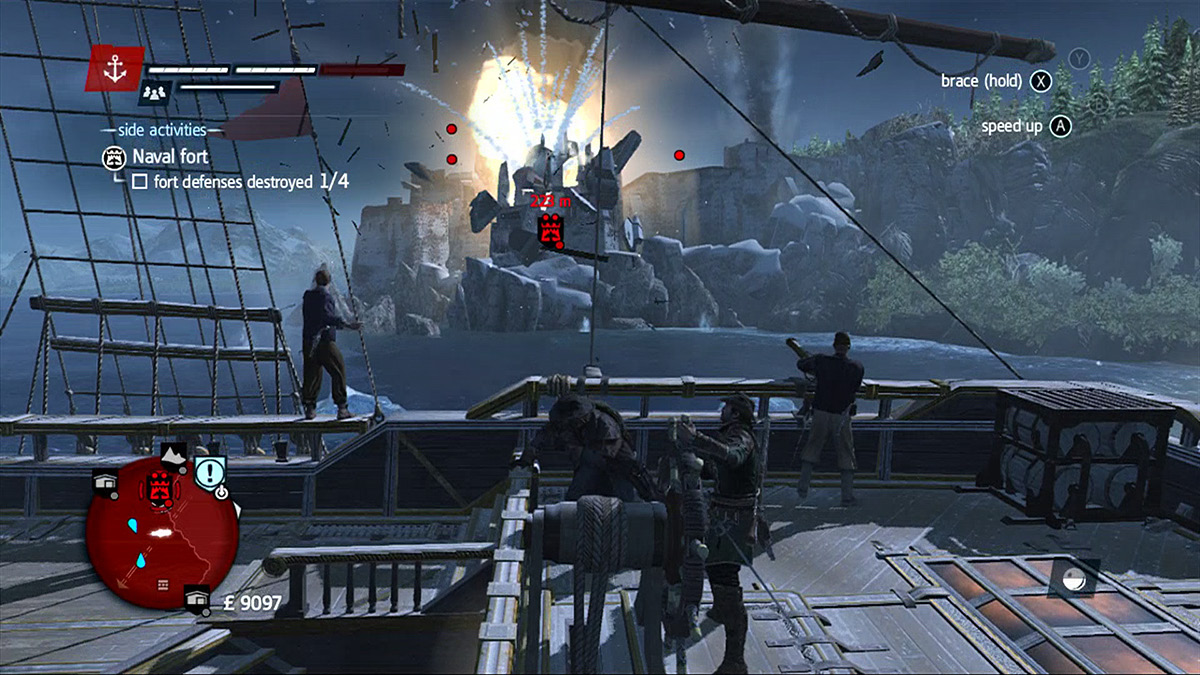
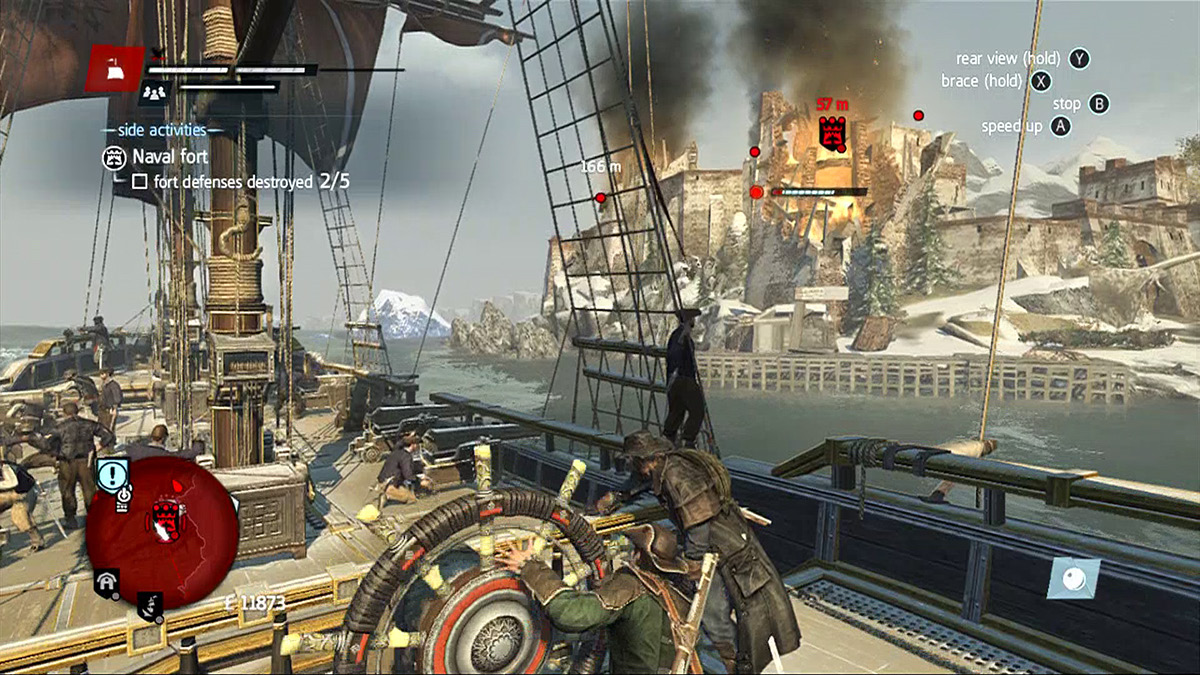
Fort Baie Rouge is one of the tougher forts to capture, not only because it has five defense towers all firing at you while you attack the fort, but also because there are a couple of patrolling enemy ships that are an added distraction when you’re attempting to overthrow this Naval Fort. Going into this battle without upgrading the Morrigan to a battle-ready status will almost guarantee your demise.
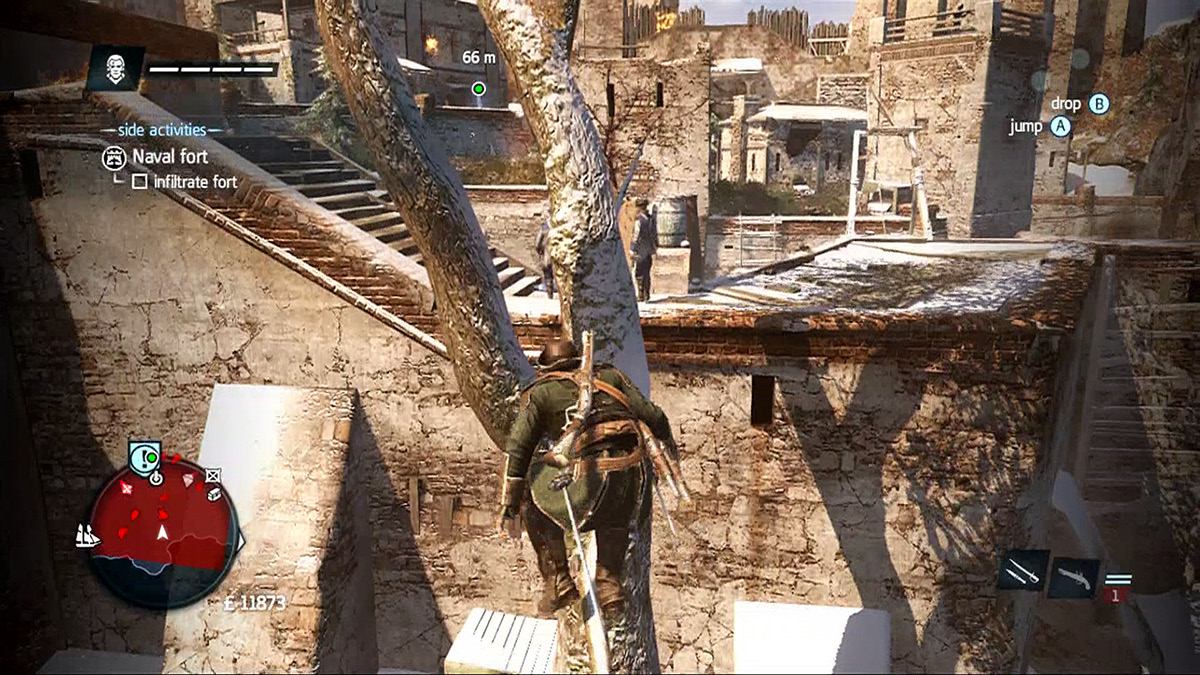
Once you’ve weathered the storm of the sea battle, prepare for your next task of taking down the largest of the forts in the game. Instead of knocking on the front door, take the tree branch that extends over the entry trail and follow the path to the upper wall, where you will find two guards that are currently distracted by the massive chaos you and your crew just inflicted on their fort. Use the distractions at the front gate to your advantage; by entering on the second level you find yourself directly above one of the powder reserves you are to destroy, and you may also notice one of the two snipers you need to kill. Stay silent while you destroy this first powder reserve. Kill the guard rushing over to it from the right and destroy it, then quickly climb up the tower to kill the first sniper.
From the first tower, you will be able to see the second tower, right next to it. In a pinch, you can use your pistols to take out the second sniper. But it’s preferable to use the wires to cross the gap and kill the second (final) sniper silently. From here, return to the ground level and find the bushes that are located in the center of the fort. From the looks of it, it will be impossible to destroy the second powder reserve without being caught, but since there isn’t a reward for staying hidden, you can shoot the barrel and kill the guard standing by it in the process; if you keep to the bushes, you can hide so that the other guards won’t see you. Then sneak up to the next level and kill the two guards in front of the final powder reserve. It is important to stay stealthy while destroying the powder reserves because doing so is impossible when you are detected.
Once you’ve lit the fuse to ignite the final powder reserve, make your way to the pile of leaves near the fort headquarters’ front door. When the powder explodes, the fort captain and his two guards will rush out. Lure them to your hiding place and claim the fort for yourself.
Fort Blanc
Naval Objectives:
- Destroy fort defenses (5).
Land Objectives:
- Destroy powder reserves (2).
- Kill the fort commanders (2).
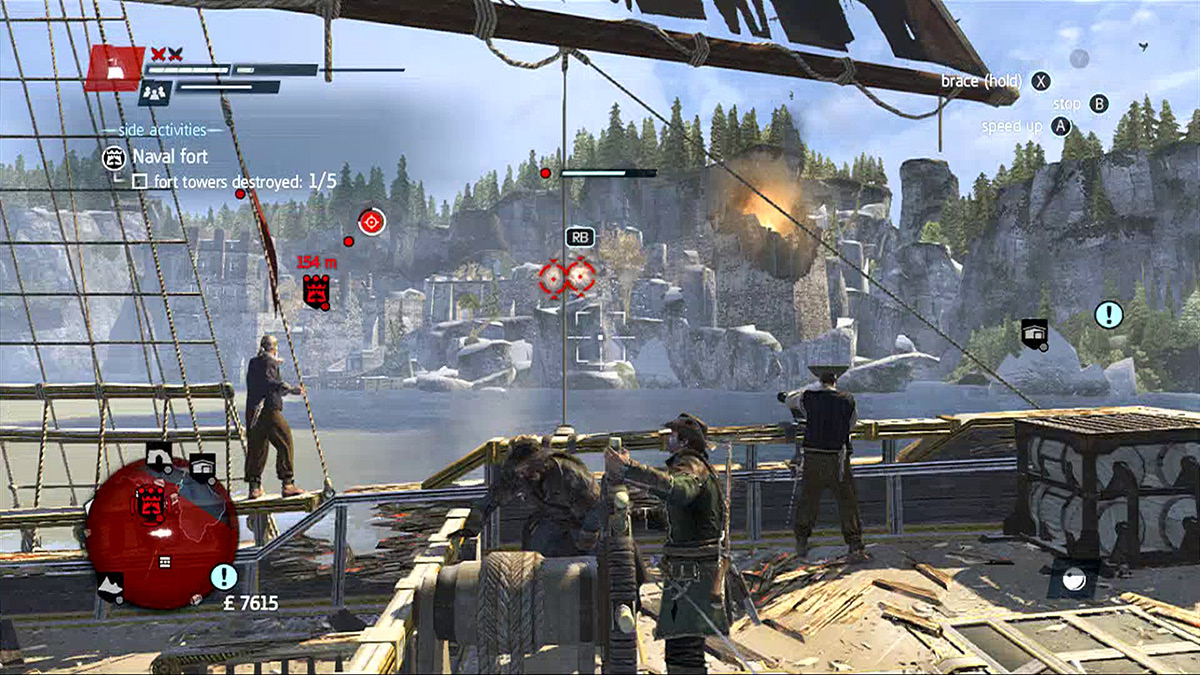
Fort Blanc is another difficult fort to capture. There are five towers to destroy and a large patrol protects the sea. Fortunately, Fort Blanc has a relatively large body of water in front of it, but it is located in a cove, which makes it impossible to flank. Use this large area to your advantage by keeping the enemy spread out; your speed can outrun the cannon fire from the fort as long as you are diligent and aware of the highlighted areas in the water. Much like Fort Baie Rouge, you must first sink the enemy patrol ships before attacking the fort defense towers because it is much easier to avoid the fort’s fire than cannon fire from a ship following close behind you.
Once you’ve survived the daunting battle out at sea, take up arms and attack the fort on foot. Your entrance is on the western side of the fort; you can find it by using the trees and rock wall that breaks off from the main path to the front gate. Using this entrance takes you to a platform that oversees the entire fort; don’t spend too much time here, but recon your path and choose one that will suit your needs. Since there are only two types of objectives, your tactics throughout this fort takeover will be the same: stay hidden and assassinate anyone who stands in your way.
It especially important to stay hidden, especially in the beginning, because this fort is large and fully populated with snipers, large groups of soldiers, and tough fort commanders that are much easier to kill if you take them on while they are by themselves. If you head right from the platform, you come across some stables where you can assassinate the two guards watching from behind the stables, then you can sneak around the guard tower undetected. If you choose to climb the guard tower and kill the sniper, it may benefit you in the near future; you can also jump across the gap into an area of brush next to your first objective.
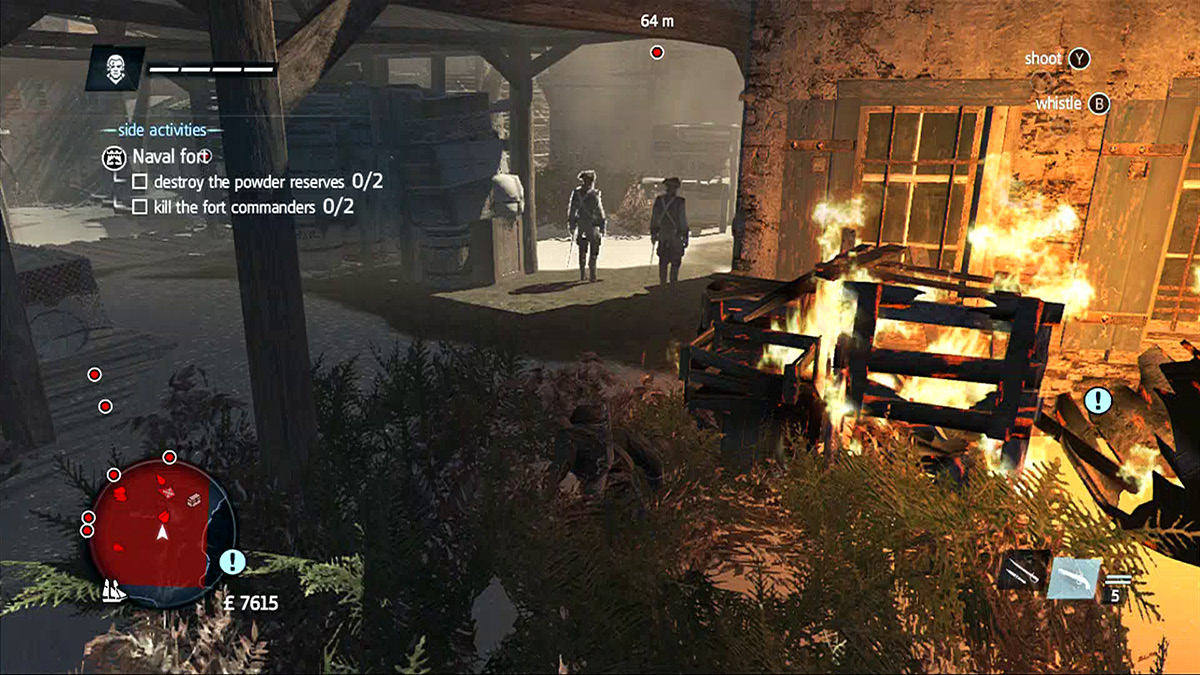
Here, there are two brutes watching the front door of the fort’s headquarters, where one of the fort’s commanders is. Kill the brutes by climbing the adjacent shack and battle the fort commander. This completes the first part of this objective.
Now, run to the next guard tower but be sure to time the guard’s patrol so you’re no spotted and shot by him. Then jump down and assassinate the guards protecting the first powder reserve. Keep to the rooftops to reach the second powder reserve. As long as you stay hidden, destroying it shouldn’t be a problem.
You have one more part to the final objective left to complete: this part is sensitive and should be performed carefully. Make your way back to the rooftops and run to the center of the fort, where the second fort commander is commanding his troops in the battle against your crew. He is trying to kill your men, so once you are in range, assassinate him from the air and complete the fort activity. Enjoy the new fast travel location and the brand new renovations that will become available to you.
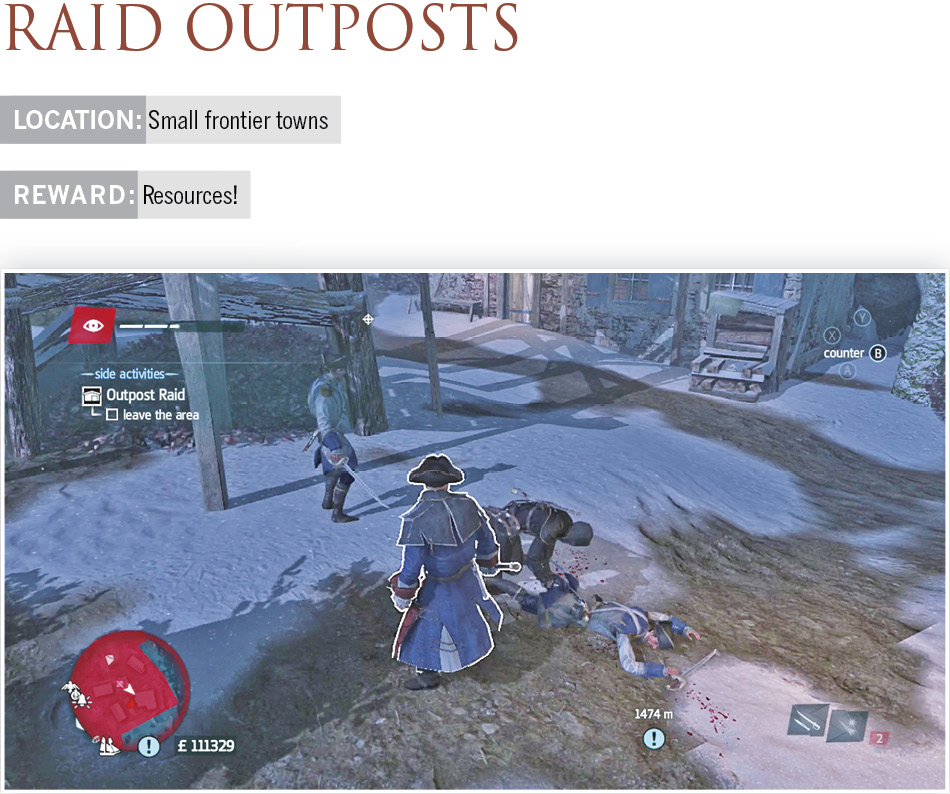
If they spot you, the key holders run into the warehouses and lock themselves in. You will lose the opportunity to loot any of the warehouses that get locked, so make haste to kill the key holders before they reach safety.
Sleep Darts and Berserk Darts/Grenades make outposts much easier to loot. Stay on top of buildings or trees and use your tools to disable the guards before they spot you. Do this against any gunners in watchtowers or buildings first, and then almost no one can spot you without getting really lucky. Hit the key holders with Berserk Darts; this stops them from running and eventually gets them killed (one way or the other). Proceed slowly, take out the guards, and then go down to collect your keys and loot. As long as you’re patient, this is easy work.
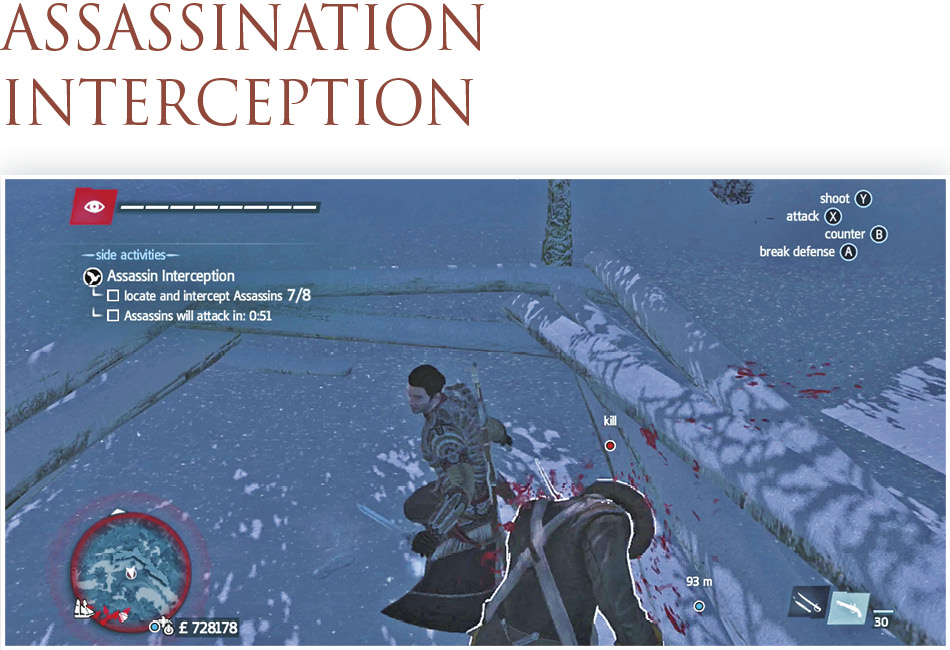
Assassination Interceptions are challenging side activities that have multiple steps. You need to locate pigeons that carry special commands to Assassins in the area. This lets you know the target of the attack. You then have to reach the target and kill as many Assassins as possible before a time limit runs out. When it does, all of the surviving Assassins attack their intended victim and kill the person unless you fight them all off before a single one gets a ranged attack or melee swipe. Your victims usually cannot defend themselves.
The first step is to catch a pigeon. Look for them on the map once you’ve discovered a key location with an interception mission. Climb to the rooftops and approach the pigeon—push gently forward on your left stick so that Shay walks slowly and quietly. When you get close enough, follow the onscreen prompts to get the bird before it flies away. If you fail, you can come back later to try again. Or you can give chase and make another attempt at the next spot where it lands.
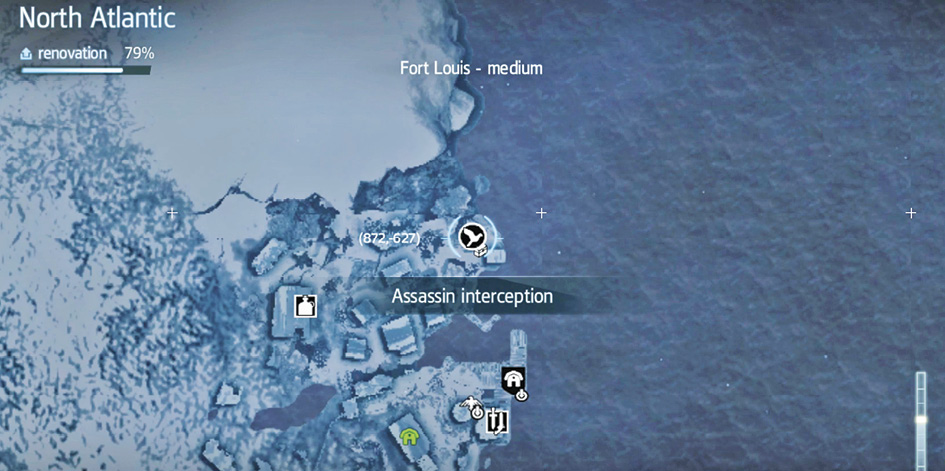
Once you get the pigeon and find the location where the attack will take place, hurry toward it. When you arrive, look on the map for yellow circles. These reveal multiple locations near the victim. Assassins are inside each circle, but you won’t have a specific site to go after (it’s a general area rather than a pinpointed target). If the circle centers around the building, the Assassin is probably on the roof. If it’s by a street or open area, the enemy is probably on the ground.
Use Eagle Vision to spot your targets, and then kill them with impunity. Do everything possible to avoid other gang members or guards. You don’t have any time to spare, and useless fighting won’t help anyone.
All of the Assassins are wearing the standard yellow gang colors, and that’s a big help for spotting them. Normal gang members show up on your minimap as a hostile target; these guys don’t until they’re revealed. Thus, if you see a yellow-clad person who isn’t on your minimap, you know it’s an Assassin before you even turn on Eagle Vision. Save a moment or two by killing them without stopping to check.
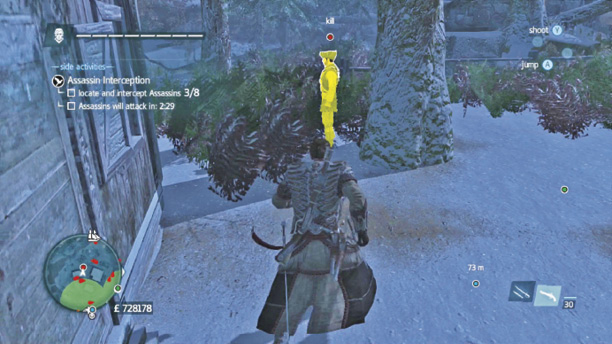
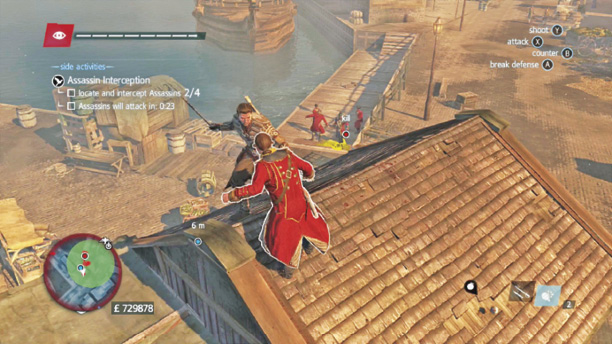
If the timer is about to run out, collapse back to the victim’s location and load your ranged weapons. The Assassins are happy to use their own guns to kill your victim. Shoot them as soon as you see them, and watch the rooftops if you can’t see the Assassin coming from the street. You’re likely doomed if more than one Assassin has survived, because it’s very tough to keep them off of your friend. Watch the movement of the circles to tell which Assassin is approaching first. This makes it easier to spot them because you know the direction to look and their approximate distance from you by gauging the epicenter of the circle.
Once all Assassins are dead, you’ve won! Try to complete all of the interceptions because that gets you a couple of Abstergo Challenges along the way. Note that you receive a monetary bonus for killing all of the Assassins before the timer runs out.
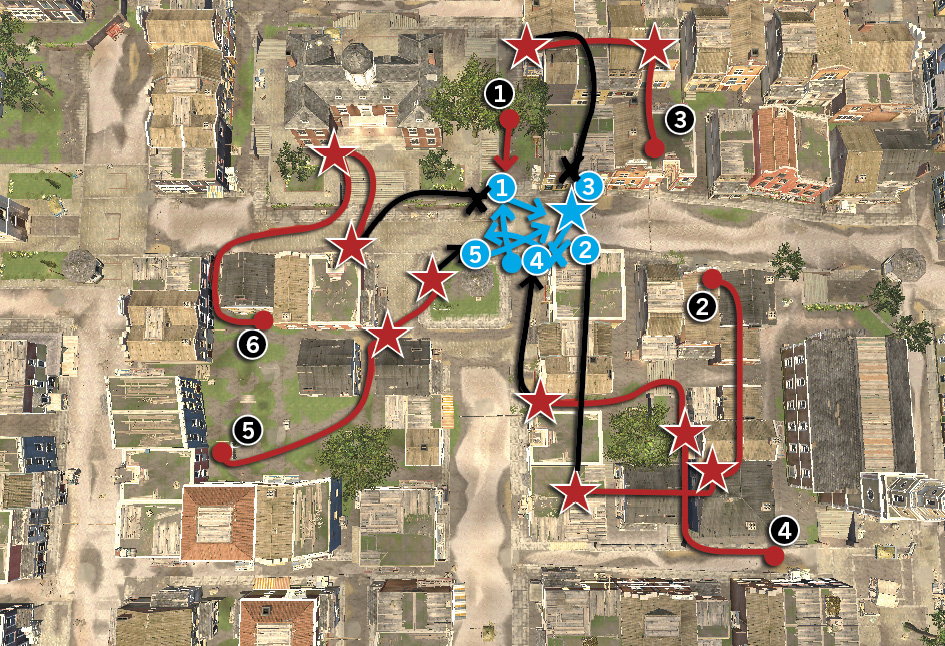
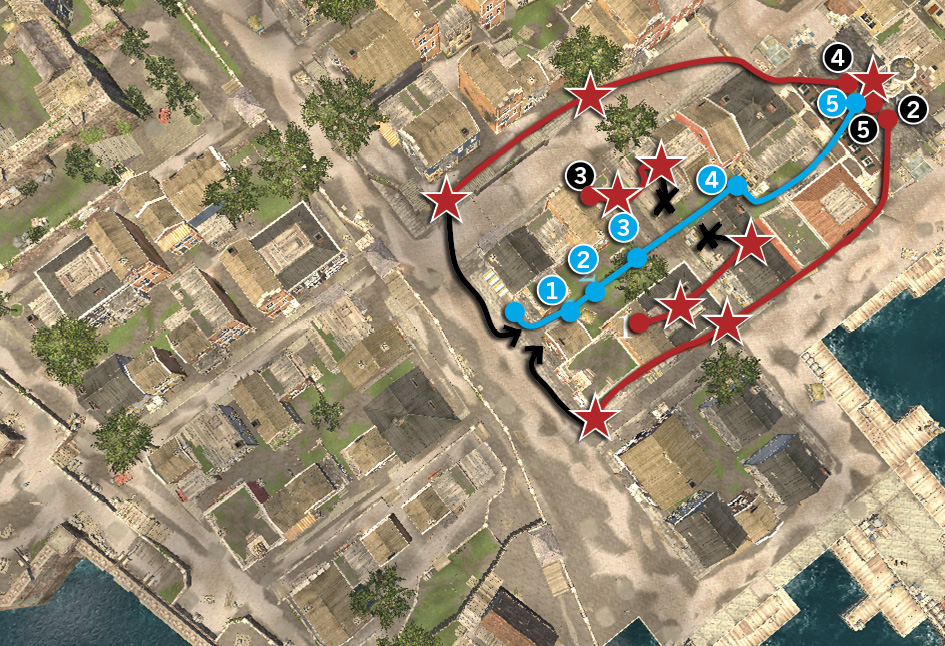
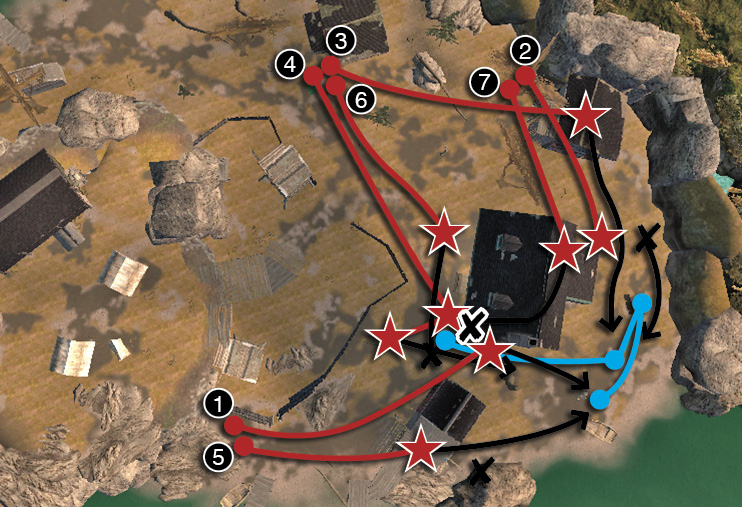
The maps in this section show you the layout of the interception area. Lines indicate movement: red for Assassin movement during the timer, black for their movement afterward, and blue for the target’s movement.
Red circles show you where the Assassins begin their preparations. As soon as the timer starts ticking, that’s where they’ll be, but many move to take up new positions. The red stars show their location during the preparation phase; these are places where the Assassins pause. The black Xs mark their final position when it’s time to go for the kill. That’s your last chance to stop them.
The blue circle is the intended target.
Interception 1
|
Region |
|
| Location | Stuyvesant’s Farm |
| Pigeon Coordinates | 311, 258 |
| Target Coordinates | 336, 244 |
| Difficulty | Hard |
| Target Name | Scott Lawson |
| Number of Assassins | 4 |
| Time Limit | 1:30 minutes |
| Reward | 1,500 Reward + 200 Bonus reward |
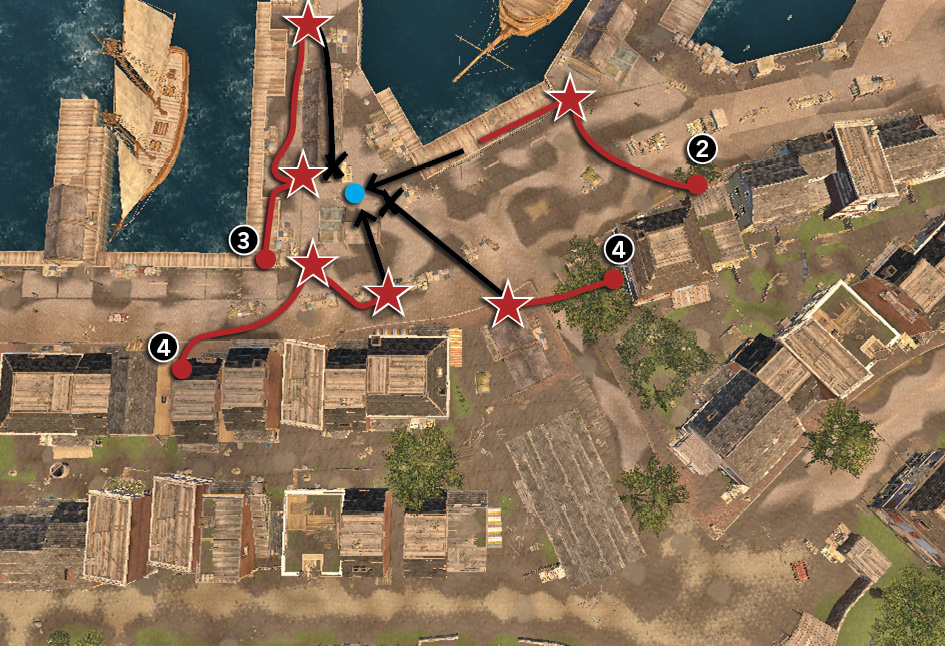
Suggested Kill Order: 3, 1, 4, 2
Interception 2
|
Region |
|
| Location | East Village |
| Pigeon Coordinates | 214, 410 |
| Target Coordinates | 267, 430 |
| Difficulty | Hard |
| Target Name | Kelly Snider |
| Number of Assassins | 5 |
| Time Limit | 2:00 minutes |
| Reward | 1,500 Reward + 200 Bonus reward |
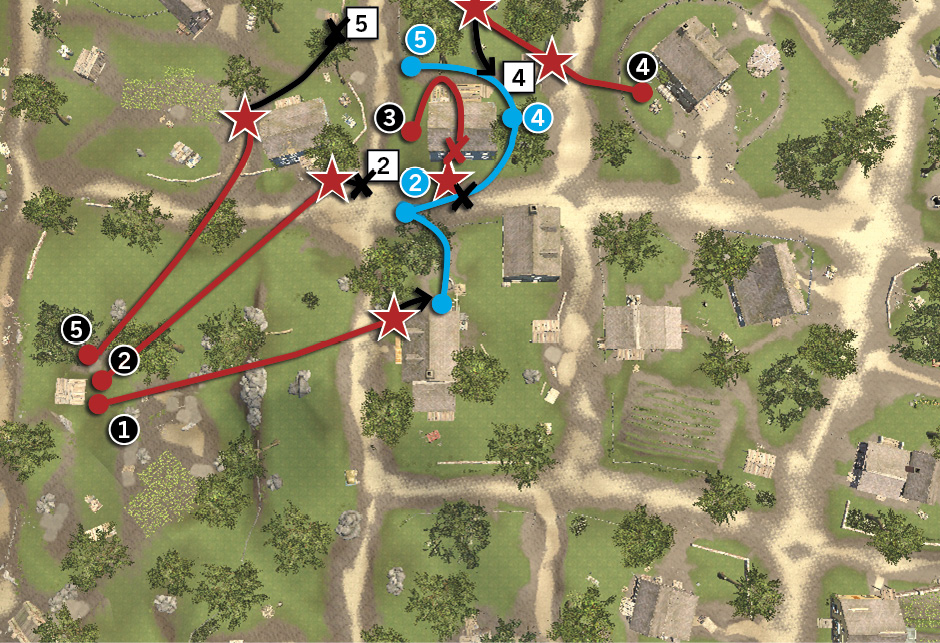
Suggested Kill Order: 1, 2, 5, 4, 3
Interception 3
|
Region |
|
| Location | Lower Manhattan |
| Pigeon Coordinates | -83, -133 |
| Target Coordinates | -53, -123 |
| Difficulty | Medium |
| Target Name | Lewis Johnson |
| Number of Assassins | 6 |
| Time Limit | 2:10 minutes |
| Reward | 1,500 Reward + 200 Bonus reward |
Suggested Kill Order: 2, 3, 6 (the target can kill the others)
Interception 4
|
Region |
|
| Location | Waterfront |
| Pigeon Coordinates | -25, -420 |
| Target Coordinates | 17, -426 |
| Difficulty | Hard |
| Target Name | Franklin Greear |
| Number of Assassins | 5 |
| Time Limit | 2:00 minutes |
| Reward | 1,500 Reward + 200 Bonus reward |
Suggested Kill Order: 4, 5, 3, 1, 2
Interception 5
|
Region |
|
| Location | Albany |
| Pigeon Coordinates | 1667, -1013 |
| Target Coordinates | 1698, -1018 |
| Difficulty | Easy |
| Target Name | Maria Gurley |
| Number of Assassins | 7 |
| Time Limit | 4:05 minutes |
| Reward | 1,500 Reward + 200 Bonus reward |
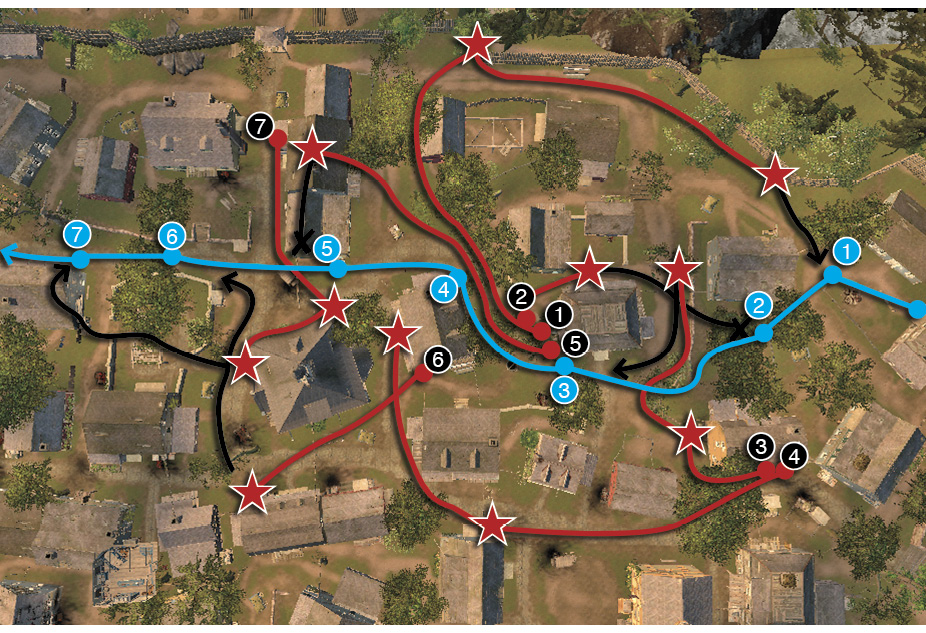
Suggested Kill Order: 3, 4, 5, 6, 7, 2, 1
Interception 6
|
Region |
|
| Location | Fort Soleil |
| Pigeon Coordinates | -856, -115 |
| Target Coordinates | -803, -168 |
| Difficulty | Medium |
| Target Name | Micheal Crawley |
| Number of Assassins | 7 |
| Time Limit | 3:05 minutes |
| Reward | 1,500 Reward + 200 Bonus reward |
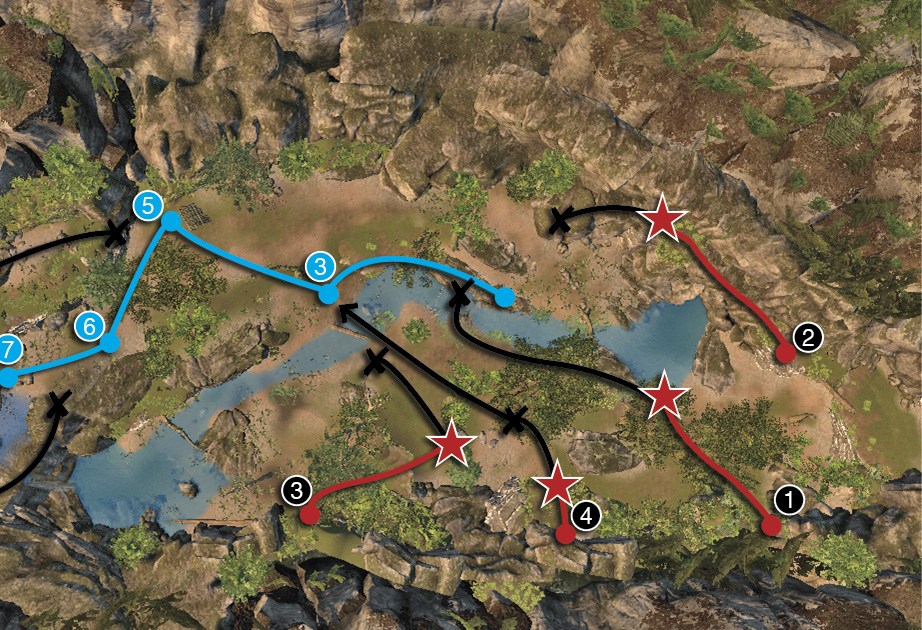
Suggested Kill Order: 2, 1, 3, 4, 6, 5, 7 (shoot the keg next to the last two)
Interception 7
|
Region |
|
| Location | Le Bras-du-Seigneur |
| Pigeon Coordinates | 1838, 939 |
| Target Coordinates | 1922, 895 |
| Difficulty | Hard |
| Target Name | Conan Brown |
| Number of Assassins | 8 |
| Time Limit | 4:15 minutes |
| Reward | 1,500 Reward + 200 Bonus reward |
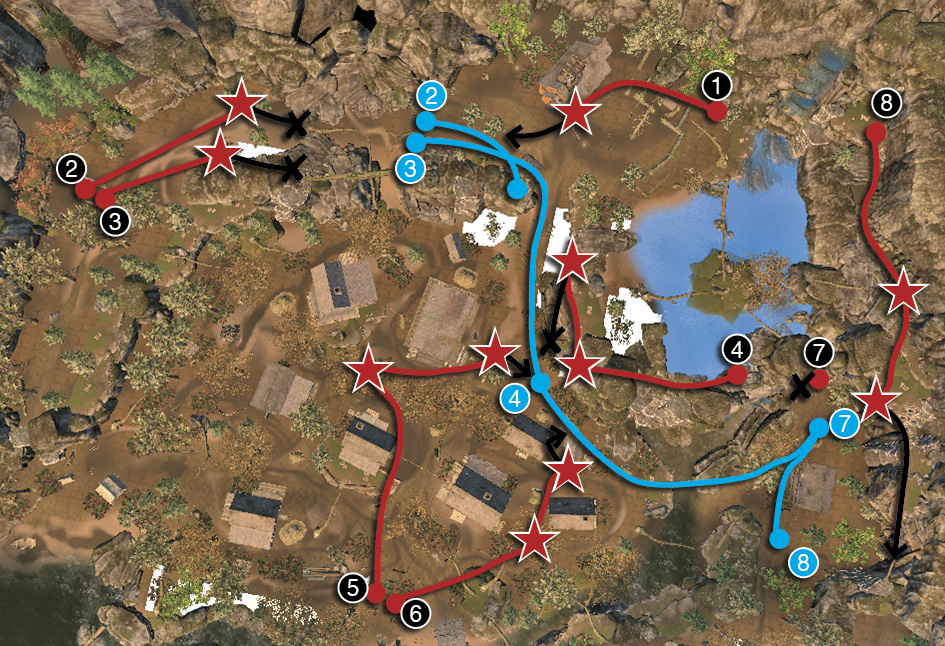
Suggested Kill Order: 1, then take tunnel to 8, 7, 4; jump down to 6, 5; sprint to 2, 3
Interception 8
|
Region |
|
| Location | Lac Eternel |
| Pigeon Coordinates | -1222, 1574 |
| Target Coordinates | -1145, 1586 |
| Difficulty | Hard |
| Target Name | Randall Gordon |
| Number of Assassins | 5 |
| Time Limit | 2:10 minutes |
| Reward | 1,00 Reward + 200 Bonus reward |
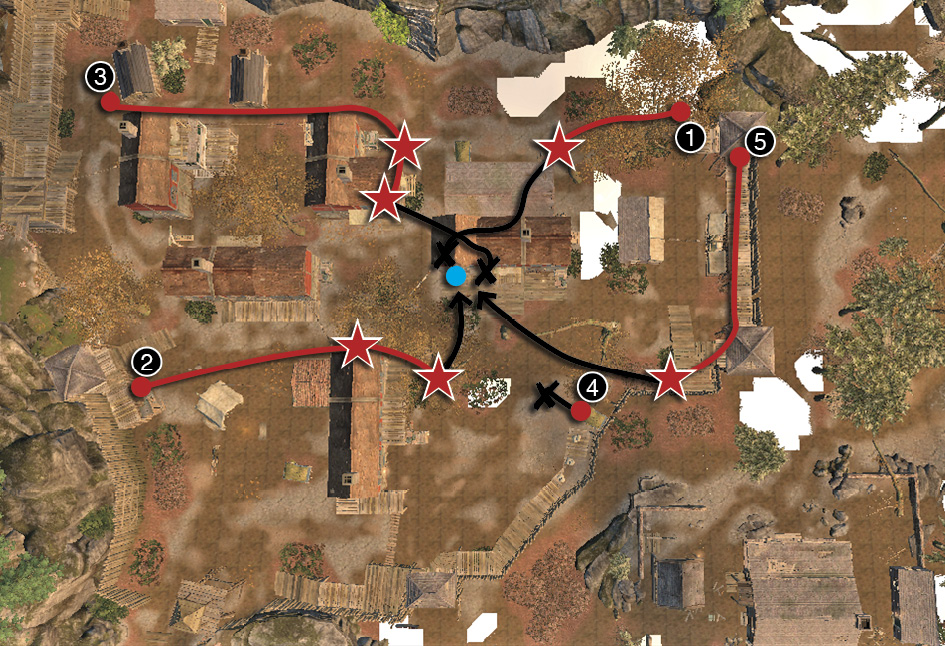
Suggested Kill Order: 4, 5, 1, 3, 2
Interception 9
|
Region |
|
| Location | Fort Baie Rouge |
| Pigeon Coordinates | 738, 2289 |
| Target Coordinates | 739, 2198 |
| Difficulty | Hard |
| Target Name | Rachel Plourde |
| Number of Assassins | 6 |
| Time Limit | 2:10 minutes |
| Reward | 1,500 Reward + 200 Bonus reward |
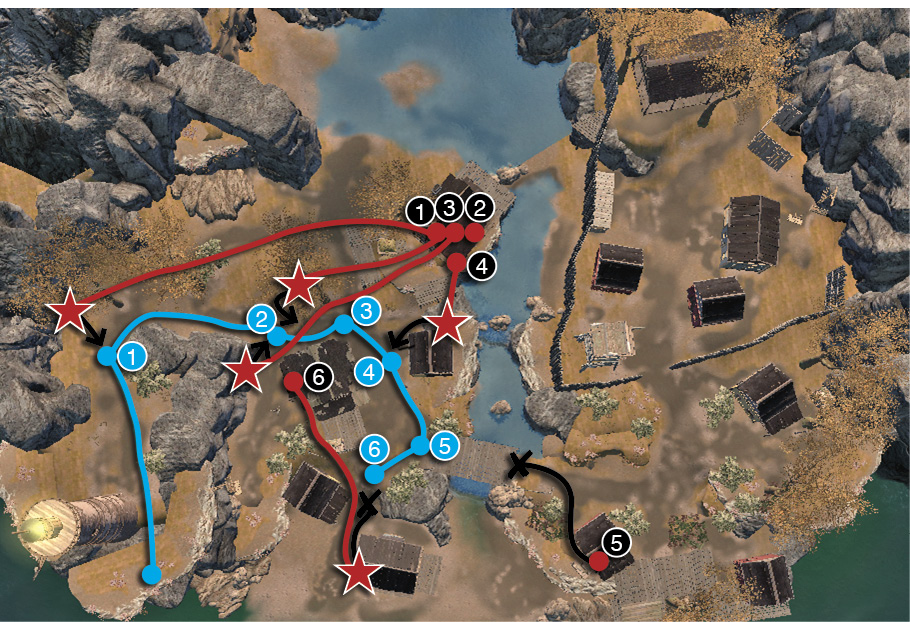
Suggested Kill Order: 1, 2, 3, 4, 5, 6
Interception 10
|
Region |
|
| Location | Port de la Joye |
| Pigeon Coordinates | -2777, 804 |
| Target Coordinates | -2788, 862 |
| Difficulty | Medium |
| Target Name | David Borgen |
| Number of Assassins | 7 |
| Time Limit | 1:45 minutes |
| Reward | 1,500 Reward + 200 Bonus reward |
Suggested Kill Order: 4, 6, 3, 2, 7, 5, 1
Interception 11
|
Region |
|
| Location | Fort Louis |
| Pigeon Coordinates | 3047, -1032 |
| Target Coordinates | 2992, -1058 |
| Difficulty | Medium |
| Target Name | Philippe Beaubien |
| Number of Assassins | 6 |
| Time Limit | 2:00 minutes |
| Reward | 1,500 Reward + 200 Bonus reward |
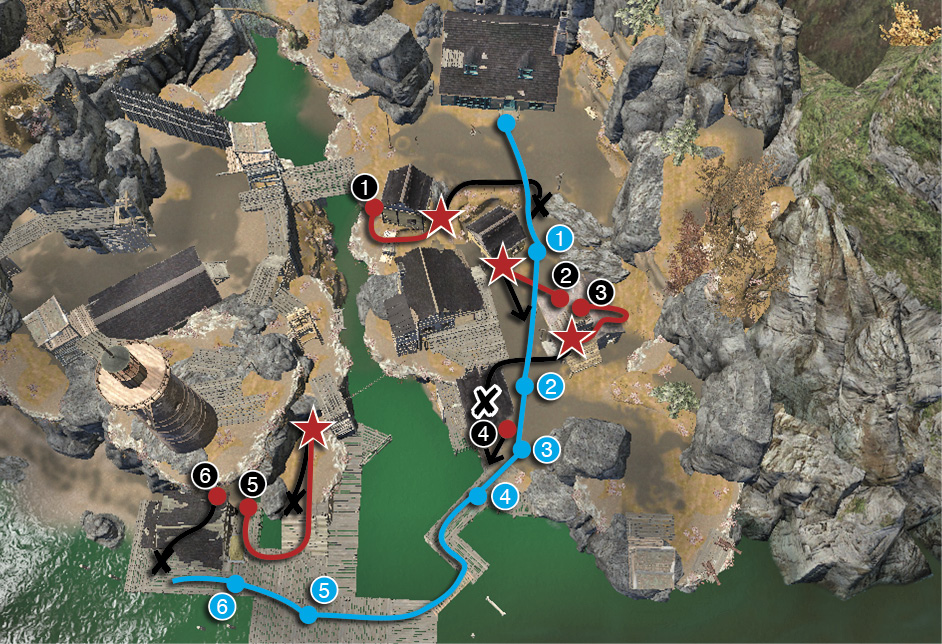
Suggested Kill Order: 2, 3, 1, 4, 5, 6
Interception 12
|
Region |
|
| Location | Greenwich |
| Pigeon Coordinates | -232, 104 |
| Target Coordinates | -226, 75 |
| Difficulty | Hard |
| Target Name | Marla Capps |
| Number of Assassins | 9 |
| Time Limit | None |
| Reward | 1,500 Reward + 200 Bonus reward + Templar Outfit |
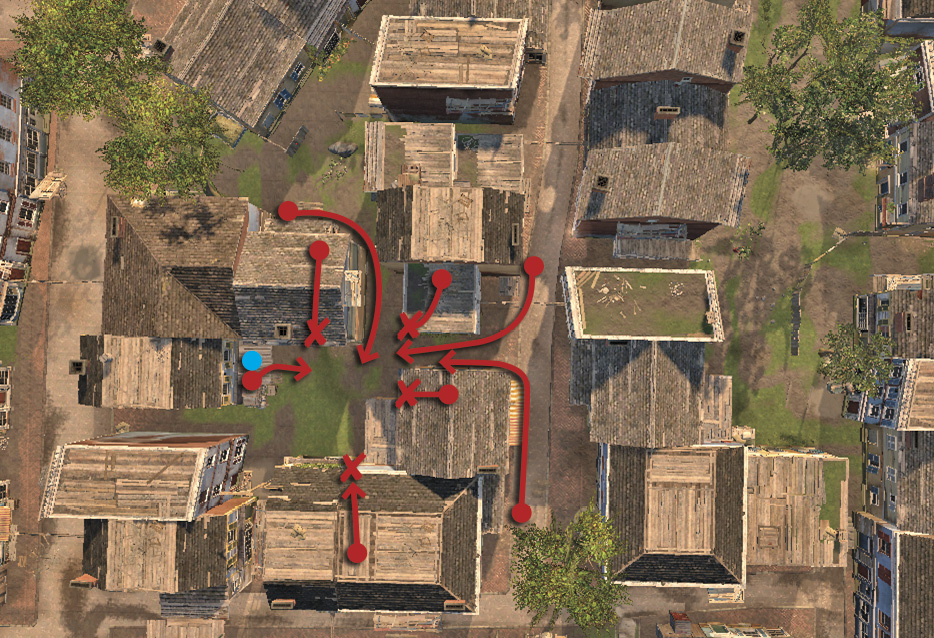
Suggested Kill Order: Any (just survive)
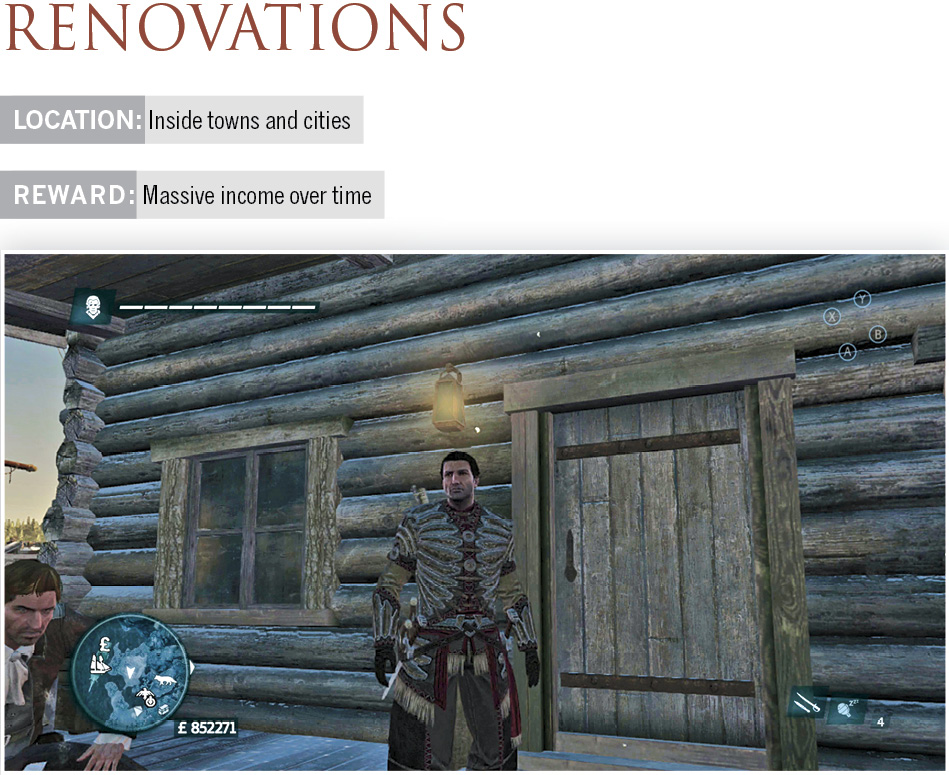
These aren’t tasks that you have to work on. Instead, people in damaged areas just need some money and resources to fix their buildings. If you’re kind enough to donate, it raises your income over time. Think of this as an investment in the world and in yourself, because that money sure adds up. The sooner in the game that you complete Renovations, the easier it is to make a profit off of your investments because they have hours and hours to generate revenue.
To get more materials, use the Morrigan to board ships and salvage them. You really can’t do much better than that, because resources come in very quickly once you’re good at boarding ships.
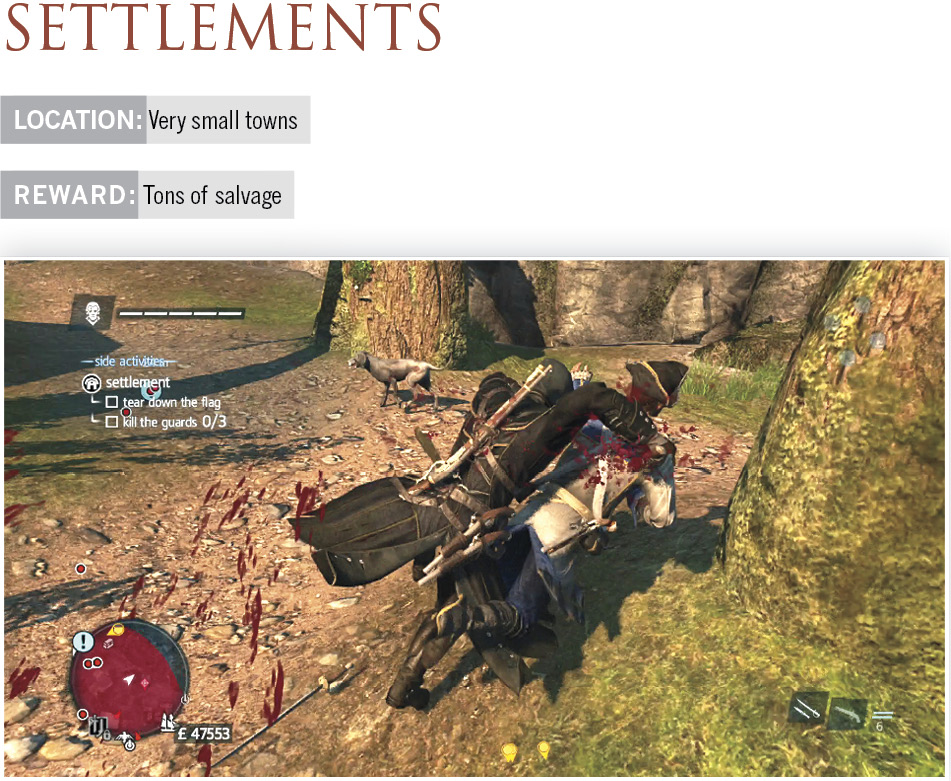
Some towns are occupied when you arrive and need liberating. Follow the goals onscreen to help the place. You’ll be killing guards and the leader of the town’s garrison and destroying anything of military value that’s located there.
These large battles are more involved than many of the other side activities, but the rewards are very good. You get even more material than you’d expect from boarding and seizing a larger ship.
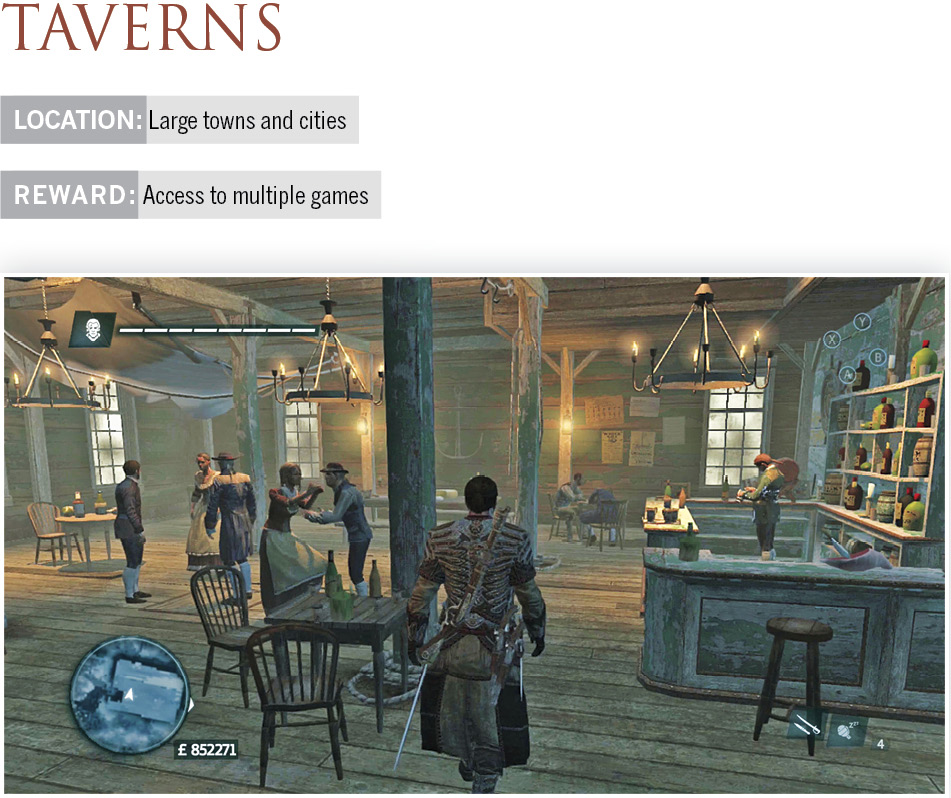
Taverns are located throughout the new world. They’re on all of the major maps; just look for their icons when you enter a bigger town. Once there, go to the tavern and engage in a fistfight to clear out any bad elements and unlock the tavern. These fights aren’t that dangerous because you’re used to fighting much worse, and with higher stakes.
Unlocked taverns have multiple useful aspects. You can spend money to purchase information. This marks a camp on your map that has a high salvage value.
You can recruit more sailors if the Morrigan lost many of its men. This is very expensive, and if you’re feeling poor or cheap, you can also get your sailors by boarding and seizing vessels. Just go after lower-level ships while you’re building yourself back up.
There are also three board games to practice, and you’re allowed to bet on the outcomes of each. This is a decent way to make money once you’re very accomplished at these games. Note that it takes some time to improve your skills, because two of the games might be new to you.
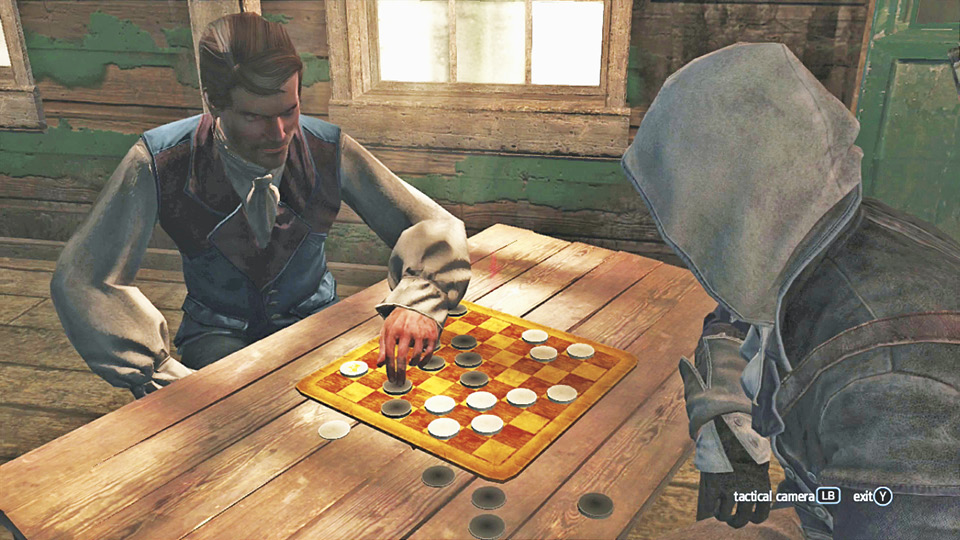
The games that are available are Checkers, Fanorona, and Nine Men’s Morris.
Checkers is a traditional game that many people have likely played at some point in their lives. Play conservatively and wait for the opponent to expose their pieces.
Fanorona is very tough while you’re learning to play it. Move the stones along the drawn lines on the board and destroy any enemy stone that they touch and any enemy stones that are in the same line of attack and touching the last stone that was destroyed. You can take out several stones with a move, and if your stone has additional attacks that it can make, these form a combo and let you keep playing until you’ve run out of moves or gotten quite a large combo already.
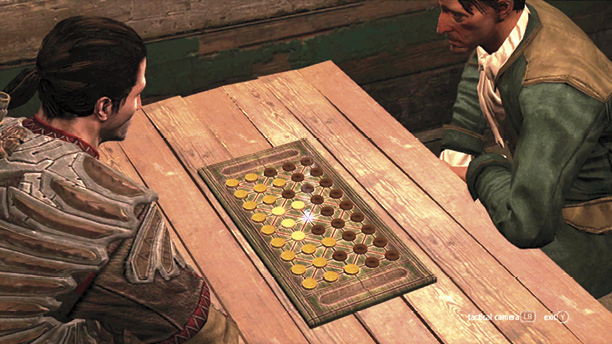
To win a game, it can be useful to sacrifice one of your own pieces to force your opponent’s pieces toward the outer edge of the board (via an “away” capture), enabling you to corner them.
The most important skill to learn in Fanorona is the small sacrifices of the late game. You can get a large lead and still blow it all at the end if you can’t learn how to force the opponent into trades. Your opponent never gives up and is happy to wait for hours just moving one piece back and forth while ignoring you. You MUST present stones so that the computer has to take them. And you must have other stones set up that won’t be killed in the combo and that can take advantage of the enemy piece that you forced into the trade.
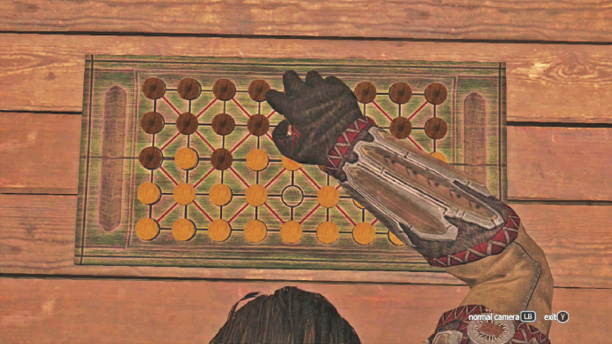
To do this, carefully approach each computer stone in the late game and make sure they have only a single angle of attack on your pieces. Trace it out in front of you, and have another stone in position to take the attacking piece without being taken itself. This often involves having the board on one side of your secondary stone or blocking every new avenue of movement for the attacking stone.
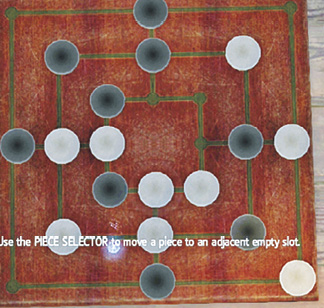
Nine Men’s Morris is a long version of Tic-Tac-Toe. You’re trying to line up mills, which are a series of three stones. When you succeed, you get to remove an enemy piece of the board. Even getting a single success can be enough to ensure victory in the game if you’re careful. Don’t try to place stones in a direct 1, 2, 3 order. The computer will know what you’re doing and will block this every time. Use proper Tic-Tac-Toe tactics and place your pieces along two converging lines so that the computer might not see what’s happening until you’re in a place to connect two mills at once, forcing the computer to block one and let the other through.
For example, in the central square, you can place a stone in the upper left, then the lower right, and wait for a free chance to put a third stone in the lower left. This gives you potential mills along the left side and the bottom side. The computer has to block one, but you get the other and can remove the blocking stone because you completed a mill. Your opponent then has to waste another turn blocking the second mill again, giving you even more time to work against them.
Once you get a single mill, your goal is to free enough
wiggle room to move the pieces in the late game back and forth to connect the mill again and again. Try to place a piece in a position beside your mill to give this movement leeway to one of the pieces in your trio. Once you can spend late turns sliding a mill out of position and then back, you’ll destroy your opponent. Target the pieces they are using to set up a mill, and you’ll be in great shape quite soon.
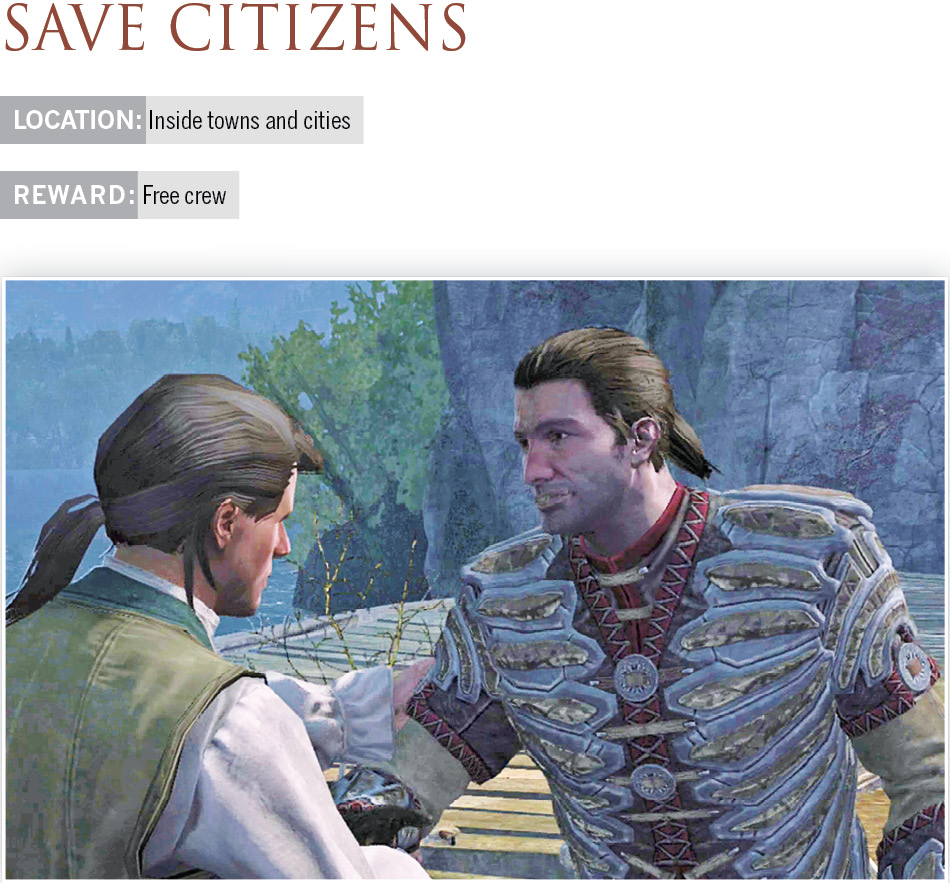
Look for yellow circles while moving around town. These often represent citizens who are in trouble. Follow the directions that appear onscreen. You might have a simple fight, but sometimes the people are in even more danger and might be killed if you approach . These tasks require stealth, so use Sleep Darts on the targets in the rear of the group and then close in for the kills.