
Assassin's Creed III Guide Walkthrough
Sequence 12
Laid to Rest
Mission Overview
|
Optional Objectives |
|
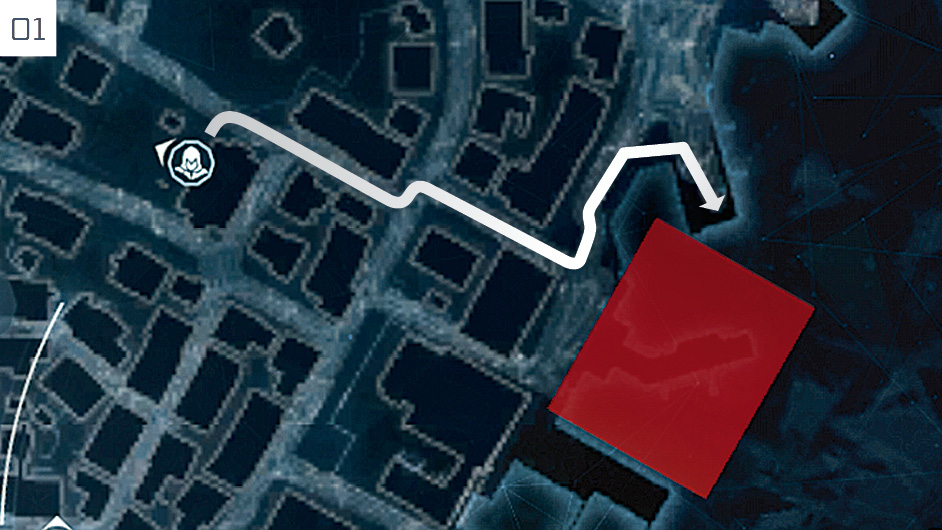
This Memory begins automatically at the start of Sequence 12. Walk calmly to the waypoint. When play resumes after the momentous cinematic, kill the mercenaries assaulting Connor, then dispatch the second group in the graveyard. You must now reach the HMS Jersey. With Connor at full Notoriety, follow the seemingly unlikely optimal route detailed here to avoid all further conflict and pay the red Restricted Area a wide berth.
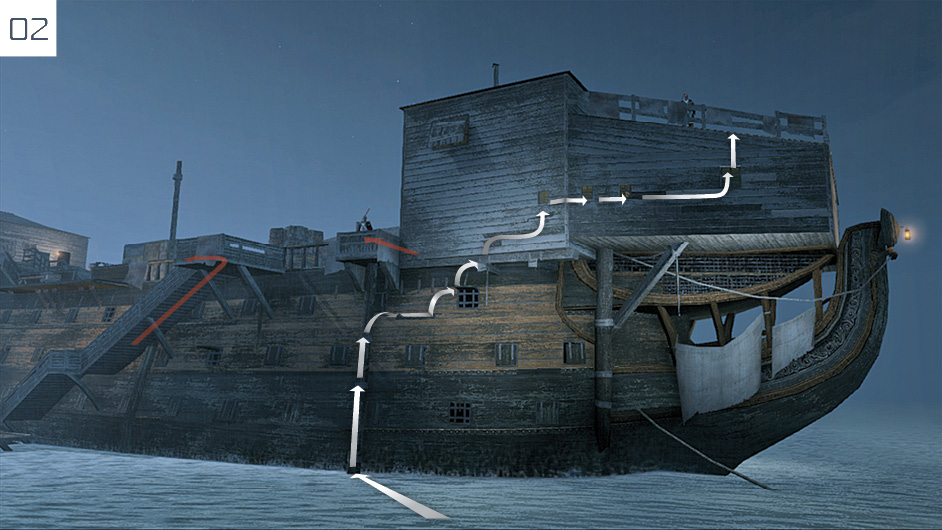
From the dock, leap into the water and swim out to the HMS Jersey. Stealth is mandatory from this point in the Memory. Approach the bow of the mighty ship, then follow the climbing route shown here. There are two patrolling guards who may see Connor during the later stages of the climb, but it’s easy to move out of sight before they fully detect him.
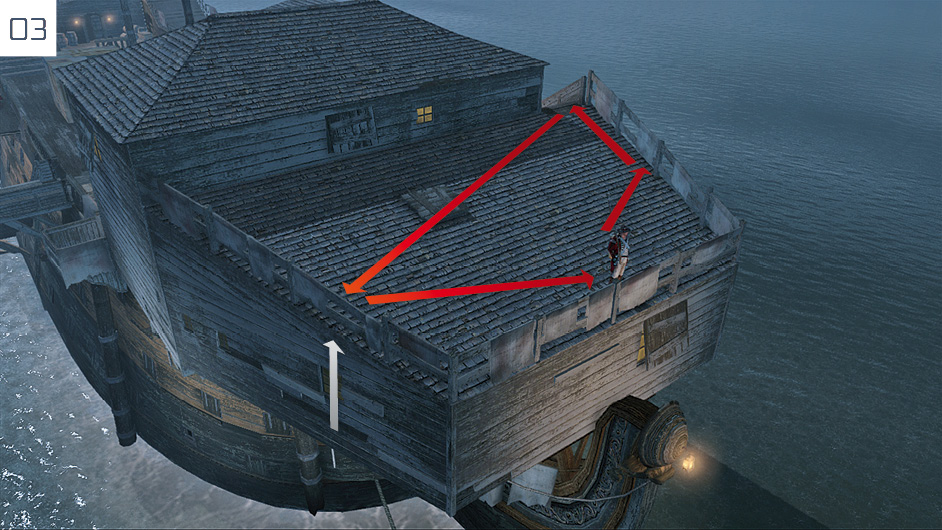
As the battle with the mercenaries counts for thirteen of your fifteen maximum “regular” kills to complete the Optional Objective, fulfilling both the infiltration and the secondary criteria is a matter of picking your targets carefully. You could, technically, sneak past this guard – but his patrol route might lead him to spot Connor at a later point. Wait until he moves to the south of the ship, climb up, and perform a silent assassination. This also triggers the first checkpoint of the infiltration.
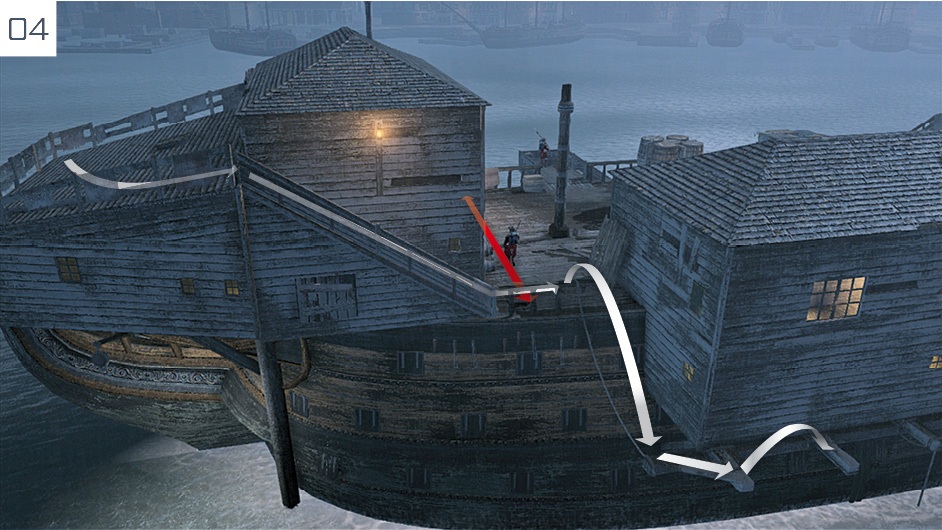
Stop at the top of the staircase and wait for a patrolling guard to stand in the area below. When he turns away, run down and leap from the balustrade to reach a protruding beam, then move out of sight.
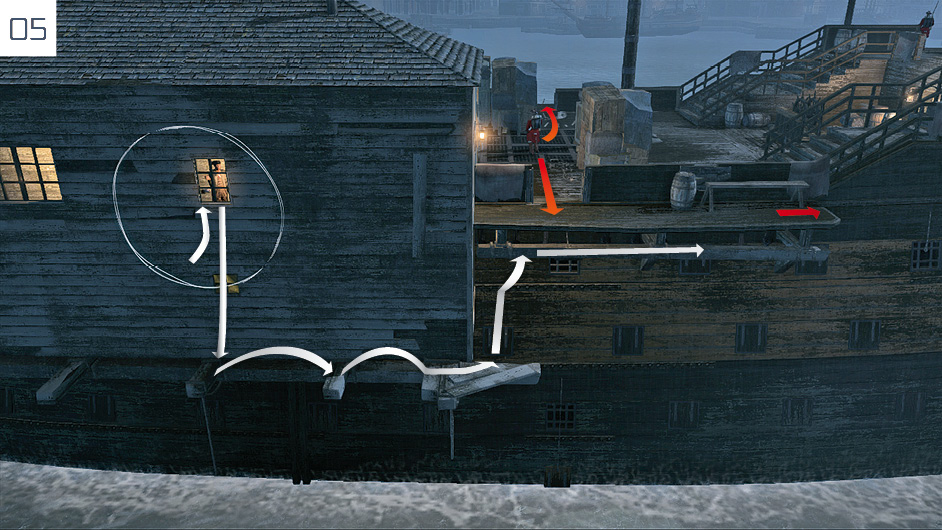
Hang outside the window in the specified area to eavesdrop on the captain. Once the conversation is complete, drop back down; note that there is a checkpoint at this stage, should the next steps go awry. Move to the end of the white wooden wall and press Connor against the corner to wait for the arrival of a guard above. When he turns away, jump to the beam directly ahead and traverse to the right.
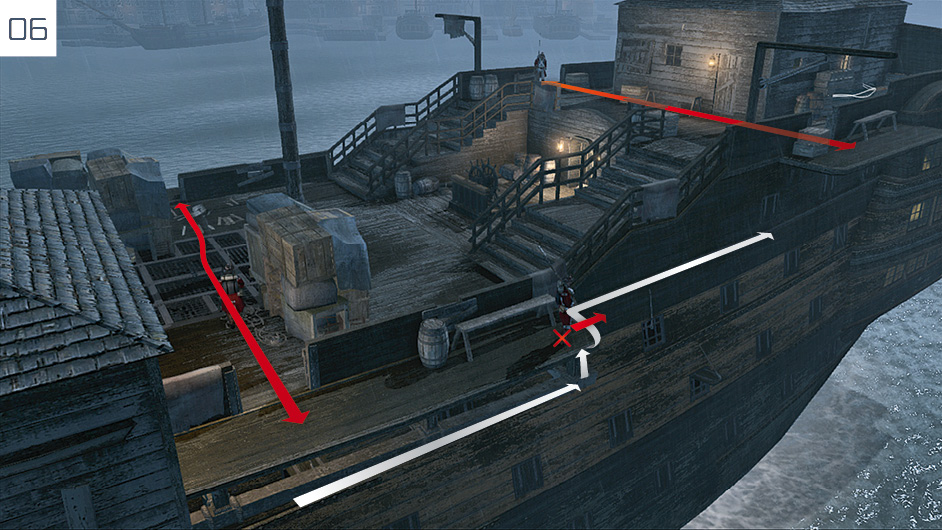
You must now perform a ledge assassination to remove the stationary guard who faces north. Wait out of sight until the two other patrols marked here are facing elsewhere, then make the kill. Immediately traverse to the right along the wooden ledge.
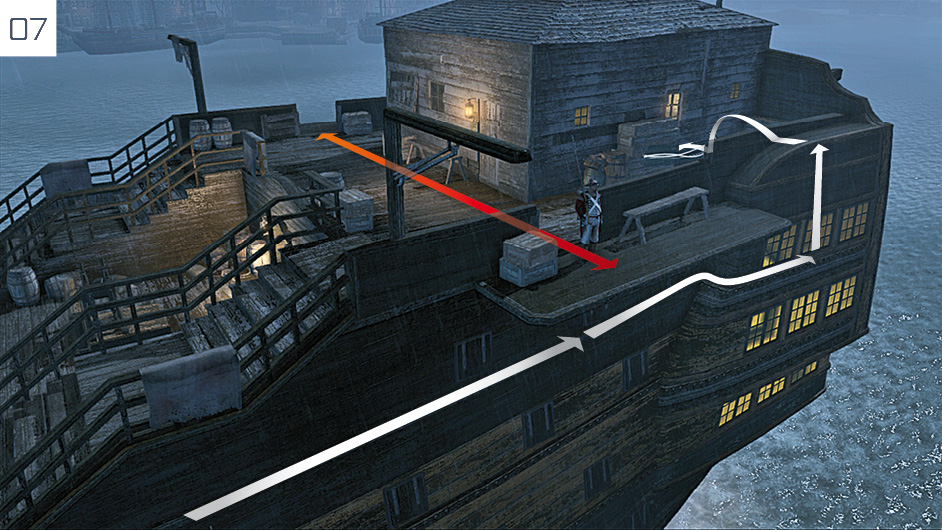
Continue to the right until you reach the first window, then wait until the guard patrolling outside the captain’s cabin walks to the opposite side of the vessel. You should then climb up and move into the eavesdrop position.
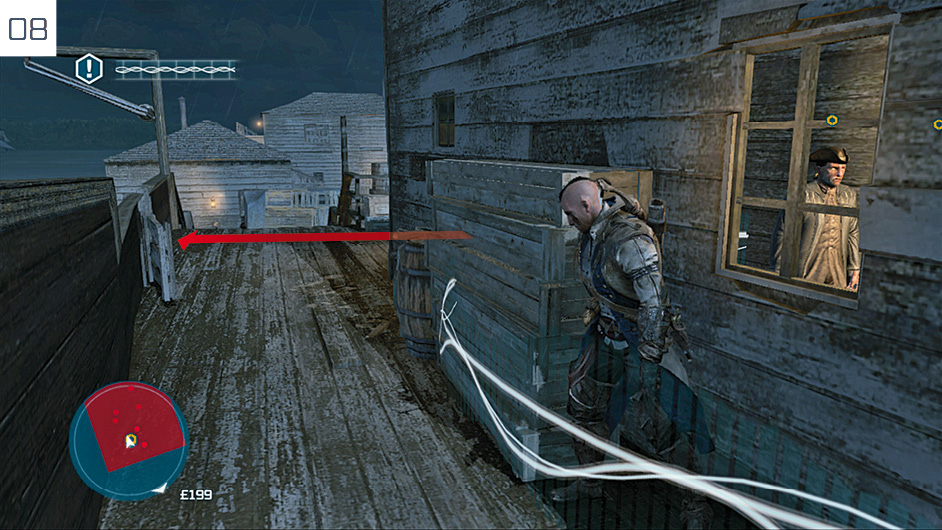
Press against the boxes to hide Connor from view during the eavesdrop, then wait for the conversation to finish. When the men leave the cabin, two new Optional Objectives are introduced. If you have no desire to achieve 100% Synchronization, you can now simply dive overboard to end the Memory.
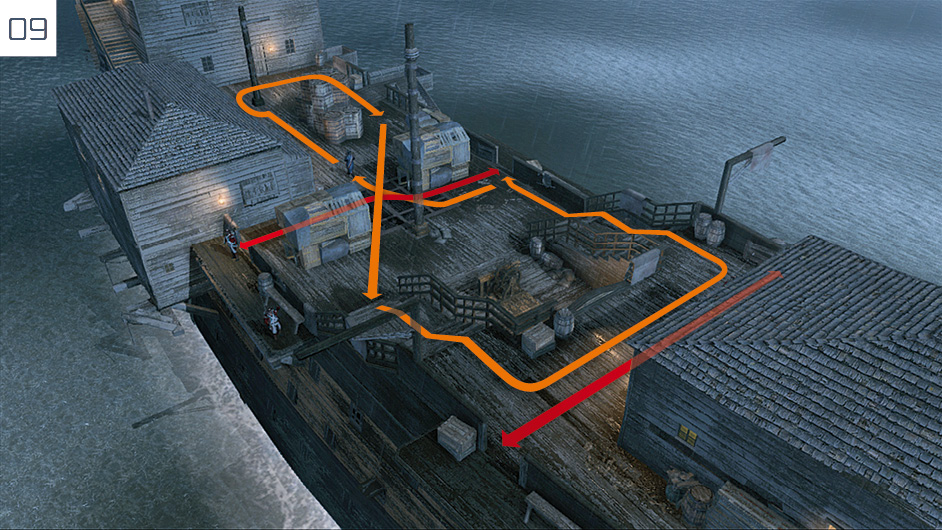
The direct prohibition on detection is essentially maintained by the Optional Objective that specifies against open conflict at this stage. Though the captain does not count as a “regular” kill, the death of even one additional guard will cause you to fail the original Optional Objective. There is no cause for panic, however: with a checkpoint moments beforehand, it’s easy to replay this final challenge. Study the annotated map of the pertinent patrol routes on the deck; the captain’s path is marked in orange.
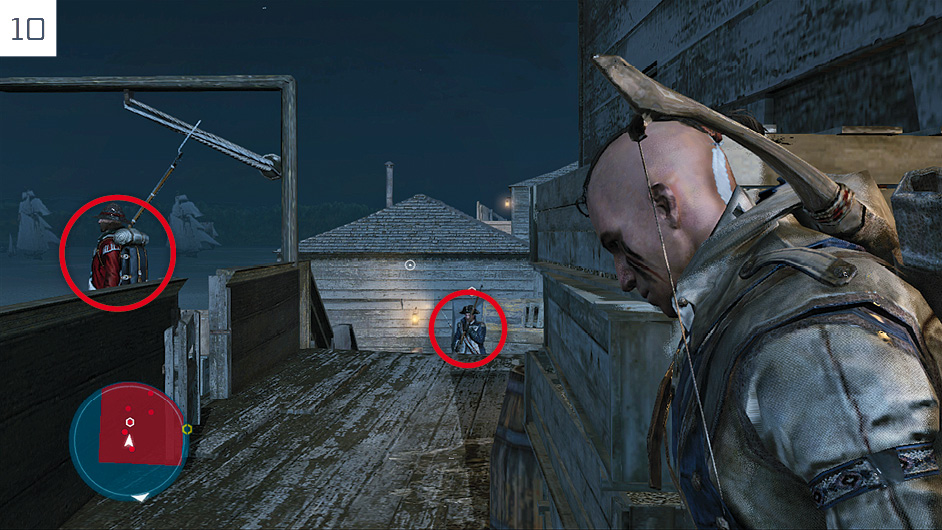
Due to the special properties of Poison Darts, they are by far our recommended method of assassination. Stay behind the boxes where you eavesdropped the conversation and wait until the captain approaches the stairs leading to Connor’s position, then activate Precision Mode aiming to line up a shot. When he moves within range, tap  /
/ to throw the dart, then slip back into cover. The captain will continue to stumble along his patrol route; when he falls dead to the ground, nearby guards will approach his corpse. Once you are sure that no one is watching, dive overboard.
Chasing Lee
Mission Overview
|
Optional Objectives |
Important Note |
|
|
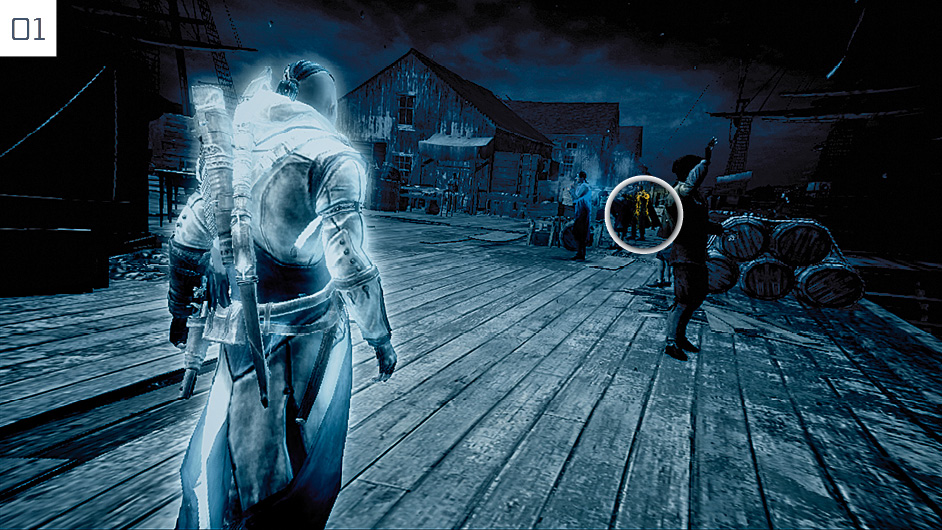
Enter the Green Dragon Tavern in Boston, then travel to the investigation zone to the east. Walk along the dock until you pass the second ship on the right, then activate Eagle Vision to identify Charles Lee.
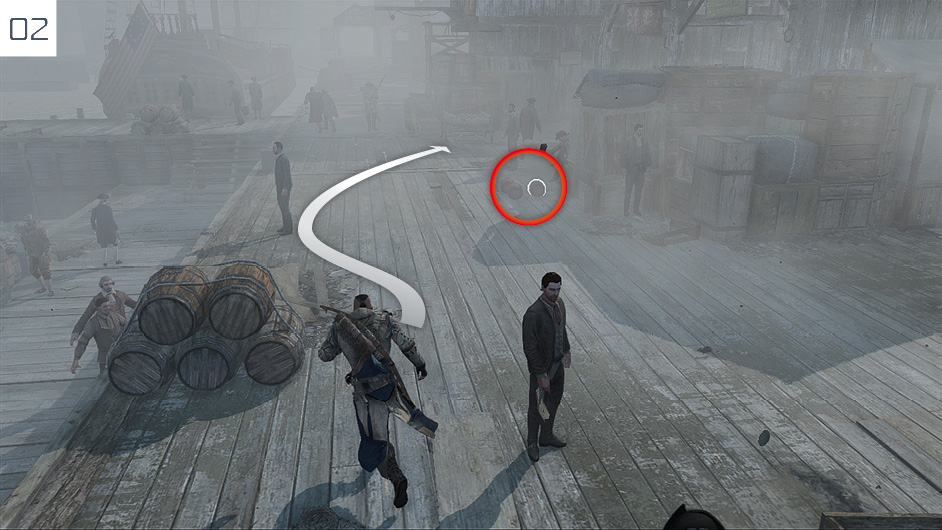
You must now pursue Lee along the dock. This in itself is not especially difficult, completing the two Optional Objectives, however, is much more demanding. Sprint directly ahead until the powder kegs explode (highlighted in red here); directing your initial sprint slightly to the left can sometimes enable you to avoid the effects of the blast.
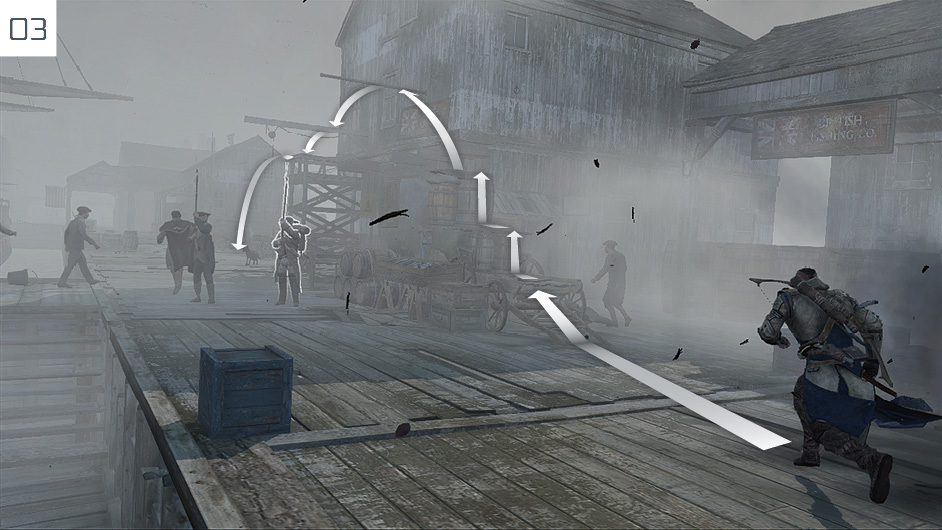
Free run over the short course to the right of the two soldiers. It may help to hold  /
/ for a manual jump at the top to avoid the pole and beam, leaping directly back to the boards below.
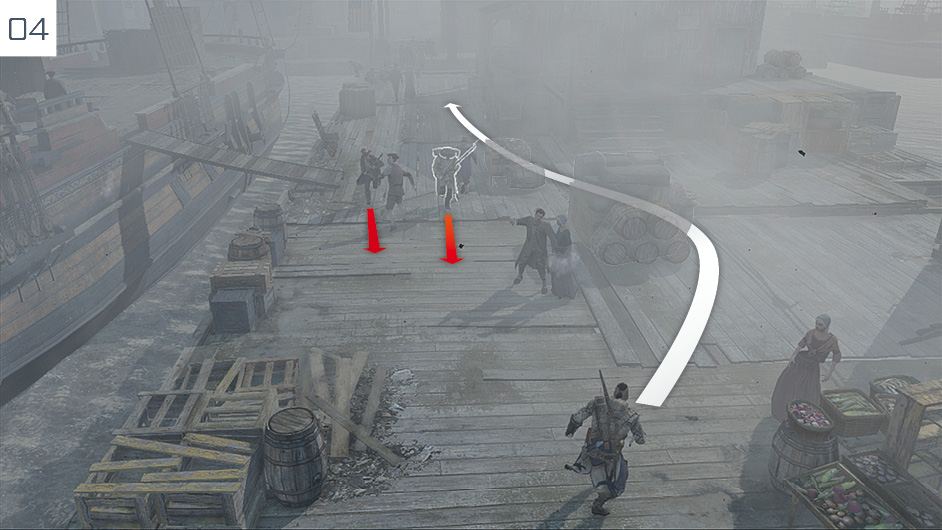
Swerve to the right to bypass the next two soldiers.
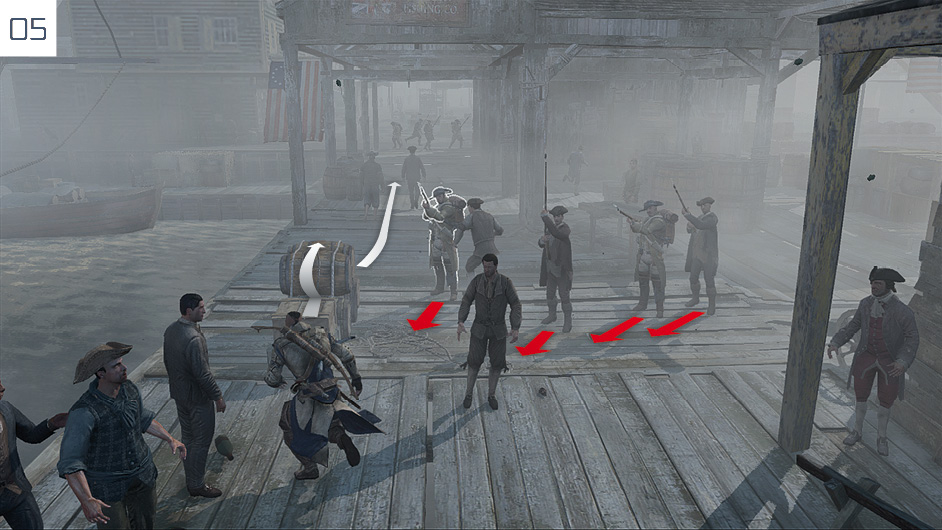
Move to the outside edge of the boardwalk to avoid the soldiers who run to block Connor’s path.
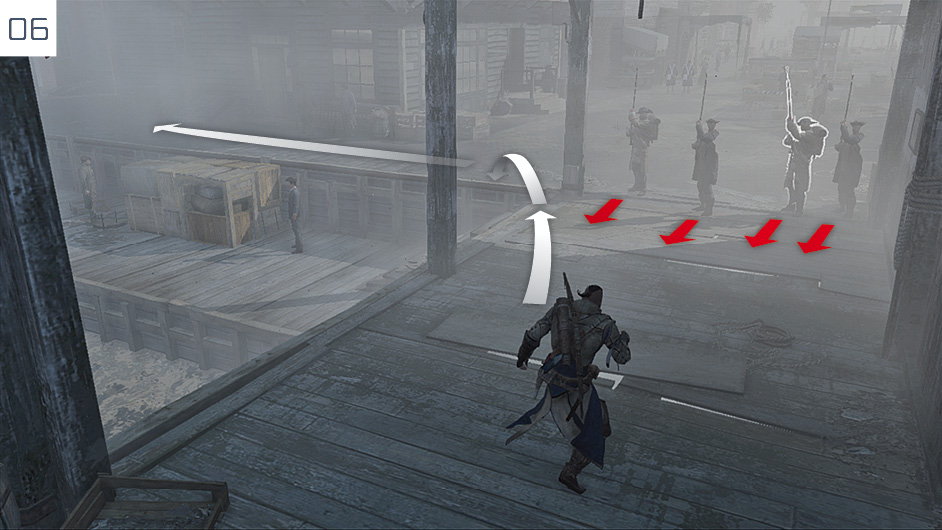
The last step of the pursuit that involves aggressive third parties occurs at the end of the dock: avoid the soldiers by cutting the corner.
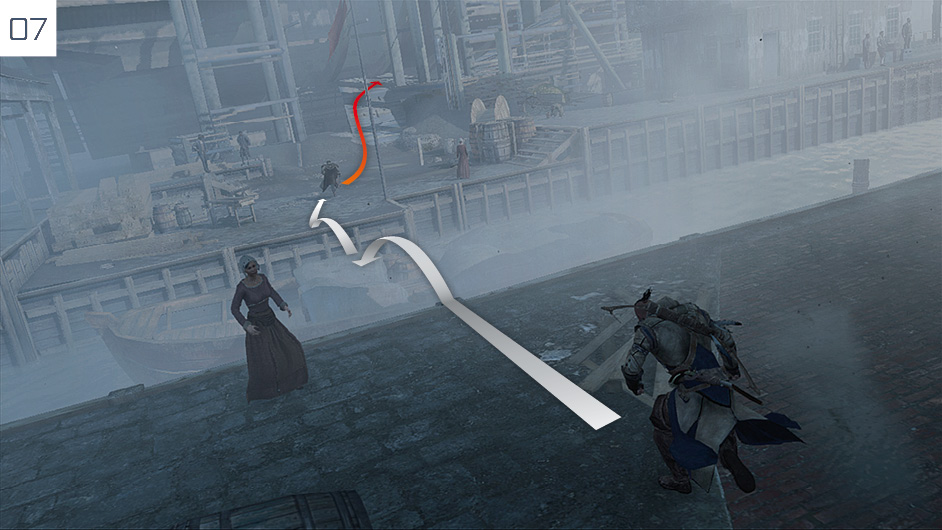
This next section of the chase is practically a stroll in the park. Avoid civilians, cross the water via the boat, then follow Lee into the ship under construction. At the top of the ramp, take a sharp right and slide beneath the gap.
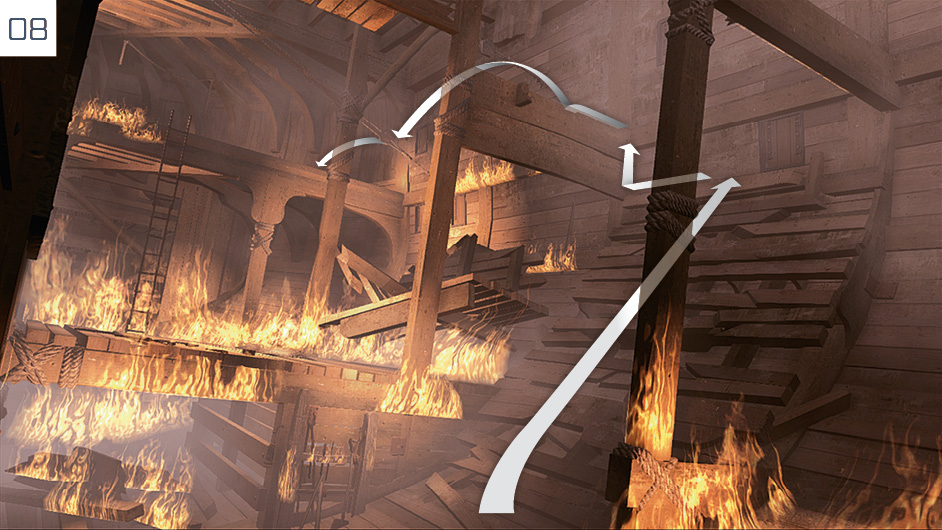
A new Optional Objective specifies that you must avoid contact with flames. After the explosion, scale the wall to the right to reach a beam above, to Connor’s left; climb onto it, then swing via the two ropes to land on the platform opposite.
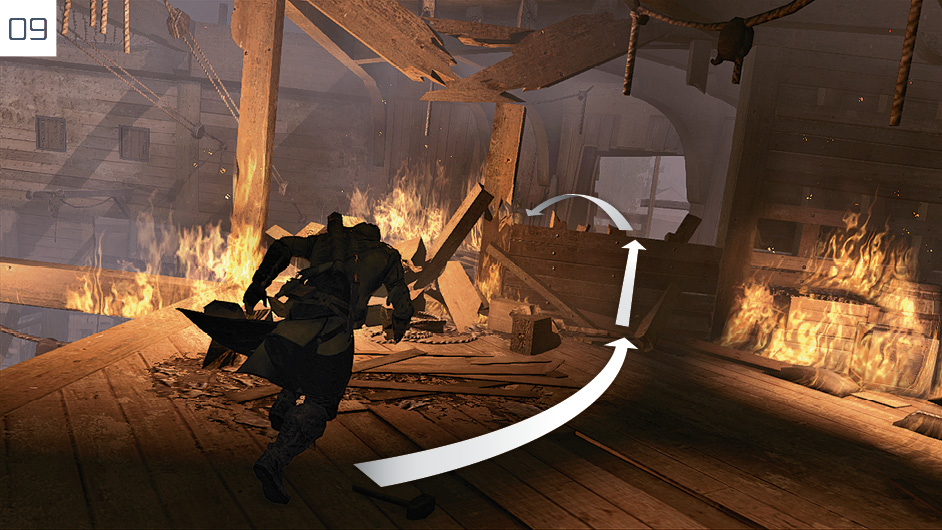
When the wooden wall collapses, leap through the new opening. Go through the door and turn left.
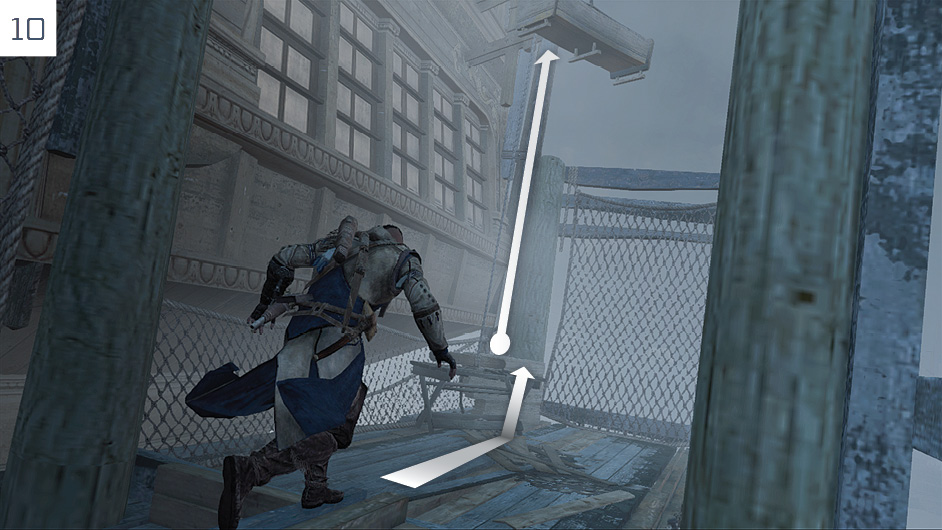
Though dramatic, the next section of the chase is painless if you maintain your pace and stay to the center of the free run course. At the end, move towards the rope on the left; Connor will automatically cut it and ascend to the upper level.
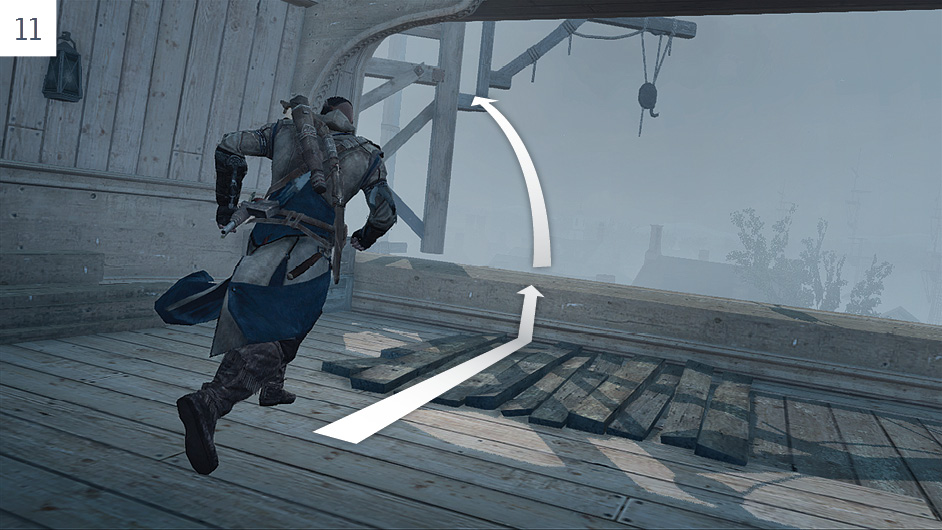
When Lee swings out of sight, run and jump in the direction shown here to follow him. Stay hot on his heels for this short last section of the course, and a cinematic will mark the end of the pursuit. You will require no assistance during the events that follow.
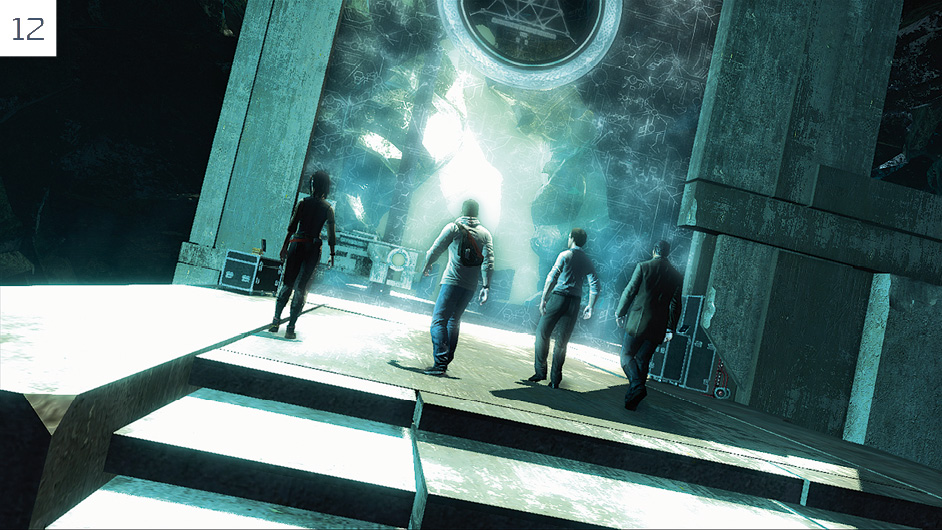
December 20, 2012: Once the story returns to the present, you have one final opportunity to check emails at the terminal. If you have yet to place any of the three Power Sources, you must attend to this now. When you are ready, follow the other Assassins to the vault gate to continue.
Epilogue MissionsAfter the closing credits, play resumes with Connor outside the Manor. You now have access to three “Epilogue missions” marked by the Once you have viewed both cinematics, a third Memory Start marker appears in Boston. Simply travel to the city to trigger an intriguing cutscene in the Animus “white room”. This introduces a new, online-only side quest. The “Fin.” Achievement/Trophy is unlocked when Connor is returned to the streets of Boston, marking the end of the main storyline – but, for most players, the game will be far from over. You can now return to completing all remaining side quests, optional activities and challenges. |
 icon. One is in the north of the Frontier in Connor’s old village, and another one is on the east side of New York. Both offer cinematics that show developments in the New World, and do not feature direct play.