
Assassin's Creed III Guide Walkthrough
December 12, 2012
Power Source #3
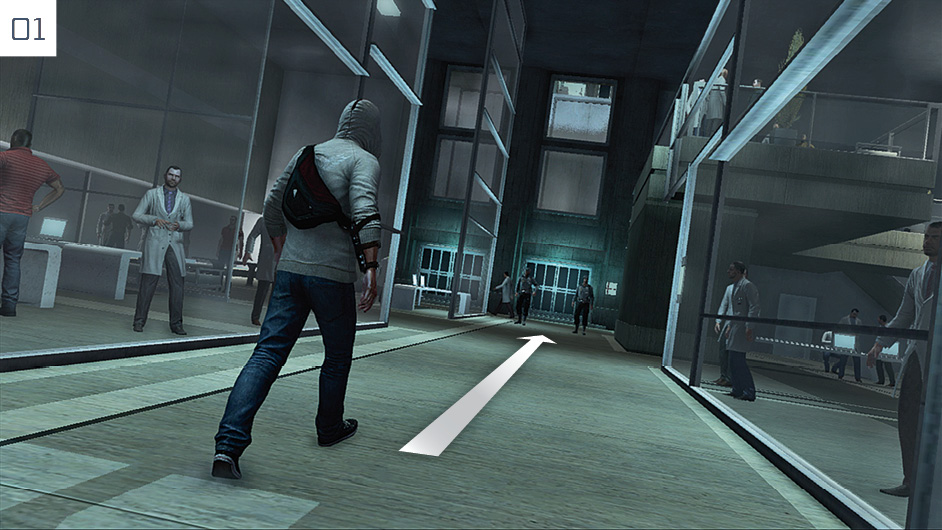
Walk along the corridor until you reach two guards, then disable them when they attack. As in previous excursions outside the Grand Temple, you must interpret the movement of your opponents to react to their attacks.
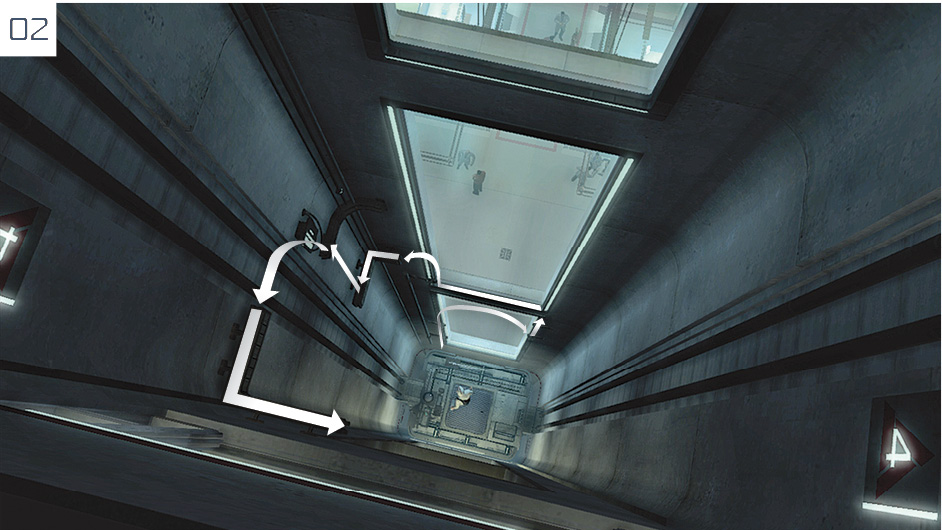
Approach the elevator; after the cutscene, climb to the top of the shaft. There is only one way up, as illustrated here.
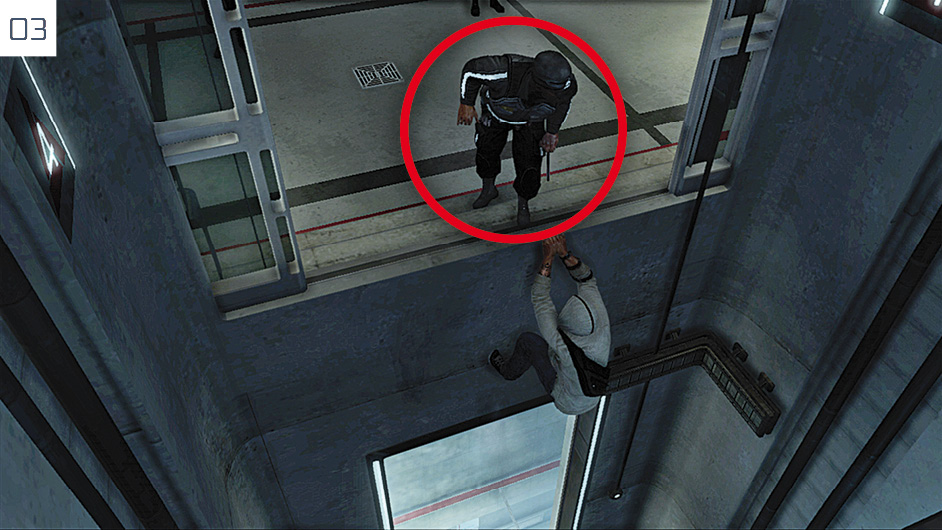
When you reach the opening above, there is a perfect opportunity for a ledge assassination. Jump up and fight the guards. You will need to make regular use of the human shield move from this point forward.
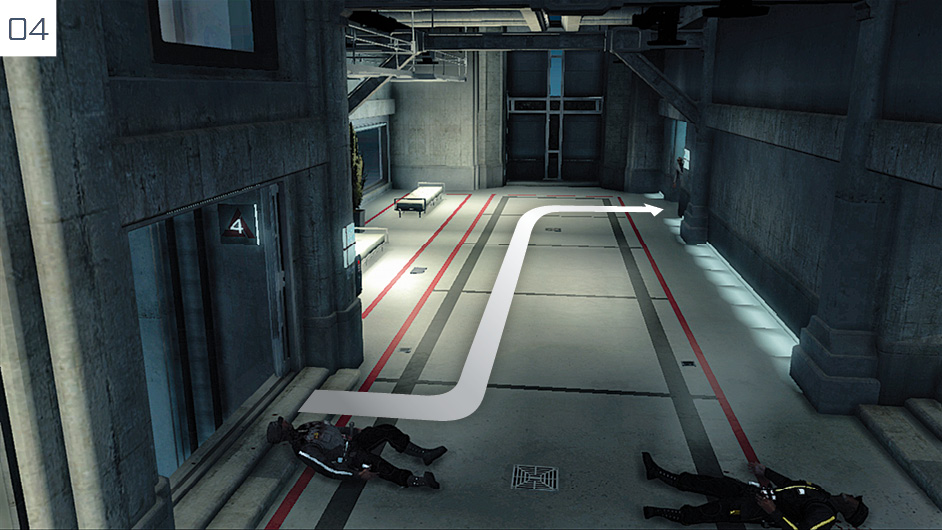
With your back to the elevator, head to the door on the left (marked Conference C) where there are more guards to fight.
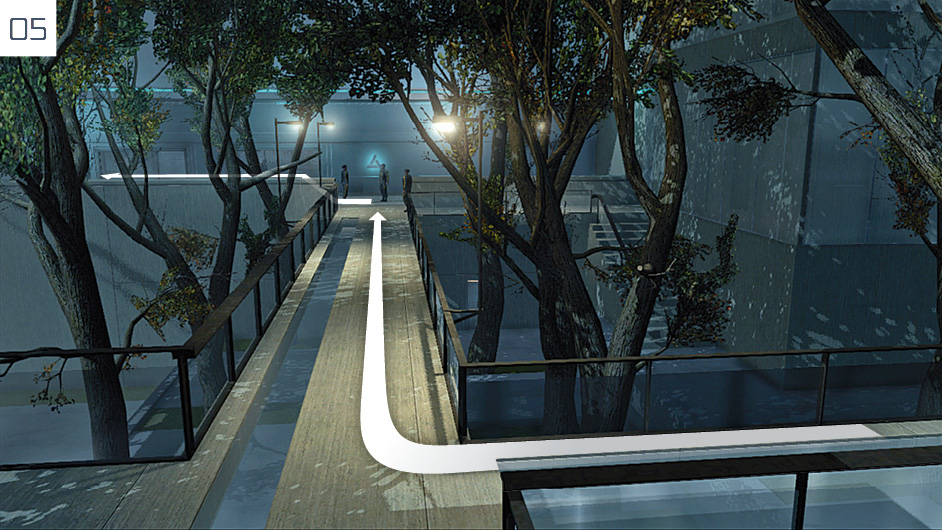
When you reach the atrium, stay on the walkway as you dispatch the next group of opponents. Jump through the broken window and approach the first door on the left.
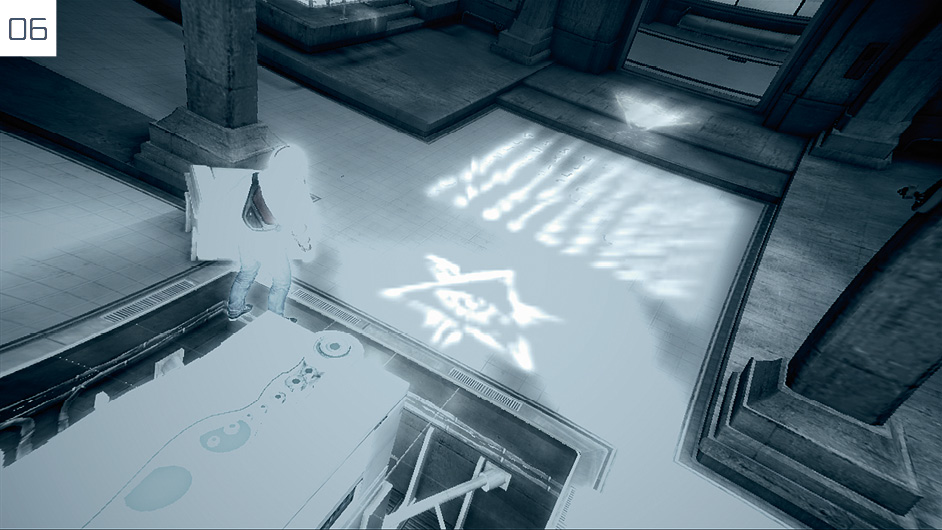
For those who recall the conclusion of Assassin’s Creed, activate Eagle Vision after the cutscene with Daniel Cross. Subject 16’s messages are still visible in the lab where Desmond was once held hostage.
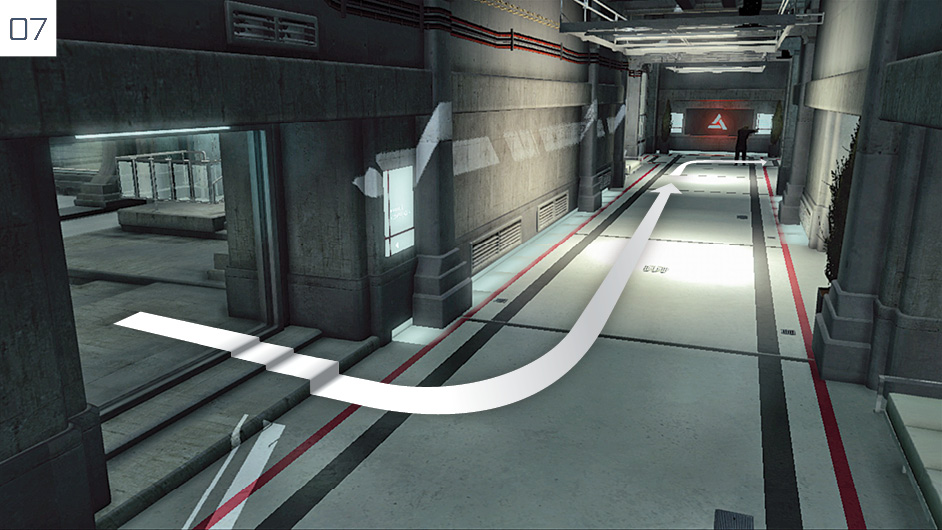
Kill the two guards in the corridor outside, then chase Cross.
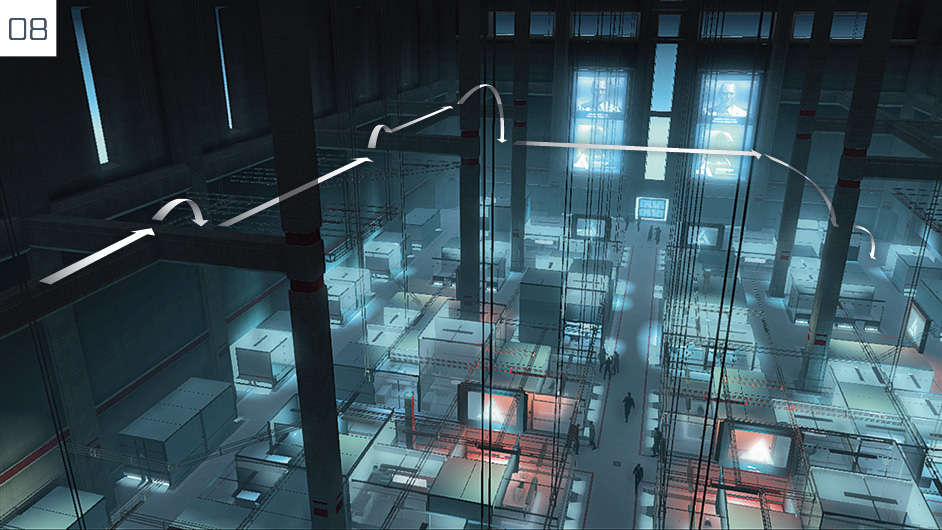
When he leaps through the window, follow him into another area that should be familiar to Assassin’s Creed fans. Follow the free run course in a clockwise progression to descend to ground level.
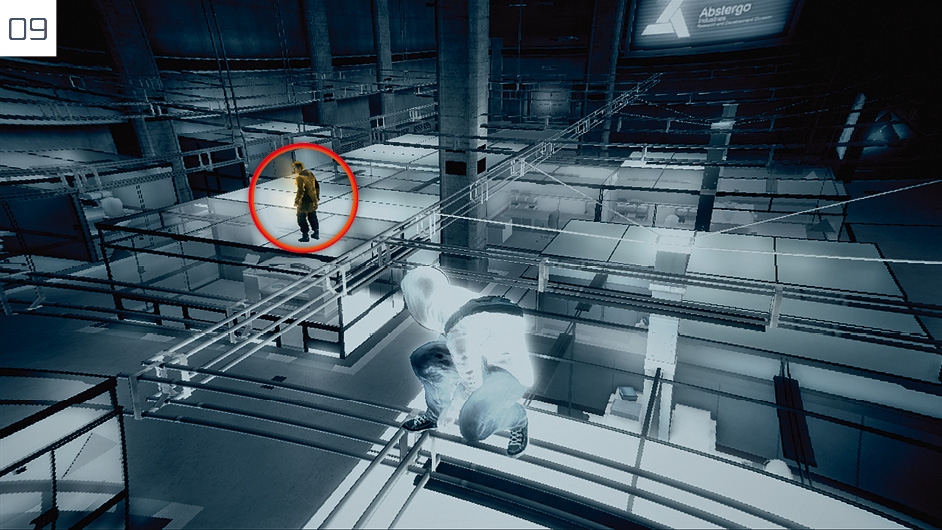
On the lower level, fight the guards in the immediate area to reduce the number of guns potentially leveled at Desmond, then climb on top of a glass cubicle (or the metal framework above) and activate Eagle Vision to locate Cross; he is marked with a gold highlight. Free run to his position and assassinate him.
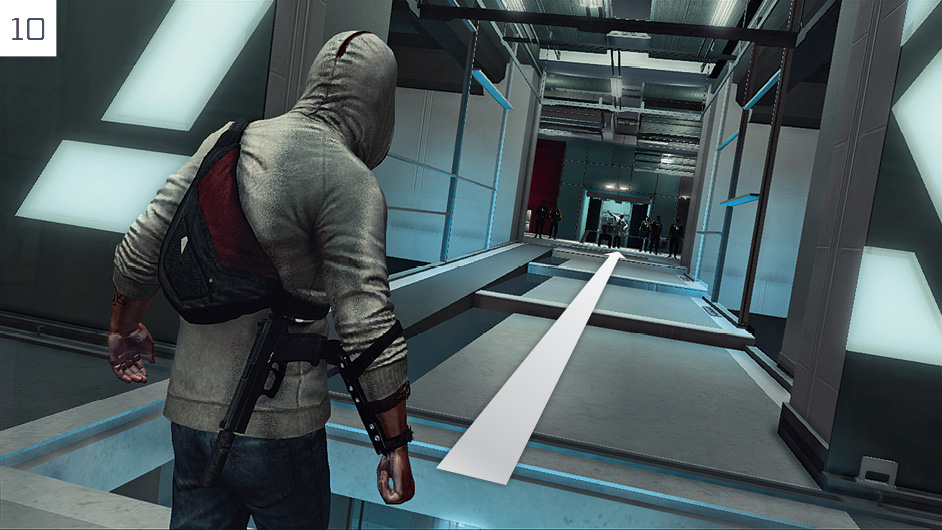
When play resumes, you will find that Desmond is now equipped with a gun. Fight your way through the linear path until all guards have been disabled. At this point, a secretary will open a final door. The closing moments of the mission are entirely story-driven, so we’ll curtail our involvement here to avoid spoiling any surprises.
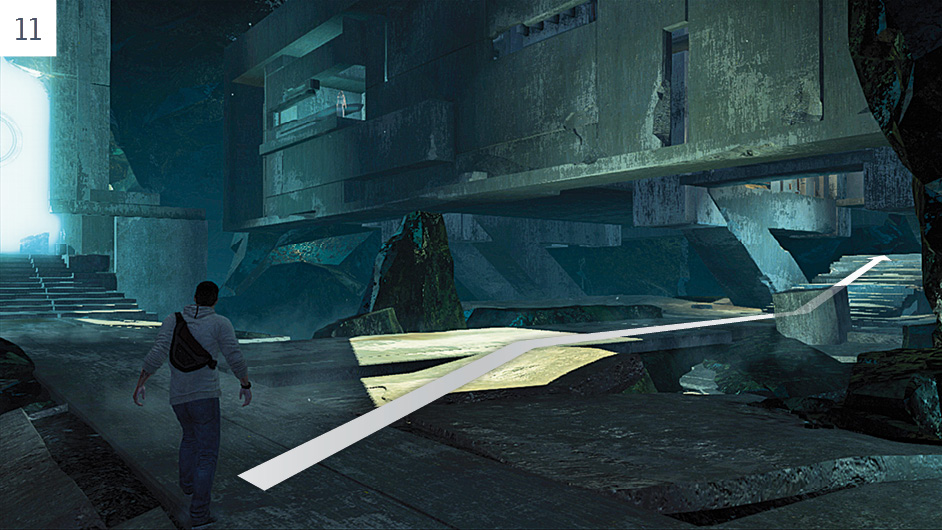
If you have inserted the previous two Power Sources, you can now put the third in its rightful place. Start by running up the steps uncovered by the second Power Source, then take a right. Swing via the poles concealed in the broken ceiling, then take another right to ascend a second set of steps.
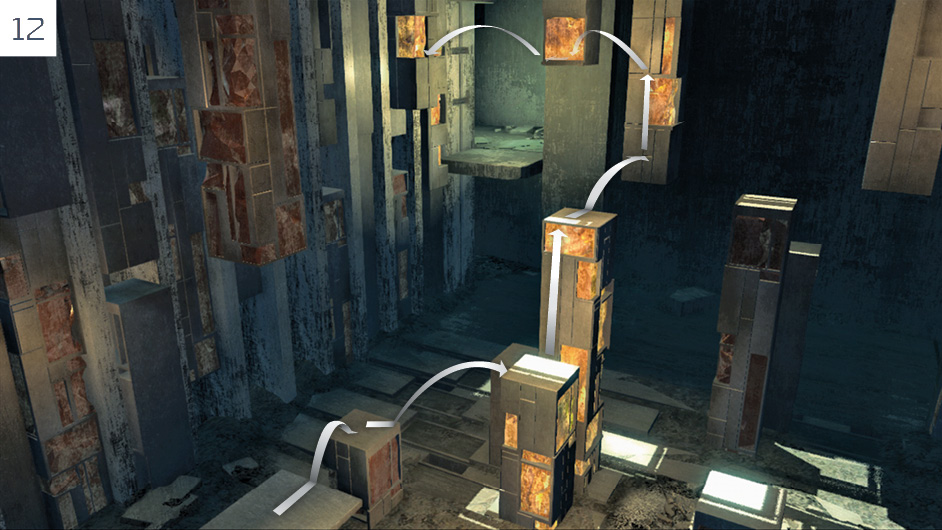
Inside the room with the strange “pillars”, those marked with an eerie orange luminescence actually indicate a route to an upper level.
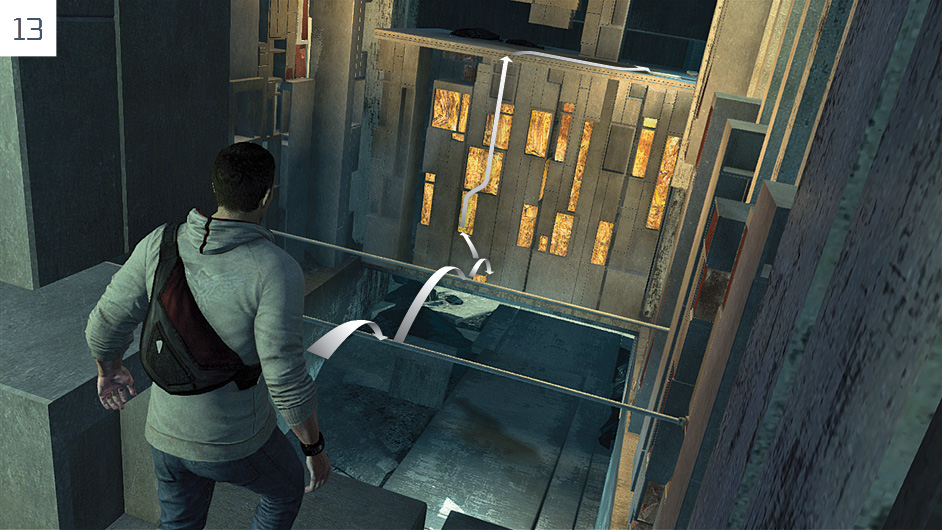
Run through the next room, then swing via the two poles to reach a ledge on the opposite wall. Climb to the top, then walk to the right.
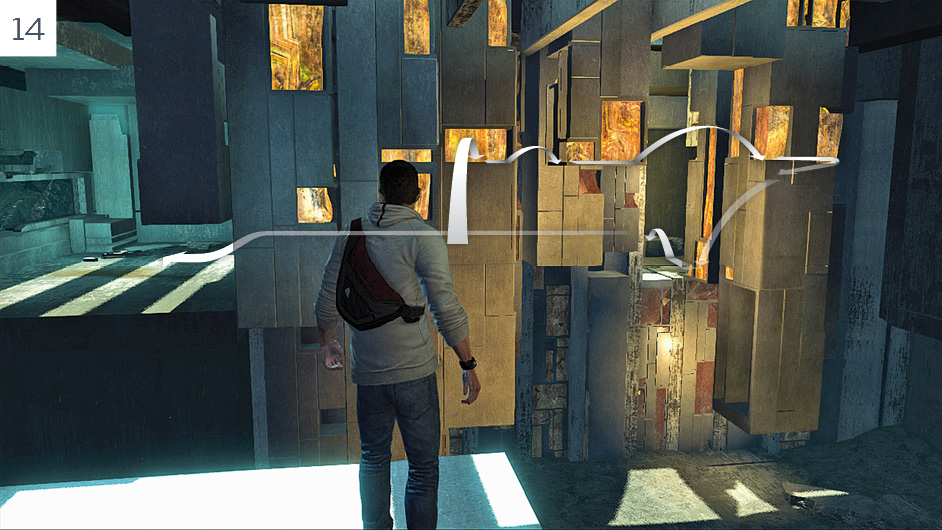
The final step is to use the ledges shown here to traverse to an opening to the right, then approach the console where the Power Source can be placed. Once this has been achieved (via a cutscene), turn left and jump to the lower level, then swing via the pole to return to the main floor area. Check Desmond’s emails and speak to his colleagues for new conversations, if you wish, then enter the Animus, to continue.