
Assassin's Creed III Guide Side Quests
Naval Primer

From Sequence 06 onwards, Connor can embark on a number of nautical expeditions. Naval Missions are multi-stage Memories that focus on navigation and naval combat on board the Aquila, and tell a side-story concurrent to Connor’s adventures on land. Privateer Contracts are shorter Memories where the Aquila and her crew must neutralize opposing fleets to complete a variety of objectives. Both types of mission can be
started via the East Coast map by interacting with Robert Faulkner at the Homestead, or any Harbormaster in other areas.
Before we move on to walkthroughs and tactics for all Naval Missions and Privateer Contracts, we will first offer a variety of valuable explanations, tips and insights on how to captain the Aquila effectively.
Basics
The curved meter to the left of the mini-map represents the Aquila’s integrity. Collisions with rocks or other vessels, and being hit by enemy gunfire or Rogue Waves without bracing, will all result in damage. If you generate sufficient funds through the Homestead, you can invest in upgrades to the ship’s hull later in the story. The Aquila’s life bar cannot be refilled while she is out at sea, though the crew undertakes full repairs between each mission.
While audio cues are useful in many areas in Assassin’s Creed III they are perhaps most important during naval sorties, as the crew’s comments offer important information on events on and around the Aquila ( 01).
01).
- Left of Connor stands Robert Faulkner, who offers warnings of Rogue Winds and Rogue Waves, and will caution his young captain when he sails against the wind.
- The two men located amidships, on the left and right, are Gunnery Officers. They will inform you when cannons are ready to fire – and protest with strained forbearance if you request a broadside or swivel gun shot while loading is in progress.
Listening to your crew provides vital information, and isn’t just part of an ambient soundscape. We say this now in the knowledge that you will almost certainly disregard their comments at first, but come to respect their contribution when a warning enables you to avoid a collision, or brace to avoid an otherwise deadly broadside. Even when your attention is arrested by a specific target, your crew always has a full 360-degree view of the dangers surrounding the Aquila.
Mini-Map Legend
|
|
Destination |
|
Allied ships |
|
|
Objective/Target |
|
Rogue waves |
|
|
Enemy ships |
|
Wind Direction |


Commands
|
XBOX 360 |
PS3 |
Summary |
|
|
|
Used to steer the ship. |
|
|
Used to control the game camera. |
|
|
|
|
Half Sail/Full Sail: Increases the speed of the ship. |
|
|
|
Half Sail/No Sail: Decreases the speed of the ship. |
|
|
|
Brace: Connor and his crew take cover from enemy gunfire or Rogue Waves. |
|
|
|
Fire Swivel Guns: Hold to aim, release to fire. |
|
|
Fire Cannons: Hold to focus, release to fire. |


Navigational Tips
- Sailing at Full Sail makes your vessel faster, but at the cost of reduced maneuverability.
- Sailing at Half Sail is slower, but enables you to steer the Aquila more efficiently.
- Rogue Winds push you in the prevailing direction of the gust, and make it almost impossible to steer into the wind at Full Sail. Indeed, turning the wheel hard right to counter the effects of a Rogue Wind from the right, for example, will still lead to an inexorable drift to the left. To counteract the effects of these temporary gales, call for Half Sail. If time is of the essence, alternating between the two movement speeds can offer a compromise of maneuverability and pace.
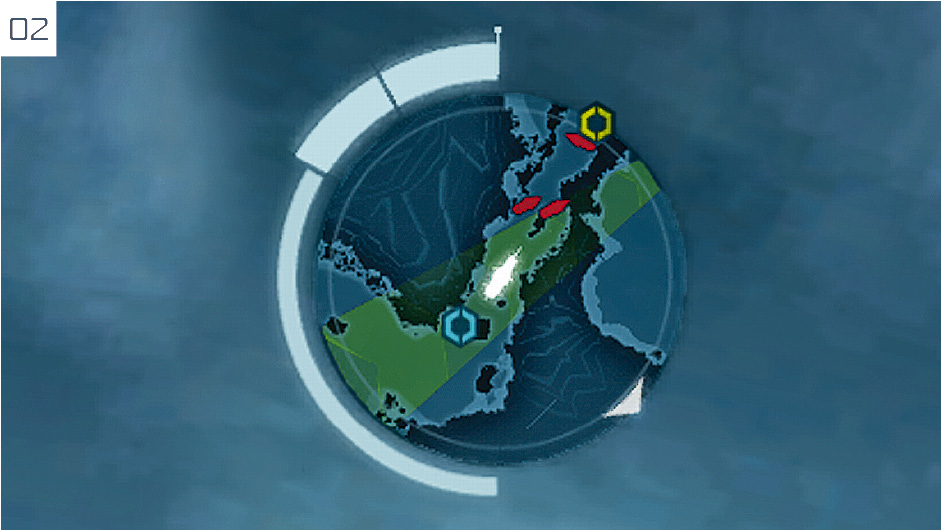
- On the mini-map, a funnel-shaped indicator shows the direction of the prevailing wind (Rogue Winds notwithstanding –
 02). Sailing with the wind makes the Aquila faster; in these instances, the funnel is colored green. When you sail against the wind, the vessel’s speed is greatly arrested – as indicated by an orange or red hue.
- Hitting rocks or cliffs will damage the Aquila. Moving too close to the shore can cause the vessel to graze sandbars and reefs, which leads to a reduction in speed.
- Rogue Waves are a phenomena restricted to specific Memories, and require that you brace to avoid damage; the perfect time to do so is usually indicated by an onscreen prompt. Whenever you receive a warning that a Rogue Wave is incoming, check its angle of approach on the mini-map and always try to steer into it before you brace. Moving away from it can lead to serious damage to the Aquila when the brace ends too quickly. That said, timing this maneuver perfectly can lead to the spectacular sight of the Aquila riding the crest of the wave.
Note that you can upgrade the Aquila over the course of the game, increasing the amount of damage that can be dealt to other ships, and making her less vulnerable to attacks. Once you reach Sequence 06, you can walk up to Robert Faulkner (who is standing on the landing stage of the Aquila), or books next to Harbormasters, and purchase upgrades.
Naval Warfare
General Advice
- Approaching enemy ships head-on is often an inefficient solution as it limits your offensive possibilities. Instead, try to make diagonal approaches that will enable you to fire powerful broadsides.
- In many battles, you should ensure that all enemy ships are on one side of the Aquila. Being pounded by multiple ships from both sides can be disorienting and, as a consequence, devastating. Whenever it is possible to do so, circle around enemy fleets in a wide arc. In situations where you do have enemies on both sides, however, you should note that the port and starboard cannons can be fired independently, and are subject to separate reload timers. While the dangers posed by sailing amidst enemy vessels are higher, this situation also increases your potential firepower.
- When you fire a broadside, holding the button to “focus fire” will gradually narrow the white band that indicates the direction of fire. This can lead to a huge increase in accuracy over medium-to-long range. When the Aquila is extremely close to an opposing vessel, there is no need to focus the cannons. Just fire away immediately; this can save precious seconds.
- Hitting larger vessels with an accurate broadside may cancel a shot that they are preparing to fire. The same, alas, is true for the Aquila: damaging hits will briefly disable your attacking options.
- The swivel guns have a much shorter reload time, but inflict negligible damage against larger vessels unless directed at a Weak Point. Their primary function is to eliminate small gunboats with a single shot, or schooners with up to three hits. Unless fired at point blank range, swivel gun fire will only hit ships if the hovering target reticule is red. When the Aquila is close to an opposing ship, the reticule will be primarily red, with occasional shifts to white. Over long distances, the opposite is true. Acquiring the ability to “snipe” at long range is something that takes practice and experience to perfect.
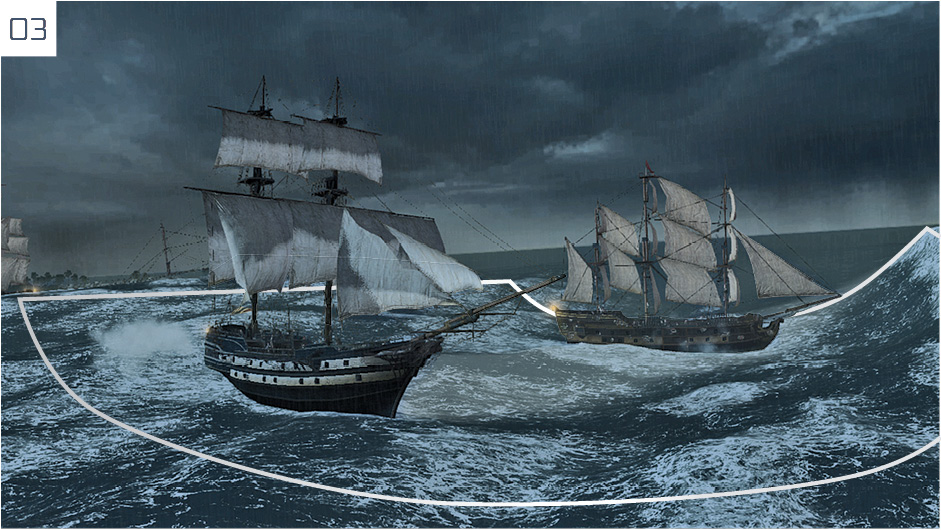
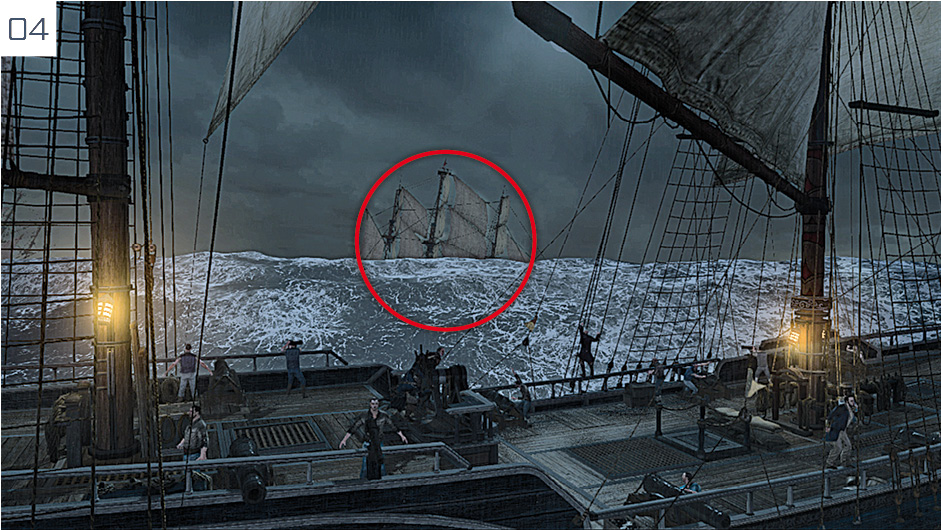
- Some naval expeditions take place on rough seas, with waves further complicating engagements. Taking aim is then a lot more difficult; in many instances, you must focus your cannons and wait until you have a clear line of sight to fire. If you find yourself within a wave canal (
 03), wait until the Aquila and the enemy ship are aligned and seize the opportunity to fire. If the Aquila and an enemy ship are instead separated by a wave (
 04), focus your cannons in the direction of the ship (using its mast as visual reference), and open fire when your target is at the same elevation as the Aquila.
 - Naturally, upgrades make it easier to complete Optional Objectives if you are keen to secure 100% Synchronization. We strongly advise that you obtain the Extra Cannon, Improved Rudder and Piercing Round upgrades at an early stage in the story. Though shockingly expensive, Hull Reinforcements may also help with the most difficult Optional Objectives. They can facilitate more aggressive strategies, as the extra durability means that it is slightly less important to regard the Aquila’s hull integrity as something to be maintained at all costs.
- Checkpoints are common in the multi-stage Naval Missions, and can be exploited if you are determined to complete a perfect playthrough. Cutscenes often indicate that your progress has been stored, which means that you can return to that checkpoint if your progress in an Optional Objective is less than satisfactory. The shorter Privateer Contracts, however, occur as a single “take”, and must be repeated from the very beginning if events go awry.
- Before we continue, a little trivia for readers conversant with Assassin’s Creed motifs: Aquila is the Latin word for “eagle”, and the name of a constellation that features the star Altaïr – which is derived from an Arabic phrase meaning “the flying eagle”.
Enemy Vessel Type Overview
Gunboat

Notes
- Smallest enemy vessels; low damage.
- Not a priority: take them out with swivel guns as you wait for cannon reloads.
Frigate

Notes
- Can fire their cannons with relatively short reloading intervals.
- Ram their bow or focus a broadside at their bow to expose their Weak Point.
Schooner

Notes
- Attack you head-on in a right-angle with grapeshot.
- Fast and highly maneuverable, they can deal considerable damage; eliminate them quickly.
Man-of-War

Notes
- Largest enemy vessel.
- Use heat shot for maximum damage, or aim broadsides at their bow (or even ram it!) to expose their Weak Point.
Gunboats
Gunboats are the smallest and weakest vessels that the Aquila will face, though they can be moderately dangerous in large numbers. The best tactic when you face them in fleets comprising multiple vessel types is to target them with swivel guns in moments where you must wait for the main cannons to reload while engaging larger ships. Hold  /
/ to display the aiming reticule, wait until it turns red, then release to fire. A single shot will usually send a gunboat to the bottom of the sea.
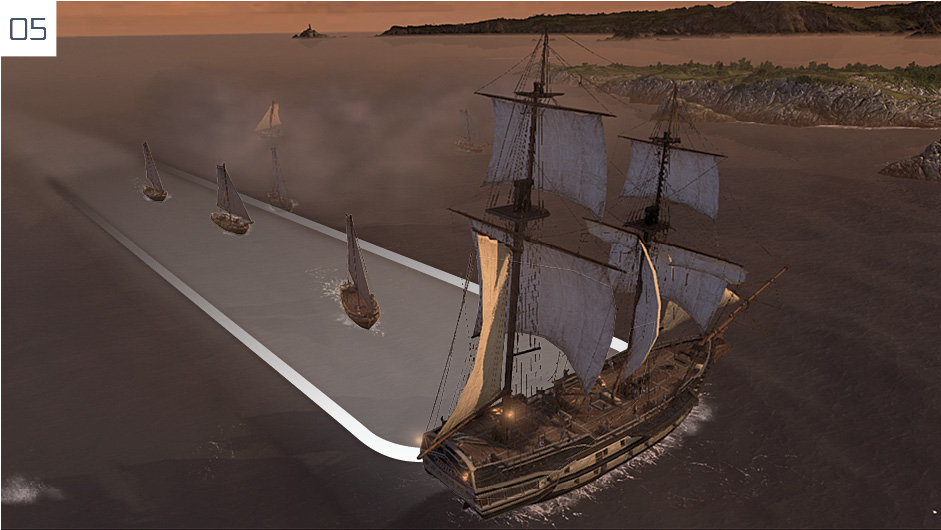
Firing broadsides at a single gunboat is generally inefficient. However, if there are multiple gunboats (and schooners) congregated to port or starboard, you can eliminate multiple vessels with a single volley ( 05).
05).
Schooners
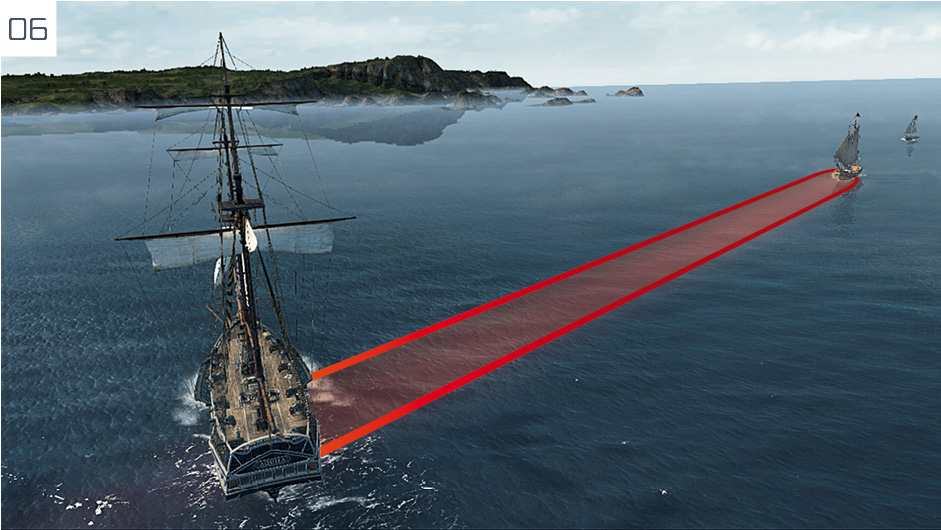
These vessels are small and not particularly durable, but they can deal considerable damage to the Aquila if left unchecked. They favor grapeshot and will fire an initial flurry during their approach if adopting hit-and-run tactics ( 06), and may turn into your wake to attack the Aquila from behind. Even a single schooner can inflict grievous damage over the course of a battle, so it always pays to make them priority targets.
Schooners require at least three shots to sink with the default swivel guns, but can be destroyed with only two once you obtain the (essential) Piercing Round upgrade. A single broadside is sufficient to send them beneath the waves.
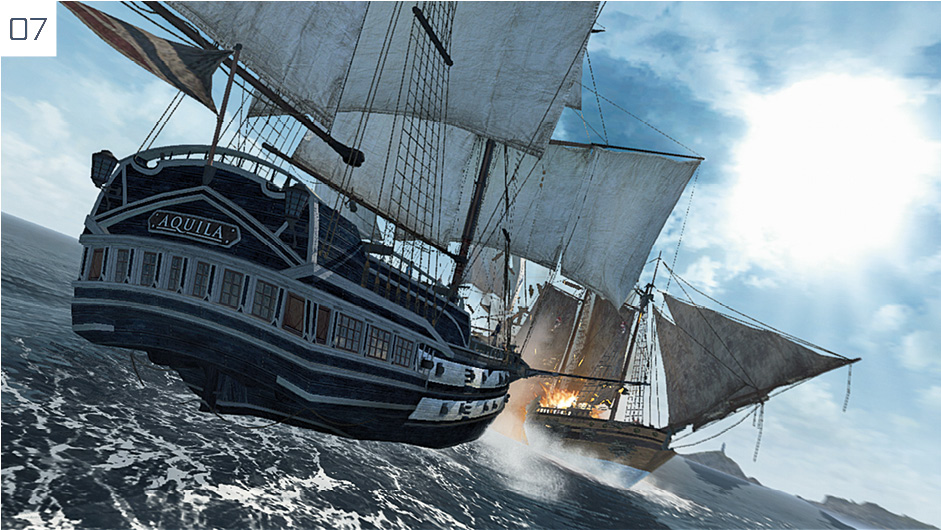
You can destroy all small ships by ramming them at high speed ( 07), though the accompanying loss of velocity means that this is only practical against one (maximum two) targets at a time. This tactic is even more efficient if you purchase the Naval Ram upgrade.
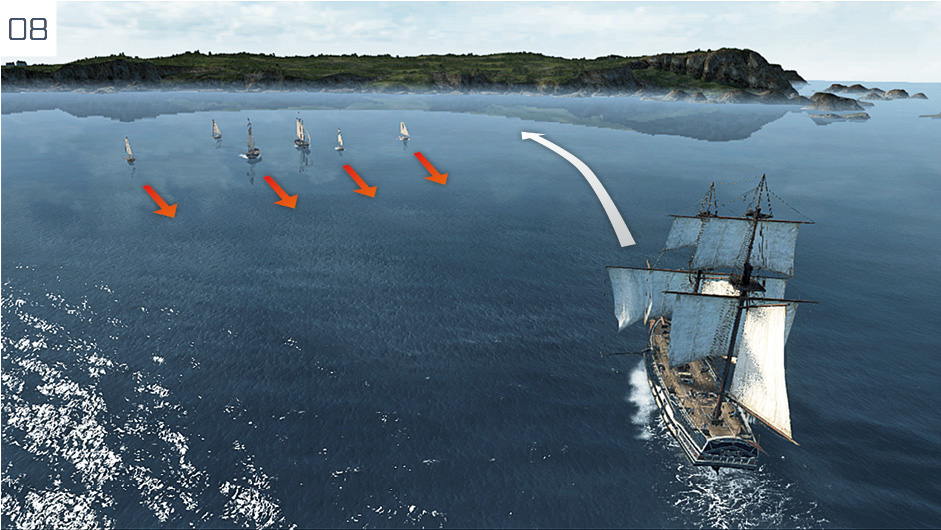
There are many instances where you will face a large fleet composed primarily of schooners and gunboats. A good way to defeat them efficiently is to circle around them in a broad curve ( 08). Fire broadsides at schooners or multiple vessels in close proximity, and employ the swivel guns to eliminate targets during reloads.
Frigates
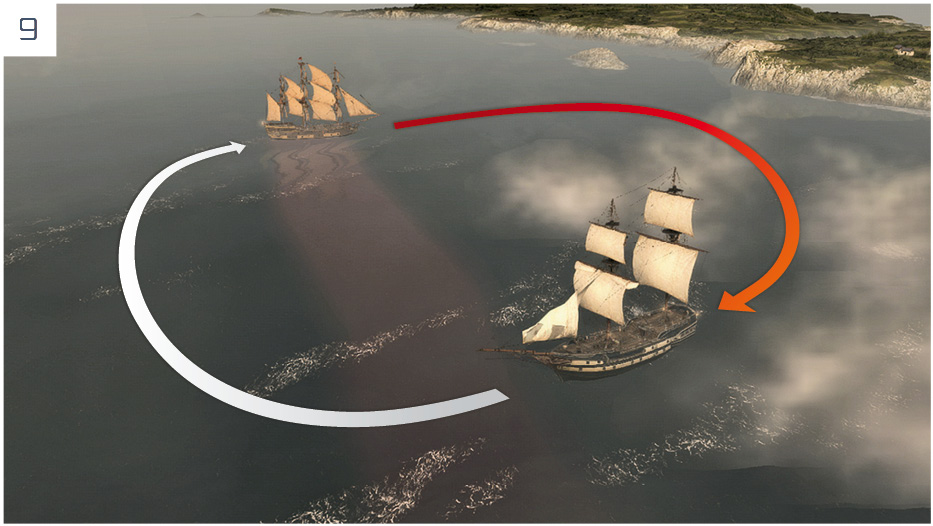
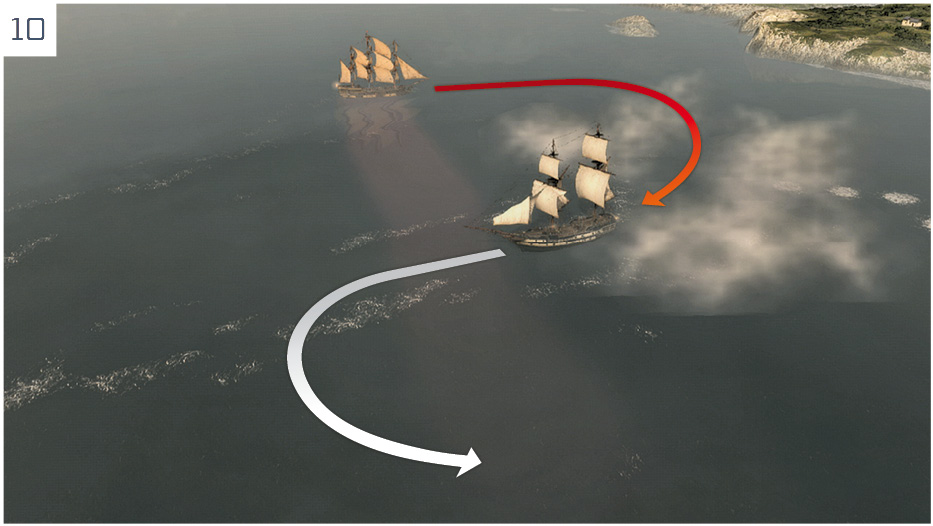
When you engage a frigate it will usually attempt to circle your ship ( 09). However, as the frigate is able to fire its cannons at very short intervals, this can lead to a situation where you must almost perpetually brace to avoid its shots. A better strategy is to break off and steer in the opposite direction (
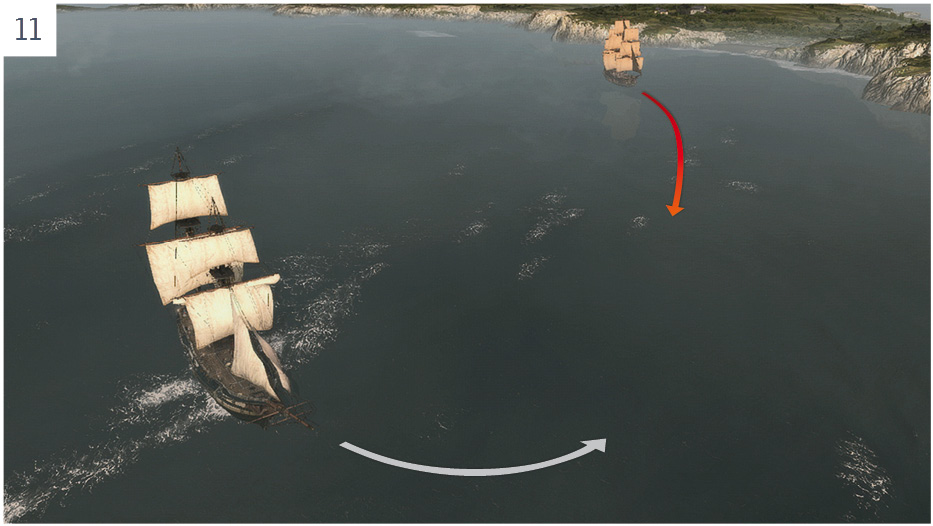
 10). While you are steering your ship in a half circle, the enemy will now come at you perpendicularly (
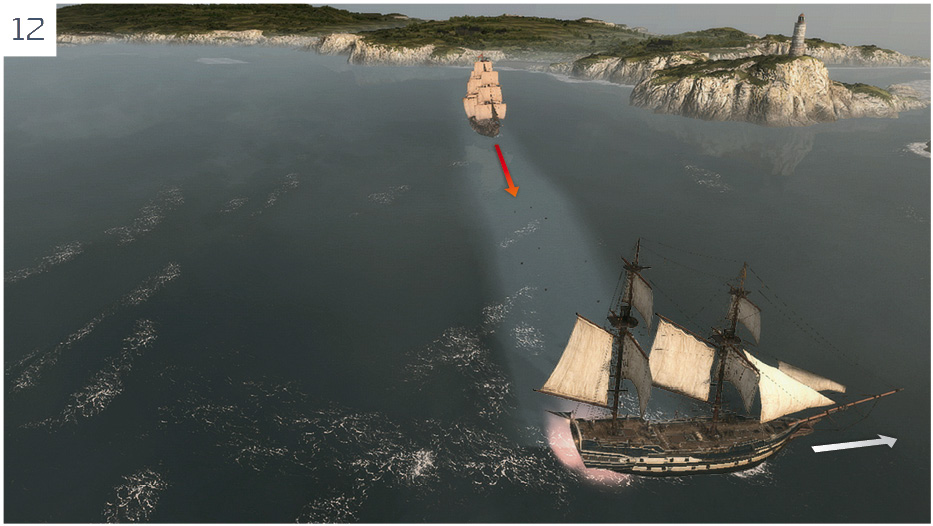
 11). Focus your cannons and fire a broadside at the enemy ship’s bow (
 12). Furthermore, firing at a frigate’s bow often exposes its Weak Point, enabling you to destroy it with a single well-aimed swivel gun shot.
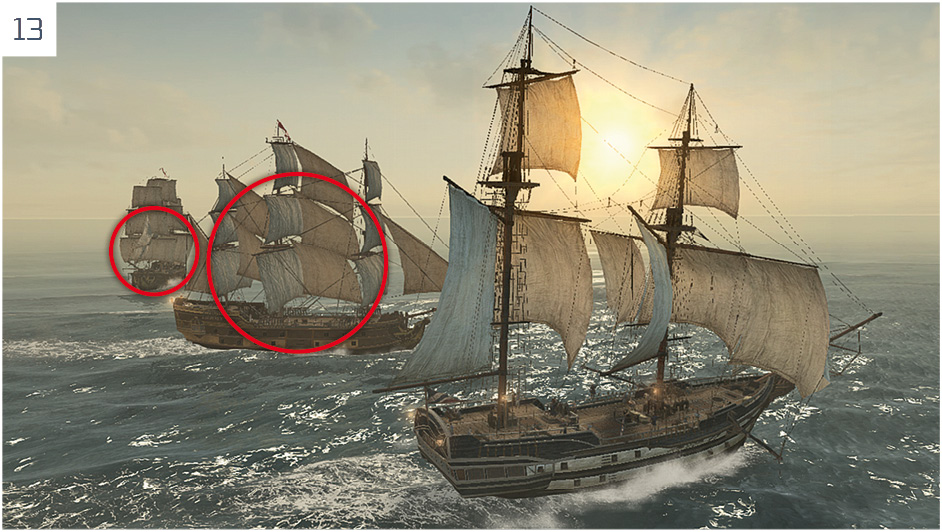
When you face multiple frigates, try to avoid situations where they surround you. Instead, try to circle them, keeping both on one side, ideally in a straight line ( 13). With this tactic, one of the enemy frigates will act as a shield for the Aquila, and may sustain damage from broadsides fired by its more distant ally.
Man-of-War
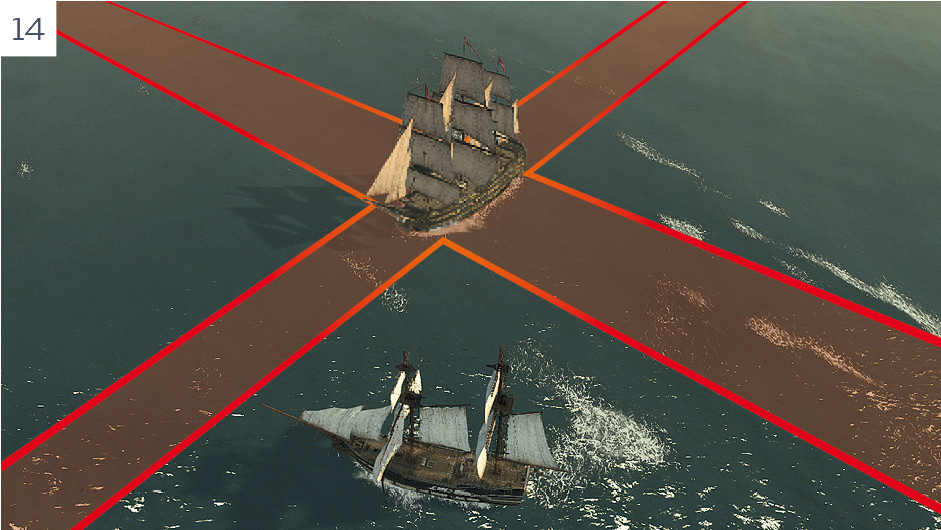
The man-of-war is the largest vessel you will encounter. Even if you use chain shot to destroy their masts, they are still able to shoot their cannons. For optimal results, measure your approach to pummel these leviathans while remaining outside their direct line of fire ( 14). The (extremely expensive) Heat Shot ammunition upgrade will increase the damage that you inflict with broadsides.
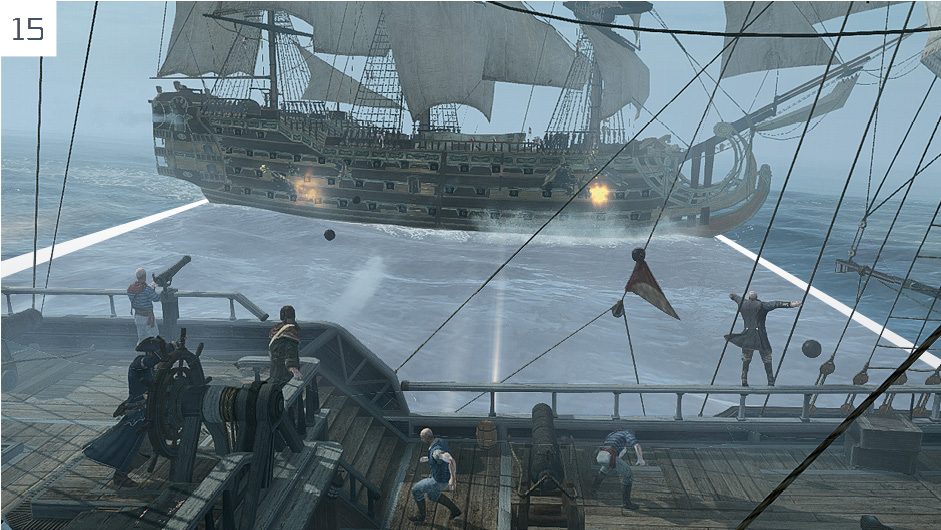
When you are very close to a man-of-war, there is no need to focus your broadsides ( 15). Just fire quickly and then steer the Aquila away from the inevitable counterattack.
Even though it is a large vessel, the man-of-war is fast and versatile. Engaging it in combat and maneuvering around it can be draining, as it can fire more frequently than the Aquila, and has cannons equipped in its bow, stern, port and starboard sides. The quickest way to defeat a man-of-war is to approach it from the front and focus broadsides at its bow to expose a Weak Point; you can also achieve this on occasion with a judiciously aimed collision. Once this point of vulnerability is revealed, you can destroy it with a single, well-aimed swivel gun shot.