
Assassin's Creed III Guide Walkthrough
Sequence 08

New York

Something on the Side
Mission Overview
|
Optional Objectives |
Important Note |
|
|
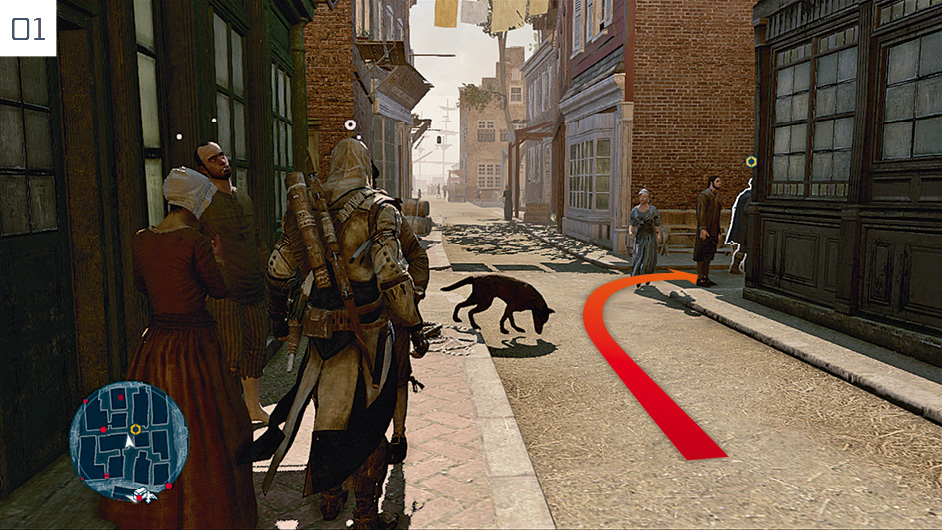
This Memory begins immediately after your arrival in New York. Mount the horse and ride into the city with your guide. After the cutscene, follow the counterfeiter into the alleyway. Blend with the crowd before he turns right, to avoid detection, then press yourself against the corner to watch him from afar. When he resumes his journey after turning suspiciously to regard the alley behind him, you can break into a brief jog to cut the distance.
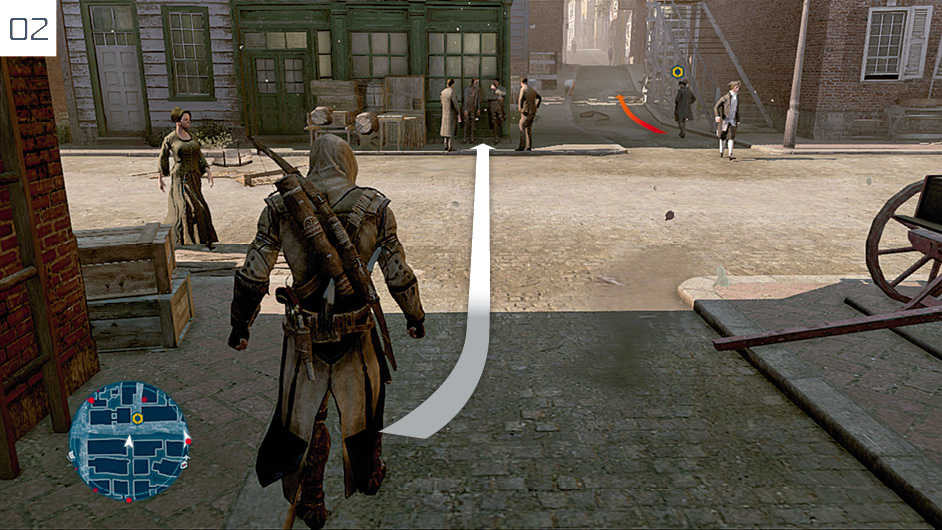
After he crosses the street to reach another alley, hang back in a crowd by the left-hand corner as a brief fight breaks out. Do not get involved in the scuffle – stay where you are and wait for him to resume his journey.
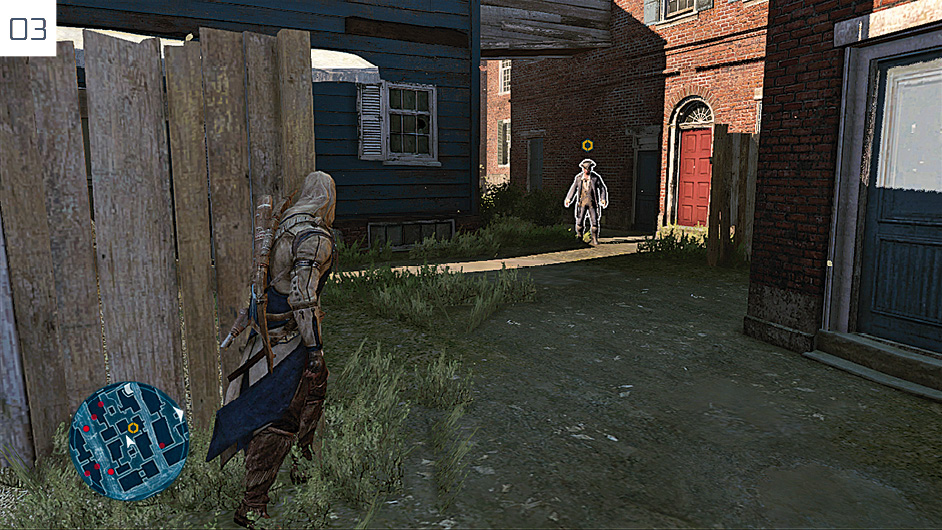
The counterfeiter will opt for the next alleyway to the left, increasing his pace. Keep up, with the Fast Walk ability, and hide when you reach a wooden fence; he will turn to examine the path behind.
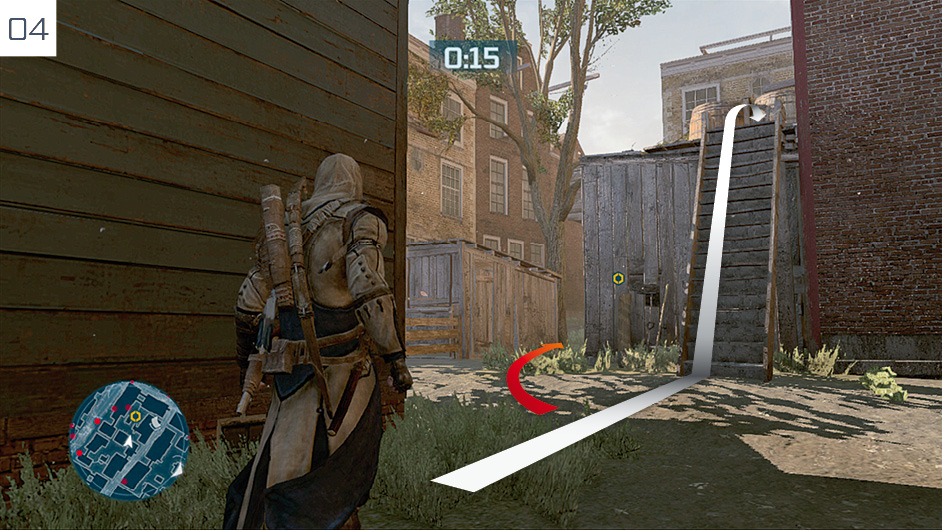
When you reach the position shown here, climb the steep wooden stairs and hide behind the barrels. The counterfeiter meets with an associate, and a new primary goal and Optional Objective are both revealed. Wait until the eavesdrop is complete, hold back a few moments for your target to move away, then jump down and continue your pursuit.
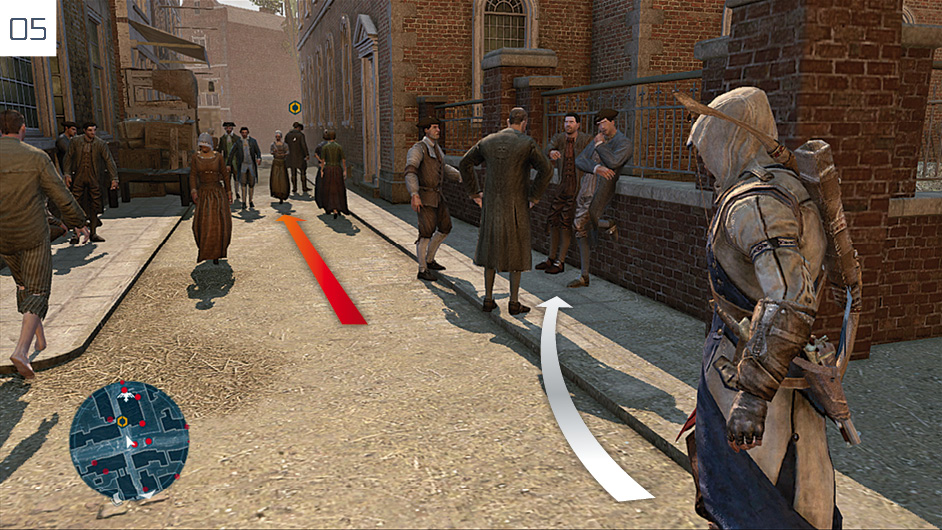
Back on the streets, make your way into the Blend position shown here; your person of interest turns to regard the street behind him before he turns to the left.
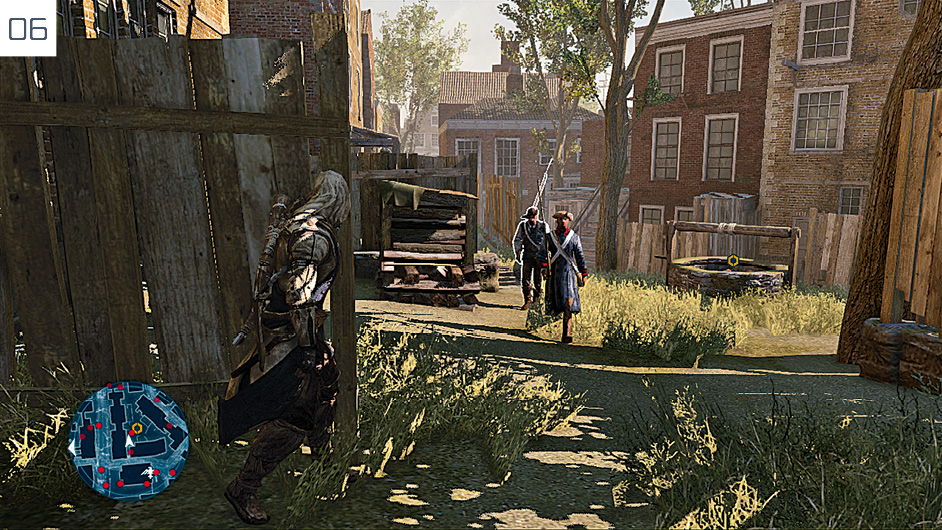
In the secluded area, stay behind the fence to avoid detection as the counterfeiter approaches the well. He will jump inside it to avoid two guards. Don’t panic: they will not react to Connor, and simply pass him without comment or consequence.
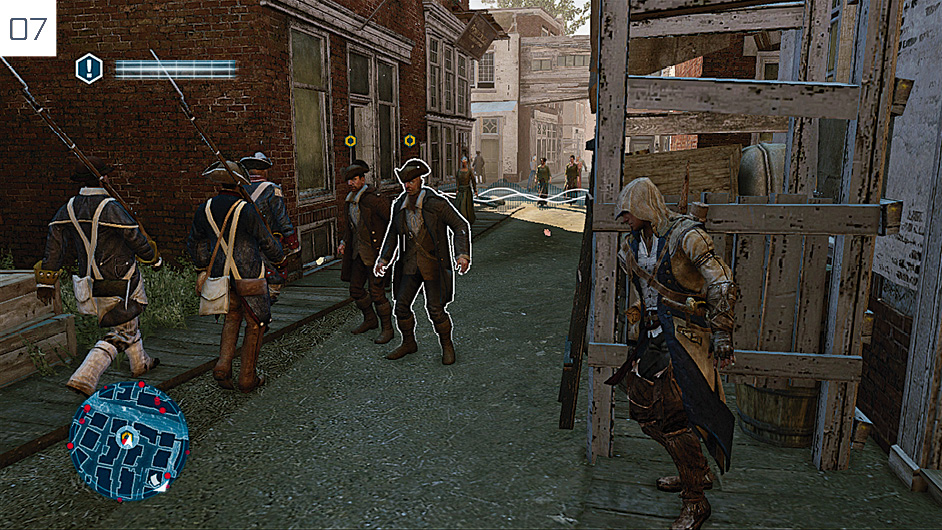
Stay out of sight as your target winds through paths less travelled, and he will eventually convene with an associate in an alleyway. A new Optional Objective is revealed here: you must complete a successful mobile eavesdrop. Make use of Blend opportunities as you find them, and stay to the rear of the circle. In the final long alleyway, hide to the right – as illustrated here – to avoid detection when they turn for the last time.
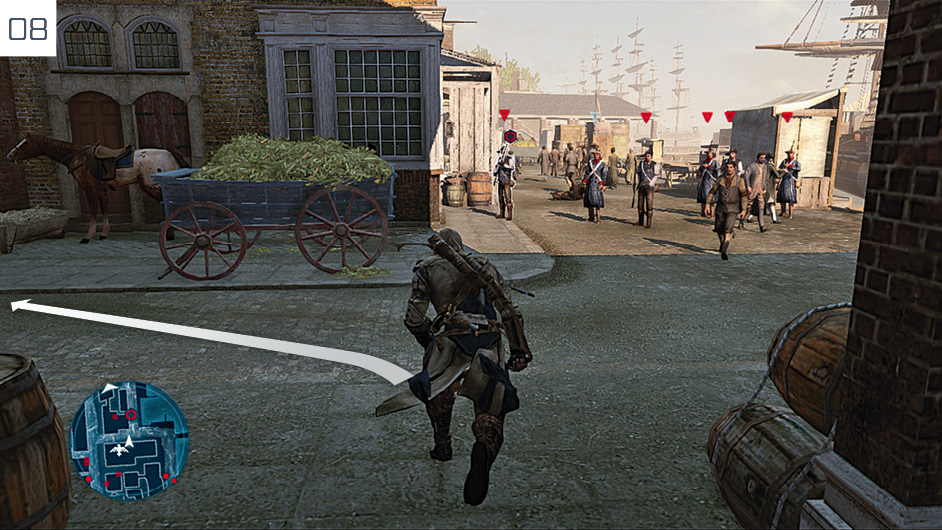
After the cutscene, Connor must pursue Hickey through the streets, but avoid making physical contact with anyone as he runs if you plan to complete the Optional Objective. The best way to accomplish this is to regulate your use of  /
/ to vary your pace as you weave through crowds and past obstructions. Once you leave the alleyway, in the position illustrated above, a group of soldiers will block Connor’s direct pursuit of Hickey. To complete the Memory, cut to the left, then take the first right. You can then easily intercept Hickey by performing the Tackle move (
 /
/ ) as he emerges from the alley to the right.
bridewell prison & Public Execution
Mission Overview
|
Optional Objectives (Bridewell Prison) |
Optional Objectives (Public Execution) |
|
|
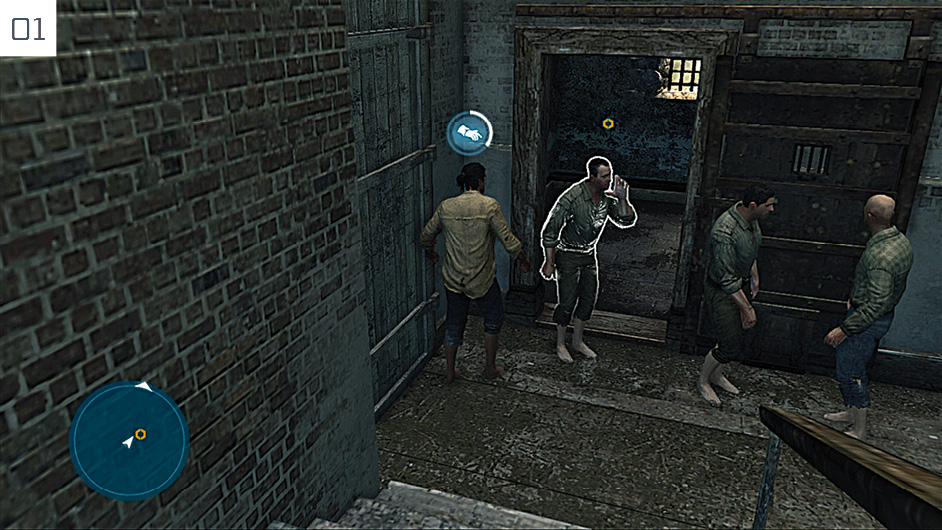
Bridewell Prison: When the Memory begins, move to the wall to eavesdrop, then interact with the bed to advance time. When play resumes, follow the guard to the lower level and activate Eagle Vision to identify Weems. When you speak to him, don’t get too invested in the board game: you won’t see it to its conclusion. After the cutscene, you must pickpocket Finch to continue. If you run straight up to the upper level, you will find Finch speaking with other prisoners. Follow him until he walks down the stairs, then stand behind him to perform the theft, as shown here.
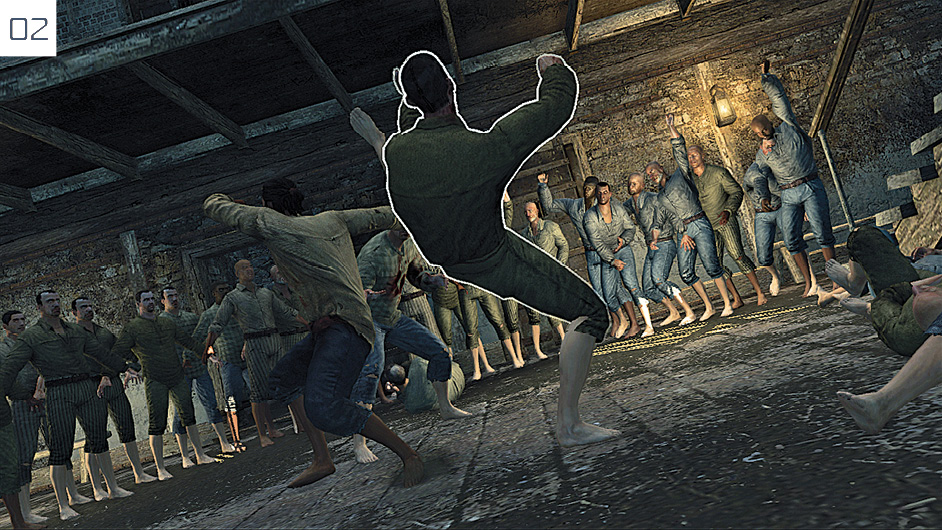
Return to your cell as directed. When the next day begins, approach Weems on the lower level. Start a fight with one of the three highlighted prisoners. Most of your opponents are resistant to Counter Kills, so use Counter Disarm to stagger them and two presses of  /
/ to knock them from their feet, then press
  towards them (a vital step) and tap
  /
/ to knock them out as they lie prone. If your timing is sound, this action should generally end as another prisoner attempts an attack for you to counter and begin again.
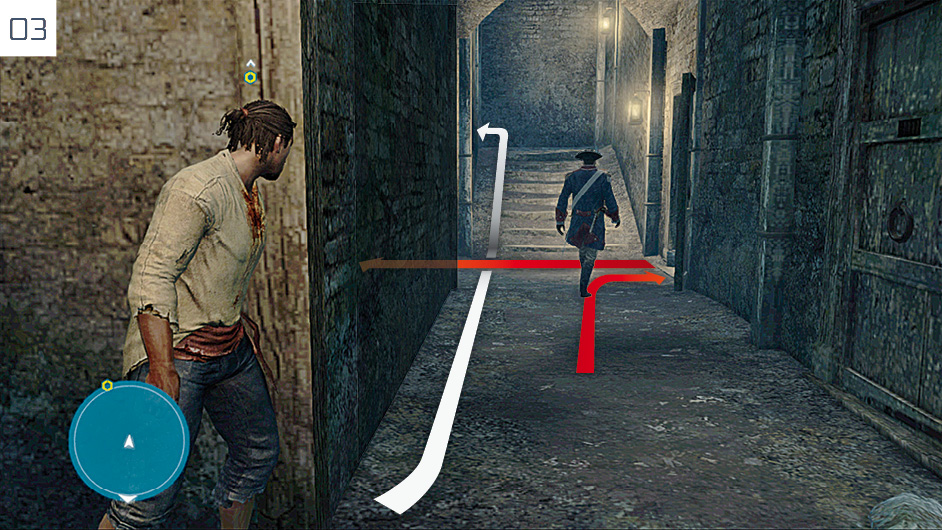
In the cell, pickpocket the Warden when he stands outside, then open the door. Follow him along the corridor, then hide at the corner as he turns left, as shown here. When he takes a second left, head up the stairs. Take a right to speak with Weems at the top.
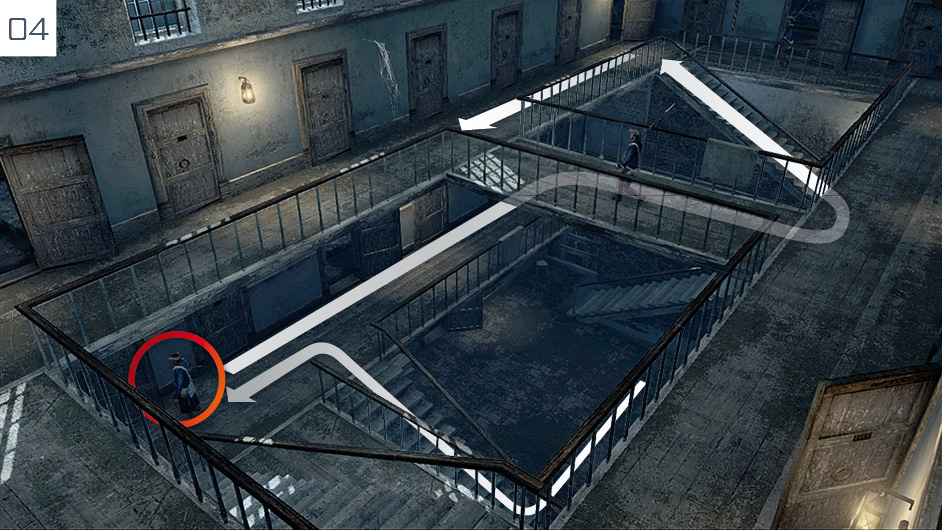
The new Optional Objective challenges you to reach Hickey’s cell within two minutes. Fast Walk directly ahead and follow the guard up the far staircase; when he stops at the top, disable him with a silent, non-lethal takedown. Fast Walk to the stairs on the opposite side of the floor and climb them to reach the waypoint before Connor is detected.
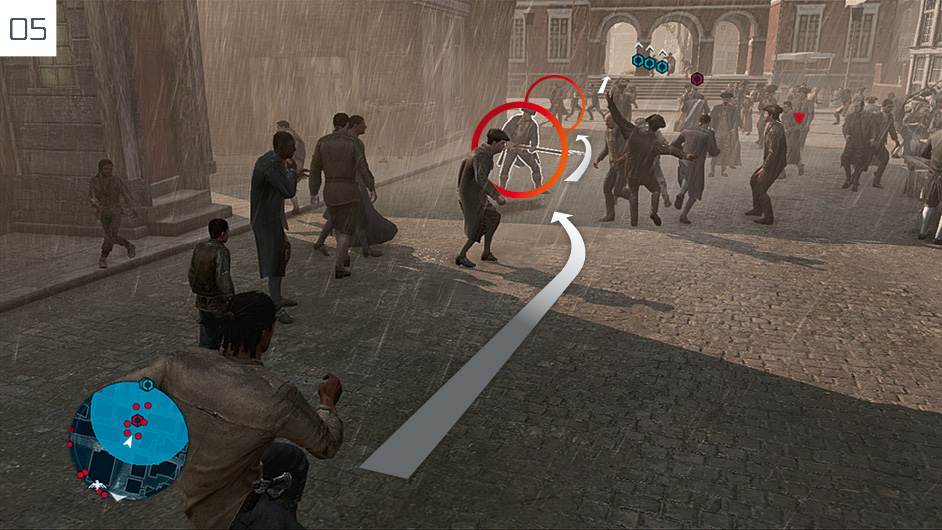
Public Execution: This third of three interconnected Memories begins with an atmospheric and evocative scene that we won’t spoil by offering superfluous assistance. Our focus here is purely on the two Optional Objectives; feel free to ignore these and just run for the primary target. Those keen to achieve Full Synchronization should follow the approximate path marked here (the positions can vary) to dispatch two enemy guards en route to killing Pitcairn. Keep  /
/ held to perform running assassinations; with the “slow motion” effect interfering with standard timing, try to tap
  /
/ just before you make contact with the targets. After you dispatch the second, stop to pick up his musket and fire on the Templar. If you cannot disable Pitcairn before he kills Washington’s bodyguards, simply restart from the checkpoint literally moments beforehand. Be warned: this may take many attempts to perfect.