
Assassin's Creed III Guide Walkthrough
Sequence 10
Alternate Methods
Mission Overview
|
Optional Objectives |
|
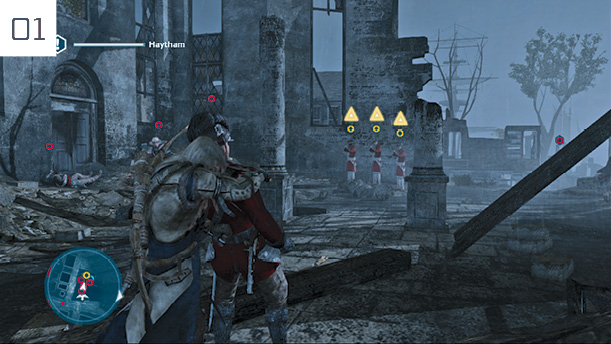
Reconvene with Haytham in New York, close to Fort George. When the Memory begins, follow him on the free run course through the burnt-out buildings. In the fight that follows, a new Optional Objective encourages you to use two guards as human shields. This isn’t difficult: just move into the center of the area. The volleys of the marksmen highlighted by orange hexagons ( ) will provide plenty of opportunities to complete the secondary challenge. Keep the camera trained on their position and be ready to react until the Optional Objective has been satisfied, then pull back to the rear of the area for the rest of the fight. When the bodyguards are dead or disabled, run over to the targets.
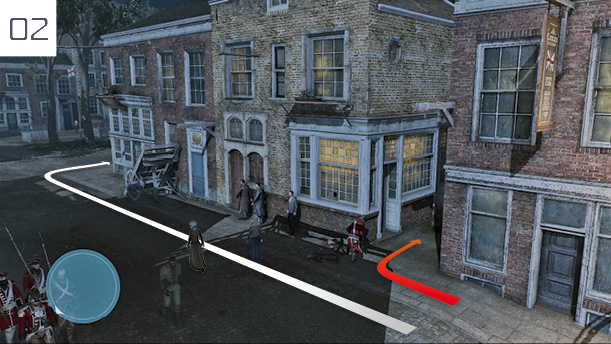
Sprint in pursuit of the escapee immediately. When you reach the street, move to the right-hand side to prevent the patrol from reacting before Connor passes their position. When your target takes a right into an alleyway, continue straight ahead and take the next right instead.
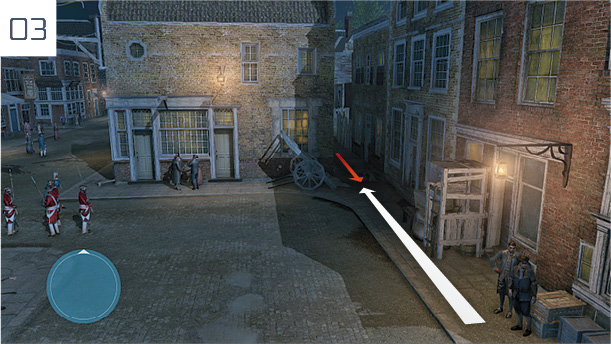
There are two potential solutions here: those aiming for 100% Synchronization should skip to the “Air Tackle” box-out. If the Optional Objective isn’t important to you, just run towards your target as he approaches from the alleyway and hold  /
/ then press
  /
/ to tackle him. After the cutscene, you can propel your reluctant captive towards the waypoint by pressing
  /
/ whenever he stops.
Air Tackle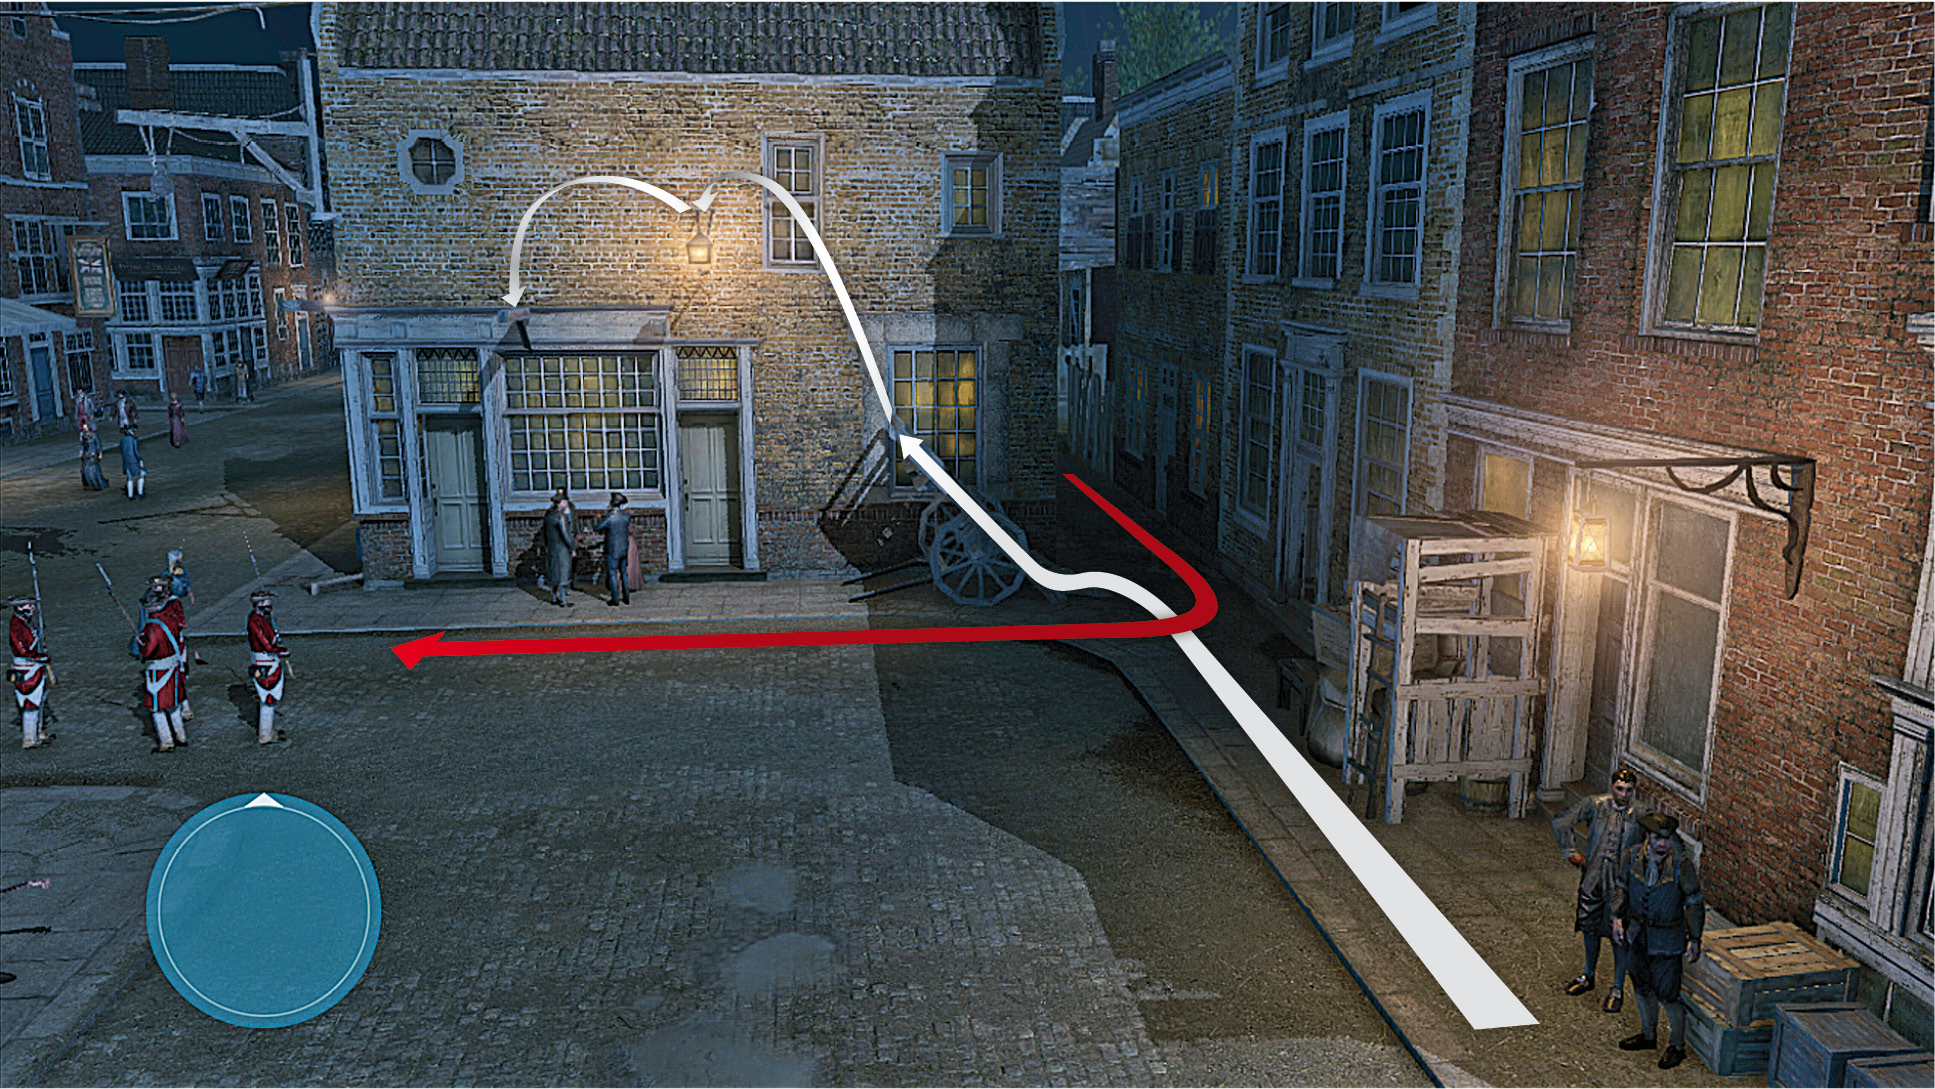 Completing the task with a tackle from above to satisfy the Optional Objective demands a near-flawless run from the beginning, so be prepared for a few restarts before you master the required timing. When you round the corner, run up the wagon and jump to the light fitting, then swing to the beam. Angle the camera to look at the street below, hold |
 /
/ then press
  /
/ to tackle the escapee as he passes beneath Connor. If you miss this opportunity, all is not lost just yet: swing around the corner, then try again on the next street.
Broken Trust
Mission Overview
|
Optional Objectives |
Preparation |
|
|
 To begin this Memory, travel to the Frontier, then meet Haytham at Valley Forge in the west of the region. When the cinematics end, ride to the waypoint in the north. You must now stop the Patriot messengers on the track ahead. Players attempting a perfect playthrough must do so within the specified time limit, and without once touching the ground. The path that Connor must follow is narrow, so pay very close attention to the winding trail – note that the approximate route is marked in green on the mini-map – and limit use of the spur command to straight sections.
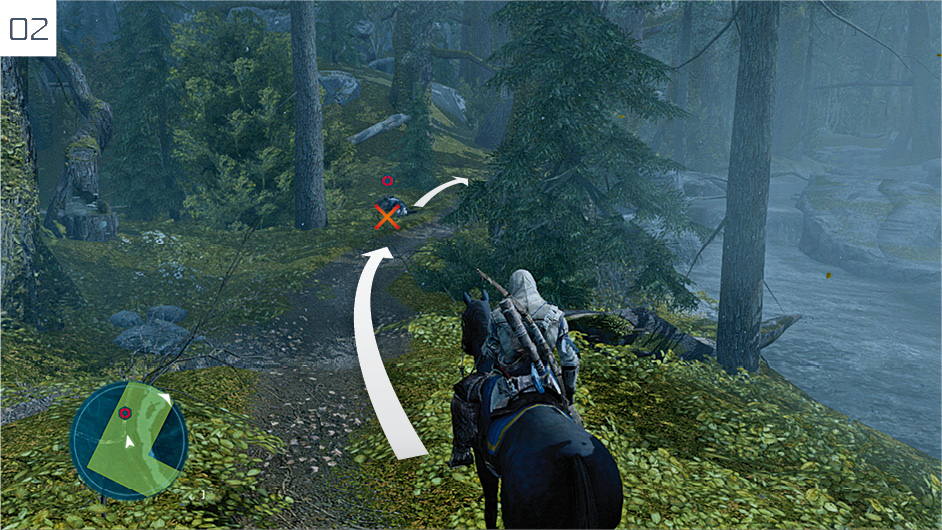
The first messenger is attending to his ailing horse on the left side of the track; you should see him approximately twenty seconds after passing through the initial waypoint. Just ride straight over him: there’s no need to stop or waste a bullet.
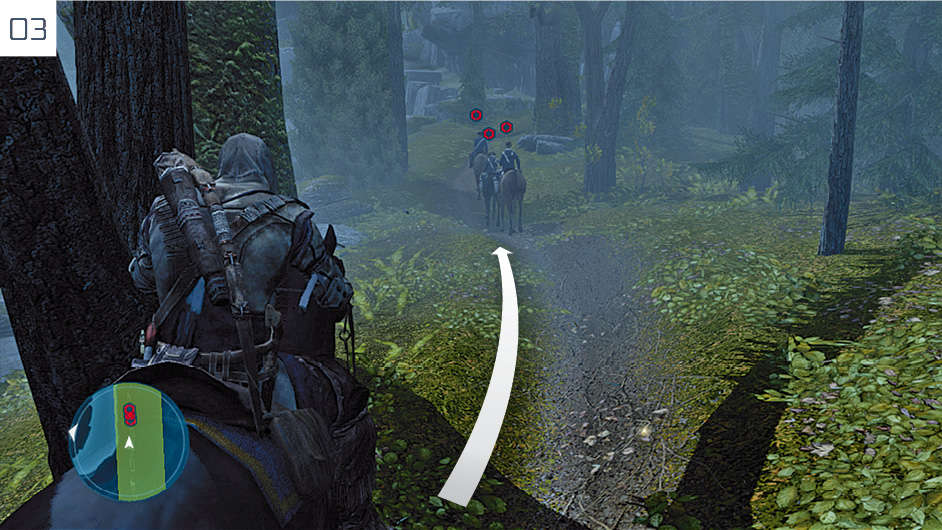
Further along the track, you will encounter three of the messengers riding slowly in close formation. Equip the Hidden Blade, then perform an assassination on the rider to the rear once you move within range; Connor will automatically appropriate his horse. You can then shoot the second and third riders immediately, which is essential: the riders may dismount and attack Connor with firearms. Players who are still using a single-shot pistol can alternatively switch to the bow for the third target.
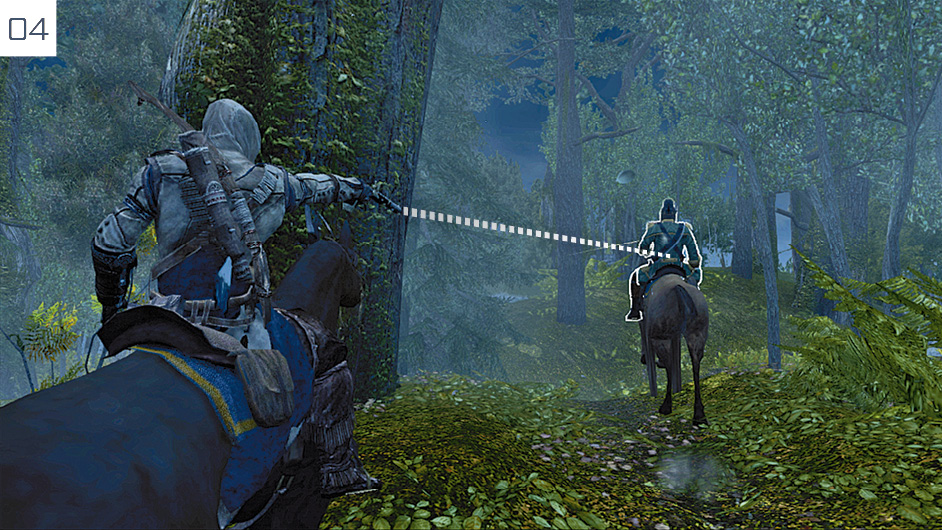
The final messenger rides with a far greater sense of purpose, perhaps aware of Connor’s pursuit. To catch him, try to take a “racing line” on corners and spur your horse when the track allows it. Your target will tumble from the saddle after one shot but, depending on your current preferred firearm, may take another bullet (or an arrow) to finish off. Be very careful to stay on your horse: the related Optional Objective does not end until you reach Connor’s village. Pay the red Restricted Area a wide berth during the final leg of the journey.
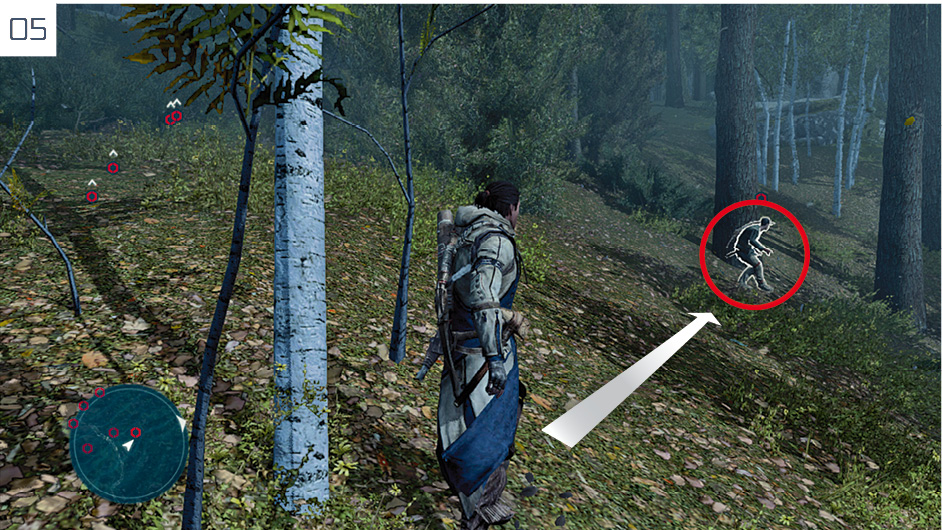
Ride into the village and approach the final waypoint to trigger a cutscene. When it ends, a third Optional Objective is given: to disable the Kanien'kehá:ka warriors with non-lethal methods. Select Connor’s fists as his primary weapon, then exit the village. Run to approach each warrior, then slow down and sneak behind them before tapping  /
/ to incapacitate them silently. If you pick your route carefully, you should remain undetected. Should a warrior see Connor, however, drop a Smoke Bomb to incapacitate him before you render him unconscious.
Battle of Monmouth
Mission Overview
|
Optional Objectives |
|
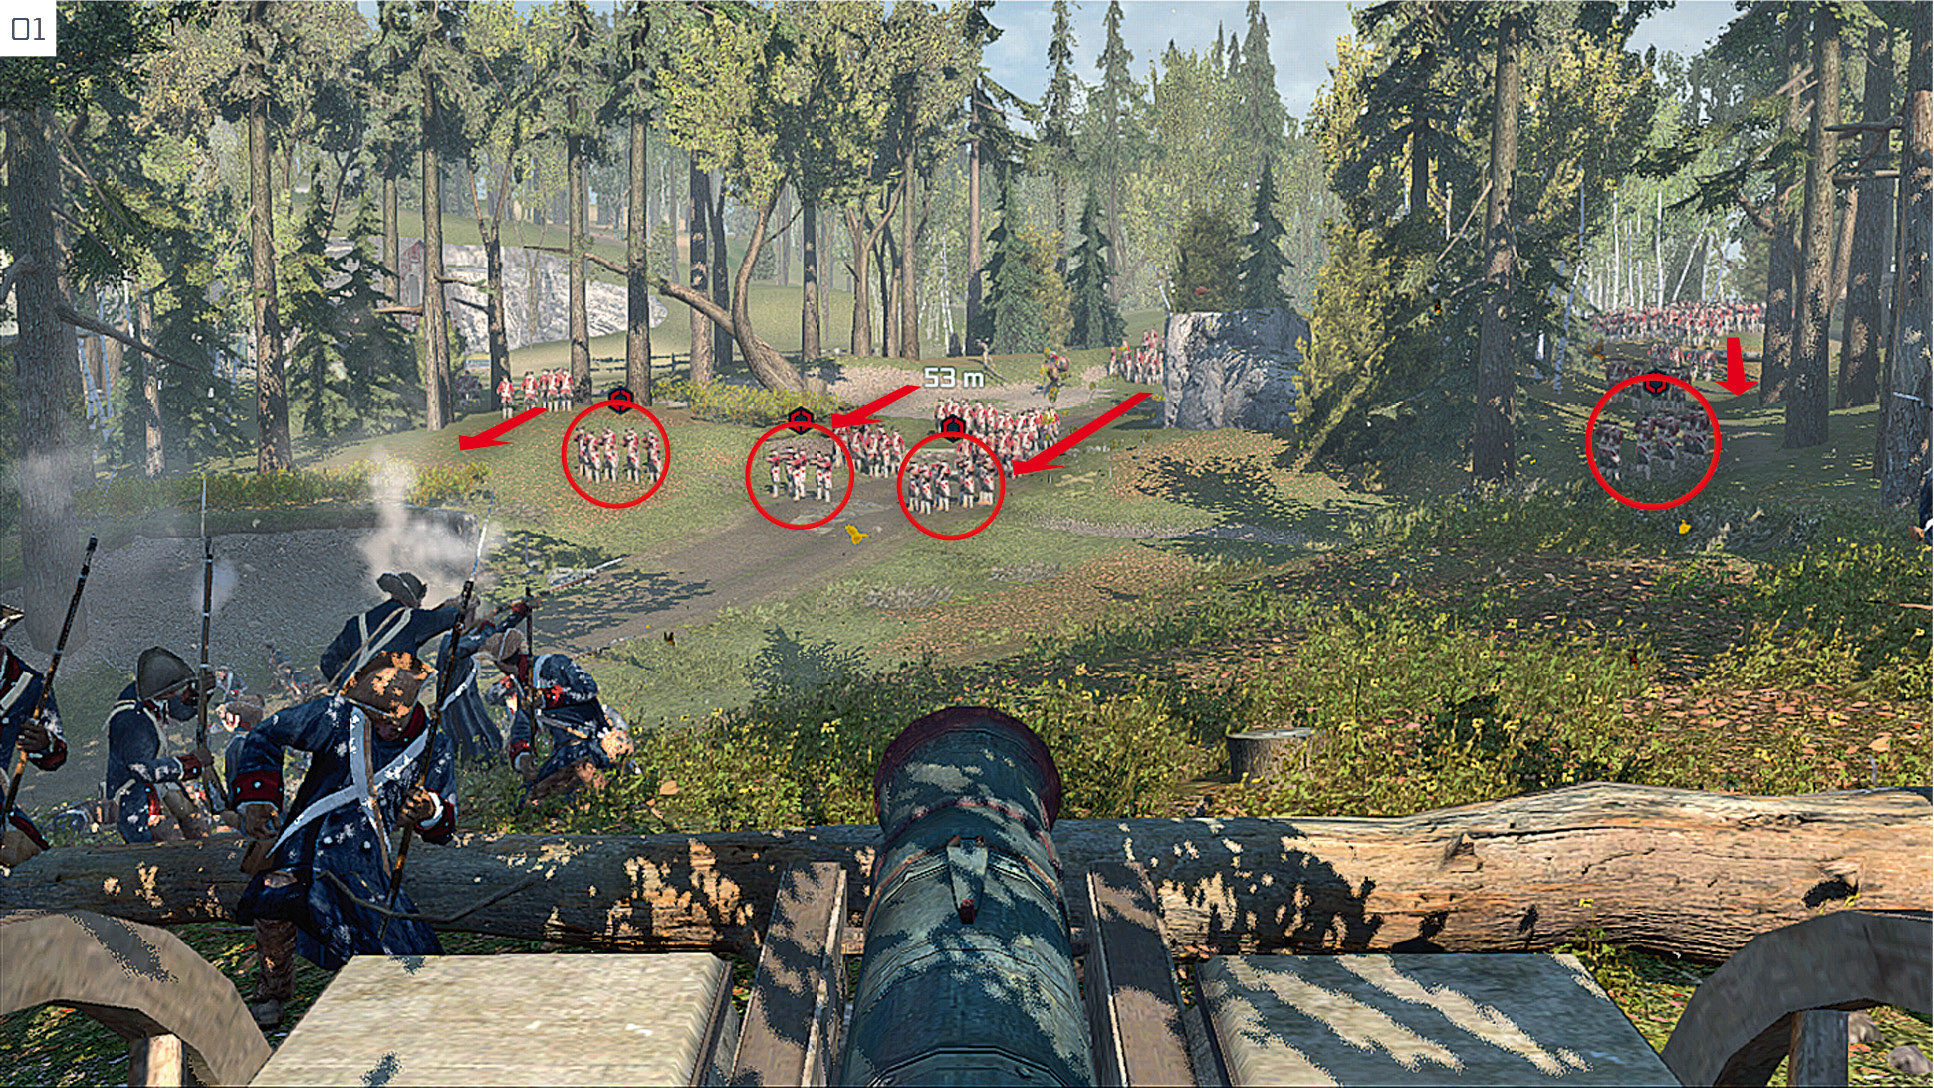
The final Memory of Sequence 10 begins in the south of the Frontier area. After the opening cinematic, play resumes with Connor commanding a cannon emplacement to slow the Loyalist advance while the Patriots retreat. Use  to aim the cannon,
  /
/ to fire and
  to pan your view of the battlefield. The annotated screenshot here shows the general movement of the Loyalist soldiers, and the four positions where they will stop and ready their weapons. Loyalist troops with
  icons above their heads are priority targets: they will remain stationary and fire at the Patriots, sapping the “life gauge” in the left-hand corner of the screen. The best general strategy is to focus on the troops to the left, only attending to the single stream on the right during quieter moments.
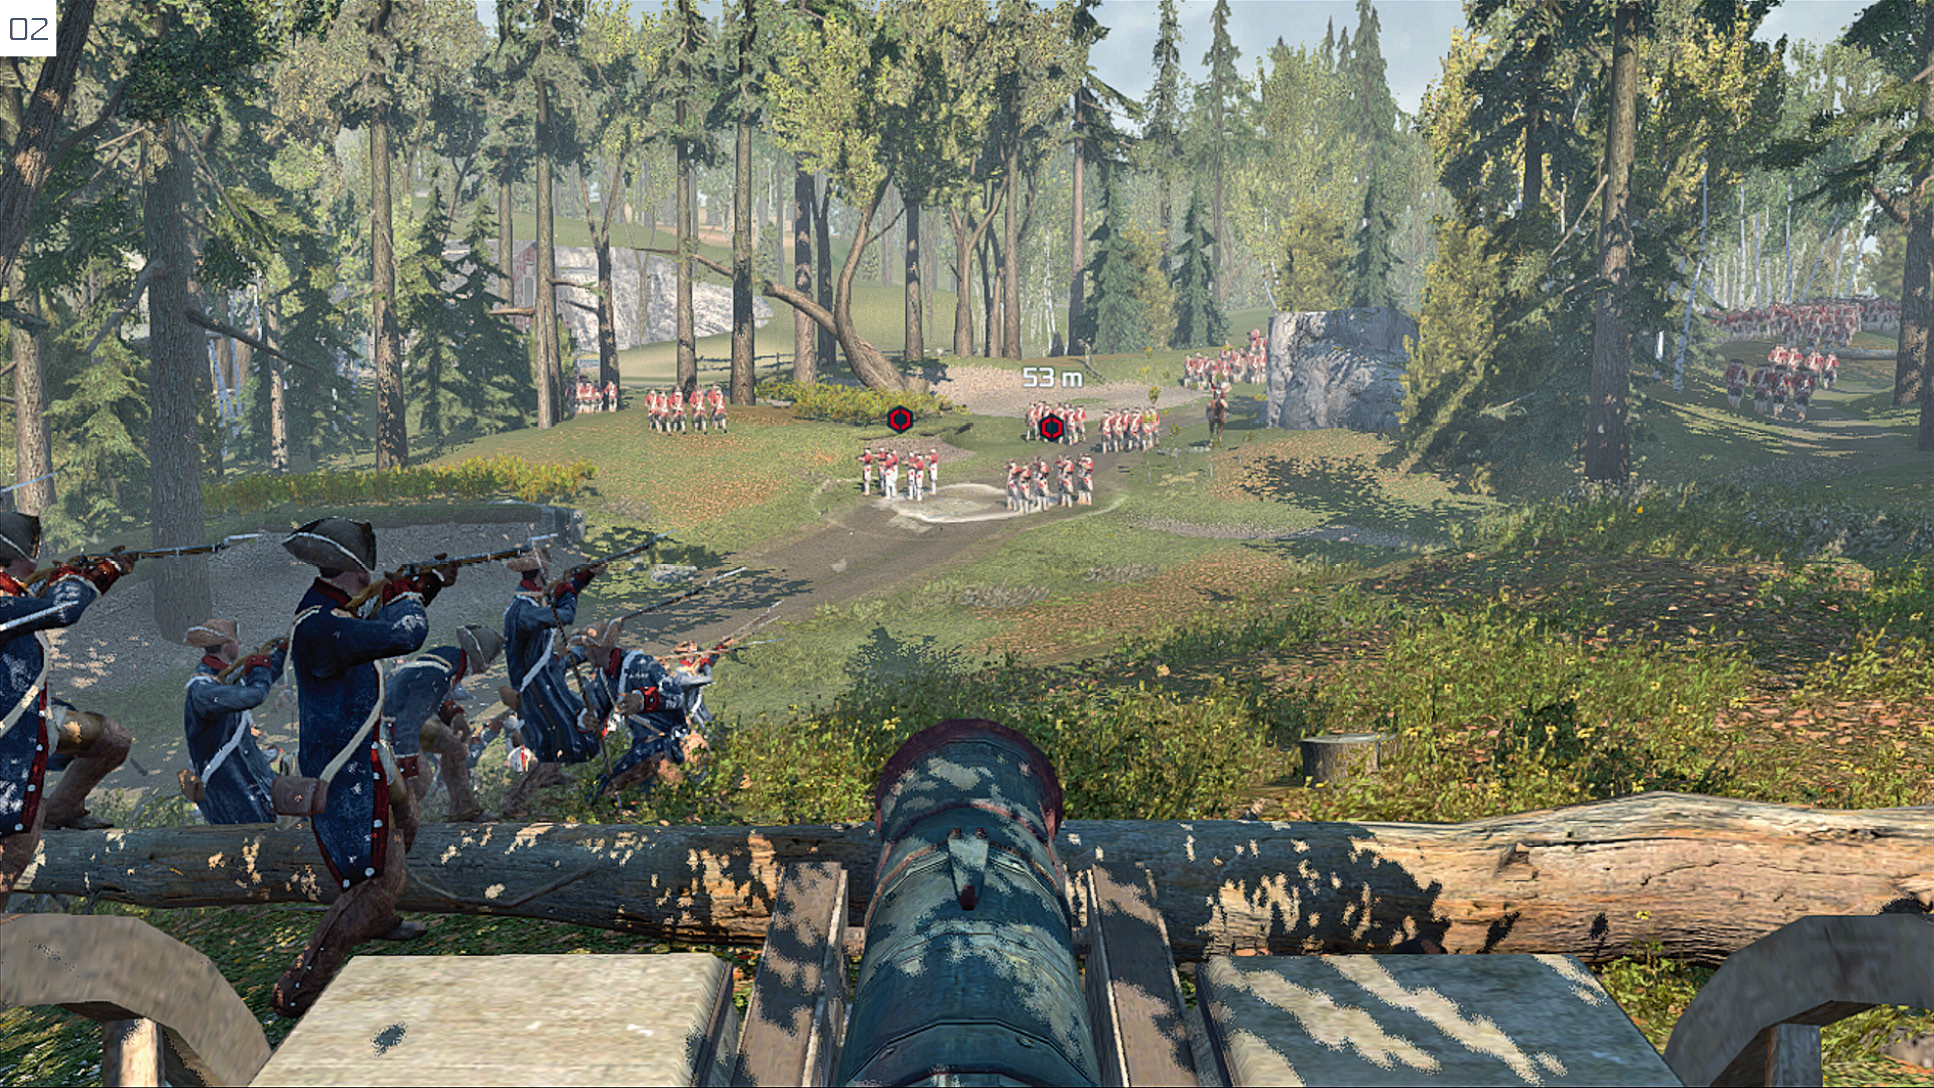
To complete the Optional Objectives (and the Circus Act Achievement/Trophy for killing 15 guards with a single cannon shot), you must be highly accurate with your marksmanship, taking the cannon’s period of flight, and potential movement of troops prior to impact, into account. Each group of eight men moving in close formation represents a platoon. Dispatching two simultaneously is something that is easiest to achieve with the left-hand flow of Loyalists: just position your cannonball between two groups as illustrated here.
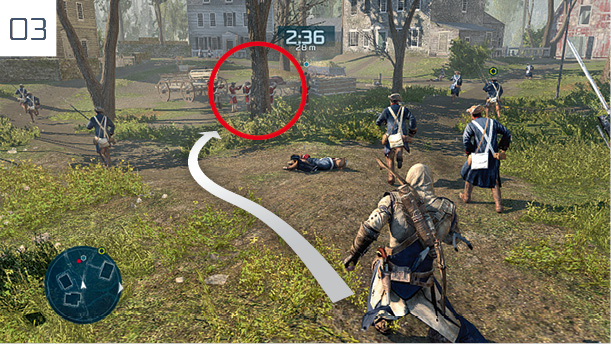
You now have three minutes to retreat via a crumb trail of waypoints, but a new Optional Objective rather complicates matters: you must prevent the execution of three Patriots. The first firing line is not far from your starting position. After you cross the river and pass a General Store on your left, look for them in the position marked here. You can simply charge into the Redcoats to avert the execution, but we find it more effective to use a pistol to shoot an opponent during the approach. If you decide to fight the three battles, Counter Kills and Kill Streaks will enable you to save time.
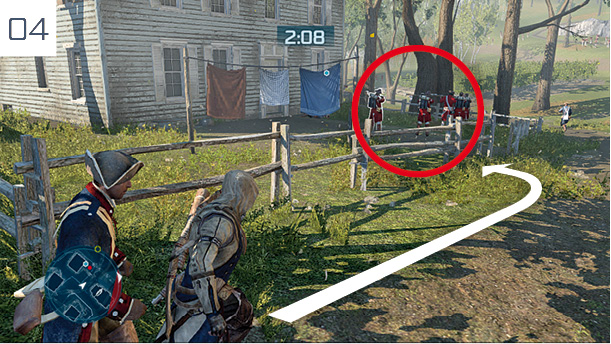
When you pass a large barn with faded red paintwork, the second firing line is in front of the next house on the left.
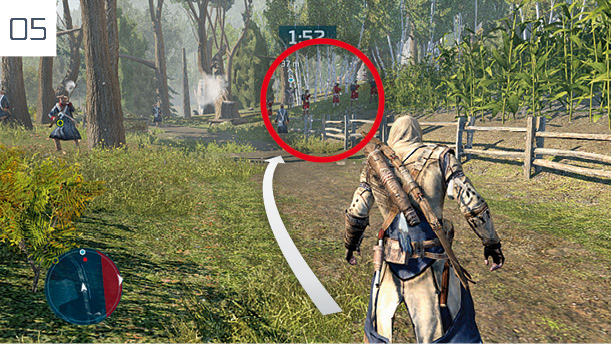
The final firing line is on the right-hand side of the road, just beyond the field of crops surrounded by a wooden fence. The final waypoint is a short sprint away.