
Assassin's Creed III Guide Primer
Viewpoints & Maps
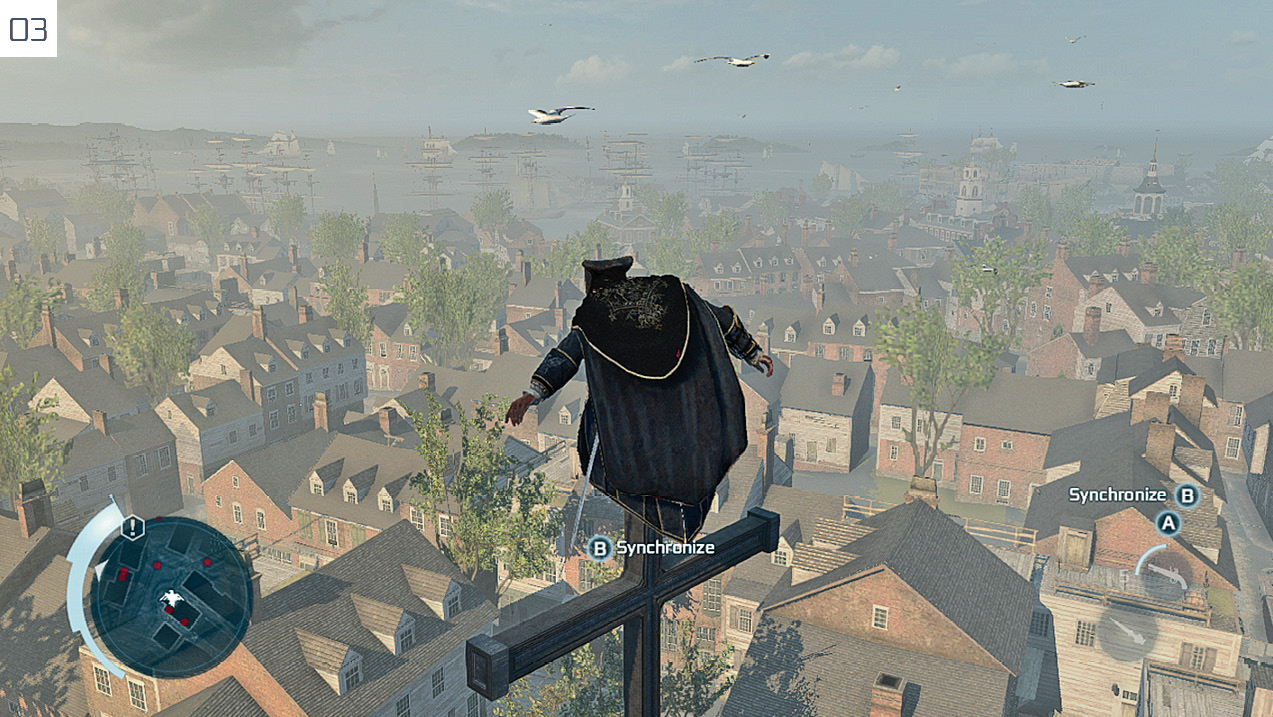
When you first arrive in Boston, the entire map (and, by extension, mini-map) is blank, with the exception of a small area surrounding Haytham’s immediate position. You can
uncover portions of this obscuring fog simply by moving around. At street level, this will form slim tunnels that barely uncover streets in their entirety, let alone surrounding buildings. The
degree of terrain revealed is increased if you explore at higher elevations, but unveiling the entire map by this method would be excessively time-consuming. Fortunately, there is a much easier way.
Boston is dotted with lofty vantages that Haytham can scale, known as Viewpoints ( 03) and marked with a distinctive icon (
 ) on the main map and mini-map. After reaching the appropriate summit or perch, you can press
  /
/ to have Desmond “Synchronize” with his ancestor’s environment.
Synchronizing at a Viewpoint immediately reveals the surrounding terrain, including any points of interest in that vicinity (which, in time, will include side quest start positions and other optional activities).
Main Map
You can access the main map at any time during active play by pressing  /
/ (
( 04). Haytham’s position is represented by the hooded Assassin icon (
 ), with the accompanying arrow corresponding to the direction that the camera is facing – not Haytham himself.
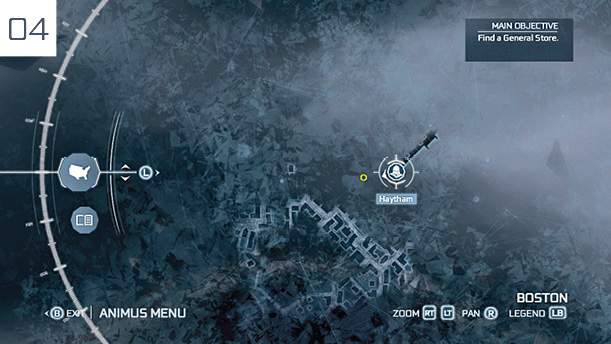
Use  to navigate the menu on the left-hand side of the screen.
  is used to move around the map, while
  &
&  /
/ &
&  enable you to control the zoom level – and, by zooming out entirely, to view a separate map of the entire region. You can view a complete legend for all in-game and map icons by pressing
  /
/ . To see a description of an icon on the map, move the cursor over it.
During the early stages of the game, the map menus are incomplete, with further entries introduced as you progress through the storyline. For now, you have access to Filters – which enable you to limit map icons to specific categories to more easily find what you are looking for – and the Collectibles section of the Logbook menu.
Though the main map screen is useful for route planning and gaining an understanding of the distances involved in many endeavors, one of its most useful features is the ability to set a manual waypoint marker with  /
/ . This can be used to explore without losing your bearings, or to break longer journeys into sections – for example, to ensure that a long ride on horseback only follows spacious roads to maximize speed. Using it to highlight a map icon (such as a shop or Viewpoint) will make the site in question appear on the mini-map, even if it is a great distance away. For more complicated and lengthy travels, using such markers can make it much easier to take an efficient route.
|
 Fast Travel
 /
/ to Fast Travel instantly to those locations. As the story progresses, new Fast Travel locations are added to enable swift movement over both long and relatively short distances.
Mini-Map
The mini-map shows a small portion of the main map ( 05). The arrow on the outer edge of the mini-map always points north. The arrow in the center represents Haytham.
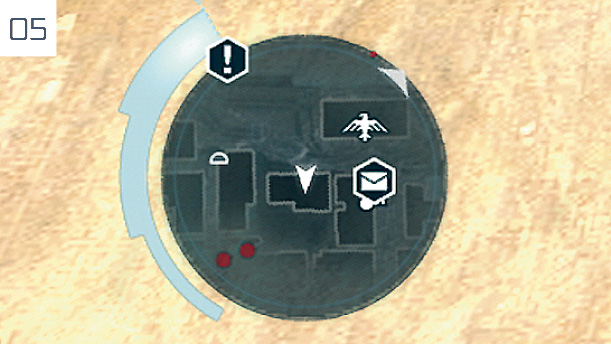
All places of interest, points of interactivity and active waypoints within Synchronized areas are marked by icons on the mini-map. Main routes (such as streets, alleyways and dirt paths) are lighter in tone than the dark outlines of the buildings that surround them; a similar color-coding applies in rural areas.
Many icons on the mini-map only appear when they lie within its boundaries. Those representing shops or side quests, for example, shrink and disappear from view as Haytham moves away from them.
Some icons appear at all times. Memory Start locations for main story missions, objective-specific waypoints and manual markers (placed on the main map) are always clearly displayed. If these destinations lie outside of the current mini-map area, the icons will move to the outer rim of the display to indicate their approximate location.
Icons situated at a different elevation to Haytham (such as Redcoats on the streets below as he bounds over rooftops) appear slightly faded on the mini-map.
Key Map Icons
|
|
Main Mission |
|
|
Ally |
|
|
Target |
|
|
Destination |
|
|
Enemy |
|
|
Viewpoint |


