
Assassin's Creed III Guide Primer
Stealth
Much of what you encounter in Boston can be understood as a matter of simple common sense. Those who are charged to uphold laws, for example, will take a dim view of those who disregard them. In time, you’ll clearly see how the city functions in a manner akin to a clockwork engine. By observing and coming to understand the rhythms of its mechanisms, such as the way in which soldiers might patrol on cue, you can devise and execute plans to exploit its predictability – and more easily adapt when scripted set-pieces and surprises occur.
Though extraordinarily well-versed in a multitude of combat disciplines, there are many instances where Haytham’s interests are best served by avoiding open conflict. You will soon take part in scenarios where stealth is mandatory, or leads to a more rewarding outcome. In this section, we’ll look at the many ways in which you can stay out of conflict, keep casualties to a bare minimum, and gradually acquire the ability to infiltrate heavily guarded areas with aplomb.
Low Profile and High Profile
The first lesson you should learn about stealth in Assassin’s Creed III is that if you can’t stay out of sight, you should at least do your utmost to be as unobtrusive as possible until you can disappear. There is a clear distinction made between the types of actions you can perform. Those that are described as High Profile – such as sprinting, free running and attacking – are likely to draw attention, whereas Low Profile behavior pretty much entails acting like a nondescript citizen. As a general rule of thumb, actions performed while holding  /
/ belong to the High Profile category, and are often incompatible with stealth approaches.
Before we continue, it’s worth taking a moment to underline the importance of the (Low Profile) Fast Walk ability (hold  +
+  /
/ ) in stealth situations. This makes Haytham adopt a more purposeful stride than the basic walk, but does not attract any greater degree of attention than his default gait. If you need to move in plain sight from one place of concealment to another, this is often the best way to do so.
Social Status Indicators
Yellow, down-facing triangles known as Social Status Indicators (SSI) appear above potential hostiles whenever Haytham is arousing their suspicion ( 01). This is the first stage in a system known as the Detection Loop, which underpins all stealth-based gameplay in Assassin’s Creed III. These visual indicators are accompanied by distinctive audio prompts, and appear under the following basic conditions:
- If Haytham performs antisocial or extravagant, High Profile actions – such as climbing, free running over rooftops, acts of violence or theft.
- Whenever Haytham is seen trespassing in a Restricted Area, marked in red on the mini-map, or if his current objective leads him to a place where his presence is not welcome.
- If Haytham is known to potential assailants: some Memories feature situations where guards will attack once they identify him.
- Special conditions that determine that certain individuals are set at a high state of anxiety or alertness – for example, a target that you must follow as a mission objective.
- The Detection Loop has very distinct stages:
- During the first phase, the triangular Social Status Indicators gradually fill with a yellow hue while Haytham remains in range within an enemy’s field of vision. Retreating calmly to a safe distance, hiding, or just breaking the direct line of sight between Haytham and potential assailants, will clear the gauge.
- When you begin to employ stealth techniques regularly, you’ll soon come to appreciate that the first stage of detection is something to respect, but not fear – especially when enemies are distant. In a sense, it represents the kind of casual curiosity or suspicion that can be allayed instantly. On noticing Haytham, a guard might think: “What’s his business here?” When you walk calmly out of sight, with no opportunity for real scrutiny, the guard dismisses the thought without hesitation.
- Once the gauge is completely yellow, the second stage begins. As it fills with a red hue, potential hostiles will actively pay attention to Haytham, and will often approach him to investigate. The best way to evade this heightened scrutiny is to move out of sight and put at least one additional corner between you and the investigating party or group. Potential hostiles will always move to Haytham’s last known location. If they find nothing there, or within the immediate area, they will soon return to their posts or patrols.
- When Haytham cannot be seen by an opponent compelled to investigate, the potential hostile is marked by a gray triangle – and the detection process temporarily stalls. As detection meters can be seen through solid surfaces, you can use this feature to judge where best to hide.
- When a Social Status Indicator is completely red, Haytham is identified, which will cause all nearby antagonists to attack. If your current objectives specify that he must remain unseen, this will cause immediate Desynchronization – and a return to the last saved checkpoint. Once hostilities commence, all potential adversaries in the vicinity will seek to engage Haytham in combat, or give chase if he attempts to flee the scene. You can resolve the situation by killing all active hostiles, or escaping.
- In some situations, particularly when Haytham is trespassing, the initial “suspicion” phase is greatly accelerated – and there are even instances where guards practically attack on sight. In such moments, ensuring that you do not enter their field of view is of paramount importance.
- It’s worth noting that the detection range of guards is reduced during severe weather, such as heavy rain or thick snowfall.
Line of Sight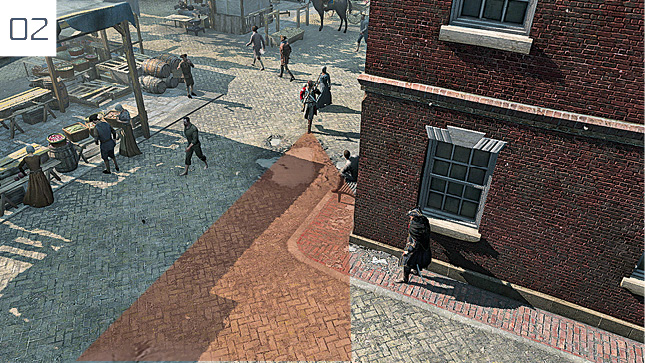 Guards can only see Haytham if he moves into their line of sight: a broad, invisible yet predictable “cone” of vision that extends in the direction they are facing, but not through solid obstacles such as walls or carts ( When Haytham is required to follow targets and keep them within sight, different rules apply. In such instances, it isn’t Haytham’s actual field of vision that is taken into account – it is only required that your targets remain visible to you on the screen, irrespective of what Haytham himself sees. Haytham can be standing facing a wall, yet you can maintain unbroken “visual” contact by positioning the camera with |
 02). Guards are not generally blessed with great peripheral vision, and will disregard Haytham over long distances (usually anything greater than 25 meters).
 .
.Blending
When in close proximity to two or more civilians, Haytham will automatically “Blend” with them, enabling him to hide in plain sight. In bustling urban areas, Blending is the most common and effortless method of avoiding detection. The process of entering and exiting a Blend situation is always accompanied by visual and audio effects.
- Haytham must be standing still or walking to Blend. While Blending, he is effectively invisible to most potential enemies and individuals that he must follow or avoid.
- Entering a Blend will immediately cancel the first stage of the Detection Loop system, emptying the yellow SSI gauges instantly.
- When Haytham exits a Blend, there is a short period of grace where he remains invisible. You can exploit this to transfer seamlessly between different groups of citizens, or move safely out of sight.
- Illegal or reprehensible actions can immediately break a Blend. In open conflict, citizens will often back away or flee from Haytham as he approaches them, which makes Blending impossible.
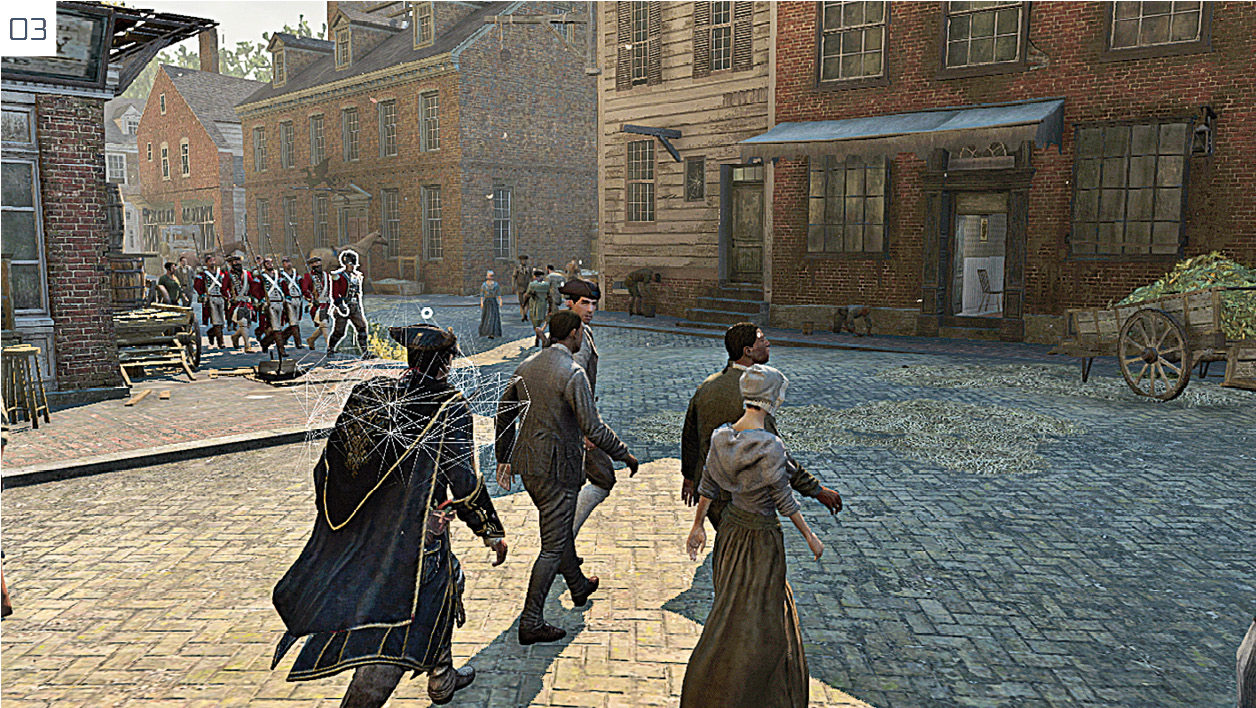
- In addition to citizens wandering the streets and ad hoc groups engaged in conversation (
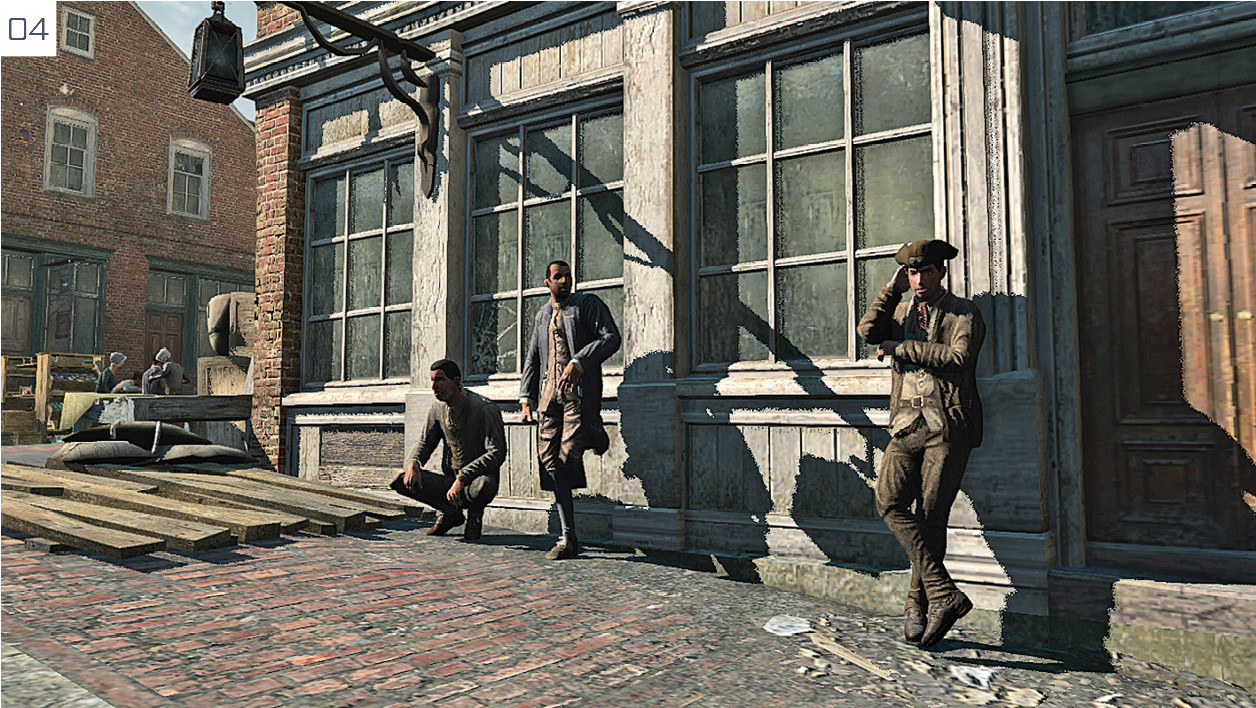
 03), you will encounter situations that are tailor-made for an instant Blend opportunity. Look out for citizens leaning against buildings (
 04), or standing examining wares on market stalls: there is usually a space for Haytham to slide into and effortlessly disappear from view.
Using Corners
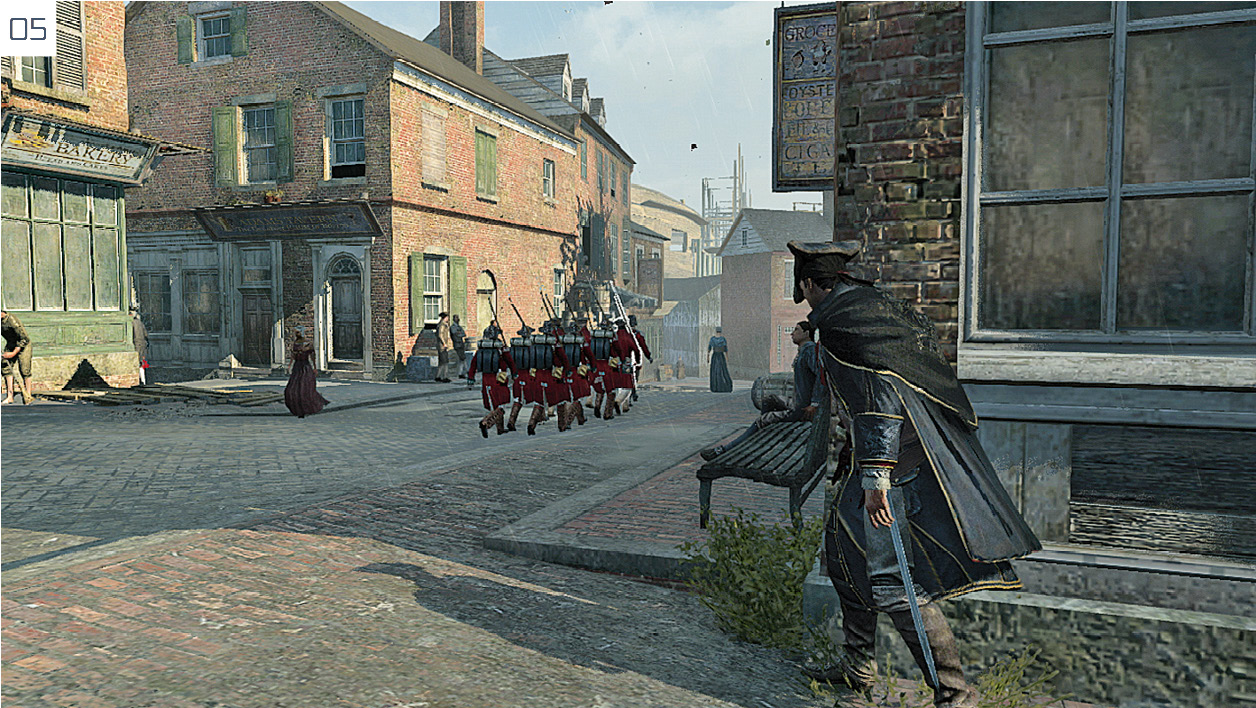
If you approach and make contact with the edge of any suitably solid corner, Haytham will press his body against it and peer around to regard the area beyond ( 05). This doesn’t render him entirely invisible (anyone approaching from certain angles may see him clearly), but it’s a great way to get a clear look at a street or any other open expanse without moving into plain view. To leave this position, just move
  away from the surface.
Hiding Places
When Haytham needs to escape a pursuing mob, survey his surroundings without potential violent interruptions, or execute a silent assassination, entering a hiding place is often the best course of action. There are many different varieties of hiding place, which we will introduce after these tips and guidelines:
- Direct Haytham into a hiding place to make him disappear. With “soft” hiding places (such as piles of leaves or hay), you can also enter via a Leap of Faith or a standard jump from above.
- If you can break a clear line of sight between Haytham and his pursuers, entering a hiding place and remaining still will usually enable you to end open conflict. If Haytham is seen entering the hiding place, however, he will immediately leap out: you cannot use them while hostile witnesses can see him.
- Hiding places are refuges where Haytham can survey the surrounding area without fear of detection. If you need to plan an infiltration by observing enemy movements, you can wait inside one and use
 (plus indispensable glances at the mini-map) to study and memorize patrol routes.
 - Hiding places are also used for some of the most efficient stealth assassination techniques – a topic we’ll come to shortly.
This list of hiding places is not exhaustive, but those that we don’t detail here are thematically similar to the ones that we do illustrate – and, therefore, easy to identify.
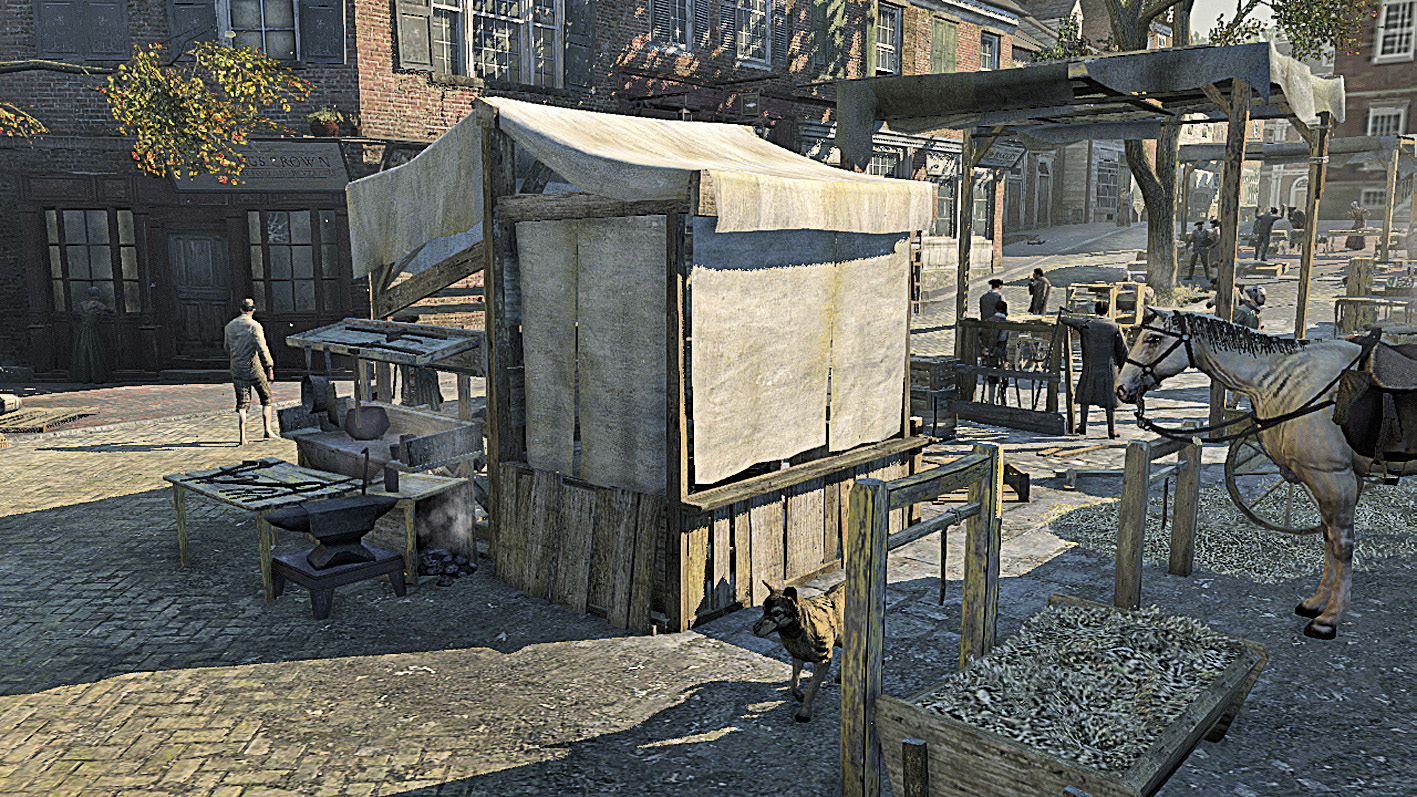
Any kind of covered shelter or stall, identified by a billowing white sheet, represents an effective (though relatively uncommon) hiding place.

In addition to carts carrying produce, you can also jump into the back of covered wagons.
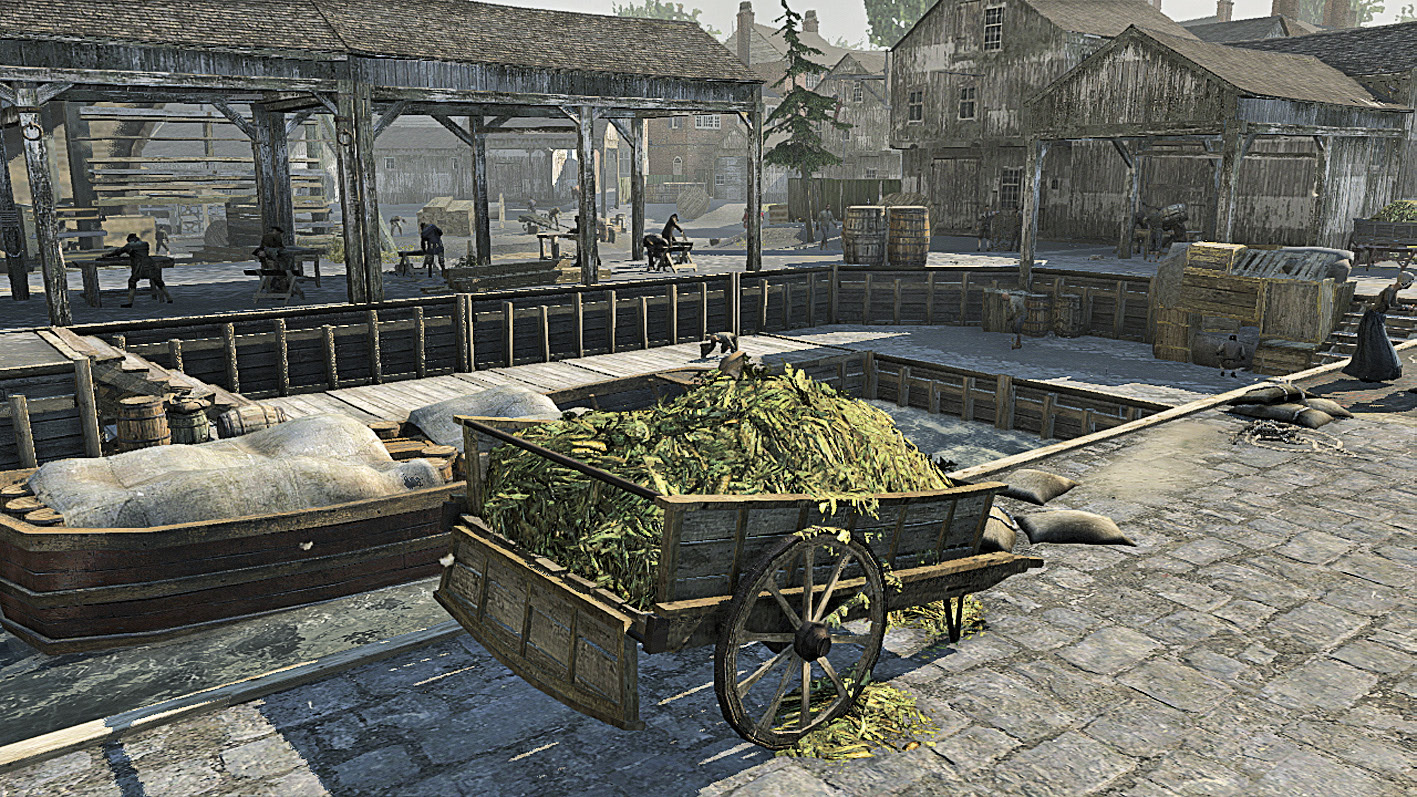
Piles of leaves, soft branches, hay or produce – found on the ground, in a stationary container, or carried in a wagon – are the most common form of hiding place.
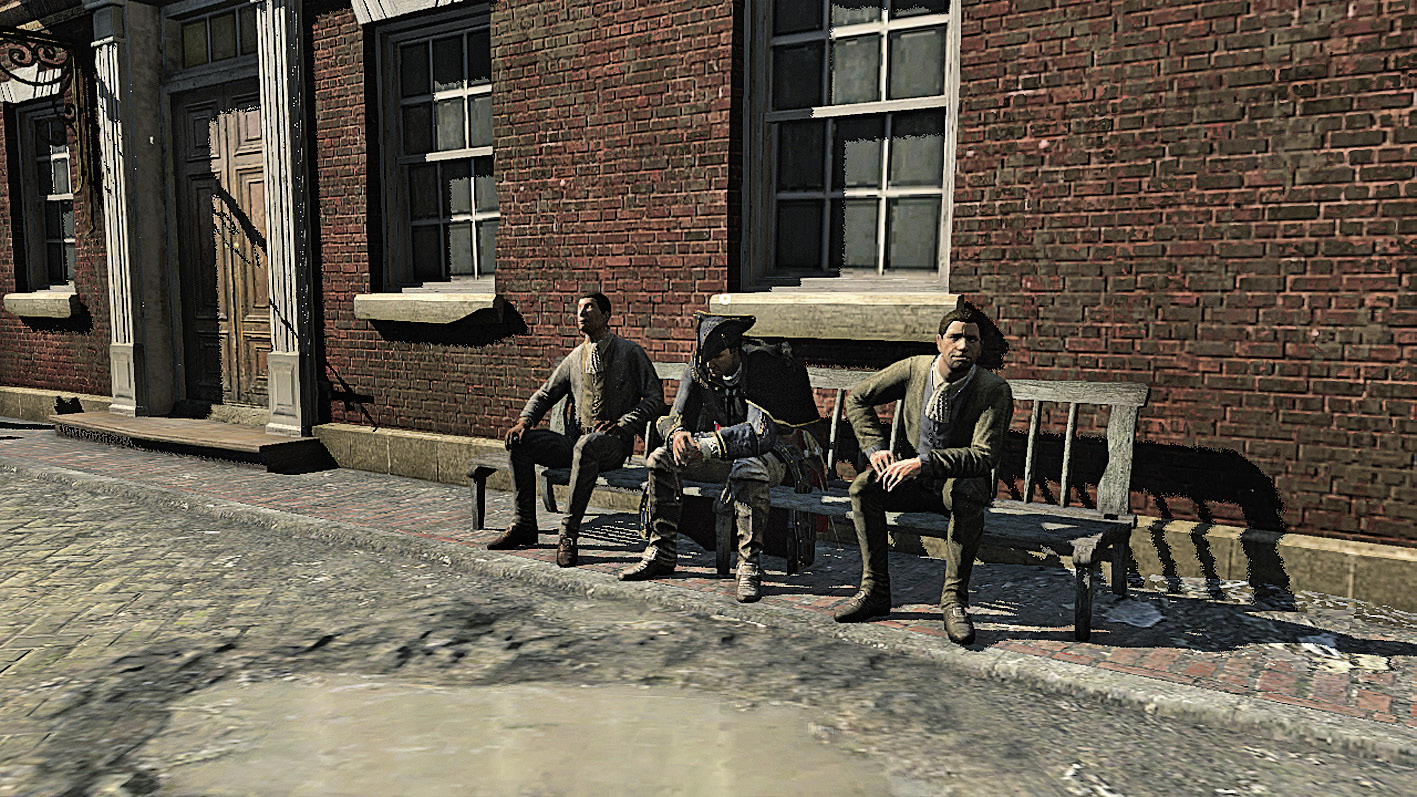
Benches always offer a spare seat on which Haytham can seem entirely unobtrusive.
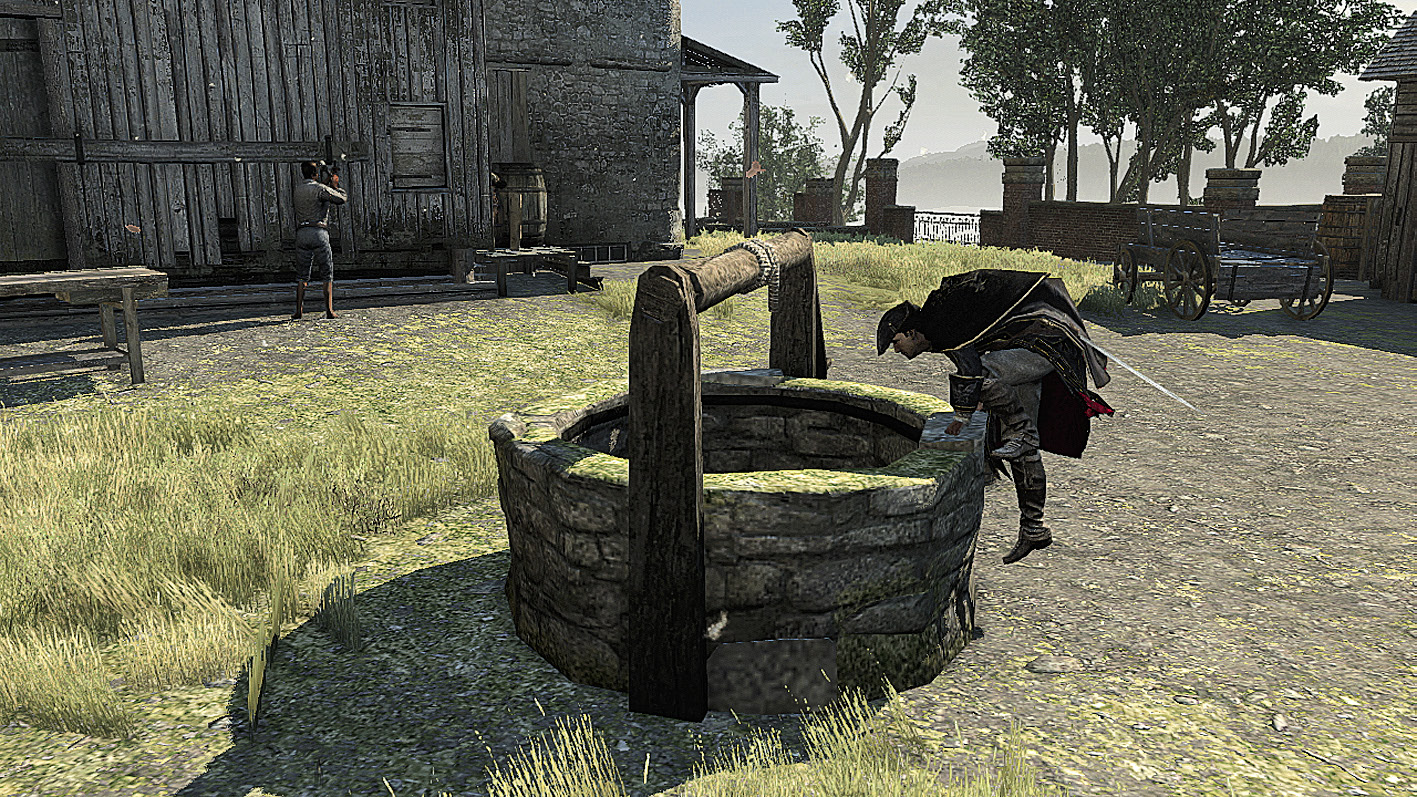
Wells are quite rare, but are an effective hiding position when you find them – and the site of one of the more spectacular assassination animations.
Stalking Zones
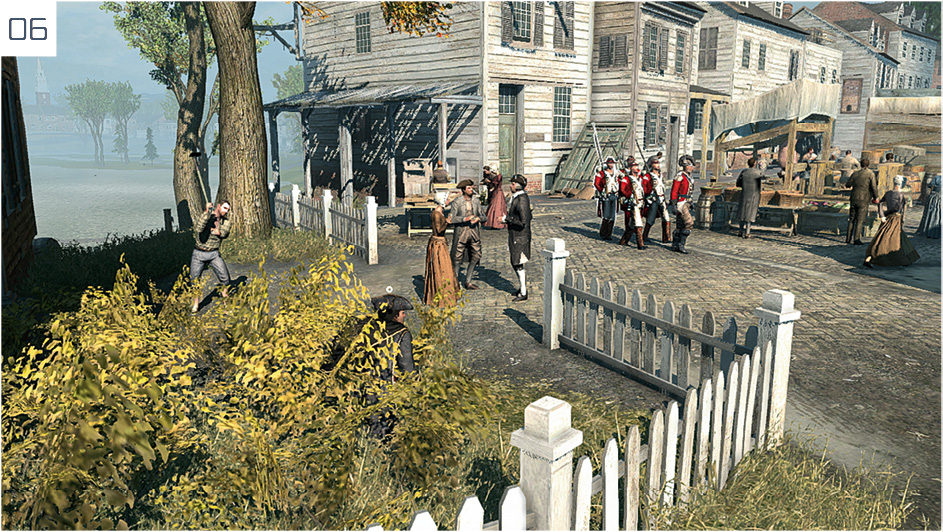
Stalking Zones are patches of undergrowth or foliage where Haytham can hide ( 06).
06).
- You must walk, not run, into a Stalking Zone to become concealed. As you cross the boundary where the zone begins, Haytham will automatically adopt a crouching position.
- In many ways, Stalking Zones function similar to Blending with civilians. As long as you remain within their boundaries, Haytham is invisible. However, he enters plain sight the moment he stands up, with no “grace” period to move to another place of concealment. For that reason, ensure that unfriendly eyes are facing elsewhere before you emerge.
- Haytham is also invisible to wild animals in Stalking Zones – a feature that becomes more significant later in the story.