
Assassin's Creed III Guide Walkthrough
Sequence 09
Missing Supplies
Mission Overview
|
Optional Objectives |
Important Note |
|
|
 After the opening cinematic, Connor begins in the northeast of the Frontier map. Ride to the Memory Start marker in the far west to speak with Washington. If you plan to complete the Frontiersmen Challenges, go to the northwest and talk to Washington outside his house until he has no new lines to speak. Once you’re ready, make your way to the waypoint to the southeast and enter the abandoned building.
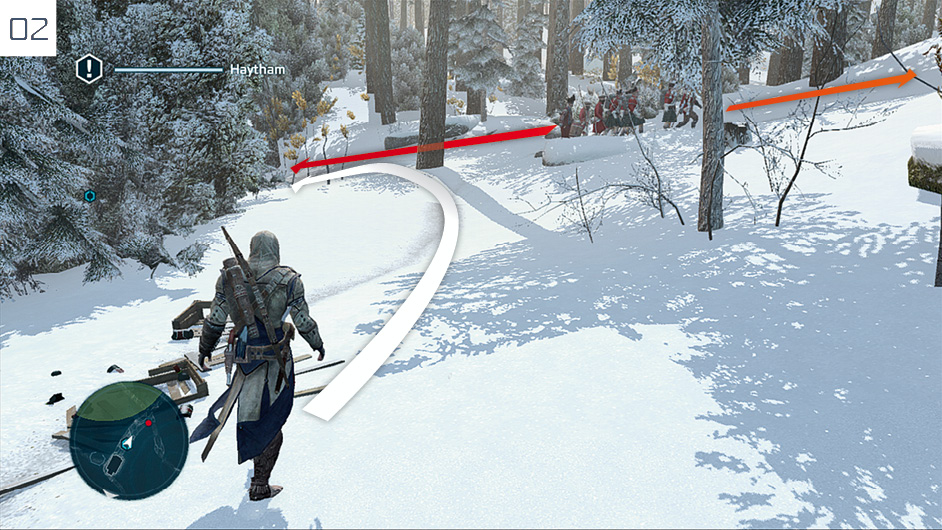
After the cinematic, you must analyze clues within the green search zone, starting with a position at the center of the crate debris just outside the building. You must then follow the trail to the left to reach the next clue, but a fairly substantial Redcoat patrol operates on this path. You can either wait for them to head to the west to avoid them entirely, or speed things up with a battle – but note that Desynchronization will ensue if Haytham’s Life Bar is depleted.
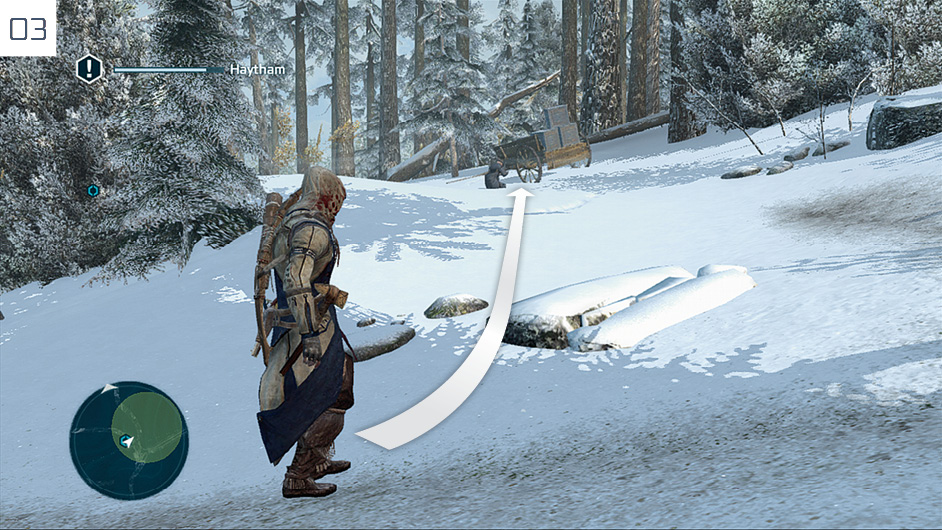
The third and final clue can be found further east along the track. Once you enter the much-reduced search area, look to the left to find a cart. After you approach it, the driver will attempt to escape. Close the gap by sticking to the path, then tap  /
/ when you move within range to catch him with the non-lethal Tackle ability. You can then run to the waypoint to intercept the convoy.
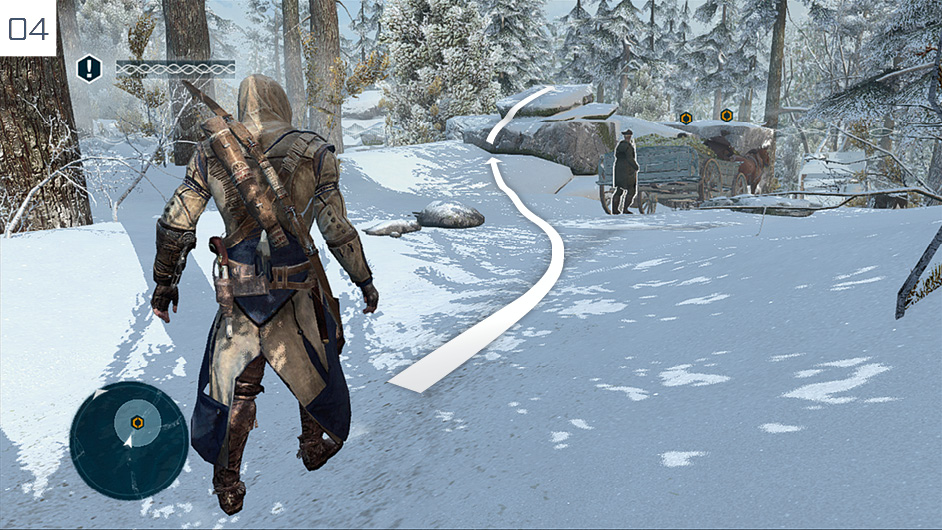
If the Optional Objectives are not important to you, completing this section of the Memory is a simple matter of climbing into the back of the rear cart. If you are a slave to perfection, the task is only slightly more demanding. Clamber over the rocks as directed in the screenshot here, then stay within the circular area by following your targets on the left-hand side of the track. As long as you stay just behind all prospective hostiles, this will pass without incident. When you espy a guard sitting next to a pile of hay, approach carefully and climb inside the pile of hay once the carts pass; as you perform an assassination, a cutscene will begin.
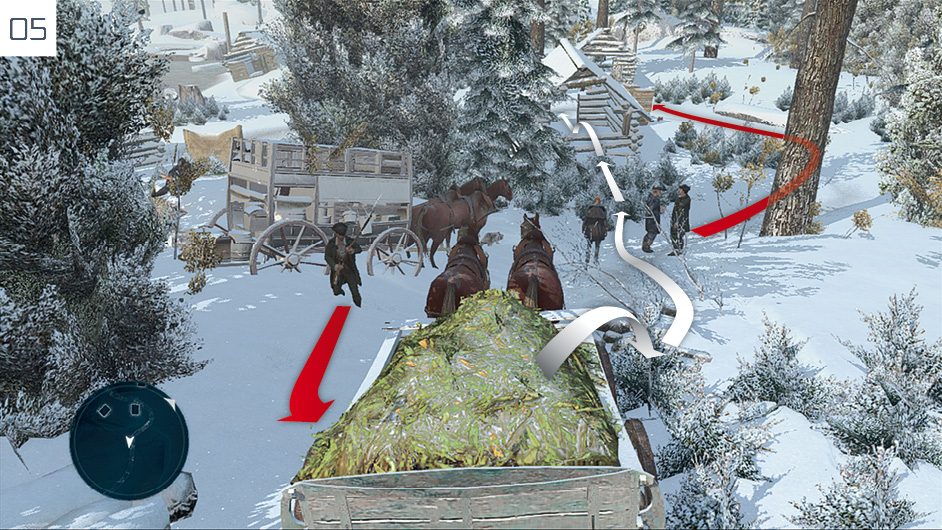
Play resumes in the enemy camp, with Connor hidden in the hay cart. Wait until a guard approaches, then silently assassinate him before jumping out to follow the driver and his companion from a discrete distance. Move through the Stalking Zone, then enter the empty shelter and hide to the left of the door.
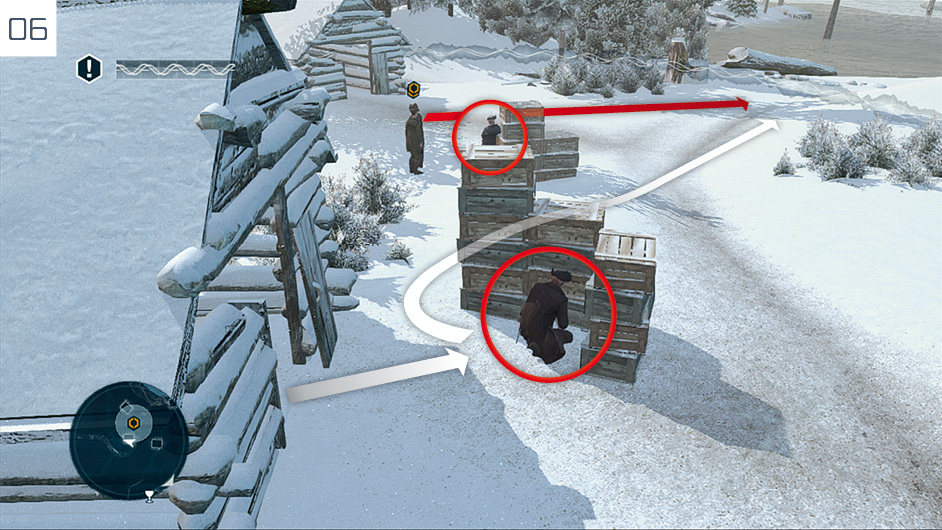
When the driver meets up with a new associate at the cabin opposite, wait until he strolls away, then assassinate the guard crouched by another pile of crates directly ahead. Standing to the left of your target will prevent his body from falling into view; a small but important detail. Press up against the corner of the crates and wait. Once your principal targets move on, walk up to the next guard and perform a corner assassination, then head to the Stalking Zone and follow them to the final cabin on the right. After a cinematic interlude, intervene to save Haytham from a beating. Several guards will run to join the battle, but this is nothing that you can’t handle at this stage.
Father and Son
Mission Overview
|
Optional Objectives |
|
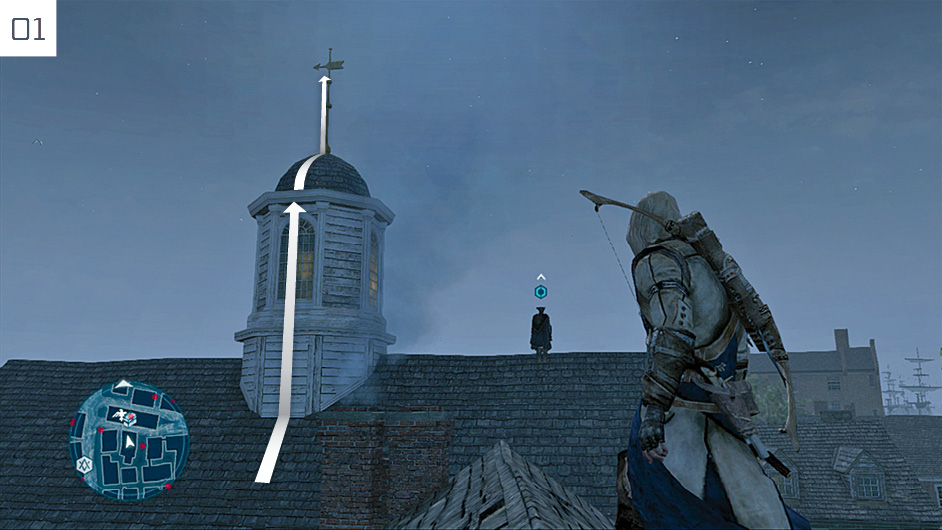
Travel to New York, then approach the bench at the Memory Start marker: note that this Memory and the one that follows are automatically played in succession. When Connor and Haytham are reunited, follow the Templar over the rooftops. Haytham stops close to a Viewpoint at one stage; if you pay him a wide berth (as shown here), you can Synchronize with this before you approach him to trigger a (rather fine) cinematic. Afterwards, follow Haytham’s lead again until you trigger another cutscene at the bottom of a ladder.
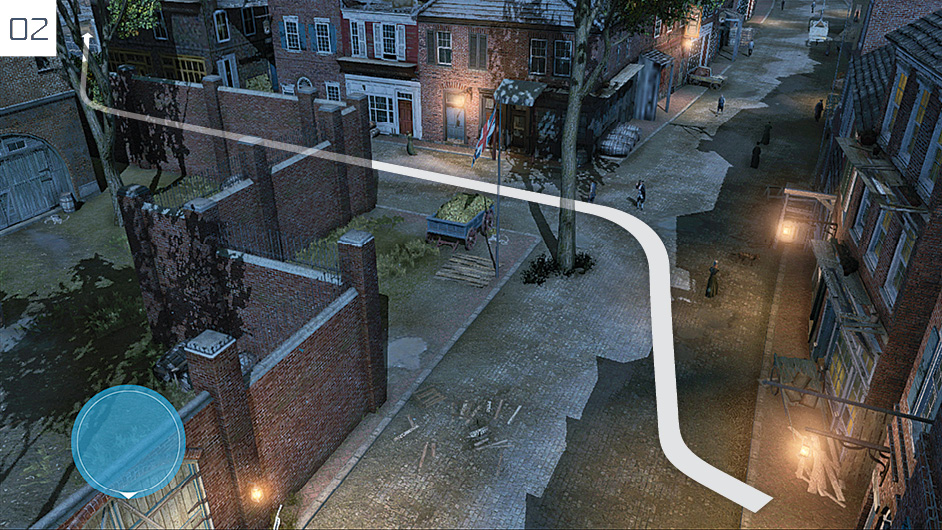
You must now intercept a target at the waypoint to obtain a disguise. From your starting position, follow the route marked here. If you have yet to liberate New York’s East District, you may witness an execution. Ignore this for now: you can return to administer justice at a later date.
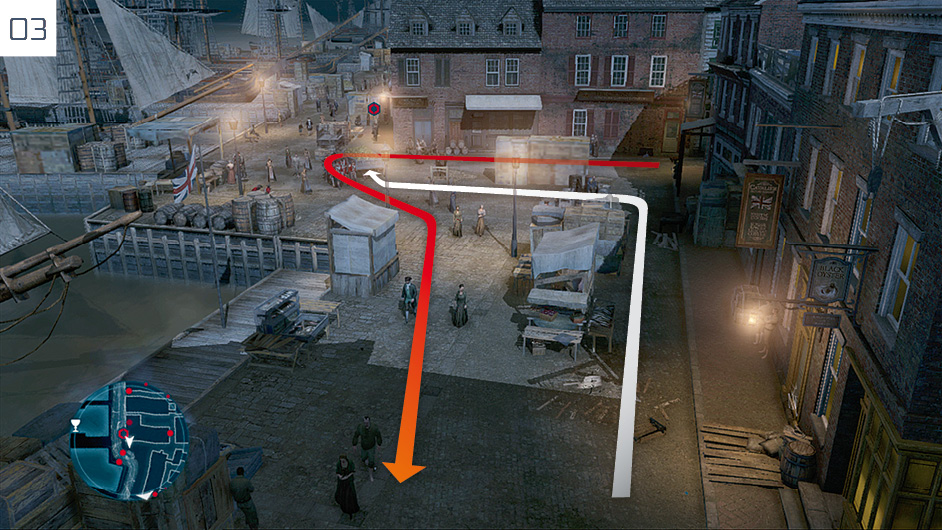
As you round the corner by the waterfront, look for a hay cart. A group led by an Officer patrols this area, and will stop to examine this hiding place when they pass it. Wait until they move on, heading north.
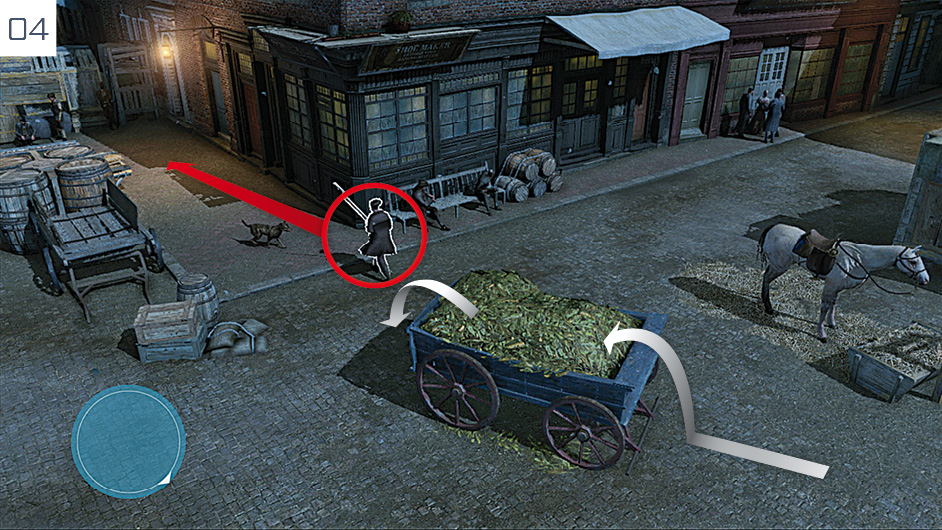
Your target has a simple movement pattern that takes him between two main positions. Jump into the hay cart, and wait for him to draw near. When he turns away, jump out and quietly assassinate him, then loot him before the patrol returns. This ends this Memory, which transitions instantly to the events of The Foam and the Flames.
The Foam and the Flames
Mission Overview
|
Optional Objectives |
Further Reading |
|
|
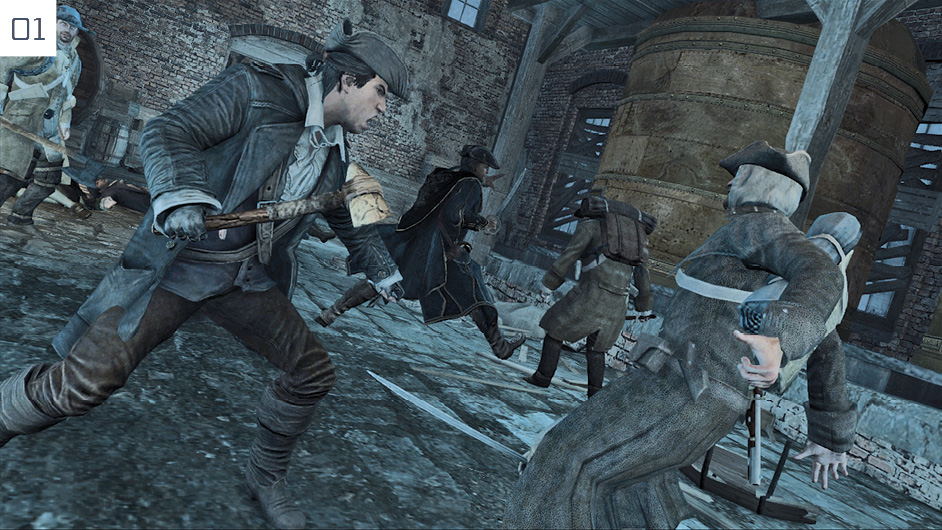
Follow Haytham, then quickly dispatch assailants in the brawl that follows to ensure that his health does not fall below 50%. Though most of the combatants are generic mercenaries, there are several that correspond to the Grenadier archetype. If you fail the Optional Objective, it’s easy to return to the previous checkpoint – or even restart the Memory if the cutscene that follows the battle has already begun.
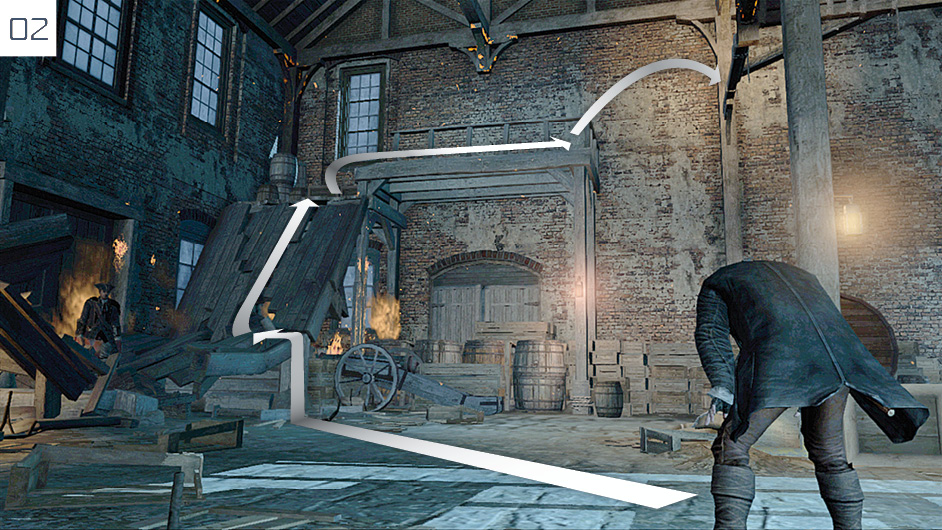
Connor must now escape the burning building. Though you can follow Haytham at the start, their paths soon diverge. There is also an Optional Objective that specifies you avoid contact with the flames, though this is one of the easier challenges. Start by climbing up the ramp, then jump into the rafters.
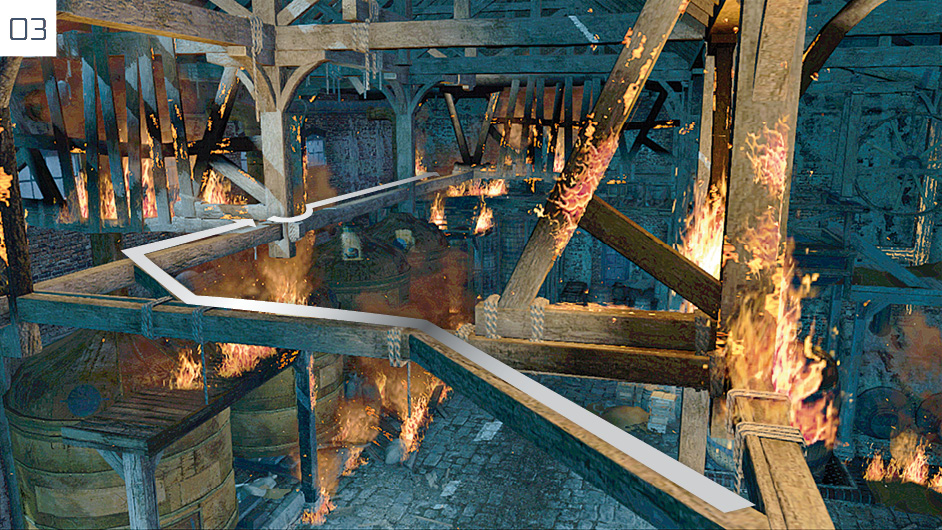
Cut the corners to avoid the burning wooden beams, then sprint for the V-shaped rafter and jump through.
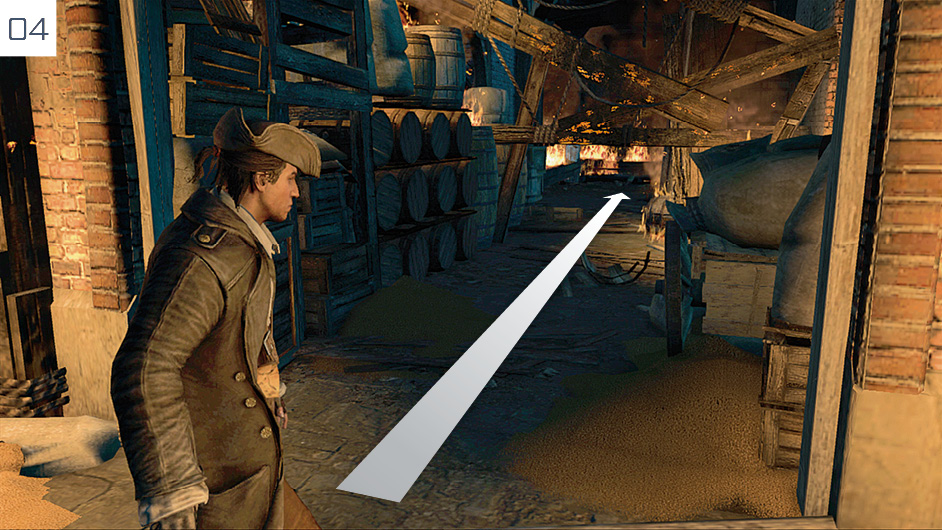
When you land, turn right and follow the obvious route until the path collapses. Run beneath the burning beams.
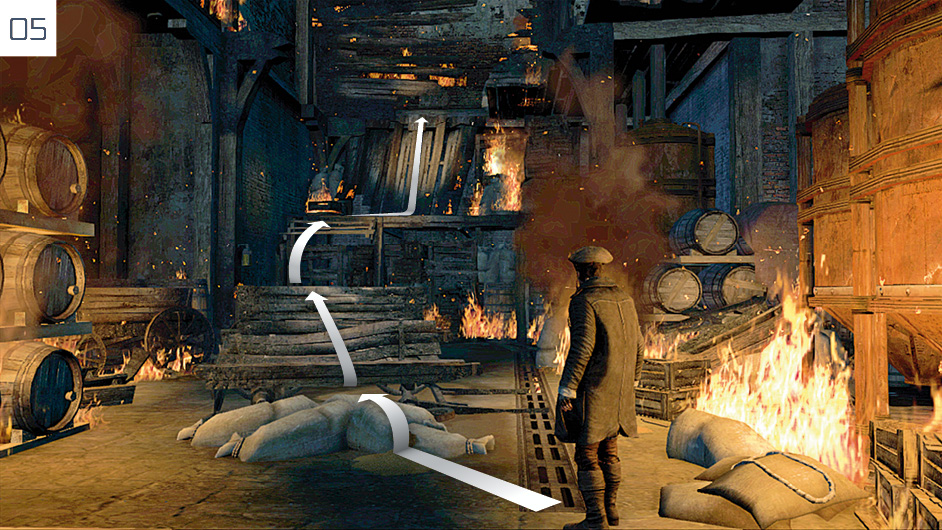
Scale the wall as illustrated here, then follow the onscreen instructions to perform a Back Eject.
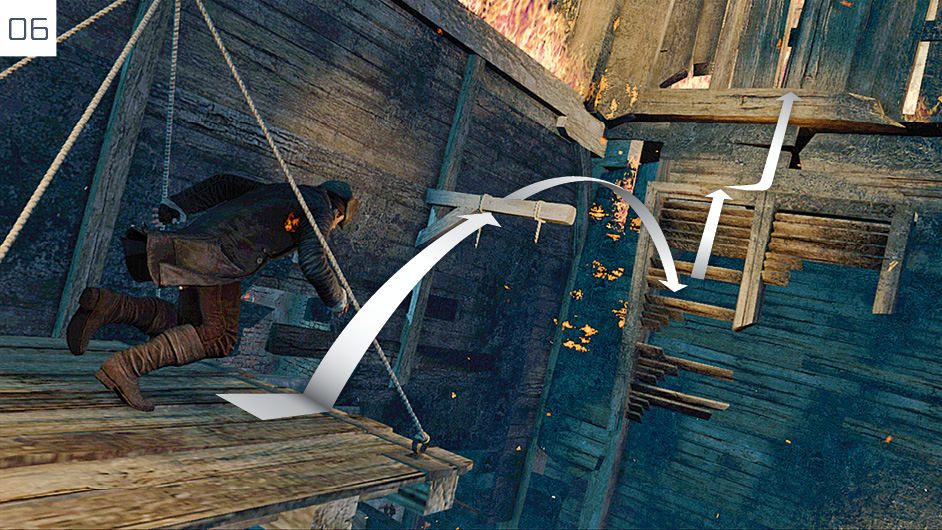
Finally, jump over to the wall and climb all the way to the top.
A Bitter End
Mission Overview
|
Optional Objectives |
Further Reading |
|
|
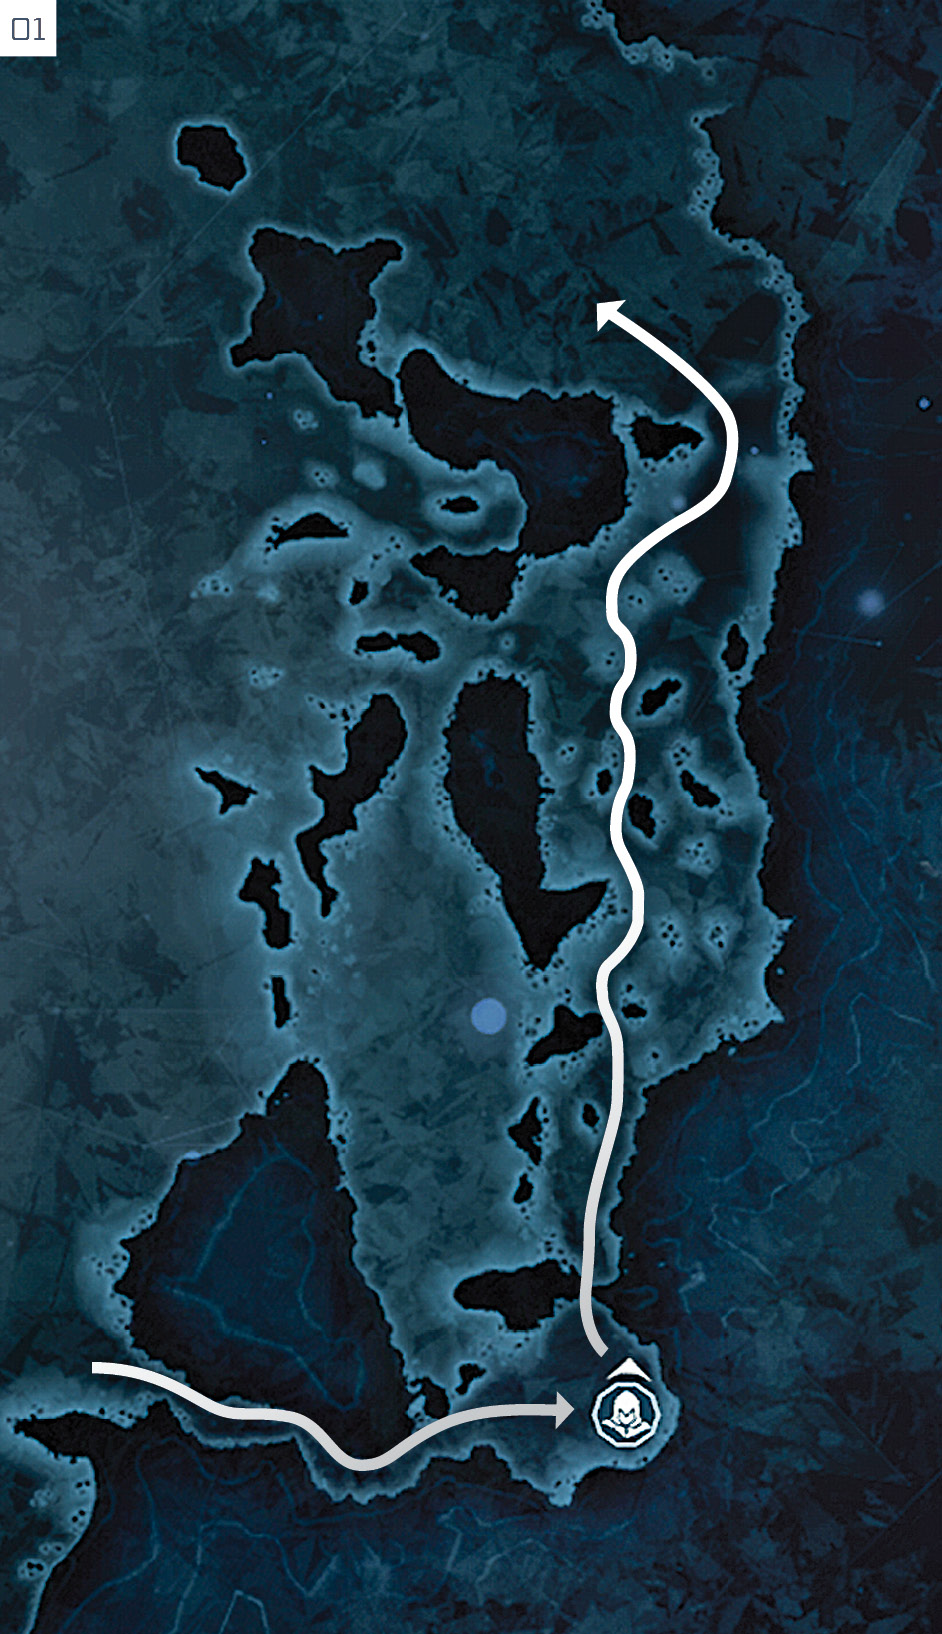
After the events of The Foam and the Flames, Connor is automatically positioned next to Haytham at the Memory Start marker, though don’t feel compelled to start immediately: you are free to attend to other affairs beforehand. When you do begin, sail along the narrow channel. Take great care to avoid collisions. Regular short transitions to half sail are enough to navigate with ease until you reach the waypoint. You must now sail after the schooner, and stay within 500 meters to complete the Optional Objective. As before, you will regularly find half sail essential to improve the Aquila’s mobility for tight turns, and to counter the effects of rogue winds. Whenever you have the opportunity, employ a brief period of full sail for additional speed. The annotated map here shows a course that will easily enable you to remain within the specified range. When you are directed to take the outside curve, the Optional Objectives end.
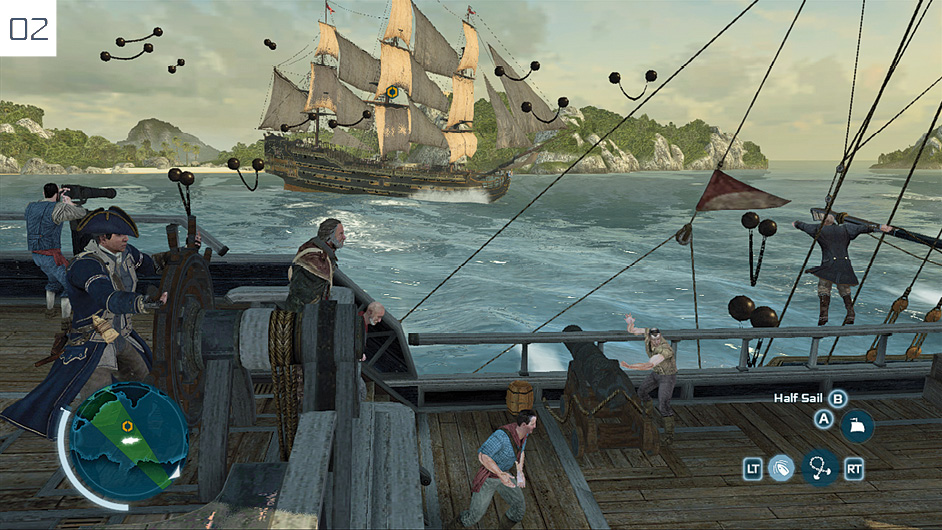
In the battle that follows, avoid the Man-of-War as you sink the smaller vessels. Once they have been removed from the equation, switch to Grapeshot as directed (hold  /
/ , then select the ammunition from the menu), then perform broadside attacks to destroy its masts, as shown here. When the vessel sits dead in the water, approach it to trigger a cutscene.
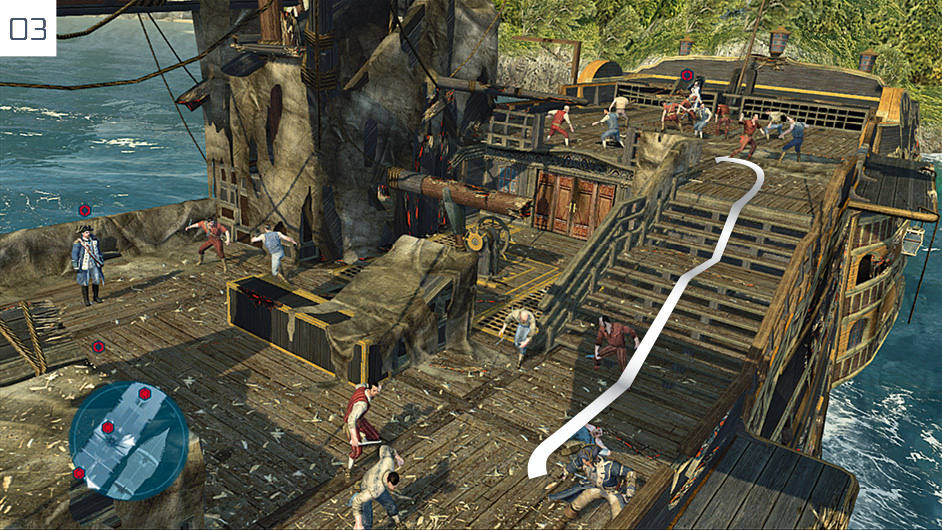
The final Optional Objective is to achieve a Kill Streak of three, which must be accomplished before you dispatch all targets marked in red on the mini-map. If you run immediately to the Officer at the stern, it’s pretty easy to accomplish this by killing him first, then dispatching his nearby crewmen. It’s much harder to do this in the area where two Officers fight together, due to their ability to resist Kill Streak attacks. When the battle ends, walk to the waypoint marker and interact with the door to end the Sequence.